
Access for Microsoft 365 Access 2021 Access 2019 Access 2016 Access 2013 Access 2010 More…Less
Use the Yes/No data type to store a Boolean value, such as True or False, On or Off, Yes or No, and any field that contains only one of two values. This data type often maps to a Check Box control on a form or report.
In this article
-
Add a Yes/No field in Datasheet view
-
Add a Yes/No field in Design view
-
Set or change Yes/No field properties
-
Delete a Yes/No field
-
Yes/No field property reference
Add a Yes/No field in Datasheet view
You can add a Yes/No field to a new or existing table in Datasheet View.
Add to an existing table
-
Open the table in Datasheet View.
-
If necessary, scroll horizontally to the first blank field.
-
Select Click to Add and then select Yes/No from the list.
-
Double-click the new header row, and then type a meaningful name for the new field.
-
Save your changes.
Add to a new table
-
On the Create tab, in the Tables group, click Table.
-
Click Save , and in the Save As dialog box, enter a name for the new table.
-
Select Click to Add and then select Yes/No from the list.
-
Double-click the new header row, and then type a meaningful name for the new field.
-
Save your changes.
Top of Page
Add a Yes/No field in Design view
You can add a Yes/No field to a new or existing table in Design View.
Add to an existing table
-
Open the table in Design View.
-
In the Field Name column, select the first blank row, and then type a name for the field.
-
Select the adjacent cell in the Data Type column, and then select Yes/No from the list.
-
Save your changes.
Add to a new table
-
On the Create tab, in the Tables group, click Table.
-
Click Save, and in the Save As dialog box, enter a name for the new table.
-
Right-click the document tab for the new table and click Design View.
-
In the Field Name column, select the first blank row, and then type a name for the field.
-
Select the adjacent cell in the Data Type column, and then select Yes/No from the list.
-
Save your changes.
Top of Page
Set or change Yes/No field properties
You can use Datasheet View to set a subset of field properties, such as Default Value or Name & Caption, but use Design View to set all available properties, including Format or Indexed.
-
Open the table in Design View.
-
On the General tab in the lower section of the table designer, under Field Properties, locate the property that you want to change.
-
Select the field next to the property name. Depending on the property, you can enter data, start the Expression Builder by clicking
 , or select an option from a list.
For information about how to use each field property, select the property and then press F1.
 , or select an option from a list.
Top of Page
Delete a Yes/No field
Important When you delete a Yes/No field that contains data, you lose that data permanently — you cannot undo the deletion. For that reason, you should back up your database before you delete any table fields or other database components.
Delete from Datasheet view
-
Open the table in Datasheet View.
-
Locate the Yes/No field, right-click the header row (the name), and then click Delete Field.
-
Click Yes to confirm the deletion.
Delete from Design view
-
Open the table in Design View.
-
Click the row selector (the blank square) next to the Text field, and then press DELETE, or right-click the row selector and then click Delete Rows.
-
Click Yes to confirm the deletion.
Top of Page
Yes/No field property reference
When you use Design View to add a Yes/No field to a table, you can set and change a number of properties for the field. This table shows the Yes/No field properties, describes what each one does, and explains the implications of setting or changing them.
|
Property |
Use |
|
Caption |
The label text that is displayed for this field by default in forms, reports, and queries. If this property is empty, the name of the field is used. Any text string is allowed. An effective caption is usually brief. |
|
Default Value |
Automatically assigns the specified value to this field when a new record is added. |
|
Format |
Determines the way that the field appears when it is displayed or printed in datasheets, or in forms or reports that are bound to the field. Select one of the following:
|
|
Indexed |
Specifies whether the field has an index. There are three available values:
Note: Do not change this property for a field that is used in a primary key. Although you can create an index on a single field by setting the Indexed field property, some kinds of indexes cannot be created in this manner. For example, you cannot create a multi-field index by setting this property. |
|
Text Align |
Specifies the default alignment of text within a control. |
|
Validation Rule |
Supplies an expression that must be true whenever you add or change the value in this field. Use in conjunction with the Validation Text property. |
|
Validation Text |
Enter a message to display when a value that is entered violates the expression in the Validation Rule property. |
Top of Page
Need more help?
Want more options?
Explore subscription benefits, browse training courses, learn how to secure your device, and more.
Communities help you ask and answer questions, give feedback, and hear from experts with rich knowledge.
The confirmation alert is showing with two buttons: OK and Cancel.
What if no party crosses the electoral threshold in a parliamentary election?
Pretty sure you don’t have many options here. Also, how would ‘No’ be different from ‘Cancel’?
– Brian Driscoll
Feb 1, 2012 at 5:05
This is our Splunktool team suggestion ✌, we tried and its working fine
if (confirm('Are you sure you want to save this thing into the database?')) {

   console.log('Thing was saved to the database.');
} else {

   console.log('Thing was not saved to the database.');
}
<html><head>
    <script type="text/javascript" src="http://code.jquery.com/jquery-1.7.1.js"></script>
    <script type="text/javascript" src="http://ajax.googleapis.com/ajax/libs/jqueryui/1.8.16/jquery-ui.js"></script>
    <link rel="stylesheet" type="text/css" href="/css/normalize.css">
    <link rel="stylesheet" type="text/css" href="/css/result-light.css">
    <link rel="stylesheet" type="text/css" href="http://ajax.googleapis.com/ajax/libs/jqueryui/1.8.17/themes/base/jquery-ui.css">
</head>
<body>
    <a class="checked" href="http://www.google.com">Click here</a>
    <script type="text/javascript">

        $(function() {
            $('.checked').click(function(e) {
                e.preventDefault();
                var dialog = $('<p>Are you sure?</p>').dialog({
                    buttons: {
                        "Yes": function() {alert('you chose yes');},
                        "No":  function() {alert('you chose no');},
                        "Cancel":  function() {
                            alert('you chose cancel');
                            dialog.dialog('close');
                        }
                    }
                });
            });
        });

    </script>
</body><html>
If you don’t want to use a separate JS library to create a custom control for that, you could use two confirm dialogs to do the checks:
if (confirm("Are you sure you want to quit?")) {
   if (confirm("Save your work before leaving?")) {

   } else {

   }
} else {

}
Suggestion : 2
In the next section we will show you all of the options available to you when creating message boxes. Then we will introduce you to the syntax of the MsgBox Function and finally go over other message box examples. Below we will talk about generating message boxes with different button layouts. If you do choose a different message box type, you will need to append the icon type after the buttons using a “+”: The messagebox will return vbYes or vbNo depending on the user’s choice. You can then then perform different actions based on the choice:
In VBA, it’s easy to display a simple MsgBox:
MsgBox "This is a Message Box"
Below we will create a message box with:
Dim answer As Integer

answer = MsgBox("Text", vbQuestion + vbYesNo + vbDefaultButton2, "Message Box Title")
If answer = vbYes Then
MsgBox "Yes"
Else
MsgBox "No"
End If
Another example:
Sub MsgBoxPromptTitle()
MsgBox "Step 1 Complete. Click OK to run step 2.", , "Step 1 of 5"
End Sub
You can also add line breaks to your message box prompts with ‘vbNewLine’.
Sub MsgBoxPromptTitle_NewLine()
MsgBox "Step 1 Complete." & vbNewLine & "Click OK to Run Step 2.", , "Step 1 of 5"
End Sub
Suggestion : 3
In a dialog box, there are two buttons: OK and Cancel. If a user clicks on the OK button, the confirm method returns true, and if a user clicks on the cancel button, the confirm method returns false. So you can use the return value of the confirm method to know the user’s selection. (If you want the buttons to say something different, like Yes and No, I’ll show you how at the bottom of this post.) In JavaScript, you can use the confirm method of the window object to display a dialog box, and wait for the user to either confirm or cancel it. Today, we’ll discuss how it works along with a real-world example. When a user clicks on the Delete My Profile! button, it calls the deleteProfile function. In the deleteProfile function, we’ve called the confirm method which presents the confirmation dialog box to the user.
2._
var result = window.confirm(message);
3._
var result = confirm(message);
Suggestion : 4
Display Yes, No, and Cancel buttons. Display Retry and Cancel buttons. Display Yes and No buttons. Display OK and Cancel buttons.
Dim Msg, Style, Title, Help, Ctxt, Response, MyStringMsg = "Do you want to continue?"
Style = vbYesNo + vbCritical + vbDefaultButton2 Title = "MsgBox Demonstration"
Help = "DEMO.HLP"
Ctxt = 1000 Response = MsgBox(Msg, Style, Title, Help, Ctxt) If Response = vbYes Then ' User chose Yes.    MyString = "Yes"    '
Perform some action.Else ' User chose No.    MyString = "No"    '
Perform some action.End If
I’m showing a confirmation alert box through JavaScript:
function checked() {
 if (hdnval.toLowerCase() != textbox1.toLowerCase()) {
  var save = window.confirm('valid')
   if (save == true)
   {
     return true;
   }
   else
    {
      return false;
    }
 }
}
The confirmation alert is showing with two buttons: OK and Cancel.
I want to show a third button in my confirmation alert. I want the three buttons to be like this: ‘Yes’ ‘No’ ‘Cancel’, as it shows in MS Word.
Answer
This cannot be done with the native javascript dialog box, but a lot of javascript libraries include more flexible dialogs. You can use something like jQuery UI’s dialog box for this.
See also these very similar questions:
- JavaScript confirm box with custom buttons
- custom choices in javascript confirm dialog
Here’s an example, as demonstrated in this jsFiddle:
<html><head>
    <script type="text/javascript" src="http://code.jquery.com/jquery-1.7.1.js"></script>
    <script type="text/javascript" src="http://ajax.googleapis.com/ajax/libs/jqueryui/1.8.16/jquery-ui.js"></script>
    <link rel="stylesheet" type="text/css" href="/css/normalize.css">
    <link rel="stylesheet" type="text/css" href="/css/result-light.css">
    <link rel="stylesheet" type="text/css" href="http://ajax.googleapis.com/ajax/libs/jqueryui/1.8.17/themes/base/jquery-ui.css">
</head>
<body>
    <a class="checked" href="http://www.google.com">Click here</a>
    <script type="text/javascript">

        $(function() {
            $('.checked').click(function(e) {
                e.preventDefault();
                var dialog = $('<p>Are you sure?</p>').dialog({
                    buttons: {
                        "Yes": function() {alert('you chose yes');},
                        "No":  function() {alert('you chose no');},
                        "Cancel":  function() {
                            alert('you chose cancel');
                            dialog.dialog('close');
                        }
                    }
                });
            });
        });

    </script>
</body><html>
Attribution
Source : Link , Question Author : Rocky , Answer Author : Community

|
05-18-2017, 06:49 AM |
|||
|
|||
|
Adding Yes, No Boxes in Word Document Hello all, I need help adding boxes into a word document. I am creating a form and need several columns of yes, no boxes in different area’s on a questionnaire. Please help!
|


|
05-18-2017, 07:52 AM |
|
A single checkbox would give you true/false.
__________________
|
|
05-18-2017, 11:16 AM |
|||
|
|||
|
To be honest, I am looking for a very simple solution to add the boxes to a word document for printing purposes only. For an example, Yes No and the boxes empty beneath for someone to check off with a pen. Thank you!
|
|
05-18-2017, 06:07 PM |
|
The checkbox content controls under the Developer tab will worik fine. So will various symbols.
|
- Remove From My Forums
-
Question
-
User-1395830550 posted
I have showing a confirmation alert box through my javascript as following
function checked() {
if (ndhval.toLowerCase() != textbox1.toLowerCase()) {
var save = window.confirm(‘valid’)
if (save == true)
{
return true;
}
else
{
return false;
}
}
}the confirmation alert is showing with two btn OK and Cancel.
I want to show 3 button in my confirmation alert ‘Yes’ ‘No’ ‘Cancel’, as it shows in MS Word.
is it possible if yes then its possible? please someone help me.
thanks in advanced.
Answers
-
-
Marked as answer by
Thursday, October 7, 2021 12:00 AM
-
Marked as answer by
Radio button can be used in a Form to capture user’s feedback. Following is a simple example that shows the usage of a radio button also known as Option button.

- On the Word Ribbon, under the tab Developer, within the group Controls, click the Legacy Tools icon. A drop-down list appears.
- From the drop-down list, under the section ActiveX Controls, click the icon Option Button (ActiveX Control). Word creates something like the following.
- By default, the radio button appears in Design Mode. Click the Design Mode option available within group Controls to switch to normal mode, so that the radio button becomes clickable.
- To change the caption of the radio button,
- Click the radio button and then click Design Mode from the Controls group.
- Right-click the radio button and click option Properties from the right-click menu.
- On the Properties sheet, under the tab Alphabetic, look for the row with the heading Caption. On the adjacent cell of Caption, double-click to delete the default caption i.e. OptionButton 1 and enter a new caption. Alternatively, you can delete the default caption to retain only radio button. Later, you can resize the button by dragging the resize handles.
The next challenge is to group the radio buttons under different sections.
This is important for each group of buttons to behave independently. Otherwise, all the buttons in the document would behave as one group (by default) and only one feedback could be captured.
For example, in the above example form, each question contains two radio buttons (Yes/No) to capture feedback. Each pair of buttons must be grouped to capture feedback for individual question.
To group radio buttons
- Switch to design mode by selecting the radio button and then clicking the Design Mode option from within the group Controls.
- Once you are in Design Mode, right-click the radio button and select option Properties from the right-click menu. The Properties sheet appears.
- On the Properties sheet, under the tab Alphabetic, look for the row with the heading GroupName. Click the adjacent cell to enter a group name.
- Now you need to keep the same group name for the rest of the radio buttons, which you want to keep as one group. You are done.
Note: Before you share a document containing Radio button or any other controls, you should to protect your document to prevent editing of the document. To know how to protect a document, read the following articles:
https://wordknowhow.wordpress.com/2013/06/25/how-to-insert-text-fields-check-boxes-drop-down-lists-etc-in-a-word-document-to-create-a-form/
https://wordknowhow.wordpress.com/2014/04/03/how-to-create-or-add-checkboxes-checkbox-controls-to-your-word-document/

About wordknowhowhttp://wordknowhow.comThis blog site was started to help people with Microsoft Word. I use Word a lot at work, and I understand that some features are difficult to use. There were no simplified instructions online to help me use these features. It is for this reason that this site exists; to make your life easier with Word.
Feel free to post your comments, queries, suggestions, etc. I will do my best to help you!
In this Article
- VBA MsgBox Function
- VBA YesNo Message Box
- VBA Message Box Options
- Syntax of MsgBox Function
- Customize Message Box Title and Prompt
- MessageBox LineBreaks
- MsgBox Icons
- MsgBox Icons – Information
- MsgBox Icons – Critical
- MsgBox Icons – Question
- MsgBox Icons – Exclamation
- MsgBox Variables
- OK Message Box – vbOKOnly
- OK Cancel Message Box – vbOKCancel
- Yes No Message Box – vbYesNo
- Yes No Cancel Message Box – vbYesNoCancel
- Abort Retry Ignore Message Box – vbAbortRetryIgnore
- Retry Cancel Message Box – vbRetryCancel
- VBA MessageBox Examples
- Message Box Confirmation Before Running Macro
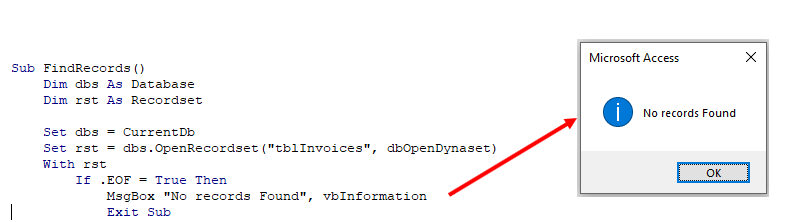
- Yes / No Message Box – Exit Sub
- VBA Message Box in Access VBA
This tutorial will cover how to use the VBA MsgBox Function to display messageboxes to users (including the YesNo Messagebox). You might also be interested in our article on InputBoxes.
VBA MsgBox Function
In VBA, it’s easy to display a simple MsgBox:
MsgBox "This is a Message Box"
However you can do a lot more than display a simple OK message box. Let’s quickly look at complicated example before we dive into specifics…
VBA YesNo Message Box
Below we will create a message box with:
- A title “Message Box Title” and prompt “Text”
- A question mark icon
- Yes / No options instead of a simple “OK”
- Default button = ‘No’
Dim answer As Integer

answer = MsgBox("Text", vbQuestion + vbYesNo + vbDefaultButton2, "Message Box Title")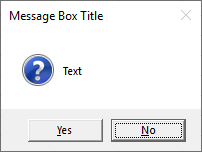
The messagebox will return vbYes or vbNo depending on the user’s choice. You can then then perform different actions based on the choice:
If answer = vbYes Then
  MsgBox "Yes"
Else
  MsgBox "No"
End If
In the next section we will show you all of the options available to you when creating message boxes. Then we will introduce you to the syntax of the MsgBox Function and finally go over other message box examples.
VBA Message Box Options
Take a look at the image below. Here you will see (almost) all of the options available to you when creating message boxes. Take notice of the icons and the different buttons.
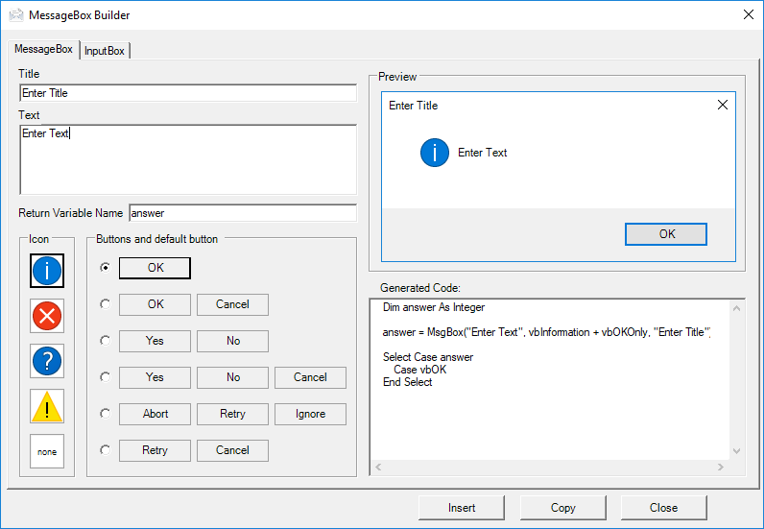
This is a screenshot of the “MessageBox Builder” from our Premium VBA Add-in: AutoMacro. The MessageBox Builder allows you to quickly design your desired messagebox and insert the code into your code module. It also contains many other code builders, an extensive VBA code library, and an assortment of coding tools. It’s a must-have for any VBA developer.
Syntax of MsgBox Function
MsgBox( prompt [, buttons ] [, title ] [, helpfile, context ] )
prompt (Required) – This is the primary message box text.
buttons – Choose which buttons to display. If omitted, ‘OKonly’. Here you can also specify what icon to show and the default button.
title – The title at the top of the message box. If omitted, the name of the current application is displayed (ex. Microsoft Excel).
helpfile – Specify help file that can be accessed when user clicks on the ‘Help’ button. If specified, then you must also add context (below)
context – Numeric expression representing the Help context number assigned to the appropriate Help topic.
You can probably ignore the helpfile and context arguments. I’ve never seen them used.
Customize Message Box Title and Prompt
The MsgBox function allows you to customize the title and prompt messages like so:
Msgbox "Prompt",,"Title"Another example:
Sub MsgBoxPromptTitle()
  MsgBox "Step 1 Complete. Click OK to run step 2.",, "Step 1 of 5"
End Sub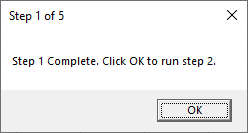
Important! You must remember to surround your text with quotations.
MessageBox LineBreaks
You can also add line breaks to your message box prompts with ‘vbNewLine’.
Sub MsgBoxPromptTitle_NewLine()
  MsgBox "Step 1 Complete." & vbNewLine & "Click OK to Run Step 2.", , "Step 1 of 5"
End Sub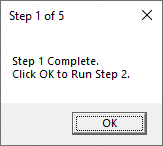
Notice we use the & symbol to join text together. You can learn more about using & with text and other options for inserting linebreaks in our article on joining text.
VBA Coding Made Easy
Stop searching for VBA code online. Learn more about AutoMacro — A VBA Code Builder that allows beginners to code procedures from scratch with minimal coding knowledge and with many time-saving features for all users!

Learn More
MsgBox Icons
VBA gives you the ability to add one of four pre-built icons to your message boxes:
| Icon Constant | Icon |
|---|---|
| vbInformation | |
| vbCritical | |
| vbQuestion | |
| vbExclamation |
The Icon constant should be placed within the button argument:
Sub MsgBoxQuestionIcon()
  MsgBox "Question Example", vbQuestion
End Sub
This will generate the default ‘OK’ message box with the Question icon:
![]()
Notice how when you type, the VBA Editor will show you the options available to you:

This is helpful because you don’t need to remember the exact syntax or names of icons or buttons.
Now we will demo each message box icon:
MsgBox Icons – Information
Sub MsgBoxInformationIcon()
  MsgBox "Information Example", vbInformation
End Sub![]()
MsgBox Icons – Critical
Sub MsgBoxCriticalIcon()
  MsgBox "Critical Example", vbCritical
End Sub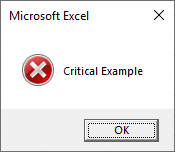
VBA Programming | Code Generator does work for you!
MsgBox Icons – Question
Sub MsgBoxQuestionIcon()
  MsgBox "Question Example", vbQuestion
End Sub![]()
MsgBox Icons – Exclamation
Sub MsgBoxExclamationIcon()
  MsgBox "Exclamation Example", vbExclamation
End Sub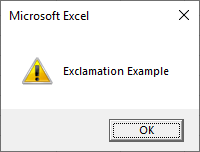
Below we will talk about generating message boxes with different button layouts. If you do choose a different message box type, you will need to append the icon type after the buttons using a “+”:
Sub MsgBoxQuestionIcon()
  MsgBox "Do you want to continue?", vbOKCancel + vbQuestion
End Sub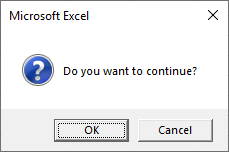
MsgBox Variables
So far we have worked primarily with the default ‘OK’ message box. The OK message box only has one option: Pressing ‘OK’ allows the code to continue. However, you can also specify other button groupings: OK / Cancel, Yes / No, etc.
In which case you will want to perform different actions based on which button is pressed. Let’s look at an example.
Here is the message box we will generate:
This is the entire code (we will break it down next):
Sub MsgBoxVariable()

Dim answer As Integer
answer = MsgBox("Do you want to Continue?", vbQuestion + vbYesNo)

  If answer = vbYes Then
    MsgBox "Yes"
  Else
    MsgBox "No"
  End If

End Sub
First we assign the messagebox output to an integer variable.
Dim answer As Integer

answer = MsgBox("Do you want to Continue?", vbQuestion + vbYesNo)
Next we use an If-Else to determine what to do based on which button is pressed:
If answer = vbYes Then
  MsgBox "Yes"
Else
  MsgBox "No"
End If
The MsgBox function returns an integer value (between 1-7) so we define the variable as an integer type. However, instead of referring to the integer number, you can refer to a constant (ex. vbOK, vbCancel, etc.). Look at this table to see all of the options:
| Button | Constant | Value |
|---|---|---|
| OK | vbOK | 1 |
| Cancel | vbCancel | 2 |
| Abort | vbAbort | 3 |
| Retry | vbRetry | 4 |
| Ignore | vbIgnore | 5 |
| Yes | vbYes | 6 |
| No | vbNo | 7 |
Now we will demo each button grouping:
OK Message Box – vbOKOnly
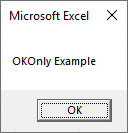
This is the standard VBA messagebox.
Sub MsgBox_OKOnly()

Dim answer As Integer
answer = MsgBox("OKOnly Example", vbOKOnly)

End Sub
OK Cancel Message Box – vbOKCancel
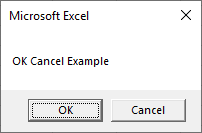
Sub MsgBox_OKCancel()

Dim answer As Integer
answer = MsgBox("OK Cancel Example", vbOKCancel)

  If answer = vbOK Then
    MsgBox "OK"
  Else
    MsgBox "Cancel"
  End If

End Sub
AutoMacro | Ultimate VBA Add-in | Click for Free Trial!
Yes No Message Box – vbYesNo
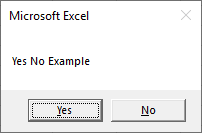
Sub MsgBox_YesNo()

Dim answer As Integer
answer = MsgBox("Yes No Example", vbYesNo)

  If answer = vbYes Then
    MsgBox "Yes"
  Else
    MsgBox "No"
  End If

End Sub
Yes No Cancel Message Box – vbYesNoCancel
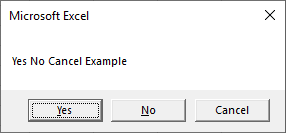
Sub MsgBox_YesNoCancel()

Dim answer As Integer
answer = MsgBox("Yes No Cancel Example", vbYesNoCancel)

  If answer = vbYes Then
    MsgBox "Yes"
  ElseIf answer = vbNo Then
    MsgBox "No"
  Else
    MsgBox "Cancel"
  End If

End Sub
Abort Retry Ignore Message Box – vbAbortRetryIgnore
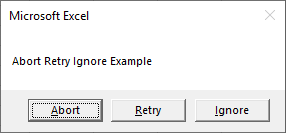
Sub MsgBox_AbortRetryIgnore()

Dim answer As Integer
answer = MsgBox("Abort Retry Ignore Example", vbAbortRetryIgnore)

  If answer = vbAbort Then
    MsgBox "Abort"
  ElseIf answer = vbRetry Then
    MsgBox "Retry"
  Else
    MsgBox "Ignore"
  End If

End Sub
Retry Cancel Message Box – vbRetryCancel
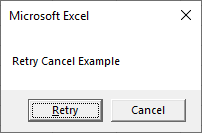
Sub MsgBox_RetryCancel()

Dim answer As Integer
answer = MsgBox("Retry Cancel Example", vbRetryCancel)

  If answer = vbRetry Then
    MsgBox "Retry"
  Else
    MsgBox "Cancel"
  End If

End Sub
AutoMacro | Ultimate VBA Add-in | Click for Free Trial!
VBA MessageBox Examples
Message Box Confirmation Before Running Macro
This code will display a Yes No Message box before calling a macro. If Yes is clicked the macro is called, if No is clicked, the Macro does not run.
Sub Msgbox_BeforeRunning()

  Dim answer As Integer
  answer = MsgBox("Do you want to run Macro1?", vbQuestion + vbYesNo)

  If answer = vbYes Then Call Macro1

End Sub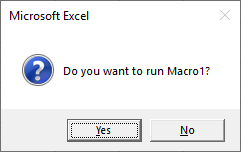
Yes / No Message Box – Exit Sub
Here we will confirm with the user whether to continue running a macro. If No is clicked, the code will exit the sub, otherwise the procedure will continue.
Sub Msgbox_BeforeRunning()

  Dim answer As Integer
  answer = MsgBox("Do you want to continue?", vbQuestion + vbYesNo)

  If answer = vbNo Then Exit Sub

  'Some Code

End Sub
VBA Message Box in Access VBA
All of the above examples work exactly the same in Access VBA as in Excel VBA.
When sharing an Office document with colleagues or a group, making sure the content remains accurate is critical. Although you can add a password to protect a document, people with access can still make unwanted changes, which can result in delays or communication of the wrong information.
If you use Office 365, Office 2019, or an older version, you can use several features to restrict editing to a section or entire document, spreadsheet, or presentation to prevent users from making changes accidentally.
In this Windows 10 guide, we walk you through multiple methods to restrict document editing and prevent accidental changes on Word, Excel, and PowerPoint documents.
- How to prevent unwanted edits by restricting changes in Microsoft Office
- How to prevent unwanted edits using the read-only option in Microsoft Office
- How to prevent unwanted edits by marking documents as final in Microsoft Office
How to prevent unwanted edits by restricting changes in Microsoft Office
In Microsoft Office, you can use the restrict editing tools to control formatting, style, and the types of content users are allowed to update to prevent unwanted changes.
Restricting modifications in Word
To restrict style and formatting editing in Word, use these steps:
- Open the Word document.
- Click on File.
- Click on Info.
- On the right side, click the Protect document menu.
- Select the Restrict Editing option.

- Under the «Formatting restrictions» section, check the Limit formatting to a selection of styles option.
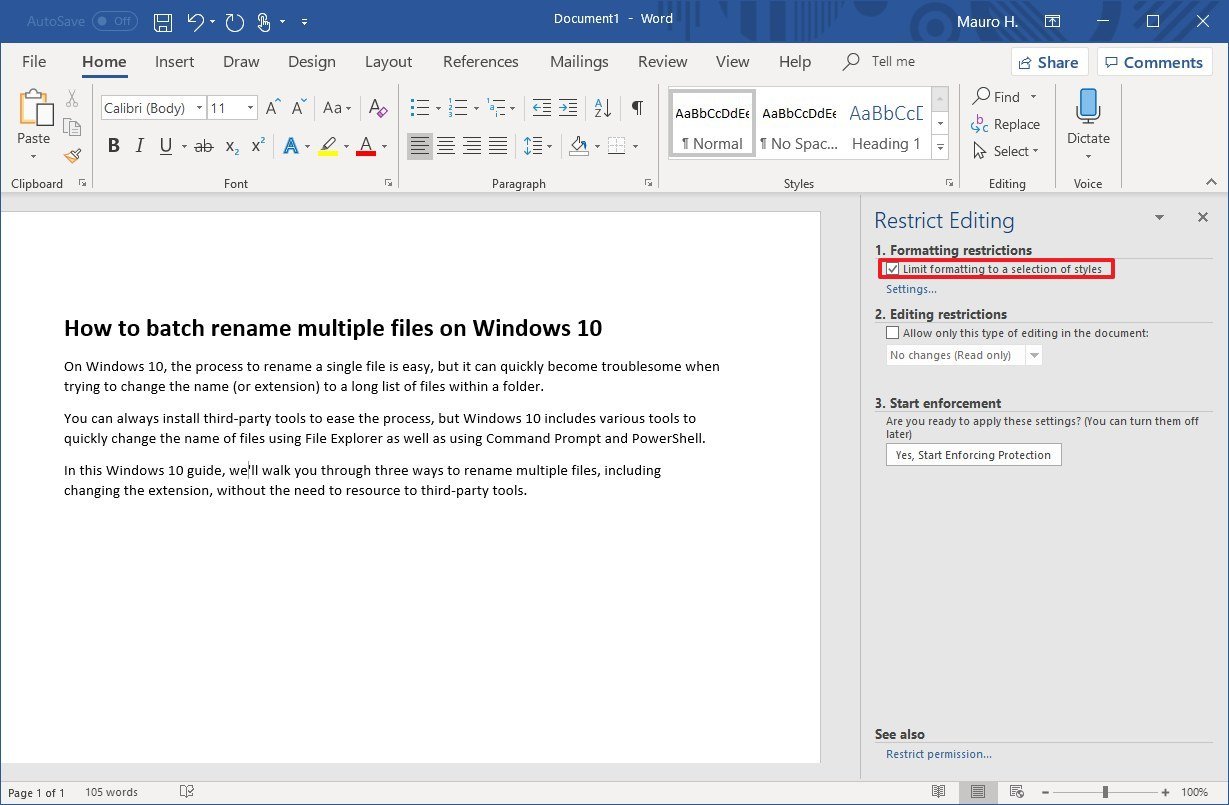
- Click the Settings option.
- Clear the styles that you want to restrict from editing.Tip: You can also use the «All,» «Recommended Minimum,» and «None» buttons to quickly allow or deny a group of styles.

- (Optional) Under the «Formatting» section, select the formatting that you want to allow or deny:
- Allow AutoFormat to override formatting restrictions.
- Block Theme or Scheme switching.
- Block Quick Style Set switching.
- Click the OK button.
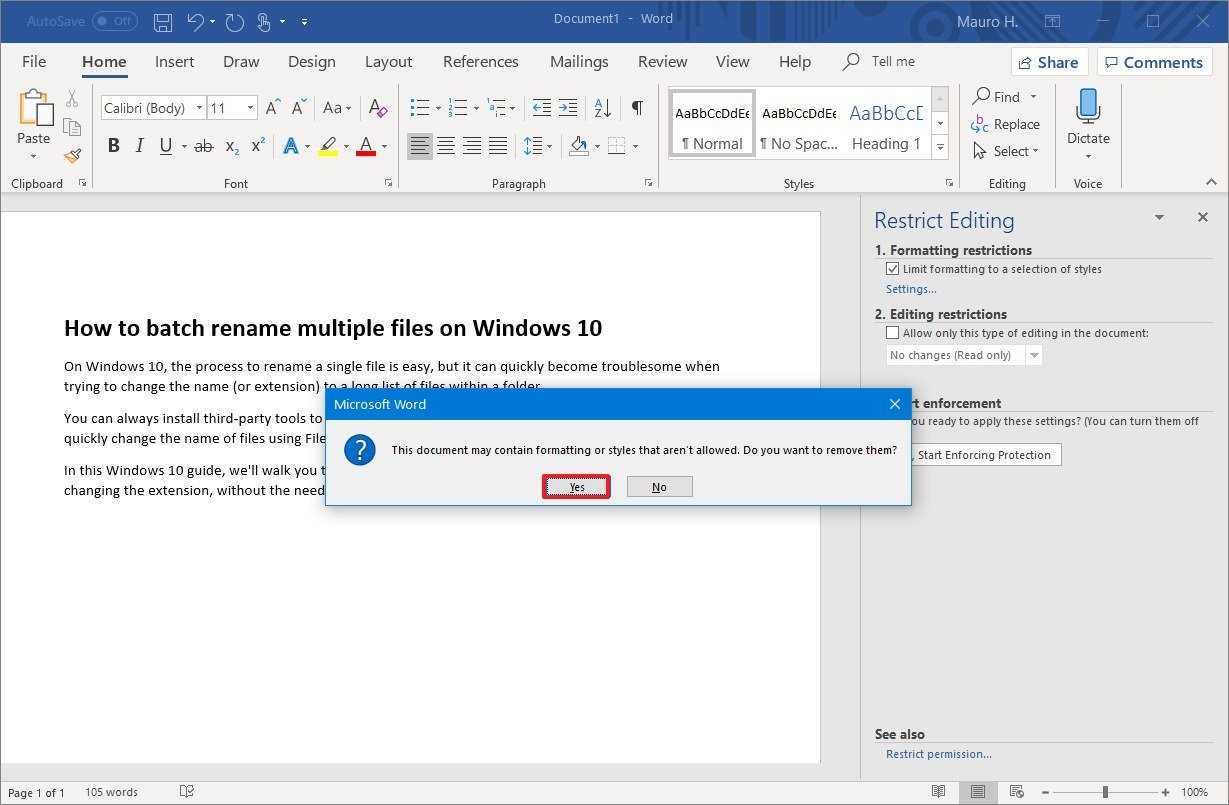
- Click the Yes button to remove (or the No button to retain the original changes) formatting or styles that are now restricted.
- Check the Allow only this type of editing in the document option.
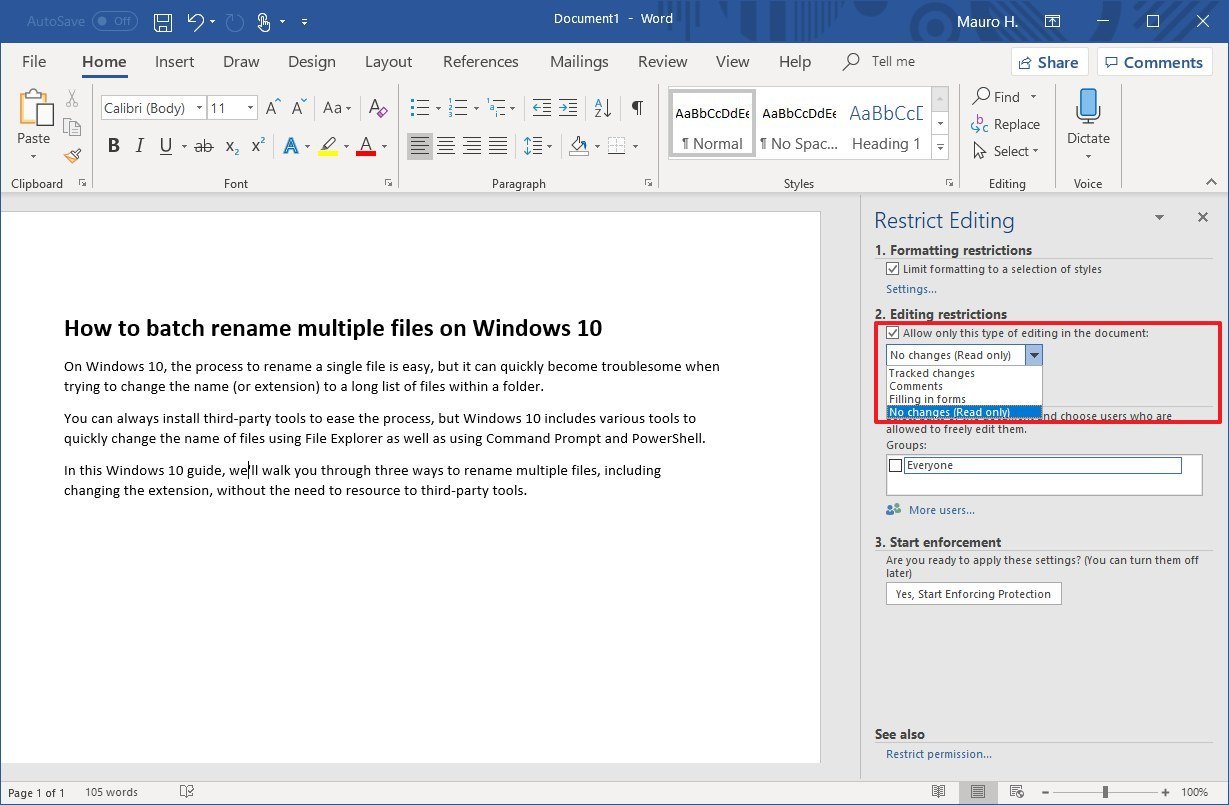
- Use the drop-down menu to select an option that best suits your situation, including:
- No changes (Read only).
- Tracked changes.
- Comments.
- Filling in forms.
Tip: If you want users to only view the content while preventing unintentional changes, use the «No changes (Read only)» option and set a password on step No. 17.
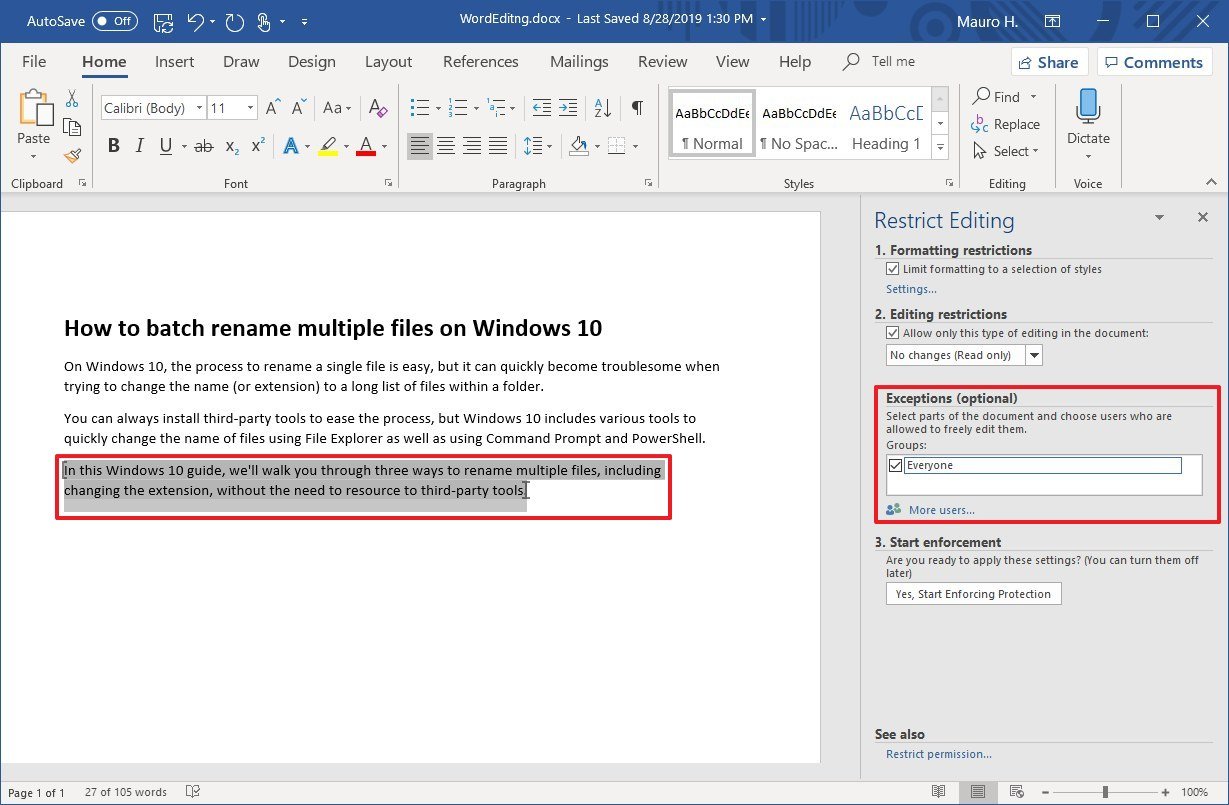
- (Optional) Using the mouse, select the part of the document that users are allowed to edit without restrictions.
- Under the Exceptions section, select the group or user (click the More users option) you want to allow to edit the part of the document selected.
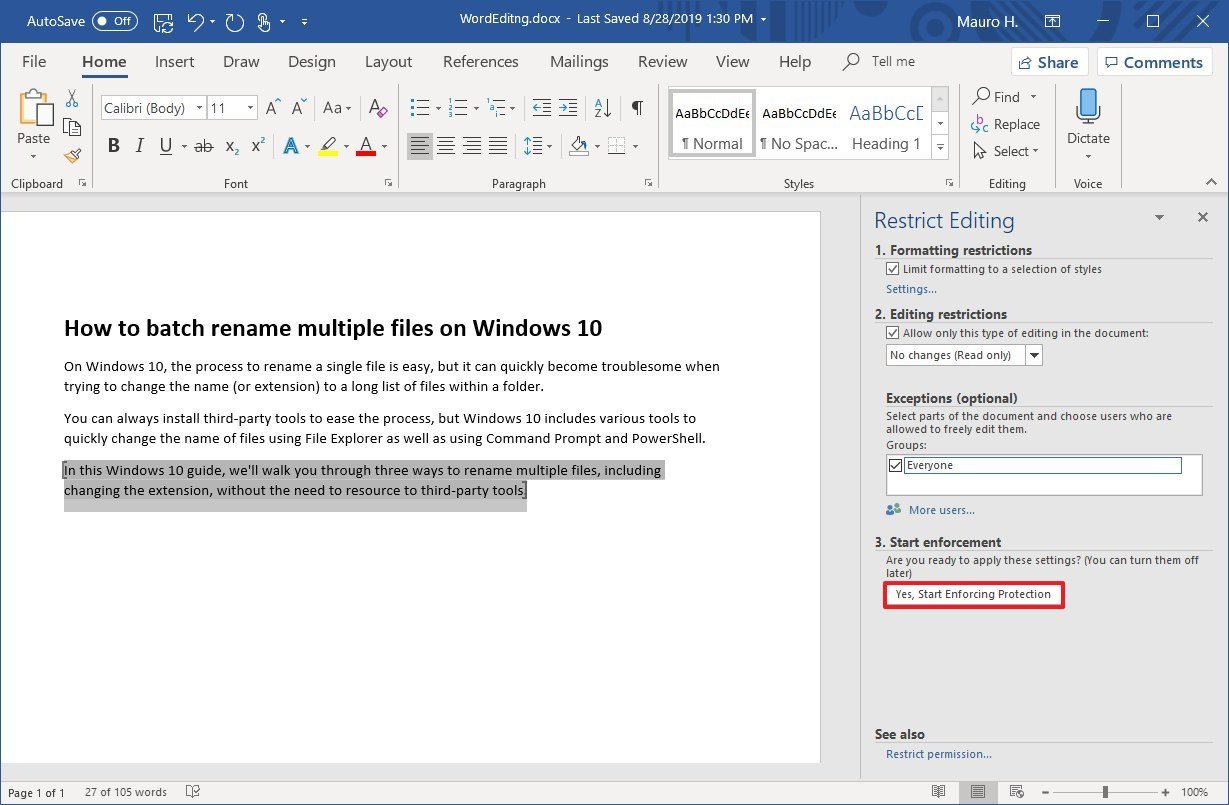
- Under the «Start enforcement» section, select the Yes, Start Enforcing Protection button.
- (Optional) Select the Password option.
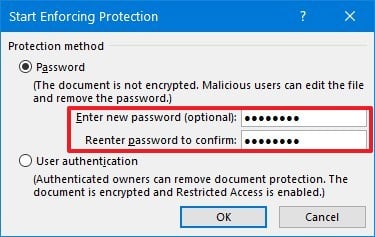
- Click the OK button.
Once you complete these steps, the application will block users from making unwanted changes based on your configuration.
If you change your mind, you can always revert the settings using the same instructions, but on step No. 6, click the Stop Protection button at the bottom of the «Restrict Editing» pane in the right side.
Restricting modifications in Excel
To restrict editing to a sheet in Excel, use these steps:
- Open the Excel document.
- Click on File.
- Click on Info.
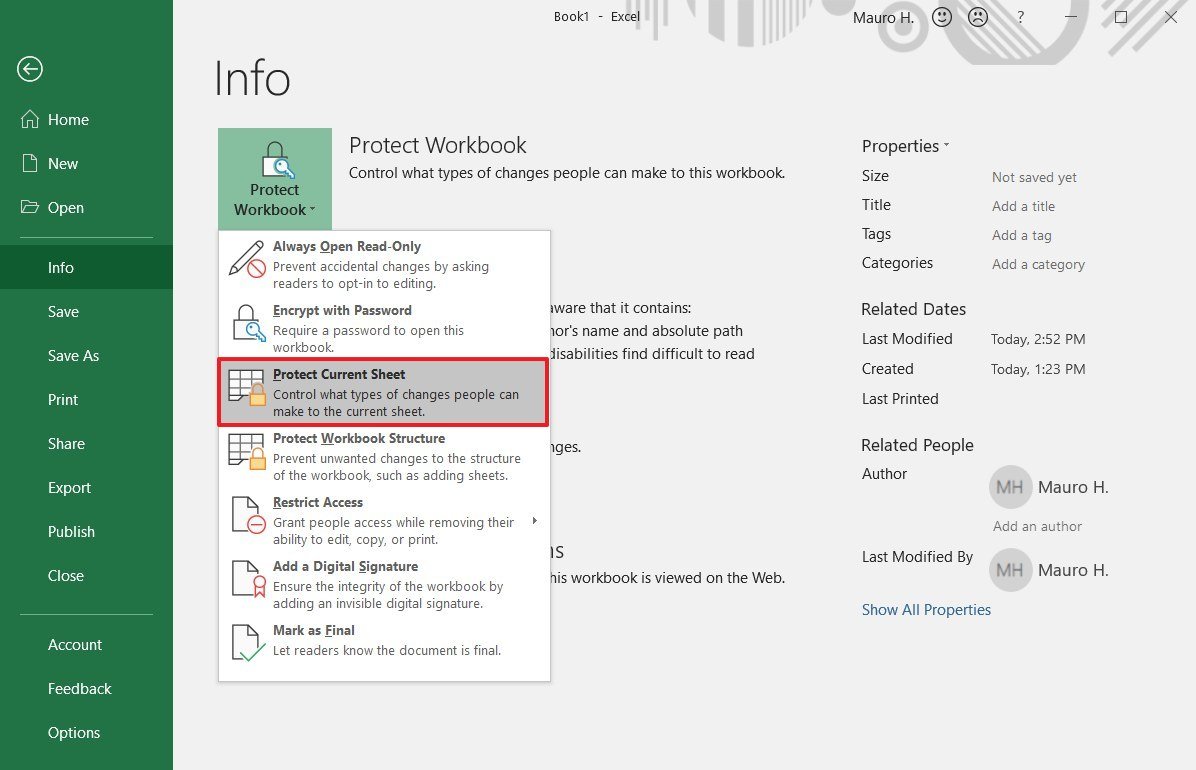
- On the right side, click the Protect Workbook menu.
- Select the Protect current sheet option.
- (Optional) Set a password to unlock the sheet.
- Check the Protect worksheet and contents of locked cells option.
- Select the edits users are allowed to make.
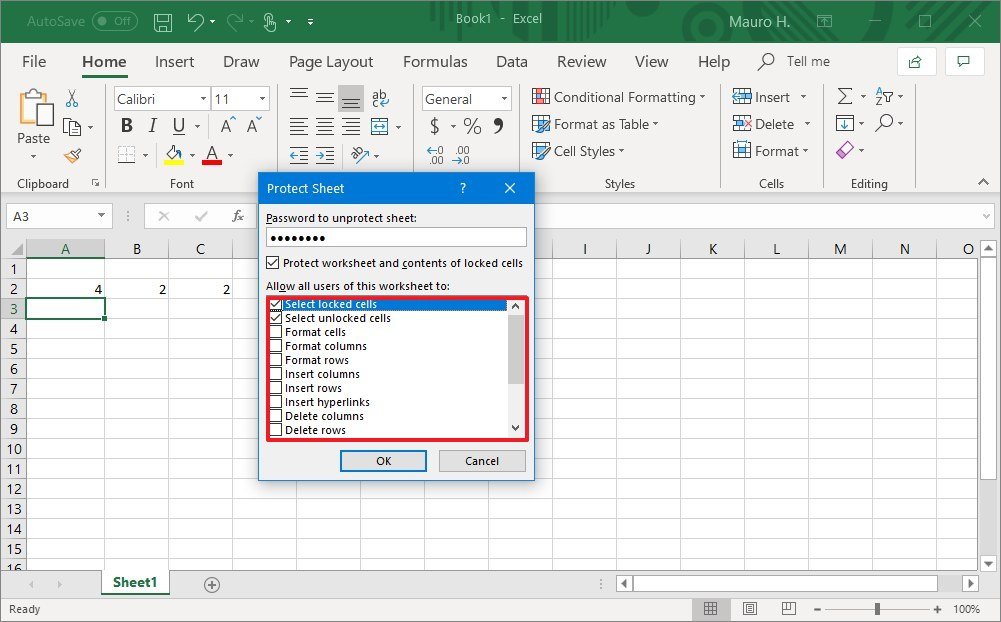
- Click the OK button.
- Re-enter the password to confirm.
- Click the OK button.
After completing the steps, users will only be allowed to make changes based on the settings that you specified.
If you no longer need to protect an Excel sheet, you can revert the changes using the same instructions, but on step No. 4, make sure to click the Unprotect option on the right side.
Protect workbook structure
In addition to restricting edits to the sheet, you can also prevent unwanted changes to the structure of the workbook with these steps:
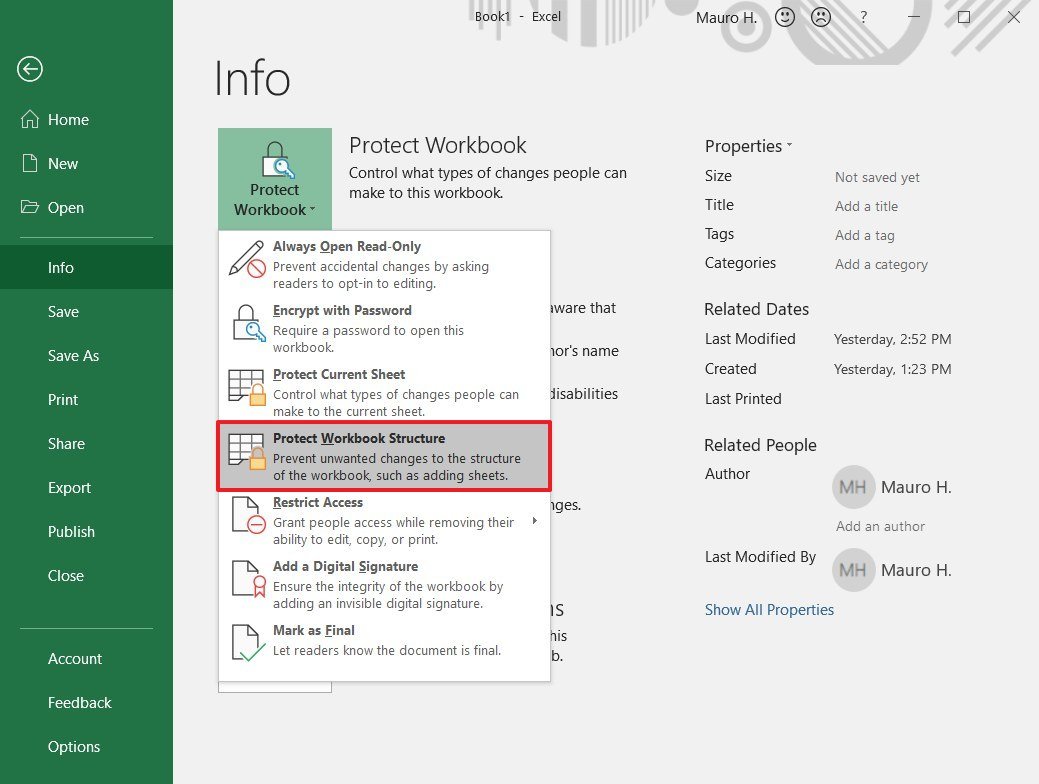
- Open the Excel document.
- Click on File.
- Click on Info.
- On the right side, click the Protect Workbook menu.
- Select the Protect Workbook Structure option.
- (Optional) Set a password to allow changes.
- Under the «Protect workbook for» section, check the Structure option.
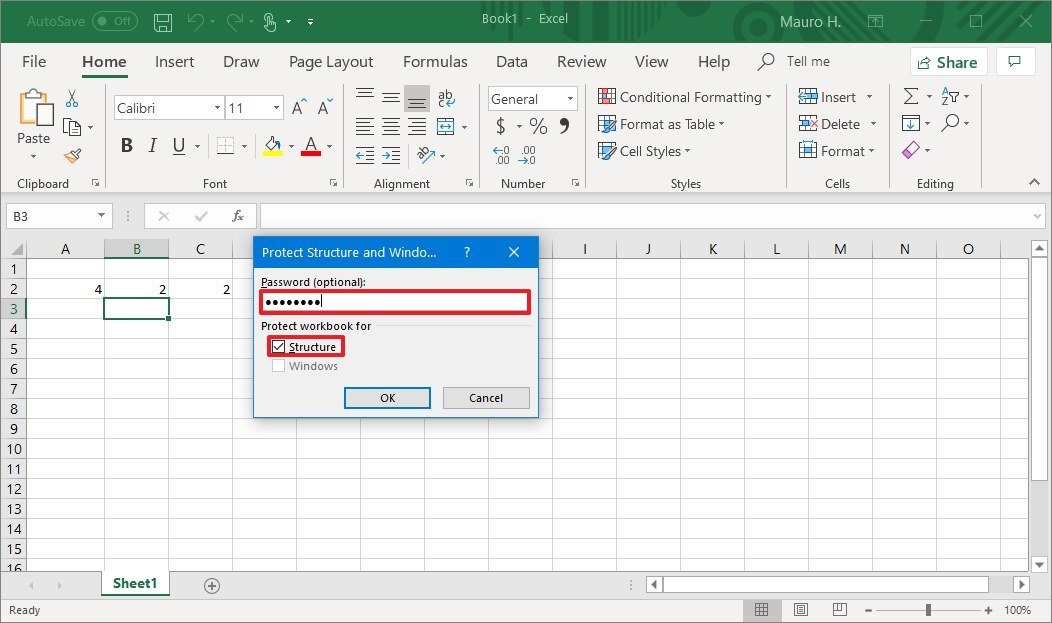
- Click the OK button.
- Re-enter the password to confirm.
- Click the OK button.
Once you complete these steps, users won’t be able to modify the structure of the workbook, including adding, moving, deleting, hiding or renaming worksheets.
You can always undo the changes using the same instructions until step No. 5.
How to prevent unwanted edits using the read-only option in Microsoft Office
If you don’t want anyone to make accidental changes to a Word, Excel, or PowerPoint document, you can configure the file to always open as read-only.
To open a document always in read-only mode, use these steps:
- Open the Office document.
- Click on File.
- Click on Info.
- On the right side, click the Protect document menu.
- Select the Always Open Read-Only option.
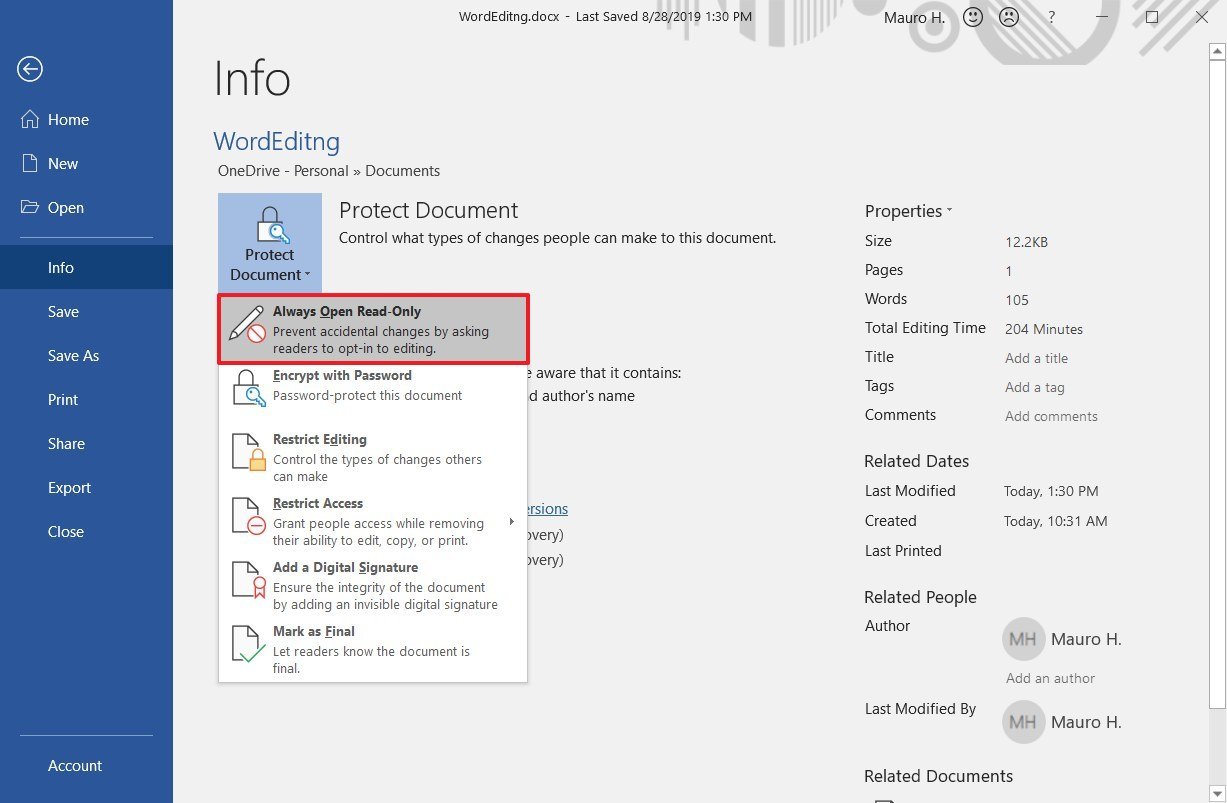
After completing these steps, the document will always open in read-only mode to prevent accidental changes. If you must input an update, close and re-open the document, and click the No button in the dialog box.
How to prevent unwanted edits by marking documents as final in Microsoft Office
Alternatively, you can also mark a Word, Excel, and PowerPoint document as final to prevent unintentional changes.
To mark an Office document as final, use these steps:
- Open the Office document.
- Click on File.
- Click on Info.
- On the right side, click the Protect document menu.
- Select the Mark as Final option.
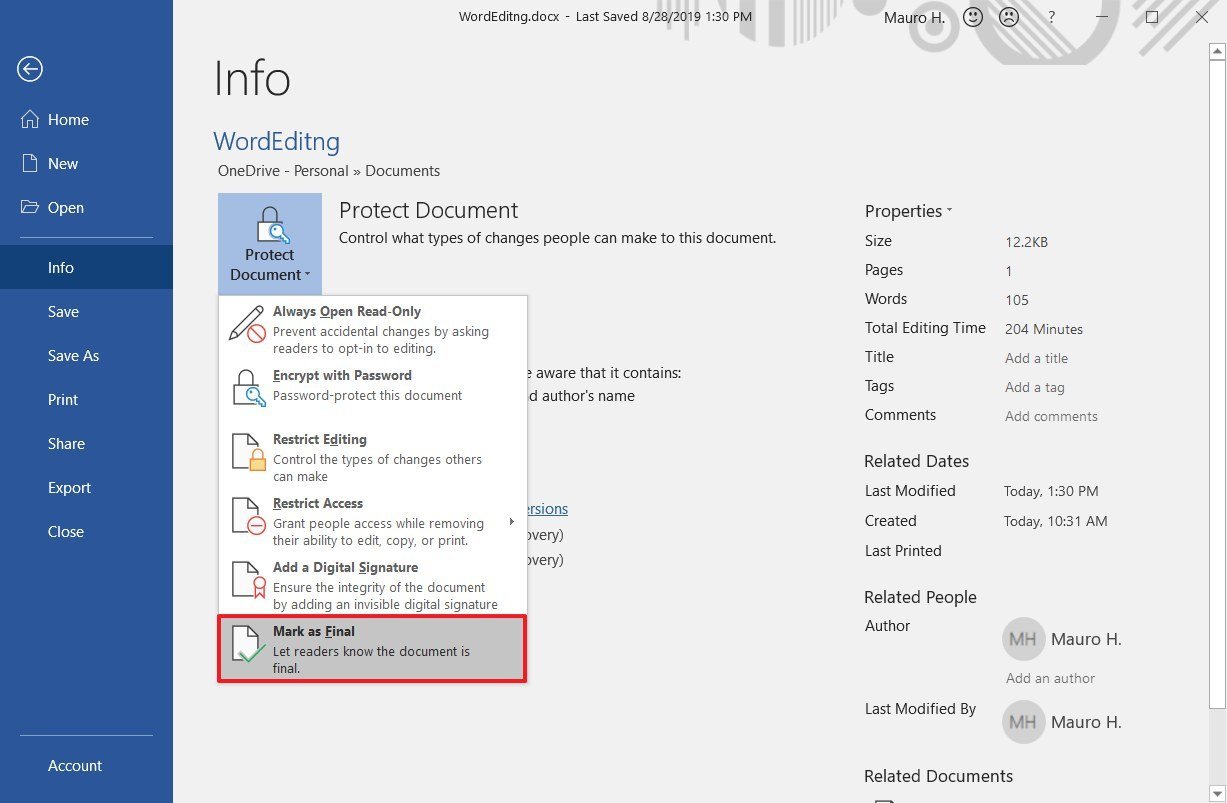
- Click the OK button.
- Click the OK button again.
Once you complete these steps, the document will be marked as final, and as a result, changing comments, typing, and proofing will be disabled, preventing users from making changes.
You can always undo the setting using the same instructions until step No. 5.
While marking a document as final disables editing, users will still able to unlock the document to make changes. However, it’s a handy feature to let users know that the file has been finalized and to prevent unintentional changes that can go unnoticed.
All the latest news, reviews, and guides for Windows and Xbox diehards.
Mauro Huculak is technical writer for WindowsCentral.com. His primary focus is to write comprehensive how-tos to help users get the most out of Windows 10 and its many related technologies. He has an IT background with professional certifications from Microsoft, Cisco, and CompTIA, and he’s a recognized member of the Microsoft MVP community.
Most Popular
Skip to content
Note to self.
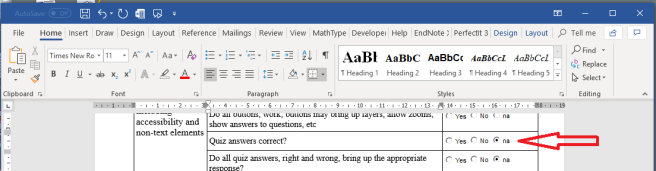
When editing a Word document that has radio buttons in it — in my case, a checklist — I accidentally clicked on a button. But I want them all to be blank when I give the checklist to a user!
I have 3 buttons — Yes, No and na, and they are mutually exclusive, so I don’t want to use checkboxes.
But I find that once I have checked one radio button, I cannot easily undo it.
It can be undone, and it’s actually not very difficult.
(1) Go to developer tab. Now, if the developer tab is not visible, go File → Options → Customize Ribbon and under Customize the Ribbon choose Main Tabs and then check Developer.

(2) On the Developer ribbon, choose Design Mode.
(3) Right-click on the troublesome button and choose Properties.
(4) Find Value and change it to False (just delete True and type False).

(5) Exit the Properties panel by clicking on the red X top-right. The button is reset. It will also reset if you hit Enter after typing False.
(6) Close Design Mode. You’ll see that the buttons still work as they did before.
Note: Sometimes you’ll get a very long list of properties and Value won’t be there; look at the top — have you actually clicked on the button? Beside (Name) it should say the button name, in this case, ‘OptionButton61543’. If it says something like ‘ThisDocument’, you’ve clicked on whitespace beside the button, not inside the button. Just try again! Maybe click elsewhere on the page and then go back to the button. Try clicking on the button then right-clicking, etc.
Clear for action.

I’m a scientist by training, currently working as a writer, trainer and editor.
View all posts by Darren