
Время на прочтение
4 мин
Количество просмотров 69K
 Здравствуйте, уважаемое хабрасообщество! Как-то раз был на хабре интересный материал про генерацию doc-файлов средствами PHP. К сожалению, больше на хабре ничего на эту тему я не нашел. На тот момент я разработал собственное решение.
Оно состояло в том, чтобы генерировать .docx файлы. Аргументы были следующие:
- На дворе 2012 год, а этот формат появился аж в 2007-м
- Генерить .docx несомненно проще, чем .doc, поскольку .docx = .zip, а .doc — бинарный файл
- Костыль с генерацией HTML и переименованием в doc не подойдет для более-менее уважающих себя проектов
- С помощью приведенного ниже метода мы с легкостью сгенерируем Excel, и вообще всё что угодно.
Подробности под катом.
Структура файла

 Возьмите ваш любой файл .docx и переименуйте его в .zip, а затем откройте. И вы увидите структуру docx-файла. Да, да! Это обычный zip-архив. Кратко скажу, что самое интересное для нас лежит в папке word. Здесь-же в корне находятся общие настройки документа.
Самое же интересное для нас в папке word — файл document.xml, который представляет из себя файл с содержимым Office Open XML. Именно он содержит в себе непосредственно содержимое документа. Подробнее об этом формате можно почитать на английской Википедии. В папке _rels находится файл document.xml.rels. Он нам пригодится в будущем, чтобы описывать связи прикрепленных файлов внутри документа. Может еще существовать папка media, если в вашем документе присутствуют изображения. Имена остальных файлов вроде-бы говорят за себя.
Учимся генерить .docx
Итак, как мы уже определились, .docx это просто обычный zip-архив, поэтому решение напрашивается само собой: класс-генератор документов должен быть наследником класса ZipArchive, который доступен «из коробки». А остальное — дело техники. Ниже приведен класс для создания пустого .docx-файла (не забываем включить zlib и использовать кодировку UTF-8).
class Word extends ZipArchive{

    // Файлы для включения в архив
    private $files;

    // Путь к шаблону
    public $path;

    public function __construct($filename, $template_path = '/template/' ){

      // Путь к шаблону
      $this->path = dirname(__FILE__) . $template_path;

      // Если не получилось открыть файл, то жизнь бессмысленна.
      if ($this->open($filename, ZIPARCHIVE::CREATE) !== TRUE) {
        die("Unable to open <$filename>n");
      }


      // Структура документа
      $this->files = array(
        "word/_rels/document.xml.rels",
        "word/theme/theme1.xml",
        "word/fontTable.xml",
        "word/settings.xml",
        "word/styles.xml",
        "word/document.xml",
        "word/stylesWithEffects.xml",
        "word/webSettings.xml",
        "_rels/.rels",
        "docProps/app.xml",
        "docProps/core.xml",
        "[Content_Types].xml" );

      // Добавляем каждый файл в цикле
      foreach( $this->files as $f )
        $this->addFile($this->path . $f , $f );
    }

    // Упаковываем архив
    public function create(){

      $this->close();
    }
}


$w = new Word( "Example.docx" );

$w->create();
Возле скрипта должен появиться файл Example.docx При этом не забываем создать саму структуру файлов. Для её получения пользуемся пресловутым MS Office и Winrar’ом. После сборки пробуем открыть в через MS Office. В случае незначительных ошибок в XML ворд выдаст предупреждение, что в документе содержатся ошибки, но и предложит их исправить. Если же документ собран совсем неправильно, ворд лишь ругнется и откажется открывать.
Вставляем текст
Для получения требуемого XML текста я использовал тот же подход ламера: печатал текст в ворде, извлекал внутренности и изучал. Вот какой XML у меня получился для обычного абзаца:
<w:p w:rsidR="00BB20FC" w:rsidRPr="00357A74" w:rsidRDefault="00357A74" w:rsidP="00BB20FC">
<w:pPr>
<w:jc w:val="left"/>
<w:rPr>
<w:sz w:val="28"/>
<w:lang w:val="en-US"/>
</w:rPr>
</w:pPr>
<w:r w:rsidRPr="00357A74">
<w:rPr>
<w:sz w:val="28"/>
<w:lang w:val="en-US"/>
</w:rPr>
<w:t>{TEXT}</w:t>
</w:r>
</w:p>
Нетрудно понять, что нужно изменить, чтобы получить требуемое выравнивание и размер текста. В тег w:t вставляем наш текст, но без переноса строк!
Вводим в наш класс метод assign, и генератор становится таким:
class Word extends ZipArchive{

    // Файлы для включения в архив
    private $files;

    // Путь к шаблону
    public $path;

    // Содержимое документа
    protected $content;

    public function __construct($filename, $template_path = '/template/' ){

      // Путь к шаблону
      $this->path = dirname(__FILE__) . $template_path;

      // Если не получилось открыть файл, то жизнь бессмысленна.
      if ($this->open($filename, ZIPARCHIVE::CREATE) !== TRUE) {
        die("Unable to open <$filename>n");
      }


      // Структура документа
      $this->files = array(
        "word/_rels/document.xml.rels",
        "word/theme/theme1.xml",
        "word/fontTable.xml",
        "word/settings.xml",
        "word/styles.xml",
        "word/stylesWithEffects.xml",
        "word/webSettings.xml",
        "_rels/.rels",
        "docProps/app.xml",
        "docProps/core.xml",
        "[Content_Types].xml" );

      // Добавляем каждый файл в цикле
      foreach( $this->files as $f )
        $this->addFile($this->path . $f , $f );
    }

    // Регистрируем текст
    public function assign( $text = '' ){

      // Берем шаблон абзаца
      $p = file_get_contents( $this->path . 'p.xml' );

      // Нам нужно разбить текст по строкам
      $text_array = explode( "n", $text );

      foreach( $text_array as $str )
        $this->content .= str_replace( '{TEXT}', $str, $p );
    }

    // Упаковываем архив
    public function create(){

      // Добавляем содержимое
      $this->addFromString("word/document.xml", str_replace( '{CONTENT}', $this->content, file_get_contents( $this->path . "word/document.xml" ) ) );

      $this->close();
    }
}

$w = new Word( "Пример.docx" );

$w->assign('Пример текста.
Будущее не предопределено.');

$w->create();
Вот в принципе и всё. В следующий раз мы научимся вставлять изображения.
Просто, не правда ли? Весь код с примером.
UPD. Сделал подсветку кода.
UPD 2. Читайте продолжение.
I want to create an applications that can replace specific words in docx document, I’ve got a function that can convert docx files into xml, the following is the function
function read_file_docx($filename){
    $content = '';
    if(!$filename || !file_exists($filename)) return false;
    $zip = zip_open($filename);
    if (!$zip || is_numeric($zip)) return false;
    while ($zip_entry = zip_read($zip)) {
            if (zip_entry_open($zip, $zip_entry) == FALSE) continue;
            if (zip_entry_name($zip_entry) != "word/document.xml") continue;
            $content .= zip_entry_read($zip_entry, zip_entry_filesize($zip_entry));
            zip_entry_close($zip_entry);
    }// end while
    zip_close($zip);
    return $content;
}
This function returns the following xml data
<w:document xmlns:o="urn:schemas-microsoft-com:office:office" xmlns:r="http://schemas.openxmlformats.org/officeDocument/2006/relationships" xmlns:v="urn:schemas-microsoft-com:vml" xmlns:w="http://schemas.openxmlformats.org/wordprocessingml/2006/main" xmlns:w10="urn:schemas-microsoft-com:office:word" xmlns:wp="http://schemas.openxmlformats.org/drawingml/2006/wordprocessingDrawing">
    <w:body>
    <w:p>
        <w:pPr>
            <w:pStyle w:val="style0"/>
            <w:spacing w:after="0" w:before="0"/>
            <w:contextualSpacing w:val="false"/>
        </w:pPr>
        <w:r>
            <w:rPr>
                <w:sz w:val="24"/>
                <w:szCs w:val="24"/>
            </w:rPr>
            <w:t>Nomor</w:t>
            <w:tab/>
            <w:tab/>
            <w:t>: 032/AP-DK/04/14</w:t>
        </w:r>
    </w:p>
    ..
with the results above, I can do string processing to replace specific words, the problem is how to restore xml above to docx document ?
Let’s start with the standard «hello world» document.
The required script reads as follows:
The first line: require_once ‘path_to_phpdocx/classes/CreateDocx.php’ is a call to the main class in phpdocx, and path_to_phpdocx has to be substituted by the actual path to the library relative to the current script.
You can see here the final result and download the corresponding Word document :
![]()
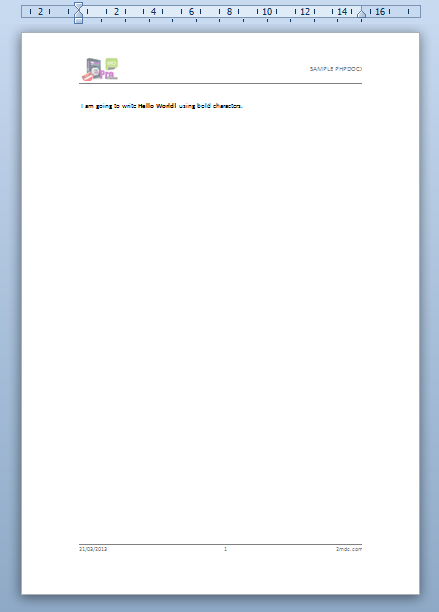
OK, this has been simple enough but not very rewarding. Let’s go one step further and introduce a little more of formatting:
Now this starts to look a little nicer although there’s still some work ahead:
![]()

At this point one may wonder if there is a simple way to «wrap» our document in a more beautiful frame including, for example, headers and footers and even a first page.
There are quite a few ways to do so:
- Importing the headers and footers from an existing Word document
- Creating your own headers and footers via the addheader and addFooter methods
- Using a different base template with all the required formatting
- Using a custom template
As we have not yet talked about templates (base or custom) and the addHeader and addFooter methods require of certain concepts not yet introduced, we will restrict ourselves,by the time being (please, be patient), to the first of the available options.
We have already prepared a standard Word document (.docx) with a nice header and footer that we would like to insert in our current document. Its relative path to this script is, for example, resources/niceHeaderAndFooter.docx.
Let’s proceed:
This is definitely starting to look much nicer:
![]()
If you prefer only to import the header you may have called:
and equivalently
if you only wish to import the footer.
Footers and headers can include photos, tables, standard text, lists, links, shapes, etcetera. The import procedure also preserves the display properties of the headers and footers (first, even and odd pages).
Now to continue we are going to populate our Word document with a series of standard objects:
- Lists
- Tables
- Images
- Charts
There are many other possibilities but we prefer to refer to the documentation for a complete set of examples in order not to clutter this tutorial with unneeded details.
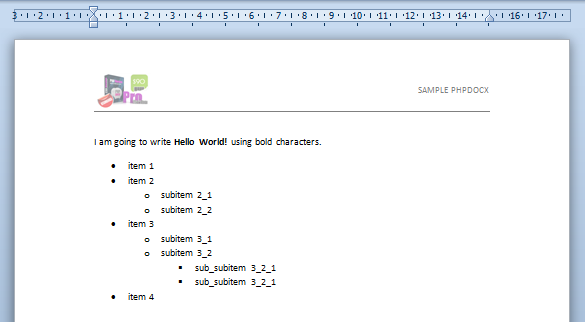
Let us first include a simple unordered nested list after our «hello world» paragraph. In order to do so you should call the addList method:
The result looks like this:
![]()
If you had chosen the second parameter to be 2 instead of 1 you would have got a standard numbered list. Now you may wonder:
- How can I get more sophisticated list styles?
- How can I insert something more than plain text as an item for a list?
The answer to the first question is pretty simple: you may run the parseStyles() method (see example) in a separate script and generate a Word document with all the info about the list, paragraph and table styles that are available by default. We will see later that if you choose to use your own «base template» you may incorporate all the styles you wish. You may also call the createListStyle method to generate your own list styles in execution time.
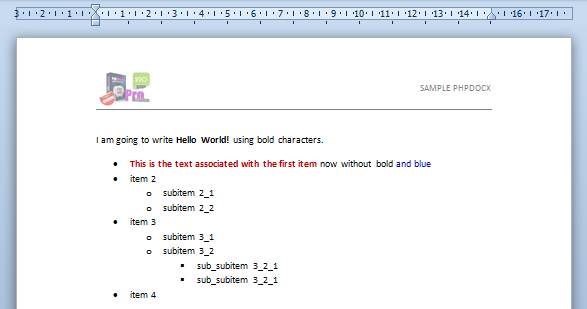
The answer to the second question is a little more elaborate but still simple enough: you should create a WordFragment to achieve more sophisticated formatting:
The corresponding code reads:
And you get:
![]()
This way to insert elements one within the other may be extended to other cases very easily:
- Create a new WordFragment (WordFragment class).
- Include all the required content into the WordFragment with standard phpdocx methods.
- Insert the resulting WordFragment:
- Within a table.
- Within a list (only inline content).
- Anywhere in the Word document with the insertWordFragmentBefore/After methods.
- In the headers and footers via the addHeader and addFooter methods.
Now we will try to insert a simple table so our Word document gets richer in contents.
And you get:
![]()
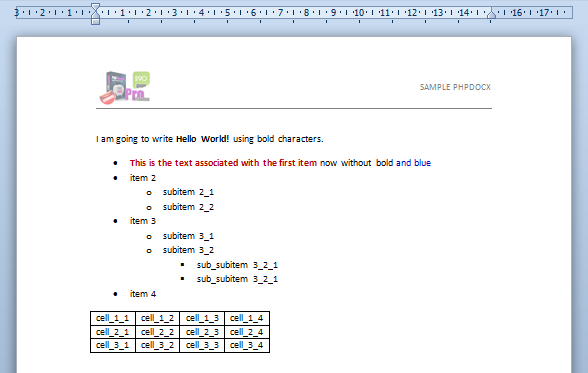
This is certainly not the most beautiful table you have ever seen but we can solve that problem pretty easily by having a look at the available table styles in the document that we have generated before with the parseStyles() method.
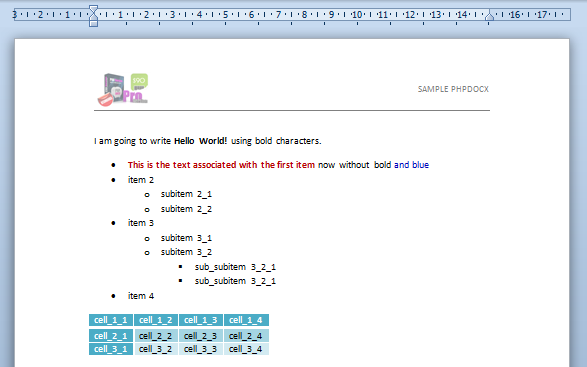
For example, you may use the «MediumGrid3-accent5PHPDOCX» accent table style (blame Word for the funky names):
This certainly looks much nicer and pretty simple to implement:
![]()
Although this example clearly does not exhaust all the table formatting capabilities of phpdocx we leave the nitty-gritty details to the addTable method API documentation.
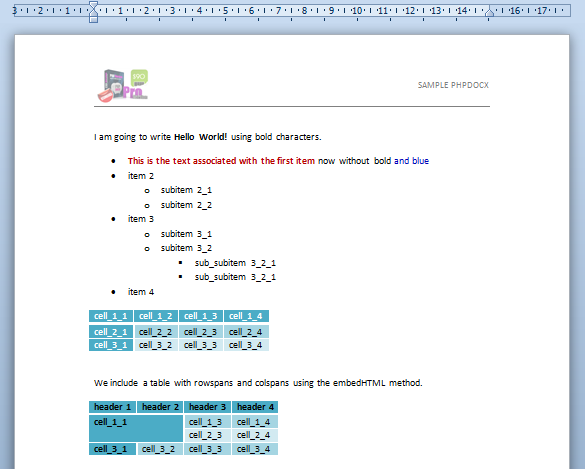
But one always want something more and eventually one may need to insert tables with «rowspans» and «colspans». What can we do about that?
The simplest way (although not the only one) to do that it is to parse an HTML table and associate a Word style to it.
As our script is starting to get a little lengthly let us concentrate only in the relevant part of it. Let’s define a $myTable variable as follows:
This should render a table like this:
![]()
By the way, if you do not like the styles that come bundled with phpdocx (basically the quick styles that come with the standard Word 2007 distribution) you may import custom styles from other Word document using the importStyles() method or by using your own base template.
- If you use px instead of pt as your CSS units take into account a 0.75 relative scale factor
WARNING:
As you can foresee the embedHTML method may have multiple uses but for the sake of brevity we will ignore them by the time being and we will move forward to investigate how to include images and charts.
To insert an image is as simple as this:
This should render an image like this:
![]()
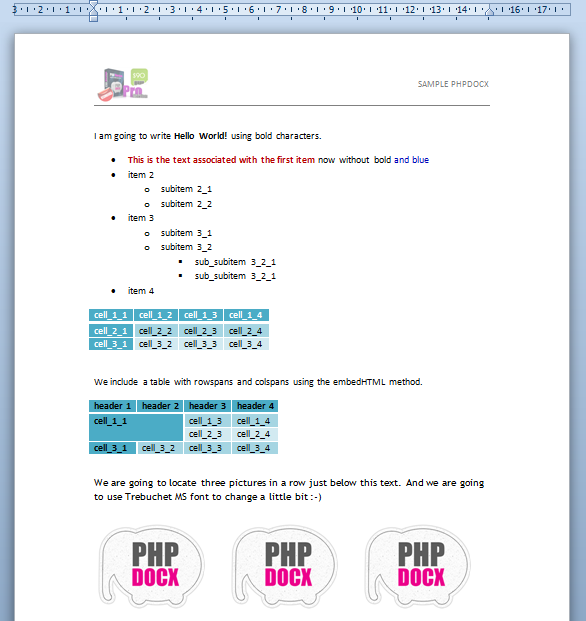
If you need to include more than one photo with a precise layout you may combine the addTable method with WordFragments to generate the desired ouput. For example:
This should now render the three inserted image like this:
![]()
To finish with the most basic functionality of phpdocx we are going now to insert a chart.
phpdocx virtually allows to include any chart that can be included through the standard Word interface:
- 2D and 3D pie charts
- 2D and 3D bar graphs
- 2D and 3D col bars
- 2D and 3D area charts
- 2D and 3D line charts
- 2D and 3D surface charts
- 2D and 3D bubble charts
- radar charts
- doughnut charts
- scatter charts
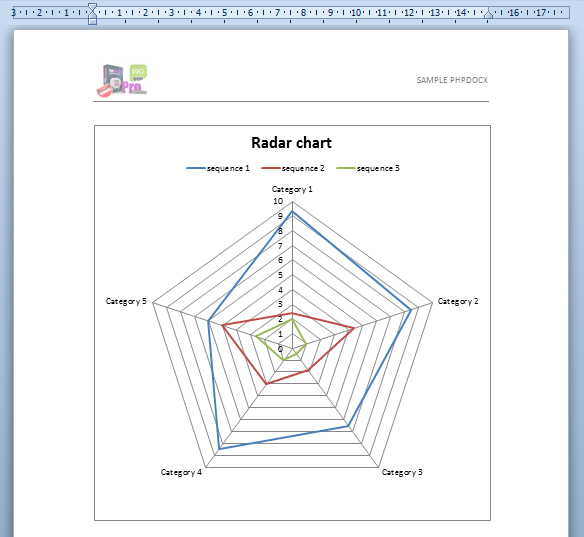
As an example we will insert a radar type chart:
And you get:
![]()
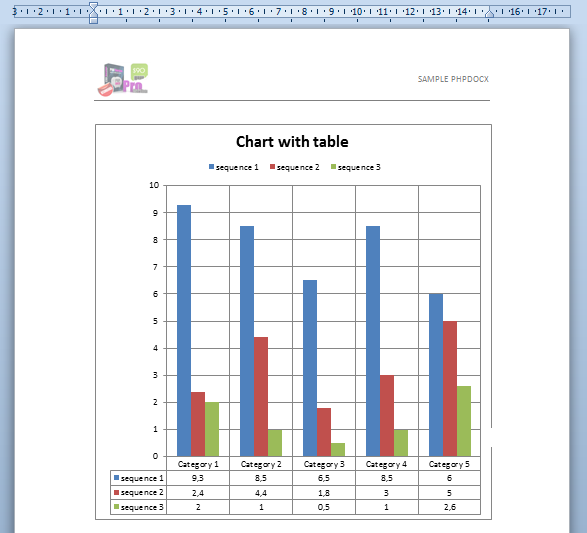
In order to see all the available options you should visit the Full reference Documentation, nevertheless to illustrate the flexibility of phpdocx you may easily create a bar chart with the associated data data table just by setting the ’showtable’ option to 1 and setting the type to «colChart»:
So this time we will obtain:
![]()
Using your own base template and setting up general config options
We have already commented that phpdocx users may use their own «base templates» in order to generate their custom documents or reports.
The procedure is quite simple. One only has to make a call to the desired template whenever a new DOCX is created:
As you may see from the result:
![]()
You may get customized headers and footers as well as many other configuration options in just one shot.
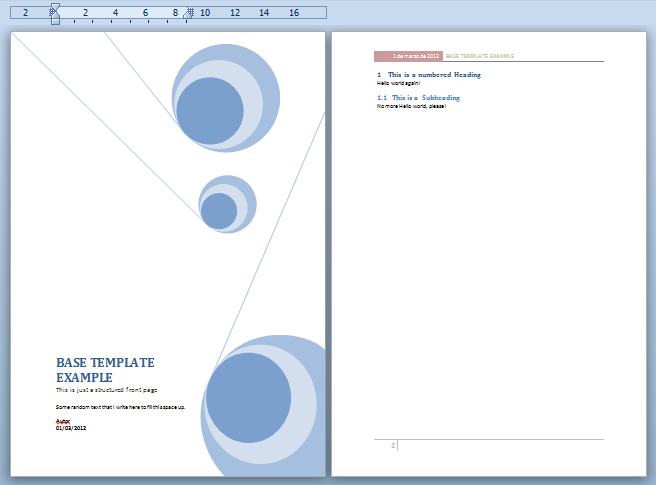
For example you may also include a «front page» as structured content that will be preserved by phpdocx:
So we get:
![]()
Nevertheles to use the default template may show convenient because it has been prepared to have available all the standard Word style options.
If you work with your own template make sure, by using the parseStyles() method that you have enough styles at your disposal.
- The contents of your baseTemplate will be ignored (only headers,footers and «front page», if it has been inserted as structured content, will survive in the final document). If you really want to work with an existing template for your document content you should run the CreateDocxFromTemplate class on which we will elaborate on next section.
WARNING:
Время от времени многим программистам приходится сталкиваться с такими задачами, как создание word или pdf файлов средствами PHP. Если со вторым ощутимых проблем нет, так как есть хорошая библиотека, то с Word-ом дела обстоят сложнее.
Чтобы создать word файл можно использовать специальную библиотеку или пойти более хитрым путем. О нем и пойдет речь.
Подключать библиотеку и разбираться в принципах ее работы у меня не было желания, поэтому я нашел способ генерации Word документов на лету с помощью PHP.
Для этого нужно подготовить word шаблон и сохранить как xml файл. Затем средствами php мы будем открывать xml файл и делать замену нужных строк на необходимые и сохранять файл в виде .doc расширения. Таким образом, любой пользователь сможет без ошибок открыть сгенерированный word и работать с ним.
Единственной сложностью такого подхода остается разобраться с кодом самого word-а в xml виде, так как в нем будет много мусора. Для этого вам нужно будет постоянно создавать word файлы и прописывать слова, теги, свойства, таблицы. А в xml версии смотреть, как выглядит тот или иной код, чтобы затем его использовать для генерации шаблонов. Советую прописывать в ворде слова очень аккуратно, например, если нажмете backspace на букве или enter, то слово может разбиться на несколько групп в разных тегах. Поэтому для xml версии — чем проще пишите в word, тем лучше его xml версия.
По моим наблюдениям тело word-а всегда в тегах <w:body></w:body>. Поэтому внутри них и находится содержимое.
Пара примеров:
Текст: <w:p w:rsidR=»00822E93″ w:rsidRDefault=»003428FA»><w:r><w:t>Первый текст</w:t></w:r></w:p>
Перевод строк: <w:p w:rsidR=»00655BB2″ w:rsidRDefault=»00655BB2″><w:pPr><w:rPr><w:lang w:val=»en-US»/></w:rPr></w:pPr></w:p>
Таблица похожа на обычный table в html:
<w:tbl> = <table>
<w:tr> = <tr>
<w:tc> = <td>
Напоследок оставлю бонус собственного производства.
Разместите папку word, например, в корень вашего сайта и запустите index.php. Скрипт не только создаст на основе word.xml файл zakaz.doc, но и автоматически скачает его. Вам останется только открыть через word сгенерированный документ. Сама генерация идет в index.php. Для примера добавил помимо обычных строк таблицу, в которой вы сможете добавлять свои значения. Табличка динамическая. Это означает, что вы сможете добавлять в нее бесконечное количество товаров. Кстати, никто не мешает вам использовать генерацию прямо из БД вашего сайта. Это может быть очень удобным.
-
Home
- XML to Word Convertor in PHP
704 votes
0 answers


Get the solution ↓↓↓
2023-03-24
Write your answer
Share solution ↓
Additional Information:
Date the issue was resolved:
2023-03-24
Link To Source
Link To Answer
People are also looking for solutions of the problem: php undefined array key
Didn’t find the answer?
Our community is visited by hundreds of web development professionals every day. Ask your question and get a quick answer for free.
Similar questions
Find the answer in similar questions on our website.
Write quick answer
Do you know the answer to this question? Write a quick response to it. With your help, we will make our community stronger.
About the technologies asked in this question
PHP
PHP (from the English Hypertext Preprocessor — hypertext preprocessor) is a scripting programming language for developing web applications. Supported by most hosting providers, it is one of the most popular tools for creating dynamic websites.
The PHP scripting language has gained wide popularity due to its processing speed, simplicity, cross-platform, functionality and distribution of source codes under its own license.
https://www.php.net/
HTML
HTML (English «hyper text markup language» — hypertext markup language) is a special markup language that is used to create sites on the Internet.
Browsers understand html perfectly and can interpret it in an understandable way. In general, any page on the site is html-code, which the browser translates into a user-friendly form. By the way, the code of any page is available to everyone.
https://www.w3.org/html/
Welcome to programmierfrage.com
programmierfrage.com is a question and answer site for professional web developers, programming enthusiasts and website builders. Site created and operated by the community. Together with you, we create a free library of detailed answers to any question on programming, web development, website creation and website administration.
Get answers to specific questions
Ask about the real problem you are facing. Describe in detail what you are doing and what you want to achieve.
Help Others Solve Their Issues
Our goal is to create a strong community in which everyone will support each other. If you find a question and know the answer to it, help others with your knowledge.