
Convert XML Files to Excel – 5 Methods to Import
To Import XML data to Excel you can use any of these listed methods.
- VBA to import XML to Excel
- Quick VBA to Convert XML into Excel
- VBA to read each nodes in XML
- VBA to Import XML from any website
- Directly Open XML in Excel.
- Data Import to Convert XML to XLSX
Lets review one by one & get free Excel macro code also to do this.
1. VBA Read XML file into Excel
1.1 Quick VBA To Convert XML to Excel
This methods import and open XML file in Excel from local path, but it is slightly different from the previous methods.
This does a plain import in quick way.
Public Sub Convert_XML_To_Excel_From_Local_Path()
    Dim xml_File_Path As String
    Dim wb As Workbook

    'Load XML Data into a New Workbook - Code from Officetricks.com
    Application.DisplayAlerts = False
     xml_File_Path = ThisWorkbook.Sheets(1).Cells(2, 1)
     Set wb = Workbooks.OpenXML(Filename:=xml_File_Path)

    'Copy Content from New workbook to current active Worksheet
     wb.Sheets(1).UsedRange.Copy ThisWorkbook.Sheets("Sheet2").Range("A1")

     'Close New Workbook & Enable Alerts
     wb.Close False
     Application.DisplayAlerts = True
End Sub
1.2 Advanced method to Read each node in XML file using VBA
This VBA code will import XML to Excel by reading each element or node in it, using object model.
If it is not just an plain import & you want to process each XML node in code, then this is the most preferred method.
Public Sub Convert_XML_To_Excel_Through_VBA()
    'Code from Officetricks.com
    'Add referece from Menu: "Tools -> References -> Microsoft XML Vn.0"
    Dim iRow As Integer, iCol As Integer
    Dim xmlDoc As MSXML2.DOMDocument, xmlRoot As MSXML2.IXMLDOMNode
    Dim xmlNodes As MSXML2.IXMLDOMNode, xmlData As MSXML2.IXMLDOMNode
    Set xmlDoc = New MSXML2.DOMDocument

    'Load & Wait till complete XML Data is loaded
    xmlDoc.async = False
    xmlDoc.validateOnParse = False
    xmlDoc.Load ("D:sitemap.xml")

    'XML Loaded. Now Read Elements One by One into XML DOM Objects
    Set xmlRoot = xmlDoc.DocumentElement
    Set xmlNodes = xmlRoot.FirstChild

    'Read XML Data and Load into Excel Sheet by each Node and Chile Node
    iRow = 0
    For Each xmlNodes In xmlRoot.ChildNodes
        iRow = iRow + 1
        iCol = 0

        For Each xmlData In xmlNodes.ChildNodes
            iCol = iCol + 1
            ThisWorkbook.Sheets(2).Cells(1, iCol) = xmlData.BaseName
            ThisWorkbook.Sheets(2).Cells(iRow, iCol) = xmlData.Text
        Next xmlData
    Next xmlNodes
End Sub
Before executing the code above, just change the path of the input file in the line, xmlDoc.Load.
By this method, you will be able to import multiple XML files into Excel.
1.3 Import XML into Excel using VBA from Website
The above method is used to load data from a local file. Use the below method if you have to import XML data to Excel from a website URL directly.
Public Sub Import_XML_From_URL()
    'Clear & Setup Output Sheet - Code from Officetricks.com
    ThisWorkbook.Sheets(2).Activate
    ThisWorkbook.Sheets(2).Cells.Select
    Selection.ClearContents

    'Switch Off Alert Messages while Importing.
    Application.DisplayAlerts = False

    'VBA Command To Import XML File from Website to Excel
    ThisWorkbook.XmlImport URL:="XML_File_Download_URL", ImportMap:= _
        Nothing, Overwrite:=True, Destination:=ThisWorkbook.Sheets(2).Range("$A$1")

    Application.DisplayAlerts = True
End Sub
All the methods discussed above can be used to automate the process of converting XML to Excel file from a local computer or from a Website URL.
To convert XML file to Excel using menu options, follow these simple steps.
- Open a Excel workbook (xls or xlsx).
- Click ‘File’ menu & choose ‘Open’ (shortcut – ‘Alt+F+O’).
- Browse folder path & choose XML file.
- Click ‘Open’ or press ‘Enter’.
- Choose ‘As an XML table’ in popup menu & click ‘OK’.
- Click ‘OK’ when Excel notify that a schema will be created based on XML source data.
Now, the system will import XML to Excel in active worksheet.
But, wait. We do have more easy methods & even few VBA codes do perform this task.
3. Data Import XML to Excel – Menu Option
To view XML in proper readable format, you can open XML files in Excel using the “Data Import” feature as explained below.
- Click ‘Data’ menu & choose ‘From Other Sources’ (shortcut – ‘Alt+A+F+O’)
- Select “From XML Data Import”.
- Choose XML path and file in ‘Select Data Source’ window.
- Excel will notify about schema creation by itself. Click OK.
- Choose target cell address to import XML data.
- Click ‘OK’.
Usually in manual options, Excel itself will guide you to further steps to import XML to Excel. These option are built in options of Microsoft XML converter.
It is also possible to import data in XML to Excel through macro Code. We have explained 3 different methods in this article to this through VBA.
View XML Maps – Data mapping using Excel
Excel will create a schema by itself once your import XML into Excel. To view the XML maps added to the Excel workbook, follow these steps.
- Right click on imported XML table.
- Select ‘XML’ in the popup menu & choose “XML Source”.
- Sidebar on right hand side will appear with source details.
- Edit Map field details in this sidebar.
- Click on ‘XML Maps’ to view list of maps linked.
- Rename, Add, Delete, Assign map schema details in this window.
The same option is also available in Developer Tab “Document Panel” from the Excel Menu. Use this option to assign a new schema or map to the imported XML file.
Note: Similar to editing importing XML, you can create a XML file from Excel directly, by saving it in XML format, right from the ‘File’ menu ‘Save As’ Option.
Import Sitemap to Excel
Bloggers, Web Admin, SEO & Marketing people scan through sitemaps from lot of websites to improve the performance of their pages in search engine result pages. They can use the techniques in this page to import Sitemap from a Website and process all the links within that Domain.
We have completed few quick steps about Extensible Markup Language or XML to Excel converter. This file format is used to exchange data between computer applications across Internet, LAN or apps within same Computer.
This file can be opened in any Internet browsers (Firefox, Chrome, IE, Opera etc.,) or a Text editor directly to view it’s content since it is not a encoded format. But, to view it in a readable format, this article will help more.
Other Reference: Microsoft Answers on Importing XML data
By this, you can create your own Excel XML viewer. We have summarized 2 manual methods & 3 different methods using VBA. Be it on-demand process or automation, this complete guide about converting a XML file to Excel will be a handy quick reference.
THE «HARD CODED» WAY IS THIS:
Starting from this
<result>
   <entry>
      <published_date>20130201</published_date>
      <post_count>18</post_count>
   </entry>
  <entry>
      <published_date>20120201</published_date>
      <post_count>15</post_count>
   </entry>
and you want to obtain an excel with two column:
**published_date** |  **post_count**
20130201       |           18
20120201       |           15
so that we can assume that in your XML you will always have
<result><entry><Element>VALUE</Element><Element...n>VALUE</Element...n></entry>
IMPORTANT:
Open up VBA editor in PowerPoint, Excel.. Word and add references to «Microsoft XML, v3.0» (this reference is for Office 2000… you might have others).
Source: http://vba2vsto.blogspot.it/2008/12/reading-xml-from-vba.html
Employee.XML
<?xml version="1.0" encoding="UTF-8" standalone="yes"?>
<EmpDetails>
<Employee>
<Name>ABC</Name>
<Dept>IT-Software</Dept>
<Location>New Delhi</Location>
</Employee>
<Employee>
<Name>XYZ</Name>
<Dept>IT-Software</Dept>
<Location>Chennai</Location>
</Employee>
<Employee>
<Name>IJK</Name>
<Dept>HR Operations</Dept>
<Location>Bangalore</Location>
</Employee>
</EmpDetails>
CODE TO READ ABOVE XML
Sub XMLfromPPTExample()
Dim XDoc As MSXML2.DOMDocument
Dim xEmpDetails As MSXML2.IXMLDOMNode
Dim xEmployee As MSXML2.IXMLDOMNode
Dim xChild As MSXML2.IXMLDOMNode

Set XDoc = New MSXML2.DOMDocument
XDoc.async = False
XDoc.validateOnParse = False
XDoc.Load ("C:Emp.xml")
Set xEmpDetails = XDoc.documentElement
Set xEmployee = xEmpDetails.firstChild
For Each xEmployee In xEmpDetails.childNodes
For Each xChild In xEmployee.childNodes
MsgBox xChild.baseName & " " & xChild.Text
Next xChild
Next xEmployee
End Sub
In your case, of course, you need to adapt your routine:
result —> EmpDetails in the code provided
entry —> Employee in the code provided
plus any other necessary adjustment.
In this way you can have as much as many «entry» and «entry child» elements you want.
In fact, looping through all the elements inside your «entry» you will get your COLUMN, then every new entry is a new ROW.
Unfortunately, I don’t have excel on the MAC so I just put the logic, you should check the sintax your own… in this way you build a EXCEL table on the worksheet you want.
Dim col = 1; Dim row=1;

For Each xEmployee In xEmpDetails.childNodes
    col = 1
    For Each xChild In xEmployee.childNodes
       Worksheets("NAMEOFTHESHEET").Cells(col, row).Value = xChild.Text
       MsgBox xChild.baseName & " " & xChild.Text
       col = col + 1;
    Next xChild
row = row+1;
Next xEmployee
THE CORRET WAY SHOULD BE THIS:
LoadOption:=xlXmlLoadImportToList?
You are getting the XML from a URL call, but I strongly suggest to try to work with an XML file on disk at the beginning, and check if it’s correctly valid. So what you should do is get a sample XML from this «WebService» then save it on disk. An try load it in the following way:
   Sub ImportXMLtoList()
    Dim strTargetFile As String
    Dim wb as Workbook

         Application.Screenupdating = False
         Application.DisplayAlerts = False
         strTargetFile = "C:example.xml"
         Set wb = Workbooks.OpenXML(Filename:=strTargetFile,        LoadOption:=xlXmlLoadImportToList)
         Application.DisplayAlerts = True

         wb.Sheets(1).UsedRange.Copy ThisWorkbook.Sheets("Sheet2").Range("A1")
         wb.Close False
         Application.Screenupdating = True
    End Sub
Содержание
- Load XML into Excel through VBA
- 2 Answers 2
- VBA Macro Import – Read XML File into Excel – 5 Easy Tips
- Convert XML Files to Excel – 5 Methods to Import
- 1. VBA Read XML file into Excel
- 1.1 Quick VBA To Convert XML to Excel
- 1.2 Advanced method to Read each node in XML file using VBA
- 1.3 Import XML into Excel using VBA from Website
- 2. How to Convert XML to Excel?
- 3. Data Import XML to Excel – Menu Option
- View XML Maps – Data mapping using Excel
- Import Sitemap to Excel
- VBA XML
- Excel VBA XML
- Types of Node in VBA XML
- Steps to Import & Add XML in Excel VBA
- Example #1
- Example #2
- Pros of VBA XML
- Things to Remember
- Recommended Articles
Load XML into Excel through VBA
I’ve got a bit of VBA that is loading an XML file through VBA. However when it is imported it is all in one column and not split into a table.
When I manually import this through the Data tab I get the warning there is no schema but asks if I would like Excel to create one based on source data. This then places all the data in a nice table.
I would like this to happen automatically within my current VBA code:
Currently the data then presents itself like this, unstructured. How can I automatically turn this into a table?
2 Answers 2
THE «HARD CODED» WAY IS THIS:
Starting from this
and you want to obtain an excel with two column:
so that we can assume that in your XML you will always have
IMPORTANT: Open up VBA editor in PowerPoint, Excel.. Word and add references to «Microsoft XML, v3.0» (this reference is for Office 2000. you might have others).
Employee.XML
CODE TO READ ABOVE XML
In your case, of course, you need to adapt your routine:
result —> EmpDetails in the code provided
entry —> Employee in the code provided
plus any other necessary adjustment.
In this way you can have as much as many «entry» and «entry child» elements you want.
In fact, looping through all the elements inside your «entry» you will get your COLUMN, then every new entry is a new ROW.
Unfortunately, I don’t have excel on the MAC so I just put the logic, you should check the sintax your own. in this way you build a EXCEL table on the worksheet you want.
THE CORRET WAY SHOULD BE THIS:
You are getting the XML from a URL call, but I strongly suggest to try to work with an XML file on disk at the beginning, and check if it’s correctly valid. So what you should do is get a sample XML from this «WebService» then save it on disk. An try load it in the following way:
Источник
VBA Macro Import – Read XML File into Excel – 5 Easy Tips
Convert XML Files to Excel – 5 Methods to Import
To Import XML data to Excel you can use any of these listed methods.
Please enable JavaScript
- VBA to import XML to Excel
- Quick VBA to Convert XML into Excel
- VBA to read each nodes in XML
- VBA to Import XML from any website
- Directly Open XML in Excel.
- Data Import to Convert XML to XLSX
Lets review one by one & get free Excel macro code also to do this.
1. VBA Read XML file into Excel
1.1 Quick VBA To Convert XML to Excel
This methods import and open XML file in Excel from local path, but it is slightly different from the previous methods.
This does a plain import in quick way.
1.2 Advanced method to Read each node in XML file using VBA
This VBA code will import XML to Excel by reading each element or node in it, using object model.
If it is not just an plain import & you want to process each XML node in code, then this is the most preferred method.
Before executing the code above, just change the path of the input file in the line, xmlDoc.Load.
By this method, you will be able to import multiple XML files into Excel.
1.3 Import XML into Excel using VBA from Website
The above method is used to load data from a local file. Use the below method if you have to import XML data to Excel from a website URL directly.
All the methods discussed above can be used to automate the process of converting XML to Excel file from a local computer or from a Website URL.
2. How to Convert XML to Excel?
To convert XML file to Excel using menu options, follow these simple steps.
- Open a Excel workbook (xls or xlsx).
- Click ‘File’ menu & choose ‘Open’ (shortcut – ‘Alt+F+O’).
- Browse folder path & choose XML file.
- Click ‘Open’ or press ‘Enter’.
- Choose ‘As an XML table’ in popup menu & click ‘OK’.
- Click ‘OK’ when Excel notify that a schema will be created based on XML source data.
Now, the system will import XML to Excel in active worksheet.
But, wait. We do have more easy methods & even few VBA codes do perform this task.
To view XML in proper readable format, you can open XML files in Excel using the “Data Import” feature as explained below.
- Click ‘Data’ menu & choose ‘From Other Sources’ (shortcut – ‘Alt+A+F+O’)
- Select “From XML Data Import”.
- Choose XML path and file in ‘Select Data Source’ window.
- Excel will notify about schema creation by itself. Click OK.
- Choose target cell address to import XML data.
- Click ‘OK’.
Usually in manual options, Excel itself will guide you to further steps to import XML to Excel. These option are built in options of Microsoft XML converter.
It is also possible to import data in XML to Excel through macro Code. We have explained 3 different methods in this article to this through VBA.
View XML Maps – Data mapping using Excel
Excel will create a schema by itself once your import XML into Excel. To view the XML maps added to the Excel workbook, follow these steps.
- Right click on imported XML table.
- Select ‘XML’ in the popup menu & choose “XML Source”.
- Sidebar on right hand side will appear with source details.
- Edit Map field details in this sidebar.
- Click on ‘XML Maps’ to view list of maps linked.
- Rename, Add, Delete, Assign map schema details in this window.
The same option is also available in Developer Tab “Document Panel” from the Excel Menu. Use this option to assign a new schema or map to the imported XML file.
Note: Similar to editing importing XML, you can create a XML file from Excel directly, by saving it in XML format, right from the ‘File’ menu ‘Save As’ Option.
Import Sitemap to Excel
Bloggers, Web Admin, SEO & Marketing people scan through sitemaps from lot of websites to improve the performance of their pages in search engine result pages. They can use the techniques in this page to import Sitemap from a Website and process all the links within that Domain.
We have completed few quick steps about Extensible Markup Language or XML to Excel converter. This file format is used to exchange data between computer applications across Internet, LAN or apps within same Computer.
This file can be opened in any Internet browsers (Firefox, Chrome, IE, Opera etc.,) or a Text editor directly to view it’s content since it is not a encoded format. But, to view it in a readable format, this article will help more.
By this, you can create your own Excel XML viewer. We have summarized 2 manual methods & 3 different methods using VBA. Be it on-demand process or automation, this complete guide about converting a XML file to Excel will be a handy quick reference.
Источник
VBA XML

Excel VBA XML
The full form of XML is eXtensible Markup Language which is much like an HTML file, is designed to store and transport the data from different programs. XML file stores the data which includes the splits and separators. We can create a VBA code by which we can import the data from the XML file into Excel. In order to import the data from the XML file to any other format, we need to set some rules which tells what kind of data and fields can be used in the XML file. To create a macro in VBA for the XML file, we do not mandatory need XML Notepad in our system. But if we have it will be easy for us to read the XML file for the data we need.
Although in Excel, we have a provision of importing the data of XML file but using VBA, we can read, import the XML file in Excel.
Valuation, Hadoop, Excel, Mobile Apps, Web Development & many more.
Types of Node in VBA XML
In XML, we have a variety of Nodes that constructively helps in reading and parsing the XML file into other sources such as Word or Excel. Each DocumentElement refers to some of the nodes lists below.
- Parent Node
- First Child
- Last Child
- Child Nodes
- Next Sibling
- Previous Sibling
All the above-mentioned nodes confirm the type as [XDoc.DocumentElement], where only Child nodes are the array type of [XDoc.DocumentElement].
In this example, we will see a very simple VBA Code to access the XML file saved in the individual system’s any location and load them into VBA. Usually, to import XML files in Excel using VBA, we have MSXML2.DOMDocument object to allow us to transverse the data through XML structure. But this may not be used in this example.
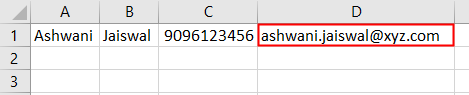
For this, we must have an XML file in which we can create a data structure in the form of Schema. Below is the screenshot of Company schema where under that we have Employee branch with the employee details like First Name, Last Name, Contact Number, Email ID.
Steps to Import & Add XML in Excel VBA
Below are the examples of XML in Excel by using the VBA Code.
Example #1
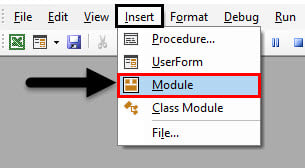
Step 1: First go to Insert menu tab in VBA and open a Module where we will be writing the code transverse data through XML as shown below.
Step 2: Write the subprocedure in the name of VBA XML for the definition of the code.
Code:
Step 3: As we already discussed, for the XML file we will require Object. So, Now define a variable using DIM as String which will be used for storing the File name.
Code:
Step 4: Now we will use an application Display Alerts which is used for showing the alert message if the chosen path is incorrect.
Code:
Step 5: Now we will put the link or location where we have kept XML file and assign it to the defined variable.
Code:
Step 6: As we discussed, we will get the first Object with MSXML2.DOMDoucment.
Code:
Step 7: To load the data of XML file in Excel, we need to open that XML file, using the name and location which we have stored in XML File variable and select the load option as Import to List as shown below.
Code:
Step 8: At last, again use the Application option to display the alert as TRUE if there is any.
Code:
Step 9: Now we will compile the written code by pressing F8 functional key and run it, if there is no error found during compilation.
We will see, the data stored in the XML file is not imported in a new workbook as shown below. We can fetch any length of data of XML file into Excel using this simple VBA Code.

Example #2
There is another way to import the data of an XML file using the VBA Code which is simple too. For this, we can have another module of we can make the changes in the same module as well.
Step 1: For this again we would require a module and there write the subprocedure in the name of VBA XML.
Code:

Step 2: Define a variable as String where we will be storing the file location and another variable for Workbook as shown below.
Code:
Step 3: Now similar to the previous example we will now use 2 Applications, one of Screen updating and other for Display Alerts as FALSE.
Code:
Step 4: Now in the defined variable XMLFile, we will assign the path of the XML file.
Code:

Step 5: Similar to example-1, we will now update set the code for Opening XML file with the path defined in XMLFile variable and load the data Import to list.
Code:
Step 6: Now again to put the Display alert application as TRUE.
Code:
Step 7: Once the data is imported we will copy that into another workbook from the selected cell A1:D1 as per the number of headers available in the XML file.
Code:
Step 8: At last close the code using Screen updating application as TRUE.
Code:
Step 9: Now if we run this code, we will see the data from the XML file will get imported into a new Excel workbook as shown below.
Pros of VBA XML
- Even if you do not know how to create an XML file and work on it, using such VBA codes, we can extract the data into VBA Code or in Excel.
- We can parse a portion of XML Data or complete data into the VBA window by using node references.
Things to Remember
- Every node reference has its own value and meaning. Using the right note type is very important for every condition.
- XML to VBA is not limited to the code which we have seen in the above examples.
- We can extract any type of data using the code which we have seen in above-discussed examples. But keep the proper location and path which is easy to access.
- We can also extract the XML file data without opening it from the developer tab’s Source option. This will help us to get the data as it is into the Excel workbook.
- Save the written code Excel file in Macro enabled excel format, to avoid losing the code.
Recommended Articles
This is a guide to the VBA XML. Here we discuss Steps to Import & Add XML in Excel VBA and its different types of node along with practical examples and downloadable excel template. You can also go through our other suggested articles –
Источник
Excel VBA XML
The full form of XML is eXtensible Markup Language which is much like an HTML file, is designed to store and transport the data from different programs. XML file stores the data which includes the splits and separators. We can create a VBA code by which we can import the data from the XML file into Excel. In order to import the data from the XML file to any other format, we need to set some rules which tells what kind of data and fields can be used in the XML file. To create a macro in VBA for the XML file, we do not mandatory need XML Notepad in our system. But if we have it will be easy for us to read the XML file for the data we need.
Although in Excel, we have a provision of importing the data of XML file but using VBA, we can read, import the XML file in Excel.
Types of Node in VBA XML
In XML, we have a variety of Nodes that constructively helps in reading and parsing the XML file into other sources such as Word or Excel. Each DocumentElement refers to some of the nodes lists below.
- Parent Node
- First Child
- Last Child
- Child Nodes
- Next Sibling
- Previous Sibling
All the above-mentioned nodes confirm the type as [XDoc.DocumentElement], where only Child nodes are the array type of [XDoc.DocumentElement].
In this example, we will see a very simple VBA Code to access the XML file saved in the individual system’s any location and load them into VBA. Usually, to import XML files in Excel using VBA, we have MSXML2.DOMDocument object to allow us to transverse the data through XML structure. But this may not be used in this example.
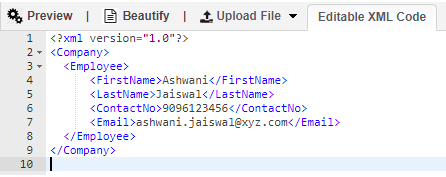
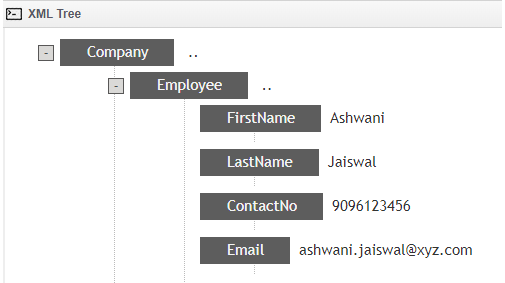
For this, we must have an XML file in which we can create a data structure in the form of Schema. Below is the screenshot of Company schema where under that we have Employee branch with the employee details like First Name, Last Name, Contact Number, Email ID.
Steps to Import & Add XML in Excel VBA
Below are the examples of XML in Excel by using the VBA Code.
You can download this VBA XML Excel Template here – VBA XML Excel Template
Example #1
Step 1: First go to Insert menu tab in VBA and open a Module where we will be writing the code transverse data through XML as shown below.
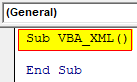
Step 2: Write the subprocedure in the name of VBA XML for the definition of the code.
Code:
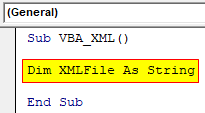
Sub VBA_XML()

End Sub
Step 3: As we already discussed, for the XML file we will require Object. So, Now define a variable using DIM as String which will be used for storing the File name.
Code:
Sub VBA_XML()

Dim XMLFile As String

End Sub
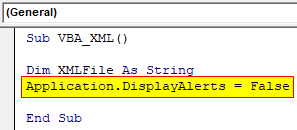
Step 4: Now we will use an application Display Alerts which is used for showing the alert message if the chosen path is incorrect.
Code:
Sub VBA_XML()

Dim XMLFile As String
Application.DisplayAlerts = False

End Sub
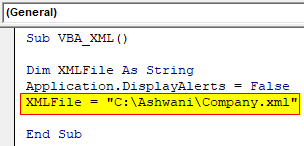
Step 5: Now we will put the link or location where we have kept XML file and assign it to the defined variable.
Code:
Sub VBA_XML()

Dim XMLFile As String
Application.DisplayAlerts = False
XMLFile = "C:AshwaniCompany.xml"

End Sub
Note: Keep the XML file in the location which is easy to access.
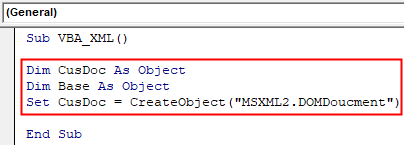
Step 6: As we discussed, we will get the first Object with MSXML2.DOMDoucment.
Code:
Sub VBA_XML()

Dim CusDoc As Object
Dim Base As Object
Set CusDoc = CreateObject("MSXML2.DOMDoucment")

End Sub
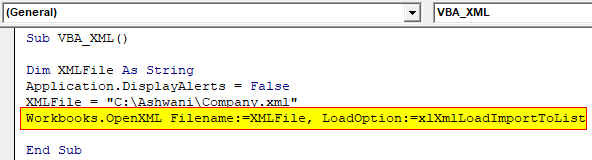
Step 7: To load the data of XML file in Excel, we need to open that XML file, using the name and location which we have stored in XML File variable and select the load option as Import to List as shown below.
Code:
Sub VBA_XML()

Dim XMLFile As String
Application.DisplayAlerts = False
XMLFile = "C:AshwaniCompany.xml"
Workbooks.OpenXML Filename:=XMLFile, LoadOption:=xlXmlLoadImportToList

End Sub
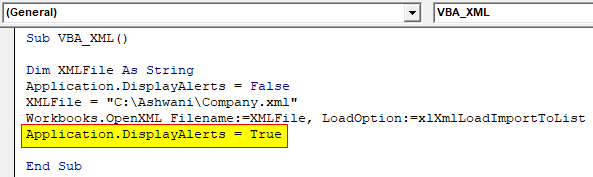
Step 8: At last, again use the Application option to display the alert as TRUE if there is any.
Code:
Sub VBA_XML()

Dim XMLFile As String
Application.DisplayAlerts = False
XMLFile = "C:AshwaniCompany.xml"
Workbooks.OpenXML Filename:=XMLFile, LoadOption:=xlXmlLoadImportToList
Application.DisplayAlerts = True

End Sub
Step 9: Now we will compile the written code by pressing F8 functional key and run it, if there is no error found during compilation.
We will see, the data stored in the XML file is not imported in a new workbook as shown below. We can fetch any length of data of XML file into Excel using this simple VBA Code.
Example #2
There is another way to import the data of an XML file using the VBA Code which is simple too. For this, we can have another module of we can make the changes in the same module as well.
Step 1: For this again we would require a module and there write the subprocedure in the name of VBA XML.
Code:
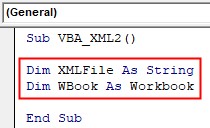
Sub VBA_XML2()

End Sub
Step 2: Define a variable as String where we will be storing the file location and another variable for Workbook as shown below.
Code:
Sub VBA_XML2()

Dim XMLFile As String
Dim WBook As Workbook

End Sub
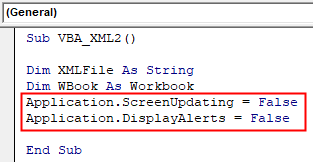
Step 3: Now similar to the previous example we will now use 2 Applications, one of Screen updating and other for Display Alerts as FALSE.
Code:
Sub VBA_XML2()

Dim XMLFile As String
Dim WBook As Workbook
Application.ScreenUpdating = False
Application.DisplayAlerts = False

End Sub
Step 4: Now in the defined variable XMLFile, we will assign the path of the XML file.
Code:
Sub VBA_XML2()

Dim XMLFile As String
Dim WBook As Workbook
Application.ScreenUpdating = False
Application.DisplayAlerts = False
XMLFile = "C:AshwaniCompany.xml"

End Sub
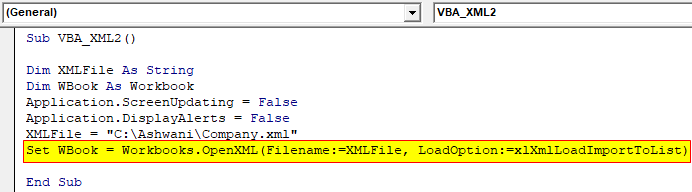
Step 5: Similar to example-1, we will now update set the code for Opening XML file with the path defined in XMLFile variable and load the data Import to list.
Code:
Sub VBA_XML2()

Dim XMLFile As String
Dim WBook As Workbook
Application.ScreenUpdating = False
Application.DisplayAlerts = False
XMLFile = "C:AshwaniCompany.xml"
Set WBook = Workbooks.OpenXML(Filename:=XMLFile, LoadOption:=xlXmlLoadImportToList)

End Sub
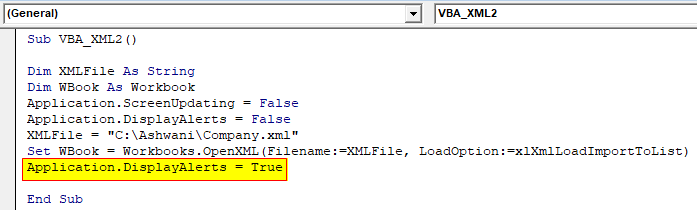
Step 6: Now again to put the Display alert application as TRUE.
Code:
Sub VBA_XML2()

Dim XMLFile As String
Dim WBook As Workbook
Application.ScreenUpdating = False
Application.DisplayAlerts = False
XMLFile = "C:AshwaniCompany.xml"
Set WBook = Workbooks.OpenXML(Filename:=XMLFile, LoadOption:=xlXmlLoadImportToList)
Application.DisplayAlerts = True

End Sub
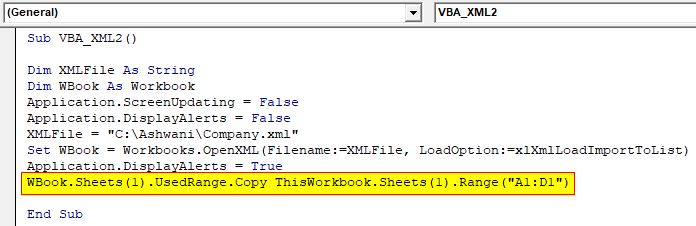
Step 7: Once the data is imported we will copy that into another workbook from the selected cell A1:D1 as per the number of headers available in the XML file.
Code:
Sub VBA_XML2()

Dim XMLFile As String
Dim WBook As Workbook
Application.ScreenUpdating = False
Application.DisplayAlerts = False
XMLFile = "C:AshwaniCompany.xml"
Set WBook = Workbooks.OpenXML(Filename:=XMLFile, LoadOption:=xlXmlLoadImportToList)
Application.DisplayAlerts = True
WBook.Sheets(1).UsedRange.Copy ThisWorkbook.Sheets(1).Range("A1:D1")

End Sub
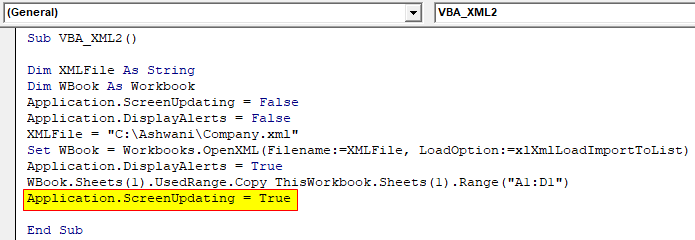
Step 8: At last close the code using Screen updating application as TRUE.
Code:
Sub VBA_XML2()

Dim XMLFile As String
Dim WBook As Workbook
Application.ScreenUpdating = False
Application.DisplayAlerts = False
XMLFile = "C:AshwaniCompany.xml"
Set WBook = Workbooks.OpenXML(Filename:=XMLFile, LoadOption:=xlXmlLoadImportToList)
Application.DisplayAlerts = True
WBook.Sheets(1).UsedRange.Copy ThisWorkbook.Sheets(1).Range("A1:D1")
Application.ScreenUpdating = True

End Sub
Step 9: Now if we run this code, we will see the data from the XML file will get imported into a new Excel workbook as shown below.
Pros of VBA XML
- Even if you do not know how to create an XML file and work on it, using such VBA codes, we can extract the data into VBA Code or in Excel.
- We can parse a portion of XML Data or complete data into the VBA window by using node references.
Things to Remember
- Every node reference has its own value and meaning. Using the right note type is very important for every condition.
- XML to VBA is not limited to the code which we have seen in the above examples.
- We can extract any type of data using the code which we have seen in above-discussed examples. But keep the proper location and path which is easy to access.
- We can also extract the XML file data without opening it from the developer tab’s Source option. This will help us to get the data as it is into the Excel workbook.
- Save the written code Excel file in Macro enabled excel format, to avoid losing the code.
Recommended Articles
This is a guide to the VBA XML. Here we discuss Steps to Import & Add XML in Excel VBA and its different types of node along with practical examples and downloadable excel template. You can also go through our other suggested articles –
- VBA LBound
- VBA Get Cell Value
- VBA IsError
- VBA Solver
- Importance of an XML Parser
- Build XML Parser Using VBA
- Conclusion

This article will teach us how to parse XML files in VBA.
Importance of an XML Parser
As a Microsoft Excel user, it is common that you might receive some data in the form of an XML file. You will have to retrieve the information from the XML file and use it in your sheets or VBA macros according to your requirement.
A way to do this is to treat it as a text file and parse the information. But this is not an elegant way to parse XML files since the information is stored well-structured using tags, and treating it as a text file negates this concept.
Therefore, we will have to make use of an XML Parser. An XML Parser reads the XML file and retrieves the relevant data so it can be used readily.
Build XML Parser Using VBA
We can parse an XML file using VBA and convert the data into our Excel sheet. The method we will be using uses the XML DOM implementation, short for the XML Document Object Model, and this model allows us to represent the XML file as an object we can then manipulate as required.
To start parsing your XML file through VBA, you must perform a simple sequence of steps. These are explained below.
To parse XML through VBA, you need to have MSXML.4.0 or greater on your system.
-
Add Reference to Microsoft XML
First, you need to add a reference to
Microsoft XML, V6.0in the VBA Editor. This is how it is done:Open the VBA Editor from the Developer tab in Excel.
-

-
Scroll down and check
Microsoft XML, V6.0, then click onOK.Note that the version of Microsoft XML depends on the operating system and Microsoft Office installed on your computer.
-
Write VBA Code to Load the XML File Into
XML DOMSuppose we have the following XML file:
<?xml version="1.0" encoding="ISO8859-1" ?>
<menu>
<food>
<name> Halwa Puri </name>
<price> $7.50 </price>
<description> Halwa Puri is from Indian and Pakistani cuisines, having the sweet Halwa and the savory Puri which is a fried flatbread. </description>
<calories> 900 </calories>
</food>
</menu>
We can use the following code to parse this XML file through VBA by making an
XML DOMobject in the following way:Sub XMLParser() Dim xDoc As New MSXML2.DOMDocument60 Dim node As IXMLDOMElement Set xDoc = New MSXML2.DOMDocument60 With xDoc .async = False .validateOnParse = True If xDoc.Load("D:VBAexample.xml") = False Then Debug.Print .parseError.reason, .parseError.ErrorCode Exit Sub End If Set node = xDoc.SelectSingleNode("//price") MsgBox node.Text End With End Sub

In the code above, we have first created a variable xDoc of the MSXML2.DOMDocument60 type. Here, we have appended 60 at the end because we are using version 6.0 of Microsoft XML, and without the 60, this code will generate a compile-time error of User-defined type not found.
Next, we have specified that we are working with the xDoc variable using the With statement. The .async property defines permission for asynchronous downloads, and the .validateOnParse property indicates if the parser should validate the XML document.
After that, we use the .Load function to load the specified XML file into the DOM variable. Here, you can change the path and file name to the one on your computer.
The next two lines are for error handling in case the XML file is not loaded properly. To test if the loading has worked, we take one node from the file and specify its name as price.
You should note that the node name is case-sensitive and must be specified according to your XML file. Finally, we display the price using the node.Text property in a message box.
Output:

This shows that the loading has worked perfectly fine.
One way to use the XML file data is to store it in an Excel sheet. Let us make a few changes to the code above to store the data in the Excel sheet:
Sub XMLParser()

Dim xDoc As New MSXML2.DOMDocument60
Set xDoc = New MSXML2.DOMDocument60
Dim list As MSXML2.IXMLDOMNodeList
Dim osh As Worksheet
Set osh = ThisWorkbook.Sheets("Sheet1")
oRow = 1

With xDoc
.async = False
.validateOnParse = True

If xDoc.Load("D:VBAexample.xml") = False Then
Debug.Print .parseError.reason, .parseError.ErrorCode
Exit Sub
End If

Set list = xDoc.SelectNodes("//price")
loopCount = 0
For Each node In list
oRow = oRow + 1
osh.Range("A" & oRow) = node.Text
Next
End With

End Sub
Here, we are retrieving all the price nodes and storing them in the sheet. In this example, we have only one price node that will be saved into the sheet as follows:

You can tweak the code according to your XML file and requirements.
Conclusion
This sums up our discussion on the method to parse XML files through VBA. In this article, we have learned how to build an XML parser using XML DOM in VBA.