
Word for Microsoft 365 Word for the web Word 2021 Word 2019 Word 2016 Word 2013 Word 2010 Word 2007 More…Less
In Word, you can automate frequently used tasks by creating and running macros. A macro is a series of commands and instructions that you group together as a single command to accomplish a task automatically.
To save time on tasks you do often, bundle the steps into a macro. First, you record the macro. Then you can run the macro by clicking a button on the Quick Access Toolbar or pressing a combination of keys. It depends on how you set it up.
-
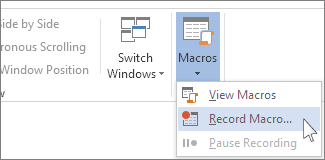
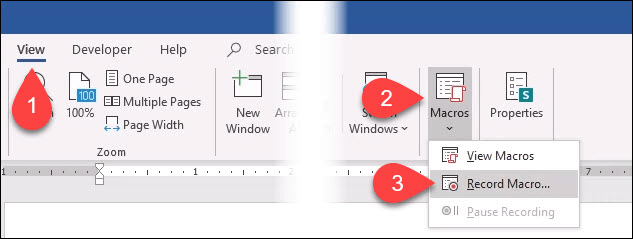
Click View > Macros > Record Macro.

-
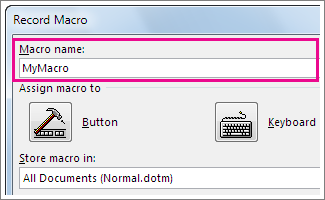
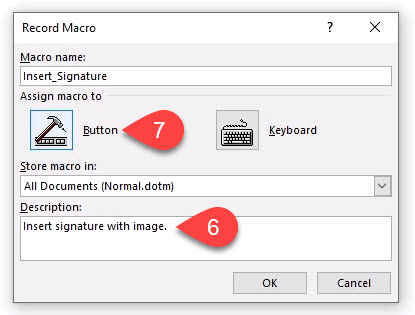
Type a name for the macro.
-
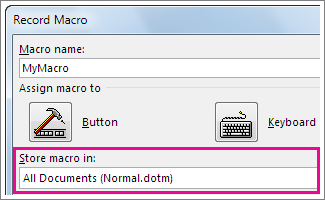
To use this macro in any new documents you make, be sure the Store macro in box says All Documents (Normal.dotm).
-
To run your macro when you click a button, click Button.
-
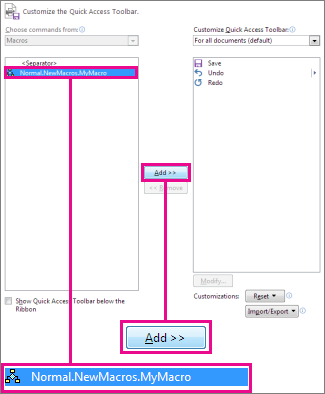
Click the new macro (it’s named something like Normal.NewMacros.<your macro name>), and click Add.
-
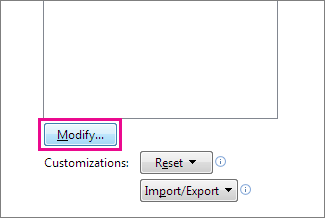
Click Modify.
-
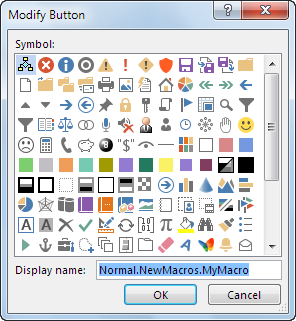
Choose a button image, type the name you want, and click OK twice.
-
Now it’s time to record the steps. Click the commands or press the keys for each step in the task. Word records your clicks and keystrokes.
Note: Use the keyboard to select text while you’re recording your macro. Macros don’t record selections made with a mouse.
-
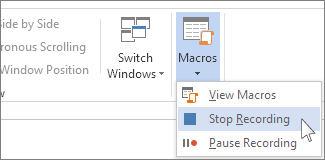
To stop recording, click View > Macros > Stop Recording.
The button for your macro appears on the Quick Access Toolbar.

To run the macro, click the button.
-
Click View > Macros > Record Macro.
-
Type a name for the macro.
-
To use this macro in any new documents you make, be sure the Store macro in box says All Documents (Normal.dotm).
-
To run your macro when you press a keyboard shortcut, click Keyboard.
-
Type a combination of keys in the Press new shortcut key box.
-
Check to see whether that combination’s already assigned to something else. If it’s already assigned, try a different combination.
-
To use this keyboard shortcut in any new documents you make, be sure the Save changes in box says Normal.dotm.
-
Click Assign.
-
Now it’s time to record the steps. Click the commands or press the keys for each step in the task. Word records your clicks and keystrokes.
Note: Use the keyboard to select text while you’re recording your macro. Macros don’t record selections made with a mouse.
-
To stop recording, click View > Macros > Stop Recording.
To run the macro, press the keyboard shortcut keys.
To run a macro, click the button on the Quick Access Toolbar, press the keyboard shortcut, or you can run the macro from the Macros list.
-
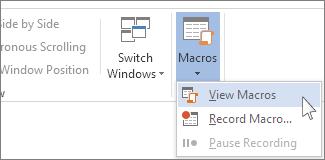
Click View > Macros > View Macros.
-
In the list under Macro name, click the macro you want to run.
-
Click Run.
To make a macro from one document available in all new documents, add it to the Normal.dotm template.
-
Open the document that contains the macro.
-
Click View > Macros > View Macros.
-
Click Organizer.
-
Click the macro you want to add to the Normal.dotm template, and click Copy.

-
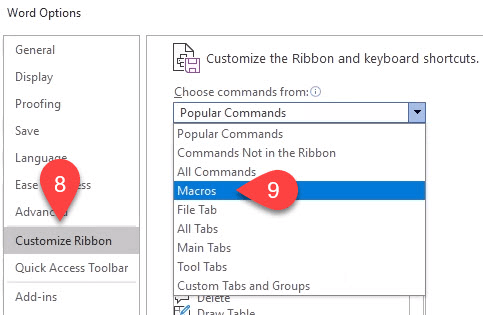
Click File > Options > Customize Ribbon.
-
Under Choose commands from, click Macros.
-
Click the macro you want.
-
Under Customize the ribbon, click the tab and custom group where you want to add the macro.
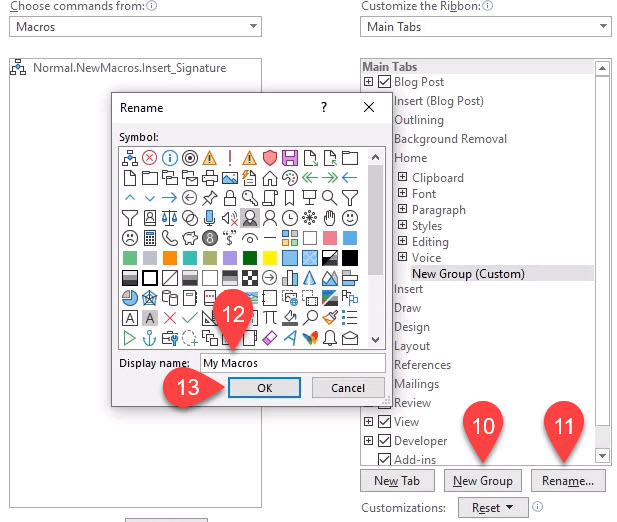
If you don’t have a custom group, click New Group. Then click Rename and type a name for your custom group.
-
Click Add.
-
Click Rename to choose an image for the macro and type the name you want.
-
Click OK twice.
-
On the Developer tab, in the Code group, click Macros.
-
In the Macro name box, type a name for the macro.
Note: If you give a new macro the same name as a built-in macro in Word, the new macro actions will replace the built-in macro. To view a list of built-in macros, click Word Commands in the Macros in list.
-
In the Macros in list, click the template or document in which you want to store the macro.
To make your macro available in all documents, be sure to click Normal.dotm.
-
Click Create to open the Visual Basic Editor.
After you open the Visual Basic Editor, you may want more information about working with Visual Basic for Applications. For more information, click Microsoft Visual Basic Help on the Help menu or press F1.
You can record a sequence of actions, or you can write a macro from scratch by entering Visual Basic for Applications code in the Visual Basic Editor.
Note: To work with macros in Office Word 2007, you need to show the Developer tab.
-
Click the Microsoft Office Button
, and then click Word Options. -
Click Popular.
-
Under Top options for working with Word, select the Show Developer tab in the Ribbon check box.
Note: The Ribbon is a component of the Microsoft Office Fluent user interface.
 , and then click Word Options.
-
On the Developer tab, in the Code group, click Record Macro.
-
In the Macro name box, type a name for the macro.
Note: If you give a new macro the same name as a built-in macro in Office Word 2007, the new macro actions will replace the built-in macro. To view a list of built-in macros, on the Developer tab, in the Code group, click Macros. In the Macros in list, click Word Commands.
-
In the Store macro in box, click the template or document in which you want to store the macro.
Important: To make your macro available in all documents, be sure to click Normal.dotm.
-
In the Description box, type a description of the macro.
-
Do one of the following:
-
Begin recording To begin recording the macro without assigning it to a button on the Quick Access Toolbar or to a shortcut key, click OK.
-
Create a button To assign the macro to a button on the Quick Access Toolbar, do the following:
-
Click Button.
-
Under Customize Quick Access Toolbar, select the document (or all documents) for which you want to add the macro to the Quick Access Toolbar.
Important: To make your macro available in all documents, be sure to click Normal.dotm.
-
Under Choose commands from dialog box, click the macro that you are recording, and then click Add.
-
To customize the button, click Modify.
-
Under Symbol, click the symbol that you want to use for your button.
-
In the Display name box, type the macro name that you want to display.
-
Click OK twice to begin recording the macro.
The symbol that you choose is displayed in the Quick Access Toolbar. The name that you type is displayed when you point to the symbol.
-
-
Assign a keyboard shortcut To assign the macro to a keyboard shortcut, do the following:
-
Click Keyboard.
-
In the Commands box, click the macro that you are recording.
-
In the Press new shortcut key box, type the key sequence that you want, and then click Assign.
-
Click Close to begin recording the macro.
-
-
-
Perform the actions that you want to include in the macro.
Note: When you record a macro, you can use the mouse to click commands and options, but not to select text. You must use the keyboard to select text. For more information about selecting text by using the keyboard, see Select text.
-
To stop recording your actions, click Stop Recording in the Code group.
Change the keyboard shortcut for a macro
-
Click the Microsoft Office Button
, and then click Word Options. -
Click Customize.
-
Next to Keyboard shortcuts, click Customize.
-
In the Categories list, click Macros.
-
In the Macros list, click the macro that you want to change.
-
In the Press new shortcut key box, type the key combination that you want to choose.
-
Check the Current keys box to make sure that you aren’t assigning a key combination that you already use to perform a different task.
-
In the Save changes in list, click the option that matches where you want to run your macro.
Important: To make your macro available in all documents, be sure to click Normal.dotm.
-
Click Close.
-
On the Developer tab, in the Code group, click Macros.
-
In the list under Macro name, click the macro that you want to run.
-
Click Run.
-
On the Developer tab, in the Code group, click Macros.
-
In the Macro name box, type a name for the macro.
Note: If you give a new macro the same name as a built-in macro in Office Word 2007, the new macro actions will replace the built-in macro. To view a list of built-in macros, click Word Commands in the Macros in list.
-
In the Macros in list, click the template or document in which you want to store the macro.
To make your macro available in all documents, be sure to click Normal.dotm.
-
Click Create to open the Visual Basic Editor.
After you open the Visual Basic Editor, you may want more information about working with Visual Basic for Applications. For more information, click Microsoft Visual Basic Help on the Help menu or press F1.
To make quick work of tasks that you do often, in the desktop version of Word you can bundle the steps into macros that run with a single click. In Word for the web, you have to step through such tasks manually.
If you have Word, first click Open in Word to open your document in Word.

Then follow the instructions for the desktop version of Word.
When you run the macro in Word and save the document, you’ll see the results of the macro when you reopen your doc in Word for the web.
Need more help?

You may have the feeling that the Word macros are quite useless. Who needs them anyway? Well, sometimes they are used in malware… Moreover, they are written in a long forgotten VBA (Visual Basic for Applications, which is somehow limited Visual Basic 6 in an interpreted form), eeww!
But in fact, after all, many people may sometimes need to write a report in Word, or issue a paper, or write a CV before sending it to their dream company… For some people, their job is working in Word itself. Often, various documentation systems can export pages to doc or docx formats that your customers ask for. And it often happens that exported documents look awful, you have to fix them manually every time after export.
Working in Word often involves performing some repetitive actions, which can be sometimes (but not always!) solved by correctly setting and applying styles, as well as using templates. How do you automate everything else? This is where these very macros come to our aid.
What is so good about them? Well, for example, they can automatically and quickly enough do some work for you. Calculate something, reformat the document, mark suspicious words with annotations… Just everything that you program! They can even correct something in real time while you are writing a document. VBA in Word allows you to automate almost all actions that you can perform with a document manually.
Macros can be attached both to a specific document (which is of little use to us, but for Trojan writers this is the only option), and to the Word itself, which allows you to apply macros to any document which you work with.
Macros work in any version of Word and require minimal changes when porting from one version to another (and often do not require them at all). With macros you can even implement a full-fledged user interface with forms!
Let’s dive into Visual Basic and write something useful! Our first example will be a macro that replaces two or more consecutive line breaks with a single one. This is often required when correcting documents after exporting them from documentation systems, or if you want to remove accidentally added extra line breaks in a document you have written yourself. We will make a solid macro, with a user interface and an operation progress display.
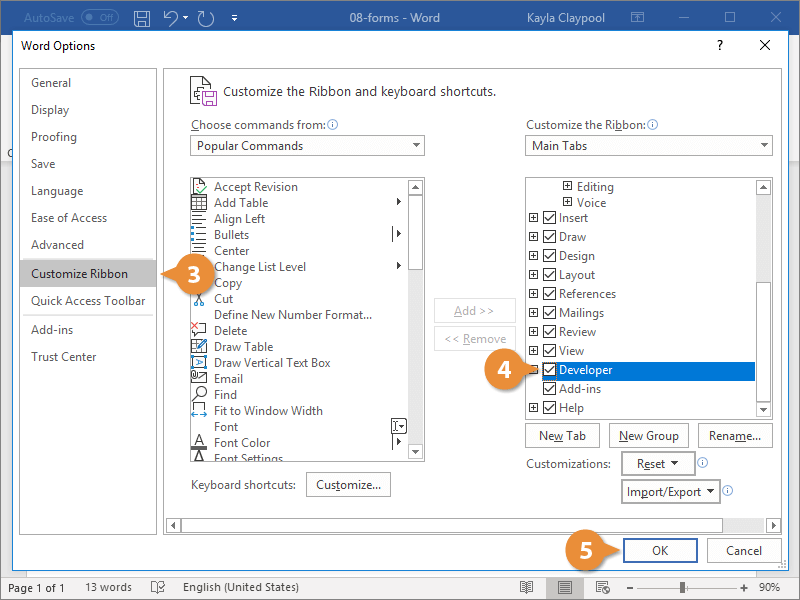
Firstly, to start writing or using macros, you need to make sure that the «Developer» panel is displayed in Word. If you don’t see it, after creating a new document open the «File» menu -> «Options» -> «Customize Ribbon», then find there and set the «Developer» checkbox.
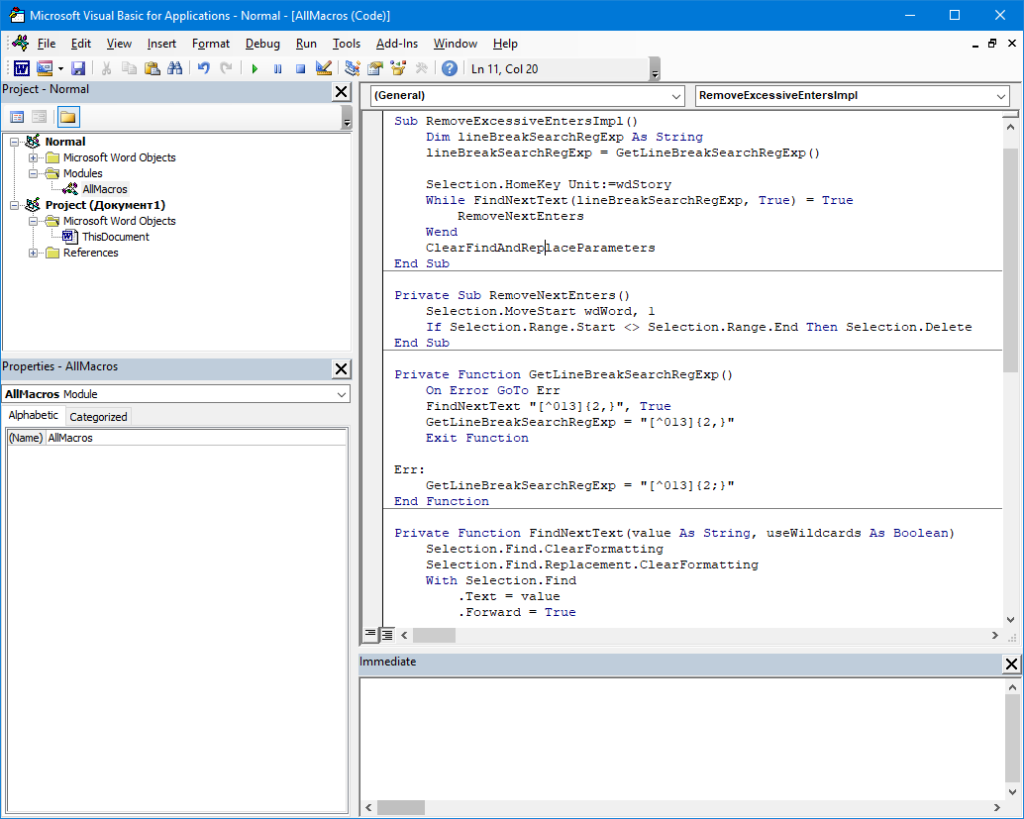
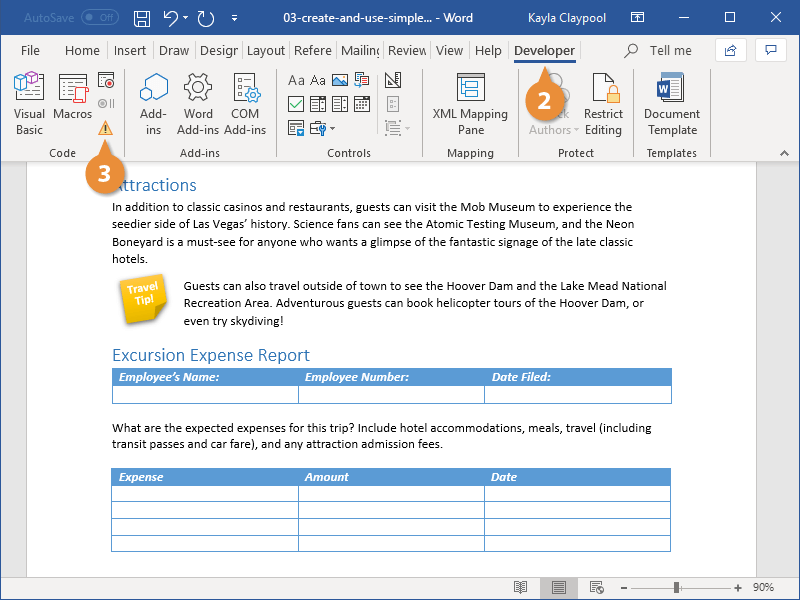
After that, open the «Developer» tab and click the «Visual Basic» button.
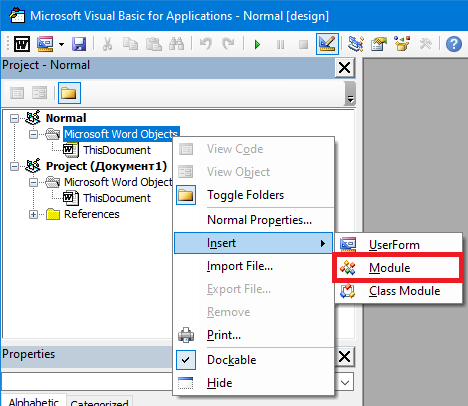
On the left side of the opened VBA window you will see two projects: «Normal», and a project related to the current open document. Your «Normal» project can already contain some files in the «Modules» directory. In any case, create a new module by right-clicking on «Normal» and choosing «Insert» -> «Module».
This new module is a file, where we will put the macro code. You can rename the module (which has the «Module1» name by default) in the «Properties» window -> «Name». I will name my module «AllMacros». Now open the module code by double-clicking on its name. Let’s proceed with creating the macro. Let me remind you that our goal is to replace two or more consecutive line breaks with a single one, performing such replacements throughout the document. Obviously, we need a function that searches a substring in text, because we want to find several consecutive line breaks. In Word, a line break is equivalent to the beginning of a paragraph. You can search for it using the regular search box by typing ^p, ^13 or ^013 there (which corresponds to the ASCII code for line break). The function which do the same will look like this:
|
1 2 3 4 5 6 7 8 9 10 11 12 13 14 15 16 17 18 19 20 21 |
Private Function FindNextText(text As String, useWildcards As Boolean) Selection.Find.ClearFormatting Selection.Find.Replacement.ClearFormatting With Selection.Find .Text = text .Forward = True .Format = False .MatchCase = False .MatchWholeWord = False .MatchKashida = False .MatchDiacritics = False .MatchAlefHamza = False .MatchControl = False .MatchWildcards = useWildcards .MatchSoundsLike = False .MatchAllWordForms = False .Wrap = wdFindStop End With Selection.Find.Execute FindNextText = Selection.Find.Found End Function |
Let’s see what happens here. We declare a function with two parameters. The first one is a String — this is the text to search for, and the second one is a Boolean, which tells whether to use wildcards. I’ll talk about them later. In the next two lines #2 and #3, we clear the formatting of the search string and the replacement string, in case it was earlier set by the user. Word allows you to specify the formatting of the search/replace string, but this is not required for our task. Next, we set some parameters for the Selection.Find object: set some unused options to False; the Text parameter is the string we want to find; and the MatchWildcards parameter indicates the use of wildcards. The Wrap parameter tells whether to continue the search when it reaches the point from which it has begun, and we have its value set to wdFindStop, since we want to stop when we get to the end of the document, and not to loop the search.
In general, all this abundance of properties and objects of the Word, Excel, and PowerPoint object models (yes, they support macros, too) is well described in MSDN. For example, this page lists the properties and methods of the Find object.
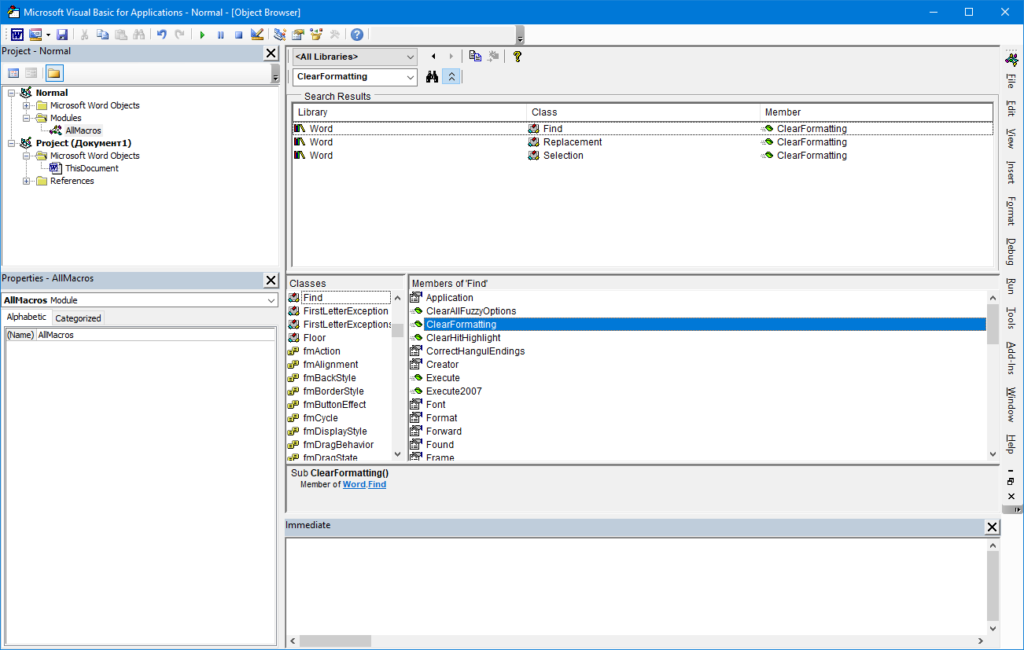
In addition, all available objects, their properties and methods can be viewed directly in the Word VBA editor. To do this, press F2 or select the «View» menu -> «Object browser», which will open the object browser, where you can scroll through all the available objects or search for something particular.
Back to our function. On line #19, we execute the search for the given text with the specified parameters. Line #20 is a statement, somewhat similar to the C-style return. It sets the return value of the function, but does not return from the function itself. We return a boolean value Selection.Find.Found, which indicates whether something was found.
Note that changing the Selection.Find object properties will replace their values for the user, too, as this object is shared between the user and the macro. For example, if you were searching for something in Word with specific parameters, then executing the macro will replace your search parameters with those that we specified in the macro. Optionally, we can save them in macro, and restore them later, but I will not bother that much, just clean them up after our macro has finished execution. Let’s write a function that resets the parameters to default values:
|
Private Sub ClearFindAndReplaceParameters() With Selection.Find .ClearFormatting .Replacement.ClearFormatting .Text = «» .Replacement.Text = «» .Forward = True .Wrap = wdFindStop .Format = False .MatchCase = False .MatchWholeWord = False .MatchWildcards = False .MatchSoundsLike = False .MatchAllWordForms = False End With End Sub |
Please note that this is a Sub, not a Function, because we do not want to return any value from this procedure. This is just like a void function in C language.
Now, how can we find two or more consecutive line breaks? To achieve this, we will need to utilize the wildcards, which were mentioned above. Word supports search wildcards, and they somewhat resemble regular expressions. By the way, you can use them outside of macros from the advanced search window:
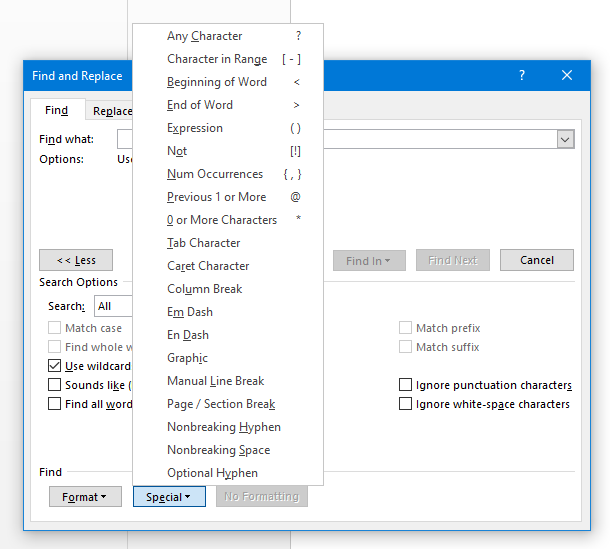
I found a decent description of wildcard characters here. Let’s write a wildcard to search for two or more consecutive line breaks: [^013]{2,}. This is very similar to a classic Perl or PCRE regular expression, but square brackets specify a newline character in a unique Word style. Curly brackets indicate that there must be two or more characters in a row. By the way, there is a potential pitfall: not all Word versions/localizations will search with such a wildcard. In some cases, you need to specify a semicolon instead of a comma (yes, Microsoft sometimes does extremely strange things). To make our macro more universal, we will write a function that will return a wildcard suitable for searching in the version of Word where you execute this function:
|
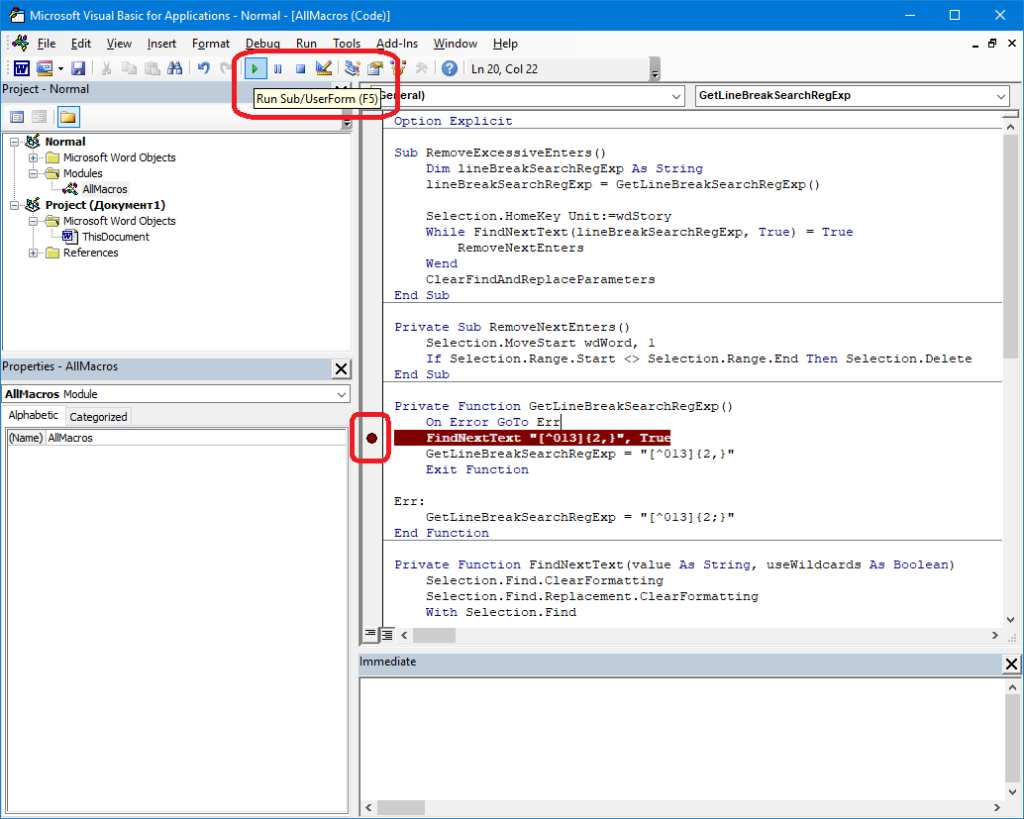
Private Function GetLineBreakSearchRegExp() On Error GoTo Err FindNextText «[^013]{2,}», True GetLineBreakSearchRegExp = «[^013]{2,}» Exit Function Err: GetLineBreakSearchRegExp = «[^013]{2;}» End Function |
Here we first try to search using wildcard [^013]{2,}. If everything is OK, then we return this wildcard from the function as a working one (line #4). Otherwise, an error occurs, but we are ready to handle it: we have set a handler for all errors in line #2. The execution will continue from the Err label, and here we return the wildcard, which is suitable for other versions of Word (here the comma inside the curly braces is replaced by a semicolon).
Next, we write a function that replaces several consecutive line breaks with a single one:
|
Private Sub RemoveNextEnters() Selection.MoveStart wdWord, 1 If Selection.Range.Start <> Selection.Range.End Then Selection.Delete End Sub |
This function requires that it will be called when the Selection object contains several line breaks (found earlier). In line #2, we move the selection start one character forward, and then in line #3, if the the selection start is not equal to its end, remove its contents. For example, if three line breaks were selected, we step 1 character forward (leaving one line break untouched), and then delete the remaining two (which are still selected).
Everything that remains is to write the last function that will manage everything.
|
Sub RemoveExcessiveEnters() Dim lineBreakSearchRegExp As String lineBreakSearchRegExp = GetLineBreakSearchRegExp() Selection.HomeKey Unit:=wdStory While FindNextText(lineBreakSearchRegExp, True) = True RemoveNextEnters Wend ClearFindAndReplaceParameters End Sub |
Here we just run previously written functions. First, we get the text of the wildcard to search for several line breaks in a row, then we emulate the Ctrl+HomeKey press in line #5 to move the cusror to the very beginning of the document, and then in the loop we search for all the places we are interested in and delete the excessive line breaks. At the end, we reset the search parameters to default values.
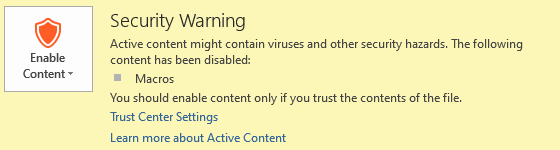
That’s it, you can now run the macro! Please note that we marked Private all the functions except the last one. We do not want them to be called directly from Word (or from other VBA modules). Only the RemoveExcessiveEnters function will be available for calling from the outside of our module. Before running, make sure that macros are enabled. If the following panel appears, then click «Enable content»:
![]()
If there is no such panel, then you can open the «File» menu -> «Info», and enable macros from there:
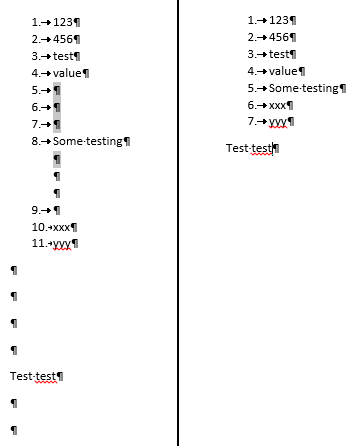
You can enable macros for the duration of a single Word session (this is the default behavior when you click «Enable Content»), so that after restarting Word, macros will be disabled again. To run the macro, go back to the «Developer» panel in Word and click the «Macros» button, select our RemoveExcessiveEnters macro and click «Run». Of course, you should have some experimental document open, with extra line breaks. As a bonus, our macro also removes empty list items, because they are exactly the same several line breaks in a row.
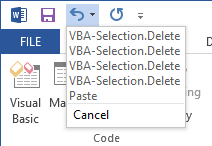
The macro runs quite fast. Its work can be undone (each step independently) by opening the menu of completed actions:
Macros can be debugged through the VBA window which we used to write the macro. By clicking to the left of the line of code, you can, like in other development environments, set a breakpoint, and then debug the macro with the «Run» button. The function with the cursor inside will be executed. If you place the cursor in a function which takes any arguments, a regular request to choose a macro to run will appear, as when you press the «Macros» button in Word.
I think, there’s quite enough content for a single article. Of course, I promised user interface, progress tracking, and I will implement all of this (and even a little more), but in the next post.
The macro code can be downloaded here. You can import it into your Word by right-clicking on «Normal» -> «Import file…» and selecting the downloaded file.
P.S. By the way, I recommend creating backups of your macros by exporting them somewhere to your disk. Even licensed Word can sometimes behave strangely and delete them from the «Normal» template for some reason.
The Microsoft Office suite is one of the most popular office solutions. From Word and Excel to PowerPoint – the practical applications for writing, calculating, and presenting have been proving their worth for years. But many users are not even aware of the range of features that they provide. For instance, MS Office programs include a function that allows you to create, save, and execute macros in order to automate certain tasks and processes. Especially for regularly recurring workflows, this feature lets you save valuable time and effort.
But what role do macros play in Word and how do these command sequences work exactly? Also find out how to create macros in Word and integrate them into your documents.
Contents
- What is a Word macro?
- How Do Macros Work in Word?
- Creating Macros in Word: How it Works
- Recording Word Macros Executed by Button
- Creating Word Macros Executed via Key Combination
- Executing Word Macros
- Adding macro buttons to a Word tab ribbon
- Importing Existing Macros in Word
- Word Macros: Examples of Useful Command Sequences
- Word Macro for Automatically Determining the Average Sentence Length
- Word Macro Example: Correcting Transposed Letters
- Macro Code for Removing All Hyperlinks
What is a Word macro?
Macros are considered a standard feature in programming as well as the use of computer programs. They are basically subprograms that developers and users can create to save sequences of commands or operating instructions, which can then be started with a simple action. When faced with many regularly recurring tasks, Microsoft Word is typically an application that benefits from the option to automate work steps.
For this reason, the Editor (as well as Access, Excel or PowerPoint, for example) include an integrated tool for recording and executing custom Word macros. The script language Visual Basic for Applications (VBA), likewise developed by Microsoft, serves as the recording language here.
Note
The event-driven programming language VBA replaced the mutually incompatible macro languages of the various Microsoft Office programs in the mid-1990s. Thanks to this standardized solution, cross-program command chains can also be created and run to transfer data from a Word document into an Excel table with a single click, for example.
How Do Macros Work in Word?
Creating macros in Word may sound like a task for experienced programmers at first. After all, writing new program code in a special programming language is not often among the core skills of the average Word user. However, the fact that creating and using Word macros is possiblewithout any programming knowledge at all is thanks to the integrated macro tool. Known as a macro recorder, this tool makes writing code completely unnecessary. To create a new macro, all the user has to do is start recording, perform the desired operating steps and commands, and then stop the recording again when the sequence is finished. The VBA code for Word macros is generated automatically; no further action is required on the part of the user.
Note
With the Visual Basic Editor, the Microsoft Office tools have integrated their own VBA development environment that allows the code of recorded macros to be viewed and edited.
You can also assign each new macro in Word with a unique key combination or button that allows the corresponding command sequence to be run at any time. In the case of buttons, these can be added to the toolbar for quick access, enabling you to start a macro with a single click. If the Word macro created is to be available in all documents, save it in the template file Normal.dotm, which is used by Word as the general template for all new text projects.
Creating Macros in Word: How it Works
If you would like to configure your own automated sequences for your Word documents, but lack the technical knowledge in the programming language VBA, you should use the option to create macros in Word using the recorder. You can find the macro tools as standard under the “Macros” section in the “View” tab. In order to make it easier to create and manage Word macros, however, it is advisable to activate the developer tools which provide you access to the Visual Basic Editor, among other features. This optional toolbox can be unlocked as follows:
- Open the “File” tab.
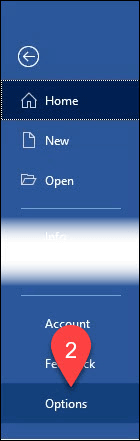
- Click on “Options”.
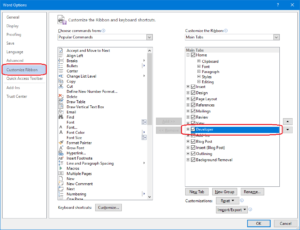
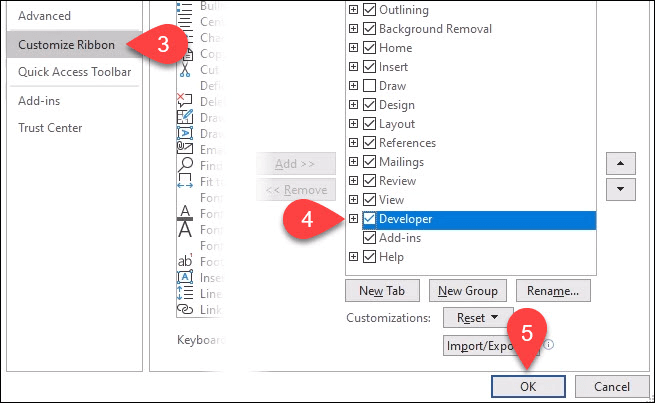
- Switch to the “Customize the Ribbon” section and place a checkmark in the “Developer” box (under “Main Tabs”).

As soon as you have activated the “Developer” tools in the Word options, the tabunder the same name will automatically be added to the user interface. When you click on it, you will see the section for creating and managing macros in the far left of the toolbar. Find out in the following step-by-step guide how to create your own macros in Word using this quick-access menu and how you can run them at a later time.
Recording Word Macros Executed by Button
The typical solution for a new macro in Word is one that can be run by clicking a button. If you would like to create such a macro using the developer tools, first click on the “Developer” tab and then select the option “Record Macro”:

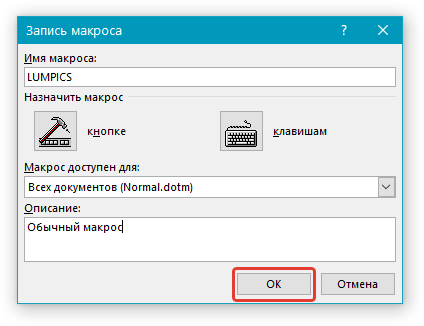
Now enter a name for the macro and select the document you wish to create the macro for under “Store macro in:”. If you would like to create a cross-program macro, simply select the option “All Documents (Normal.dotm)”. To enable the macro to be executed in Word using a button, finally click on “Button”:

Select the macro you wish to create in the left window and click on “Add”, making it also selectable in the right window. Click on it here again and then press the “Change” button. You can now assign your new Word macro any icon you wish:

Confirm your desired button by clicking on “OK” twice. Now perform the actions you want to save in the macro. Word will record your mouse clicks as well as key strokes. However, the recorder will not save any movements or highlighting with the mouse. So if you want to select some text, for example, you will need to use the keyboard (hold down the [Shift] key and use the arrow keys).
Once you have finished the sequence for the macro, you can stop the recording via “Stop Recording”:

The key for the new Word macro will automatically be added to the toolbar for quick access:

Creating Word Macros Executed via Key Combination
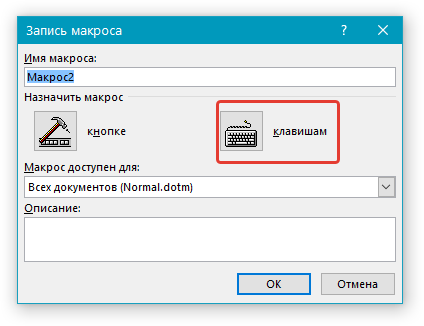
You can create a Word macro that can be started using a unique key combination in essentially the same way as for macro buttons: Start the process using the “Record Macro” button in the macro menu under “Developer”, enter a suitable name, and decide whether you want to make the macro available in all documents or only in a certain project. In the final step before beginning the recording, you should choose the “Keyboard” option in order to open the menu for new hotkeys:

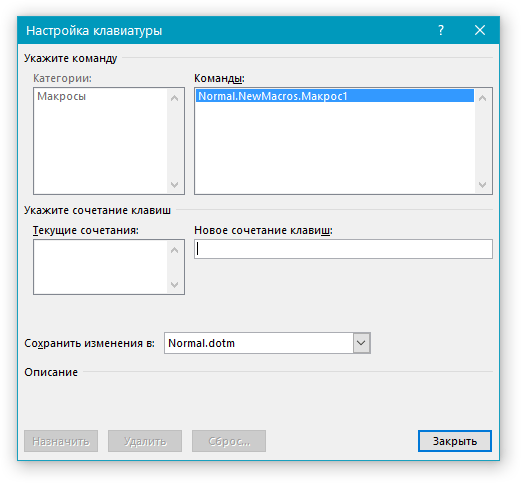
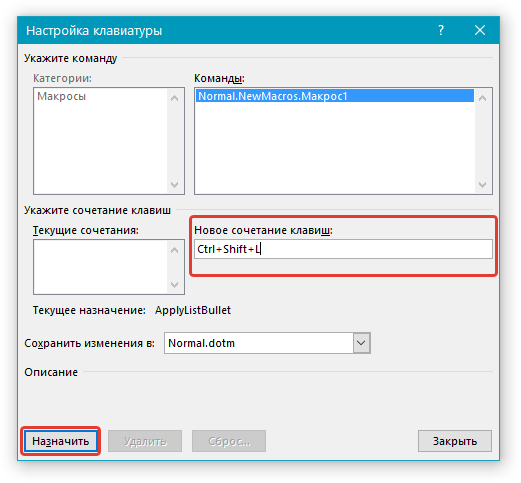
In the “Customize Keyboard” menu that then appears, select the macro under “Commands”. Next, click on the “Press new shortcut key” field with the left mouse button and press your desired key combination. Here it is important to press these keys simultaneously. In the following Word macro example, we used the [Ctrl], [Shift], and [#] keys.

Under “Save changes in”, you can define whether the key combination should be valid universally (“Normal”) or only for a certain Word document; to confirm your choice, click on the “Assign” button. As soon as you close the menu, the macro recording will start.
Executing Word Macros
Once you have created a macro, you can start it at any time using the defined execution option. You only need to use the define key combination or click on the corresponding button in the quick-access menu (in the top left). You can also run your Word macros using the macro list by following the steps below:
- Click on the “Macros” button under the “Developer” tab or alternatively on “Macros” in the menu under the “View” tab, and then on “View Macros”.
- Select the desired macro from the list using a left mouse click.
- Now press “Run”.

Adding macro buttons to a Word tab ribbon
If the macro icon is too small for you in the quick-access toolbar or if you would like to add a button for a macro executable via key combination, you can also integrate a macro button into the ribbon of any tab. To do so, simply create a user-defined group for the tab and add the desired macro to it. You can do both in the “Customize Ribbon” menu in the Word options (accessibly via “File” -> “Options”).
Creating a user-defined group:
In the right window under “Customize Ribbon”, select the tab in which you wish to create the new group and then click on the “New Group” button. In addition to the standard groups here, the entry “New Group (User-Defined)” will now appear. Click on this and then press “Rename” to give the group a suitable name as well as an icon:

Integrating a Word macro into a user-defined group:
After creating a user-defined group for a tab’s ribbon, you can now add any number of Word macros to this group. First click on the “Macros” option in the left menu section under “Choose commands from:” and then on the Word macro you wish to integrate. In the right menu window, now click on the user-defined group before finally pressing the “Add” button:

Close the Word options and open the tab you added the macro button to. You should now see this in the group you created in the ribbon:

Importing Existing Macros in Word
You may also find yourself in the situation in which you already have VBA macros, but they are not available in your Word installation. This could be the case, for instance, if you created these macros on another device or received them from another person. Plus, there are various online sources where you can find a wide range of macros. Microsoft Word offers you the option to import ready-made command chains for use in your program. The tool for this is the Visual Basic Editor mentioned earlier. It can be opened via the key combination [Alt] + [F11] or alternatively using the “Developer” tab.
The next steps depend on whether you are importing a finished macro file or pure macro code.
Importing ready-made macro files (.frm, .bas, .cls):
If you have a complete macro as a file, you can import it into your Word installation in just a few steps. First, select the document you want to add the macro to in the Project Explorer. If you can’t find the explorer in the code editor, you can open it by selecting the “View” tab and pressing the “Project Explorer” menu item. In the file manager, now click on your current or another Word project if the macro should only be applied to one document. If you select the project “Normal”, the Word macro will be imported for all documents:

To import the macro, click on “File” and then “Import File”. Specify the storage location for the macro file and press “Open” to start the import process.

Importing macro code:
If you only have the code for a certain macro, other steps have to be taken for importing. Here too, you start by selecting the document you wish to add the automatic command sequence to. Open the explorer and double-click on the entry “ThisDocument” (in the subfolder “Microsoft Word Objects”) for the respective document or under “Normal” (to save the macro in the universal template):

In the code window that appears next, copy the macro code and then click on the “Save” button. If you selected a specific Word document in the previous step, you will be notified that you will have to save it as a “Word document with macros”. Then click on “No” and select the corresponding entry under the “File Type” list. Finally, click on “Save” to generate the new file format:

Word Macros: Examples of Useful Command Sequences
Now that you know what a Word macro is and how to use macros in Word (creating, running, and importing macros), we can explain the purpose of these command chains for automation in Microsoft’s text editor using a number of specific Word macro examples.
Word Macro for Automatically Determining the Average Sentence Length
There are various web tools you can use to analyze your texts – such as to ascertain the average length of your sentences. Using the right macro, you can also find this out directly in Word. The following code automatically looks at all the sentences in your document and divides the total word count by the number of sentences. The macro then displays the average length in a text popup (“Average Words Per Sentence:”):
Sub CountWords()
Dim s As Range
Dim numWords As Integer
Dim numSentences As Integer
numSentences = 0
numWords = 0
For Each s In ActiveDocument.Sentences
numSentences = numSentences + 1
numWords = numWords + s.Words.Count
Next
MsgBox "Average Words Per Sentence: " + Str(Int(numWords / numSentences))
End Sub
Word Macro Example: Correcting Transposed Letters
Anyone who regularly types texts on a computer will know just how quickly typos like transposed letters occur. But these errors can be quickly corrected. Using the following macro, you only need to place the marker in front of the erroneous pair of letters. Running the macro via key combination or button then allows the letters to be swapped around automatically:
Sub TransposeCharacters()
Selection.MoveRight Unit:=wdCharacter, Count:=1, Extend:=wdExtend
Selection.Cut
Selection.MoveRight Unit:=wdCharacter, Count:=1
Selection.Paste
End Sub
Macro Code for Removing All Hyperlinks
Whenever you include website addresses in your texts, Word will automatically change them into clickable hyperlinks to the corresponding sites. But if you don’t want your document to contain these hyperlinks, you usually have to delete the links individually. The following Word macro example saves you a whole lot of work by automatically removing the first hyperlink found in the document. You can therefore run the macro as often as necessary until all the hyperlinks are gone:
Sub RemoveHyperlinks()
'On Error Resume Next
Dim x As Variant
For Each x In ActiveDocument.Hyperlinks
Selection.WholeStory
Selection.Range.Hyperlinks(1).Delete
Next x
End Sub
Click here for important legal disclaimers.
Содержание
- Области использования макросов:
- Включение макросов
- Запись макросов
- Изменение комбинаций клавиш для макроса
- Запуск макроса
- Создание нового макроса
- Вопросы и ответы
![]()
Макрос — это набор определенных действий, команд и/или инструкций, которые сгруппированы в одну целостную команду, обеспечивающую автоматическое выполнение той или иной задачи. Если вы активный пользователь MS Word, вы тоже можете автоматизировать часто выполняемые задачи, создав для них соответствующие макросы.
Именно о том, как включить макросы в Ворд, как их создавать и использовать для упрощения, ускорения рабочего процесса и пойдет речь в этой статье. И все же, для начала не лишним будет более подробно разобраться в том, зачем вообще они нужны.
Области использования макросов:
- 1. Ускорение часто выполняемых операций. В числе таковых форматирование и редактирование.
2. Объединение нескольких команд в целостное действие “от и до”. Например, с помощью макроса можно вставить таблицу заданного размера с необходимым количеством строк и столбцов.
3. Упрощение доступа к некоторым параметрам и инструментам, расположенным в различных диалоговых окнах программы.
4. Автоматизация сложных последовательностей действий.
Последовательность макросов может быть записана или создана с нуля путем введения кода в редактор Visual Basic на одноименном языке программирования.
Включение макросов
По умолчанию макросы доступны не во всех версиях MS Word, точнее, они просто не включены. Чтобы активировать их необходимо включить средства разработчика. После этого на панели управления программы появится вкладка “Разработчик”. О том, как это сделать, читайте ниже.
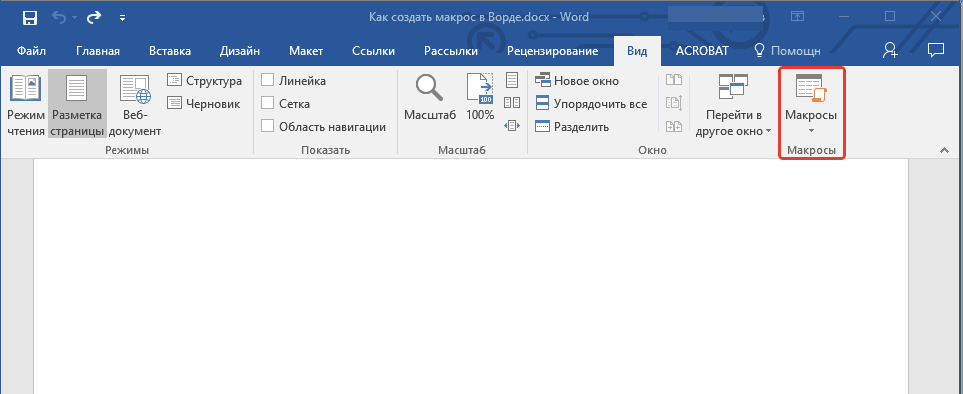
Примечание: В версиях программы, в которых макросы доступны изначально (например, Ворд 2016), средства для работы с ними находятся во вкладке “Вид” в группе “Макросы”.
1. Откройте меню “Файл” (кнопка “Microsoft Office” ранее).
2. Выберите пункт “Параметры” (ранее “Параметры Word”).
3. Откройте в окне “Параметры” категорию “Основные” и перейдите в группе “Основные параметры работы”.
4. Установите галочку напротив пункта “Показывать вкладку “Разработчик” на ленте”.
5. На панели управления появится вкладка “Разработчик”, в которой и будет находиться пункт “Макросы”.

Запись макросов
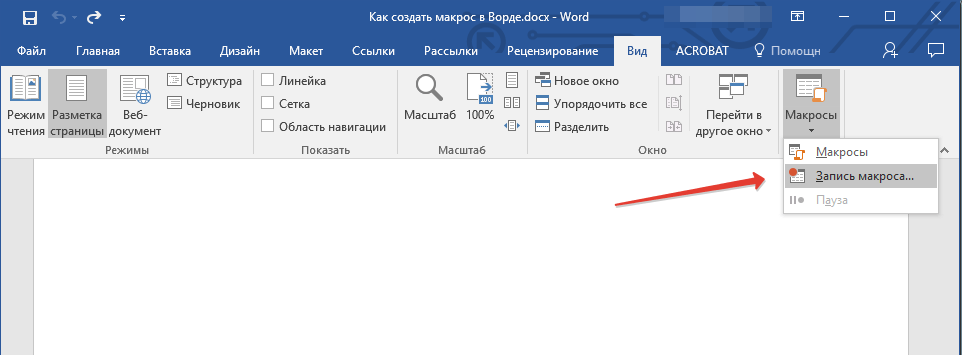
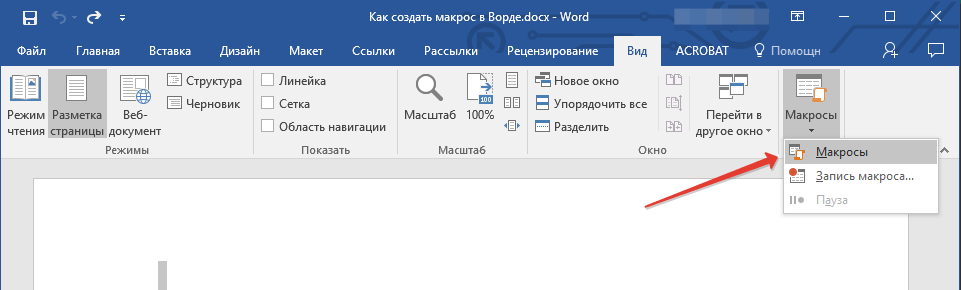
1. Во вкладке “Разработчик” или, в зависимости от используемой версии Ворда, во вкладке “Вид”, нажмите кнопку “Макросы” и выберите пункт “Запись макроса”.
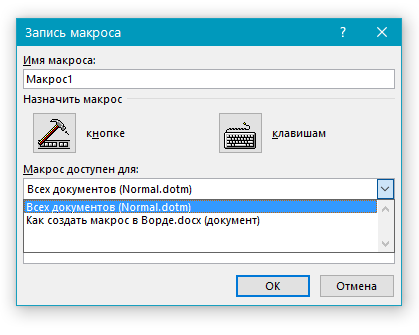
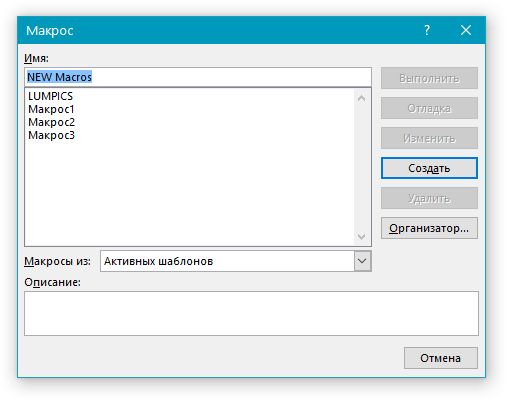
2. Задайте имя для создаваемого макроса.
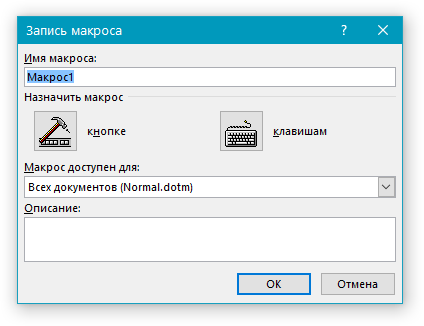
Примечание: Если вы, создавая новый макрос, даете ему точно такое же имя, как у встроенного в программу, действия, записанные вами в новый макрос, будут выполняться взамен стандартным. Для просмотра макросов, доступных в MS Word по умолчанию, в меню кнопки “Макросы” выберите “Команды Word”.
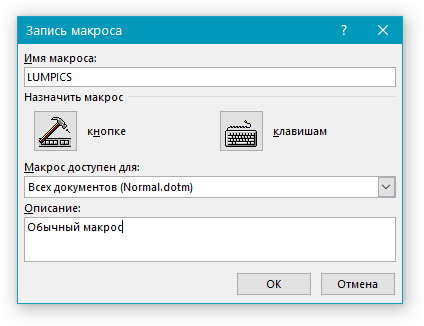
3. В пункте “Макрос доступен для” выберите то, для чего он будет доступен: шаблон или документ, в который его следует сохранить.
- Совет: Если вы хотите, чтобы создаваемый макрос был доступен во всех документах, с которыми вы работаете в дальнейшем, выберите параметр “Normal.dotm”.
4. В поле “Описание” введите описание для создаваемого макроса.
5. Выполните одно из действий, указанных ниже:
- Нажмите “кнопке”;
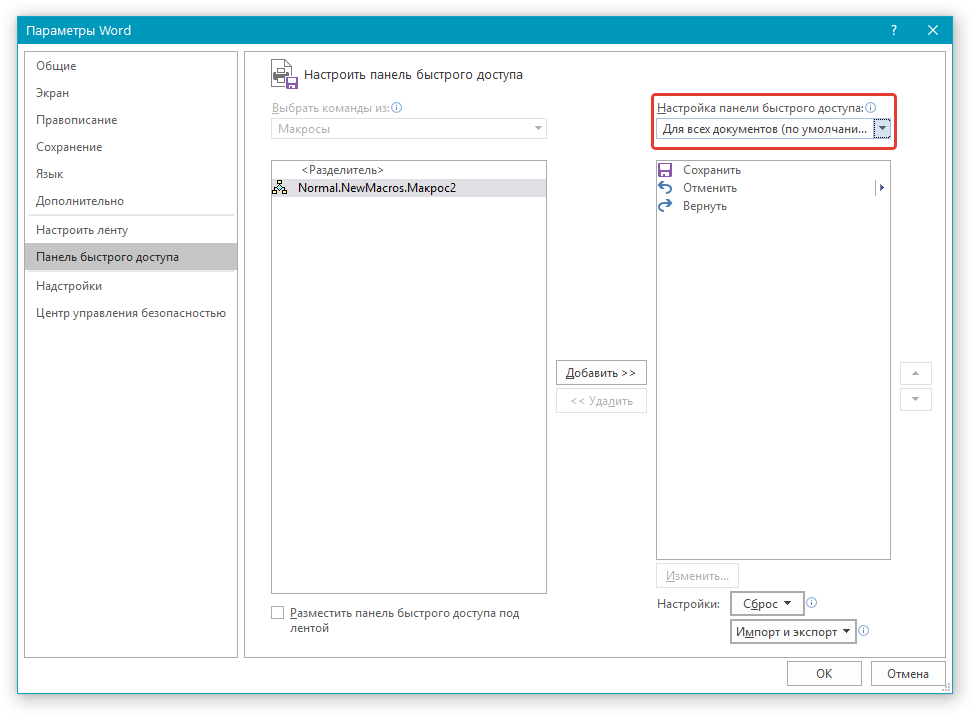
- Выберите документ или документы, в которых требуется добавить создаваемый макрос на панель быстрого доступа (раздел “Настройка панели быстрого доступа”);

- Совет: Чтобы создаваемый макрос был доступен для всех документов, выберите параметр “Normal.dotm”.
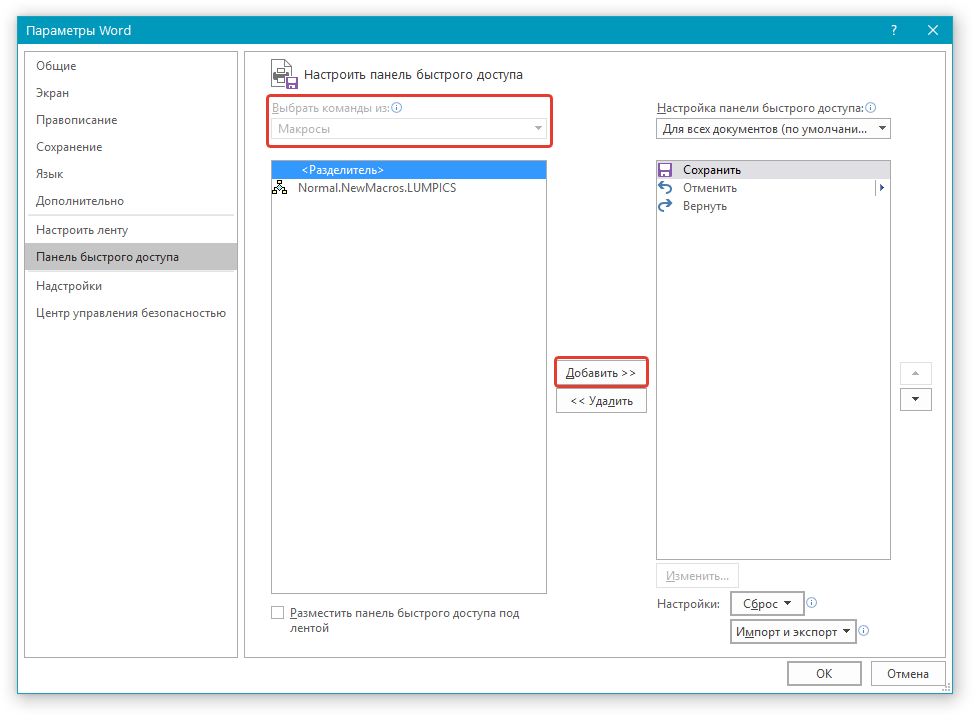
В окне “Макрос из” (ранее “Выбрать команды из”) выберите макрос, который следует записать, нажмите “Добавить”.
- Если вы хотите настроить эту кнопку, нажмите “Изменить”;
- Выберите подходящий символ для создаваемой кнопки в поле “Символ”;
- Введите имя макроса, которое будет отображаться в дальнейшем в поле “Отображаемое имя”;
- Для начала записи макроса дважды кликните по кнопке “ОК”.
Символ, который вы выбрали, будет отображаться на панели быстрого доступа. При наведении указателя курсора на этот символ, будет отображаться его имя.
- Кликните по кнопке “Клавишами” (ранее “Клавиатура”);
- В разделе “Команды” выберите макрос, который необходимо записать;
- В разделе “Новое сочетание клавиш” введите любую удобную для вас комбинацию, после чего нажмите кнопку “Назначить”;
- Для начала записи макроса нажмите “Закрыть”.
6. Выполните поочередно все те действия, которые необходимо включить в макрос.
Примечание: Во время записи макроса нельзя использовать мышь для выделения текста, а вот для выбора команд и параметров нужно использовать именно ее. При необходимости, выделить текст можно с помощью клавиатуры.
Урок: Горячие клавиши в Ворде
7. Для остановки записи макроса нажмите “Остановить запись”, эта команда расположена в меню кнопки “Макросы” на панели управления.

Изменение комбинаций клавиш для макроса
1. Откройте окно “Параметры” (меню “Файл” или кнопка “MS Office”).
2. Выберите пункт “Настройка”.
3. Нажмите на кнопку “Настройка”, расположенную рядом с полем “Сочетание клавиш”.
4. В разделе “Категории” выберите “Макросы”.
5. В открывшемся списке выберите макрос, который необходимо изменить.
6. Кликните по полю “Новое сочетание клавиш” и нажмите клавиши или комбинацию клавиш, которые вы хотите назначить для конкретного макроса.

7. Убедитесь, что назначенное вами сочетание клавиш не используется для выполнения другой задачи (поле “Текущее сочетание”).
8. В разделе “Сохранить изменения” выберите подходящий вариант (место) для сохранения места, где макрос будет запускаться.

- Совет: Если вы хотите, чтобы макрос был доступен к использованию во всех документах, выберите параметр “Normal.dotm”.
9. Нажмите “Закрыть”.
Запуск макроса
1. Нажмите на кнопку “Макросы” (вкладка “Вид” или “Разработчик”, в зависимости от используемой версии программы).

2. Выберите макрос, который хотите запустить (список “Имя макроса”).
3. Нажмите “Выполнить”.

Создание нового макроса
1. Нажмите кнопку “Макросы”.
2. Задайте имя для нового макроса в соответствующем поле.
3. В разделе “Макросы из” выберите шаблон или документ, для которого будет сохранен создаваемый макрос.

- Совет: Если вы хотите, чтобы макрос стал доступен во всех документах, выберите параметр “Normal.dotm”.
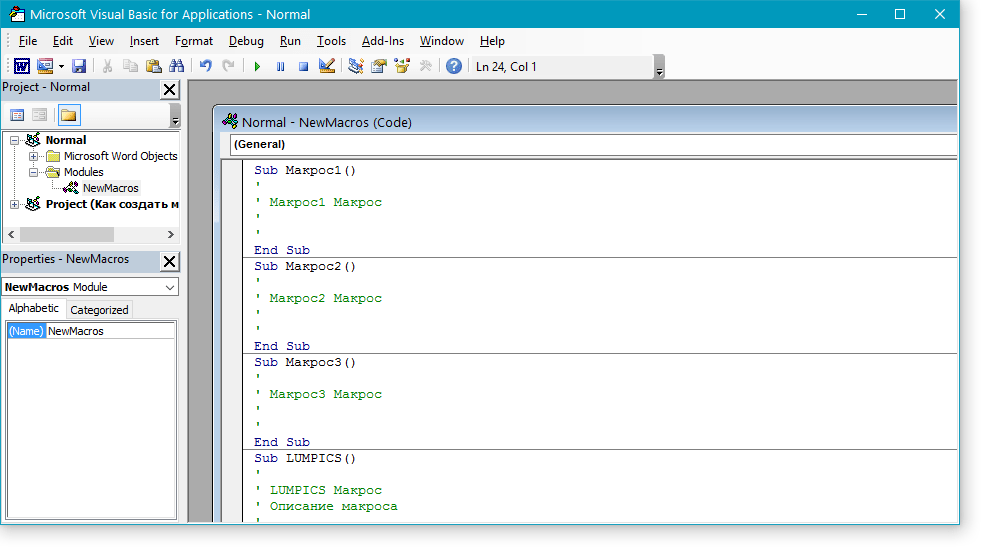
4. Нажмите “Создать”. Будет открыт редактор Visual Basic, в котором и можно будет создать новый макрос на языке Visual Basic.
На этом все, теперь вы знаете, что такое макросы в MS Word, зачем они нужны, как их создавать и как с ними работать. Надеемся, информация из этой статьи будет полезной для вас и действительно поможет упростить, ускорить работу со столь продвинутой офисной программой.
If you work with Microsoft Word a lot and find yourself doing the same things repeatedly, create a macro. Macro is a shortening of the word macroinstruction, which means a series of instructions to accomplish a task.
The great thing about creating macros in Word is that you don’t need to know how to program. If you can press record and stop, you can do this.
Aren’t Macros Dangerous?
Have you heard about macros being bad because they can contain viruses? Although you do have to be careful about opening Office documents from unknown people because they might have malicious macros, that’s not an issue here. You make your own macro, so you know it’s not a virus.
For this example, you’re going to create a macro in Word to insert your signature at the end of a document.
- With Word open, go to the View tab.
- Select the down arrow under the Macros button.
- Select Record Macro… a new window will open.
- In the Macro name: field, enter a meaningful name for the macro. Spaces are not allowed. Use an underscore or dash.
- In the Store macro in: dropdown, you can select what documents you want this macro to be used. If you choose All Documents (Normal.dotm), the macro will be available to you in every new Word document you make from now on. If you choose a single document, it will only apply to that single document. It’s usually best to choose All Documents.

- In the Description: field, write what the macro does. This is a simple macro with a descriptive name, but as you get confident with macros you’ll do more complex things, so a description is always a good idea.
- You can choose Assign macro to either a button you’ll create with the Button or hotkeys you can choose using the Keyboard button. There’s already a lot of shortcut keys for Word, so a button may be best. Select Button. A new window will open called Word Options.
- Here you’ll assign the macro a button on the Word Ribbon. Select Customize Ribbon.
- In the Choose commands from: dropdown, select Macros. This will show us our macros in the area beneath it.
- You need somewhere on the ribbon to put the macro. For this example, select Home in the Main Tabs area. Then select New Group.
- Select Rename so you can give it a meaningful name.
- In the Rename window, select one of the icons to represent the group then enter My Macros in the Display name field.
- Select OK to apply it. You’ll see the change in the Main Tabs area.
- With the new My Macros selected in the Main Tabs area, select the Normal.NewMacros.Insert_Signature macro.
- Select Add to insert it into the My Macros group.
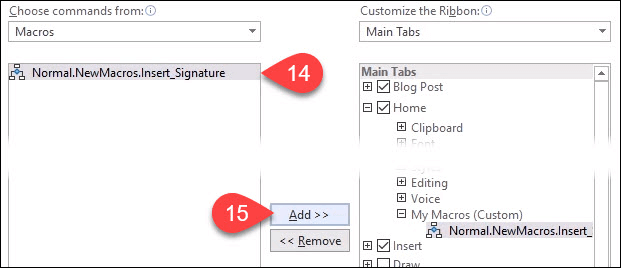
- Of course, you’ll want to rename it. With the macro selected in the Main Tabs area, select Rename…
- In the Rename window, select an icon and enter a simple name in the Display name: field.
- Select OK to commit the change. You’ll see the change in the Main Tabs area.
- Select OK below the Main Tabs area to finish creating the button for the macro.

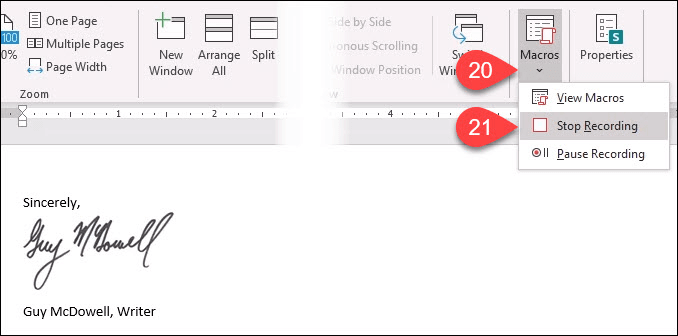
- Go ahead and create whatever signature block you’d like. Add in a scan of your signature or other images. Whatever you’d like. When done that, select the down arrow under the Macros button.
- Select Stop Recording. That’s it. Your Insert Signature macro is made.
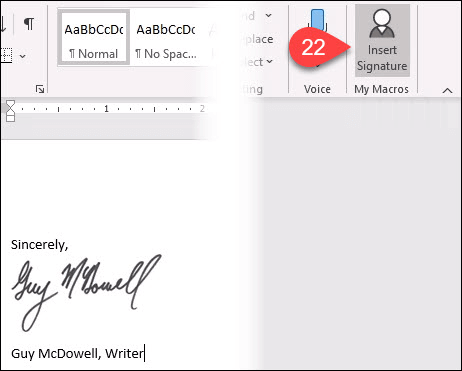
- Test it out by finding the Insert Signature button you created in the Home tab and select it. Your signature block should magically appear exactly as you designed it.
How To Write a Macro
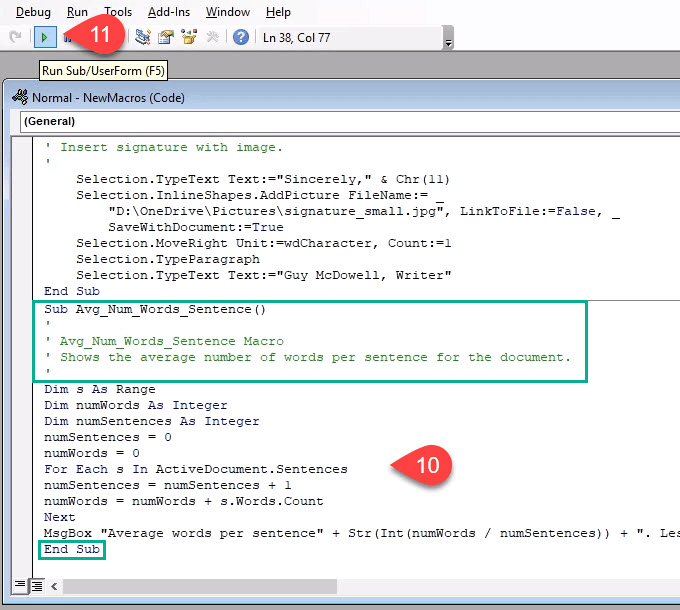
For most macros, the recording method is the most efficient way to create them. Eventually, you’ll want to do something more complex. This requires writing the macro in the Visual Basic for Applications (VBA) language. We’ve got the best VBA guide for beginners, so bookmark that. Let’s create a macro to give us the average words per sentence to help us tell when we’re being wordy.
- You need access to the Developer tab which is hidden by default in Word. In the top-left corner of Word, select File.
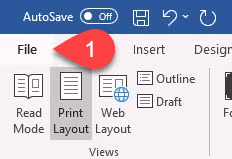
- Near the bottom-left, select Options.
- In the window that opens, select Customize Ribbon.
- On the right side, look for Developer and put a checkmark next to it.
- Select OK to close the window. The Developer tab will now show.
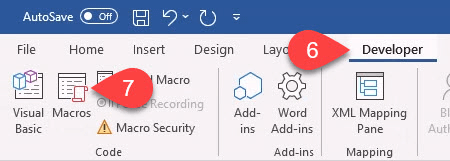
- Select the Developer tab.
- Select the Macros button.
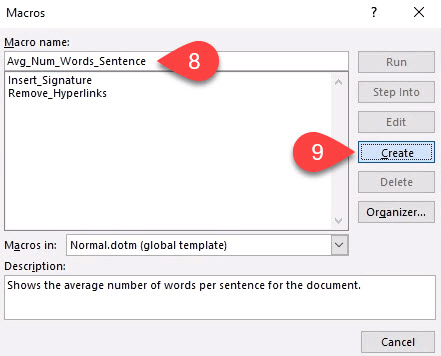
- Enter a meaningful name in Macro name: Leave the Macros in: as Normal.dotm so it will apply to all Word documents. Always enter a description in the Description: area.
- Select Create. The Microsoft Visual Basic for Applications development tool will open.
- The code that’s shown in the green rectangles below should already be there with some blank space between them. Copy and paste the following code into that space:
Dim s As Range
Dim numWords As Integer
Dim numSentences As Integer
numSentences = 0
numWords = 0
For Each s In ActiveDocument.Sentences
numSentences = numSentences + 1
numWords = numWords + s.Words.Count
Next
MsgBox “Average words per sentence” + Str(Int(numWords / numSentences)) + “. Less than 15 is best.”
- Select the Run button to test the code. If it doesn’t run as expected, edit the code until it runs the way you want.
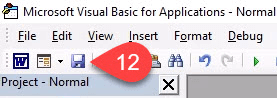
- Select the Save button and close the development window.
- Create a button in the Word ribbon using the same method as shown in the “How to Record a Macro” instructions above.
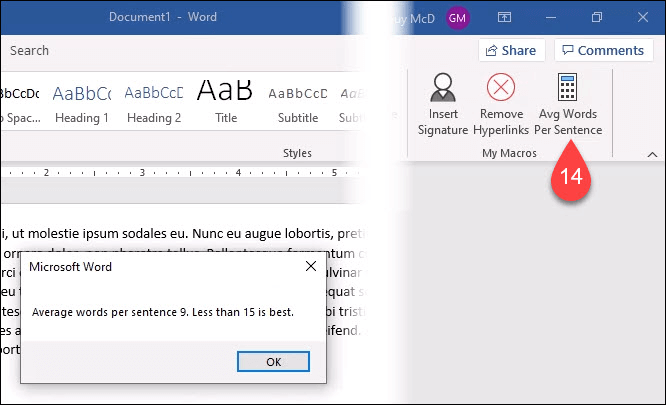
- Find the button you just created and test it.
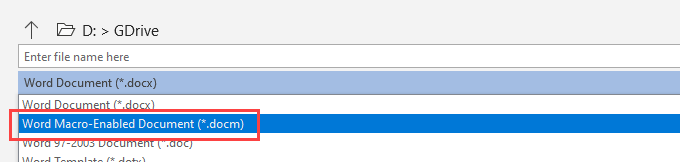
My Macro Doesn’t Work When I Save My Word Document
Word defaults to save with the file extension .docx, which doesn’t allow macros to automatically run. If you want the macro to run, you’ll need to change the file type to Word Macro-Enabled Document (*.docm).
This filetype exists partly to combat macro security issues. If you see this file extension on a document you weren’t expecting to receive, be suspicious.
What Else Can I Do With Macros?
You can create macros in Excel, Outlook, even PowerPoint. Anything that you’re currently doing manually, you should be able to record or write a macro to do it. Using macros in Word along with great Windows shortcut keys will amplify your productivity tenfold.
Набор возможностей текстового редактора Microsoft Word действительно очень широк. С помощью этой программы можно решать множество задач, которые возникают при работе с текстовыми документами любой направленности, что и делает этот продукт таким популярным. В Word реализована даже небольшая среда для программирования, с помощью которой можно значительно облегчить себе работу. В самом редакторе это называется макрокомандой или, как называют чаще, макросом. К сожалению, многие пользователи избегают знакомства с эти инструментом, ошибочно полагая, что это что-то сложное и не особо нужное. В этой статье подробно рассмотрим, как создать макрос в Word, что это вообще такое и почему вы делали неправильно, не пользуясь макрокомандами. Давайте разбираться. Поехали!

Что это такое
Макрокоманда — это, по сути, небольшая программа, которая позволяет автоматизировать и облегчить работу с текстом. В большинстве продуктов Microsoft реализована функция, сохраняющая историю действий пользователя, наиболее часто используемые инструменты и прочее. Всё это можно перевести в формат команд, и вместо того, чтобы каждый раз делать одно и то же, вы просто нажмёте клавишу на клавиатуре, и Word всё сделает за вас. Удобно? Ещё бы! На самом деле, это совсем не сложно. Далее в статье по порядку о том, как создать макрос.
Макросы позволяют выполнять несколько основных функций. Они предназначены для реализации следующих задач:
- Ускоряют часто выполняемые процедуры и операции внутри текстового редактора Word. Это относится к редактированию, форматированию и не только.
- Объединяют несколько команд в цельное действие «от и до». Как пример, используя макрос, можно простыми движениями моментально вставить таблицу, которая будет иметь определённые заданные размеры, а также получит нужное число столбцов и строк.
- Упрощают получение доступа к некоторым функциям и инструментам для работы с текстом, графиков и пр. При этом они могут располагаться в разных окнах и разделах программы.
- Автоматизируют сложные последовательные операции и действия.

Последовательность используемых макросов может быть создана буквально с нуля. Для этого потребуется ввести соответствующий код в редактор Visual Basic.
Создание макроса
Алгоритм действий при создании команды следующий:
- Определить порядок действий.
- Выполнить.
- Записать действия в макрос.
Например, вам нужно выделить жирным шрифтом часть текста в таблице. Для записи команды придётся использовать горячие клавиши — комбинации для каждого инструмента вы можете подсмотреть, наведя курсор на нужный инструмент.

Допустим, нужная вторая колонка. Перемещение между столбцами таблицы осуществляется при помощи клавиши «Tab». Вы нажимаете «Tab» необходимое количество раз, пока не дойдёте до нужной колонки. Затем, если вам нужно выделить часть содержимого ячейки, снимаете выделение, нажав стрелку влево. Далее выделим два слова из ячейки. Выполните комбинацию Ctrl+Shift и нажмите стрелку вправо дважды (либо столько раз, сколько слов необходимо выделить). И последний шаг — сделать выделенную область полужирной с помощью комбинации Ctrl+B.
Теперь, определившись с порядком действий, запишите макрокоманду. Для этого, перейдите на вкладку «Вид» и отыщите в панели инструментов кнопку «Макросы». Кликнув по ней, вы увидите маленькое меню, в котором нужно выбрать пункт «Записать макрос». В появившемся окне введите название для команды и нажмите на кнопку «Записать». Сразу после этого, возле курсора появится иконка с кассетой, свидетельствующая о том, что началась запись. Выполните чётко по порядку все необходимые действия (в этом примере для выделения полужирным шрифтом нескольких слов из ячейки таблицы). После того как вы всё сделали, нажмите на значок «Стоп» (квадратик) в нижней части окна программы. Всё, макрос готов.
Как записать макрос
Если следовать пошаговой инструкции, с самостоятельной записью макросов даже у начинающего пользователя проблем возникнуть не должно.


Алгоритм действий можно представить в таком виде:
- В зависимости от того, какая версия текстового редактора Word используется, откройте вкладку «Разработчик» или «Вид», где располагается кнопка «Макросы». Нужно просто кликнуть по пункту «Запись макроса».
- У каждого макроса должно быть своё имя. Его можно задать сугубо на собственное усмотрение. Это на его функциональность никак влиять не будет.
- Если дать макросу точно такое же имя, как и у стандартных макросов в программе Word, он будет выполнять его функции вместо основного. Поэтому не поленитесь заглянуть в меню «Макросы» и открыть раздел «Команды Word». Здесь прописаны все стандартные названия.
- В строке, которая называется «Макрос доступен для» нужно выбрать, для чего именно он будет доступен.
- В графу с описанием нужно ввести собственное описание создаваемого макроса.
- Далее можно кликнуть на «Начните запись», либо же «Создайте кнопку». В первом случае запись макроса начнётся без его привязки к кнопке на панели управления или клавиатуре. Во втором макросу будет задана соответствующая клавиша или кнопка.
- Добавьте один или несколько документов, куда следует добавить новый макрос. Это делается через «Параметры Word» во вкладке «Панель быстрого доступа».
- В левом окне выберите нужный макрос для записи и кликните по кнопке «Добавить».
- Для изменения настроек этой кнопки всегда есть возможность кликнуть на «Изменить».
- Далее выбирайте символ, который хотите использовать для кнопки.
- Укажите имя. Именно оно будет затем отображаться в соответствующем поле.
- Дважды кликните ОК, чтобы начать запись макроса.
- Когда потребуется остановить запись, жмите соответствующую клавишу в меню «Макросы».


Записанный макрос в дальнейшем можно будет использовать на своё усмотрение.
Использование макросов
Как же всё это использовать? А очень просто: в панели инструментов нажмите кнопку «Макросы» и одноимённый пункт в появившемся меню — перед вами откроется список всех макросов. Выберите сохранённый вами и нажмите «Выполнить». Существует более удобный вариант — создать специальную кнопку в панели инструментов. Делается это следующим образом: перейдите в меню «Файл», затем «Параметры» и кликните по пункту «Панель быстрого доступа». В разделе «Выбрать команды из:» укажите «Макросы» и выберите из них требуемый. После этого кликните по кнопке «Добавить». Также вы можете назначить иконку, которая будет отображаться для этой кнопки. Готово. В ленте инструментов появится соответствующая иконка, нажатием на которую вы запустите записанный вами алгоритм действий.


Создать макрокоманду можно практически для чего угодно. Можно изменять абзацный отступ, межстрочные интервалы, выровнять области текста, выполнить расчёт заданных значений, или настроить автоматическое заполнение таблицы. Нажмите «Записать макрос» и кликайте мышкой, вызывая соответствующие меню и задавая необходимые значения. Только не выделяйте текст мышкой, для этого лучше использовать горячие клавиши или специальный инструмент программы. Как только всё будет сделано, остановите запись.
Подобные команды могут содержать любое количество шагов и быть любого уровня сложности. Процесс создания макрокоманд одинаковый и для Word 2007, и для Word 2010, и для версии Word 2013.
Как видите, процесс достаточно простой, а инструмент очень эффективный. Главное, чётко определить алгоритм выполняемых действий. Научившись использовать макросы, вы значительно облегчите себе работу и сможете эффективнее и быстрее решать многие задачи, работая с текстовыми документами. Пишите в комментариях, помогла ли вам эта статья и задавайте любые интересующие вопросы по рассмотренной теме.
Applicability: Word 365, 2019, 2016; Windows and MAC OS X operating systems.
Here’s a question from a reader::
I am a teacher typically use Word 2019 to write my documents. I often need to change the font and size of my document paragraphs. Is there a way to automate my work with Macros, so i can modify my document paragraph with a one click? I am sure this is going to save me a couple of hours per week, which i’ll gladly invest in other tasks.
Thanks for your question. The key advantage of Macros is that they allow you automate your tasks in Microsoft Office applications. Macros can be either recorded or manually coded using Visual Basic for Applications (VBA). Word ships a Macro recorder that allows you to develop automation scripts without coding. If you are just starting out with automation, this might be a good enough solution. That said, with a little bit of VBA knowledge, you can write efficient and powerful Macros.
Enabling the developer tab in Word
If you don’t see the Developer tab in your Microsoft Word Ribbon, you’ll need to setup your Macro development environment.
- Open a new Word document. In case that you would like to work on an existing file, ensure that you have a copy for backup, before making any changes.
- Now, go ahead and make the developer menu visible in the Ribbon.
Recording a Word Macro – a practical example
- Now, hit the newly added Developer tab.
- Go to the Code button group.

- Hit the Record Macro button to invoke the Macro recorder function.

- Define a meaningful name for your Macro. Note:As the name you provide will be used in the auto created VBA code, Ensure no spaces in the Macro name.

- Note: Although it’s possible to assign Macros to buttons , for simplicity we’ll run Macro manually via the View tab or Developer tabs.
- Execute the sequence of steps you would like to record. In this case, you’ll record the following steps:
- Select a specific paragraph in your document.
- Go to the Home tab.
- Set the font to Times New Roman.
- Set the Font Size to 16.
- Center your Text by hitting Ctrl +E.
- Once Done, return to the Developer tab and hit Stop Recording.
- Now let us take a look at the auto-generated VBA code. Hit Macros and then highlight the AutoFormat Macro and hit Edit.

- Close the VBA Editor.
Save your work in a Word Macro enabled template
- Hit File, then Save As.
- In the Save As dialog right hand side, determine your saving location and provide a meaningful name to your Workbook.

- Choose Word Macro Enabled Document as your document type. Note: Your Word document will be saved with the .docm suffix.
- Hit the Save Button.
Executing your macro
- Open your Word document.
- Select the Paragraph you would like to automatically format. Just as an example, here’s the paragraph i chose:

- Go to the View tab.
- Hit the Macros button.
- Select your AutoFormat Macro
- Hit Run – this will apply the macro on the selected paragraph.
- Voi’la , nice result!


Assigning your Macro to Buttons or keyboard shortcuts
Note: This is an optional step that should be attempted after you have followed the Macro recording tutorial above.
OK, so far we got our Macro basics working. Now it’s time to improve a bit our Macro usability in the Word doc. Let me show you how you can associate your Macro with a quick access button, so you can launch it more easily.
- Right click on the Ribbon and select Customize the Quick Access Toolbar.
- The Word Options dialog will come up.
- In the Choose commands from dropdown, select Macros.
- Highlight your Macro and hit the Add>> Button to add a shortcut to your Macro to the Quick Access Toolbar.
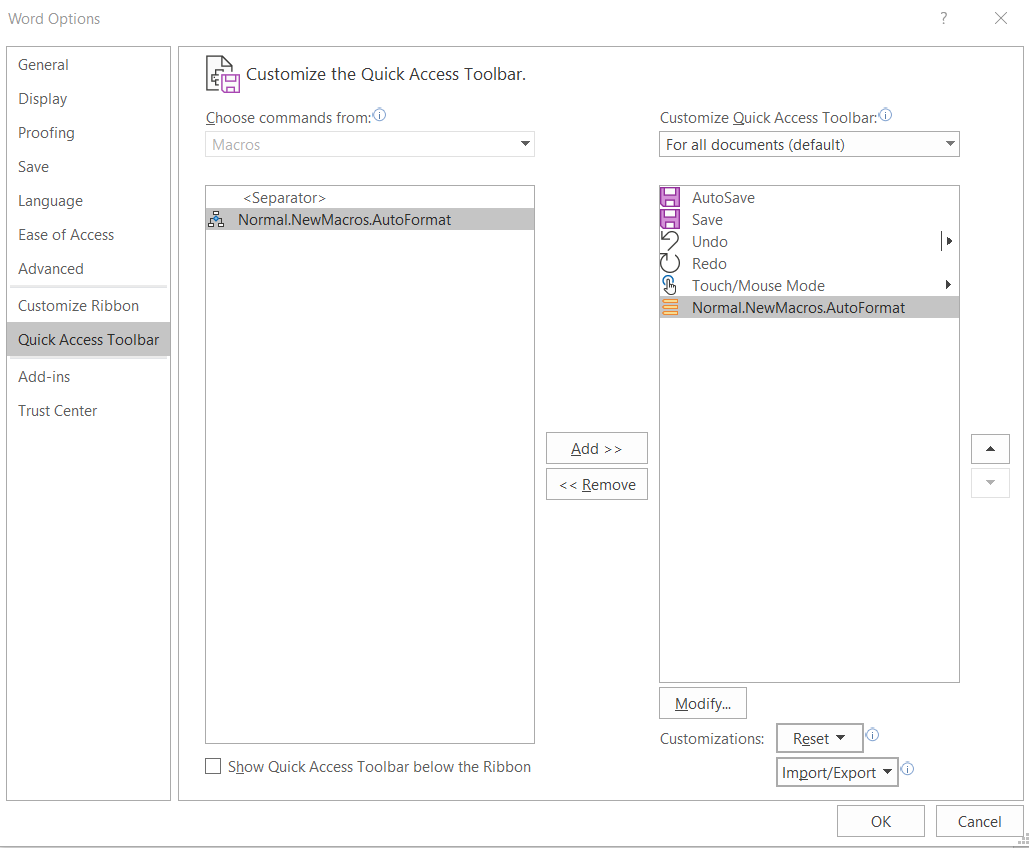
- Hit the Modify… button to define a suitable icon for your Macro.
- Define a Display name for your button.
- Hit OK.
- Now, you can launch your Macro from the Quick Access Toolbar, just above the Ribbon.
Note: You are able to associate your Word Macro not only with quick access buttons but also with command buttons embedded in your document and specific custom keyboard shortcuts.
Creating Word Macros using VBA
With some simple Visual Basic for Applications coding skills we can edit the macros and write programs to automate various kinds of works using VBA.
Aside Note: FYI – some of the Microsoft Office applications, such as Powerpoint and Outlook, do not have built in macro recorders. Therefore, writing VBA is mandatory for writing Powerpoint macros and automating Outlook.
- To edit a macro, click on the Developer tab and select Macros in the code option.
- Click on the macro and select Edit.
- The Visual Basic for applications editor will open up.
- Let’s assume that we want to manually edit the Macro we have recorded in the previous step, so that Word not only set the Size, font and alignment of the paragraph, but also the color.
- Setting the color of a section is achieved using the following VBA command:
[code] Selection.Font.Color [/code]
- In our case, we’ll want to set it to a random blue, so we’ll append the following snippet to our Recorded macro:
[code] Selection.Font.Color = 16737792[/code]
- Here’s how your VBA code should look like:

- In the VBA Editor hit File and then Save.
- Back to your document, run your Macro on a paragraph and observe the font color change.

- Voi’la!
Useful Word Macro example you can write
Since publishing this tutorial, many readers asked for more in depth examples of Word Macros. This list covers the most prevalent tasks you can automate using Visual Basic in Word. Here we go:
Create and Save New Document
Sub CreateNewDoc()
'This small snippet first creates a new document, then it checks whether a document with the same name already exists before saving.
Dim myDoc As New Document
Dim filePath As String

'Modify your file path as needed
filePath = "C:MyNewDoc.docx"

Set myDoc = Documents.Add
With myDoc
If Dir(filePath) = "" Then
.SaveAs2 (filePath)
Else

'You have already an existing document

MsgBox ("Please use a different file name")
End If
End With

myDoc.Close SaveChanges:=wdPromptToSaveChanges

End Sub
Note: When creating new documents, you are able to specify the template (.dotm/.dotx files) you would like to use. Templates are typically stored at: C:Users<your_user_name>AppDataRoamingMicrosoftTemplates
Documents.Add <strong>Template:=<your_template_folder></strong>Open a Word document with VBA
Sub OpenDoc()
'This code checks whether your document exists and then opens it
filePath = "C:MyNewDoc.docx"

If Dir(filePath) = "" Then
MsgBox ("file doesn't exist")
Else
Documents.Open (filePath)
End If

End Sub
Closing one/all open documents
Sub CloseDoc()

'This code closes a specific document
filePath = "C:MyNewDoc.docx"
Documents(filePath).Close SaveChanges:=wdPromptToSaveChanges
End Sub
Sub CloseAllDocs()
'This code closes all opened documents in your computer
Documents.Close SaveChanges:=wdPromptToSaveChanges
End SubSaving Word as PDF
Here’s how to easily automate saving of Word documents as PDF files.
Sub SaveAsPdf()
'This code saves a word document in a PDF format
FileName = Left(CStr(ActiveDocument.Name), Len(CStr(ActiveDocument.Name)) - 5)
ActiveDocument.SaveAs2 FileName:="c:" + FileName + ".pdf", FileFormat:=wdFormatPDF

End Sub
Inserting header and footer
This code sets the header and footer of your Word document first page.
Sub InsertHeaderFooterFirstPage()
Dim myDoc As Document
Dim headerText As String
Dim footerText As String

Set myDoc = ActiveDocument
'Replace the header and footer text as needed
headerText = "This document was written by you"
footerText = "All rights reserved to you"

With myDoc.Sections(1)
'We first ensure that we can set different header and footer texts
.PageSetup.DifferentFirstPageHeaderFooter = True
'Setting the header and footer texts
.Headers(wdHeaderFooterFirstPage).Range.Text = headerText
.Footers(wdHeaderFooterFirstPage).Range.Text = footerText

End With

End Sub
Additional Word Macro ideas
Here are a few more ideas which we’ll be posting in the upcoming future.
- Find and Replace (Execute Method)
- Insert a paragraph (before and after a selection)
- Printing documents programatically
- Working with tables
This concludes our tutorial for today. As you just saw, there is a lot to be done with the Word macro recorder and VBA Macros in Word. In case you are looking for more specific help that goes beyond the scope of this tutorial, kindly contact us via our contact form.
Устали выполнять повторяющиеся задачи в Microsoft Word? В программе похоронен мощный инструмент автоматизации, который может избавить вас от этой работы. Мы говорим о макросах, и хотя эта функция опирается на Microsoft Visual Basic для приложений (VBA), вы можете использовать ее, даже если идея кодирования вызывает у вас хиби-джиби.
При нажатии кнопки Word записывает ваши действия, создавая макрос, который вы можете воспроизводить так часто, как захотите. Если вы любите приключения, вы можете легко изменить макрос для дополнительной степени автоматизации.
Здесь мы покажем вам один простой, но полезный пример: как автоматизировать функцию поиска и замены Word.
Запись макроса
В этом примере вы уважаемый президент Общества сохранения антикварной стоматологической техники. У вас есть десятки документов Word об исторических зубных протезах и тому подобном, и все они имеют заметное упоминание имени общества. Затем внезапно правление голосует за изменение названия на Лигу сохранения стоматологического антиквариата. Теперь вам нужен простой способ обновить документы.
Вы можете начать с нового пустого документа или открыть существующий. Если вы еще этого не сделали, вам нужно включить вкладку «Разработчик».
Перейдите в Файл> Параметры> Настроить ленту . Справа в разделе « Основные вкладки» установите флажок « Разработчик» . Выберите ОК и выйдите.

Теперь создадим наш макрос.
- Щелкните Разработчик> Записать макрос .
- Вам будет предложено назвать макрос. Введите «ChangeSocietyName» или любое другое имя, которое вам подходит. При именовании макросов избегайте пробелов, точек, восклицательных знаков и специальных символов, иначе вы получите сообщение об ошибке. Вы можете использовать числа, но первым символом должна быть буква.
- Вы можете назначить макрос кнопке и / или сочетанию клавиш, но это не обязательно. Если вы выберете кнопку, Word позволит вам добавить ее на панель быстрого доступа. Вы также можете добавить краткое описание макроса.
- Нажмите ОК , и Word запишет ваши действия. Нажмите Ctrl + H, чтобы открыть диалоговое окно « Найти и заменить ».
- Введите «Общество сохранения старинной стоматологической техники» в поле «Найти» и «Лига сохранения антиквариата» в поле «Заменить».
- Нажмите « Заменить все», чтобы выполнить операцию «Найти и заменить». Это единственное действие, которое вы хотите записать. Не имеет значения, заменяет ли макрос какой-либо текст. Дело в том, чтобы сохранить его для других документов.
- Это важно: щелкните Разработчик> Остановить запись . В противном случае макрос будет включать все последующие действия.
А теперь посмотрим на вашу работу. Откройте документ, содержащий название общества. Щелкните Разработчик> Макросы . Если дважды щелкнуть ChangeSocietyName, Word автоматически выполнит операцию «Найти и заменить».

Совет: Во время записи макроса вам может потребоваться выполнить действие, которое вы не хотите записывать. Например, вы можете захотеть скопировать и вставить текст в диалоговое окно «Найти и заменить», а не вводить его вручную. Нет проблем: просто нажмите « Разработчик»> «Приостановить запись» , скопируйте и вставьте текст, затем нажмите « Разработчик»> «Продолжить запись» . Затем вы можете завершить запись макроса, как описано выше.
Хотя мы сосредоточились здесь на Microsoft Word, вы также можете использовать макросы для повышения производительности в Excel . И есть много макросов для экономии времени для Microsoft OneNote .
Погружение в код
Теперь мы более подробно рассмотрим наш новый макрос Word. Перейдите в « Разработчик»> «Макросы» , но вместо двойного щелчка по макросу выберите его и нажмите « Изменить» . Это открывает редактор Visual Basic, автономную среду для создания приложений VBA.

Это может показаться устрашающим, но вы можете игнорировать меню и большинство панелей. Вместо этого сосредоточьтесь на окне, содержащем код. Как видите, Word только что написал макрос, который выполняет поиск и замену.
Sub ChangeSocietyName()
 '
 ' ChangeSocietyName Macro
 ' Rename Society for the Preservation of Antique Dental Appliances
 '
 Selection.Find.ClearFormatting
 Selection.Find.Replacement.ClearFormatting
 With Selection.Find
 .Text = "Society for the Preservation of Antique Dental Appliances"
 .Replacement.Text = "Dental Antiques Preservation League"
 .Forward = True
 .Wrap = wdFindContinue
 .Format = False
 .MatchCase = False
 .MatchWholeWord = False
 .MatchWildcards = False
 .MatchSoundsLike = False
 .MatchAllWordForms = False
 End With
 Selection.Find.Execute Replace:=wdReplaceAll
 End Sub
Давайте объясним, что здесь происходит.
«Подпрограмма» в первой строке является сокращением от «подпрограммы», небольшой программы, которая может работать сама по себе или как часть более крупного приложения VBA. Строки, перед которыми стоят одинарные кавычки, предназначены для комментариев. Кавычки указывают VBA игнорировать любые утверждения в этих строках.
Затем мы переходим к сути кода: коду, который выполняет операцию поиска и замены . Как видите, он определяет значения для каждого параметра в диалоговом окне «Найти и заменить», включая текст и текст замены в кавычках. Команда Selection.Find.Execute в конце эквивалентна нажатию кнопки «Заменить все».
Модификация макроса
Чтобы использовать макросы, вам не нужно возиться с кодом или даже смотреть на него. Но вы можете получить больше от этой функции, если захотите погрузиться в нее. Например, предположим, что вы допустили опечатку при записи макроса. Вместо того, чтобы перезаписывать это, вы можете зайти в Visual Basic и исправить.
Вы также можете настроить макрос, чтобы сделать его более полезным, и этим мы здесь и займемся. Когда вы запускаете «Найти и заменить» вручную или с помощью макроса, Word запоминает найденный и заменяющий текст. В следующий раз, когда вы откроете диалоговое окно «Найти и заменить», оно будет выглядеть следующим образом.

Было бы лучше очистить значения, чтобы получить чистое диалоговое окно. Мы сделаем это с помощью второго макроса, но на этот раз мы сделаем это непосредственно в Visual Basic.
- В редакторе Visual Basic выберите всю подпрограмму от первой строки до End Sub. Нажмите Ctrl + C, чтобы скопировать его.
- Поместите курсор под End Sub и нажмите Ctrl + V. Вы только что продублировали подпрограмму.
- Измените имя с ChangeSocietyName на ClearFindReplace (или любое другое имя, которое вам подходит). Это важно, потому что VBA выдаст сообщение об ошибке, если вы попытаетесь запустить макросы с повторяющимися именами.
- В значениях .Text и Replacement.Text удалите текст, но оставьте кавычки. По сути, вы говорите Word ничего не найти и ничего не заменить, но вы также очищаете эти значения.
Результат должен выглядеть так:

Sub ClearFindReplace()
 '
 ' ClearFindReplace Macro
 ' Clear Text from Find and Replace dialog
 '
 Selection.Find.ClearFormatting
 Selection.Find.Replacement.ClearFormatting
 With Selection.Find
 .Text = ""
 .Replacement.Text = ""
 .Forward = True
 .Wrap = wdFindContinue
 .Format = False
 .MatchCase = False
 .MatchWholeWord = False
 .MatchWildcards = False
 .MatchSoundsLike = False
 .MatchAllWordForms = False
 End With
 Selection.Find.Execute Replace:=wdReplaceAll
 End Sub
Теперь вернемся к макросу ChangeSocietyName. Под кодом поиска и замены, но перед End Sub введите ClearFindReplace (без скобок в конце).
Правильно: вам не нужно вводить весь код, который вы только что создали, только имя макроса.
Sub ChangeSocietyName()
 '
 ' ChangeSocietyName Macro
 ' Rename Society for the Preservation of Antique Dental Appliances
 '
 Selection.Find.ClearFormatting
 Selection.Find.Replacement.ClearFormatting
 With Selection.Find
 .Text = "Society for the Preservation of Antique Dental Appliances"
 .Replacement.Text = "Dental Antiques Preservation League"
 .Forward = True
 .Wrap = wdFindContinue
 .Format = False
 .MatchCase = False
 .MatchWholeWord = False
 .MatchWildcards = False
 .MatchSoundsLike = False
 .MatchAllWordForms = False
 End With
 Selection.Find.Execute Replace:=wdReplaceAll
 ClearFindReplace
 End Sub
Когда Word запускает ChangeSocietyName, сначала выполняется исходная функция «Найти и заменить». Затем он интерпретирует ClearFindReplace как команду для запуска второго макроса.
Идем дальше с VBA
Как видите, функция записи макросов Word может помочь вам сэкономить время множеством способов. Вы можете создавать макросы для автоматизации практически любой операции, а в редакторе Visual Basic вы можете настраивать макросы, вставлять один макрос в другой или создавать подпрограмму, которая выполняет несколько макросов один за другим.
Поскольку VBA – это полноценный язык программирования, вы можете включать подпрограммы в более крупные приложения с переменными, циклами, условными операторами и т. Д. И как только вы изучите основы VBA в Word, вы сможете применить многие из этих знаний для создания макросов в Microsoft Excel и Access.
Чтобы пойти дальше, вы захотите узнать больше о соглашениях VBA и редакторе Visual Basic, например о том, как организовать свой код и как бороться с ошибками. Но даже если вы хотите придерживаться простых функций, подобных описанным здесь, вы можете значительно улучшить свою производительность.
A macro is a series of commands that are recorded and saved, so that they can be easily run again on demand. If you have a series of repetitive tasks, recording a macro can save you a lot of time.
Show the Developer Tab
Before you can create or use macros, you’ll need to turn on the Developer tab.
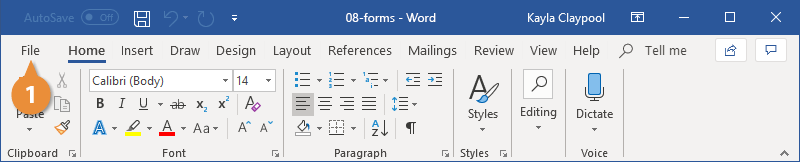
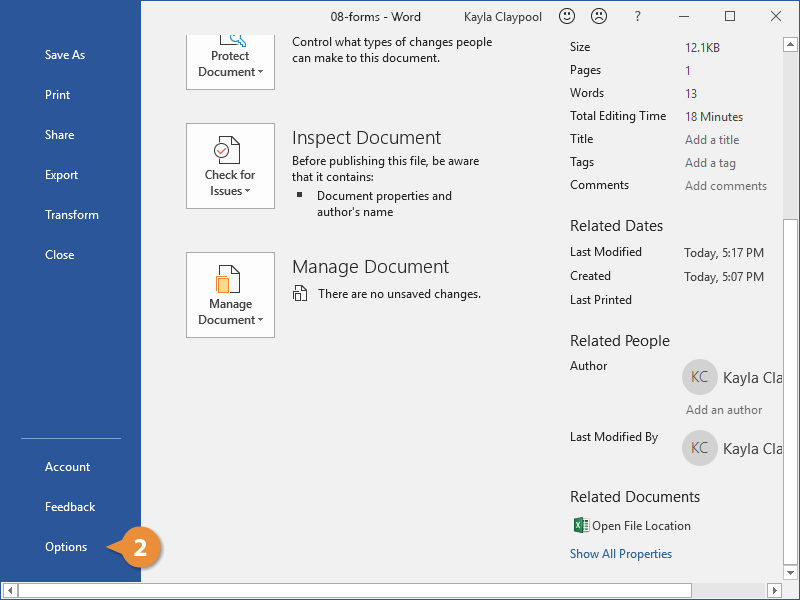
- Click the File tab.

- Select Options.

The Word Options window opens.
- Click the Customize Ribbon tab on the left.
The column on the right controls which ribbon tabs are enabled.
- Check the Developer check box.
- Click OK.
The Developer tab now appears at the end of the ribbon.
Enable Macros
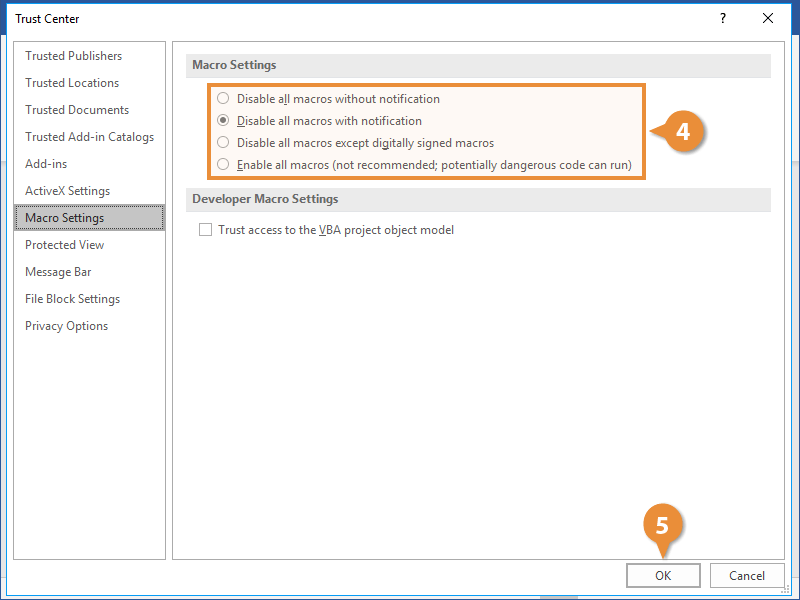
Once you’ve enabled the Developer tab, you can change a document’s security settings to allow macros to be used.
- Enable the Developer tab in Word Options.
- Click the Developer tab.
- Click the Macro Security button.
Before you use macros, it’s important to know that macros can be a security risk. Since they run outside code, running one from an untrustworthy source can infect your computer, or others on your network, with a virus.
- Choose the proper security level.
There are four levels of macro security:
- The first level disables macros entirely, blocking them without a notification. This option is the safest but doesn’t allow you to run macros at all—even macros you record yourself.
- The default setting blocks macros but displays a notification. This notification allows you to enable macros on a case-by-case basis. This option is safe, as long as you know that you can trust the macros you allow.
- You can automatically enable digitally signed macros. You’ll still be prompted for most macros, but trusted macros will be allowed without a prompt.
- Finally, you can enable all macros without a prompt. This can be dangerous, so use this command with caution.
- Click OK.
The selected macro security setting is enabled.
Record a Macro
When you have a repetitive series of tasks to perform, you can record those tasks as a macro.
- Place the cursor where you want to start recording the macro.
- Click the Record Macro button.
The Record Macro window opens, where you can set up the macro’s name, description, and triggering mechanism before you record it.
- Give the macro a name.
Notice that the macro will be saved to the Normal template, meaning that it will be available in other documents created using that template. If you need it saved to another template or document, make sure to specify that here.
Next, you can choose whether the macro gets triggered to run by a button that can be added to the Quick Access Toolbar, or a keyboard shortcut key combination. This lesson will cover adding a macro that uses a keyboard shortcut.
- Click the Keyboard button.
- Press the keyboard shortcut keys that you want to use.
Make sure to use a keyboard shortcut combination that won’t interfere with any other Word or system commands.
- Click Assign.
- Click Close.
The macro immediately begins recording.
- Record the macro.
While recording, the macro captures keystrokes and buttons clicked, but text selection made with the mouse will not be recorded. Use the keyboard to select text and move the cursor, if you want those actions recorded.
A Stop button will also appear on the status bar while a macro is recording.
- Click the Stop button when you’re finished recording.
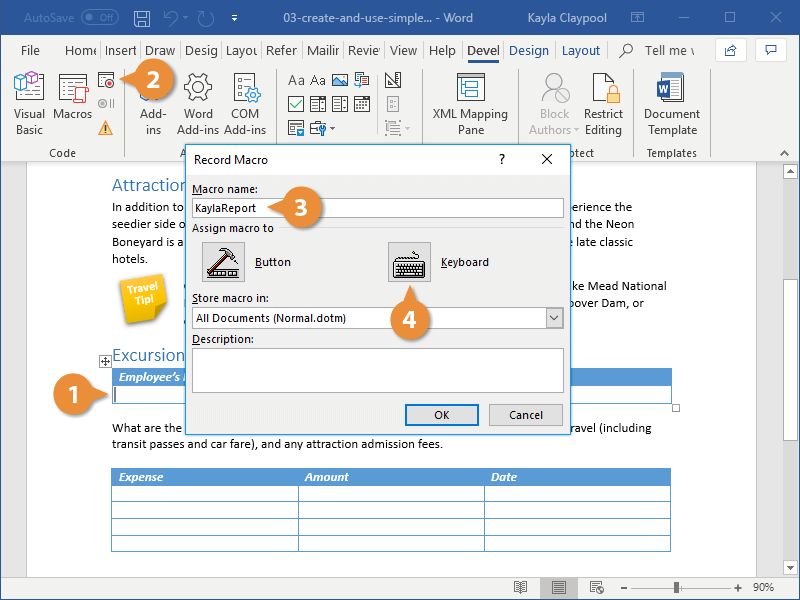
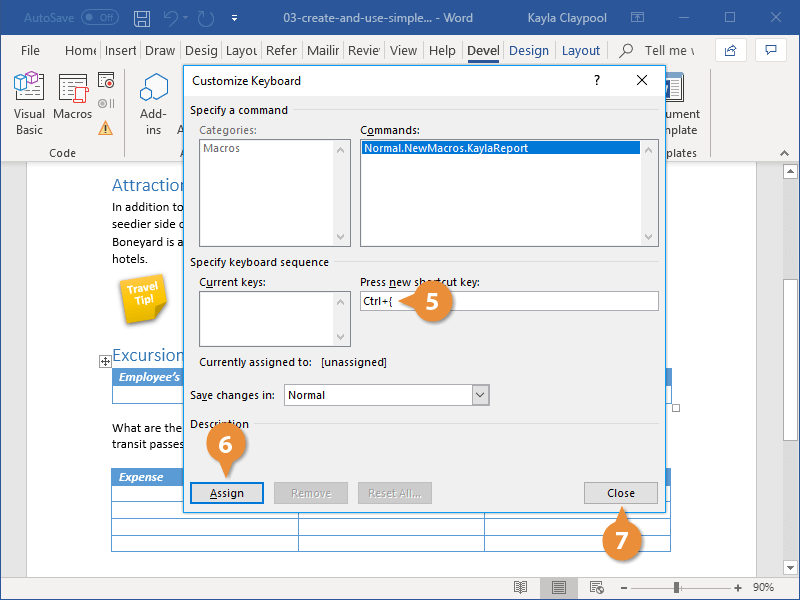
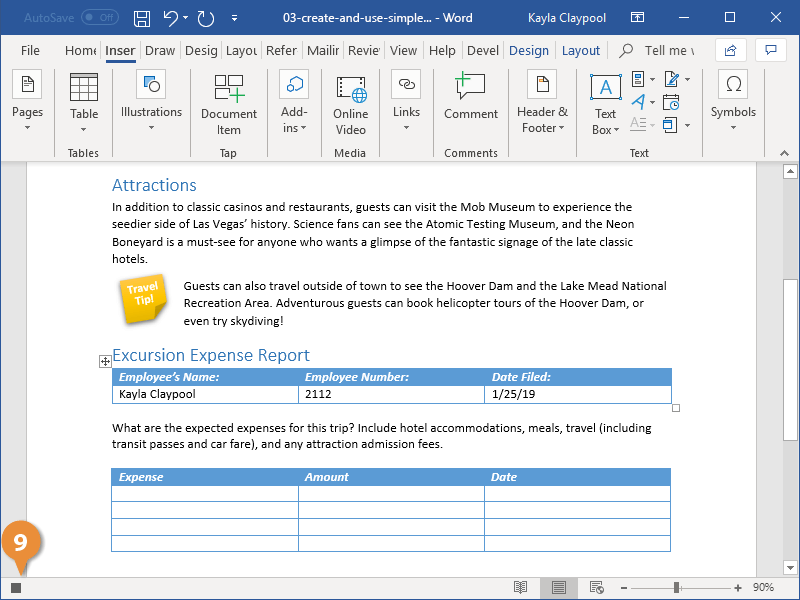
The recording stops, and the macro is saved.
Run a Macro
When you’ve recorded and saved a macro into a document, you can run it using the keyboard shortcut or Quick Access Toolbar button assigned to it when it was created. You can also view all the macros in a document and choose one to run directly.
- Click where you want to run the macro.
- Click the Developer tab.
- Click the Macros button.
All the macros in the current template are listed in the Macros dialog box. From here, you can run a macro, edit it, create a new one, or delete macros that you no longer need.
- Select a macro.
- Click the Run button.
Select a macro and click the Edit button to open the macro in the Visual Basic editor. From there, you can view the steps the macro uses, delete unneeded steps, or even change the properties of a step to customize the macro even more.
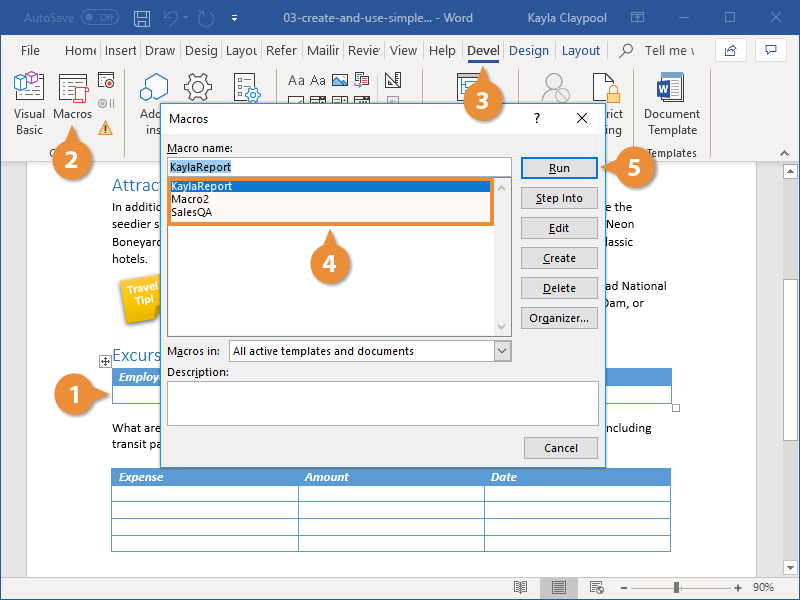
The selected macro is run.

FREE Quick Reference
Click to Download
Free to distribute with our compliments; we hope you will consider our paid training.