
Does anyone know how to write to an excel file (.xls) via OLEDB in C#? I’m doing the following:
   OleDbCommand dbCmd = new OleDbCommand("CREATE TABLE [test$] (...)", connection);
   dbCmd.CommandTimeout = mTimeout;
   results = dbCmd.ExecuteNonQuery();
But I get an OleDbException thrown with message:
«Cannot modify the design of table
‘test$’. It is in a read-only
database.»
My connection seems fine and I can select data fine but I can’t seem to insert data into the excel file, does anyone know how I get read/write access to the excel file via OLEDB?
asked Sep 12, 2008 at 0:10
![]()
1
I was also looking for and answer but Zorantula’s solution didn’t work for me.
I found the solution on http://www.cnblogs.com/zwwon/archive/2009/01/09/1372262.html
I removed the ReadOnly=false parameter and the IMEX=1 extended property.
The IMEX=1 property opens the workbook in import mode, so structure-modifying commands (like CREATE TABLE or DROP TABLE) don’t work.
My working connection string is:
"Provider=Microsoft.Jet.OLEDB.4.0;Data Source=workbook.xls;Mode=ReadWrite;Extended Properties="Excel 8.0;HDR=Yes;";"
![]()
answered Apr 23, 2009 at 10:49
0
You need to add ReadOnly=False; to your connection string
Provider=Microsoft.Jet.OLEDB.4.0;Data Source=fifa_ng_db.xls;Mode=ReadWrite;ReadOnly=false;Extended Properties="Excel 8.0;HDR=Yes;IMEX=1";
![]()
answered Oct 8, 2008 at 18:38
![]()
ZorantulaZorantula
1721 silver badge2 bronze badges
2
I also had the same problem. Only remove the extended property IMEX=1. That will solve your problem. Your table will be created in your Excel file…
![]()
answered Aug 4, 2011 at 20:16
![]()
A couple questions:
- Does the user that executes your app (you?) have permission to write to the file?
- Is the file read-only?
- What is your connection string?
If you’re using ASP, you’ll need to add the IUSER_* user as in this example.
answered Sep 12, 2008 at 2:04
![]()
Michael HarenMichael Haren
105k40 gold badges165 silver badges205 bronze badges
- How do I check the permissions for writing to an excel file for my application (I’m using excel 2007)?
- The file is not read only, or protected (to my knowledge).
- My connection String is:
«Provider=Microsoft.Jet.OLEDB.4.0;Data
Source=fifa_ng_db.xls;Mode=ReadWrite;Extended
Properties=»Excel
8.0;HDR=Yes;IMEX=1″»
answered Sep 12, 2008 at 16:12
![]()
DanielbDanielb
1,5785 gold badges23 silver badges34 bronze badges
2
Further to Michael Haren’s answer. The account you will need to grant Modify permissions to the XLS file will likely be NETWORK SERVICE if this code is running in an ASP.NET application (it’s specified in the IIS Application Pool). To find out exactly what account your code is running as, you can do a simple:
Response.Write(Environment.UserDomainName + "\" + Environment.UserName);
answered Oct 8, 2008 at 18:49
![]()
Duncan SmartDuncan Smart
30.9k10 gold badges66 silver badges70 bronze badges
I was running under ASP.NET, and encountered both «Cannot modify the design…» and «Cannot locate ISAM…» error messages.
I found that I needed to:
a) Use the following connection string:
Provider=Microsoft.Jet.OLEDB.4.0;Mode=ReadWrite;Extended Properties='Excel 8.0;HDR=Yes;';Data Source=" + {path to file};
Note I too had issues with IMEX=1 and with the ReadOnly=false attributes in the connection string.
b) Grant EVERYONE full permissions to the folder in which the file was being written. Normally, ASP.NET runs under the NETWORK SERVICE account, and that already had permissions. However, the OleDb code is unmanaged, so it must run under some other security context. (I am currently too lazy to figure out which account, so I just used EVERYONE.)
![]()
answered Jun 10, 2009 at 16:11
Table of Contents
- Introduction
- Building the Sample
- Source code
- Description
- Common operations:
- Microsoft PIA
- OleDb option for exporting
- Extended properties
- Using OpenXML
- Exception Handling
- Location of excel operations
- Conclusions
- Special Note
- See also
Introduction
When creating data-centric business applications customers may require their data readily available in one or more formats such as Microsoft Excel or a requirement to import data from one or more formats where one may be Microsoft
Excel. This articles intent is to provide not only options for fulfilling these requirements but also do comparisons between various paths for interacting with Microsoft Excel.
All code runs in a Windows desktop project yet all classes to interact with Excel are in class projects with no dependencies on Windows forms
Building the Sample
- Requires SQL-Server Express edition or higher
- NuGet packages have been removed from the solution as the total space is large. Use NuGet «restore packages» if you don’t have restore packages set by default. If you have a slow computer downloading the required packages may take five or more minutes.
- Scripts to create and populate data is located under ExcelOperations project in the folder SqlScripts. Before running the script check the location of the database to ensure the script runs correctly. As is, the location is the
default location for SQL-Server installation. - Some code makes use of C# 7 but with a little modification will work with earlier versions of C#
- Source code.
Source code
Description
This article explores working with Excel using automation, Open XML and OleDb for common tasks such as exporting from a DataGridView and much more. There will be farther in this startup series.
Most of the code can be executed in the Windows form project while there are bits of code which are not and when you come across code not presented/callable from the form there will be sample code in method headers on how to
call the method e.g. there are two examples (in ExcelOperations class) for exporting to delimited text files, they are self-contained so simply call them while in Operations class in ExcelOperations class/OleDbWork there is a method ReadPeopleNoHeaderRow which
has sample calls to the method in the method header.
There are examples for working with automation, Open XML and OleDb. Run each one and note time to execute. Every time Open XML will be faster than the other two while OleDb is a close second on some calls. But speed is not everything,
for example, we want a list of sheet names. Using OleDb the sheet names are in A-Z order while the other two methods are in ordinal position. Suppose you need to create a new Excel file, this is not possible with OleDb and similar OleDb has no methods for
formatting data. Knowing this one might use Excel automation and when doing so with a large data set the application may become unresponsive which means accept this or use a backgrounder worker component or use async techniques to overcome a non-responsive
application (async is shown in one code sample).

There are 14 file formats for Excel were this article will work with one, .xlsx which is the default XML-based file format for Excel 2007 and higher versions while .xls is for Excel 97 through Excel 2003.
The reason the focus is on Excel 2007 file format is this is the industry standard. Excel prior versions are still used yet less and less
as time goes by.
Common operations:
- Exporting a DataGridView bound to a DataTable or a List on a form with no formatting for column headers or cells.
- Exporting a DataGridView bound to a DataTable List on a form with formatting for columns and/or cells.
- Export a DataGridView without the DataSource property set. With or without formatting of cells and/or columns.
- Export from a container such as a DataTable or List with or without a column or cell formatting.
- Export from a database table(s) with or without a column or cell formatting.
- Export from a text file or XML file with or without a column or cell formatting.
- Import one or more WorkSheets into a database, text file, XML or similar container.
Note Not all of these operations are covered in this article yet the ones which are will provide insight into how to do those task which are not presented. Also there are several code samples not presented in
the main form application, these demos will have in the method headers how to use the method.
Exporting data to Excel without formatting for many the choice is to work with Excel automation or through OleDb manage data provider.
Considerations for working with Excel automation.
Several objects are needed to get started, Excel.Application, Excel.WorkBook and Excel.WorkSheet. First the Excel.Application object is created followed by a ExcelWorkBook which form the base for creating an Excel object in memory.
Next an Excel.WorkSheet is created with the option of providing a sheet name. If no sheet name is provided the sheet name will be the default, Sheet1. Once the Worksheet has been added to the Excel.Application by way of the Excel.WorkBook data can now be inserted
into the sole WorkSheet.
Many a developer will jump onto their favorite search engine and come up with a code sample such as the one shown below in figure 1. At first glance, this looks great so the developer drops the code into their project and then
realizes that there is no save method, easy enough to fix by adding the Save method. The first issue is how a developer thinks about exception handling, in this case, a try-catch statement is used which displays a message that something failed. Usually when
there is a runtime exception with code as shown below all objects created to interact with Excel will usually (and it’s most of the time) stick around in memory unknown to the client who may make several attempts to use the cool export feature and on each
failure leaves more un-freed objects in memory and may very well require them to restart the machine to clear memory left around from failed export operations.
The next issue is the operation is performed within a form. These operations should be within a class dedicated to this and similar operations but not with data operations such as reading data from a database to populate a DataGridView.
Data operations belong in their own class. The form then calls methods in these classes to read data (and perform add/edit/delete operations) from a database then in the call methods in the Excel class to export to Excel. One way around these issues is to
move away from Excel automation as shown in figure 1A which uses a language extension method. The language extension converts data in a DataGridView to a DataTable were the DataGridView may have been populated by its DataSource or populated by adding rows
manually. The extension method provides an option to include or exclude column headers. Once the DataTable is returned from the extension method it’s passed to a method for a third-party library known as SpreadSheetLight which is free and installable via NuGet
inside Visual Studio. A single method call is used to export/import the DataTable into a new Excel file including options to name the WorkSheet. The benefit of this method is it is fairly universal, not tied to any set of data while the downsides are; requires
a third party library, the data inserted into Excel are all strings (which is the same for when using Excel automation). If we exclude the cells will all be strings and focus on having to use a third-party library the alternate is to create a method that a
DataTable is passed which uses either OpenXML to export data to Excel which in this case will require a considerable code base, no different if OleDb were to be used to export/import data into Excel. No matters which direction is taken there are advantages
and disadvantages. The last option is to go with a third party library paid for or free, two of them are EPPlus and GemBox. Using a paid library makes since only when you need efficient and flexible methods that you don’t have to maintain or that your methods
created in house are not performing as expected and time is critical to completing the application.
Microsoft PIA
Primary Interop Assembly which are based on Component Object Model (COM). When you call a COM object of Office from managed code, a Runtime Callable Wrapper (RCW) is automatically created. The RCW marshals calls between the .NET
application and the COM object. The RCW keeps a reference count on the COM object. If all references have not been released on the RCW, the COM object of Office does not quit and may cause the Office application not to quit after your automation has finished
or not finished because of an exception.
Figure 1
using
Excel = Microsoft.Office.Interop.Excel;
private
void
btnExportExcel_Click(object
sender, EventArgs e)
{
try
{
Microsoft.Office.Interop.Excel.Application excel =
new
Microsoft.Office.Interop.Excel.Application();
excel.Visible =
true;
Microsoft.Office.Interop.Excel.Workbook workbook = excel.Workbooks.Add(System.Reflection.Missing.Value);
Microsoft.Office.Interop.Excel.Worksheet sheet1 = (Microsoft.Office.Interop.Excel.Worksheet)workbook.Sheets[1];
int
StartCol = 1;
int
StartRow = 1;
int
j = 0, i = 0;
//Write Headers
for
(j = 0; j < dgvSource.Columns.Count; j++)
{
Microsoft.Office.Interop.Excel.Range myRange = (Microsoft.Office.Interop.Excel.Range)sheet1.Cells[StartRow, StartCol +

 j];
myRange.Value2 = dgvSource.Columns[j].HeaderText;
}
StartRow++;
//Write datagridview content
for
(i = 0; i < dgvSource.Rows.Count; i++)
{
for
(j = 0; j < dgvSource.Columns.Count; j++)
{
try
{
Microsoft.Office.Interop.Excel.Range myRange = (Microsoft.Office.Interop.Excel.Range)sheet1.Cells[StartRow + i,

 StartCol + j];
myRange.Value2 = dgvSource[j, i].Value ==
null
? "" : dgvSource[j, i].Value;
}
catch
{
;
}
}
}
}
catch
(Exception ex)
{
MessageBox.Show(ex.ToString());
}
}
This alternate method to export data from a DataGridView full source can be found here. The main parts are as follows. A language extension method to convert a DataGridView contents to a DataTable where all values will be strings.
Full source for the following code.
Figure 1A
using
System;
using
System.Data;
using
System.IO;
using
System.Linq;
using
System.Windows.Forms;
namespace
UtilityLibrary
{
public
static
classDataGridViewExtensionMethods
{
/// <summary>
/// Given a DataGridView populates without a data source,
/// create a DataTable, populate from rows/cells from the
/// DataGridView with an option to include/exclude column names.
/// </summary>
/// <param name="pDataGridView"></param>
/// <param name="pColumnNames"></param>
/// <returns></returns>
/// <remarks>
/// There is no attempt made to figure out data types coming
/// from data in the DataGridView
/// </remarks>
public
static
DataTable GetDataTable(this
DataGridView pDataGridView, bool
pColumnNames = true)
{
DataTable dt =
new
DataTable();
foreach
(DataGridViewColumn column in
pDataGridView.Columns)
{
if
(column.Visible)
{
if
(pColumnNames)
{
dt.Columns.Add(new
DataColumn() { ColumnName = column.Name });
}
else
{
dt.Columns.Add();
}
}
}
object[] cellValues =
new
object[pDataGridView.Columns.Count];
foreach
(DataGridViewRow row in
pDataGridView.Rows)
{
if
(!row.IsNewRow)
{
for
(int
i = 0; i < row.Cells.Count; i++)
{
cellValues[i] = row.Cells[i].Value;
}
dt.Rows.Add(cellValues);
}
}
return
dt;
}
/// <summary>
/// Generates comma delimited rows into a string array.
/// </summary>
/// <param name="sender"></param>
/// <returns></returns>
/// <remarks></remarks>
public
static
string[] CommaDelimitedRows(this
DataGridView sender)
{
return
(
from row
in
sender.Rows.Cast<DataGridViewRow>()
where !((DataGridViewRow)row).IsNewRow
let RowItem =
string.Join(",", Array.ConvertAll(((DataGridViewRow)row).Cells.Cast<DataGridViewCell>().ToArray(), (DataGridViewCell
c) => ((c.Value == null) ?
"" : c.Value.ToString())))
select RowItem).ToArray();
}
public
static
voidExportToCommandDelimitedFile(this
DataGridView pSender, string
pFileName)
{
File.WriteAllLines(Path.Combine(AppDomain.CurrentDomain.BaseDirectory, pFileName), pSender.CommaDelimitedRows());
}
public
static
voidExpandColumns(this
DataGridView sender)
{
foreach
(DataGridViewColumn col in
sender.Columns)
{
col.AutoSizeMode = DataGridViewAutoSizeColumnMode.AllCells;
}
}
}
}
With the DataTable returned from the extension above the following class provides exporting capabilities
using
System;
using
System.Data;
using
SpreadsheetLight;
using
DocumentFormat.OpenXml.Spreadsheet;
using
SysDraw = System.Drawing;
using
System.IO;
namespace
SpreadSheetLightLibrary
{
public
class
ExcelOperations
{
/// <summary>
/// True if last operation had a runtime exception
/// </summary>
/// <returns></returns>
public
bool
HasException { get;
set; }
/// <summary>
/// Exception of last operation ran that throw an exception
/// </summary>
/// <returns></returns>
public
Exception Exception { get;
set; }
/// <summary>
/// Wraps Exception message
/// </summary>
/// <returns></returns>
public
string
ExceptionMessage
{
get
{
if
(HasException)
{
return
Exception.Message;
}
else
{
return
"None";
}
}
}
/// <summary>
/// Export DataTable to a new Excel file
/// </summary>
/// <param name="pFileName">Path and Excel file name</param>
/// <param name="pSheetName">Sheet name to place data</param>
/// <param name="pDataTable">DataTable to import into pSheetName</param>
/// <param name="pColumnHeaders">Include or exclude columns</param>
/// <returns></returns>
public
bool
SimpleExport(string
pFileName, string
pSheetName, DataTable pDataTable, bool
pColumnHeaders)
{
try
{
if
(File.Exists(pFileName))
{
File.Delete(pFileName);
}
using
(SLDocument doc = new
SLDocument())
{
doc.SelectWorksheet(pSheetName);
if
(pSheetName != "Sheet1")
{
doc.AddWorksheet(pSheetName);
doc.DeleteWorksheet("Sheet1");
}
// start at row 1, column A
// SLConvert.ToColumnIndex("A") is kind of overkill but it exposes you to the convert class
doc.ImportDataTable(1, SLConvert.ToColumnIndex("A"),
pDataTable, pColumnHeaders);
if
(pColumnHeaders)
{
var headerSyle = doc.CreateStyle();
headerSyle.Font.FontColor = SysDraw.Color.White;
headerSyle.Font.Strike =
false;
headerSyle.Fill.SetPattern(PatternValues.Solid, SysDraw.Color.Green, SysDraw.Color.White);
headerSyle.Font.Underline = UnderlineValues.None;
headerSyle.Font.Bold =
true;
headerSyle.Font.Italic =
false;
doc.SetCellStyle(1, 1, 1, pDataTable.Columns.Count, headerSyle);
}
doc.AutoFitColumn(1, pDataTable.Columns.Count);
doc.SaveAs(pFileName);
}
return
true;
}
catch
(Exception ex)
{
HasException =
true;
Exception = ex;
return
false;
}
}
/// <summary>
/// This represents the bare amount of code to import
/// a DataTable into a new Excel file. Please note if
/// there are dates they need to be format using a style.
///
/// For an example of date styling/formatting
/// Class project ExcelBackend, Operations class method ImportDataTable2
/// where I setup a style for a date as mm-dd-yyyy
///
/// Formatting is beyond this code sample as this code sample is meant
/// to be a generic method to take a DataGridView into a DataTable then
/// use the DataTable to import into a WorkSheet. I could had done dates
/// and other types but that is more specific to your data and as mentioned
/// the link above is my code sample that shows formatting/styling.
///
/// </summary>
/// <param name="pFileName"></param>
/// <param name="pSheetName"></param>
/// <param name="pDataTable"></param>
/// <param name="pColumnHeaders"></param>
public
void
SimpleExportRaw(string
pFileName, string
pSheetName, DataTable pDataTable, bool
pColumnHeaders)
{
using
(SLDocument doc = new
SLDocument())
{
doc.SelectWorksheet(pSheetName);
if
(pSheetName != "Sheet1")
{
doc.AddWorksheet(pSheetName);
doc.DeleteWorksheet("Sheet1");
}
doc.ImportDataTable(1, SLConvert.ToColumnIndex("A"),
pDataTable, pColumnHeaders);
doc.SaveAs(pFileName);
}
}
}
}
The key to exporting in this case, one sole method to perform the export. As mentioned earlier you could discard the idea of using a third party library and instead write this code yourself yet if not an expert with OpenXML there
really is no clear reason to go in this direction as we want easy to use methods without worrying about maintaining said code.
How to handle exceptions properly to ensure all objects are released? The key is persistence when designing and coding, in this case a method to export data to Excel using automation.
Start off by populating a DataGridView with perhaps 200 rows with a nominal column count. Run the operation, did all work properly, if so do the same operation with and without allowing users to add new rows to the DataGridView,
in the sample above this would throw an exception if there is a new row in the DataGridView. A fix is to check for the new row while iterating the DataGridView.
If a runtime exception is thrown best to open Task Manager and kill any instances of Excel that are shown in the process window.
Tip: Place a StatusStrip on the form, add a label on the status strip with images as shown in figure 2, use the image shown below from the sample project or whatever images work for you, images are easier to
see the text which is why images were used here. Add a Timer component and create the Tick event for the timer. In the Tick event add code as shown below (can be found in the source code for this article) and add the method IsExcelInMemory. Now when coding
and testing Excel operations when you see the square image Excel is not in memory while the Excel image indicates Excel is still in memory. Excel is notorious for staying in memory even if no runtime exception was thrown. The number one reason because a run
time exception being thrown for Excel to stay in memory is when you have a line of code where you have more than two dots to access a method or property e.g. Excel.WorkBook.WorkSheet.Range where there should be one object for Excel, one for the WorkBook then
one for the Sheet so when we access the Sheet there is only one dot in the code. When there are more than two dots the underlying COM objects will not release properly and tend to hang around in memory.
In each code sample for this article that demonstrates Excel automation, there are zero lines of code that have more than one dot in a method call to Excel for this very reason.
Another way to determine issues is to use an event in the class which does Excel operations. The following is an excerpt from the code provided with this article.
public
class
ExaminerEventArgs : EventArgs
{
public
ExaminerEventArgs(string
message)
{
StatusMessage = message;
}
public
string
StatusMessage { get;
set; }
}
public
EventHandler<ExaminerEventArgs> ProgressUpdated;
private
void
OnProgressUpdated(string
message)
{
ProgressUpdated?.Invoke(this,
new
ExaminerEventArgs(message));
}
Then at key areas in your code call OnProgressUpdate in the class which in turn (in this case) displays your text in a ListBox. We could instead write to a text file yet for development purposes immediate results are better.
xlWorkBooks = xlApp.Workbooks;
xlWorkBook = xlWorkBooks.Open(fileName);
OnProgressUpdated("Opened");
#region Timer logic
private
bool
IsExcelInMemory()
{
return
Process.GetProcesses().Any(p => p.ProcessName.Contains("EXCEL"));
}
private
void
timer1_Tick(object
sender, EventArgs e)
{
if
(IsExcelInMemory())
{
toolStripStatusLabel1.Image = Properties.Resources.ExcelInMemory;
}
else
{
toolStripStatusLabel1.Image = Properties.Resources.ExcelNotInMemory;
}
toolStripStatusLabel1.Invalidate();
}
#endregion
Figure 2 (top image shows Excel is not in memory while the second indicates Excel is still in memory)

Coupling up the status image and event for displaying where we are at in code can greatly assist with debugging issues with Excel automation code in tangent with not using more than two dots in a call to Excel.
Another way to reduce the chances of objects staying in memory to avoid exceptions is to wrap the code which may have issues with a try-catch-finally. The first step is to create a list of objects, each time a new object is
used to interact with Excel is created we add this object to the list. Then if an exception is thrown release the objects created prior to the exception. Chances are this will clutter your code to the point that it may become unmaintainable so the next option
is to discard the try-catch-finally and fully test your code but leave the list of objects part.
In the following example a list of objects is created, each time an Excel object is created it’s added to the list. Once the Excel operations are completed the objects are disposed. There is one exception to using the list of
objects in the code sample presented below which is locating the intended WorkSheet to read via a for-next if the current sheet in the iteration is not the sheet we want to read then dispose of this object immediately. This is done, in this case by using a
C# 7 feature, local function and if not using C# 7 the method ReleaseComObject would be moved outside the method with a private scope.
public
void
ReadCells(string
pFileName, string
pSheetName)
{
void
ReleaseComObject(object
pComObject)
{
try
{
Marshal.ReleaseComObject(pComObject);
pComObject =
null;
}
catch
(Exception)
{
pComObject =
null;
}
}
var annihilationList =
new
List<object>();
var proceed =
false;
Excel.Application xlApp =
null;
Excel.Workbooks xlWorkBooks =
null;
Excel.Workbook xlWorkBook =
null;
Excel.Worksheet xlWorkSheet =
null;
Excel.Sheets xlWorkSheets =
null;
Excel.Range xlCells =
null;
xlApp =
new
Excel.Application();
annihilationList.Add(xlApp);
xlApp.DisplayAlerts =
false;
xlWorkBooks = xlApp.Workbooks;
annihilationList.Add(xlWorkBooks);
xlWorkBook = xlWorkBooks.Open(pFileName);
annihilationList.Add(xlWorkBook);
xlApp.Visible =
false;
xlWorkSheets = xlWorkBook.Sheets;
annihilationList.Add(xlWorkSheets);
for
(var intSheet = 1; intSheet <= xlWorkSheets.Count; intSheet++)
{
try
{
xlWorkSheet = (Excel.Worksheet)xlWorkSheets[intSheet];
if
(xlWorkSheet.Name == pSheetName)
{
proceed =
true;
break;
}
else
{
ReleaseComObject(xlWorkSheet);
}
}
catch
(Exception ex)
{
HasErrors =
true;
ExceptionInfo.UnKnownException =
true;
ExceptionInfo.Message = $"Error finding sheet: '{ex.Message}'";
ExceptionInfo.FileNotFound =
false;
ExceptionInfo.SheetNotFound =
false;
proceed =
false;
annihilationList.Add(xlWorkSheet);
}
}
if
(!proceed)
{
var firstSheet = (Excel.Worksheet)xlWorkSheets[1];
xlWorkSheet = xlWorkSheets.Add(firstSheet);
xlWorkSheet.Name = pSheetName;
annihilationList.Add(firstSheet);
annihilationList.Add(xlWorkSheet);
xlWorkSheet.Name = pSheetName;
proceed =
true;
ExceptionInfo.CreatedSheet =
true;
}
else
{
if
(!annihilationList.Contains(xlWorkSheet))
{
annihilationList.Add(xlWorkSheet);
}
}
if
(proceed)
{
if
(!annihilationList.Contains(xlWorkSheet))
{
annihilationList.Add(xlWorkSheet);
}
foreach
(var key in
ReturnDictionary.Keys.ToArray())
{
try
{
xlCells = xlWorkSheet.Range[key];
ReturnDictionary[key] = xlCells.Value;
annihilationList.Add(xlCells);
}
catch
(Exception e)
{
HasErrors =
true;
ExceptionInfo.Message = $"Error reading cell [{key}]: '{e.Message}'";
ExceptionInfo.FileNotFound =
false;
ExceptionInfo.SheetNotFound =
false;
annihilationList.Add(xlCells);
xlWorkBook.Close();
xlApp.UserControl =
true;
xlApp.Quit();
annihilationList.Add(xlCells);
return;
}
}
}
else
{
/*
* Send information back to caller why we failed
*/
HasErrors =
true;
ExceptionInfo.SheetNotFound =
true;
ExceptionInfo.FileNotFound =
false;
}
// this is debatable, should we save the file after adding a non-existing sheet?
if
(ExceptionInfo.CreatedSheet)
{
xlWorkSheet?.SaveAs(pFileName);
}
xlWorkBook.Close();
xlApp.UserControl =
true;
xlApp.Quit();
ReleaseObjects(annihilationList);
}
public
voidReadCells(string
pFileName, string
pSheetName)
{
void
ReleaseComObject(object
pComObject)
{
try
{
Marshal.ReleaseComObject(pComObject);
pComObject =
null;
}
catch
(Exception)
{
pComObject =
null;
}
}
var annihilationList =
new
List<object>();
var proceed =
false;
Excel.Application xlApp =
null;
Excel.Workbooks xlWorkBooks =
null;
Excel.Workbook xlWorkBook =
null;
Excel.Worksheet xlWorkSheet =
null;
Excel.Sheets xlWorkSheets =
null;
Excel.Range xlCells =
null;
xlApp =
new
Excel.Application();
annihilationList.Add(xlApp);
xlApp.DisplayAlerts =
false;
xlWorkBooks = xlApp.Workbooks;
annihilationList.Add(xlWorkBooks);
xlWorkBook = xlWorkBooks.Open(pFileName);
annihilationList.Add(xlWorkBook);
xlApp.Visible =
false;
xlWorkSheets = xlWorkBook.Sheets;
annihilationList.Add(xlWorkSheets);
for
(var intSheet = 1; intSheet <= xlWorkSheets.Count; intSheet++)
{
try
{
xlWorkSheet = (Excel.Worksheet)xlWorkSheets[intSheet];
if
(xlWorkSheet.Name == pSheetName)
{
proceed =
true;
break;
}
else
{
ReleaseComObject(xlWorkSheet);
}
}
catch
(Exception ex)
{
HasErrors =
true;
ExceptionInfo.UnKnownException =
true;
ExceptionInfo.Message = $"Error finding sheet: '{ex.Message}'";
ExceptionInfo.FileNotFound =
false;
ExceptionInfo.SheetNotFound =
false;
proceed =
false;
annihilationList.Add(xlWorkSheet);
}
}
if
(!proceed)
{
var firstSheet = (Excel.Worksheet)xlWorkSheets[1];
xlWorkSheet = xlWorkSheets.Add(firstSheet);
xlWorkSheet.Name = pSheetName;
annihilationList.Add(firstSheet);
annihilationList.Add(xlWorkSheet);
xlWorkSheet.Name = pSheetName;
proceed =
true;
ExceptionInfo.CreatedSheet =
true;
}
else
{
if
(!annihilationList.Contains(xlWorkSheet))
{
annihilationList.Add(xlWorkSheet);
}
}
if
(proceed)
{
if
(!annihilationList.Contains(xlWorkSheet))
{
annihilationList.Add(xlWorkSheet);
}
foreach
(var key in
ReturnDictionary.Keys.ToArray())
{
try
{
xlCells = xlWorkSheet.Range[key];
ReturnDictionary[key] = xlCells.Value;
annihilationList.Add(xlCells);
}
catch
(Exception e)
{
HasErrors =
true;
ExceptionInfo.Message = $"Error reading cell [{key}]: '{e.Message}'";
ExceptionInfo.FileNotFound =
false;
ExceptionInfo.SheetNotFound =
false;
annihilationList.Add(xlCells);
xlWorkBook.Close();
xlApp.UserControl =
true;
xlApp.Quit();
annihilationList.Add(xlCells);
return;
}
}
}
else
{
/*
* Send information back to caller why we failed
*/
HasErrors =
true;
ExceptionInfo.SheetNotFound =
true;
ExceptionInfo.FileNotFound =
false;
}
// this is debatable, should we save the file after adding a non-existing sheet?
if
(ExceptionInfo.CreatedSheet)
{
xlWorkSheet?.SaveAs(pFileName);
}
xlWorkBook.Close();
xlApp.UserControl =
true;
xlApp.Quit();
ReleaseObjects(annihilationList);
}
The last line, ReleaseObjects in this case resides in a base class which the method above implements. During the releasing of objects care is taken to ensure no runtime exception is thrown. If objects do not release as expected
you can set a break-point in ReleaseObjects method, inspect the list, see if something does not seem correct, by not seem correct, you may inspect these objects and one or more may be null which means a debug session is in order to examine how the objects
were created.
public
void
ReleaseObjects(List<object> pAnnihilationList)
{
for
(var indexer = 0; indexer < pAnnihilationList.Count; indexer++)
{
try
{
if
(pAnnihilationList[indexer] != null)
{
Marshal.ReleaseComObject(pAnnihilationList[indexer]);
pAnnihilationList[indexer] =
null;
}
}
catch
(Exception)
{
pAnnihilationList[indexer] =
null;
}
}
}
Keeping with disposal of objects, a quick search on the web for “kill Excel…” is all over the web. There will be suggestions such as
private
void
KillSpecificExcelFileProcess(string
excelFileName)
{
var processes = from p
in
Process.GetProcessesByName("EXCEL")
select p;
foreach
(var process in
processes)
{
if
(process.MainWindowTitle == "Microsoft Excel - "
+ excelFileName)
process.Kill();
}
}
Which look great and most of the time work yet the problem lies in a poor understanding of how to put objects together and dispose of them. By having proper understanding of how each object is created, used and disposed of the
only time for code presented above is while in the process of writing your code and a mistake is made causing Excel to stay in memory.
Here is a brute force method to release objects.
GC.Collect();
GC.WaitForPendingFinalizers();
GC.Collect();
GC.WaitForPendingFinalizers();
Again this is only needed when the developer created objects incorrectly. The number one reason is the developer interacted with Excel, changed objects and properties together passing two dots in the call to get at a property
in very common.
The number one reason for not releasing objects correctly as mentioned is from not understanding how to create and use objects but where does this originate from? Old code samples on the web where developers perhaps wrote code
in a code module within Excel, the code worked so it was ported to a Visual Studio project. While in Excel modules Excel took care of releasing objects internally and the developers who ported code from Excel to a project did not understand this or that most
of the time (but not all of the time) objects were released upon closing the project as the GC (Garbage Collector) disposed of these objects. Yet some object will never release as expected when a) violating the two-dot rule or when the construction of a command
is done incorrectly.
The following example works as expected and releases objects but note there is very little that might cause objects not to release.
public
void
ExportToDelimited_1()
{
Excel.Application xlApp =
new
Excel.Application();
Excel.Workbook xlWorkBook =
null;
string
exportFileName = null;
xlApp.Visible =
false;
xlWorkBook = xlApp.Workbooks.Open(Path.Combine(
AppDomain.CurrentDomain.BaseDirectory,
"People.xlsx"));
exportFileName = Path.Combine(AppDomain.CurrentDomain.BaseDirectory,
"People.csv");
xlWorkBook.SaveAs(exportFileName, Excel.XlFileFormat.xlCSV);
xlWorkBook =
null;
xlApp.Quit();
}
We got away with releasing all object yet as mentioned earlier this can lead to a false sense of security that objects were released. Better to always release objects as shown below in a modified version of the last code sample.
Note more objects were used which is how we take full control of the executing code.
public
void
ExportToDelimited_2()
{
void
ReleaseComObject(object
pComObject)
{
try
{
Marshal.ReleaseComObject(pComObject);
pComObject =
null;
}
catch
(Exception)
{
pComObject =
null;
}
}
Excel.Application xlApp =
null;
Excel.Workbooks xlWorkBooks =
null;
Excel.Workbook xlWorkBook =
null;
Excel.Worksheet xlWorkSheet =
null;
xlApp =
new
Excel.Application();
xlApp.DisplayAlerts =
false;
xlWorkBooks = xlApp.Workbooks;
xlWorkBook = xlWorkBooks.Open(Path.Combine(
AppDomain.CurrentDomain.BaseDirectory,
"People.xlsx"));
xlWorkSheet = (Excel.Worksheet)xlWorkBook.ActiveSheet;
xlWorkBook.SaveAs(Path.Combine(AppDomain.CurrentDomain.BaseDirectory,
"People.csv"),
FileFormat: Excel.XlFileFormat.xlCSVWindows);
xlWorkBook.Close();
xlApp.UserControl =
true;
xlApp.Quit();
ReleaseComObject(xlWorkSheet);
ReleaseComObject(xlWorkBook);
ReleaseComObject(xlWorkBooks);
ReleaseComObject(xlApp);
}
When working with Excel automation be proactive, consider that whenever working with Excel automation that an object may not be released so take it upon yourself to fully test the code and release objects one by one.
OleDb option for exporting
Keeping with exporting a DataGridView bound or unbound with no formatting, a consideration should be with using OleDb. The main issue with interacting with Excel using OleDb is getting the connection string correct. There are
several pieces to a connection string.
The main parts we are interested are as follows.
Provider which is either Microsoft.Jet.OLEDB.4.0 for .xls file format or Microsoft.ACE.OLEDB.12.0 for .xlsx file format. Either is consider the OleDb data provider to interact with Microsoft Excel.
Extended properties
- HDR: It represents Header of the fields in the excel table. Default is YES. If you don’t have fieldnames in the header of your worksheet, you can specify HDR=NO which will take the columns of the tables that
it finds as F1,F2 etc. where Fn represents a column e.g. F1 is column A, F2 is column B. If when displaying data in a DataGridView for example where the first row is data and we don’t specify column names then we will see Fn for column names. Since when reading
data A SELECT statement of SELECT * with three columns of data the DataGridView would show F1 F2 and F3 but if we were to write SELCT F1 As FirstName, F2 As LastName, F3 As Country then as with any SQL SELECT statement the alias names for the column will display
and when interacting with these columns the aliases would be used except for the ORDER BY or WHERE clauses. In a section below a read operation is performed which shows how to read data that has unexpected data types, not mixed but simply not what we where
expecting.
- IMEX: This attribute works in tangent with MaxScanRows attribute when dealing with mixed data. Mixed data refers to the following. In the first eight rows of a WorkSheet in a column, all data is of one type vs
eight rows of data where there may be strings in three rows, numeric to four rows and one row with a date, this is mixed data. Excel attempts to figure out what type of data is in a column and rows which is known as a range. If there is mixed data in the first
eight rows what you get back may not be what you expected. For instance, if there are 100 rows of data which is mixed data and you expected dates you might get all rows typed as strings or even a numeric. If you were to get back data as numbers, more specifically
a double there is a method DateTime.FromOADate which returns a DateTime equivalent to the specified OLE Automation Date. IMEX can be set to allow read-only access or read-write access. The suggested setting for most operations is IMEX=1.
What is common for a connection string is as follows (note ,xls file format is shown yet the same holds true for .xlsx)
string
connectionstring = "Provider=Microsoft.Jet.OLEDB.4.0; Data Source=c:\testexcel.xls; Extended Properties"Excel 8.0;HDR=YES"";
If you need to experiment with a connection string to get it right rather than using string concatenation directly in your code a class can be setup as follows.
namespace
ExcelOperations.OleDbWork
{
public
enum
ExcelHeader
{
Yes,
No
}
public
class
SmartConnection
{
public
string
ConnectionString(string
pFileName, int
pImex = 1, ExcelHeader pHeader = ExcelHeader.No)
{
OleDbConnectionStringBuilder builder =
new
OleDbConnectionStringBuilder();
if
(System.IO.Path.GetExtension(pFileName)?.ToUpper() ==
".XLS")
{
builder.Provider =
"Microsoft.Jet.OLEDB.4.0";
builder.Add("Extended Properties", $"Excel
8.0;IMEX={pImex};HDR={pHeader.ToString()};");
}
else
{
builder.Provider =
"Microsoft.ACE.OLEDB.12.0";
builder.Add("Extended Properties", $"Excel
12.0;IMEX={pImex};HDR={pHeader.ToString()};");
}
builder.DataSource = pFileName;
return
builder.ConnectionString;
}
}
}
To create a new connection, create a new instance of SmartConnection class. Call ConnectionString with the file name to read, IMEX setting followed by Yes or No for setting up the connection for first row as data or first row
as column names. The file name is as setup the only required argument to be passed to the method unless IMEX or header arguments need to be overridden. This way there is string concatenation in the method which creates the connection.
Note in the method ConnectionString there is a class used, OleDbConnectionStringBuilder which makes life easy to setup the connection. Not only can a connection be created but also broken apart later for examination or to change
the connection.
Getting back to exporting data, there are no methods for creating an Excel file with OleDb data provider. The best course here is to have a blank Excel file ready to use. This file might be stored in a folder below the application
folder when needed copy the file to where you need the user of the application to access the file. Once the file has been copied (and renamed if needed) you can open the Excel file and import data from a DataTable or a List of a concrete class.
Another method to have a new file is to include a third-party library for the sole purpose of creating a new Excel file. There are several out there, one is called SpreadSheetLight
(there are code samples in the code samples provided with this article) which is a free library installable via NuGet Package manager. If you are the type that enjoys writing code rather than uses a library see
the following article which explains how to create an Excel file using OpenXml.
In the code samples provided here is part of the process to import a DataTable into an Excel file. The full code is setup and ready to run to test this method out.
public
void
ExportDataTableToExcel(string
pFileName, DataTable pDataTable)
{
mHasException =
false;
/*
* Create field names for the create table (worksheet)
*/
var columnsPartsForCreateSheet = pDataTable.Columns.OfType<DataColumn>()
.Select(col => $"{col.ColumnName.Replace("Column",
"")} CHAR(255)")
.ToArray();
/*
* Turn column name and type into a delimited string for the actual create statement
* below.
*/
var columnsForCreateSheet =
string.Join(",", columnsPartsForCreateSheet);
/*
* Full SQL INSERT statement
*/
var createStatement = $"CREATE TABLE {pDataTable.TableName} ({columnsForCreateSheet})";
/*
* Column names for the INSERT SQL staetment.
*/
var columnsPartsForInsert = pDataTable.Columns.OfType<DataColumn>()
.Select(col => col.ColumnName.Replace("Column",""))
.ToArray();
/*
* Create named parameters for the insert statement. Note that OleDb
* does not 'use' named parameters so we could had used a question mark
* for each parameter name as OleDb parameters are done in ordinal position
* which the parameters are anyways. The idea is for developers to get
* use to named parameters as when moving to SQL-Server named parameters
* allow parameters to be set out of order
*/
var paramsForInsert = pDataTable.Columns.OfType<DataColumn>()
.Select(col =>
"@" + col.ColumnName.Replace("Column",""))
.ToArray();
/*
* Insert statement for populating rows in the WorkSheet.
*/
var insertStatement =
$"INSERT INTO {pDataTable.TableName} ({string.Join(",",
columnsPartsForInsert)}) + "+
$"VALUES ({string.Join(",",
paramsForInsert)})";
try
{
var con =
new
SmartConnection();
/*
* IMPORTANT: In the connection string, second parameter must be IMEX = 0 for this to work.
*/
using
(var cn = new
OleDbConnection(con.ConnectionString(pFileName,0, ExcelHeader.Yes)))
{
using
(var cmd = new
OleDbCommand { Connection = cn })
{
cmd.CommandText = createStatement;
cn.Open();
/*
* Create the WorkSheet
*/
cmd.ExecuteNonQuery();
/*
* Change our commandText for the INSERT
*/
cmd.CommandText = insertStatement;
/*
* Create parameters once rather than creating them for each
* iteration of an insert, clearing or re-creating the parameters.
*/
foreach
(var pName in
paramsForInsert)
{
cmd.Parameters.Add(pName, OleDbType.VarWChar);
}
/*
* Insert row into the WorkSheet.
*/
for
(int
rowIndex = 0; rowIndex < pDataTable.Rows.Count ; rowIndex++)
{
for
(int
colIndex = 0; colIndex < pDataTable.Columns.Count ; colIndex++)
{
/*
* Set each parameter's value
*/
cmd.Parameters[colIndex]
.Value = pDataTable.Rows[rowIndex]
.Field<string>(pDataTable.Columns.IndexOf(pDataTable.Columns[colIndex]));
}
cmd.ExecuteNonQuery();
}
}
}
}
catch
(Exception e)
{
mHasException =
true;
mLastException = e;
}
}
/// <summary>
/// Get WorkSheet names for a specific Excel file
/// </summary>
/// <param name="pFileName"></param>
/// <returns></returns>
public
List<string> SheetNames(string
pFileName)
{
mHasException =
false;
var names =
new
List<string>();
var con =
new
SmartConnection();
try
{
using
(var cn = new
OleDbConnection(con.ConnectionString(pFileName)))
{
cn.Open();
var dt = cn.GetSchema("Tables",
new
string[] { null,
null,
null,
"Table" });
foreach
(DataRow row in
dt.Rows)
{
names.Add(row.Field<string>("Table_Name").Replace("$",
""));
}
}
}
catch
(Exception ex)
{
mHasException =
true;
mLastException = ex;
}
return
names.Distinct().ToList();
}
The above shows one method to handle writing data to a WorkSheet, there are many other methods which can be used, this is one to help getting into writing data to a WorkSheet.
In the section above for setting up a connection for columns aliasing and unexpected data types there may be cases where the data types are different than expected. Suppose the operation calls for reading a WorkSheet into a list.
A connection is opened, a command object is setup, ExecuteReader is invoked off the command and while iterating the data a run time exception is thrown indicating the type you are asking for is incorrect and does not make sense so you try a different type
and this fails too. One way around this is to keep existing code, add code to read the data into a DataTable then iterate the columns and see what the data types are reported back as. For instance, you attempted to get column A as a Integer and failed. We
iterate the columns and see that what was returned as a Double, this now tells us to read column A as a Double. Column D was thought to be a Date but by iterating the columns what is reported is a string. This means a conversion is in order.
Here we have a reader to read by iterating results from the command object and also using the reader to populate a DataTable. The DataTable code can be removed once the data types are known. They have been left in for you the
reader to see this process in action by adding the DataTable and not disturbing the reader code for iterating data.
public
void
ReadPeopleNoHeaderRow(string
pFileName, string
pSheetName)
{
mHasException =
false;
List<Person> peopleList =
new
List<Person>();
var con =
new
SmartConnection();
var dt =
new
DataTable();
try
{
using
(var cn = new
OleDbConnection { ConnectionString = con.ConnectionString(pFileName, 1, ExcelHeader.No) })
{
var selectStatement =
"SELECT F1 AS Identifer, F2 AS FirstName, F3 As LastName, "
+
"F4 AS Gender, F5 As BirthDate "
+
$"FROM [{pSheetName}$]";
using
(var cmd = new
OleDbCommand { Connection = cn, CommandText = selectStatement })
{
cn.Open();
var reader = cmd.ExecuteReader();
dt.Load(reader);
reader.Close();
reader = cmd.ExecuteReader();
while
(reader != null
&& reader.Read())
{
peopleList.Add(new
Person()
{
Id = Convert.ToInt32(reader.GetDouble(0)),
FirstName = reader.GetString(1),
LastName = reader.GetString(2),
Gender = Convert.ToInt32(reader.GetDouble(3)),
BirthDay = Convert.ToDateTime(reader.GetString(4))
});
}
reader.Close();
}
}
}
catch
(Exception ex)
{
mHasException =
true;
mLastException = ex;
}
foreach
(DataColumn col in
dt.Columns)
{
Console.WriteLine(col.DataType.ToString());
}
}
The following shows a clean example of reading data from a WorkSheet into a List. The class is different from above but the same process.
public
List<Customer> ReadCustomers(string
pFileName)
{
mHasException =
false;
var selectStatement =
"SELECT CompanyName, ContactName,ContactTitle FROM [Customers$]";
List<Customer> customers =
new
List<Customer>();
var con =
new
SmartConnection();
try
{
using
(var cn = new
OleDbConnection { ConnectionString = con.ConnectionString(pFileName,1, ExcelHeader.Yes) })
{
using
(var cmd = new
OleDbCommand { Connection = cn, CommandText = selectStatement })
{
cn.Open();
var reader = cmd.ExecuteReader();
while
(reader != null
&& reader.Read())
{
customers.Add(new
Customer()
{
CompanyName = reader.GetString(0),
ContactName = reader.GetString(1),
ContactTitle = reader.GetString(2)
});
}
}
}
}
catch
(Exception ex)
{
mHasException =
true;
mLastException = ex;
}
return
customers;
}
Other operations that OleDb excels at (although in some cases OpenXML is a better choice) is transferring data from a database directly to Excel. See
the following code sample for transferring MS-Access to Excel. Going in the opposite direction, this time switching it up to transfer from SQL-Server to Excel see
the following code sample. There is a bit more work involved for this process which is explained in the code sample and to get started is best to do the steps in SQL-Server Management
Studio.
Using OpenXML
So far Excel automation and OleDb have been touched on, another option for working with Excel is using OpenXml. The downside to working with OpenXML is there are many more moving parts and with that, without fully understanding
how pieces need to fall into place the end result is typically an unusable file. Unlike Excel automation, OpenXML does not leave objects in memory if there is an exception thrown at runtime.
The following code sample creates a new Excel file, a WorkSheet and populates the sheet with a list of a class.
public
void
CreateExcelDocPopulateWithPeople(string
pFileName, string
pSheetName, List<Person> pList)
{
mHasException =
false;
try
{
using
(var document = SpreadsheetDocument.Create(pFileName, SpreadsheetDocumentType.Workbook))
{
WorkbookPart wbp = document.AddWorkbookPart();
wbp.Workbook =
new
Workbook();
var wsp = wbp.AddNewPart<WorksheetPart>();
wsp.Worksheet =
new
Worksheet();
var sheets = wbp.Workbook.AppendChild(new
Sheets());
var sheet =
new
Sheet()
{
Id = wbp.GetIdOfPart(wsp),
SheetId = 1,
Name =
"People"
};
// ReSharper disable once PossiblyMistakenUseOfParamsMethod
sheets?.Append(sheet);
wbp.Workbook.Save();
WorkbookStylesPart stylePart = wbp.AddNewPart<WorkbookStylesPart>();
stylePart.Stylesheet = CreateStylesheet();
stylePart.Stylesheet.Save();
var sheetData = wsp.Worksheet.AppendChild(new
SheetData());
var headerRow = sheetData.AppendChild(new
Row());
headerRow.AppendChild(new
Cell()
{
CellValue =
new
CellValue("Id"),
DataType = CellValues.String,
StyleIndex = 2
});
headerRow.AppendChild(new
Cell()
{
CellValue =
new
CellValue("First Name"),
DataType = CellValues.String,
StyleIndex = 2
});
headerRow.AppendChild(new
Cell()
{
CellValue =
new
CellValue("Last Name"),
DataType = CellValues.String,
StyleIndex = 2
});
headerRow.AppendChild(new
Cell()
{
CellValue =
new
CellValue("Gender"),
DataType = CellValues.String,
StyleIndex = 2
});
headerRow.AppendChild(new
Cell()
{
CellValue =
new
CellValue("Birthday"),
DataType = CellValues.String,
StyleIndex = 2
});
// insert people data
foreach
(var person in
pList)
{
var row =
new
Row();
row.Append(
ConstructCell(person.Id.ToString(), CellValues.Number),
ConstructCell(person.FirstName, CellValues.String),
ConstructCell(person.LastName, CellValues.String),
ConstructCell(person.Role, CellValues.String),
ConstructCell(person.BirthDay.ToString("MM/dd/yyyy"),
CellValues.String));
sheetData.AppendChild(row);
}
wsp.Worksheet.Save();
}
}
catch
(Exception ex)
{
mHasException =
true;
mLastException = ex;
}
}
private
Stylesheet CreateStylesheet()
{
Stylesheet styleSheet =
null;
// 0 is default
// 1 is header
var fonts =
new
Fonts(
new
Font(new
FontSize() { Val = 10 }),
new
Font(new
FontSize() { Val = 12 },new
Bold(),new
Color() { Rgb = "FFFFFF"
}));
var fills =
new
Fills(
new
Fill(new
PatternFill() { PatternType = PatternValues.None }),
// Index 0 - default
new
Fill(new
PatternFill() { PatternType = PatternValues.Gray125 }),
// Index 1 - default
new
Fill(new
PatternFill(new
ForegroundColor { Rgb = new
HexBinaryValue() { Value = "000000"
} })
{ PatternType = PatternValues.Solid })
// Index 2 - header
);
var borders =
new
Borders(
new
Border(),
new
Border(
new
LeftBorder(new
Color() { Auto = true
}) { Style = BorderStyleValues.None },
new
RightBorder(new
Color() { Auto = true
}) { Style = BorderStyleValues.None },
new
TopBorder(new
Color() { Auto = true
}) { Style = BorderStyleValues.Thin },
new
BottomBorder(new
Color() { Auto = true
}) { Style = BorderStyleValues.Thin },
new
DiagonalBorder())
);
var cellFormats =
new
CellFormats(
new
CellFormat(), // default
new
CellFormat { FontId = 0, FillId = 0, BorderId = 1, ApplyBorder =
true
}, // body
new
CellFormat { FontId = 1, FillId = 2, BorderId = 1, ApplyFill =
true
} // header
);
styleSheet =
new
Stylesheet(fonts, fills, borders, cellFormats);
return
styleSheet;
}
/// <summary>
/// Construct cell of specific type
/// </summary>
/// <param name="value"></param>
/// <param name="dataType"></param>
/// <returns></returns>
private
Cell ConstructCell(string
value, CellValues dataType)
{
return
new
Cell()
{
CellValue =
new
CellValue(value),
DataType =
new
EnumValue<CellValues>(dataType)
};
}
When working with OpenXML it’s best to take your time and learn how things fit together rather than attempting to code this in a project on a tight timeline.
In the code that comes with this article, there are several examples of working with OpenXML which will allow you to get a handle on coding with OpenXML.
Comparing Excel Automation, OleDb and OpenXML performance.
When working with a fair amount of data e.g. thousands of rows and a fair amount of columns Excel automation is the slowest followed by OleDb. OpenXML is lighting fast yet as mention above the downside is OpenXML is more difficult
to grasp for someone with zero experience with OpenXML. This is one reason developers will work with Excel automation yet the pitfalls here is ensuring all objects are released. OleDb has pitfalls also, no method to create a new Excel file or to format cells.
Which one should you use? This is dependent on the task, is there a lot of data, first look at OpenXML. Is there a good deal of formatting, consider time which is needed to work out styles in OpenXML. With the samples provided
they give you a decent start. Is the task simply to export to Excel without formatting and is not a huge data set then consider OleDb in tangent (if needed) with the new file idea mentioned above.
Another road block with OleDb is learning where to append data too while with OpenXML and Excel automation there are methods which will provide the last used row and last used column in a WorkSheet. The library mentioned above
SpreadSheetLight also provides last used row and column (this is because at its core it OpenXML).
Some developers who frequently work with Excel will sometimes use OleDb while other times Excel automation and perhaps other times OpenXML.
There is another method which is to create a anML template for an Excel file/WorkSheet and use
embedded expressions coupled with
XML literals. The only issue is this is only possible with VB.NET. Since C# does not support this the way around this issue is to create a VB.NET class project and call the VB.NET methods from the C# project.
Steps to write this up.
Create a new Excel file as Excel 2003 XML. Create your column headers and style the headers then save the file which you can open in NotePad and then copy into a method in a class as a XDocument.
Next, locate the worksheet node e.g.
<Worksheet
ss:Name="People">
The next element is the table element
<Table
ss:ExpandedColumnCount=<%= columnCount %> ss:ExpandedRowCount=<%= customers.Count + 1 %> x:FullColumns="1"
Note columnCount and customers.Count, these refer to the count of columns and rows in the data source. The DataSource could be a DataTable or a List of a class.
This is followed by locating the row element directly below the Table element. Here we setup the column names followed by the data source.

The last step is to save the xml as a .xml file. When a user double clicks on the xml file in Windows Explorer Excel is the default program which will open the xml file. Once in Excel do a save as Excel 2007 format and now you
have a proper Excel file. This may not be for everyone but the benefit of this method is working with huge data sets is extremely fast.
Exception Handling
When working with Excel no matter which path is taken there should be proper exception handling rather than simply writing code and expecting it to function. For instance, a user creates an Excel file from your application then
opens the Excel file outside of the application. Then they forget and run the process again and fails because the file is open and can’t be created. Another failure point is when working with Excel automation the customer gets an update to Office with updates
the version of Excel Interop library and causes a runtime exception because the newer software is incompatible with methods used to perform operations you coded into the application.
For a repeatable pattern consider creating a base exception class which your class performing Excel operations implements.
A basic exception class
using System;
using System.Data.SqlClient;
namespace ExceptionsLibrary
{
public class BaseExceptionsHandler
{
protected bool mHasException;
/// <summary>
/// Indicate the last operation thrown an
/// exception or not
/// </summary>
/// <returns></returns>
public bool HasException => mHasException;
protected Exception mLastException;
/// <summary>
/// Provides access to the last exception thrown
/// </summary>
/// <returns></returns>
public Exception LastException => mLastException;
/// <summary>
/// Indicates if there was a sql related exception
/// </summary>
public bool HasSqlException => mLastException is SqlException;
/// <summary>
/// If you don't need the entire exception as in
/// LastException this provides just the text of the exception
/// </summary>
/// <returns></returns>
public string LastExceptionMessage => mLastException.Message;
/// <summary>
/// Indicate for return of a function if there was an
/// exception thrown or not.
/// </summary>
/// <returns></returns>
public bool IsSuccessFul => !mHasException;
}
}
Setup for a class working with Excel
public
class
OpenXmlExamples : BaseExceptionsHandler
Using with Open XML
public
void
CreateNewFile(string
pFileName, string
pSheetName)
{
mHasException =
false;
try
{
using
(var doc = SpreadsheetDocument.Create(pFileName, SpreadsheetDocumentType.Workbook))
{
var wbp = doc.AddWorkbookPart();
wbp.Workbook =
new
Workbook();
var wsp = wbp.AddNewPart<WorksheetPart>();
wsp.Worksheet =
new
Worksheet(new
SheetData());
var sheets = wbp.Workbook.AppendChild(new
Sheets());
var sheet =
new
Sheet()
{
Id = wbp.GetIdOfPart(wsp),
SheetId = 1,
Name = pSheetName
};
sheets?.Append(sheet);
wbp.Workbook.Save();
}
}
catch
(Exception ex)
{
mHasException =
true;
mLastException = ex;
}
}
With OleDb
public
List<string> SheetNames(string
pFileName)
{
mHasException =
false;
var names =
new
List<string>();
var con =
new
SmartConnection();
try
{
using
(var cn = new
OleDbConnection(con.ConnectionString(pFileName)))
{
cn.Open();
var dt = cn.GetSchema("Tables",
new
string[] { null,
null,
null,
"Table" });
foreach
(DataRow row in
dt.Rows)
{
names.Add(row.Field<string>("Table_Name").Replace("$",
""));
}
}
}
catch
(Exception ex)
{
mHasException =
true;
mLastException = ex;
}
return
names.Distinct().ToList();
}
Keeping with the last example, if there is no exception a list of strings is returned and if there is an exception a empty list of strings is returned. We can see if there was an exception or not as follows
private
void
cmdGetSheetNamesAutomation_Click(object
sender, EventArgs e)
{
var example =
new
ExcelBaseExample();
var fileName = Path.Combine(AppDomain.CurrentDomain.BaseDirectory,
"Customers.xlsx");
var sheetNames = example.GetWorkSheetNames(fileName);
if
(!example.HasErrors)
{
sheetNames.Insert(0,
"Select sheet");
cboSheetNamesAutomation.DataSource = sheetNames;
}
else
{
// notifiy user
}
}
Location of excel operations
The best place for these operations is not within a form but instead within a class dedicated to working with Excel. This is no different than where should operations go for interacting with databases. We can decouple the Excel
operations into a class project so that if other projects need similar functionality all you need to do is add a reference to the class project with Excel operations.
Within the supplied code samples this is shown, Excel operations are in their own class project. The following screen shot is from the code sample which goes with this article. Note that specific operations are separated into
various class projects and are all used in MainApplication. Several of the class projects were brought in from other solutions and simply work as they were intended to be plug and play.
Conclusions
There is more than one way to work with Excel, which method is best all depends on your requirements. In this article I, have briefly touched on several methods to interact with Excel. In part two of this series formatting of cells will be discussed along with
working with ranges, references tables. Part three in this series will cover reporting which includes working with charts. Part four in the series will deal with working with mixed data types along with suggestions for importing and exporting data from unknown
sources.
Special Note
When trying out the demonstrations in the sample code, when the main application executes Excel files in the bindebug folder are removed and or removed with fresh copies. This means for any write operations done on the last
execution will be lost on the new execution. All files which are expected to be in the application folder are in a folder at solution level. All operations are within the FolderLibrary project and are called in FormShown event of the main form.
NuGet packages used in the solution, there are a great deal of packages which in short are required by Open XML. So don’t be alarmed by the list of packages.
To list all packages in the NuGet console
Get-Package | ft -AutoSize
See also
Excel patterns for properly releasing memory once finished with Excel operations (C#).
Excel get last row and column for sheet, column or range (C#).
Export Excel from SQL-Server (VB.NET and C#).
DataGridView unbound to Excel or Text file (C#).
Alternate methods for with Microsoft Excel in VB.NET projects.
Export MS-Access table to MS-Excel Worksheet (VB.NET and C#).
Read ranges in Excel using OleDb data provider (VB.NET).
Set row height and column width for all cells in an Excel sheet using automation (VB.NET with C# helpers).
Open XML SDK.
Open XML SDK on GitHub.
Excel Object Model Overview.
This article describes the way to read or write into the excel workbook(or a file, used interchangeably) pro-grammatically using C#.NET language and ACE Oledb data providers by Microsoft.
This covers the following topics:
- System Requirements
- Development Environment
- Versions of Excel files which can be read or written
- How to build a connection string?
- How to build a command string?
- Possible errors and exceptions
System Requirements
To read/write the excel worksheet using ACE oledb providers, MS office need not to be installed on a machine. An installable package containing ACE oledb providers can be installed from ACE OLEDB Installer Location
Go to this link to install the required version and also check the system requirements.
Note: You can install either 32 bits version or 64 bits version but not both. Also, if you have 64 bits office installed then you can’t install 32 bits ACE oledb and vice versa.
Check the requirements carefully on the page.
Development Environment
- ACE 12.0 oledb Data Providers dlls
- Development IDE – Visual Studio [or simple Notepad]
Versions of Excel files which can be read or written
This ACE 12.0 oledb data provider can carry out operations on all excel files till version 2010.
How to build a Connection String?
A typical example of connection string:
Provider=Microsoft.ACE.OLEDB.8.0;Data Source=;Extended Properties="Excel 8.0;"
Below is the description for each part:
- Provider : It is the main oledb provider that is used to open the excel sheet. This can be Microsoft.Jet.OLEDB.4.0 for Excel 97 onwards Excel file format or Microsoft.ACE.OLEDB.12.0. So far it is tested with upto Excel 2010 version.
- Data Source : It is the full path of the excel workbook. Replace with the full path of your existing excel workbook/ file.
- Extended Properties (Optional) : Extended properties can be applied to Excel workbooks which may change the overall activity of the excel workbook from your program. The most common ones are the following :
- HDR : It represents Header of the fields in the excel table. Default is YES. If you dont have fieldnames in the header of your worksheet, you can specify HDR=NO which will take the columns of the tables that it finds as f1,f2 etc.
- ReadOnly : You can also open excel workbook in readonly mode by specifying ReadOnly=true; By Default Readonly attribute is false, so you can modify data within your workbook
- FirstRowHasNames : It is the same as HDR, it is always set to 1 ( which means true) you can specify it as false if you dont have your header row. If HDR is YES provider disregards this property. You can change the default behaviour of your environment by changing the Registry Value- [HKLMSoftwareMicrosoftJet4.0EnginesExcelFirstRowHasNames] to 00 (which is false)
- MaxScanRows : Excel does not provide the detailed schema defination of the tables it finds. It need to scan the rows before deciding the data types of the fields. MaxScanRows specifies the number of cells to be scanned before deciding the data type of the column. By default the value of this is 8. You can specify any value from 1 – 16 for 1 to 16 rows. You can also make the value to 0 so that it searches all existing rows before deciding the data type. You can change the default behaviour of this property by changing the value of [HKLMSoftwareMicrosoftJet4.0EnginesExcelTypeGuessRows] which is 8 by default. Currently MaxScanRows is ignored, so you need only to depend on TypeGuessRows Registry value. Hope Microsoft fixes this issue to its later versions
- IMEX : (A Caution) As mentioned above excel have to guess a number or rows to select the most appropriate data type of the column, a serious problem may occur of you have mixed data in one column. Say you have data of both integer and text on a single column, in that case excel will choose its data type based on majority of the data. Thus it selects the data for the majority data type that is selected, and returns NULL for the minority data type. If the two types are equally mixed in the column, the provider chooses numeric over text.
For e.g., In your eight (8) scanned rows, if the column contains five (5) numeric values and three (3) text values, the provider returns five (5) numbers and three (3) null values.
To work around this problem for data, set “IMEX=1” in the Extended Properties section of the connection string. This enforces the ImportMixedTypes=Text registry setting. You can change the enforcement of type by changing [HKLMSoftwareMicrosoftJet4.0EnginesExcelImportMixedTypes] to numeric as well
Thus if you look into the simple connectionstring with all of them, it will look like:
Provider=Microsoft.Jet.OLEDB.4.0;Data Source=E:\testexcel.xls;Extended Properties="Excel 8.0;HDR=YES;IMEX=1;MAXSCANROWS=15;READONLY=FALSE""
or
Provider=Microsoft.ACE.OLEDB.12.0;Data Source=E:\testexcel.xlsx;Extended Properties="Excel 12.0;HDR=YES;IMEX=1;MAXSCANROWS=15;READONLY=FALSE""
How to build a command string?
If you have ever written a MS SQL query then you will not have difficulty in writing a command string. Here, command strings are written or defined in the same fashion as in MS SQL.
Think of each excel sheet as a MS SQL table from which data is to be fetched. Thus, complete excel file as a database.
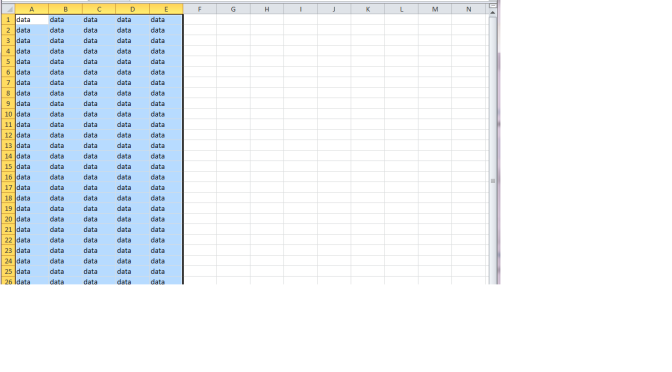
Below image is the snapshot of a sample excel sheet which we will try to read or write into.

Read Command String
In order to read the excel sheet, “SELECT” command is used. Either you may want to read the complete excel sheet or you may be interested in reading just a block of data. Both scenarios are supported and this is what us different from defining the MS SQL “Select” query.
Range (block of data) is defined using A2:R5 format.
Don’t worry about ranges. I have described it in the below section.
Here, as per the above command string, it will read all rows starting from row# ‘1’ and 5 columns from column# ‘A’ to ‘E’
Write Command String
This also corresponds to DML queries (INSERT,UPDATE and DELETE) in MS SQL.
You can write:
INSERT INTO [NameOfExcelSheet] VALUES('firsttextcol', 2, '4/11/2009');

[I assume First Column is char field, 2nd col is integer, 3rd is Date]
DELETE FROM [NameOfExcelSheet] Where secondintcol=2;
UPDATE [NameOfExcelSheet] SET secondintcol = 3 where firsttextcol = ‘firsttextcol’;
As in MS SQL, you can use [] (Square brackets) to allow spaces within column names and table names.
How to create an excel worksheet?
Simple. Use
Create table [NameOfExcelSheet] ()
For e.g. Create table [myTableName] (col1 int, col2 char(20))
How to Drop an excel workSheet?
To drop an excel worksheet, just use
Drop table [NameOfExcelSheet]
This will drop the worksheet.
Note:
- About Deleting Worksheet:
If this is the last worksheet, it will not delete the workbook file. You need to do it yourself. - About specifying ranges:
When you specify a worksheet as your source, the provider adds new records below existing records in the worksheet as space allows. When you specify a range (named or unnamed), Jet also adds new records below the existing records in the range as space allows. However, if you requery on the original range, the resulting recordset does not include the newly added records outside the range. Using MDAC you cannot add new rows beyond the defined limits of the range, otherwise you will receive Exception: “Cannot expand named range”
Possible errors and exceptions
- 1)”Microsoft.ACE.OLEDB.12.0-provider” is not registered
Reason:This is because of mismatch b/w compilation configuration in Visual Studio and the ACE version installed on the system.
Resolution:Make sure that both are same. Compile your app using the 64x bits if 64 bits ACE is installed or use 32 bits ACE.
SPONSORED

DRESS YOUR HAIR Like Never Before. Coming to YOU in United States By GKHAIR

Jaagrugta Failao – By Sunil Singhal
Провайдеры данных
Для работы с Excel 2003 (.Xls) можно использовать провайдер Microsoft Jet OLE DB 4.0.
SELECT * FROM OPENROWSET(
	'Microsoft.Jet.OLEDB.4.0',
	'Excel 12.0;Database=d:tmpTimeSheets.xlsx;HDR=YES;IMEX=1',
	'SELECT * FROM [Sheet1$]');
Для работы с Excel 2007 (.Xlsx) — Microsoft ACE OLEDB 12.0.
SELECT * FROM OPENROWSET (
    'Microsoft.ACE.OLEDB.12.0',
    'Excel 12.0;Database=d:tmpTimeSheets.xlsx;HDR=YES;IMEX=1',
    'SELECT * FROM [Sheet1$]');
В Windows 10 открыть настройки источников данных ODBC можно написав «Источники данных ODBC» или через Панель управления Администрирование.
Extended Properties
HDR=YES|NO. HDR=YES означает, что первую строку листа, следует рассматривать как заголовки колонок. Т.о. значение из первой строки можно использовать как имена полей в sql запросах (любых: select, insert, update, delete).IMEX=1|3. 1 — открыть соединение для чтения. 3 — для записи.
Создание Linked Server в Sql Server для доступа к Excel
EXEC sp_addLinkedServer
    @server= N'XLSX_2010',
    @srvproduct = N'Excel',
    @provider = N'Microsoft.ACE.OLEDB.12.0',
    @datasrc = N'd:tmpTimeSheets.xlsx',
    @provstr = N'Excel 12.0; HDR=Yes';
GO
После создания связанного сервера можно будет просмотреть имена доступных листов.
Затем, чтобы обратиться к сервису:
SELECT * FROM OPENQUERY (XLSX_2010, 'Select * from [Sheet1$]')
или
SELECT * FROM [XLSX_2010]...[Лист1$]
Обращение к лиcтам, диапазонам, полям
Для обращения к листу из SQL запроса нужно использовать имя листа, например: [Sheet1$] или [Лист1$]. Обращение к диапазону: [Sheet1$A16:F16].
Вставка данных в произвольное место
Примеры указания диапазона при вставке строк (insert)
- [table1$B4:E20]
- [table1$S4:U]
- [table1$F:G]
При вставке должны выполняться следующие условия:
- Первая строчка указанного диапазона дожна входить в диапазон ячеек с данными. Чтобы создать на листе диапазон с данными достаточно в углах некоторого прямоугольного диапазона (в левом верхнем и правом нижнем) вписать значение (C4:I7 на скриншоте). Т.е. сама первая строчка указанного в
insertдиапазона данные содержать не обязана, достаточно, чтобы она просто входила в такой диапазон. Иначе возникнет ошибка"This table contains cells that are outside the range of cells defined in this spreadsheet" - Хвост диапазона должен содержать пустые строки (хотя бы одну).
Пример: Дан лист, где заполнены только 2 ячейки: C4, I7. После выполнения команды INSERT INTO [table1$E6:G] VALUES(2, 'FF','2014-01-03') результат будет как на скриншоте. Поясним: строка E6:G6 является первой строкой диапазона для вставки. Она входит в заполненный диапазон C4:I7. Поэтому данные были вставлены на следующей пустой строке — 8. Из этого примера становится ясно, что через OleDb нельзя работать с несколькими независимыми диапазонами на одном листе, используя вставку (update будет работать).

Ошибки
System.Data.OleDb.OleDbException (0x80004005): Operation must use an updateable query. Соединение открыто для чтение, при этом происходит попытка внести изменения (выполнить insert, update или delete). Решение: открыть соединение для записи, установив свойство провайдера в строке соединения IMEX=3 (см. выше).System.Data.OleDb.OleDbException (0x80004005): "This table contains cells that are outside the range of cells defined in this spreadsheet". Такая ошибка возникает при подпытке обновить (update) или вставить (insert) значения в диапазоне, в котором отсутствуют данные на листе.- Если нужно произвести запись в определенные ячейки инструкцией update, то
Ссылки
- https://www.codeproject.com/Tips/705470/Read-and-Write-Excel-Documents-Using-OLEDB
- https://stackoverflow.com/questions/36987636/cannot-create-an-instance-of-ole-db-provider-microsoft-jet-oledb-4-0-for-linked
- https://stackoverflow.com/questions/26267224/the-ole-db-provider-microsoft-ace-oledb-12-0-for-linked-server-null
- http://www.ashishblog.com/importexport-excel-xlsx-or-xls-file-into-sql-server/
- https://yoursandmyideas.com/2011/02/05/how-to-read-or-write-excel-file-using-ace-oledb-data-provider/
- https://stackoverflow.com/questions/46373895/how-to-open-a-huge-excel-file-efficiently Несколько способов открыть большой Excel файл, в т.ч. с помощью OleDb.
Read and write Excel files with C# using OLEDB on x86 and x64 platforms
Excel is a common format for storing tabular data. It is a powerful tool from Microsoft Office package.
Since it is often format for string data, it is often required to work with this data from the third party applications. Office itself provides libraries for working with Excel files along with libraries for other products from Microsoft Office package.
Unfortunately, Microsoft Office does not come for free, plus it is not a good practice to have Office installed on server where you might run Web applications. Luckily, Windows comes with Microsoft.Jet.OLEDB.4.0 driver which provides access to Excel files but there is only 32bit version, so in case you application is compiled for x64 platform, you will not be able to use it.
If you want to compile your application for x64 you have to install Microsoft Access Database Engine 2010 Redistributable or Microsoft Access Database Engine 2016 Redistributable which comes with both x86 and x64 support. It is free and available from Microsoft download website.
  <connectionStrings>
    <add name="connection.excel.system" connectionString="Provider=Microsoft.Jet.OLEDB.4.0;Data Source=C:tempsample.xls;Extended Properties='Excel 8.0;HDR=Yes;IMEX=0';"/>
    <add name="connection.excel.office" connectionString="Provider=Microsoft.ACE.OLEDB.16.0;Data Source=C:tempsample.xls;Extended Properties='Excel 8.0;HDR=Yes;IMEX=0';"/>
  </connectionStrings>
- HDR=Yes; indicates that the first row contains column names, not data. HDR=No; indicates the opposite.
- IMEX=1; tells the driver to always read «intermixed» (numbers, dates, strings etc) data columns as text. This option will also set readonly for Excel file, so if you are about to write to Excel file, set this option to 0
Writing Excel file
            var connectionString =  ConfigurationManager.ConnectionStrings["connection.excel.system"];

            using (OleDbConnection conn = new OleDbConnection(connectionString.ConnectionString))
            {
                conn.Open();
                OleDbCommand cmd = new OleDbCommand();
                cmd.Connection = conn;

                cmd.CommandText = "CREATE TABLE [Customers] (id INT, [Full Name] VARCHAR, [Email Address] VARCHAR, [Date Created] DATE);";
                cmd.ExecuteNonQuery();

                cmd.CommandText = $"INSERT INTO [Customers](id,[Full Name],[Email Address],[Date Created]) VALUES (23,'Dejan','test@test.com','{DateTime.Now.ToString("yyyy-MM-dd")}');";
                cmd.ExecuteNonQuery();

                cmd.CommandText = "UPDATE [Customers] SET [Full Name] = 'Dejan Stojanovic' WHERE id = 23;";
                cmd.ExecuteNonQuery();

                cmd.CommandText = "DROP TABLE [Customers];";
                cmd.ExecuteNonQuery();

                conn.Close();
            }
Note
Unfortunately DELETE is not supported, only INSERT and UPDATE are supported. As an alternative you can set nulls for the row you want to delete or insert existing rows in a new sheet by skipping the one you want to delete and then delete old sheet and rename the temporary one
Reading Excel file
            using (OleDbConnection conn = new OleDbConnection(connectionString.ConnectionString))
            {
                conn.Open();
                OleDbCommand cmd = new OleDbCommand();
                cmd.Connection = conn;

                OleDbDataAdapter adapter = new OleDbDataAdapter("SELECT * FROM [Customers] WHERE id=23", connectionString.ConnectionString);
                DataSet dataSet = new DataSet();

                adapter.Fill(dataSet,"Customers");

                conn.Close();
            }
Binding directly to DataTable instance is not possible, so even though you might have only one table in you result, you have to bind to DataSet with OleDbDataAdapter and access the table object from tables collection of DataSet class instance.
References
Disclaimer
Purpose of the code contained in snippets or available for download in this article is solely for learning and demo purposes. Author will not be held responsible for any failure or damages caused due to any other usage.

About the author
DEJAN STOJANOVIC
Dejan is a passionate Software Architect/Developer. He is highly experienced in .NET programming platform including ASP.NET MVC and WebApi. He likes working on new technologies and exciting challenging projects
CONNECT WITH DEJAN ![]()
![]()
![]()
![]()
Today, I am going to explain how to insert a data into Excel, using OLEDB in Windows Application and how to display the data, using DataGridView.
Before we begin, let us check the following prerequisites.
Step 1
Add «Microsoft.Office.Interpol.Excel» references to your project, basically, it is the .DLL file located at C:Program Files (x86)Microsoft Visual Studio 12.0Visual Studio Tools for OfficePIAOffice15
Step 2
Add the mentioned namespace given below.
- using System.Data.OleDb;
- using System.IO;
- using Excel = Microsoft.Office.Interop.Excel;
Now, in my scenario, I am just going to enter four textbox values into an Excel, so I have created four textboxes with label names and one DataGridView to display the entered items, as shown below.
Create one Excel file with the header and add this Excel file in your project, as shown shown below.
Now, it’s time to write button event coding to add the item into an Excel file; just double click the button and write the code, mentioned below.
- string filename = System.IO.Path.GetDirectoryName(System.Reflection.Assembly.GetExecutingAssembly().Location) + «\Detail.xlsx»;
- string con = String.Format(@ «Provider=Microsoft.ACE.OLEDB.12.0;» + «Data Source={0};Extended Properties=’Excel 12.0;HDR=YES;IMEX=0;READONLY=FALSE'», filename);
- using(OleDbConnection cn = new OleDbConnection(con)) {
- cn.Open();
- OleDbCommand cmd1 = new OleDbCommand(«INSERT INTO [Sheet1$] « + «([Name],[Age],[Emp ID],[Designation]) « + «VALUES(@value1,@value2,@value3,@values4)», cn);
- cmd1.Parameters.AddWithValue(«@value1», textBox1.Text);
- cmd1.Parameters.AddWithValue(«@value2», textBox2.Text);
- cmd1.Parameters.AddWithValue(«@value3», textBox3.Text);
- cmd1.Parameters.AddWithValue(«@value4», textBox4.Text);
- cmd1.ExecuteNonQuery();
- System.Data.OleDb.OleDbDataAdapter cmd2;
- cmd2 = new System.Data.OleDb.OleDbDataAdapter(«select * from [Sheet1$]», con);
- DataSet ds = new System.Data.DataSet();
- cmd2.Fill(ds);
- dataGridView1.DataSource = ds.Tables[0];
- }
Just execute the program and enter the textbox value, click the Add button and you will see the result, as shown below.
If you get the error mentioned below, while executing the program, just right click an Excel file and go to Properties.
Just change the Build Action from None to Content and change the option copy to output directory to always copy and re-excute the program and you will get the expected output.
Introduction
Microsoft Excel file can be used as OLE DB data source.
Microsoft .NET Framework has rich capabilities for working with OLE DB data sources and SQL Server.
So, we can make a simple command line OleDB-SQL utility to import Excel data to SQL Server.
The core code of the utility:
bulkCopy.DestinationTableName = sqlTableName;
bulkCopy.WriteToServer(oleDbDataReader);
This code inserts all the data from the Excel data reader to the destination table at SQL Server.
After this operation, you can run a stored procedure using sqlcmd utility to process the data.
For testing Excel queries, the utility has a CSV export mode.
You can download the binary executable of the OleDB-SQL utility, the source code, and example files.
Table of Contents
- Introduction
- Command Line Utility for Excel Data Import to SQL Server
- Function OleDbToSqlServer
- Function ExpandConnectionStringFileName
- Function OleDbToCSV
- Function FormatValueForCSV
- Function Main
- The Building of the Solution
- Command File for Excel Data Import to SQL Server
- Command File for Excel Data Import to SQL Server
- Command File for Excel Data Import to CSV Files
- Excel Data Import Configuration Files
- Conclusion
- Download
- See Also
Command Line Utility for Excel Data Import to SQL Server
You can skip these comments and just download and use the OleDB-SQL utility.
Function OleDbToSqlServer
The heart of the utility is OleDbToSqlServer function.
The function reads data from OLE DB data source using connection string oleDbConnectionString and SQL statement oleDbSQL and writes the data to SQL Server table sqlTableName using connection string sqlConnectionString.
static void OleDbToSqlServer(string oleDbConnectionString, string oleDbSQL,
    string sqlConnectionString, string sqlTableName)
{

    oleDbConnectionString = ExpandConnectionStringFileName(oleDbConnectionString);

    OleDbConnection oleDbConnection = new OleDbConnection(oleDbConnectionString);
    try
    {
        oleDbConnection.Open();
        OleDbCommand command = new OleDbCommand(oleDbSQL, oleDbConnection);
        try
        {
            OleDbDataReader reader = command.ExecuteReader();
            try
            {
                SqlConnection sqlConnection = new SqlConnection(sqlConnectionString);
                try
                {
                    sqlConnection.Open();
                    using (SqlBulkCopy bulkCopy = new SqlBulkCopy(sqlConnection))
                    {
                        bulkCopy.DestinationTableName = sqlTableName;
                        bulkCopy.WriteToServer(reader);
                    }
                }
                finally
                {
                    sqlConnection.Close();
                }
            }
            finally
            {
                reader.Close();
            }
        }
        finally
        {
            command.Dispose();
        }
    }
    finally
    {
        oleDbConnection.Close();
    }
}
The only standard .NET Framework code is used except the function ExpandConnectionStringFileName.
Function ExpandConnectionStringFileName
This function expands a filename of the data source file of the OLE DB connection string.
Due to this feature, you can use a relative path to the data source.
static string ExpandConnectionStringFileName(string connectionString)
{
    const string term = "Data Source=";

    int index = connectionString.IndexOf(term);
    if (index < 0)
        return connectionString;

    string dataSource = connectionString.Substring(index + term.Length,
        connectionString.IndexOf(";", index + term.Length) - index - term.Length);

    if (!File.Exists(dataSource))
        return connectionString;

    string expandedDataSource = Path.GetFullPath(dataSource);

    connectionString.Replace(term + dataSource, term + expandedDataSource);

    return connectionString;

}
Function OleDbToCSV
The function OleDbToCSV reads data from OLE DB data source using connection string oleDbConnectionString and SQL statement oleDbSQL and writes the CSV data to the standard output using delimiter.
static void OleDbToCSV(string oleDbConnectionString, string oleDbSQL,
    string delimiter)
{
    oleDbConnectionString = ExpandConnectionStringFileName(oleDbConnectionString);

    OleDbConnection oleDbConnection = new OleDbConnection(oleDbConnectionString);
    try
    {
        oleDbConnection.Open();
        OleDbCommand command = new OleDbCommand(oleDbSQL, oleDbConnection);
        try
        {
            OleDbDataReader reader = command.ExecuteReader();
            try
            {
                Console.Write("{0}", reader.GetName(0));
                for (int i = 1; i < reader.FieldCount; i++)
                {
                    Console.Write("{1}{0}", reader.GetName(i), delimiter);
                }
                Console.WriteLine();

                while (reader.Read())
                {
                    Console.Write("{0}", reader.GetValue(0));
                    for (int i = 1; i < reader.FieldCount; i++)
                    {
                        Console.Write("{1}{0}",
                            FormatValueForCSV(reader.GetValue(i), delimiter),
                            delimiter);
                    }
                    Console.WriteLine();
                }
            }
            finally
            {
                reader.Close();
            }
        }
        finally
        {
            command.Dispose();
        }
    }
    finally
    {
        oleDbConnection.Close();
    }
}
The only standard .NET Framework code is used except the function FormatValueForCSV.
Function FormatValueForCSV
The function quotes the value which contains qoutes or delimiters.
static Object FormatValueForCSV(Object value, string delimiter)
{
    switch (value.GetType().Name)
    {
        case "String":
            if (value.ToString().IndexOf('"') >= 0)
            {
                return '"' + value.ToString().Replace(@"""", @"""""") + '"';
            }
            else if (value.ToString().IndexOf(delimiter) >= 0)
            {
                return '"' + value.ToString() + '"';
            }
            else
                return value.ToString();
        default:
            return value;
    }

}
Function Main
The main function reads parameters and runs the required function.
static void Main(string[] args)
{
    try
    {
        if (args.Length == 0)
        {
            Help();
            return;
        }

        switch (args[0].ToLower())
        {
            case "sql":
                if (args.Length != 5)
                {
                    Help();
                    break;
                }
                OleDbToSqlServer(args[1], args[2], args[3], args[4]);
                break;
            case "csv":
                if (args.Length != 4)
                {
                    Help();
                    break;
                }
                OleDbToCSV(args[1], args[2], args[3]);
                break;
            default:
                Help();
                break;
        }
    }
    catch (Exception e)
    {
        Console.WriteLine(e.Message);
        Environment.ExitCode = 2;
    }
}
You can find the function Help in the source code.
The Building of the Solution
We should build two versions: for x86 and x64 platforms.
The platform of the utility to use should be identical to the installed Microsoft Office platform.
To build the oledb-sql utility you can use the following commands:
@echo off

csc /target:exe /platform:x86 /out:oledb-sql.exe oledb-sql.cs

csc /target:exe /platform:x64 /out:oledb-sql-64.exe oledb-sql.cs
Command File for Excel Data Import to SQL Server
There are working command files for Excel Data Imports to SQL Server or CSV files below.
You can modify it for your tasks freely.
You should uncomment the string rem set exe=oledb-sql-64.exe if Microsoft Office x64 is installed on the machine.
Command File for Excel Data Import to SQL Server
The file runs :RUN_ONE part for each configuration file like oledb-sql-task-*.txt.
The format of the configuration file is described below. Each file should contain the required parameters for oledb-sql.exe utility. You can uncomment echo command to see the value of a variable.
@echo off

rem Change to oledb-sql-64.exe if Microsoft Office x64 installed
set exe=oledb-sql.exe
rem set exe=oledb-sql-64.exe

for %%i in (oledb-sql-task-*.txt) do call :RUN_ONE %%i
goto END

:RUN_ONE

for /F "eol=; tokens=1* delims===" %%i in (%1) do set %%i=%%j

rem echo %OleDbConString%
rem echo %OleDbSQL%
rem echo %SqlConString%
rem echo %SqlTable%
rem echo %CsvFile%

%exe% sql "%OleDbConString%" "%OleDbSQL%" "%SqlConString%" "%SqlTable%"

:END
Command File for Excel Data Import to CSV Files
The file runs :RUN_ONE part for each configuration file like oledb-sql-task-*.txt.
The format of the configuration file is described below. Each file should contain the required parameters for oledb-sql.exe utility. You can uncomment echo command to see the value of a variable.
@echo off

rem Change to oledb-sql-64.exe if Microsoft Office x64 installed
set exe=oledb-sql.exe
rem set exe=oledb-sql-64.exe

for %%i in (oledb-sql-task-*.txt) do call :RUN_ONE %%i
goto END

:RUN_ONE

for /F "eol=; tokens=1* delims===" %%i in (%1) do set %%i=%%j

rem echo %OleDbConString%
rem echo %OleDbSQL%
rem echo %SqlConString%
rem echo %SqlTable%
rem echo %CsvFile%

%exe% csv "%OleDbConString%" "%OleDbSQL%" , > %CsvFile%

:END
Excel Data Import Configuration Files
Each Excel data import configuration file contains values for one import operation:
- The OLE DB Provider connection string for the Excel data query.
- The SQL Statement for the Excel data query.
- The SQL Server connection string (for SQL mode)
- The target table name (for SQL mode).
- The target CSV file name (for CSV mode).
The configuration file example for Microsoft.Jet.OLEDB.4.0 provider:
OleDbConString==Provider=Microsoft.Jet.OLEDB.4.0;Data Source=test.xls;Extended Properties='Excel 8.0';

OleDbSQL==SELECT NULL AS ImportID, * FROM [Sheet1$]

SqlConString==Data Source=.;Initial Catalog=AzureDemo50;User ID=excel_user;Password=ExSQL_#02;

SqlTable==dbo04.ExcelTestImport

CsvFile==ExcelTestImport1.csv
The configuration file example for Microsoft.ACE.OLEDB.12.0 provider:
OleDbConString==Provider=Microsoft.ACE.OLEDB.12.0;Data Source=test.xlsm;Extended Properties='Excel 12.0';

OleDbSQL==SELECT NULL AS ImportID, * FROM [Sheet1$]

SqlConString==Data Source=.;Initial Catalog=AzureDemo50;Integrated Security=SSPI;

SqlTable==dbo04.ExcelTestImport

CsvFile==ExcelTestImport2.csv
See details about OLE DB providers in the article Excel Import to SQL Server using Distributed Queries.
Conclusion
Using the described technique, you can import Excel data to SQL Server easily.
Just add a new configuration file for each pair of Excel and SQL Server table.
Download
See Also
- References
- Connection strings for Excel
- Connection strings for SQL Server
- How-To
- How to use Excel with SQL Server linked servers and distributed queries
- Downloads
- Microsoft Access Database Engine 2010 Redistributable
- Microsoft Access Database Engine 2016 Redistributable
Microsoft Excel is an electronic spreadsheet that has become one of the most important and widely used software for storing, organizing and manipulating data. Be it a small medical store or the accounts department of a big enterprise, everybody uses Excel. Recently I came across a requirement where a customer had to programmatically read/write data to and from an Excel workbook file. In .NET, there are multiple ways to do so, right from using an interop assembly to using an OleDb connection API to read/write from and to Excel files.
To use an OLEDB connection in a WPF .NET app, the Office System Driver for Data Connectivity must be installed on your machine. The driver can be downloaded from here. If the .NET application uses an OleDb provider ‘Microsoft.ACE.OLEDB.12.0’ without installing this driver, the application will throw ‘the ‘microsoft.ace.oledb.12.0’ provider is not registered on the local machine’ exception.
Another important point to note is that, since the .NET application will read the data from Excel workbook which is managed by the Operating System filesystem, the workbook must be closed in order to successfully read or write data from it, else the .NET application throws an exception. If you want to keep the workbook open and yet want the .NET application to read the data from it, then the workbook must configured as a shared workbook.
For our demo, create an Excel File (2010/2013) with the following Structure:

Make the workgroup shared as shown here:

The Sharing options are as follows:


The Sharing options must be set to synchronize changes from the Excel Worksheet to the .NET client application.
Step 1: Open Visual Studio 2012/2013 and create a new WPF application targeted to using the .NET 4.5 framework. Name the app as ‘WPF_Excel_Reader_Writer’. In the MainWindow.xaml add a DataGrid and a Button as shown here:
<Grid>
<Grid.RowDefinitions>
<RowDefinition Height=»272*»/>
<RowDefinition Height=»71*»/>
</Grid.RowDefinitions>
<Button Content=»Synchronize»
Name=»btnsync» Grid.Row=»1″
FontSize=»40″ FontFamily=»Times New Roman»
FontWeight=»ExtraBold»
/>
<DataGrid Name=»dgEmp» AutoGenerateColumns=»False» ColumnWidth=»*»
>
<DataGrid.Columns>
<DataGridTextColumn Header=»EmpNo» Binding=»{Binding EmpNo}»></DataGridTextColumn>
<DataGridTextColumn Header=»EmpName» Binding=»{Binding EmpName}»></DataGridTextColumn>
<DataGridTextColumn Header=»Salary» Binding=»{Binding Salary}»></DataGridTextColumn>
<DataGridTextColumn Header=»DeptName» Binding=»{Binding DeptName}»></DataGridTextColumn>
</DataGrid.Columns>
</DataGrid>
</Grid>
Step 2: To the project, add a new class file and name it as ‘DataAccess.cs’. Add the following code in it:
using System;
using System.Threading.Tasks;
using System.Data.OleDb;
using System.Collections.ObjectModel;
namespace WPF_Excel_Reader_Writer
{
public class Employee
{
public int EmpNo { get;set; }
public string EmpName { get; set; }
public int Salary { get; set; }
public string DeptName { get; set; }
}
public class DataAccess
{
OleDbConnection Conn;
OleDbCommand Cmd;
public DataAccess()
{
Conn = new OleDbConnection(«Provider=Microsoft.ACE.OLEDB.12.0;Data Source=F:\FromC\VS2013\WPF_45_DEMOS\Employee.xlsx;Extended Properties=»Excel 12.0 Xml;HDR=YES;»»);
}
/// <summary>
/// Method to Get All the Records from Excel
/// </summary>
/// <returns></returns>
public async Task<ObservableCollection<Employee>> GetDataFormExcelAsync()
{
ObservableCollection<Employee> Employees = new ObservableCollection<Employee>();
await Conn.OpenAsync();
Cmd = new OleDbCommand();
Cmd.Connection = Conn;
Cmd.CommandText = «Select * from [Sheet1$]»;
var Reader = await Cmd.ExecuteReaderAsync();
while (Reader.Read())
{
Employees.Add(new Employee() {
EmpNo = Convert.ToInt32(Reader[«EmpNo»]),
EmpName = Reader[«EmpName»].ToString(),
DeptName = Reader[«DeptName»].ToString(),
Salary = Convert.ToInt32(Reader[«Salary»])
});
}
Reader.Close();
Conn.Close();
return Employees;
}
/// <summary>
/// Method to Insert Record in the Excel
/// S1. If the EmpNo =0, then the Operation is Skipped.
/// S2. If the Employee is already exist, then it is taken for Update
/// </summary>
/// <param name=»Emp»></param>
public async Task<bool> InsertOrUpdateRowInExcelAsync(Employee Emp)
{
bool IsSave = false;
//S1
if (Emp.EmpNo != 0)
{
await Conn.OpenAsync();
Cmd = new OleDbCommand();
Cmd.Connection = Conn;
Cmd.Parameters.AddWithValue(«@EmpNo», Emp.EmpNo);
Cmd.Parameters.AddWithValue(«@EmpName», Emp.EmpName);
Cmd.Parameters.AddWithValue(«@Salary», Emp.Salary);
Cmd.Parameters.AddWithValue(«@DeptName», Emp.DeptName);
//S2
if (!CheckIfRecordExistAsync(Emp).Result)
{
Cmd.CommandText = «Insert into [Sheet1$] values (@EmpNo,@EmpName,@Salary,@DeptName)»;
}
else
{
if (Emp.EmpName != String.Empty || Emp.DeptName != String.Empty)
{
Cmd.CommandText = «Update [Sheet1$] set EmpNo=@EmpNo,EmpName=@EmpName,Salary=@Salary,DeptName=@DeptName where EmpNo=@EmpNo»;
}
}
int result = await Cmd.ExecuteNonQueryAsync();
if (result > 0)
{
IsSave = true;
}
Conn.Close();
}
return IsSave;
}
/// <summary>
/// The method to check if the record is already available
/// in the workgroup
/// </summary>
/// <param name=»emp»></param>
/// <returns></returns>
private async Task<bool> CheckIfRecordExistAsync(Employee emp)
{
bool IsRecordExist = false;
Cmd.CommandText = «Select * from [Sheet1$] where EmpNo=@EmpNo»;
var Reader = await Cmd.ExecuteReaderAsync();
if (Reader.HasRows)
{
IsRecordExist = true;
}
Reader.Close();
return IsRecordExist;
}
}
}
The code we just saw does the following:
-The Employee class is used to define attributes for the Employee object.
-The class DataAccess is used to interact with the Excel file using the following declarations:
- The connection and command objects are defined using OleDbConnection and OleDbCommand respectively.
- The constructor defines a connection string for the Excel file using Mictosoft.ACE.OLEDB.12.0 provider. Here the path of the Excel file passed to the connection string need to be changed as per the location of the Excel file.
- All methods are defined as async to make Async calls.
- The GetDataFromExcelAsync() method opens connection to the Excel file and reads data from the Worksheet with the name Sheet1. This methods returns an ObservableCollection.
- The method InsertOrUpdateRowInExcelAsync() method accepts an Employee objects. If the EmpNo from this object is zero(0) then the execution of the rest of the code of this method is skipped. This is just a simple check and you can customize is as per your business needs. This method calls the CheckIfRecordExistAsync() method which is responsible to check if the Employee record already exists. If yes, then the record is accepted for update, else a new record is created.
Step 3: We will now subscribe to the following events:
- Loaded event of the Window
- Click event of the button
- CellEditEnding, RowEditEnding and SelectionChanged events of the DataGrid
Step 4: Add the following code in the MainWindow.xaml.cs:
public partial class MainWindow : Window
{
//The object of the DataAccess class
DataAccess objDs;
public MainWindow()
{
InitializeComponent();
}
//The Employee Object for Edit
Employee emp = new Employee();
/// <summary>
/// On Load get data from the Excel
/// </summary>
/// <param name=»sender»></param>
/// <param name=»e»></param>
private void Window_Loaded(object sender, RoutedEventArgs e)
{
objDs = new DataAccess();
try
{
dgEmp.ItemsSource = objDs.GetDataFormExcelAsync().Result;
}
catch (Exception ex)
{
MessageBox.Show(ex.Message);
}
}
/// <summary>
/// TO Synchronize the Excel Workbook with the Application
/// </summary>
/// <param name=»sender»></param>
/// <param name=»e»></param>
private void btnsync_Click(object sender, RoutedEventArgs e)
{
try
{
dgEmp.ItemsSource = objDs.GetDataFormExcelAsync().Result;
}
catch (Exception ex)
{
MessageBox.Show(ex.Message);
}
}
/// <summary>
/// Read Data entered in each Cell
/// </summary>
/// <param name=»sender»></param>
/// <param name=»e»></param>
private void dgEmp_CellEditEnding(object sender, DataGridCellEditEndingEventArgs e)
{
try
{
FrameworkElement eleEno = dgEmp.Columns[0].GetCellContent(e.Row);
if (eleEno.GetType() == typeof(TextBox))
{
emp.EmpNo = Convert.ToInt32(((TextBox)eleEno).Text);
}
FrameworkElement eleEname = dgEmp.Columns[1].GetCellContent(e.Row);
if (eleEname.GetType() == typeof(TextBox))
{
emp.EmpName = ((TextBox)eleEname).Text;
}
FrameworkElement eleSal = dgEmp.Columns[2].GetCellContent(e.Row);
if (eleSal.GetType() == typeof(TextBox))
{
emp.Salary = Convert.ToInt32(((TextBox)eleSal).Text);
}
FrameworkElement eleDname = dgEmp.Columns[3].GetCellContent(e.Row);
if (eleDname.GetType() == typeof(TextBox))
{
emp.DeptName = ((TextBox)eleDname).Text;
}
}
catch (Exception ex)
{
MessageBox.Show(ex.Message);
}
}
/// <summary>
/// Get the Complete row
/// </summary>
/// <param name=»sender»></param>
/// <param name=»e»></param>
private void dgEmp_RowEditEnding(object sender, DataGridRowEditEndingEventArgs e)
{
try
{
bool IsSave = objDs.InsertOrUpdateRowInExcelAsync(emp).Result;
if (IsSave)
{
MessageBox.Show(«Record Saved Successfully»);
}
else
{
MessageBox.Show(«Problem Occured»);
}
}
catch (Exception ex)
{
MessageBox.Show(ex.Message);
}
}
/// <summary>
/// Select the Recod for the Update
/// </summary>
/// <param name=»sender»></param>
/// <param name=»e»></param>
private void dgEmp_SelectionChanged(object sender, SelectionChangedEventArgs e)
{
emp = dgEmp.SelectedItem as Employee;
}
}
The code has the following specifications:
- The Loaded event makes call to GetDataFromExcelAsync() method from the DataAccess class. The result returned from the method is then displayed in the DataGrid using ItemsSource property
- In the SelectionChanged implementation, the Employee object is generated which will be used for update
- The CellEditEnding implementation is used to read the cell value entered in the specific row of the DataGrid. These values will be put in the Employee object. This object will then be used to insert or update in the Excel Worksheet
- The RowEditEnding implementation will make a call to the InsertOrUpdateRowInExcelAsync() method and pass an Employee to it for inserting or updating
- Clicking the button will retrieve the latest data from the worksheet and display it in the DataGrid
Step 5: Run the application. You will see the following:

To test synchronization, add a new record in Excel and click on the ‘Synchronize’ button. The newly added record will be as shown below:

(that’s the best straight row highlighting I could do after 3 attempts  )
)
Since the Workbook is shared, the data entered in the worksheet of the workbook can be directly synchronized even when the workbook is open.
Similarly enter a record in the DataGrid Row. When you click on the next row or the current row loses focus, the record will be saved in the Worksheet as shown here.

To verify, close the application and reopen the Excel file. The newly added record will be displayed in Excel as shown here:

And that’s how using WPF, we can Read and Write Data to Excel files.
Conclusion: We just saw that if Excel files are used as a data store, using OleDb features the data from the Workgroup can be read and manipulated in a WPF .NET application.
Download the entire source code of this article (Github)
This article has been editorially reviewed by Suprotim Agarwal.

C# and .NET have been around for a very long time, but their constant growth means there’s always more to learn.
We at DotNetCurry are very excited to announce The Absolutely Awesome Book on C# and .NET. This is a 500 pages concise technical eBook available in PDF, ePub (iPad), and Mobi (Kindle).
Organized around concepts, this Book aims to provide a concise, yet solid foundation in C# and .NET, covering C# 6.0, C# 7.0 and .NET Core, with chapters on the latest .NET Core 3.0, .NET Standard and C# 8.0 (final release) too. Use these concepts to deepen your existing knowledge of C# and .NET, to have a solid grasp of the latest in C# and .NET OR to crack your next .NET Interview.
Click here to Explore the Table of Contents or Download Sample Chapters!

Mahesh Sabnis is a DotNetCurry author and a Microsoft MVP having over two decades of experience in IT education and development. He is a Microsoft Certified Trainer (MCT) since 2005 and has conducted various Corporate Training programs for .NET Technologies (all versions), and Front-end technologies like Angular and React. Follow him on twitter @maheshdotnet or connect with him on LinkedIn