

Introduction
This is a tutorial about writing code in Excel spreadsheets using Visual Basic for Applications (VBA).
Excel is one of Microsoft’s most popular products. In 2016, the CEO of Microsoft said «Think about a world without Excel. That’s just impossible for me.” Well, maybe the world can’t think without Excel.
- In 1996, there were over 30 million users of Microsoft Excel (source).
- Today, there are an estimated 750 million users of Microsoft Excel. That’s a little more than the population of Europe and 25x more users than there were in 1996.
We’re one big happy family!
In this tutorial, you’ll learn about VBA and how to write code in an Excel spreadsheet using Visual Basic.
Prerequisites
You don’t need any prior programming experience to understand this tutorial. However, you will need:
- Basic to intermediate familiarity with Microsoft Excel
- If you want to follow along with the VBA examples in this article, you will need access to Microsoft Excel, preferably the latest version (2019) but Excel 2016 and Excel 2013 will work just fine.
- A willingness to try new things
Learning Objectives
Over the course of this article, you will learn:
- What VBA is
- Why you would use VBA
- How to get set up in Excel to write VBA
- How to solve some real-world problems with VBA
Important Concepts
Here are some important concepts that you should be familiar with to fully understand this tutorial.
Objects: Excel is object-oriented, which means everything is an object — the Excel window, the workbook, a sheet, a chart, a cell. VBA allows users to manipulate and perform actions with objects in Excel.
If you don’t have any experience with object-oriented programming and this is a brand new concept, take a second to let that sink in!
Procedures: a procedure is a chunk of VBA code, written in the Visual Basic Editor, that accomplishes a task. Sometimes, this is also referred to as a macro (more on macros below). There are two types of procedures:
- Subroutines: a group of VBA statements that performs one or more actions
- Functions: a group of VBA statements that performs one or more actions and returns one or more values
Note: you can have functions operating inside of subroutines. You’ll see later.
Macros: If you’ve spent any time learning more advanced Excel functionality, you’ve probably encountered the concept of a “macro.” Excel users can record macros, consisting of user commands/keystrokes/clicks, and play them back at lightning speed to accomplish repetitive tasks. Recorded macros generate VBA code, which you can then examine. It’s actually quite fun to record a simple macro and then look at the VBA code.
Please keep in mind that sometimes it may be easier and faster to record a macro rather than hand-code a VBA procedure.
For example, maybe you work in project management. Once a week, you have to turn a raw exported report from your project management system into a beautifully formatted, clean report for leadership. You need to format the names of the over-budget projects in bold red text. You could record the formatting changes as a macro and run that whenever you need to make the change.
What is VBA?
Visual Basic for Applications is a programming language developed by Microsoft. Each software program in the Microsoft Office suite is bundled with the VBA language at no extra cost. VBA allows Microsoft Office users to create small programs that operate within Microsoft Office software programs.
Think of VBA like a pizza oven within a restaurant. Excel is the restaurant. The kitchen comes with standard commercial appliances, like large refrigerators, stoves, and regular ole’ ovens — those are all of Excel’s standard features.
But what if you want to make wood-fired pizza? Can’t do that in a standard commercial baking oven. VBA is the pizza oven.

Yum.
Why use VBA in Excel?
Because wood-fired pizza is the best!
But seriously.
A lot of people spend a lot of time in Excel as a part of their jobs. Time in Excel moves differently, too. Depending on the circumstances, 10 minutes in Excel can feel like eternity if you’re not able to do what you need, or 10 hours can go by very quickly if everything is going great. Which is when you should ask yourself, why on earth am I spending 10 hours in Excel?
Sometimes, those days are inevitable. But if you’re spending 8-10 hours everyday in Excel doing repetitive tasks, repeating a lot of the same processes, trying to clean up after other users of the file, or even updating other files after changes are made to the Excel file, a VBA procedure just might be the solution for you.
You should consider using VBA if you need to:
- Automate repetitive tasks
- Create easy ways for users to interact with your spreadsheets
- Manipulate large amounts of data
Getting Set Up to Write VBA in Excel
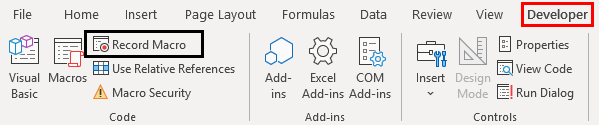
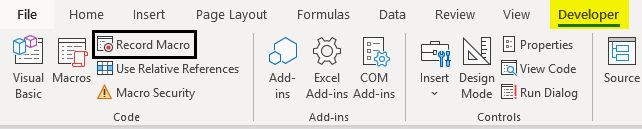
Developer Tab
To write VBA, you’ll need to add the Developer tab to the ribbon, so you’ll see the ribbon like this.

To add the Developer tab to the ribbon:
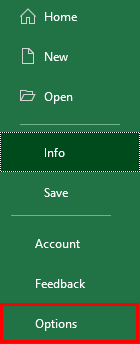
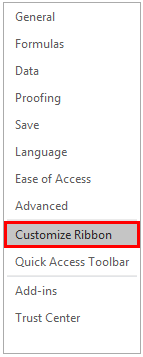
- On the File tab, go to Options > Customize Ribbon.
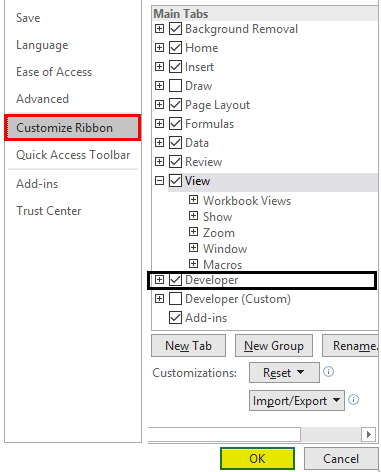
- Under Customize the Ribbon and under Main Tabs, select the Developer check box.
After you show the tab, the Developer tab stays visible, unless you clear the check box or have to reinstall Excel. For more information, see Microsoft help documentation.
VBA Editor
Navigate to the Developer Tab, and click the Visual Basic button. A new window will pop up — this is the Visual Basic Editor. For the purposes of this tutorial, you just need to be familiar with the Project Explorer pane and the Property Properties pane.

Excel VBA Examples
First, let’s create a file for us to play around in.
- Open a new Excel file
- Save it as a macro-enabled workbook (. xlsm)
- Select the Developer tab
- Open the VBA Editor
Let’s rock and roll with some easy examples to get you writing code in a spreadsheet using Visual Basic.
Example #1: Display a Message when Users Open the Excel Workbook
In the VBA Editor, select Insert -> New Module
Write this code in the Module window (don’t paste!):
Sub Auto_Open()
MsgBox («Welcome to the XYZ Workbook.»)
End Sub
Save, close the workbook, and reopen the workbook. This dialog should display.
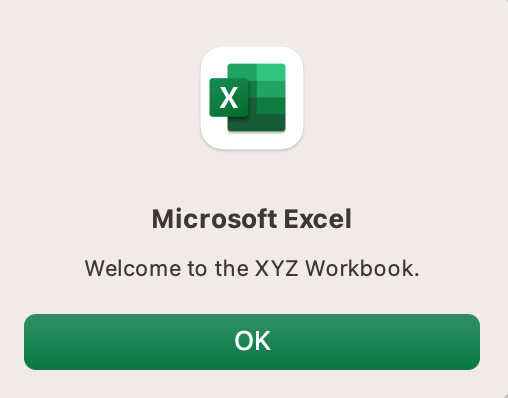
Ta da!
How is it doing that?
Depending on your familiarity with programming, you may have some guesses. It’s not particularly complex, but there’s quite a lot going on:
- Sub (short for “Subroutine): remember from the beginning, “a group of VBA statements that performs one or more actions.”
- Auto_Open: this is the specific subroutine. It automatically runs your code when the Excel file opens — this is the event that triggers the procedure. Auto_Open will only run when the workbook is opened manually; it will not run if the workbook is opened via code from another workbook (Workbook_Open will do that, learn more about the difference between the two).
- By default, a subroutine’s access is public. This means any other module can use this subroutine. All examples in this tutorial will be public subroutines. If needed, you can declare subroutines as private. This may be needed in some situations. Learn more about subroutine access modifiers.
- msgBox: this is a function — a group of VBA statements that performs one or more actions and returns a value. The returned value is the message “Welcome to the XYZ Workbook.”
In short, this is a simple subroutine that contains a function.
When could I use this?
Maybe you have a very important file that is accessed infrequently (say, once a quarter), but automatically updated daily by another VBA procedure. When it is accessed, it’s by many people in multiple departments, all across the company.
- Problem: Most of the time when users access the file, they are confused about the purpose of this file (why it exists), how it is updated so often, who maintains it, and how they should interact with it. New hires always have tons of questions, and you have to field these questions over and over and over again.
- Solution: create a user message that contains a concise answer to each of these frequently answered questions.
Real World Examples
- Use the MsgBox function to display a message when there is any event: user closes an Excel workbook, user prints, a new sheet is added to the workbook, etc.
- Use the MsgBox function to display a message when a user needs to fulfill a condition before closing an Excel workbook
- Use the InputBox function to get information from the user
Example #2: Allow User to Execute another Procedure
In the VBA Editor, select Insert -> New Module
Write this code in the Module window (don’t paste!):
Sub UserReportQuery()
Dim UserInput As Long
Dim Answer As Integer
UserInput = vbYesNo
Answer = MsgBox(«Process the XYZ Report?», UserInput)
If Answer = vbYes Then ProcessReport
End Sub
Sub ProcessReport()
MsgBox («Thanks for processing the XYZ Report.»)
End Sub
Save and navigate back to the Developer tab of Excel and select the “Button” option. Click on a cell and assign the UserReportQuery macro to the button.
Now click the button. This message should display:
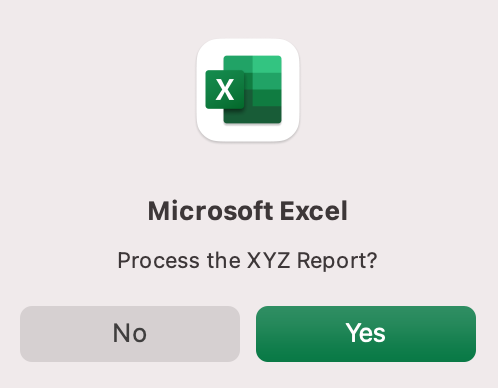
Click “yes” or hit Enter.
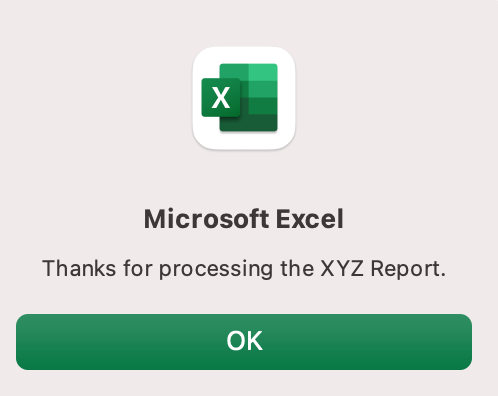
Once again, tada!
Please note that the secondary subroutine, ProcessReport, could be anything. I’ll demonstrate more possibilities in example #3. But first…
How is it doing that?
This example builds on the previous example and has quite a few new elements. Let’s go over the new stuff:
- Dim UserInput As Long: Dim is short for “dimension” and allows you to declare variable names. In this case, UserInput is the variable name and Long is the data type. In plain English, this line means “Here’s a variable called “UserInput”, and it’s a Long variable type.”
- Dim Answer As Integer: declares another variable called “Answer,” with a data type of Integer. Learn more about data types here.
- UserInput = vbYesNo: assigns a value to the variable. In this case, vbYesNo, which displays Yes and No buttons. There are many button types, learn more here.
- Answer = MsgBox(“Process the XYZ Report?”, UserInput): assigns the value of the variable Answer to be a MsgBox function and the UserInput variable. Yes, a variable within a variable.
- If Answer = vbYes Then ProcessReport: this is an “If statement,” a conditional statement, which allows us to say if x is true, then do y. In this case, if the user has selected “Yes,” then execute the ProcessReport subroutine.
When could I use this?
This could be used in many, many ways. The value and versatility of this functionality is more so defined by what the secondary subroutine does.
For example, maybe you have a file that is used to generate 3 different weekly reports. These reports are formatted in dramatically different ways.
- Problem: Each time one of these reports needs to be generated, a user opens the file and changes formatting and charts; so on and so forth. This file is being edited extensively at least 3 times per week, and it takes at least 30 minutes each time it’s edited.
- Solution: create 1 button per report type, which automatically reformats the necessary components of the reports and generates the necessary charts.
Real World Examples
- Create a dialog box for user to automatically populate certain information across multiple sheets
- Use the InputBox function to get information from the user, which is then populated across multiple sheets
Example #3: Add Numbers to a Range with a For-Next Loop
For loops are very useful if you need to perform repetitive tasks on a specific range of values — arrays or cell ranges. In plain English, a loop says “for each x, do y.”
In the VBA Editor, select Insert -> New Module
Write this code in the Module window (don’t paste!):
Sub LoopExample()
Dim X As Integer
For X = 1 To 100
Range(«A» & X).Value = X
Next X
End Sub
Save and navigate back to the Developer tab of Excel and select the Macros button. Run the LoopExample macro.
This should happen:
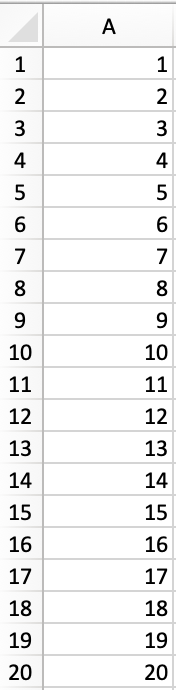
Etc, until the 100th row.
How is it doing that?
- Dim X As Integer: declares the variable X as a data type of Integer.
- For X = 1 To 100: this is the start of the For loop. Simply put, it tells the loop to keep repeating until X = 100. X is the counter. The loop will keep executing until X = 100, execute one last time, and then stop.
- Range(«A» & X).Value = X: this declares the range of the loop and what to put in that range. Since X = 1 initially, the first cell will be A1, at which point the loop will put X into that cell.
- Next X: this tells the loop to run again
When could I use this?
The For-Next loop is one of the most powerful functionalities of VBA; there are numerous potential use cases. This is a more complex example that would require multiple layers of logic, but it communicates the world of possibilities in For-Next loops.
Maybe you have a list of all products sold at your bakery in Column A, the type of product in Column B (cakes, donuts, or muffins), the cost of ingredients in Column C, and the market average cost of each product type in another sheet.
You need to figure out what should be the retail price of each product. You’re thinking it should be the cost of ingredients plus 20%, but also 1.2% under market average if possible. A For-Next loop would allow you to do this type of calculation.
Real World Examples
- Use a loop with a nested if statement to add specific values to a separate array only if they meet certain conditions
- Perform mathematical calculations on each value in a range, e.g. calculate additional charges and add them to the value
- Loop through each character in a string and extract all numbers
- Randomly select a number of values from an array
Conclusion
Now that we’ve talked about pizza and muffins and oh-yeah, how to write VBA code in Excel spreadsheets, let’s do a learning check. See if you can answer these questions.
- What is VBA?
- How do I get set up to start using VBA in Excel?
- Why and when would you use VBA?
- What are some problems I could solve with VBA?
If you have a fair idea of how to you could answer these questions, then this was successful.
Whether you’re an occasional user or a power user, I hope this tutorial provided useful information about what can be accomplished with just a bit of code in your Excel spreadsheets.
Happy coding!
Learning Resources
- Excel VBA Programming for Dummies, John Walkenbach
- Get Started with VBA, Microsoft Documentation
- Learning VBA in Excel, Lynda
A bit about me
I’m Chloe Tucker, an artist and developer in Portland, Oregon. As a former educator, I’m continuously searching for the intersection of learning and teaching, or technology and art. Reach out to me on Twitter @_chloetucker and check out my website at chloe.dev.
Learn to code for free. freeCodeCamp’s open source curriculum has helped more than 40,000 people get jobs as developers. Get started
What is Programming in Excel?
Programming refers to writing a set of instructions that tell Excel to perform one or more tasks. These instructions are written in the Visual Basic for Applications (VBA) as this is the language understandable to Excel. To write an instruction, one can either write a code in VBA or record a macro in Excel. A macro is recorded to automate repetitive tasks. When a macro is recorded, VBA generates a code in the background.
For example, to submit an Excel report, a table needs to undergo the same set of tasks each time. These tasks include applying a pre-defined border, color, alignment, and font. To program in Excel, a macro can be recorded for performing all these tasks.
The purpose of programming in Excel is to save the user from performing the same tasks again and again. Moreover, it helps accomplish multiple tasks at a great speed that would have taken a lot of time, had they been performed manually.
Table of contents
- What is Programming in Excel?
- Stages of Programming in Excel VBA
- Stage 1–Enable the Developer Tab in Excel
- Stage 2–Record a Macro in Excel
- Stage 3–View and Examine the VBA Code Generated by the Recorded Macro
- Stage 4–Test the VBA Code of the Recorded Macro
- Stage 5–Save the Recorded Macro (or the VBA Code)
- Frequently Asked Questions
- Recommended Articles
- Stages of Programming in Excel VBA
Stages of Programming in Excel VBA
Programming in Excel VBA is carried out in the following stages:
- Enable the Developer tab in Excel
- Record a macro in Excel
- View and examine the VBA code generated by the recorded macro
- Test the VBA code of the recorded macro
- Save the recorded macro (or the VBA code)
Further in this article, every stage of programming ine xcel has been discussed one by one. The steps to be performed in each stage are also listed.
Stage 1–Enable the Developer Tab in Excel
Let us understand how to enable the Developer tabEnabling the developer tab in excel can help the user perform various functions for VBA, Macros and Add-ins like importing and exporting XML, designing forms, etc. This tab is disabled by default on excel; thus, the user needs to enable it first from the options menu.read more in Excel. This tab is enabled to record a macro and access VBA. When the Developer tab is enabled, it appears on the Excel ribbonRibbons in Excel 2016 are designed to help you easily locate the command you want to use. Ribbons are organized into logical groups called Tabs, each of which has its own set of functions.read more. However, by default, Excel does not display the Developer tab.
Note: To know an alternate method to record a macro and access VBA, refer to the “alternative to step 1” in stages 2 and 3.
The steps to enable the Developer tab in Excel are listed as follows:
Step 1: Go to the File tab displayed on the Excel ribbon.
Step 2: Select “options” shown in the following image.
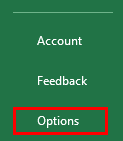
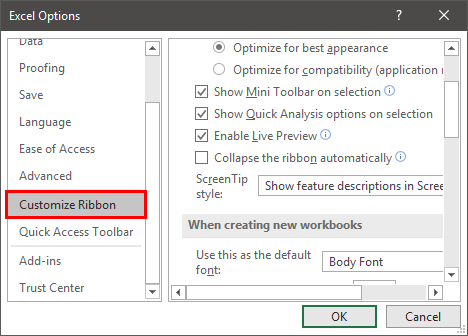
Step 3: The “Excel options” window opens, as shown in the following image. Select “customize ribbon” displayed on the left side of this window.
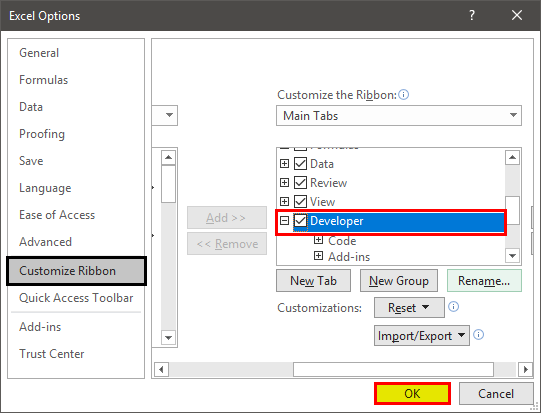
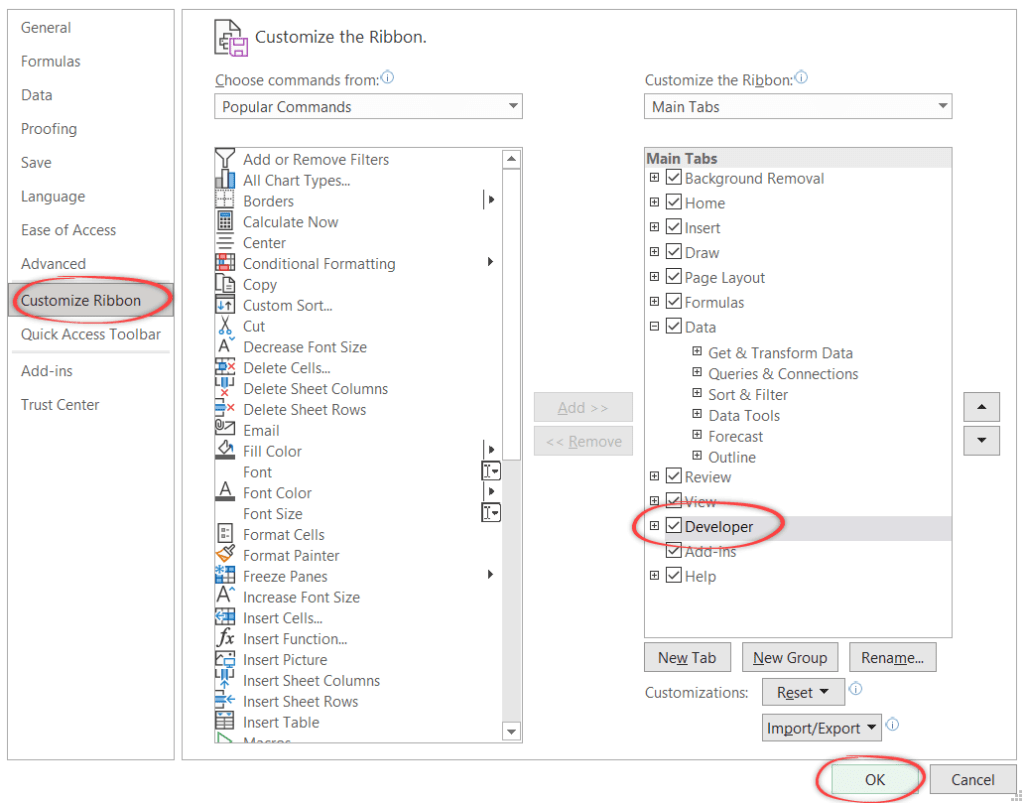
Step 4: Under “choose commands from” (on the left side of the window), ensure that “popular commands” is selected. Under “customize the ribbon” (on the right side of the window), choose “main tabs” from the drop-down list.
Next, select the checkbox of “developer” and click “Ok.” This checkbox is shown in the following image.
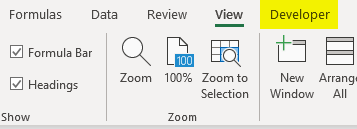
Step 5: The Developer tab appears on the Excel ribbon, as shown in the following image.

Stage 2–Record a Macro in Excel
Let us learn how to record a macroRecording macros is a method whereby excel stores the tasks performed by the user. Every time a macro is run, these exact actions are performed automatically. Macros are created in either the View tab (under the “macros” drop-down) or the Developer tab of Excel.
read more in Excel. When a macro is recorded, all tasks performed by the user (within the workbook) are stored in the Macro Recorder until the “stop recording” option is clicked. Apart from Microsoft Excel, a macro can be recorded for all Office applications that support VBA.
The steps to record a macro in Excel are listed as follows:
Step 1: From the Developer tab, click “record macro” from the “code” group.
Alternative to step 1: One can also click “record macro” from the “macros” group of the View tab of Excel.
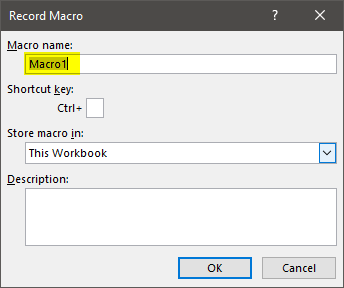
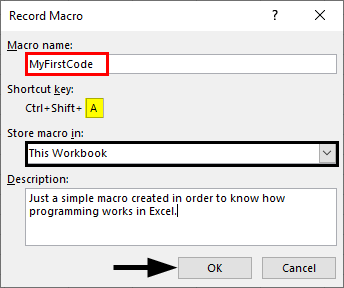
Step 2: The “record macro” window opens, as shown in the following image. In this window, one can name the macro before recording it. The default macro name given by Excel is “macro1.”
The rules governing a macro name are stated as follows:
- It should not contain any space ( ), period (.) or exclamation point (!).
- It cannot contain any special characters (like $, @, ^, #, *, &) except the underscore (_).
- It should not begin with a numerical value. Rather, it must start with a letter.
- It cannot exceed 255 characters in length.
Note: It is recommended to use short and meaningful names for macros. Further, one must assign a unique name to each macro. In VBA, two macros within the same code module cannot have the same names.
Step 3: In the “macro name” box, we have entered the name “recording_macro.”
Notice that an underscore has been used as a separator between the two strings (recording and macro) of the name. No spaces, periods or special characters have been used in this name.
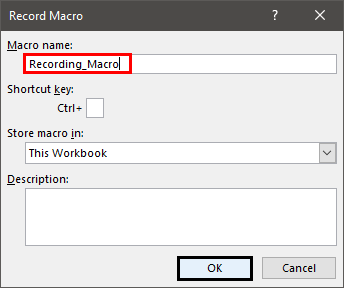
Step 4: Click “Ok” to start recording the macro. Once “Ok” is clicked in the preceding window, the “record macro” button (in the Developer tab or the View tab) changes to the “stop recording” button.
Next, carry out the tasks to be recorded in the macro “recording_macro.”
Note: Since the Macro Recorder records every action performed by the user, ensure that the actions are executed in the right sequence. If the recorded sequence is correct, Excel will perform the tasks efficiently each time the macro is run.
However, if a sequencing error occurs, one must either re-record the actions or edit the VBA codeVBA code refers to a set of instructions written by the user in the Visual Basic Applications programming language on a Visual Basic Editor (VBE) to perform a specific task.read more manually. If one is recording the macro for the first time, it is recommended to keep a copy of the workbook to prevent any undesired changes to the stored data.
In the following steps (step 4a to step 4c), the tasks to be recorded have been performed.
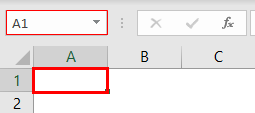
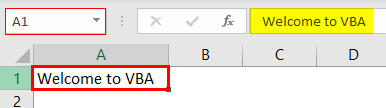
Step 4a: Select cell A1 of the worksheet. This is the first task that is recorded. The selection is shown in the following image.
Step 4b: Type “welcome to VBA” in cell A1. This is the second task that is recorded. Exclude the beginning and ending double quotation marks while typing.
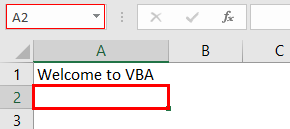
Step 4c: Press the “Enter” key. As a result, the selection shifts from cell A1 to cell A2. This becomes the third task that is recorded.
The selection is shown in the following image.
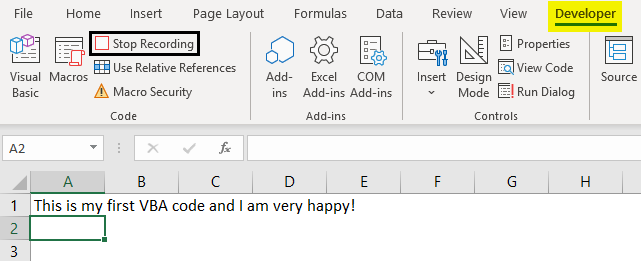
Step 5: Click “stop recording” in the “code” group of the Developer tab. By clicking this option, Excel is told to refrain from recording any further tasks.
The “stop recording” option is shown in the following image.

Stage 3–View and Examine the VBA Code Generated by the Recorded Macro
Let us observe and study the VBA code generated by the macro recorded in stage 2. Remember that one can either directly write a code in the Visual Basic Editor (VBE or VB Editor) or let a macro do the same.
The VBE is a tool or program where VBA codes are written, edited, and maintained. When a macro is recorded, a code is automatically written in a new module of VBE. Note that VBA is the programming language of Excel.
The steps to view and study the code generated by the recorded macro are listed as follows:
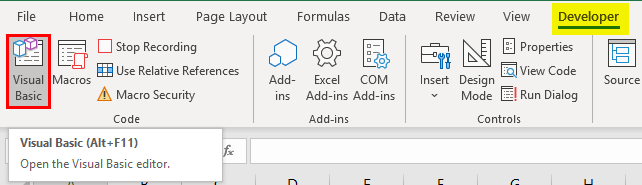
Step 1: Click “visual basic” from the “code” group of the Developer tab. This option is shown in the following image.
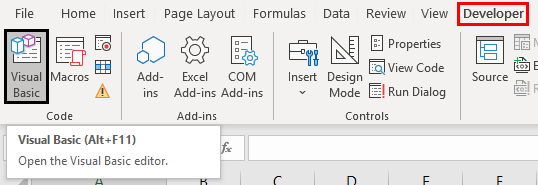
Alternative to step 1: As a substitute for the preceding step, press the keys “Alt+F11” together. This is the shortcutAn Excel shortcut is a technique of performing a manual task in a quicker way.read more to open the VBE window.
Note: “Alt+F11” is a toggle key which when pressed repeatedly, helps to switch between VBE and Excel.
![]()
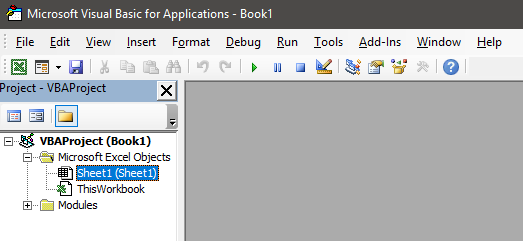
Step 2: The Visual Basic Editor window opens, as shown in the following image.
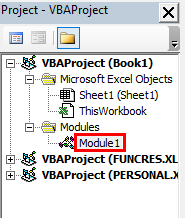
To the left of the VBE window, the worksheet, workbook, and module are shown. This window on the left (named “Project-VBAProject”) is also known as the Project window or the Project Explorer of VBE.
Step 3: Double-click “modules” shown in the following image.
Note: “Modules” are folders shown in the Project window after recording a macro. They are not shown prior to recording a macro. “Modules” are also shown when a module is inserted manually from the Insert tab of the VBE.
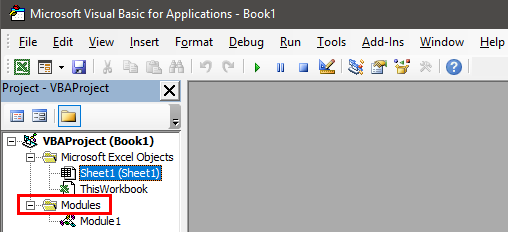
Step 4: Double-click “module1” under modules. A code appears on the right side of the VBE window. This window on the right [named “Book1-Module1 (Code)”] is known as the module code window.
The code is displayed in the following image.
Note: The code generated by recording a macro can be checked in the “modules” folder (in the module code window). In a module code window, one can also write a code manually or copy-paste it from another source.

In the following steps (step 4a to step 4d), the code generated by the recorded macro has been studied.
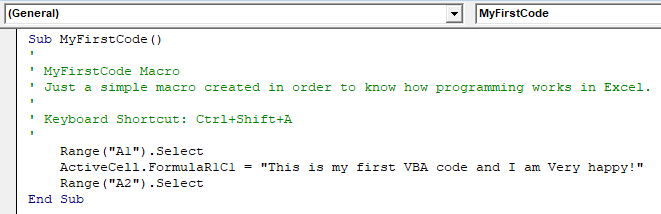
Step 4a: The first word of the code is “Sub.” “Sub” stands for subroutine or procedure. At the start of the code, the word “Sub,” the macro name (recording_macro), and a pair of empty parentheses are displayed. This is followed by the statements to be executed by the code. These statements are:
ActiveCell.FormulaR1C1 = “Welcome to VBA”
Range (“A2”). Select
The code ends with “End Sub.”
The start or head [Sub Recording_Macro ()] and the end or tail [End Sub] of the code are shown in the following image.
Note 1: The words “macro” and “code” are often used interchangeably by several Excel users. However, some users also distinguish between these two words.
A VBA code is a command created either by writing a code directly in VBE or by recording a macro in Excel. In contrast, a macro consists of instructions that automate tasks in Excel. According to one’s choice, one can decide whether or not to differentiate between the two words.
Note 2: The “Sub” can be preceded by the words “Private,” “Public,” “Friend,” or “Static.” All these words set the scope of the subroutine. The default subroutine used in VBA is “Public Sub.” So, when “Sub” is written in a code, it implies “Public Sub.”
A “Public Sub” can be initiated by subroutines of different modules. However, a “Private Sub” cannot be initiated by subroutines of other modules.

Step 4b: The first activity we performed (in step 4a of stage 2) was to select cell A1. Accordingly, the following statement of the code tells Excel that the active cell is R1C1.
ActiveCell.FormulaR1C1
When a macro is recorded, VBA uses the R1C1 style for referring to cells. In this style, the letter R is followed by the row number and the letter C is followed by the column number. So, cell R1C1 implies that the row number is 1 and the column number is also 1. In other words, cell R1C1 is the same as cell A1 of Excel.
Step 4c: The second activity we performed (in step 4b of stage 2) was to type “welcome to VBA” in cell A1. So, the following statement of the code tells Excel that the value in cell R1C1 is “welcome to VBA.”
ActiveCell.FormulaR1C1 = “Welcome to VBA”
Step 4d: The third activity we performed (in step 4c of stage 2) was to press the “Enter” key. By pressing this key, the selection had shifted from cell A1 to cell A2. Therefore, the following statement tells Excel to select cell A2.
Range (“A2”). Select
This is the way VBA generates a code for all the activities performed under stage 2 of programming in Excel. Examining the code line-by-line makes it easier to interpret it.
Stage 4–Test the VBA Code of the Recorded Macro
Let us test the code when it is run multiple times. Note that a macro (or code) can be run as many times as one wants. Each time it runs, it performs the recorded tasks in Excel.
The steps to test the code that we examined in stage 3 are listed as follows:
Step 1: Delete the string “welcome to VBA” from cell A1 of Excel. Let A1 remain as a blank, selected cell. The following image shows the empty cell A1.
Note: To go back from VBE to Excel, press the toggle key “Alt+F11.”
Step 2: Go to VBE again by pressing the key “Alt+F11.” Click anywhere within the code. Next, click the “Run Sub/UserForm (F5)” button. This button is shown within a blue box in the following image.
Note: Alternatively, one can press the key F5 to run the VBA code.

Step 3: The output is shown in the following image. The preceding code enters the string “welcome to VBA” in cell A1. Thereafter, the selection shifts to cell A2. The string “welcome to VBA” has been entered in cell A1 because this cell was selected (in step 1) before running the code.
Each time the code is run, the currently selected cell (or the active cell) is filled with the string “welcome to VBA.” Then, the selection shifts to cell A2. So, if cell M10 is the active cell, running the code fills this cell with the stated string and selects cell A2 at the end.
However, had cell A2 been selected, running the code would have filled this cell with the string “welcome to VBA.” Moreover, in the end, cell A2 would have remained the selected cell.

Stage 5–Save the Recorded Macro (or the VBA Code)
Let us learn how to save a workbook containing a recorded macro. If a macro is saved, its VBA code is also saved.
The steps to save a workbook containing a macro (or a VBA code) are listed as follows:
- Click “save as” from the File tab of Excel. The “save as” dialog box opens, as shown in the following image.
- Assign a name to the Excel workbook in the “file name” box. We have entered the name “macro class.”
- Save the workbook with the “.xlsm” extension. So, in the “save as type” box, choose “Excel macro-enabled workbook.”
- Click “save” to save the workbook.
A workbook containing a macro should always be saved with the “.xlsm” extension. This extension ensures that the macro is saved and can be reused the next time the workbook is opened.
Note 1: The “save as” command is used when a workbook is saved for the first time. It is also used when a new copy of the workbook is to be created and, at the same time, the original copy is to be retained as well.
Note 2: If the workbook containing a macro is saved as a regular workbook (with the “.xlsx” extension), the macro will not be saved. Further, one may lose the code of the recorded macro.

Frequently Asked Questions
1. What is programming and how is it carried out in Excel?
Programming refers to instructing Excel to perform one or more tasks. To instruct Excel, either a code can be written in the Visual Basic for Applications (VBA) or a macro can be recorded in Excel. Each time a macro is recorded, a code is generated by VBA in the background.
The steps to carry out programming in Excel are listed as follows:
a. Enable the Developer tab in Excel.
b. Record a macro in Excel. For recording, perform each activity in the sequence in which it should be recorded.
c. Save the code generated by the recorded macro and run it whenever required.
One can also carry out programming by writing a code manually and then saving and running it.
Note: To learn the details of programming in Excel, refer to the description of the different stages given in this article.
2. How to write a code for programming in Excel?
For programming in Excel, a code is written in Visual Basic Editor (VBE), which is a tool of VBA. The steps to write a code in VBE are listed as follows:
a. Open a blank Excel workbook.
b. Press the keys “Alt+F11” to open VBE.
c. Select any worksheet from “Microsoft Excel Objects” listed in the “Project-VBA Project window.”
d. Click the Insert tab and choose “module.” A folder named “modules” and an object named “module1” are created in the “Project-VBA Project window.” At the same time, a window opens on the right, which is titled “Book1-Module1 (Code).”
e. Enter the code in the “Book1-Module1 (Code)” window that has opened in the preceding step.
f. Click anywhere within the code once it has been written entirely.
g. Run the code by pressing F5 or clicking the “Run Sub/UserForm (F5)” button.
If the code has been entered correctly in step “e,” Excel will perform the tasks it has been instructed to. However, if there is an error in the code, an error message will appear.
Note: For saving a code, refer to stage 5 of programming in Excel given in this article.
3. How to learn programming in Excel?
To learn programming, one can learn how to record a macro in Excel. It is easier to learn macro recording than to create a code manually in VBE. Moreover, macro recording can be done even if one does not know VBA coding.
However, each time a macro is recorded, examine the generated code carefully. As one becomes proficient in macro recording, the codes too will become understandable. In this way, learning programming in Excel will no longer be a complicated task.
Recommended Articles
This has been a guide to Programming in Excel. Here we discuss how to record VBA macros along with practical examples and downloadable Excel templates. You can learn more from the following articles–
- Create Button Macro in ExcelA Macro is nothing but a line of code to instruct the excel to do a specific task. Once the code is assigned to a button control through VBE you can execute the same task any time in the workbook. By just clicking on the button we can execute hundreds of line, it also automates the complicated Report.read more
- What is VBA Macros?
- Excel MacroA macro in excel is a series of instructions in the form of code that helps automate manual tasks, thereby saving time. Excel executes those instructions in a step-by-step manner on the given data. For example, it can be used to automate repetitive tasks such as summation, cell formatting, information copying, etc. thereby rapidly replacing repetitious operations with a few clicks.
read more - Code in Excel VBAVBA code refers to a set of instructions written by the user in the Visual Basic Applications programming language on a Visual Basic Editor (VBE) to perform a specific task.read more
Whether you’re new to Excel VBA or just want a refresher, this tutorial is for you. In 20 minutes (or less!), we’ll take you through the basics of working with VBA code. You’ll learn to write and run VBA code, use the macro recorder, and more! We also give you some common examples when working on VBA Excel. So, buckle up as we’re going to get started! 😉
What is VBA in Excel?
VBA stands for Visual Basic for Applications. It’s a programming language used to automate tasks in Microsoft Office products, including Excel, Word, and Outlook. With VBA Excel, you can write code to automate tasks, create custom functions, and even move data between Office programs.
This programming language was introduced with Excel 5.0 in 1993. It might be hard to believe that the Excel and VBA combo has been around for almost 30 years now. And as you can see, we’re still talking about it today! This means that this language is still popular among spreadsheet users—which makes sense considering what it offers and that few other spreadsheet apps can compete with this.
Why is VBA important?
VBA is important because of all the things it can do, but mainly its ability to automate mundane tasks that take a lot of time is particularly useful. As well as that, here are some common uses of VBA in Excel:
- Create custom functions. If you find yourself using the same complex formula over and over again, you can save yourself some time by creating a custom function using VBA.
- Create custom add-ins for Excel. Add-ins are small programs that extend the functionality of Excel. You can, for example, create an add-in that allows you to apply formatting to selected cells, generate random numbers, apply formulas, or anything else you may want to improve productivity.
- Simplify the data entry process. With Excel VBA, you can create custom forms that will simplify data entry and eliminate errors. You’ll be able to enter all information in one place with consistent formats. It’s easier for everyone involved.
- Automate tasks that you would otherwise have to do manually. Automating tedious, manual tasks with VBA Excel code is an easy way to save time and avoid mistakes. Here’s a common example. You might need to frequently update your spreadsheets by pulling data from various sources such as QuickBooks or Xero. However, doing this manually every day can prove costly in both efficiency and accuracy due to human error.
Are there no-code ways to automate workflows in Excel?
If you want to automate such processes without coding, Power Query is one of your best options. However, it’s not always ideal if any of your data sources isn’t supported by Power Query.
In this case, try using third-party integration tools like Coupler.io, which is a solution to import data from different sources into Excel automatically. You can even set up a schedule to refresh your data (hourly, daily, monthly, etc.) to keep it always up-to-date.
Coupler.io allows you to pull data from CRM applications like Pipedrive, time-tracking tools like Clockify and many other apps and sources including Microsoft Excel. Check out all the available Excel integrations to choose the ones you need. So, you basically can automate data flow between your workbooks or even merge Excel files using it.
Excel VBA programming: Before you get started
Before we get started with Excel VBA programming, let’s understand a few basic terminologies and how to open the Visual Basic Editor (VBE).
A few basic terminologies
Here are a few terminologies we’ll be looking at in this article:
- A macro is simply a procedure written in VBA Excel. You can write macros by using the macro recorder or write your own code.
- A module is where you will store your code. Think of it as a blank canvas where you can write whatever you want.
- A procedure is an instruction or a set of instructions. The two main types of procedures are Sub procedure and Function procedure.
- A Sub procedure (or Sub) is a procedure that only performs actions and does not return a value.
- A Function procedure (or Function) is a procedure that returns a value.
How to open VBA editor in Excel
To use VBA in Excel, you first need to open the Visual Basic Editor (VBE) by simply pressing Alt+F11 on your keyboard.
Alternatively, click on the Developer tab from the ribbon menu, then click on the Visual Basic button. If the Developer tab is not visible, see the section below on how to show the Developer tab in Excel.

After the Visual Basic Editor is open, you’ll be able to find multiple sections described below:

- Menu bar. This is the main menu of the VBE and contains various commands. Many of the commands have shortcut keys associated with them.
- Code pane. This area is where the macro/code can be found. Here are all declaration variables, procedures, functions, etc.
- Toolbar. It contains most of the useful commands that are used while codding. You can customize it by clicking View > Toolbars, then customize as you see fit. Most people just leave them as they are.
- Project Explorer. The Project Explorer Window can usually be found on the top left side of the VBA Excel editor, showing a hierarchical list of open projects. This list contains Microsoft Excel Objects (Sheets and ThisWorkbook section), Forms (all User Forms created in the project), Modules (all macro modules), and Class Modules.
- Properties Window. The Properties Window is where you can set all the properties for all objects from your application. The properties can be sorted alphabetically or by category.
How to show the Developer tab in Excel
The Developer tab is hidden by default in Excel, but you can easily show it if you need to access the features it contains. To do so, here’s a quick guide:
- First, click on File > Options.
- In the Excel Options dialog box, click on Customize Ribbon.
- On the right pane, check the box next to Developer.
- Click OK to save your changes and close the dialog box.
Just that! Now when you open Excel, you will see the Developer tab listed among the other tabs at the top of the window.
How to use VBA in Excel
Most of the code people write in VBA are Sub and Function procedures. So, in this section, we’ll mostly learn about how to write, edit, and run them.
How to write VBA code in Excel manually
To write VBA code manually, follow the steps below:
- Create a new Excel workbook.
- Press Alt+F11 to activate the VBE.
- Click Insert > Module in the menu bar.
- Type manually or copy-paste the following code in the editor:
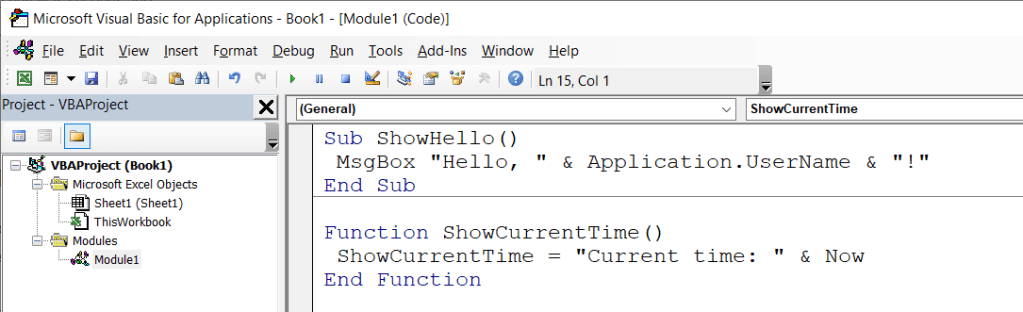
Sub ShowHello()
 MsgBox "Hello, " & Application.UserName & "!"
End Sub

Function ShowCurrentTime()
 ShowCurrentTime = "Current time: " & Now
End Function
- If you want, save the code by pressing Ctrl+S. The extension of the file needs to be XLSM because it contains a macro.
Code explanation:
- The ShowHello() is an example of a Sub procedure. Every Sub procedure starts with the keyword Sub and ends with an End Sub.
- The ShowCurrentTime() is an example of an Excel VBA Function procedure. Every Function procedure starts with the keyword Function and ends with an End Function.
How to run VBA code in Excel
Sub and Function procedures are run differently in Excel. Both can be executed in several ways, but we will cover only a few of them.
To execute an Excel VBA Function procedure:
You can click the Run button in the VBE toolbar or simply press F5 for the same command. Excel executes the Sub procedure in which the cursor is located.

Alternatively, you can execute Sub procedures from Excel by pressing the Macros button in the Developer tab:

To execute a Function procedure:
You can use it in a worksheet or call it from another procedure (a Sub or another Function procedure).
As an example, let’s see how to execute the ShowCurrentTime function by using it as a worksheet formula. To do that, simply type =ShowCurrentTime() in a cell, then press Enter. See the image below:

How to record VBA code in Excel
Another way you can get code into a VBA module is by recording your actions using the Excel Macro Recorder. The result is always a Sub procedure. So, we cannot use this tool as an alternative method of creating functions — they must be manually entered by writing and editing the code ourselves.
Here is the step-by-step for recording a macro:
- Go to the Developer tab and click the Record Macro button.
- In the Record Macro dialog box, enter a name for the macro. Optionally, you can enter a shortcut key, macro location, and description.

- Click OK to start recording.
- Perform all the actions that need to be recorded. For example, let’s just enter 1 to 10 from A1 to A10 manually:

- When you finish, click the Stop Recording button in the Developer tab.
How to edit recorded VBA code in Excel
After you record a macro, you may be curious to see what the code looks like. You might even wonder where your recorded macros are stored, right? Well, by default, they’re stored in a module.
So, to view and edit recorded macros, first, you need to activate the VBE by pressing Alt+F11 on your keyboard. After that, double-click the new module created and locate the code you want to edit.
For example, here is the AssignRowNumber macro we recorded previously:
Sub AssignRowNumber()
'
' AssignRowNumber Macro
' This procedure inserts row numbers to cells, 1 to 10.
'
' Keyboard Shortcut: Ctrl+Shift+M
'
    ActiveCell.FormulaR1C1 = "1"
    Range("A2").Select
    ActiveCell.FormulaR1C1 = "2"
    Range("A3").Select
    ActiveCell.FormulaR1C1 = "3"
    Range("A4").Select
    ActiveCell.FormulaR1C1 = "4"
    Range("A5").Select
    ActiveCell.FormulaR1C1 = "5"
    Range("A6").Select
    ActiveCell.FormulaR1C1 = "6"
    Range("A7").Select
    ActiveCell.FormulaR1C1 = "7"
    Range("A8").Select
    ActiveCell.FormulaR1C1 = "8"
    Range("A9").Select
    ActiveCell.FormulaR1C1 = "9"
    Range("A10").Select
    ActiveCell.FormulaR1C1 = "10"
End Sub
However, you may agree that the above code is not the best way to assign values to the cells. It selects a cell, assigns value as a formula, and then moves to the next cell. We can make the code more compact, readable, and dynamic using the following code:
Sub AssignRowNumber()
'
' AssignRowNumber Macro
' This procedure inserts row numbers to cells, 1 to 10.
'
' Keyboard Shortcut: Ctrl+Shift+M
'
 For i = 1 To 10
  ActiveSheet.Cells(i, 1).Value = i
 Next i

End Sub
In conclusion, the Macro Recorder is a great way to get into VBA programming. However, it can be complicated sometimes to understand the macro recorded. The good news is that recorded macros can be customized after they’re created, giving you even more control over what your program does and how it operates!
How to assign VBA code to a button in Excel
You can easily add a button to an Excel sheet and assign a macro to it. A few simple steps can do this.
For example, let’s take the running ShowHello() Sub procedure one step further by executing it on a button click.
Here are the steps:
- Click the Developer tab, then click Insert > Button (Form Control).
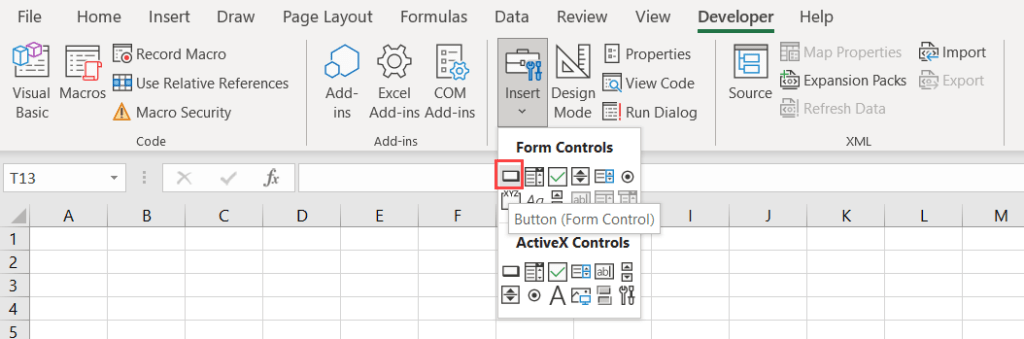
- Click and drag anywhere on the worksheet to create a button.
- In the Assign Macro dialog, select ShowHello, then click OK.

- By default, a “Button 1” is created. Click the button’s text and type “Show Hello” to rename it.
- To test the button, click on it. You’ll see a message box appear showing Hello to you 😉

More VBA Excel examples
This section contains several examples that demonstrate common VBA programming concepts. You may be able to use or adapt these pieces for your own needs.
Example #1: Looping through a range of cells
Many macros operate on each cell in a range, or they perform selected actions based on each cell’s value. These macros usually include a ForEach-Next loop that processes each cell in the range.
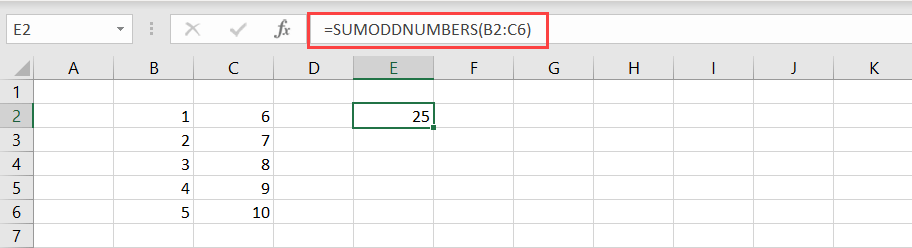
The following SUMODDNUMBERS function demonstrates how to loop through a range of cells to sum all the odd numbers.
Function SUMODDNUMBERS(range As range)
 Dim cell As range

 For Each cell In range
  If cell.Value Mod 2 = 1 Then
   SUMODDNUMBERS = SUMODDNUMBERS + cell.Value
  End If
 Next cell

End Function
To use the function, type =SUMODDNUMBERS() in a cell and input a range of cells in the parameter. See the screenshot below:
Example #2: Conditional structure
The following example shows how to use a decision structure using a Select-Case statement. Many programmers like the Select-Case structure over If-Then-Else because the code looks more readable when checking multiple conditions.
Sub ShowBudgetText()
    Dim Budget As Long
    Dim Result As String

    Budget = InputBox("Enter project budget: ")

    Select Case Budget
        Case 0 To 5000: Result = "LOW"
        Case 5001 To 10000: Result = "MEDIUM"
        Case Is > 10000: Result = "HIGH"
    End Select

    MsgBox "You have a " & Result & " budget."
End Sub
Code explanation:
The code prompts the user for a value, evaluates it, and then outputs a result. It evaluates the Budget variable and checks for three different cases (0–5000, 5001-10000, and greater than 10000). The Select-Case structure is exited as soon as VBA finds a TRUE case and executes the statements for that particular block.
Example #3: Error handling
You can’t always anticipate every error that might occur. But if possible, you should trap them to ensure your program doesn’t crash at runtime.
Below are the three methods of error handling in VBA. Each has its own benefits and drawbacks, so it’s important to choose the right one for your needs.
- On Error Resume Next ignores any encountered errors and prevents the code from stopping.
- On Error GoTo 0 stops the code on the line that causes the error and shows a message box describing the error.
- On Error GoTo [Label] allows you to specify what you want to do with the errors.
Let’s see an example. We’ll add an On Error GoTo [Label] error handling method to our previous ShowBudgetText Sub. This will trap any type of runtime error and then display the error in a warning message box.
Sub ShowBudgetText()
    Dim Budget As Long
    Dim Result As String

    On Error GoTo ErrorHandler

    Budget = InputBox("Enter project budget: ")

    Select Case Budget
        Case 0 To 5000: Result = "LOW"
        Case 5001 To 10000: Result = "MEDIUM"
        Case Is > 10000: Result = "HIGH"
    End Select

    MsgBox "You have a " & Result & " budget."

ErrorHandler:
    MsgBox "Please enter a valid input.", vbExclamation

End Sub
5 Tips for mastering Excel VBA programming
Learning any new programming language can be daunting at first, but we hope this article has given you a good start in learning Excel VBA.
In this last section, we’ve included five of our top tips that will help you on your journey to mastering the language:
- Start by learning the basics of programming. If you’re new to programming, it’s important to start with understanding what a variable is, various data types in VBA, how to use loops and conditions, etc.
- Make use of online resources. Fortunately, there are plenty of resources available to help you learn the basics. Once you have a good understanding of programming fundamentals, you’ll be able to start taking advantage of Excel VBA’s more advanced features.
- Familiarize yourself with common Excel VBA objects and methods. Some of the most commonly used Excel VBA objects include Range, Worksheet, and Workbook.
- Experiment with the Record Macro feature. This is a great way to get a feel for Excel VBA without having to write any code yourself. Simply record a macro and then edit the resulting code to customize it to your needs.
- Don’t forget to have fun! Excel VBA can be a powerful tool, but it’s also meant to be enjoyable. So relax and enjoy the process of learning something new.
Finally, thanks for reading, and have fun! 😊
-

Senior analyst programmer

Back to Blog
Focus on your business
goals while we take care of your data!
Try Coupler.io
Excel Programming (Table of Contents)
- Introduction to Programming in Excel
- How to Program in Excel?
Introduction to Programming in Excel
Have you ever been tired of doing a task in Excel which you feel can be automated and save your time? Most of the time, you must have encountered such tasks. However, in order to automate any task, you first need to have programming skills for that particular language. In Excel, you can do programming with the help of Visual Basic for Application (VBA) which is Excel’s own programming language that can help you to automate the tasks. In this article, we will see how we can do programming in Excel VBA. VBA can be used to write a program that can automate the task for you. The piece of lines we write under VBA is called Macro, which is written in such a way that they instruct the Excel system about what to be done.
How to Program in Excel?
Let’s understand how to Program in excel with few illustrations.
Enabling Developer Tab
The first thing that comes is enabling the developer tab that helps you to record and store a macro (VBA Code). Let us see how we can get that enabled.
- Navigate to the File menu in your excel file and click on it.
- Within the File menu, click on Options, and it will load a new window with all excel options available.
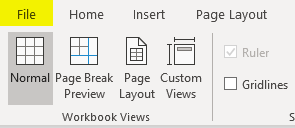
- In the new window that popped up named Excel Options, click on the Customize Ribbon tab. You can see all the customization options you can use for Excel Ribbon, which appears at the top of your Excel file.
- Enable Developer option under Main Tabs dropdown within Customize the Ribbon: section. You can check (tick-mark) the Developer tab to enable it. Click the OK button placed at the bottom right of the Excel Options tab, and that’s it.
- You have successfully enabled the Developer option within your excel. If you check the Excel Ribbon in your file now, you’ll be able to see a new tab added there with the name Developer on it.
This is the first step you need to follow before you start writing macros in Excel. Because the Developer tab is needed to record and run the macro, this option tab is not by default enabled, which is why we tried enabling it here first.
Recording a Macro
- Open the Excel file. Navigate towards the Developer tab you just enabled and then click on the Record Macro button, categorized and can be seen under the Code section.
- As soon as you click on the Record Macro button, you’ll see a window popping up; in that window, you must have to assign a name to the macro; you can also assign a shortcut key for this macro to run. Can you add the description, if any, for this macro you are creating? Once you are done with all this, you can click on the OK button placed at the right bottom of the window. See the screenshot below for your reference.
As soon as you click OK, the system starts recording the macro and all the tasks you perform will be recorded and converted to Excel Program in the backend.
- Try typing the sentence “This is my first VBA code, and I am very happy!” in cell A1 within the Excel sheet and press Enter key. These steps will be recorded in the backend of the macro.

- Under the Code section, you might have observed that the Record Macro button has changed to Stop Recording. This is like Play and Stop. Record Macro Works as Play button and Stop Recording work as Stop button. Click on the Stop Recording button to stop the recording.
The magic behind all this is, Excel has recorded my steps here and converted those into pieces of code so that this task can be automated. It means, every single step, selecting cell A1, inputting the text as “This is my first VBA code, and I am happy!”, clicking Enter to go to the next cell. All these steps are converted into a VBA code. Let’s check the code now.
- In order to go to Visual Basic Editor, you can click on the Visual Basic option under the Code category in the Developer tab, or you can use Alt + F11 as a shortcut for the same.
- Navigate towards the Modules section under VBAProject and click on the plus button under it to see the list of active modules in VBA.
- Inside the Modules folder, you can see Module1 as soon as you click on the plus sign. You can double click on Module1; it is where your code for the task we performed in previous steps (Step 3 and 4) are recorded. Save this code, and you can run it every time to get the same output. See the screenshot below:
Conclusion
- We can record a macro in Excel to automate day to day small tasks, which are simpler for the system to manipulate programmatically.
- The cool thing about it is you don’t need to dig your head deep for the logic behind each step you perform. Excel VBA does it for you.
- For some complex tasks, such as the one which involves looping and conditional statements, you need to write code manually under VBA.
Things to Remember About Programming in Excel
- The Developers tab is not by default enabled and visible to you in Excel Ribbon. You need to enable it through Excel Options.
- Recording a macro works on simple tasks that are repeating, and you need those to be automated. However, for complex tasks which involve looping or Conditional Inputs and Outputs are still need to be coded manually under VBA.
- You need to save the file as an Excel-Macro Enable file format in order to be able to read and run the code again on your excel.
Recommended Articles
This is a guide to Programming in Excel. Here we discuss how to Program in Excel along with practical examples and a downloadable excel template. You can also go through our other suggested articles –
- Ribbon in Excel
- TRIM Formula in Excel
- Project Management Template in Excel
- COUNTIFS in Excel
Written by Puneet for Excel 2007, Excel 2010, Excel 2013, Excel 2016, Excel 2019, Excel for Mac

KEY POINTS
- Visual Basic Editor is a code editor for VBA.
- It’s a separate application but you can only use it with Excel.
- You need to have the developer tab on the ribbon to access it.
- You can also use the keyboard shortcut (Alt + F11).
- It also stores the macros that you recode with the macro recorder.
- It has multiple tools to help you to write and manage all the codes.
The world of VBA starts with the Visual Basic Editor (VBE).
It’s the place where you write and manage all the macro codes and if you ask me about VBE, I’d say if you are serious about learning VBA you need to understand all the components of VBE.
That’s why it’s part of our VBA tutorial and in this guide, we have covered every single aspect of Visual Basic Editor to make you understand its functionality.
So, let’s get started.
I will be using different words (VBA editor, VB editor, or VBE) in this guide for referring to the Visual Basic Editor, so don’t be confused with it.
What is the Visual Basic Editor?
Visual Basic Editor is an application (a separate one) in which you can write and save all the VBA codes. In simple words, it’s a code editor for Excel in which you can write all the macros and store them. Even though it is a separate application (VB Editor) you can only use it with Excel.
Yes, that’s right. You can’t run VBE separately; there must be an Excel workbook open for using VBE.
Visual Basic Editor is the only way to write a VBA code in Excel. In fact, all Microsoft applications that host VBA use the Visual Basic Editor for script writing (writing code).
Below is the VBE:
Microsoft Windows

Mac

VBA is one of the ADVANCED EXCEL SKILLS and to master the VBA; you need to learn all the aspects of Visual Basic Editor.
Open the Visual Basic Editor
From the developer tab
To open the visual basic editor, you need to have the developer tab on the ribbon and to activate the developer tab (steps to add).

Now on the developer tab, in the code group, there is a button called “Visual Basic” and when you click on this button it opens the VB editor.

Shortcut Key (Window)
You can also use the keyboard shortcut key Alt + F11 to open the VBE in windows and Opt + F11 or Fn + Opt + F11 for MAC.
Even if you don’t have the developer tab on the ribbon, this shortcut key will still work and open the editor.
Edit a Macro from the List
If you want to open the VBA editor to edit a specific macro, then you can open the macros list from the developer tab.

And click on the edit button to open the VB editor to edit that specific macro.

On Quick Access Toolbar
You can also add a button on the quick access toolbar to open the VBA editor. For this, you need to click on the drop-down on the quick access toolbar and open more commands.

And then select the developer tab from “Choose Commands From” and then add the visual basic editor to the quick access toolbar by clicking on the add button.

Now you can open the visual basic editor from the button that you have on the QAT.

From the Worksheet Tab
You can also open the VBA editor by right-clicking on the worksheet tab and clicking on the view code. It will instantly take you to the code window of that worksheet.

Components of Visual Basic Editor
When you open the VBA editor first time it looks like an old application and to understand how it works you need to go component by component.

The user interface is the same (almost) for all the Excel versions in the last more than 15 years, so no matter which Excel version you are using, you can learn about Visual Basic Editor from this guide. Yes, VBE has different components which can help you in different ways, so let’s explore them one by one.
- Menu Bar
- Tool Bar
- Project Window
- Properties Window
- Code Window
- Immediate Window
- Watch Window
- Object Browser
- Find and Replace
- Locals Window
Just like any other application VBA editor has a menu bar where you can find all the options that are available to the user.
Now in the menu bar, each tab is a category of options that are available to use. Let’s suppose, in the edit menu, you can see all the options from cut-copy-paste, find and replace, and adding indent and outdent.

Along with all the options (most of them), you can find the shortcut keys to use those options.
2. Tool Bar
Just below the menu bar, you have the toolbar which is a collection of some of the options that a normal user needs to use more frequently. When you open the visual basic editor first time you will only have the standard toolbar, just like the image below.

But there are total four toolbars that you can add and use.
- Debug
- Edit
- Standard
- User Form
If you go to the view tab in the menu bar you have the option to add or remove these toolbars.

And you can also add or remove buttons from the toolbar if you want.

You can also move a toolbar just by dragging and dropping from the small dots on the right side.

3. Project Window/ Project Explorer
The project window is the place where you can see all the ongoing projects. Whenever you open a file and then open the visual basic editor you can see the hierarchy of that file in the project window.

Every project further has a collection of objects:
- Worksheet: Each worksheet in a workbook lists as an object.
- The Workbook: It represents the workbook itself as an object.
- Module: It’s the place where you write code or recorded macros stores.
- Chart Sheet: Chart sheet in the workbook will also be listed there.

When you open the VB editor, you’ll find the project window there by default. But if it’s not there somehow you can add it from the View (Menu Bar) or you can use the shortcut key Control + R.
Each object that is listed on the project window has its own code window which you can open by double click on it or you can right-click and select the view code option.

The project window is the best way to navigate through all the ongoing projects and when you start working with the editor you will get to know more about it.
4. Properties Window
As the name suggests the properties window gives you access to the properties of the selected object. Each object, for example, a worksheet has its own properties that you can see and make changes in it.

For each property, there is a drop-down on the right side from where you can change or edit that property.

Quick Tip: You can change the name of a project from the properties window.

And, if the properties window is not there by default you can activate it from the view (menu bar), or you can also use the shortcut key F4.

5. Code Window
The code window is the place where you write codes and do most of your work (editing, writing, and testing). In simple words, the code window is the place where you do all the programming.

When you first see it, it looks like a simple text editor, but it has Intellisense that can help you while programming.
There is no way I have found to add line number in the code window as other code editors have but still, VB editor indicates you the line number of the code.
Note
There’s no way I have found to add line number in the code window as other code editors have but still, VB editor indicates you the line number of the code.
6. Immediate Window
Immediate Window is the place where you can debug your code. You can type a line of code and test how it works. Let’s say if you want to test the following code:
Range("A1").Value = 9999All you need to do is enter type a question mark and then paste the code there and HIT enter. It will immediately show the result of the code.

The other way is to add Debug.Print before the code and get its result value in the immediate window.
Sub Macro1()
Debug.Print Range("A1").Value = "Yes"
End Sub
By default, the immediate window won’t be there when you open the visual basic editor, so you need to activate it from the view tab in the menu bar. You can also use the shortcut key Control + G.
7. Watch Window
Just like Excel Watch Window, the visual basic editor also has a watch window where you can add expressions to track them. You simply need to select the expression and then right-click and go to add a watch.

In the below example, I have added the Selection.Value to the add watch.

Now, to activate the watch window, go to the view menu and click on the watch window option.

And here you have the watch window tracking the added expression.
![]()
8. Object Browser
VBA has its own object browser which can help you to work with all the objects by finding all the properties and which you can use.

Imagine if you want to use the range object, the object browser will tell you about all the properties and method that comes with it. Look at the below example.

To open the object browser, use the shortcut key F2 or you can also go to the view tab and click on the object browser to open it.
9. Find and Replace
Just like the find and replace in Excel, the VBA editor has its own find and replace option that you can use to find and replace values from procedures. To open the FIND option, you can use the shortcut key Control + F, and to open the replace you can use the shortcut key Control + H.

Otherwise, you can open both options from the edit menu.

The find and replace option in VBE gives you different search patterns, like, if you want to find and replace something from the current procedure, from the current module, or from the current project.
You can also use the CASE SENSITIVE search and decide the direction of the search as well.
10. Locals Window
You can use the Locals window in VBE to displays all declared variables in the current procedure and their present values.
Using VB Editor to Write a Code
At this point, you know all the major components of the VBA editor, so now let’s learn how to add code in it.
Module Code Window Vs Object Code Window
There are two different types of code windows and both look just the same but there is a difference that you need to know.
- Module Code Window: Code in the normal module can be executed manually or you can also call it from a separate procedure.
- Object Code Window: Code in the object code window can be executed by using an event. Let’s suppose you want to run code when you double click on a cell, in that case, you need to use the double click event and you need to add code to that worksheet.
2. Module Code Window
You will be writing most of the VBA code in a module. To add code in a module you need to use the SUB procedure or the FUNCTION procedure.
- Sub procedure
- Function procedure
The difference between a sub and a function procedure is sub procedure can’t return a value, on the other hand, a function procedure can return a value.
When you record a macro that code goes straight into a module that VBA inserts automatically when you use the macro recorder.
Insert a Module
When you need to write code, you have to insert a module and for this, you simply need to go to the project window and right-click on the project name, and from that menu go to insert and select module.

Remove a Module
You can also remove a module if it doesn’t require anymore so you just simply need to right-click on the module and select remove.

And when you click on remove, it asks you if you want to back up that module before removing it. There is also an option where you can export a module to save it as a file in your system.
3. Object Code Window
Open the code window for the object you simply need to double click on it and in its the code window, there is a dropdown from where you can select the event that you want to use to execute the code.

Imagine if you want to write the code and want to execute on the double click then you need to select “BeforeDoubleClick” from the dropdown.
Understanding Design Mode, Run Mode, and Debug Mode
You can use the visual basic editor in three different modes depending on the face of programming, writing the code, locating an error, and fixing an error.
- Design Mode: Normally, when you are working in VB editor on a code you are in the design mode. Even then you just writing the code instead of designing a user form or a form you are in the design mode, like typing a code. This is also called design time.
- Run Mode: When you run a code to test a code that is how it works you are in the run mode. The best example to define this mode is when you execute a code using the Run button from the toolbar. This is also called runtime.
- Break Mode: When a code is running and in between the execution is suspended, at that time you are in break mode. In this mode, you can run a code step by step. This is also called debugging.
Tips to work with VB editor like a PRO
Just like any other programming language in VBA you can also use comments to define how that code works. Using comments is a good habit and it can help you in so many ways.
- Track Changes
- Contact Details of the Programmer
- How to Troubleshoot the Code
- And much more
To add a comment, you need to type an apostrophe and then the line of code.
Related Tip: VBA Comment Block
Quick Info
Now, look at the below example where I am adding add a VBA function (VBA LEFT Function), and the moment I type the name of the function, it shows me a tooltip for all the arguments which I need to define.

You can also use the shortcut key Control + I or use the quick info option from the EDIT menu.

Auto List Members
Each object in VBA comes with some properties and methods and when you insert an object or a command in the code window and then you enter (.) it shows you the complete list of properties and methods which come with that object.

In the above example, when I added a (.) after the borders property of the range, it showed me all the available properties that are available to access.
List Constants
While defining expressions for a property or a method you can use the list of constants available. In the below example, while using the Border Around method it showed me all the constants which are available for the weight argument.

You can use the shortcut key Control + Shift + J to get the list of constants or you can also go to the edit menu and use the option from there.

Activate Option Explicit
While writing VBA codes you will need to use variables and one of the most important things while using variables is to declare their data type. And there’s a chance that you could forget to declare it.
But when you use the option explicit statement, then you have to declare the data type for every single variable which you are using, and if you fail to do so VBA will show an error message. It’s like forcing yourself to declare every single variable with its data type. For this, you can go to the tools menu and open the options.

And from the options, tick mark “Require Variable Declaration” and click OK.

Now every module will have an Option Explicit statement at the beginning, and you have to declare every single variable.

Change the Code Window View
When you can write multiple codes in a single code window and VBA separate them with a divider, but if you want to have a more focused view, you can change the view of the code window. Below I have the codes in a single module.

But I can change this view from the view buttons from the bottom left of the window.

Now I have only active code visible.
Run a Code Step by Step
When you write a VBA code there could be a chance that that code has a bug or an error that can come while executing it. In that case, the best way is to execute that code step by step and validate each line of code.

For this, you can use shortcut key F8 to execute a code line by line or use step into option from the debug menu.

And there is also a button on the debug toolbar that you can use.

Code Indenting
When you write lengthy and complex codes then it’s important to structure them in the right way so that you can understand them later. For this, there’s one thing which comes handy, INDENTING. Indenting is basically structuring the code using tabs, below is an example.

To add indenting in a line you can use the TAB key from the keyboard, or you can also use the indent/outdent buttons from the toolbar.

Get Code from a Text File
The visual basic editor allows you to import VBA codes from a text file without copy-pasting. Once you insert a module you can go to the insert menu and select the file option from there.

It opens the dialog box where you can locate the text file and import all the codes from it to the current module.
R1C1 Reference Style
If you ever worked with the R1C1 reference style, then I’m sure you can agree on this point that way easier to write codes with it.
R1C1 Reference Style
Line Break
Even though you can adjust the width of the code window and make it wide but there could be a situation when you will be dealing with long lines of code that makes it hard to read.
The best way to deal with this problem is to add a line break. Basically, a line break is something when you break a line into two lines using the line break character.
Use a SPACE & UNDERSCORE and hit enter to add a line break.

Formatting
When it comes to user interface visual basic editor is not that good looking. But there are few formatting options that you can use to customize it or change its look the way you want.
From the Tools Menu Options Editor Format, you can access the formatting option where you can change the font style size or background color as well

Check out this video on customizing the VBA editor for a dark theme.
Personal Macro Workbook
There could be some macros that you need to access within all the workbooks that you use.
In that case, you can use the Personal Macro Workbook that can help you to store all the important codes in one place and you can access them from all the workbooks.

Using Bookmarks
The visual basic editor allows you to add bookmarks to a line from Right Click ➤ Toggle ➤ Bookmark.

And then you can also navigate between bookmarks from the option from the edit menu.

Syntax Checking
When you write codes in the code window VBA check for the syntax error and notify you when you make a syntax error. This option is activated by default, but you can also turn it off if you don’t want VBA to notify you every time you make an error.
Tools Menu ➤ Options ➤ Editor Tab ➤ Auto Syntax Check.

But I would recommend you not to deactivate it because it can help you to identify all the syntax errors that you make while writing codes.
List of Macros
If you have a lot of macros in a module, there is an option that you can use to see all the macros (Tools ➤ Macro).

There’s one big benefit of using this list option is that you can run a macro, delete it, and edit it without navigating to that procedure.
Locking a Project with a Password
Visual Basic Editor also gives you an option to lock a module with a password. So, if you don’t want the users to know the code and don’t want them to make a change in the code, you can use this option.

Tools Menu ➤ VBAProject Properties ➤ Protection Tab

Important Shortcut Keys
- Shift + F7: Object browser.
- F5: Run macro.
- Tab: Add an indent.
- Alt + Q: Close.
- F8: Step into.
- Control + H: Find and replace.
- Control + G: Immediate Window.
- Control + R: Project Explorer.
- F4: Properties window.
Learn some AMAZING Keyboard Shortcuts: Excel Keyboard Shortcuts Cheat Sheet
Alternative to Visual Basic Editor
Well, I have tried quite a few other editors to write a macro but the problem which I have found is that without the Intellisense it’s really hard to use anything other than the visual basic editor itself.

VBA editor works along with Excel, you can test your codes instantly and you can save them into the workbook. But are a few names to try.
Visual Studio Code | Ultra Edit
Points to Remember
- You can maximize or minimize the code window.
- You can change a project’s name anytime.
- The project window is the best way to navigate through the editor.
- It will make a line red if there’s an error in it while writing the code.
- You can also add a bookmark to a line of code from the Right-Click Menu Toggle Bookmark.
- You cannot use the visual basic editor without opening an Excel workbook.
More on VBA
- VBA Functions
- VBA to Add a New Sheet
- VBA Code to Activate a Worksheet
- VBA IF Then Statement
- VBA User Defined Function
- VBA Message Box
- VBA to Extract Hyperlink
- Macro to Highlight Duplicate Values
- VBA to Create a Pivot Table
[icon name=”bell” class=”” unprefixed_class=””] VBA is one of the Advanced Excel Skills
Should I need to install the Visual Basic Editor?
No. You don’t need to install the visual basic editor. It comes pre-installed with the Microsoft Office applications.
What if I don’t have the Developer Tab on the Ribbon?
If you don’t have the developer tab on the Excel ribbon, you can activate it from the Excel ribbon.
Is there an alternative to the Visual Basic Editor?
Not really. The IntelliSense that you have in the VBE makes it perfect to use to write VBA codes.
Содержание
- Способы записи макросов в Excel
- Создание макросов
- Создать макрос в Excel с помощью макрорекордера
- Написание макросов в Excel
- Настройка разрешения для использования макросов в Excel
- Вариант 1: Автоматическая запись макросов
- Запуск макроса
- Редактирование макроса
- Создание кнопки для запуска макросов в панели инструментов
- Создание графической кнопки на листе Excel
- Чтобы записать макрос, следует:
- Отображение вкладки “Разработчик” в ленте меню
- Абсолютная и относительная запись макроса
- Расширение файлов Excel, которые содержат макросы
- Что нельзя сделать с помощью макрорекодера?
- Редактор Visual Basic
- Запускаем выполнение макроса
- Корректируем макрос
Макрос записывается двумя способами: автоматически и вручную. Воспользовавшись первым вариантом, вы просто записываете определенные действия в Microsoft Excel, которые выполняете в данный момент времени. Потом можно будет воспроизвести эту запись. Такой метод очень легкий и не требует знания кода, но применение его на практике довольно ограничено. Ручная запись, наоборот, требует знаний программирования, так как код набирается вручную с клавиатуры. Однако грамотно написанный таким образом код может значительно ускорить выполнение процессов.
Создание макросов
В Эксель создать макросы можно вручную или автоматически. Последний вариант предполагает запись действий, которые мы выполняем в программе, для их дальнейшего повтора. Это достаточно простой способ, пользователь не должен обладать какими-то навыками кодирования и т.д. Однако, в связи с этим, применить его можно не всегда.
Чтобы создавать макросы вручную, нужно уметь программировать. Но именно такой способ иногда является единственным или одним из немногих вариантов эффективного решения поставленной задачи.
Создать макрос в Excel с помощью макрорекордера
Для начала проясним, что собой представляет макрорекордер и при чём тут макрос.
Макрорекордер – это вшитая в Excel небольшая программка, которая интерпретирует любое действие пользователя в кодах языка программирования VBA и записывает в программный модуль команды, которые получились в процессе работы. То есть, если мы при включенном макрорекордере, создадим нужный нам ежедневный отчёт, то макрорекордер всё запишет в своих командах пошагово и как итог создаст макрос, который будет создавать ежедневный отчёт автоматически.
Этот способ очень полезен тем, кто не владеет навыками и знаниями работы в языковой среде VBA. Но такая легкость в исполнении и записи макроса имеет свои минусы, как и плюсы:
- Записать макрорекордер может только то, что может пощупать, а значит записывать действия он может только в том случае, когда используются кнопки, иконки, команды меню и всё в этом духе, такие варианты как сортировка по цвету для него недоступна;
- В случае, когда в период записи была допущена ошибка, она также запишется. Но можно кнопкой отмены последнего действия, стереть последнюю команду которую вы неправильно записали на VBA;
- Запись в макрорекордере проводится только в границах окна MS Excel и в случае, когда вы закроете программу или включите другую, запись будет остановлена и перестанет выполняться.
Для включения макрорекордера на запись необходимо произвести следующие действия:
- в версии Excel от 2007 и к более новым вам нужно на вкладке «Разработчик» нажать кнопочку «Запись макроса»
- в версиях Excel от 2003 и к более старым (они еще очень часто используются) вам нужно в меню «Сервис» выбрать пункт «Макрос» и нажать кнопку «Начать запись».
Следующим шагом в работе с макрорекордером станет настройка его параметров для дальнейшей записи макроса, это можно произвести в окне «Запись макроса», где: 
- поле «Имя макроса» — можете прописать понятное вам имя на любом языке, но должно начинаться с буквы и не содержать в себе знаком препинания и пробелы;
- поле «Сочетание клавиш» — будет вами использоваться, в дальнейшем, для быстрого старта вашего макроса. В случае, когда вам нужно будет прописать новое сочетание горячих клавиш, то эта возможность будет доступна в меню «Сервис» — «Макрос» — «Макросы» — «Выполнить» или же на вкладке «Разработчик» нажав кнопочку «Макросы»
- поле «Сохранить в…» — вы можете задать то место, куда будет сохранен (но не послан) текст макроса, а это 3 варианта:
- «Эта книга» — макрос будет записан в модуль текущей книги и сможет быть выполнен только в случае, когда данная книга Excel будет открыта;
- «Новая книга» — макрос будет сохранен в тот шаблон, на основе которого в Excel создается пустая новая книга, а это значит, что макрос станет доступен во всех книгах, которые будут создаваться на этом компьютере с этого момента;
- «Личная книга макросов» — является специальной книгой макросов Excel, которая называется «Personal.xls» и используется как специальное хранилище-библиотека макросов. При старте макросы из книги «Personal.xls» загружаются в память и могут быть запущены в любой книге в любой момент.
- поле «Описание» — здесь вы можете описать, что и как должен делать макрос, для чего он создавался и какие функции несет, это чисто информативное поле, что называется на память.
После того как вы запустили и записали свой макрос, выполнив все нужные действия, запись можно прекратить командой «Остановить запись» и ваш макрос с помощью макрорекордера будет создан.
Написание макросов в Excel
Код макроса Excel написанный на языке Visual Basic for Application (VBA), а его выполняет инструмент приложения, к которому он присоединен. Большинство этих инструментов не доступно на уровне окна программы Excel. Как написать макрос.
Теперь продемонстрируем на примере информацию о том, как писать, редактировать и выполнять код макроса.
Чтобы написать макрос:
- Откройте рабочую книгу Excel, в которой необходимо использовать макрос: «РАЗРАБОТЧИК»-«Код»-«Visual Basic». Или нажмите комбинацию горячих клавиш ALT+F11.
- Перед началом работы в редакторе следует сделать простую настройку. Выберите инструмент в редакторе Visual Basic: «Tools»-«Options». И на вкладке «Editor» активируйте опцию «Require Variable Declaration». Это позволит реализовать автоматическое заполнение инструкций Options Explicit в начале каждого ново созданного кода. А в поле ввода «Tab Width:» укажите значение 2 вместо 4-х. Это позволит уменьшить ширину кода. Данная настройка редактора распространяется на все листы, но в границах одной рабочей книги.
- Выберите инструмент: «Insert»-«Module» чтобы создать новый стандартный модуль для макросов. В появившемся окне модуля под текстом Option Explicit введите следующий код макроса:
- Нажмите на кнопку в редакторе «Run Macro» или клавишу F5 на клавиатуре. В появившемся окне «Macros» нажмите на кнопку «Run», чтобы посмотреть результат работы макроса.


SubMyMakros()
DimpolzovatelAs String
Dimdata_segodnyaAs Date
polzovatel = Application.UserName
data_segodnya = Now
MsgBox"Макрос запустил пользователь: "& polzovatel & vbNewLine & data_segodnya
End Sub


Примечание. Если в главном меню отсутствует закладка «РАЗРАБОТЧИК», тогда ее необходимо активировать в настройках: «ФАЙЛ»-«Параметры»-«Настроить ленту». В правом списке «Основные вкладки:» активируйте галочкой опцию «Разработчик» и нажмите на кнопку ОК.
Настройка разрешения для использования макросов в Excel
В Excel предусмотрена встроенная защита от вирусов, которые могут проникнуть в компьютер через макросы. Если хотите запустить в книге Excel макрос, убедитесь, что параметры безопасности настроены правильно.
Вариант 1: Автоматическая запись макросов
Прежде чем начать автоматическую запись макросов, нужно включить их в программе Microsoft Excel. Для этого воспользуйтесь нашим отдельным материалом.
Подробнее: Включение и отключение макросов в Microsoft Excel
Когда все готово, приступаем к записи.
- Перейдите на вкладку «Разработчик». Кликните по кнопке «Запись макроса», которая расположена на ленте в блоке инструментов «Код».
- Открывается окно настройки записи макроса. Тут можно указать любое имя для него, если установленное по умолчанию вас не устраивает. Главное, чтобы имя это начиналось с буквы, а не с цифры, а также в названии не должно быть пробелов. Мы оставили название по умолчанию – «Макрос1».
- Тут же при желании можно установить сочетание клавиш, при нажатии на которые макрос будет запускаться. Первой клавишей обязательно должна быть Ctrl, а вторую пользователь устанавливает самостоятельно. Мы в качестве примера установили клавишу М.
- Далее следует определить, где будет храниться макрос. По умолчанию он расположен в этой же книге (файле), но при желании можно установить хранение в новой книге или в отдельной книге макросов. Мы оставим значение по умолчанию.
- В самом нижнем поле можно оставить любое подходящее по контексту описание макроса, но это делать не обязательно. Когда все настройки выполнены, жмем на кнопку «OK».
- После этого все ваши действия в данной книге (файле) Excel будут записываться в макрос до тех пор, пока вы сами не остановите запись.
- Для примера запишем простейшее арифметическое действие: сложение содержимого трех ячеек (=C4+C5+C6).
- Когда алгоритм был выполнен, щелкаем на кнопку «Остановить запись». Эта кнопка преобразовалась из кнопки «Запись макроса» после включения записи.


Запуск макроса
Для проверки того, как работает записанный макрос, выполним несколько простых действий.
- Кликаем в том же блоке инструментов «Код» по кнопке «Макросы» или жмем сочетание клавиш Alt + F8.
- После этого открывается окно со списком записанных макросов. Ищем макрос, который мы записали, выделяем его и кликаем на кнопку «Выполнить».
- Можно поступить еще проще и не вызывать даже окно выбора макросов, так как на первом этапе мы задали сочетание клавиш для быстрого вызова макроса. В нашем случае это Ctrl + М. Жмем данную комбинацию на клавиатуре, после чего он запускается.
- Как видим, он выполнил в точности все те действия, которые были записаны ранее.


Редактирование макроса
Естественно, при желании вы можете корректировать созданный макрос, чтобы всегда поддерживать его в актуальном состоянии и исправлять некоторые неточности, допущенные во время процесса записи.
- Снова щелкаем на кнопку «Макросы». В открывшемся окне выбираем нужный и кликаем по кнопке «Изменить».
- Открывается «Microsoft Visual Basic» (VBE) – среда, где происходит их редактирование.
- Запись каждого макроса начинается с команды
Sub, а заканчивается командойEnd Sub. Сразу же послеSubуказывается имя макроса. ОператорRange("…").Selectуказывает выбор ячейки. Например, при команде «Range(«C4»).Select» выбирается ячейка «C4». ОператорActiveCell.FormulaR1C1используется для записи действий в формулах и других расчетов. - Попытаемся немного изменить макрос, дописав выражение:
Range("C3").Select
ActiveCell.FormulaR1C1 = "11" - Выражение
ActiveCell.FormulaR1C1 = "=R[-3]C+R[-2]C+R[-1]C"заменим наActiveCell.FormulaR1C1 = "= R[-4]C+R[-3]C+R[-2]C+R[-1]C". - Закрываем редактор и запускаем макрос. Как видим, вследствие введенных нами изменений была добавлена дополнительная ячейка с данными. Она также была включена в расчет общей суммы.
- В случае если макрос слишком большой, его выполнение может занять значительное время, но внесением ручного изменения в код мы можем ускорить процесс. Добавляем команду
Application.ScreenUpdating = False. Она позволит сохранить вычислительные мощности, а значит, ускорить работу. Это достигается путем отказа от обновления экрана во время выполнения вычислительных действий. Чтобы возобновить обновление после выполнения макроса, в его конце пишем командуApplication.ScreenUpdating = True. - Добавим также команду
Application.Calculation = xlCalculationManualв начало кода, а в его конец дописываемApplication.Calculation = xlCalculationAutomatic. Этим мы сначала отключаем автоматический пересчет результата после каждого изменения ячеек, а в конце макроса – включаем. Таким образом, Excel подсчитает результат только один раз, а не будет его постоянно пересчитывать, чем сэкономит время.


Создание кнопки для запуска макросов в панели инструментов
Как я говорил ранее вы можете вызывать процедуру макроса горячей комбинацией клавиш, но это очень утомительно помнить какую комбинацию кому назначена, поэтому лучше всего будет создание кнопки для запуска макроса. Кнопки создать, возможно, нескольких типов, а именно:
- Кнопка в панели инструментов в MS Excel 2003 и более старше. Вам нужно в меню «Сервис» в пункте «Настройки» перейти на доступную вкладку «Команды» и в окне «Категории» выбрать команду «Настраиваемая кнопка» обозначена жёлтым колобком или смайликом, кому как понятней или удобней. Вытащите эту кнопку на свою панель задач и, нажав правую кнопку мыши по кнопке, вызовите ее контекстное меню, в котором вы сможете отредактировать под свои задачи кнопку, указав для нее новую иконку, имя и назначив нужный макрос.

- Кнопка в панели вашего быстрого доступа в MS Excel 2007 и более новее. Вам нужно клацнуть правой кнопкой мышки на панели быстрого доступа, которое находится в верхнем левом углу окна MS Excel и в открывшемся контекстном меню выбираете пункт «Настройка панели быстрого доступа». В диалоговом окне настройки вы выбираете категорию «Макросы» и с помощью кнопки «Добавить» вы переносите выбранный со списка макрос в другую половинку окна для дальнейшего закрепления этой команды на вашей панели быстрого доступа.

Создание графической кнопки на листе Excel
Данный способ доступен для любой из версий MS Excel и заключается он в том, что мы вынесем кнопку прямо на наш рабочий лист как графический объект. Для этого вам нужно:
- В MS Excel 2003 и более старше переходите в меню «Вид», выбираете «Панель инструментов» и нажимаете кнопку «Формы».
- В MS Excel 2007 и более новее вам нужно на вкладке «Разработчик» открыть выпадающее меню «Вставить» и выбрать объект «Кнопка».

После всего этого вы должны нарисовать кнопку на вашем листе при зажатой левой кнопке мыши. После окончания процесса рисования включится автоматически окошко, где вам нужно будет выбрать тот макрос, который обязан, выполнятся при нажатии на вашей кнопке.
Чтобы записать макрос, следует:
- Войти во вкладку «разработчик».
- Выбрать запись макроса.

- Выбрать имя макроса (в имени нельзя использовать пробелы и дефисы);
- Можно выбрать сочетание клавиш, при нажатии которых будет начинаться запись макроса;
- Выбрать место сохранения:

— при сохранении в «Эта книга» макрос будет работать только в текущем документе;
— при сохранении в «Личная книга» макрос будет работать во всех документах на Вашем компьютере.
- Можно добавить описание макроса, оно поможет Вам вспомнить, какие действия совершает макрос.
- Нажать «Ок».
- Если вы не указали сочетание клавиш, запись начнется сразу после нажатия кнопки «Ок».
- Когда идет запись, Вы должны совершать требуемую последовательность действий.
- Когда закончите, нажимайте кнопку остановить запись.
Записанные макросы отображаются в книге макросов.
Чтобы их посмотреть следует нажать кнопку «макросы». В появившемся окне появится список макросов. Выберете нужный макрос и нажмите «Выполнить».
Макросы, находящиеся в книге можно редактировать. Для этого нужно выбрать макрос и нажать кнопку «Изменить». При нажатии на кнопку «Изменить» откроется редактор макросов с записанным на языке VBA скриптом.
Отображение вкладки “Разработчик” в ленте меню
Перед тем как записывать макрос, нужно добавить на ленту меню Excel вкладку “Разработчик”. Для этого выполните следующие шаги:
- Щелкните правой кнопкой мыши по любой из существующих вкладок на ленте и нажмите «Настроить ленту». Он откроет диалоговое окно «Параметры Excel».

- В диалоговом окне «Параметры Excel» у вас будут параметры «Настроить ленту». Справа на панели «Основные вкладки» установите флажок «Разработчик».
- Нажмите «ОК».


В результате на ленте меню появится вкладка “Разработчик”

Абсолютная и относительная запись макроса
Вы уже знаете про абсолютные и относительные ссылки в Excel? Если вы используете абсолютную ссылку для записи макроса, код VBA всегда будет ссылаться на те же ячейки, которые вы использовали. Например, если вы выберете ячейку A2 и введете текст “Excel”, то каждый раз – независимо от того, где вы находитесь на листе и независимо от того, какая ячейка выбрана, ваш код будет вводить текст “Excel” в ячейку A2.
Если вы используете параметр относительной ссылки для записи макроса, VBA не будет привязываться к конкретному адресу ячейки. В этом случае программа будет “двигаться” относительно активной ячейки. Например, предположим, что вы уже выбрали ячейку A1, и вы начинаете запись макроса в режиме относительной ссылки. Теперь вы выбираете ячейку A2, вводите текст Excel и нажмите клавишу Enter. Теперь, если вы запустите этот макрос, он не вернется в ячейку A2, вместо этого он будет перемещаться относительно активной ячейки. Например, если выбрана ячейка B3, она переместится на B4, запишет текст “Excel” и затем перейдет к ячейке K5.
Теперь давайте запишем макрос в режиме относительных ссылок:
- Выберите ячейку A1.
- Перейдите на вкладку “Разработчик”.
- В группе “Код” нажмите кнопку “Относительные ссылки”. Он будет подсвечиваться, указывая, что он включен.
- Нажмите кнопку “Запись макроса”.
- В диалоговом окне “Запись макроса” введите имя для своего макроса. Например, имя “ОтносительныеСсылки”.
- В опции “Сохранить в” выберите “Эта книга”.
- Нажмите “ОК”.
- Выберите ячейку A2.
- Введите текст “Excel” (или другой как вам нравится).
- Нажмите клавишу Enter. Курсор переместиться в ячейку A3.
- Нажмите кнопку “Остановить запись” на вкладке “Разработчик”.


Макрос в режиме относительных ссылок будет сохранен.
Теперь сделайте следующее.
- Выберите любую ячейку (кроме A1).
- Перейдите на вкладку “Разработчик”.
- В группе “Код” нажмите кнопку “Макросы”.
- В диалоговом окне “Макрос” кликните на сохраненный макрос “ОтносительныеСсылки”.
- Нажмите кнопку “Выполнить”.
Как вы заметите, макрос записал текст “Excel” не в ячейки A2. Это произошло, потому что вы записали макрос в режиме относительной ссылки. Таким образом, курсор перемещается относительно активной ячейки. Например, если вы сделаете это, когда выбрана ячейка B3, она войдет в текст Excel – ячейка B4 и в конечном итоге выберет ячейку B5.
Вот код, который записал макрорекодер:

Sub ОтносительныеСсылки() ' ' ОтносительныеСсылки Макрос ' ' ActiveCell.Offset(1, 0).Range("A1").Select ActiveCell.FormulaR1C1 = "Excel" ActiveCell.Offset(1, 0).Range("A1").Select End Sub
Обратите внимание, что в коде нет ссылок на ячейки B3 или B4. Макрос использует Activecell для ссылки на текущую ячейку и смещение относительно этой ячейки.
Не обращайте внимание на часть кода Range(«A1»). Это один из тех случаев, когда макрорекодер добавляет ненужный код, который не имеет никакой цели и может быть удален. Без него код будет работать отлично.
Расширение файлов Excel, которые содержат макросы
Когда вы записываете макрос или вручную записываете код VBA в Excel, вам необходимо сохранить файл с расширением файла с поддержкой макросов (.xlsm).
До Excel 2007 был достаточен один формат файла – .xls. Но с 2007 года .xlsx был представлен как стандартное расширение файла. Файлы, сохраненные как .xlsx, не могут содержать в себе макрос. Поэтому, если у вас есть файл с расширением .xlsx, и вы записываете / записываете макрос и сохраняете его, он будет предупреждать вас о сохранении его в формате с поддержкой макросов и покажет вам следующее диалоговое окно:

Если вы выберете “Нет”, Excel сохранить файл в формате с поддержкой макросов. Но если вы нажмете “Да”, Excel автоматически удалит весь код из вашей книги и сохранит файл как книгу в формате .xlsx. Поэтому, если в вашей книге есть макрос, вам нужно сохранить его в формате .xlsm, чтобы сохранить этот макрос.
Что нельзя сделать с помощью макрорекодера?
Макро-рекордер отлично подходит для вас в Excel и записывает ваши точные шаги, но может вам не подойти, когда вам нужно сделать что-то большее.
- Вы не можете выполнить код без выбора объекта. Например, если вы хотите, чтобы макрос перешел на следующий рабочий лист и выделил все заполненные ячейки в столбце A, не выходя из текущей рабочей таблицы, макрорекодер не сможет этого сделать. В таких случаях вам нужно вручную редактировать код.
- Вы не можете создать пользовательскую функцию с помощью макрорекордера. С помощью VBA вы можете создавать пользовательские функции, которые можно использовать на рабочем листе в качестве обычных функций.
- Вы не можете создавать циклы с помощью макрорекордера. Но можете записать одно действие, а цикл добавить вручную в редакторе кода.
- Вы не можете анализировать условия: вы можете проверить условия в коде с помощью макрорекордера. Если вы пишете код VBA вручную, вы можете использовать операторы IF Then Else для анализа условия и запуска кода, если true (или другой код, если false).
Редактор Visual Basic
В Excel есть встроенный редактор Visual Basic, который хранит код макроса и взаимодействует с книгой Excel. Редактор Visual Basic выделяет ошибки в синтаксисе языка программирования и предоставляет инструменты отладки для отслеживания работы и обнаружения ошибок в коде, помогая таким образом разработчику при написании кода.
Запускаем выполнение макроса
Чтобы проверить работу записанного макроса, нужно сделать следующее:
- В той же вкладке (“Разработчик”) и группе “Код” нажимаем кнопку “Макросы” (также можно воспользоваться горячими клавишами Alt+F8).

- В отобразившемся окошке выбираем наш макрос и жмем по команде “Выполнить”.
 Примечание: Есть более простой вариант запустить выполнение макроса – воспользоваться сочетанием клавиш, которое мы задали при создании макроса.
 - Результатом проверки будет повторение ранее выполненных (записанных) действий.


Корректируем макрос
Созданный макрос можно изменить. Самая распространенная причина, которая приводит к такой необходимости – сделанные при записи ошибки. Вот как можно отредактировать макрос:
- Нажимаем кнопку “Макросы” (или комбинацию Ctrl+F8).
- В появившемся окошке выбираем наш макрос и щелкаем “Изменить”.
- На экране отобразится окно редактора “Microsoft Visual Basic”, в котором мы можем внести правки. Структура каждого макроса следующая:
- открывается с команды “Sub”, закрывается – “End Sub”;
- после “Sub” отображается имя макроса;
- далее указано описание (если оно есть) и назначенная комбинация клавиш;
- команда “Range(“…”).Select” возвращает номер ячейки. К примеру, “Range(“B2″).Select” отбирает ячейку B2.
- В строке “ActiveCell.FormulaR1C1” указывается значение ячейки или действие в формуле.

- Давайте попробуем скорректировать макрос, а именно, добавить в него ячейку B4 со значением 3. В код макроса нужно добавить следующие строки:
Range("B4").Select
ActiveCell.FormulaR1C1 = "3" - Для результирующей ячейки D2, соответственно, тоже нужно изменить начальное выражение на следующее:
ActiveCell.FormulaR1C1 = "=RC[-2]*R[1]C[-2]*R[2]C[-2]".Примечание: Обратите внимание, что адреса ячеек в данной строке (ActiveCell.FormulaR1C1) пишутся в стиле R1C1. - Когда все готово, редактор можно закрывать (просто щелкаем на крестик в правом верхнем углу окна).
- Запускаем выполнение измененного макроса, после чего можем заметить, что в таблице появилась новая заполненная ячейка (B4 со значением “3”), а также, пересчитан результат с учетом измененной формулы.
- Если мы имеем дело с большим макросом, на выполнение которого может потребоваться немало времени, ручное редактирование изменений поможет быстрее справиться с задачей.
- Добавив в конце команду
Application.ScreenUpdating = Falseмы можем ускорить работу, так как во время выполнения макроса, изменения на экране отображаться не будут. - Если потребуется снова вернуть отображение на экране, пишем команду:
Application.ScreenUpdating = True.
- Добавив в конце команду
- Чтобы не нагружать программу пересчетом после каждого внесенного изменения, в самом начале пишем команду
Application.Calculation = xlCalculationManual, а в конце –Application.Calculation = xlCalculationAutomatic. Теперь вычисление будет выполняться только один раз.


Источники
- https://lumpics.ru/how-to-create-a-macro-in-excel/
- https://MicroExcel.ru/sozdanie-makrosov/
- http://topexcel.ru/kak-sozdat-makros-v-excel/
- https://exceltable.com/vba-macros/kak-napisat-makros
- https://office-guru.ru/excel/samouchitel-po-rabote-s-makrosami-v-excel-449.html
- http://RuExcel.ru/simple-macros/
- https://micro-solution.ru/excel/vba/first-macros
How to Use the VBA Editor in Excel: Quick Guide (2023)
Excel’s Visual Basic for Applications (VBA) editor is a very powerful tool.
It lets you write and edit custom scripts that automate actions in Excel.
In fact, when you record a macro it is stored in VBA code in the VBA editor.
But writing a macro from the VBA editor directly gives you more flexibility than recording a macro in the traditional manner.
You can create better VBA code and complete more complicated tasks by working directly with Visual Basic for Applications.
In this tutorial, I show you the basics of how to use Excel’s VBA editor. Let’s get into it!
What is the VBA editor?
The Visual Basic editor, also called the VBA editor, VB editor, or VBE, is an interface for creating scripts.
VBA (Visual Basic for Applications) is the coding language that’s used to create these scripts.

Visual Basic is a full-featured programming language, but Microsoft Office’s very own VBA programming language is easier to get the hang of, so you can get started with developing applications much more quicker.
If you’ve done any programming in an integrated development environment (IDE), the VBA editor in Excel will look familiar. It lets you create, manage, and run VBA code on your Excel spreadsheet.
Let’s take a look at how to open the Visual Basic editor and do a few basic things.
How to use the VBA editor in Excel
Before you start coding, you’ll need to open the VBA editor. To do this, head to the Developer tab and click the Visual Basic button:

If you don’t see the Developer tab, go to File > Options > Customize Ribbon and make sure that the developer tab is checked in the right pane. If you want a more thorough explanation of how to add the developer tab in Excel, read it here.
You can also open the VBA editor with the shortcut key Alt + F11.
As you can see, the VBA editor is packed full of buttons, menu bars, and options. Don’t worry—we’ll go through the important ones in this guide.
In this guide, we’ll focus on the most basic parts of the Visual Basic editor.
The project view, in the left, vertical, menu bar in the VBA editor, has a folder called Modules.

This folder holds Excel VBA modules, which are like containers for VBA code. When you record macros, they’re included in a module.
Modules also contain the code window where you’ll be writing code (if you’re not recording it).
To add a new, empty module, click the Insert menu button and select Module.

If there was no Modules folder in VBAProject, the folder will be created and there will be a new module inside of it. This is where you’ll put your Excel VBA code when you’re ready to write it.
To delete a module, right-click it in the left pane and select Remove [module name].

Excel will ask you to confirm the removal. You may export the module if you’d like to save it.
Finally, let’s look at running a macro from the Visual Basic Editor window.
After you’ve created a macro, either by coding it directly or recording it from the standard Excel interface, you can run it from this view.
To run a macro, just click the Run Macro button in the menu bar:

You can also press the shortcut key F5 on your keyboard to run the macro from the VBA editor.
PRO TIP: Change the name of a module
If you’re developing big spreadsheets with lots of VBA, all the macro codes won’t be able to fit in one single module. You’ll need more. You can easily add those from the menu bar, but as you add more, it becomes increasingly more difficult to figure out what macros are in what modules.
Luckily, you can easily change the name of a module in the Properties window.
Add the Properties code window from the Insert button on the menu bar.
If the Project window is missing
If it looks like this when you open the Visual Basic editor:

The code window is missing, there’s no left vertical menu bar. Nothing is visible except the horizontal menu bar on top 🤷
You need to click on the ‘View’ tab on the menu bar, and then click to show the ‘Project Explorer’ window.
That’s it – Now what?
This was a simple Excel tutorial on getting started with the Visual Basic editor in Excel and should get you on the right track to write code (or record it).
Mastering the Excel VBA editor is important for both beginners and advanced Excel users.
When you write more VBA code, you’ll see that the Excel VBA editor becomes a better help for you in your work.
For instance, it helps you autocomplete your VBA coding with IntelliSense, helps you find syntax errors with auto syntax check, debug with the immediate window, uses the object code window, and much more.
For now, play around with the VBA editor to get a feel for where the buttons and menus are, and start getting used to the structure of VBA.
If you want to dive deeper into VBA programming, check out my free 30-minute VBA course here.
Other resources
The VBA editor is just a tiny portion of what macros are all about. You definitely need to check out my big VBA guide here.
Frequently asked questions
To open the Visual Basic Editor in Excel, follow these steps:
- Click the Developer tab.
- Click the Visual Basic button in the Code group on the Developer tab. This opens the VBA editor.
- Alternatively, you can open the VBA editor by pressing the Alt + F11 shortcut keys.
There is no need to install the VBA editor. It should already be available in your Excel program.
But you might be missing the developer tab. To add it:
- Click the File tab and Options.
- Then click the Customize Ribbon tab.
- Under Customize the Ribbon, in the right pane, select the Developer check box.
- Click OK.
Kasper Langmann2023-01-30T19:50:45+00:00
Page load link