
You can use WordArt with a Transform text effect to curve or bend text around a shape. If you want the text to circle the shape, you can also do this, but it’s a little bit more work. You can also insert WordArt multiple times to wrap text around shapes with straight edges.

-
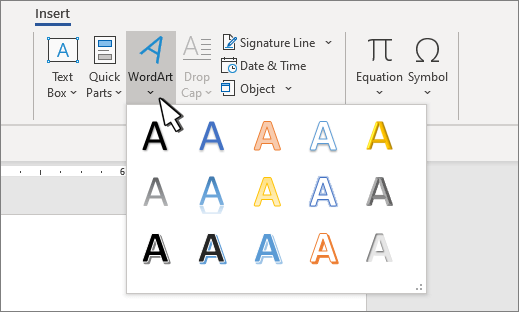
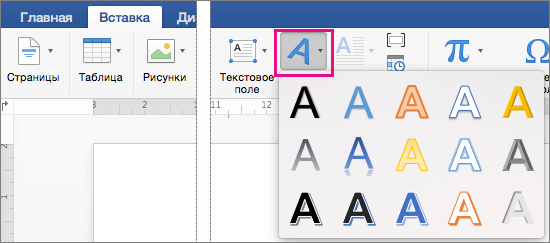
Go to Insert > WordArt, and pick the WordArt style you want.

Note: The WordArt icon is located in the Text group, and it may appear different depending on the version you’re using and the size of your screen. The icon may also look like this
or . -
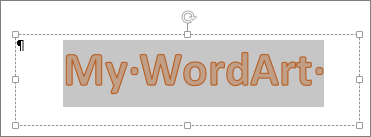
Replace the WordArt placeholder text with your own text.
-
Select your WordArt text.
-
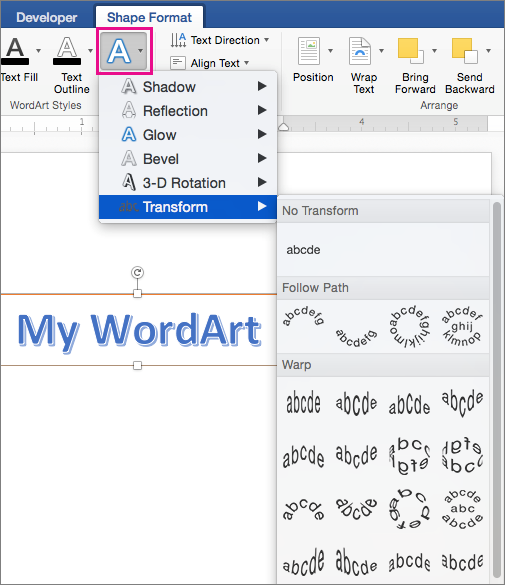
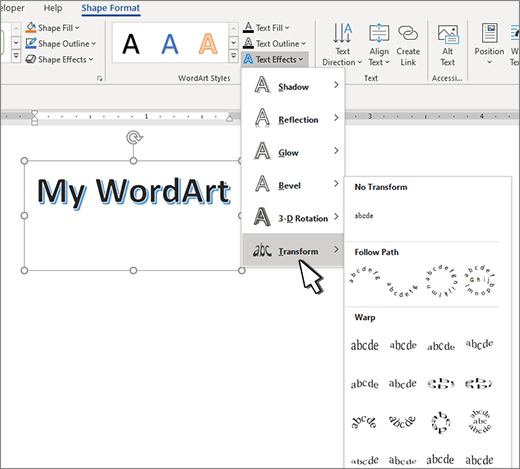
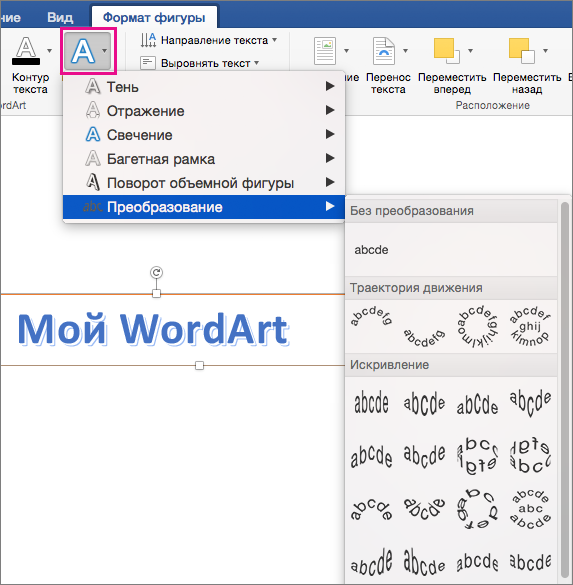
Go to Shape Format or Drawing Tools Format, select Text Effects >Transform and pick the look you want.
 or
or  .
.

Note: Depending on your screen size, you might only see the icons for WordArt Styles.

Advanced techniques
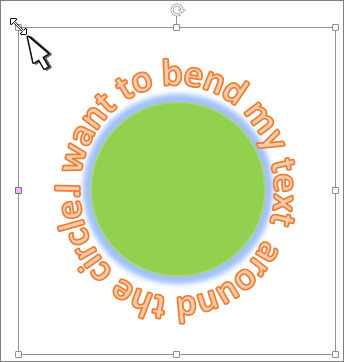
Wrap around a circle To create text that completely circles your shape, choose Circle under Follow Path, and then drag any of the sizing handles until your WordArt is the size and shape you want.
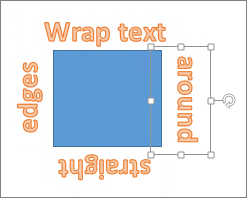
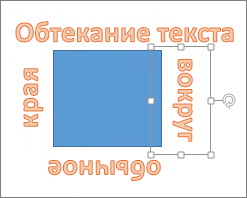
Wrap around straight edges To wrap text around a shape that has straight edges, such as a rectangle, insert WordArt objects for each edge. In this example, WordArt is inserted four times, one for each side of the shape.
Group moves and copy To move or copy multiple WordArt objects as a single shape, see Group or ungroup shapes, pictures, or other objects .
Precise angle control You can control the angle of your WordArt text in relation to your shape with precision by using the Rotate tool.
If you need very precise control or are creating a complex combination of shapes and text, you’ll want to use a third-party drawing or graphics program to create the text around your shape and then copy and paste it into your Office document.
See Also
Add shapes
Insert WordArt
Create curved or circular WordArt
-
Go to Insert > WordArt.
-
Pick the WordArt style you want.
-
Type your text.
-
Select the WordArt.
-
Go to Shape Format > Text Effects > Transform and pick the effect you want.


Advanced techniques
Wrap around a circle To create text that completely circles your shape, choose Circle under Follow Path, and then drag any of the sizing handles until your WordArt is the size and shape you want.
Wrap around straight edges To wrap text around a shape that has straight edges, such as a rectangle, insert WordArt objects for each edge. In this example, WordArt is inserted four times, one for each side of the shape.
Group moves and copy To move or copy multiple WordArt objects as a single shape, see Group or ungroup shapes, pictures, or other objects .
Precise angle control You can control the angle of your WordArt text in relation to your shape with precision by using the Rotate tool.
If you need very precise control or are creating a complex combination of shapes and text, you’ll want to use a third-party drawing or graphics program to create the text around your shape and then copy and paste it into your Office document.
In Word for the web you can see WordArt that’s already in your document, but to add more WordArt you need to open or edit the doc in the desktop version of Word.
You can use the Font features on the Home tab to change the font color and size, and apply bolding, italics, or underlines to your text.
Содержание
- Круговая надпись на объекте
- Создание объекта
- Добавление надписи
- Написание текста по кругу
- Вопросы и ответы

MS Word — это профессиональный текстовый редактор, который в первую очередь предназначен для офисной работы с документами. Однако, далеко не всегда и далеко не все документы должны быть оформлены в строгом, классическом стиле. Более того, в некоторых случаях творческий подход даже приветствуется.
Все мы видели медали, эмблемы для спортивных команд и прочие «вещицы», где текст написан по кругу, а в центре располагается какой-нибудь рисунок или знак. Написать текст по кругу можно и в Ворде, и в данной статье мы расскажем о том, как это сделать.
Урок: Как в Word написать текст вертикально
Сделать надпись по кругу можно двумя способами, точнее, двух видов. Это может быть обычный текст, расположенный по кругу, а может быть текст по кругу и на круге, то есть, именно то, что делают на всевозможных эмблемах. Оба эти метода мы рассмотрим ниже.
Круговая надпись на объекте
Если ваша задача — не просто сделать надпись по кругу, а создать полноценный графический объект, состоящий из круга и надписи, расположенной на нем тоже по кругу, действовать придется в два этапа.
Создание объекта
Прежде, чем сделать надпись по кругу, необходимо создать этот самый круг, а для этого нужно нарисовать на странице соответствующую фигуру. Если вы еще не знаете, как можно рисовать в Ворде, обязательно прочтите нашу статью.
Урок: Как рисовать в Word
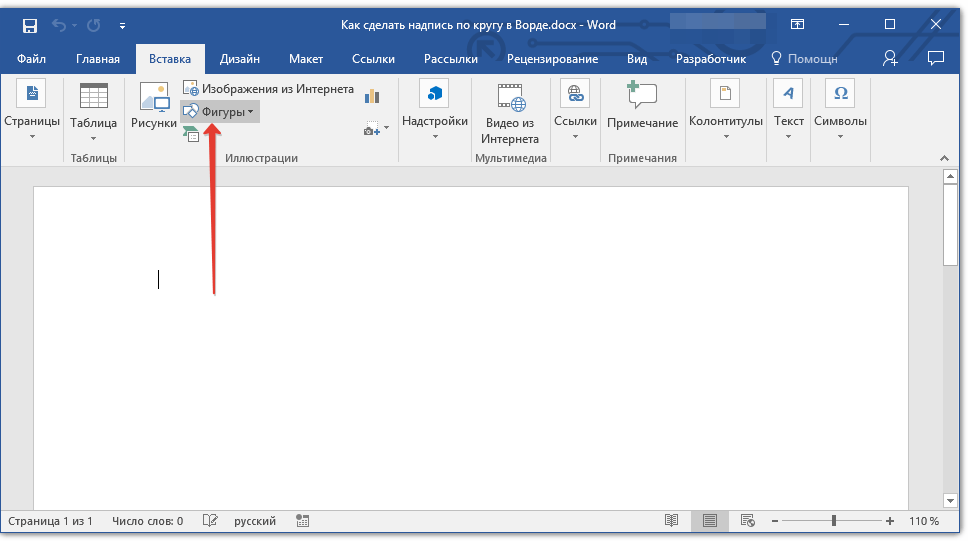
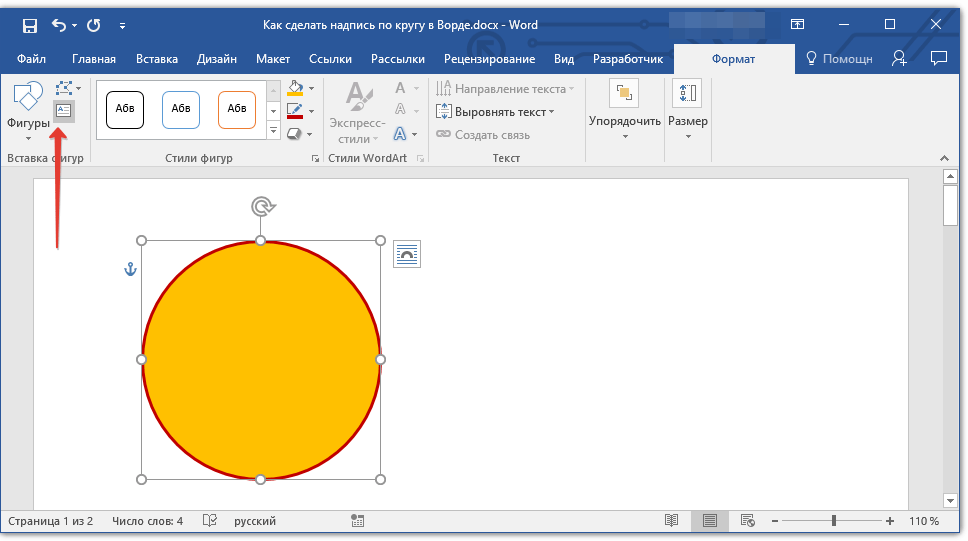
1. В документе Ворд перейдите во вкладку «Вставка» в группе «Иллюстрации» нажмите кнопку «Фигуры».
2. Из выпадающего меню кнопки выберите объект «Овал» в разделе «Основные фигуры» и нарисуйте фигуру нужных размеров.
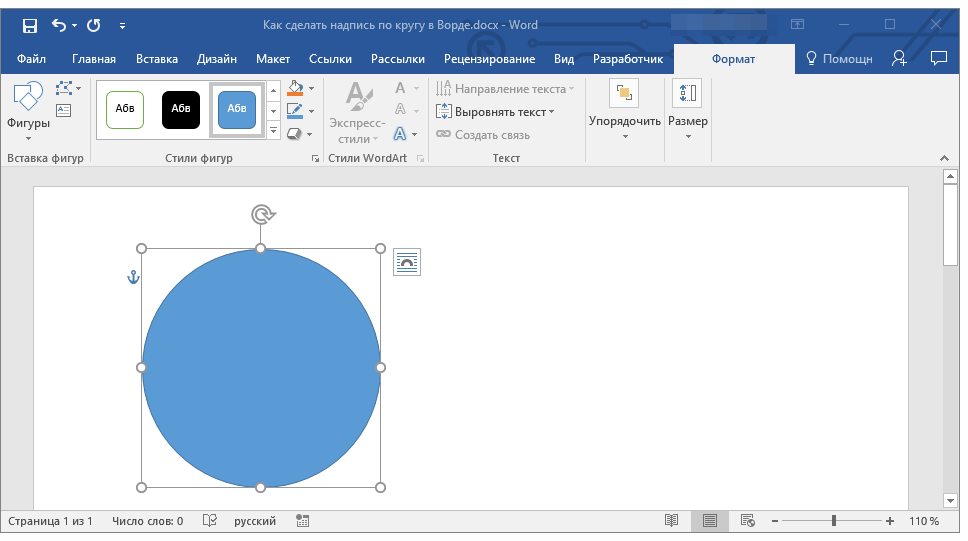
- Совет: Чтобы нарисовать круг, а не овал, перед растягиванием выбранного объекта на странице, необходимо нажать и удерживать клавишу «SHIFT» до тех пор, пока не нарисуете круг нужных размеров.
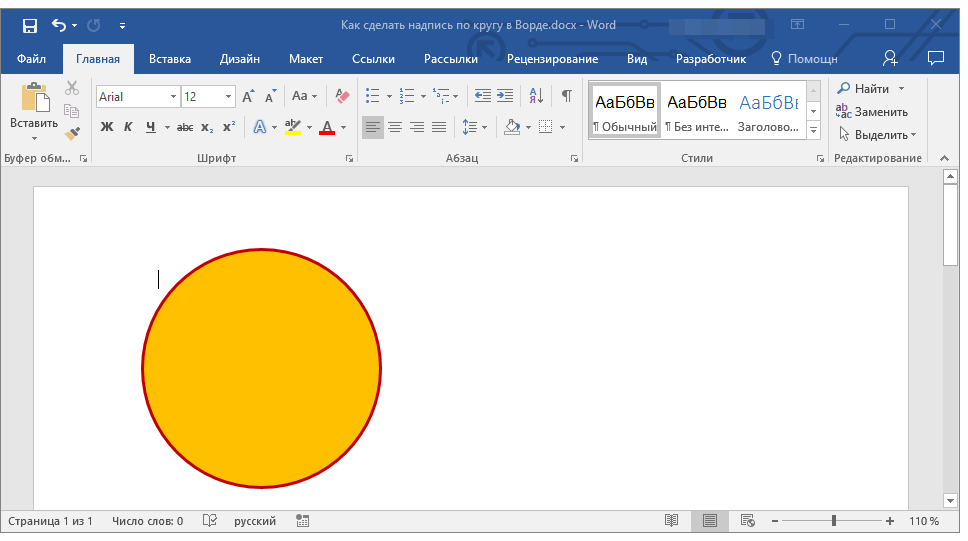
3. Если это необходимо, измените внешний вид нарисованного круга, воспользовавшись инструментами вкладки «Формат». Наша статья, представленная по ссылке выше, вам в этом поможет.
Добавление надписи
После того, как мы с вами нарисовали круг, можно смело переходить к добавлению надписи, которая и будет в нем располагаться.

1. Кликните дважды по фигуре, чтобы перейти во вкладку «Формат».

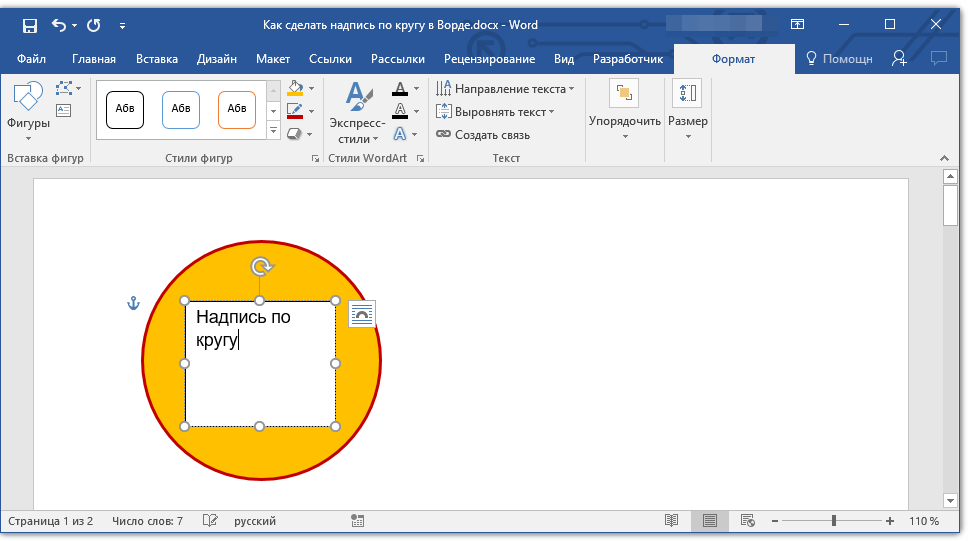
2. В группе «Вставка фигур» нажмите кнопку «Надпись» и кликните по фигуре.
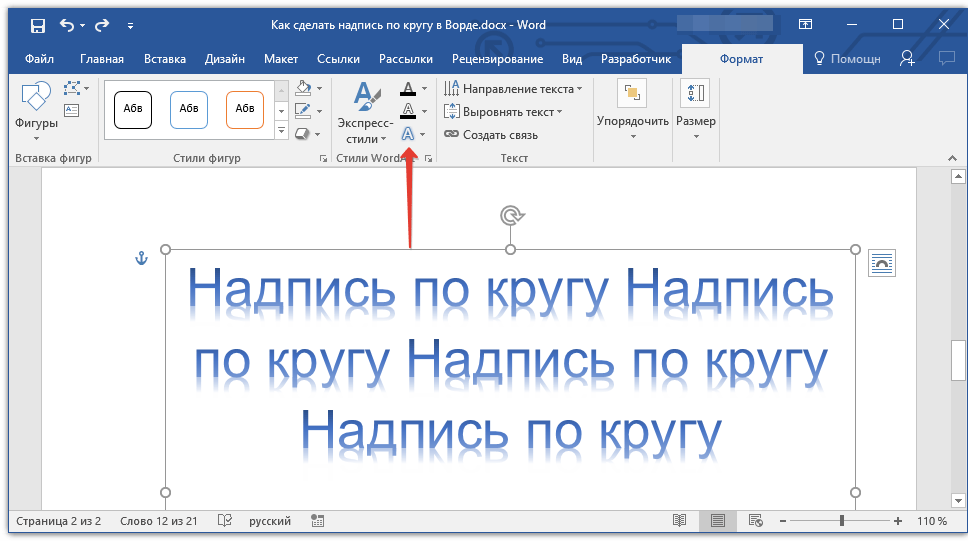
3. В появившемся текстовом поле введите текст, который должен располагаться по кругу.
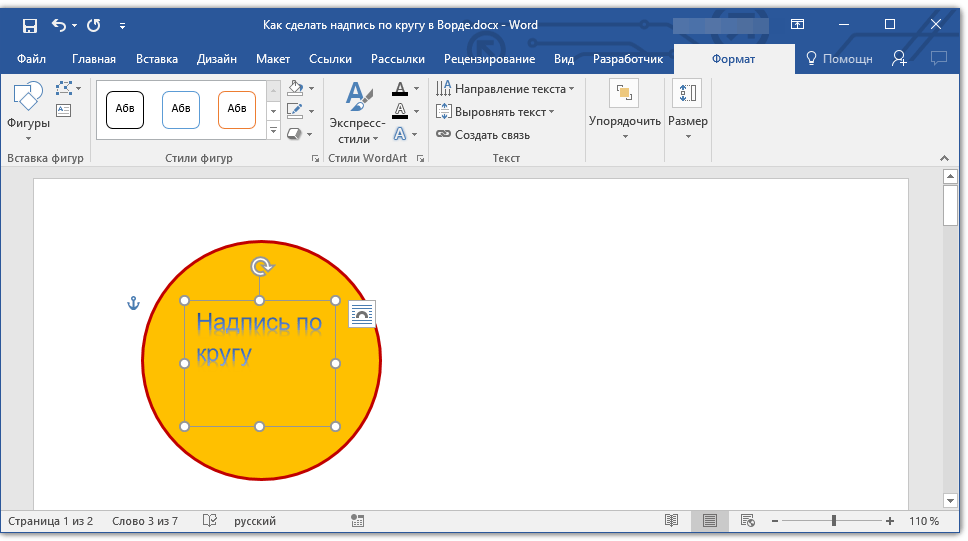
4. Измените стиль надписи, если это необходимо.

Урок: Изменение шрифта в Ворде
5. Сделайте невидимым поле, в котором располагается текст. Для этого выполните следующее:
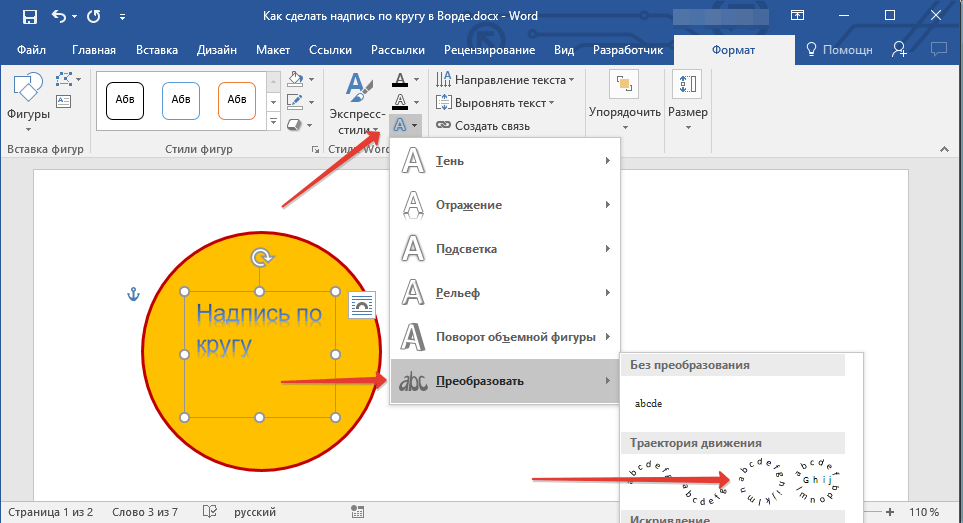
6. В группе «Стили WordArt» нажмите на кнопку «Текстовые эффекты» и выберите в ее меню пункт «Преобразовать».
7. В разделе «Траектория движения» выберите тот параметр, где надпись расположена по кругу. Он так и называется «Круг».
Примечание: Слишком короткая надпись может не «растянутся» по всему кругу, поэтому придется выполнить с ней некоторые манипуляции. Попробуйте увеличить шрифт, добавить пробелы между буквами, поэкспериментируйте.
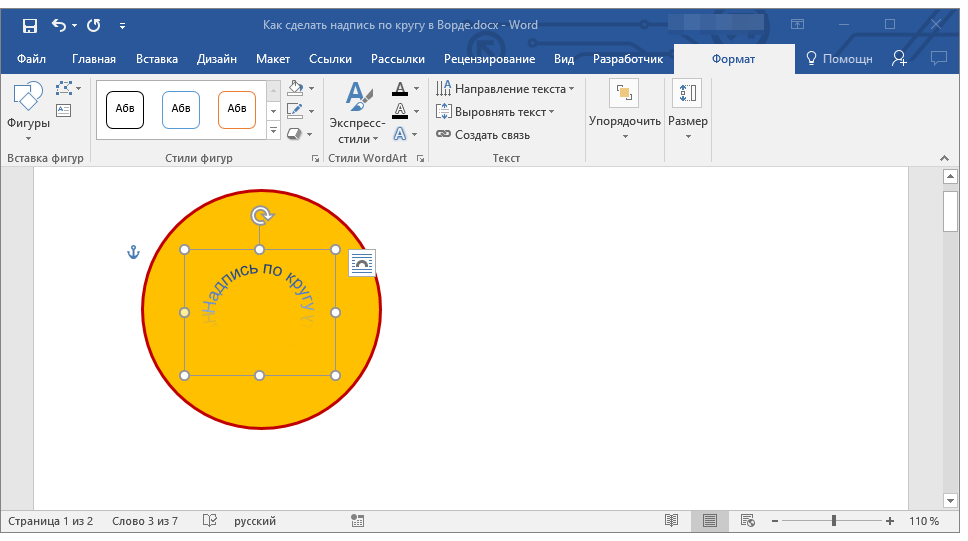
8. Растяните текстовое поле с надписью до размеров круга, на котором она должна располагаться.

Немного поэкспериментировав с перемещением надписи, размером поля и шрифта, вы сможете гармонично вписать надпись в круг.
Урок: Как повернуть текст в Word
Написание текста по кругу
Если вам не нужно делать круговую надпись на фигуре, а ваша задача — просто написать текст по кругу, сделать это можно куда проще, да и просто быстрее.
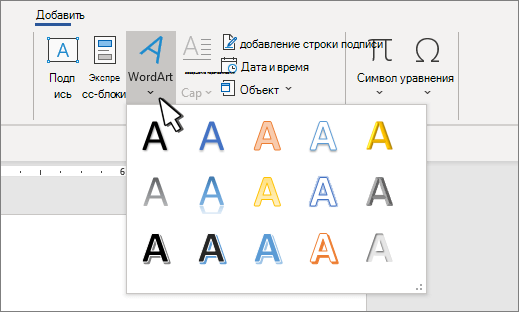
1. Откройте вкладку «Вставка» и нажмите на кнопку «WordArt», расположенную в группе «Текст».
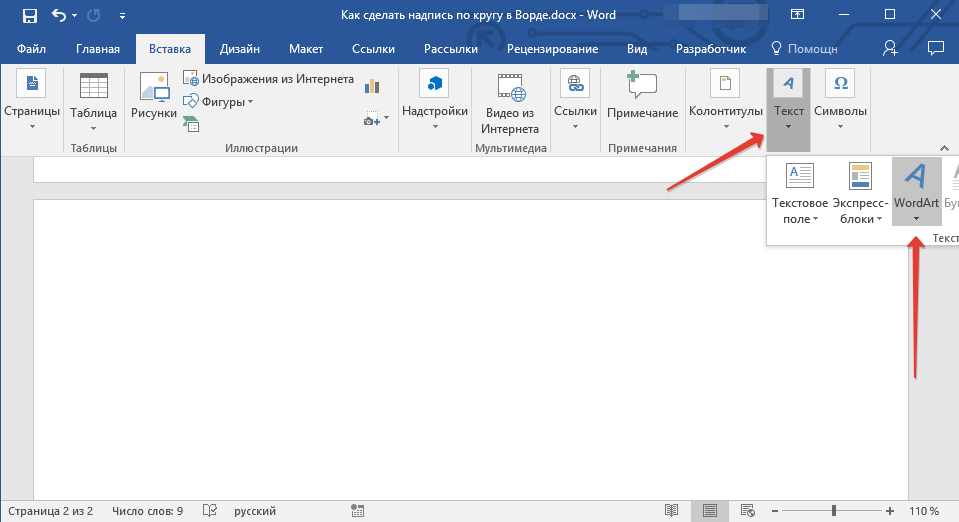
2. В выпадающем меню выберите понравившийся стиль.
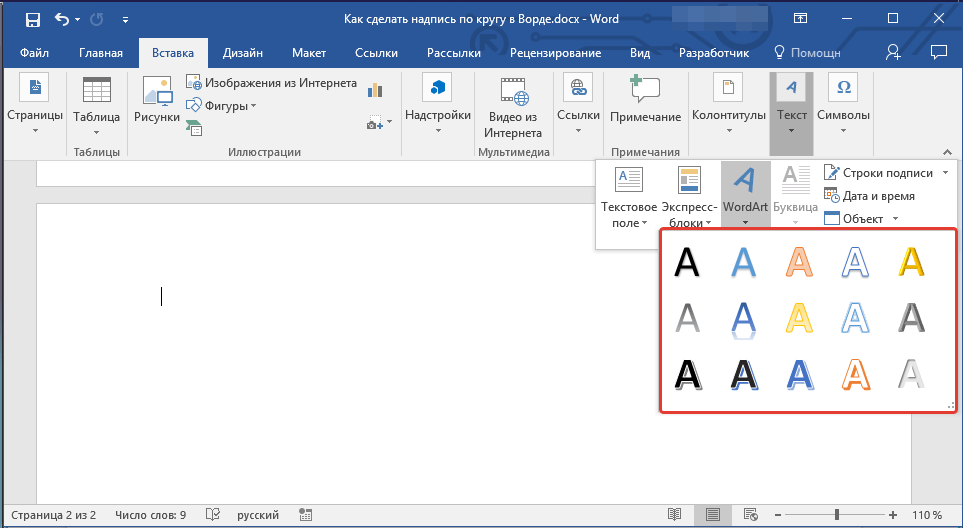
3. В появившееся текстовое поле введите необходимый текст. Если нужно, измените стиль надписи, ее шрифт, размер. Сделать все это можно в появившейся вкладке «Формат».
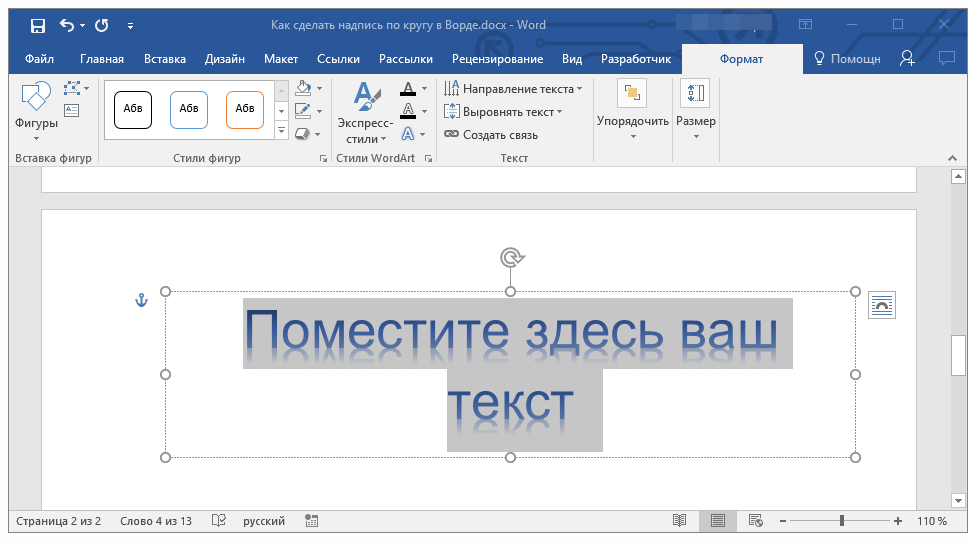
4. В этой же вкладке «Формат», в группе «Стили WordArt» нажмите на кнопку «Текстовые эффекты».
5. Выберите в ее меню пункт «Преобразовать», а затем выберите «Круг».
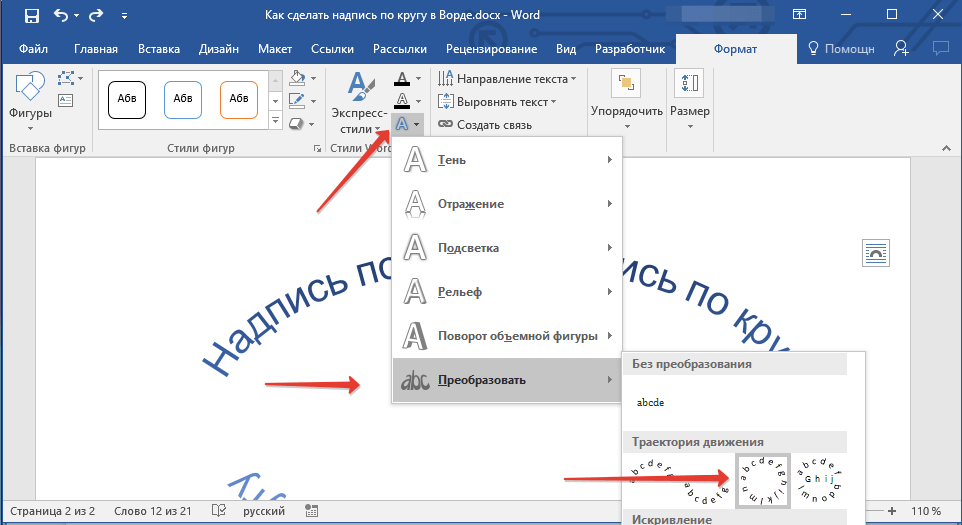
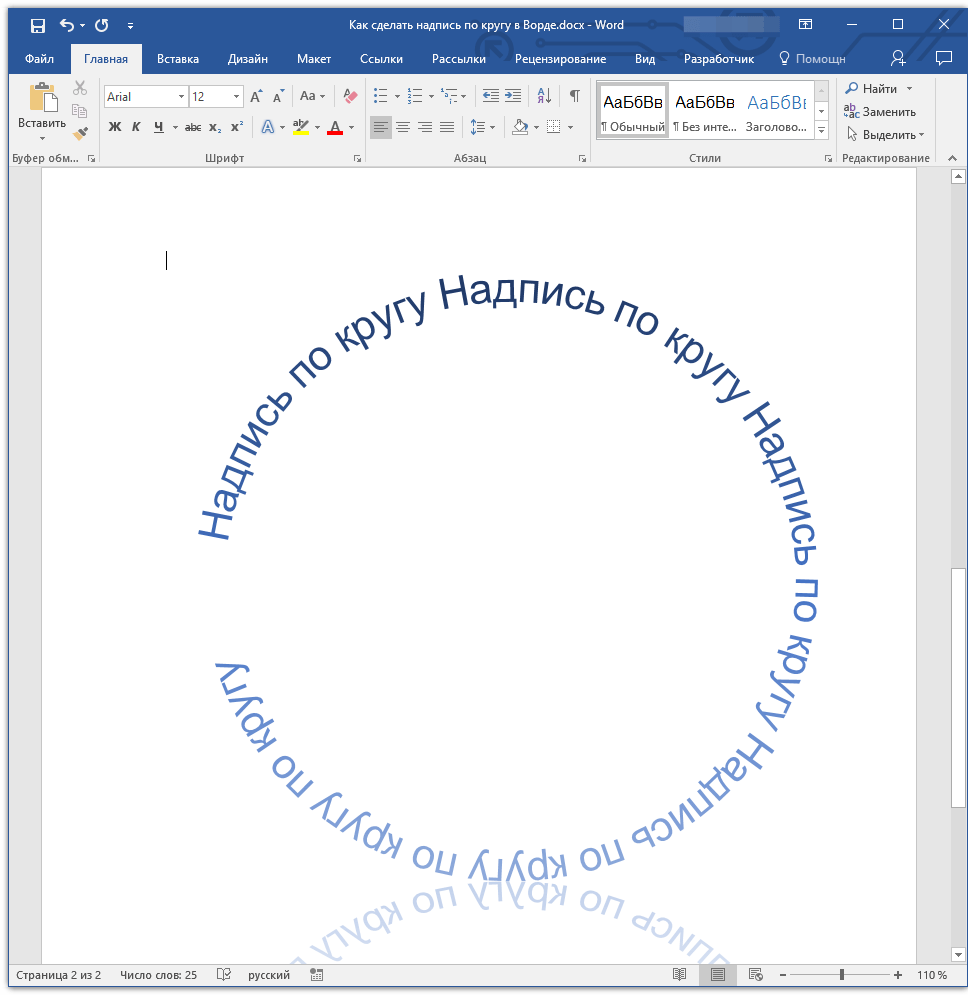
6. Надпись будет расположена по кругу. Если это требуется, подкорректируйте размер поля, в котором находится надпись, чтобы сделать круг идеальным. По желанию или необходимости измените размер, стиль шрифта.
Урок: Как в Ворд сделать зеркальную надпись
Вот вы и узнали, как в Word сделать надпись по кругу, как и о том, как сделать круговую надпись на фигуре.
Microsoft 365, Microsoft Word, Office 2007, Office 2010, Office 2013, Office 2016, Office 2019, Office 2021 / Office LTSC, Office 365 /
5 August 2022
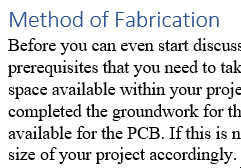
How to put text around an object; image, chart, shape or other Microsoft Word object.
Continuing from our look at putting Word text vertically, at an angle or curved
Text around a Box
Putting text around a box requires four separate text boxes, positioned and grouped around the object.
Here’s a chart with four text boxes around it.

Use the Insert | Text Box | Draw Text Box option to roughly place the four boxes around the object. Then drag each box to its exact position.

Smart users will make just two boxes (top and left), position and format them then copy those two for the matching bottom and right boxes.
Tip: group the four text boxes together in the selection pane to make management easier. If you’ll be editing the document regularly, rename the objects to clearer names then just ‘Text Box …’ etc.

Text around a Circle
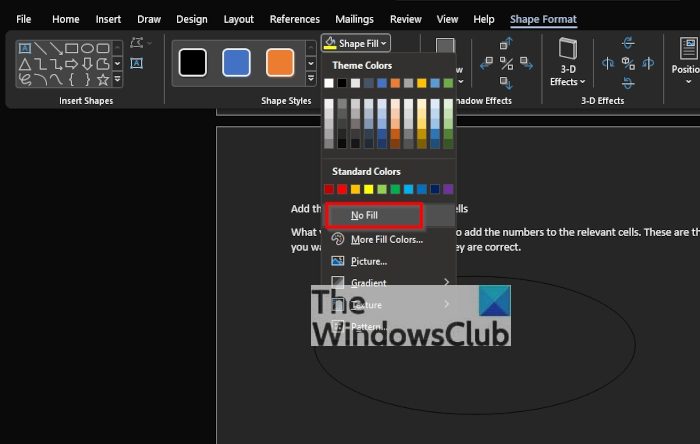
For a circular object, make a curved text box with a ‘No Fill’ or transparent background.

‘No Fill’ transparency will let you place the text box over the object without hiding the object underneath.

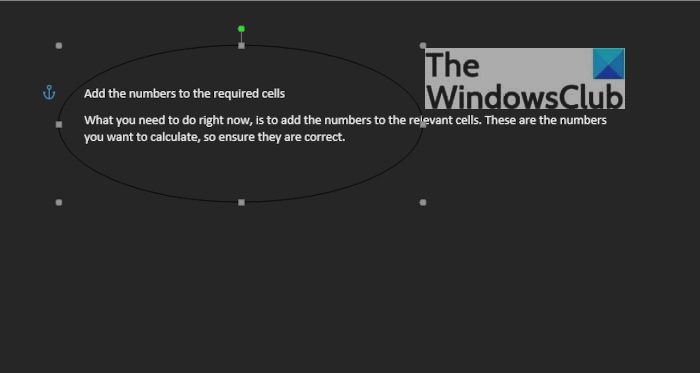
As you can see, the text curve doesn’t exactly match the smiley face curve. You can try adjusting the curve but you might find that Word doesn’t have enough fine control to get the exact effect you’d like.

How to set text on its side, an angle or a curve in Word
Two ways to add Gradient or Rainbow text or background effects in Word
See more with Selection Pane in Excel, PowerPoint and Word
Как сделать текст полукругом в Ворд 2007, 2010, 2013 и 2016

При оформлении листовок или плакатов часто возникает необходимость сделать текст в виде полукруга. Такой текст выглядит необычно и сразу привлекает внимание к документу.
Может показаться, что для создания подобного текста необходимо использовать профессиональные программы для дизайнеров, но на самом деле можно обойти только одним текстовым редактором. В этой небольшой статье вы узнаете, как сделать текст полукругом в редакторе Word 2007, 2010, 2013 или 2016.
Если у вас современная версия Word, например, Word 2007 или более новая, то вы можете сделать достаточно красивый текст в виде полукруга. Для этого сначала необходимо добавить в документ элемент, который называется «Надпись». Для этого перейдите на вкладку «Вставка» и нажмите там на кнопку «Фигуры». В результате откроется достаточно большой список доступных фигур. В этом списке необходимо выбрать элемент «Надпись». Его найти очень просто так как он находится в самом начале списка фигур. На скриншоте внизу нужный элемент означен с помощью стрелки.

После того как вы выбрали элемент «Надпись», ваш курсор превратится в крестовину. С помощью этой крестовины необходимо нарисовать прямоугольник, в потом вставить или вписать в него текст, который должен быть оформлен в виде полукруга. В результате у вас должен получиться примерно такой элемент, как на скриншоте внизу.

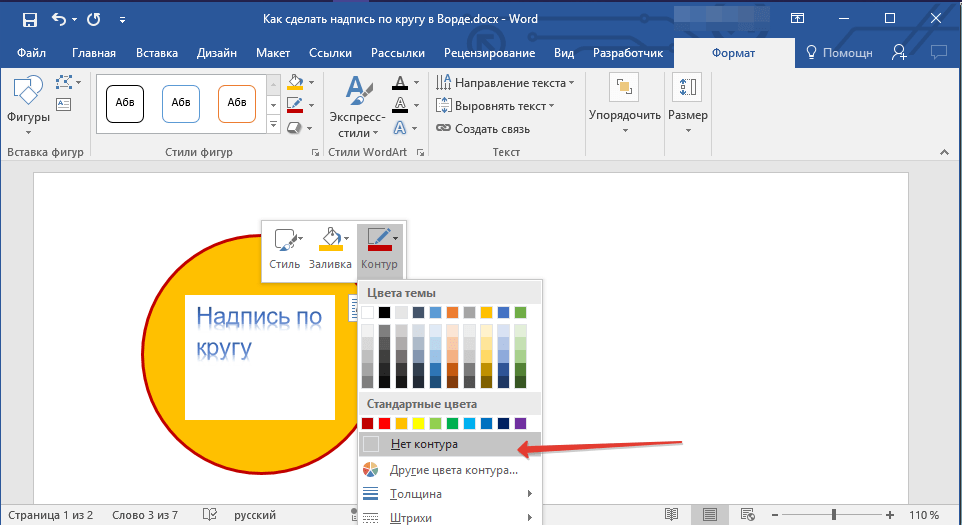
Дальше необходимо убрать рамку вокруг текста. Для этого выделяем рамку с помощью мышки и переходим на вкладку «Формат». Здесь необходимо нажать на кнопку «Контур фигуры» и в появившемся меню выбрать вариант «Нет контура».

После удаления контура можно приступать к настройке оформления текста. Для этого снова выделяем блок текста, переходим на вкладку «Формат» и нажимаем там на кнопку «Текстовые эффекты».

В результате откроется меню, в котором необходимо выбрать эффект и применить его к тексту. Для того чтобы сделать текст полукругом, вам необходимо перейти в меню «Преобразовать» и выбрать там один из эффектов в разделе «Траектория движения».

Благодаря этому эффекту, текст внутри созданного вами текстового блока будет оформлен в виде полукруга. Для того чтобы изменить кривизну полукруга необходимо просто изменить размеры блока с текстом. В конечном итоге у вас может получится примерно такая текстовая надпись как на скриншоте внизу.

При необходимости полукруг из текста можно наклонить на любой угол вправо или влево. Для этого необходимо навести курсор на зеленую точку над блоком с текстом, зажать левую кнопку мышки и передвинуть курсор в необходимом направлении.

Экспериментируя с настройками текста на вкладке «Формат», можно получить надписи с самым разным оформлением.

Как пример – текст на скриншоте вверху.
Как сделать текст в Word 2010 по кругу
Как в Ворде Сделать Надпись по Кругу. Текст в Word
Источник статьи: http://komza.ru/programmy/kak-sdelat-tekst-polukrugom-v-vord-2007-2010-2013-i-2016.html
Изогнутый текст вокруг круга или другой фигуры
Вы можете использовать объект WordArt с эффектом ” преобразовать текст” для изгиба или поворота текста вокруг фигуры. Если нужно, чтобы текст полностью окружал фигуру, потребуется немного больше усилий. Объект WordArt также можно вставить несколько раз, чтобы задать обтекание текста вокруг фигур с прямыми границами.

Перейдите к разделу вставка > WordArtи выберите нужный стиль WordArt.
Примечание: Значок WordArt находится в группе текст и может различаться в зависимости от используемой версии и размера экрана. Значок может также выглядеть так, как это  или
или  .
.
Замените текст заполнителя на собственный текст.
Выделите свой текст WordArt.
Перейдите к разделу Формат фигуры или Работа с рисунками, нажмите кнопку текстовые эффекты > преобразовать и выберите нужный вид.
Примечание: В зависимости от размера экрана могут отображаться только значки стилей WordArt.
Дополнительные методики
Обтекание вокруг круга Чтобы создать текст, полностью обменяющий фигуру, выберите пункт круг в разделе подписаться на пути, а затем перетащите любой из маркеров изменения размера, пока объект WordArt не станет нужного размера и формы.

Обтекание вокруг ровных кромок Чтобы обтекание текста вокруг фигуры, содержащей ровные края, например прямоугольника, вставьте объекты WordArt для каждого края. В этом примере объект WordArt вставлен четыре раза, по одному для каждой стороны фигуры.
Группа перемещения и копирование Чтобы переместить или скопировать несколько объектов WordArt как одну фигуру, ознакомьтесь с разделами группирование и разгруппировка фигур, рисунков или других объектов .
Точный элемент управления “угол” Угол наклона текста WordArt по отношению к фигуре можно точно настроить с помощью инструмента вращения.
Если вам нужен очень точный контроль или вы создаете сложное сочетание фигур и текста, вы можете создать текст вокруг фигуры с помощью сторонней программы рисования и скопировать и вставить его в документ Office.
См. также
Создание изогнутого или кругового текста WordArt
Перейдите к разделу вставка > WordArt.
Выберите нужный стиль WordArt.

Перейдите к разделу Формат фигуры > текстовые эффекты > преобразуйте и выберите нужный эффект.
Дополнительные методики
Обтекание вокруг круга Чтобы создать текст, полностью обменяющий фигуру, выберите пункт круг в разделе подписаться на пути, а затем перетащите любой из маркеров изменения размера, пока объект WordArt не станет нужного размера и формы.
Обтекание вокруг ровных кромок Чтобы обтекание текста вокруг фигуры, содержащей ровные края, например прямоугольника, вставьте объекты WordArt для каждого края. В этом примере объект WordArt вставлен четыре раза, по одному для каждой стороны фигуры.
Группа перемещения и копирование Чтобы переместить или скопировать несколько объектов WordArt как одну фигуру, ознакомьтесь с разделами группирование и разгруппировка фигур, рисунков или других объектов .
Точный элемент управления “угол” Угол наклона текста WordArt по отношению к фигуре можно точно настроить с помощью инструмента вращения.
Если вам нужен очень точный контроль или вы создаете сложное сочетание фигур и текста, вы можете создать текст вокруг фигуры с помощью сторонней программы рисования и скопировать и вставить его в документ Office.
В Веб-приложение Word вы можете увидеть объект WordArt, который уже есть в документе, но добавить другие объекты WordArt, чтобы открыть или изменить документ в классической версии Word.
Вы можете использовать возможности шрифта на вкладке Главная , чтобы изменить цвет и размер шрифта, а также применить к тексту полужирное начертание, курсив или подчеркивание.
Примечание: Эта страница переведена автоматически, поэтому ее текст может содержать неточности и грамматические ошибки. Для нас важно, чтобы эта статья была вам полезна. Была ли информация полезной? Для удобства также приводим ссылку на оригинал (на английском языке).
Источник статьи: http://support.microsoft.com/ru-ru/office/%D0%B8%D0%B7%D0%BE%D0%B3%D0%BD%D1%83%D1%82%D1%8B%D0%B9-%D1%82%D0%B5%D0%BA%D1%81%D1%82-%D0%B2%D0%BE%D0%BA%D1%80%D1%83%D0%B3-%D0%BA%D1%80%D1%83%D0%B3%D0%B0-%D0%B8%D0%BB%D0%B8-%D0%B4%D1%80%D1%83%D0%B3%D0%BE%D0%B9-%D1%84%D0%B8%D0%B3%D1%83%D1%80%D1%8B-7b58b220-2db6-4f08-93c9-0fe69be48d30
Написание текста по кругу в Microsoft Word
MS Word — это профессиональный текстовый редактор, который в первую очередь предназначен для офисной работы с документами. Однако, далеко не всегда и далеко не все документы должны быть оформлены в строгом, классическом стиле. Более того, в некоторых случаях творческий подход даже приветствуется.
Все мы видели медали, эмблемы для спортивных команд и прочие «вещицы», где текст написан по кругу, а в центре располагается какой-нибудь рисунок или знак. Написать текст по кругу можно и в Ворде, и в данной статье мы расскажем о том, как это сделать.
Сделать надпись по кругу можно двумя способами, точнее, двух видов. Это может быть обычный текст, расположенный по кругу, а может быть текст по кругу и на круге, то есть, именно то, что делают на всевозможных эмблемах. Оба эти метода мы рассмотрим ниже.
Круговая надпись на объекте
Если ваша задача — не просто сделать надпись по кругу, а создать полноценный графический объект, состоящий из круга и надписи, расположенной на нем тоже по кругу, действовать придется в два этапа.
Создание объекта
Прежде, чем сделать надпись по кругу, необходимо создать этот самый круг, а для этого нужно нарисовать на странице соответствующую фигуру. Если вы еще не знаете, как можно рисовать в Ворде, обязательно прочтите нашу статью.
1. В документе Ворд перейдите во вкладку «Вставка» в группе «Иллюстрации» нажмите кнопку «Фигуры».
2. Из выпадающего меню кнопки выберите объект «Овал» в разделе «Основные фигуры» и нарисуйте фигуру нужных размеров.
- Совет: Чтобы нарисовать круг, а не овал, перед растягиванием выбранного объекта на странице, необходимо нажать и удерживать клавишу «SHIFT» до тех пор, пока не нарисуете круг нужных размеров.
3. Если это необходимо, измените внешний вид нарисованного круга, воспользовавшись инструментами вкладки «Формат». Наша статья, представленная по ссылке выше, вам в этом поможет.
Добавление надписи
После того, как мы с вами нарисовали круг, можно смело переходить к добавлению надписи, которая и будет в нем располагаться.
1. Кликните дважды по фигуре, чтобы перейти во вкладку «Формат».
2. В группе «Вставка фигур» нажмите кнопку «Надпись» и кликните по фигуре.
3. В появившемся текстовом поле введите текст, который должен располагаться по кругу.
4. Измените стиль надписи, если это необходимо.
5. Сделайте невидимым поле, в котором располагается текст. Для этого выполните следующее:
- Кликните правой кнопкой мышки по контуру текстового поля;

Выберите пункт «Заливка», в выпадающем меню выберите параметр «Нет заливки»;
6. В группе «Стили WordArt» нажмите на кнопку «Текстовые эффекты» и выберите в ее меню пункт «Преобразовать».
7. В разделе «Траектория движения» выберите тот параметр, где надпись расположена по кругу. Он так и называется «Круг».
Примечание: Слишком короткая надпись может не «растянутся» по всему кругу, поэтому придется выполнить с ней некоторые манипуляции. Попробуйте увеличить шрифт, добавить пробелы между буквами, поэкспериментируйте.
8. Растяните текстовое поле с надписью до размеров круга, на котором она должна располагаться.
Немного поэкспериментировав с перемещением надписи, размером поля и шрифта, вы сможете гармонично вписать надпись в круг.
Написание текста по кругу
Если вам не нужно делать круговую надпись на фигуре, а ваша задача — просто написать текст по кругу, сделать это можно куда проще, да и просто быстрее.
1. Откройте вкладку «Вставка» и нажмите на кнопку «WordArt», расположенную в группе «Текст».
2. В выпадающем меню выберите понравившийся стиль.
3. В появившееся текстовое поле введите необходимый текст. Если нужно, измените стиль надписи, ее шрифт, размер. Сделать все это можно в появившейся вкладке «Формат».
4. В этой же вкладке «Формат», в группе «Стили WordArt» нажмите на кнопку «Текстовые эффекты».
5. Выберите в ее меню пункт «Преобразовать», а затем выберите «Круг».
6. Надпись будет расположена по кругу. Если это требуется, подкорректируйте размер поля, в котором находится надпись, чтобы сделать круг идеальным. По желанию или необходимости измените размер, стиль шрифта.
Вот вы и узнали, как в Word сделать надпись по кругу, как и о том, как сделать круговую надпись на фигуре.
Источник статьи: http://lumpics.ru/how-to-make-the-inscription-in-a-circle-in-the-word/
Microsoft Word is more than just a tool for typing text. It can be used for other types of editing as well, and that includes spicing up your text to look more professional. For example, if you want to circle your text, or add a text around a circle, these are things you can do, and we are going to explain how to get them done. One of the reasons one might want to add a circle around a text is to emphasize it, but there are other reasons as well, so do what makes you feel comfortable. In this post, we show you how to insert text in a Circle. We also show you how to circle Text in Microsoft Word using built-in functions.
How to add a Circle around Text in Word
Drawing a circle around a text is easier than you might imagine. We promise that this article will not be difficult to understand, so read carefully and things should turn out just fine.
- Open Microsoft Word
- Launch a new document
- Navigate to Shapes
- Select the circle shape
- Draw the shape in your document
- Edit Shape Format
- Drag circle over text
1] Open Microsoft Word
To begin this task, you must first launch Microsoft Word. You can find the icon on the Desktop, Taskbar, or from within the Start Menu.
2] Launch a new document
After you’ve fired up Word, you must now click on Black Document to open a new document, or launch one you’ve been working on before; the choice is yours.
3] Navigate to Shapes

The next step, then, is to locate the Shapes area. To do this, click on Insert > Shapes. You will see a dropdown menu showcasing several different types of shapes. The options to choose from are as follows:
- Lines
- Basic Shapes
- Block Arrows
- Flowchart
- Callouts
- Start and Banners
4] Select the circle shape
From under the Basic Shapes category, please click on the circle icon, or to be more correct, the oval icon.
5] Draw the shape in your document
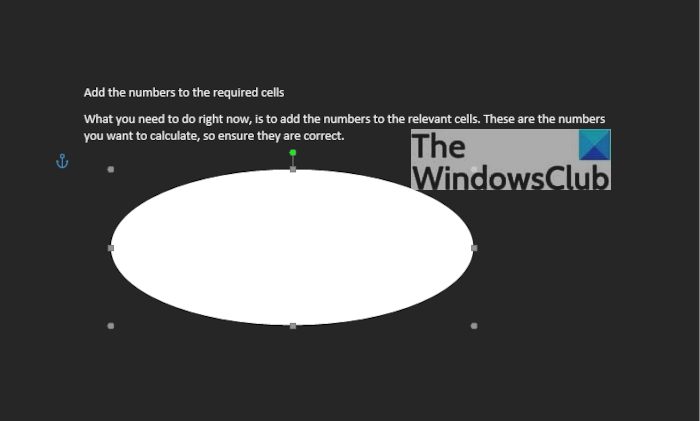
After selecting the circle, you must press and hold the left-click button, then drag to create the circle in the preferred size and position.
6] Edit Shape Format
By default, the circle will be added to your document with a color-filled center. This means, the text won’t show on the inside, so we need to change this.
To get it done, click on the shape, then select Shape Format > Shape Fill > No Fill. Doing this will remove the color from within the center of the circle.
From there, you can click on Shape Outline to determine the color of the circle’s outline.
7] Drag circle over text
The final thing you will want to do, then, is to drag the circle over the preferred line of text. Adjust the circle to allow the text to fit perfectly in the center, or in whichever form you wish.
Read: How to insert a blank page anywhere in your Word document
Apart from just creating a circle around text, folks can also create the text. Let’s look at how to do this.
- Navigate to WordArt
- Select the WordArt style you want
- Click on Shape Format or Drawing Tools Format
- Go to Transform
- Choose the circular shape
- For the newer version of Microsoft Word
- Set the circular word around a picture or shape
1] Navigate to WordArt
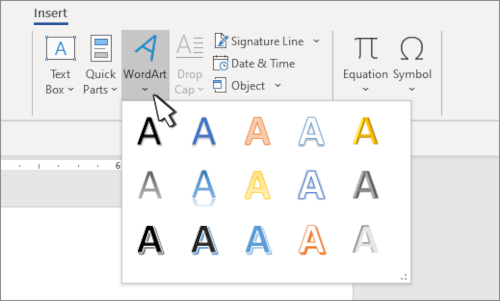
We assume you already have a Microsoft Word document opened, so from your current position, click on Insert, then select the WordArt icon from the Text menu.
2] Select the WordArt style you want
From here, you must choose the WordArt style that makes sense for your needs. Once selected, you must then type the preferred name or words for your art and hit the OK button. The art will appear in your document.
3] Click on Shape Format or Drawing Tools Format
After your WordArt has made its way to your document, you must then move to choose either Shape Format, or the Drawing Tools tab. Doing this will highlight new features to play around with.
4] Go to Transform
![]()
Next, you are required to click on Text Effects, and after that, select Transform to reveal an additional dropdown menu.
5] Choose the circular shape
From under the Follow Path category, please click on the circular shape and add it to the document.
6] For the newer version of Microsoft Word

After you’ve added the WordArt to the document, please click on the WordArt tab > Change Shape, then select the circle under Follow Path.
7] Set the circular word around a picture or shape

To top it off, drag the newly created WordArt and place it around a circular picture. Simply drag the edge of the WordArt to ensure it fits perfectly around, and that’s it, you’re done.
Read: How to mirror an Image in Microsoft Word
What are the text basics in MS word?
Folks who are new to Microsoft Word are required to learn the basics of typing, editing, and organizing text in many ways. These tasks are along the lines of the ability to add, delete, and move text in a document with ease. Additionally, users must learn how to cut, copy, and paste as well.
How do you insert text in Microsoft Word?
If you want to insert text in a Microsoft Word document, we suggest selecting Insert > Text Box, and from there, choose Draw Text Box. You must now click in the document, then drag right away to draw the text box to the size you prefer. Finally, select within the text box and then type your text.
Read: How to download Microsoft Word, Excel, PowerPoint on Mac.
You can use WordArt with a Transform text effect to partially curve or bend text around a shape. If you want the text to circle the shape, you can also do this, but it’s a little bit more work. You can also insert WordArt multiple times to wrap text around shapes with straight edges.

Tip: If you need very precise control or are creating a complex combination of shapes and text, you’ll want to use a third-party drawing or graphics program to arc the text around your shape and then copy and paste it into your Office document.
-
Click Insert > WordArt, and pick the WordArt style you want.
Note: The WordArt icon is located in the Text group, and it may appear different depending on the program you’re using and the size of your screen. Look for one of these icons:
-
With the WordArt placeholder text highlighted, enter your own text.
-
Select your WordArt text.
Drawing Tools will appear above the Format tab.
-
On the Drawing Tools Format tab, in the WordArt Styles group, click Text Effects >Transform and pick the look you want.


Note: Depending on your screen size, you might only see the icons for WordArt Styles.
If you want your text to completely circle your shape, under Follow Path pick Circle, and then click and drag any of the sizing handles until your WordArt is the shape you want.

Tip: When you have the WordArt and shape positioned the way you want, group them so you can move or copy them as a single shape.
If you want to wrap text around a shape that has straight edges, such as a rectangle, insert WordArt for each edge. In this example, WordArt is inserted four times, one for each side of the shape.
You can control the angle of your WordArt text in relation to your shape with precision by using the Rotate tool.
See Also
Add shapes
Insert WordArt
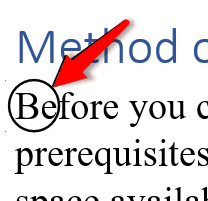
You may want to place a circle around a certain letter or number in your MS Word document. This may be to emphasize an important point in the document. It may also be to simply decorate the text.
- Use the Oval Tool
- Use the Enclose Characters Tool
- Insert a Circle Shape
- Insert Enclosed Alphanumeric Symbols
We will show you step-by-step instructions for all the tools above.
Let us begin.
Method #1: Use the Oval Tool
Note: Word does not enable the Oval Tool by default. The best place to enable and place the Oval Tool is in the Quick Access Toolbar.
Step #1: Open the Word Document
Open the Word document where you want to place circles.

Step #2: Open the Word Options menu.
Click on the File tab in the top menu toolbar.

This opens the Files menu.
Click Options at the bottom of the Files menu.
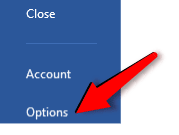
Word Options menu will open.
Click on Quick Access Toolbar.
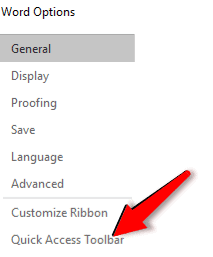
A dialog box for Customize the Quick Access Toolbar will open on the right-hand side.
Step #3: Customize the Quick Action Toolbar
Click on the down arrow below Choose commands from:
From the drop-down menu, select All Commands to change the command list below.

Search in the command list below All Commads and click on Oval.

Click on the Add button on the right-hand side of the command list.
Word will add the Oval tool in the Quick Action Toolbar list on the right.

Click on OK at the bottom of the dialog box to exit.
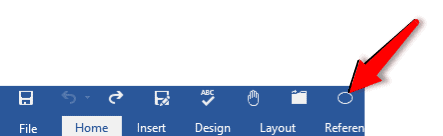
The Oval tool appears in the Quick Action Toolbar above the main toolbar.
Step #4: Use the Oval Tool
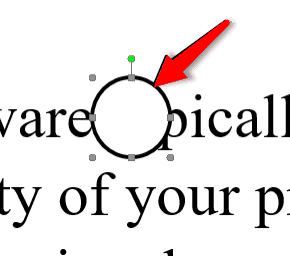
Position the cursor where you want the circle to appear.
Click on the Oval Tool in the Quick Action Toolbar.
The cursor will change to a cross.
Click on one corner and drag the cross cursor to the opposite corner to form a non-transparent circle.
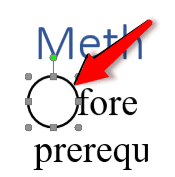
Right-Click on the circle to open a menu.
Click on Format AutoShape/Picture.
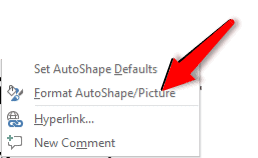
This opens the Format AutoShape dialog box.
Click on the tab Colors and Lines.
Under Fill, drag the Transparency bar to the extreme right to 100%.

Click on OK at the bottom of the dialog box to exit.
Word makes the circle transparent.
Open the Format AutoShape/Picture dialog box again. Use it to change the weight, color, and style of the circle.
Method #2: Use the Enclose Characters Tool
Note: Word does not enable the Enclose Characters Tool by default. The best place to enable and place the Enclose Characters Tool is in the Quick Access Toolbar.
Step #1: Open the Word Document
Open the Word document where you want to place circles.

Step #2: Open the Word Options menu.
Click on the File tab in the top menu bar.
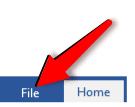
This opens the Files menu.
Click Options at the bottom of the Files menu.

Word Options menu will open.
Click on Quick Access Toolbar.

A dialog box to Customize the Quick Access Toolbar will open on the right-hand side.
Step #3: Customize the Quick Action Toolbar
Click on the down arrow below Choose commands from:
From the drop-down menu, select All Commands to change the command list below.

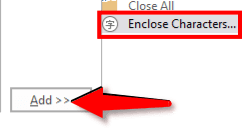
Search in the command list and click on Enclose Characters.
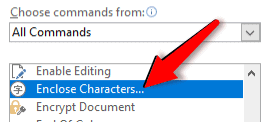
Click on the Add button on the right-hand side of the command list.
Word will add the Enclose Characters tool in the Quick Action Toolbar list on the right.
Click on OK at the bottom of the dialog box to exit.
The Enclose Characters tool appears in the Quick Action Toolbar above the main toolbar.
Step #4: Use the Enclose Characters tool
Select the letter or number around which you want the circle to appear.
Click on the Enclose Characters tool in the Quick Action Toolbar.
The Enclose Characters dialog box will open.
Under Style, click on the Enlarge symbol icon in the dialog box.
Under Enclosure, select the shape of the enclosure you want.
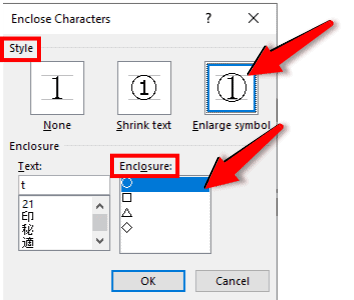
Click on OK to exit.
Word places the selected shape to enclose the letter/number.

Method #3: Insert a Circle Shape
Step #1: Open the Word Document
Open the Word document where you want to place circles.

Step #2: Insert a Circle Shape
Click on the Insert tab on the top menu toolbar to change the ribbon.

In the section Illustrations, click on the Shapes icon.

This opens a drop-down dialog box for various shapes.
Click on the Oval icon in Basic Shapes.
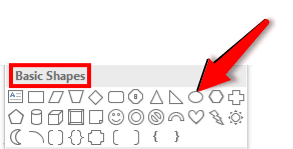
The cursor will change to a cross.
Position the cross cursor at the top left-hand corner. Drag it to the bottom right-hand corner to form a non-transparent circle.
Under Shape Styles, click on Shape Fill.

This opens the Shape Styles dialog.
Click on No Fill.

The circle changes to a transparent one.
You can select the circle and use the handles to move it. You can also change its shape and size.
Method #4: Insert Enclosed Alphanumeric Symbols
Step #1: Open the Word Document
Open the Word document where you want to place circles.
Place the cursor where you want the circle to appear.
Step #2: Insert Enclosed Alphanumeric Symbols.
Click on the Insert tab in the top menu toolbar to change the ribbon.

In the section Symbols, click on the Symbol icon.

In the drop-down menu, click on the More Symbols icon.
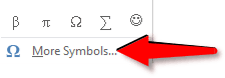
This will open the Symbol dialog.
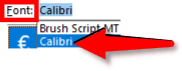
Under the Symbols tab, click on the downward arrow on the right of Font.
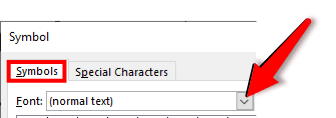
Under Font, select the Calibri font.
Under Subset, select Mathematical Operators.
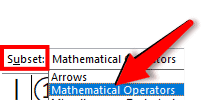
A number of encircled symbols will appear.
Select the symbol you want.
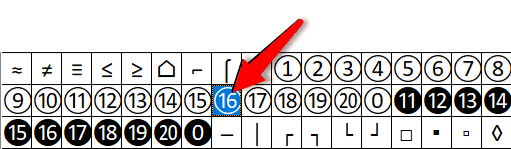
Click on Insert and then on Close at the bottom of the dialog to exit.
Word places the selected symbol in the document.

Note: Word offers only numbers as enclosed alphanumeric symbols.
Conclusion
Follow our simple instructions to place a circle around a number or letter in your document. We have shown you four methods. Select the one that suits you best.

There are many ways to make text stand out in your document. You can format the font in bold or italic or highlight the text using color. For another option, we’ll show you how to circle text in Microsoft Word.
You may want to place a circle around text to emphasize it. But you might also want to use that circled text to enhance the appearance. Whatever your reason, circling text in Word takes only a couple of steps.
Add a Shape to the Document
Open your Word document and go to the Insert tab. Click “Shapes” to view the available options.

The closest shape to a circle is the oval, which works well for circling text. Choose that option in the Basic Shapes section.
Your cursor changes to a plus sign. Click and then drag to draw the oval on your document. You can make it as large or small as you like to accommodate the text you want to circle. But remember, you can resize the shape later as well.
Now that you have your shape, you may need to adjust it so that you can see the text you circle. You can also make optional changes to the line size or color.
Format the Circle Around the Text
You can use the Shape Format tab to customize your shape.
RELATED: How to Add and Format Text in a Shape in Microsoft Word
If your shape has a fill color that you need to remove, select the shape and pick “No Fill” in the Shape Fill drop-down box on the Shape Format tab.
This allows you to place the circle over the text and see only the outline of the shape.
To adjust the line of the circle, select the Shape Outline drop-down arrow. You can then change the line color, weight, and style.
As you make your changes, you’ll see your circle update immediately. So, you can get just the right look.
Move and Resize the Circle
You can move the shape so it’s on top of the text you want to circle by simply dragging it.
If you need to make the circle larger or smaller, drag a corner or edge in or out.
You can make these adjustments to your shape until you see the ideal circle.
If your preferred method of making text pop in your document is by circling it, you can do this in just minutes. And by using the Shapes feature in Microsoft Word, you’ll have a nicely drawn circle.
READ NEXT
- › How to Use the Ink Features in Microsoft Office
- › Android’s Nearby Share Has (Unofficially) Arrived on Mac
- › Five Types of Phone Damage That Aren’t Covered by Your Free Warranty
- › The New Winamp Is Here, but It’s Not What You’d Expect
- › Windows 11 Has a New Photo Gallery in the File Explorer
- › How to Get a Refund on the PlayStation Store
- › Save Hundreds on Elegoo’s New PHECDA Laser Engraver Through Kickstarter
How-To Geek is where you turn when you want experts to explain technology. Since we launched in 2006, our articles have been read billions of times. Want to know more?