
Переноса текста по словам в ячейках диапазона на рабочем листе Excel из кода VBA. Свойство WrapText объекта Range, возвращаемые значения. Примеры.
Range.WrapText – это свойство, которое возвращает или задает значение типа Variant, указывающее, переносится ли текст в ячейках диапазона на новые строки, если длина текста превышает ширину ячейки.
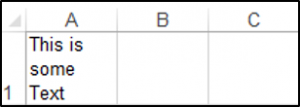
Текст в ячейках переносится по словам. Если слово не умещается в ячейке целиком, происходит перенос части слова. Обычно, высота строки рабочего листа автоматически подбирается под ячейку с максимальным количеством строк, образовавшихся в результате переноса текста.
Синтаксис
Expression.WrapText
Expression – выражение (переменная), возвращающее объект Range.
Значения
Значения, которые возвращает свойство Range.WrapText:
| Параметр | Значение |
|---|---|
| True | Во всех ячейках указанного диапазона включен перенос текста на новые строки. |
| False | Во всех ячейках указанного диапазона отключен перенос текста на новые строки. |
| Null | В указанном диапазоне присутствуют пустые ячейки, или есть ячейки как с переносом текста, так и без переноса. |
Примеры
Пример 1
Указание программе Microsoft Excel, что она должна или не должна переносить текст в ячейках заданного диапазона:
|
‘переносить текст в активной ячейке ActiveCell.WrapText = True ‘переносить текст во всех ячейках заданного диапазона Range(«A1:F20»).WrapText = True ‘не переносить текст в ячейке Cells(1, 5) Cells(1, 5).WrapText = False ‘не переносить текст во всех ячейках выбранного диапазона Selection.WrapText = False |
Пример 2
Присвоение значения, возвращаемого свойством Range.WrapText, переменной:
|
Dim a As Variant a = Range(«B2»).WrapText a = Rows(«1:2»).WrapText |
Пример 3
Просмотр значения, возвращаемого свойством Range.WrapText, с помощью информационного окна MsgBox:
|
If Not Selection.WrapText = Null Then MsgBox Selection.WrapText Else MsgBox «Null» End If |
Условие необходимо из-за того, что MsgBox не может отобразить значение Null – возникает ошибка. Поэтому, когда свойство Range.WrapText = Null, мы задаем в качестве аргумента функции MsgBox – строку «Null».
Содержание
- Wrap text in a cell
- Wrap text automatically
- Adjust the row height to make all wrapped text visible
- Enter a line break
- Need more help?
- VBA Wrap Text (Cell, Range, and Entire Worksheet)
- Wrap Text to a Cell using VBA
- Wrap Text to a Range of Cells
- Wrap Text to the Entire Worksheet
- Turn OFF WrapText
- Wrap text in a cell
- Wrap text automatically
- Adjust the row height to make all wrapped text visible
- Enter a line break
- Need more help?
- VBA Wrap Text
- Wrapping Text using VBA
- Disabling Wrapping in a Cell using VBA
- Disabling Wrapping in An Entire Worksheet
- VBA Coding Made Easy
- VBA Code Examples Add-in
- VBA Excel — Word Wrap
- 6 Answers 6
Wrap text in a cell
Microsoft Excel can wrap text so it appears on multiple lines in a cell. You can format the cell so the text wraps automatically, or enter a manual line break.
Wrap text automatically
In a worksheet, select the cells that you want to format.
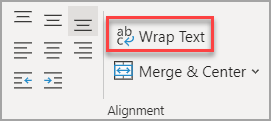
On the Home tab, in the Alignment group, click Wrap Text. (On Excel for desktop, you can also select the cell, and then press Alt + H + W.)
Data in the cell wraps to fit the column width, so if you change the column width, data wrapping adjusts automatically.
If all wrapped text is not visible, it may be because the row is set to a specific height or that the text is in a range of cells that has been merged.
Adjust the row height to make all wrapped text visible
Select the cell or range for which you want to adjust the row height.
On the Home tab, in the Cells group, click Format.
Under Cell Size, do one of the following:
To automatically adjust the row height, click AutoFit Row Height.
To specify a row height, click Row Height, and then type the row height that you want in the Row height box.
Tip: You can also drag the bottom border of the row to the height that shows all wrapped text.
Enter a line break
To start a new line of text at any specific point in a cell:
Double-click the cell in which you want to enter a line break.
Tip: You can also select the cell, and then press F2.
In the cell, click the location where you want to break the line, and press Alt + Enter.
Need more help?
You can always ask an expert in the Excel Tech Community or get support in the Answers community.
Источник
VBA Wrap Text (Cell, Range, and Entire Worksheet)
In VBA, there is a property called “WrapText” that you can access to apply wrap text to a cell or a range of cells. You need to write code to turn it ON or OFF. It’s a read and writes property, so you can apply it, or you can also get it if it’s applied on a cell.
In this tutorial, we will look at different ways of applying wrap text using a VBA code.
Wrap Text to a Cell using VBA
Use the following steps to apply Wrap Text using a VBA Code.
- Define the cell where you want to apply the wrap text using the range property.
- Type a dot to see the list of the properties and methods for that cell.
- Select the “WrapText” property from the list.
- Enter the equals sign “=” and type TRUE to turn on the wrap text.

You can also specify a cell using the following way.
Wrap Text to a Range of Cells
And if you want to apply wrap text to an entire range then you need to specify the range instead of a single cell.

You can also apply it to the used range (selection of the worksheet where you have entered data) by using the “UsedRange” property.

In the above code’s first line, you have specified the worksheet and then the “UsedProperty” to wrap the text. In the second line, you have the active sheet’s used range. But both lines work in the same way.
Here are a few more examples that you need to know:
- Non-continues cells
- Entire Row
- Entire Column
- Named Range

Wrap Text to the Entire Worksheet
To refer to the entire worksheet you need to use the Cells property as you have in the following code.

The first line of code refers to the active sheet and the second line to the worksheet “Sheet1”. You can also use a loop using FOR EACH (For Next) to loop through all the worksheets of the workbook and apply the wrap text on all the cells.

In the above code, you have “ws” as a variable and then For Each Loop loops through all the worksheets from the workbook and applies to wrap text to the entire worksheet using Cells.
Turn OFF WrapText
As you have seen you need to turn on the WrapText property, and in the same way you can turn it off by using add declaring FALSE.

Note: There’s one thing you need to understand if you have a value in a cell and the width of the cells is enough to store that value, then even if you apply wrap text, Excel won’t shift the content to the next line.
Источник
Wrap text in a cell
Microsoft Excel can wrap text so it appears on multiple lines in a cell. You can format the cell so the text wraps automatically, or enter a manual line break.
Wrap text automatically
In a worksheet, select the cells that you want to format.
On the Home tab, in the Alignment group, click Wrap Text. (On Excel for desktop, you can also select the cell, and then press Alt + H + W.)
Data in the cell wraps to fit the column width, so if you change the column width, data wrapping adjusts automatically.
If all wrapped text is not visible, it may be because the row is set to a specific height or that the text is in a range of cells that has been merged.
Adjust the row height to make all wrapped text visible
Select the cell or range for which you want to adjust the row height.
On the Home tab, in the Cells group, click Format.
Under Cell Size, do one of the following:
To automatically adjust the row height, click AutoFit Row Height.
To specify a row height, click Row Height, and then type the row height that you want in the Row height box.
Tip: You can also drag the bottom border of the row to the height that shows all wrapped text.
Enter a line break
To start a new line of text at any specific point in a cell:
Double-click the cell in which you want to enter a line break.
Tip: You can also select the cell, and then press F2.
In the cell, click the location where you want to break the line, and press Alt + Enter.
Need more help?
You can always ask an expert in the Excel Tech Community or get support in the Answers community.
Источник
VBA Wrap Text
In this Article
In this tutorial, you will learn about how to enable or disable Wrap Text in Excel using VBA.
Wrapping Text using VBA
You wrap the text in a cell or range by setting the Range.WrapText Property of the Range object to True. The following code will wrap the text in cell A1:
You can Wrap a larger range of cells as well:
Disabling Wrapping in a Cell using VBA
You can disable text wrapping in a certain cell or range using VBA. The following code will disable text wrapping in cell B2:
Disabling Wrapping in An Entire Worksheet
You can disable text wrapping in all the cells on a worksheet using VBA. The following code will allow you to disable text wrapping in all the cells in the ActiveSheet:
VBA Coding Made Easy
Stop searching for VBA code online. Learn more about AutoMacro — A VBA Code Builder that allows beginners to code procedures from scratch with minimal coding knowledge and with many time-saving features for all users! 

VBA Code Examples Add-in
Easily access all of the code examples found on our site.
Simply navigate to the menu, click, and the code will be inserted directly into your module. .xlam add-in.
Источник
VBA Excel — Word Wrap
I’m creating a small piece of VBA code with a specific formula, however it has a couple of if statements, one of which originates a double-line string (with vbNewLine ) The issue is that I can’t see the text.
So I wanted to word wrap it, but each time I set the ActiveCell.WrapText = True , nothing happens.
I checked with a message box. I set the WrapText to True, I return the property value with the MessageBox to confirm, and it’s still False.
I’ve been told to use ActiveCell.Rows.AutoFit as well, but AutoFit does nothing if the text isn’t wrapped.
Any idea what I might be doing wrong here?
6 Answers 6
It worked for me. Make sure that your screenupdating is also set to true.
For me, the code below worked. (only set to change header row, (change range))

UDFs (procedures that use the keyword Function) only return values. They cannot change other parts of the Excel object model, like cell formatting. Only Subroutines (procedures that use the keyword Sub) can do that.
You need to have your cells formatted properly before you enter your UDF. Or you could use a worksheet change event sub to format them after the fact.
Turn off/On word wrap for whole sheet row can be done by VB code shown below: If the first row is set true, excel inherits that property for whole sheet, unless you specifically turned it off using another code.
To turn off wrapping property of a specific row:

I suspect that you are trying to wrap text in merged cells. If yes, you cannot simply call:
Instead, you have to simulate the wrapping operations. I found the code from http://blog.contextures.com/archives/2012/06/07/autofit-merged-cell-row-height/ helped me last year.
This may not be exactly what the OP had in mind but I figured I’d share my VBA Word Wrap function since I couldn’t find anything on the web to do what I wanted.
This function insert CR + LF ‘s into the string in order to wrap it, so the word wrap is maintained if the text is copied to another application, text-based or otherwise.
It defaults to maximum width of 115 characters but can optionally be changed to anything. It only breaks on spaces (the last one that appears on/before position #115), and it only inserts CR + LF’s (with the constant vbCrLf ), but they can be adapted as required.
As an example of application, I was building complex SQL queries in Excel and wanted to copy the SQL over to the server app neat & tidy, instead of one giant line.
Источник
Permalink
Cannot retrieve contributors at this time
| title | keywords | f1_keywords | ms.prod | api_name | ms.assetid | ms.date | ms.localizationpriority |
|---|---|---|---|---|---|---|---|
|
Style.WrapText property (Excel) |
vbaxl10.chm177098 |
vbaxl10.chm177098 |
excel |
Excel.Style.WrapText |
9b6d236e-b46d-c557-0a54-5c9f765fd707 |
05/16/2019 |
medium |
Style.WrapText property (Excel)
Returns or sets a Boolean value that indicates if Microsoft Excel wraps the text in the object.
Syntax
expression.WrapText
expression A variable that represents a Style object.
[!includeSupport and feedback]
Microsoft Excel’s Wrap text allows the content of the cell to appear on multiple lines within a cell; rather than a long line. This feature makes it easy to view the cell content at a glance.

There are five ways we can Wrap Text in Excel:
Wrap Text From Ribbon
Follow the below steps to wrap text using Ribbon:
Step 1: Select the cell that you want to change.

Step 2: On the Home tab, in the Alignment group, click Wrap Text.

Removing Wrap Text via Ribbon
Follow the below steps to remove text wrap from the ribbon:
Step 1: Select the cell that you want to unwrap.

Step 2: On the Home tab, in the Alignment group, click Wrap Text.

Wrap Text Keyboard Shortcut
Follow the below steps to wrap text using the keyboard shortcut:
Step 1: Select the cell that you want to change.
Step 2: Press Alt + H +W on your keyboard.

Removing Wrap Text via Keyboard Shortcut
Follow the below steps to remove wrap text using the keyboard shortcut:
Step 1: Select the cell that you want to unwrap.
Step 2: Press Alt + H +W on your keyboard.

Wrap Text In The Format Cells Dialog Box
Follow the below steps to wrap text using Format Cells dialog box:
Step 1: Select the cell that you want to change.

Step 2: Right-click; click on Format cell on the Dialog Box.

Step 3: Select Alignment, in the Format Cells Dialog Box.

Step 4: Check Wrap Text in the Text Control option and click OK.

Removing Wrap Text via Format Cells Dialog Box
Follow the below steps to remove wrap text using the format cells dialog box:
Step 1: Select the cell that you want to change.
Step 2: Right-click; click on Format cell on the Dialog Box.

Step 3: Select Alignment, in the Format Cells Dialog Box.

Step 4: Uncheck Wrap Text in the Text Control option; click OK.

Manually Add Line Breaks To Wrap Your Text
Follow the below steps to manually add line breaks to wrap you text:
Step 1: Select the cell that you want to change.
Step 2: Place the cursor at the point in the text you want to add a line break.

Step 3: Press Alt + Enter. This will move the text down one line.

Home / VBA / VBA Wrap Text (Cell, Range, and Entire Worksheet)
In VBA, there is a property called “WrapText” that you can access to apply wrap text to a cell or a range of cells. You need to write code to turn it ON or OFF. It’s a read and writes property, so you can apply it, or you can also get it if it’s applied on a cell.
In this tutorial, we will look at different ways of applying wrap text using a VBA code.
Wrap Text to a Cell using VBA
Use the following steps to apply Wrap Text using a VBA Code.
- Define the cell where you want to apply the wrap text using the range property.
- Type a dot to see the list of the properties and methods for that cell.
- Select the “WrapText” property from the list.
- Enter the equals sign “=” and type TRUE to turn on the wrap text.
Sub vba_wrap_text()
  Range("A1").WrapText = True
End Sub
You can also specify a cell using the following way.
Cells(1, 1).WrapText = TrueWrap Text to a Range of Cells
And if you want to apply wrap text to an entire range then you need to specify the range instead of a single cell.
Range("A1:A5").WrapText = True
You can also apply it to the used range (selection of the worksheet where you have entered data) by using the “UsedRange” property.
Worksheets("Sheet1").UsedRange.WrapText = True
ActiveSheet.UsedRange.WrapText = True
In the above code’s first line, you have specified the worksheet and then the “UsedProperty” to wrap the text. In the second line, you have the active sheet’s used range. But both lines work in the same way.
Here are a few more examples that you need to know:
- Non-continues cells
- Entire Row
- Entire Column
- Named Range

Range("A1:A10,C1:C10").WrapText = True
Range("A:A").WrapText = True
Range("1:1").WrapText = True
Range("myRange").WrapText = True
To refer to the entire worksheet you need to use the Cells property as you have in the following code.
Cells.WrapText = True
Worksheets("Sheet1").Cells.WrapText = True
The first line of code refers to the active sheet and the second line to the worksheet “Sheet1”. You can also use a loop using FOR EACH (For Next) to loop through all the worksheets of the workbook and apply the wrap text on all the cells.

Dim ws As Worksheet
For Each ws In ActiveWorkbook.Worksheets
   Cells.WrapText = True
Next ws
In the above code, you have “ws” as a variable and then For Each Loop loops through all the worksheets from the workbook and applies to wrap text to the entire worksheet using Cells.
Turn OFF WrapText
As you have seen you need to turn on the WrapText property, and in the same way you can turn it off by using add declaring FALSE.
Range("A1").WrapText = False
Note: There’s one thing you need to understand if you have a value in a cell and the width of the cells is enough to store that value, then even if you apply wrap text, Excel won’t shift the content to the next line.

More Tutorials
- Count Rows using VBA in Excel
- Excel VBA Font (Color, Size, Type, and Bold)
- Excel VBA Hide and Unhide a Column or a Row
- Excel VBA Range – Working with Range and Cells in VBA
- Apply Borders on a Cell using VBA in Excel
- Find Last Row, Column, and Cell using VBA in Excel
- Insert a Row using VBA in Excel
- Merge Cells in Excel using a VBA Code
- Select a Range/Cell using VBA in Excel
- SELECT ALL the Cells in a Worksheet using a VBA Code
- ActiveCell in VBA in Excel
- Special Cells Method in VBA in Excel
- UsedRange Property in VBA in Excel
- VBA AutoFit (Rows, Column, or the Entire Worksheet)
- VBA ClearContents (from a Cell, Range, or Entire Worksheet)
- VBA Copy Range to Another Sheet + Workbook
- VBA Enter Value in a Cell (Set, Get and Change)
- VBA Insert Column (Single and Multiple)
- VBA Named Range | (Static + from Selection + Dynamic)
- VBA Range Offset
- VBA Sort Range | (Descending, Multiple Columns, Sort Orientation
- VBA Check IF a Cell is Empty + Multiple Cells
⇠ Back to What is VBA in Excel
Helpful Links – Developer Tab – Visual Basic Editor – Run a Macro – Personal Macro Workbook – Excel Macro Recorder – VBA Interview Questions – VBA Codes