Word for Microsoft 365 Word for the web Word 2021 Word 2019 Word 2016 Word 2013 More…Less
Moving or repositioning a picture on page in Word is as simple as dragging it with your mouse. But sometimes it doesn’t work. The key to getting the results you want is to select Layout Options.

-
Select a picture.
-
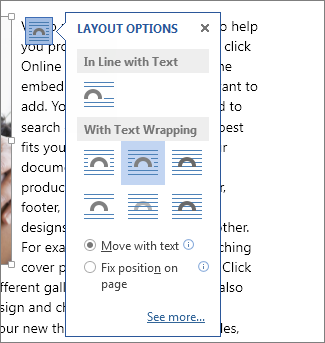
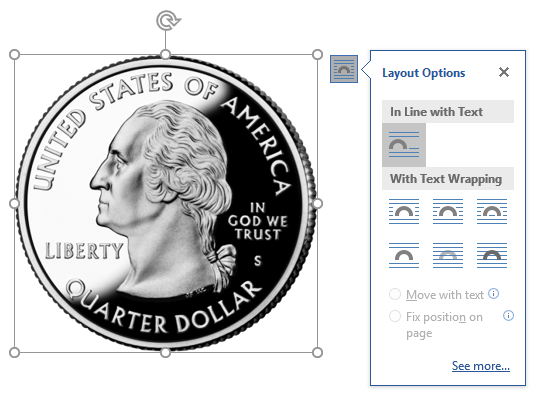
Select the Layout Options icon.
-
Choose the layout options you want:
-
To bring your picture in front of the text and set it so it stays at a certain spot on the page, select In Front of Text (under With Text Wrapping), and then select Fix position on page.
-
To wrap text around the picture but have the picture move up or down as text is added or deleted, select Square (under With Text Wrapping), and then select Move with text.
-
For or more information and examples of text wrapping, see Wrap text around pictures in Word
The picture is probably behind another object, like a block of text:
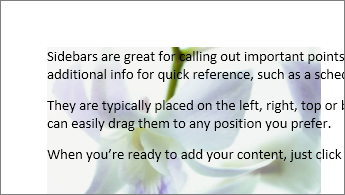
To select the picture, use the Selection pane:
-
Select Home > Select > Selection Pane.
-
In the Selection pane, select the picture.
To move a picture a tiny amount, select the picture, then hold down the Ctrl key and press an arrow key.
To move several objects at the same time, group them together:
-
Select the first object.
-
Hold down the Ctrl key and select the other objects.
-
Right-click one of the objects, point to Group, and then select Group.
Tip: If you are unable to group or multi-select pictures, it’s possible that the layout of your picture is inline with text. If so, please refer to Open Layout Options to change the picture layout to any option under With Text Wrapping.
For absolute control over the alignment and positioning of a picture, use the Layout box to set alignment relative to margins or columns, absolute position in inches, or relative position by percentage. This comes in handy when you want to place a picture a certain distance from something else, like a page margin.
-
Select the picture.
-
Select the Layout Options icon.
-
Select See more, and then make alignment and position adjustments on the Position tab.
If you can’t select any of the position options on the Position tab, select the Text Wrapping tab, and then select any option except the In line with text option.
If you have more than one picture that you want to overlap on a page, you can enable this in the Layout box.
-
Select a picture.
-
Select the Layout Options icon.
-
Select See more.
-
On the Position tab, in the Options group at the bottom, select the Allow overlap check box.
-
Repeat for each picture for which you want to enable overlapping.
In addition to aligning and positioning pictures on a page, you can also align pictures to each other, or to other objects on the page. Although picture-to-picture alignment is not available from the Layout Options icon or the Layout dialog box, it’s a common task that you might do while working with picture positioning and alignment.
-
Hold down the Ctrl key and select each object that you want to align.
-
Go to Picture Format or Picture Tools Format > Align, and then choose an option, such as Center, Top, or Bottom.
An object anchor 
All other wrapping options (Square, Tight, Through, Top and Bottom, Behind Text, In Front of Text) are anchored to a particular place in the document; the anchor indicates the paragraph with which the object is associated. Select a picture, and then select the Layout Options icon to find out how your picture is inserted.

Notes: If you select a picture and it’s not inline with text, but you don’t see an object anchor, you can ensure that anchors are shown in two ways:
-
Show formatting marks On the Home tab, in the Paragraph group, select Show/Hide ¶.
-
Always show anchors Select File > Options > Display, and then select Object anchors.
Because anchors are simply a visual indication of a picture’s relative position on a page, they cannot be removed. However, by trying different text wrapping options, you should find all the flexibility you need in positioning a picture, regardless of its anchor.
For or more information and examples of text wrapping, see Wrap text around pictures in Word.
If you want to ensure that an image stays put even if the text around it is deleted, you can lock its anchor:
-
Select the picture.
-
Select the Layout Options icon.
-
Select See more, and then select Lock anchor.
Note: Because anchors are not used for pictures placed In Line with Text, anchor locking and all other positioning options are unavailable for inline images.
See also
Wrap text around pictures in Word
Rotate a text box, shape, WordArt, or picture in Word
Group or ungroup shapes, pictures, or other objects
If you inserted a picture into your document while using Word for the web, you can cut and paste it to move it within a document, and you can apply paragraph formatting, like vertical spacing and centering, to it. However, you cannot move a picture that was inserted while using the desktop version of Word if the picture has text wrapping or a fixed position on the page.
If you find that you cannot make changes to a picture, and you have the desktop version of Word, select Open in Word to open your document in Word and make changes to its layout.
When you are done, press Ctrl+S to save your document to its original location. You can then open the document again in Word for the web, and continue editing. Word for the web will retain the layout settings that you applied in the desktop version of Word.
Need more help?
Word’s Position and Wrap Text features help arrange images and text on the page. Position features automatically place the object at the location of your choice on the page (see how to position figures in Word for more details). Text Wrap features determine how text wraps around an image or other objects on the page, depending on the chosen option.
Wrap Text features work for figures in a Word document (see text wrapping for tables). Figures in Word mean any visual objects except tables and equations. So, using the same Wrap Text features can be used for images, ClipArt objects, charts, text boxes, diagrams, and SmartArt objects.
Change text wrapping
By default, Word inserts (see examples below):
- Pictures (images and photos), charts in line with the text.
- Text boxes, shapes in front of the text.
- WordArt objects behind the text.
To change the way how text should wrap the object, select it, then do one of the following:
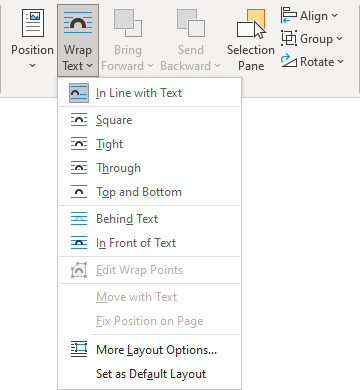
- On the Picture Format (Shape Format, Graphics Format) tab, in the Arrange group, click the Wrap Text button:
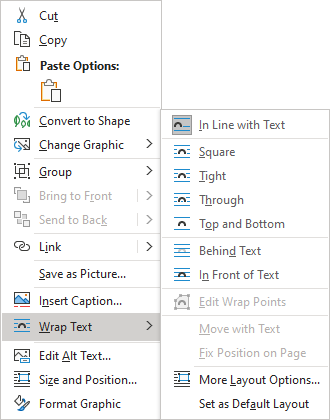
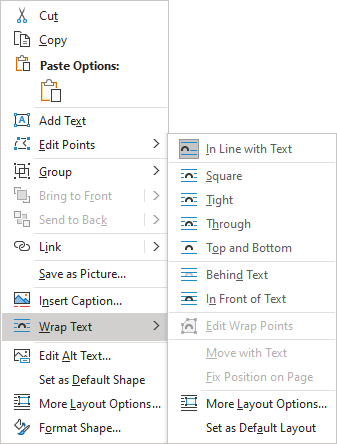
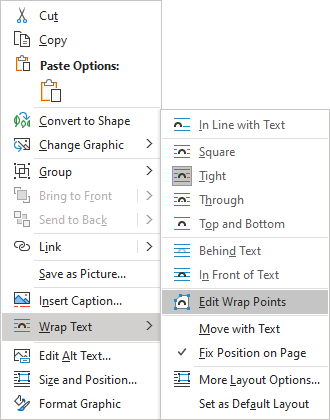
- Right-click on the object, then choose Wrap Text in the popup menu:
or
- Click the Layout Options button that appears next to the selected figure:
From the Wrap Text list, choose the option you prefer:
- In Line with Text places an object in a paragraph on the same line as the surrounding text. The text does not wrap around it.
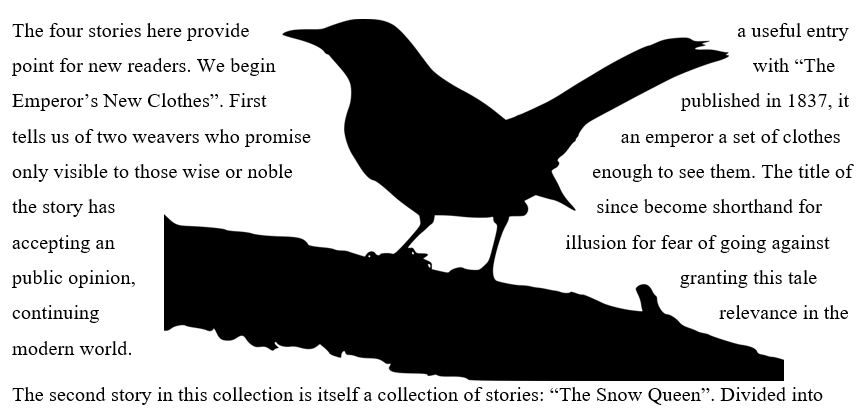
- Square wraps the text around the picture or shape on all sides at right angles (a square pattern) as if it is rectangular. The text fills the remaining rectangular region.
This option is the most common form of text wrapping.
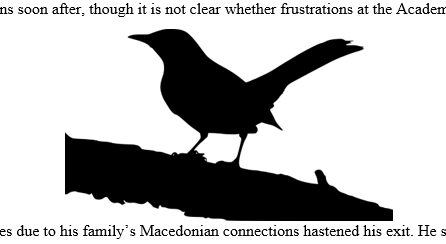
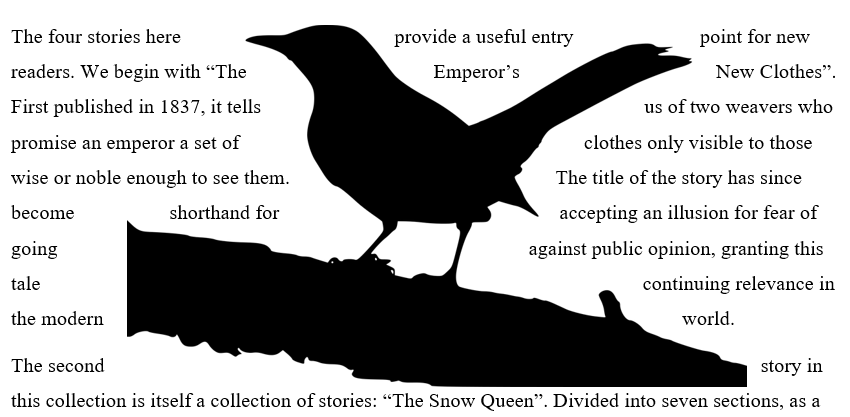
- Tight wraps the text around the edges of the figure. The text follows the shape.
This option is most useful for larger images covering most of the page width.
- Through wraps the text around the picture or shape edges, including any white gaps. If there is no white space in the image or shape, text wrapping works the same as Tight.
This option is an advanced setting because you pull or drag image and shape points in and out of their original borders:
See how to edit hyphenation points.
- Top and Bottom wraps the text above and below the figure to keep the image on its line. There is no text on either side of it.
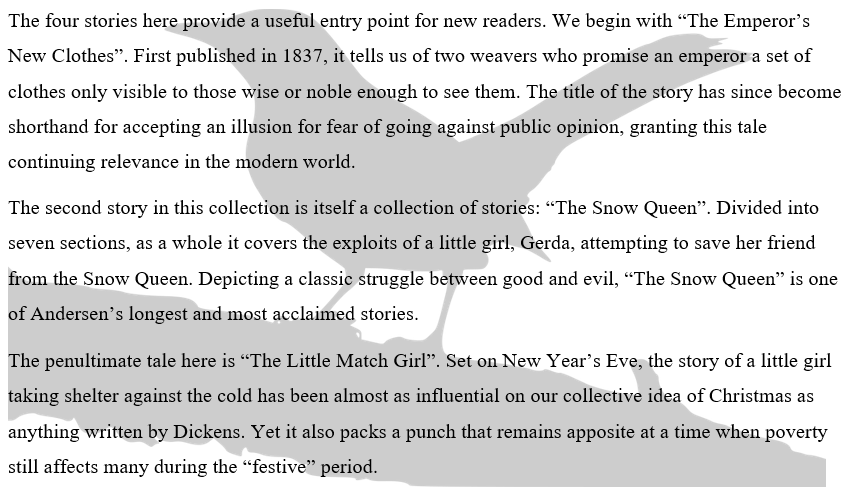
- Behind Text places the figure behind, or underneath, any existing text. The text does not wrap around it.
The picture looks like a watermark or background image.
Note: Use the Selection pane when working with objects behind the text.
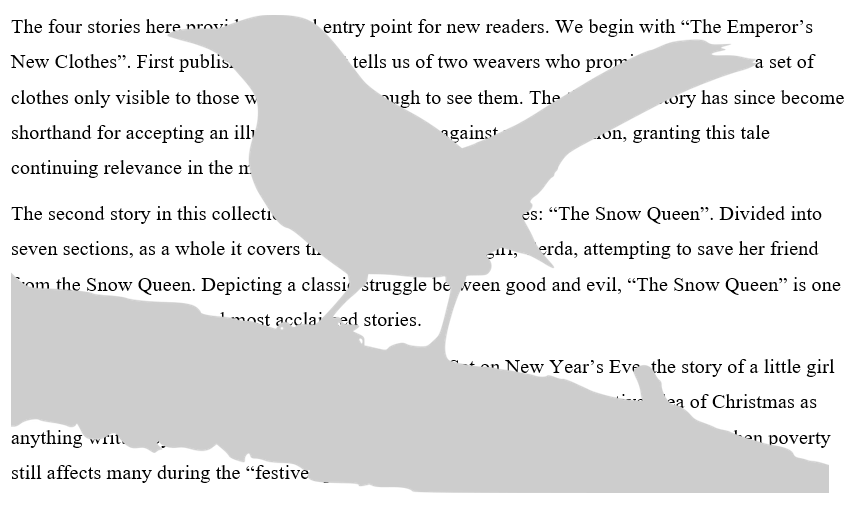
- In Front of Text places the object on top of the text. The text is not wrapped, so some of it may be blocked depending on the figure’s transparency.
Note: Figures that use the Square, Tight, Through, Top and Bottom, Behind Text, or In Front of Text wrapping style are all considered floating.
Position a figure to a paragraph or page
Also, Word offers two options for all wrapping styles except In line with Text (for floating figures):
or
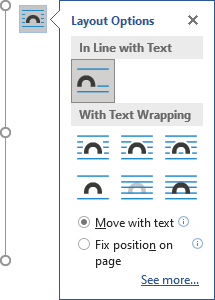
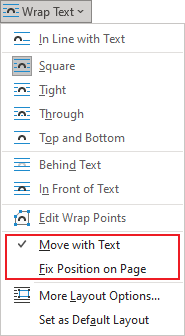
- Move with Text moves the figure along with the surrounding text.
If a figure is positioned inside the paragraph, and you delete or add any content before the paragraph, the figure moves with the paragraph. See more about Positioning a picture, text box, or shape on the page.
- Fix Position on Page keeps the figure at the same place on the page when text is added or removed.
If the paragraph where the figure is located (that paragraph contains anchor) moves to the next page, the figure moves and keeps its position relative to the page.
Note: The same options you can find in the Layout dialog box, on the Position tab, in the Options section:

Checking the Move object with text check box is equivalent to the Move with Text option from the Wrap Text dropdown list. Unchecking the Move object with text check box is equivalent to the Fix Position on Page option.
Wrap text on both sides, or one side only
To change additional options, choose More Layout Options… from the Wrap Text dropdown list or the See more… link in the Layout Options menu.
In the Layout dialog box, on the Text Wrapping tab:

- In the Wrapping style group, choose any style exact In line with text (see above).
- In the Wrap text group (available for the Square, Tight, and Thought wrapping styles), choose any of the additional options:
- Both sides wraps text around either side of the image or shape:
- Left only wraps text around only the left side of the image or shape:
- Right only wraps text around only the right side of the image or shape:
- Largest only wraps text on the side of the image or shape with the larger distance from the margin.
- Both sides wraps text around either side of the image or shape:
Change the distance between text and object
To change the distance between text and the visual object, open the Layout dialog box by one of the following methods:
- On the Picture Format (Shape Format, Graphics Format) tab, in the Arrange group, click the Wrap Text button, then select More Layout Options…
- Right-click on the object, click the Wrap Text list, then select More Layout Options… in the popup menu.
- Click the See more… link in the Layout Options menu.
In the Layout dialog box, on the Text Wrapping tab, in the Distance from text section, enter custom values for the distance between the text and the picture independently for:
- Top and Bottom (available for the Square, Tight, Thought, and Top and Bottom wrapping styles),
- Left and Right (available for the Square, Tight, and Thought wrapping styles).
For example, with the 0.3-inch distance on all sides:

Edit hyphenation points
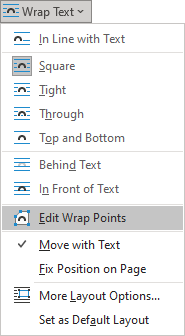
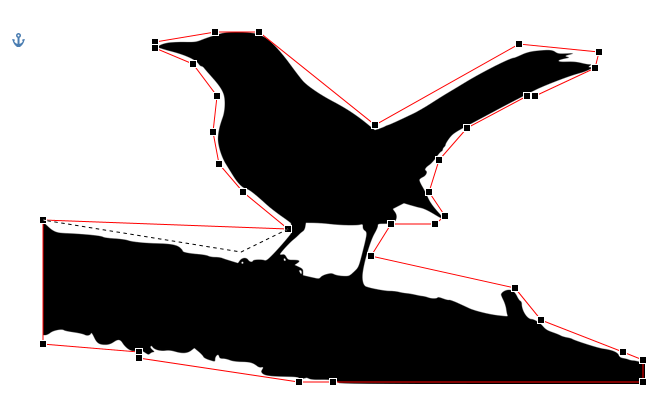
To use the Tight or Through options effectively, you may need to adjust the wrapping points for the image or shape. To edit wrap points, select the object, then activate the Edit Wrap Points view by one of the following methods:
- Picture Format (Shape Format, Graphics Format) tab, in the Arrange group, click the Wrap Text button. Then choose Edit Wrap Points from the Wrap Text dropdown list:
- Right-click on the object and select Wrap Text -> Edit Wrap Points in the popup menu:
In the Edit Wrap Points view, drag the red lines to adjust where the text wraps:

Note: There is no way to add points. You can move existing wrap points however you want.
Be careful! After changing a text wrapping option or copy-pasting the picture, Word lost the changes of Wrap Points.
Go to Picture Format or Shape Format and select Arrange > Wrap Text. If the window is wide enough, Word displays Wrap Text directly on the Picture Format tab. Choose the wrapping options that you want to apply. For example, In Line with Text, Top and Bottom, and Behind Text.
Contents
- 1 Why is my text not wrapping in Word?
- 2 What is word wrap in Word?
- 3 What is the wrap text?
- 4 What are the text wrapping options?
- 5 How do I edit text wrap in Word?
- 6 What is word wrap example?
- 7 How do I wrap text in word 2007?
- 8 How do I wrap text in Notepad?
- 9 How do you wrap text with keyboard?
- 10 How do you wrap text in a cell?
- 11 How do you unwrap text in Word?
- 12 How do I make text the default wrap in Word?
- 13 How do I change text wrapping settings?
- 14 How do you wrap text in Java?
- 15 How do you wrap text in CSS?
- 16 How do you wrap text in HTML code?
- 17 How do you wrap text in Word 2010?
- 18 How do I wrap text in Wordpad?
- 19 What is word wrap in Windows Notepad?
- 20 In which menu of Notepad word wrap option is found?
Why is my text not wrapping in Word?
The advanced options in the Word Options dialog box. Make sure the Show Text Wrapped Within the Document Window check box is cleared.
What is word wrap in Word?
Definition of word wrap
: a word processing feature that automatically transfers a word for which there is insufficient space from the end of one line of text to the beginning of the next.
What is the wrap text?
“Wrapping text” means displaying the cell contents on multiple lines, rather than one long line. This will allow you to avoid the “truncated column” effect, make the text easier to read and better fit for printing. In addition, it will help you keep the column width consistent throughout the entire worksheet.
What are the text wrapping options?
What are the Text Wrapping Options?
- Square, Tight, and Through: These three options are all variations on the same thing.
- Top and Bottom: This option keeps the text above and below the object, but not to its sides.
- Behind Text and In Front Of Text: These two options don’t affect the text at all.
How do I edit text wrap in Word?
On the Format tab, click Wrap Text, and then click Edit Wrap Points. After you click Edit Wrap Points, you see a red dashed outline with square black handles (called wrap points) on it around the picture. You can change the shape of the outline by dragging the black handles.
What is word wrap example?
An example of word wrap is the automatic moving of the words on a long line of words to fit the words within a cell on a spreadsheet. A word processing feature that moves words to the next line automatically as you type based on the current right margin setting.Words exceeding the margins are set to begin a new line.
How do I wrap text in word 2007?
Select the text box. Click the dialog launcher in the Paragraph group of the Home tab. Click the Indents And Spacing tab and select Centered in the Alignment box. Click the Line And Page Breaks tab, select All in the Tight Wrap box (Figure D), and click OK.
How do I wrap text in Notepad?
Step 1: Open Notepad. Step 2: Click the Format tab at the top of the window. Step 3: Select the Word Wrap option from this menu. Note that this setting persists through different files, and as you open and close Notepad.
How do you wrap text with keyboard?
Wrap Text Keyboard Shortcut
Select the cells to which you want to apply wrap text then press Alt ➜ H ➜ W. Certainly a quick and easy way to apply the formatting.
How do you wrap text in a cell?
Wrap text automatically
On the Home tab, in the Alignment group, click Wrap Text. (On Excel for desktop, you can also select the cell, and then press Alt + H + W.) Notes: Data in the cell wraps to fit the column width, so if you change the column width, data wrapping adjusts automatically.
How do you unwrap text in Word?
Right-click the control for which you want to enable or disable text wrapping, and then click Control Properties on the shortcut menu. Click the Display tab. Select or clear the Wrap text check box.
How do I make text the default wrap in Word?
In line with text may not be what you prefer, so here’s how to change the default.
- Go to File > Options >Advanced.
- In the Cut, copy, and paste section, change the setting under Insert/paste pictures as: to the text wrapping style you want.
- Select OK.
How do I change text wrapping settings?
To wrap text around an image:
- Select the image you want to wrap text around. The Format tab will appear on the right side of the Ribbon.
- On the Format tab, click the Wrap Text command in the Arrange group. Then select the desired text wrapping option.
- The text will wrap around the image.
How do you wrap text in Java?
The first wrap() method takes the String to wrap as its first argument and the wrap length as its second argument. The second wrap() method takes for arguments. The first is the String to wrap and the second is the wrap length. The third is the newline characters to use when a line is wrapped.
How do you wrap text in CSS?
The overflow-wrap property in CSS allows you to specify that the browser can break a line of text inside the targeted element onto multiple lines in an otherwise unbreakable place. This helps to avoid an unusually long string of text causing layout problems due to overflow.
How do you wrap text in HTML code?
To wrap text around an image by altering the HTML code:
- Example:
Paragraph text.
- Example:
Paragraph text.
- Example:
How do you wrap text in Word 2010?
Summary – How to use text wrapping in Word 2010
- Select the picture.
- Click the Format tab under Picture Tools.
- Click the Wrap Text button.
- Select the style of text wrapping that you want to use for this picture.
How do I wrap text in Wordpad?
Go to the “View” menu and choose “Options.” On the “Rich Text Tab” select how you want the words to wrap in WordPad. You can have the words wrap to the window, wrap to the ruler or not wrap at all. This does not affect the margins of your page, just how the words appear in the work space.
What is word wrap in Windows Notepad?
Word wrap is a feature in many text editors such as Notepad++ that formats long lines of text by wrapping extra text onto multiple lines.To add a new line to code, a specific “newline” character has to be used, therefore, as Word wrap doesn’t add newline characters, a compiler doesn’t count the text as a new line.
Tap or click to open Notepad. Tap or click the Format menu, and then tap or click Word Wrap.
Download Article
Download Article
- Adding an Image
- Wrapping Text
- Removing Wrap Text
- Video
- Q&A
- Things You’ll Need
|
|
|
|
|
Microsoft Word helps you incorporate images and text together in order to illustrate a document, and you can learn to wrap text around images in order to change the default settings. This wikiHow shows you how to use wrap text in Word to add captions to images.
-
1
Click on the area where you want your image. Once you do, a flashing vertical line appears right where you want the image placed.
- A mouse is useful for working with images in Word, because you have more control of the size and shape when you can click and drag the image.
-
2
Click Insert. This appears in the menu at the top of the page and pulls up a menu of different options.
Advertisement
-
3
Select Pictures.This will allow you to insert any jpg, pdf or other type of image that you have on your computer (or drives) into the document.
-
4
Select Photo Browser. This will let you choose from the photo program on your computer.
- Choose Picture From File if your image is on your desktop or in another folder.[1]
- Choose Picture From File if your image is on your desktop or in another folder.[1]
-
5
Select your image. Once you’ve opened the dialog box for inserting an image, navigate to the folder where your image is saved and click on it once to select it for insertion into the document.
-
6
Click Insert. This appears as a button at the bottom of the dialog box. Once done, your image is in the location you selected with your cursor.
-
7
View your image. Keep in mind that Word’s default setting is to put the image “in line.” This means it will treat it as if it is a large letter or a tall line of text.
- Text wrapping will allow the text to wrap around the image, go over the image or beside the image.
Advertisement
-
1
Click on the picture with your cursor. This action will bring up the Picture Formatting menu in the ribbon at the top of Word.
- Clicking outside of the image will take the picture formatting menu away and bring you back to the text formatting menu.[2]
- Clicking outside of the image will take the picture formatting menu away and bring you back to the text formatting menu.[2]
-
2
Select Wrap Text. It may be inside the Arrange grouping or in the Advanced Layout tab, Drawing Tools tab or SmartArt Tools tab, depending on the version of Word you are running.
-
3
Click the Wrap Text button. This appears in the top-right corner of your image when you click on it and will pull up a drop-down menu listing different text wrapping options.
-
4
Select a text wrapping option. Word has different text wrapping options, which you can pick according to your needs:
- Choose Square if your image is square and you want to wrap the text around the square border of your image.
- Choose Top and Bottom if you want the image to stay on its own line, but be between text on the top and bottom.
- Choose Tight to wrap text around a round or irregularly shaped image.
- Choose Through to customize the areas that the text will wrap. This is best if you want the text to be incorporated with your image in some way, or not follow the borders of the image file. This is an advanced setting, because you will pull or drag image points in and out of their original borders.
- Choose Behind Text to use the image as a watermark behind the text.
- Choose In Front of Text to display the image over the text. You may want to change the color, or it can make the text illegible.
-
5
Re-position the image. After you have selected your text wrapping option, you can click and drag your image to re-position it on the page. The program will allow you to place it where you want it now, with the text flowing around it.
-
6
Experiment with different types of text wrapping. Each image and project requires different types of text wrapping. Browse through options when you add a new image to make sure your wrap text is properly formatted.
Advertisement
-
1
Click on the text box with your wrap text. This will pull up the markers for expanding and/or moving the text box along with making your text editable.
-
2
Highlight all but the first letter of your wrap text. It’s important to leave the first letter un-highlighted because you’ll need to press the Backspace key, which could end up deleting the image you inserted above the wrap text.
-
3
Press the ← Backspace key. This will delete the text you highlighted from the text box. Make sure to delete the first letter after the rest of the text, since this will reset your wrap text settings.
Advertisement
Add New Question
-
Question
I inserted a picture, chose «text wrapping,» and selected «tight.» How do I unwrap it?
Select the «In Line with Text» option in the same text wrapping menu. This will return the image to the default text wrapping setting — the same as when you initially added the image.
-
Question
How do I get two images next to each other?
Just insert one picture right after the other (or put a space in-between if you want). If they don’t both fit on the same line, then resize them by clicking one of the corner squares and moving it inward.
-
Question
How do I select which text will wrap around the picture?
Highlight the paragraph/words you would like to use and then select «Wrap text.»
Ask a Question
200 characters left
Include your email address to get a message when this question is answered.
Submit
Advertisement
Thanks for submitting a tip for review!
wikiHow Video: How to Wrap Text in Word
Things You’ll Need
- Mouse
- Microsoft Word
References
About This Article
Article SummaryX
«When you insert an object, such as an image or shape, into your Word document, you can choose how your text wraps around it. First, insert an object. To do this, click the place in your document where you’d like it to appear, click the «»Insert»» tab, and then select the object you want to include. By default, the object will be placed in line with the text, which means it’ll probably interrupt the document’s text flow. To make text wrap around the object instead, click the object once to select it, and then click the Layout Options icon at its top-right corner—it’s the half-circle surrounded by a bunch of lines. Now you’ll see several text-wrapping options under «»With Text Wrapping.»» Each option has an icon which illustrates how the text will wrap around the object. Click the first icon in this section to wrap the text around the object in a nice clean manner that adds a little space between the object and text. Or, click through the other options to see if they better suit your needs. If you drag the object to another location in the text, the text will continue to wrap around it using your selected text-wrapping setting. Click anywhere outside the object to close your Layout Options and return to editing your document.
»
Did this summary help you?
Thanks to all authors for creating a page that has been read 271,870 times.
Is this article up to date?
From corporate logos in press releases to scientific diagrams in research papers, there are many reasons to include images in a Microsoft Word document. But how images fit with surrounding text is important when formatting a document, so you need to understand text wrapping.
What Is Text Wrapping in Microsoft Word?
Text wrapping refers to how images are positioned in relation to text in a document, allowing you to control how pictures and charts are presented. Your options for this in Microsoft Word are:
In Line with Text
This option places an image on the same line as surrounding text. The image will thus move as text is added or removed, whereas the other options here mean the image stays in one position while text shifts and ‘wraps’ around it.
Square
This wraps text around an image on all sides at right angles, as if it had a rectangular box around it. This is the most common form of text wrapping.
Top and Bottom
Text wraps above and below the image so it is on its own line. This is most useful for larger images that occupy most of the width of a page.
Tight
This is similar to Square but without the rectangular box, so text wraps around the edges of the image itself. Useful for irregularly shaped images.
Through
Similar to Tight, but text will also fill any white gaps within the image.
Find this useful?
Subscribe to our newsletter and get writing tips from our editors straight to your inbox.
Behind
Places an image behind the text, allowing you to add a watermark or background image on a page (although MS Word has a separate watermark option, too, which is easier to use in many cases).
In Front of Text
Places the picture in front of the text. This can be used to place a circle around some text or to add an arrow to highlight part of a passage.
The best choice will depend on your needs, but Square and Tight work in most cases. As such, these should be your default options.
How to Control Text Wrapping
After adding an image to a document, you can adjust the text wrapping to make sure it fits with the surrounding text. To do this:
- Click the image you want to format
- Click Layout Options or go to Format > Arrange on the ribbon
- Open the Wrap Text menu and select the setting required
If you want to use the Tight or Through options effectively, you may also need to adjust the wrapping points for the image. To do this:
- Select the image you want to adjust
- Go to Format > Arrange
- Open the Wrap Text menu and click Edit Wrap Points
- Drag the red lines to adjust the wrap points as required
The instructions above are for Microsoft Word on Windows computers, but the process is similar in Word for Mac.

