
Looking to add functionality in your .NET apps to export data to Word and PDF? Learn four ways to do this with just a little code.
Building feature rich applications can often leave users asking to take visual elements off the screen to be used elsewhere. Being able to export from an application to Word or PDF opens up new possibilities, such as sharing, reporting or even satisfying Sarbanes–Oxley (SOX) audit requirements.
Getting data out of your application and into standard formats like Microsoft Word and Adobe PDF can be a daunting task. Especially when performance optimizations for large datasets, document customization & appearance, and supported platforms are taken into consideration.
However, with the right tools, adding this feature to your .NET application can be as simple as a few lines of code. Let’s take a look at 4 ways we can include rich document functionality in our .NET apps with very little code and time investment.
For the examples we’ll be using the Telerik Document Processing Library (DPL), which is distributed at no additional cost with the Progress Telerik UI libraries for WPF, Silverlight and WinForms. For the web developers out there, the DPL is also included with ASP.NET Web Forms and MVC. In addition, no MS Office licenses or dependencies are required to use the DPL.
If you’re using Telerik UI, you already have these capabilities in your toolbox and we’ll learn how to leverage them. If you’re not using Telerik UI yet, but would like to increase your developer productivity, learn more about it here.
1. Create New Word Document in .NET
Having the ability to create a new Word document from code provides a great deal of flexibility. With a just few dependencies we have access to Word document creation APIs that include text, image, and link generation. For this example, we’ll use RadFlowDocument and RadFlowDocumentEditor to create a new Word document from a .NET console application.
We’ll start with a few dependencies like System.IO to handle a file stream, and the necessary Telerik DPL assemblies.
using System.IO;
using Telerik.Windows.Documents.Flow.FormatProviders.Docx;
using Telerik.Windows.Documents.Flow.Model;
using Telerik.Windows.Documents.Flow.Model.Editing;
Next, we create a new RadFlowDocument and RadFlowDocumentEditor. The RadFlowDocumentEditor will allow us to insert new text, image and other elements to the document.
static void Main(string[] args)
{
RadFlowDocument document = new RadFlowDocument();
RadFlowDocumentEditor editor = new RadFlowDocumentEditor(document);
Using the editor, we’ll write some text to the document using the InsertText method. We also have additional methods available such as:
- InsertFloatingImage
- InsertParagraph
- InsertTable
- InsertHyperlink
- and more

static void Main(string[] args)
{
RadFlowDocument document = new RadFlowDocument();
RadFlowDocumentEditor editor = new RadFlowDocumentEditor(document);
editor.InsertText("Hello Word!");
Once the document is complete, we just need to write it to the FileStream. For the RadFlowDocument we’ll use the DocxFormatProvider to export to the DOCX format. Similarly, we could use a PdfFormatProvider to create a PDF document.
using System.IO;
using Telerik.Windows.Documents.Flow.FormatProviders.Docx;
using Telerik.Windows.Documents.Flow.Model;
using Telerik.Windows.Documents.Flow.Model.Editing;
namespace DocProcessing
{
class Program
{
static void Main(string[] args)
{
RadFlowDocument document = new RadFlowDocument();
RadFlowDocumentEditor editor = new RadFlowDocumentEditor(document);
editor.InsertText("Hello Word!");
using (Stream output = new FileStream("output.docx", FileMode.OpenOrCreate))
{
DocxFormatProvider provider = new DocxFormatProvider();
provider.Export(document, output);
}
}
}
}

In this example, files created using the Telerik DPL are saved directly to disk. However, any file created using the DPL can also be downloaded via the browser from UI for ASP.NET AJAX and UI for ASP.NET MVC applications.
2. Mail Merge from .NET
Creating a mail merge is an effective way of building a template and populating it with data for processing documents in batches. With the mail merge process, you can create a series of personalized documents based on your data source.
The mail merge process is one that is often manually performed inside of Microsoft Word. With the Telerik DPL this process can be completely automated and customized based on the needs of your application. The mail merge APIs can be used virtually anywhere in .NET. To see it in action we’ll use an example of how a mail merge is executed in a WPF/WinForms application.
We’ll create a new document containing our template message. To create a template field in the document we’ll use the InsertField method and set the field code to MERGEFIELD with the variable name we wish to use, in this case FirstName. The variable name simply matches the property on an object that we’ll supply to the MailMerge method.
private RadFlowDocument CreateDocument()
{
RadFlowDocument document = new RadFlowDocument();
RadFlowDocumentEditor editor = new RadFlowDocumentEditor(document);
editor.InsertText("Dear ");
editor.InsertField("MERGEFIELD FirstName", "");
editor.InsertText(" ");
editor.InsertField("MERGEFIELD LastName", "");
editor.InsertLine(",");
editor.InsertLine("This is a sample Mail Merge");
return document;
}
With the document created, the next step will be to perform the mail merge. The MailMerge method takes any IEnumerable as a parameter, in this case we’ll use a predefined list of Person via GetRecipents. In this case Person has a FirstName and LastName property matching the MERGEFIELD variables.
protected void button_Click(object sender, EventArgs e)
{
RadFlowDocument document = this.CreateDocument();
RadFlowDocument mailMergeDocument = document.MailMerge(GetRecipients());
//save the document
}
The document can be saved by setting up a MemoryStream and calling Export from a DocxFromatProvider. Once the memory stream is ready, we’ll write it to a file.
protected void button_Click(object sender, EventArgs e)
{
RadFlowDocument document = this.CreateDocument();
RadFlowDocument mailMergeDocument = document.MailMerge(GetRecipients());
byte[] renderedBytes = null;
using (Stream output = new FileStream("output.docx", FileMode.OpenOrCreate))
{
DocxFormatProvider provider = new DocxFormatProvider();
provider.Export(mailMergeDocument, output);
}}
The result is a multi-page .DOCX file for each recipient provided to the mail merge. This type of document can easily be printed and sent to clients as physical mail. See demos.telerik.com/wpf and the UI for WinForms demos for a more comprehensive example that includes additional file types and document features.

3. Convert Word to PDF in .NET
One of the Telerik DPL strengths is its ability to import and export various file types like: DOCX, PDF (export only), HTML and RTF. Because of this ability, it can also be used to do file conversions between these types as well. Using the IFormatProvider we can utilize the various format providers within the Telerik DPL interchangeably. Let’s take a look at a basic example of a console app that can import a DOCX file and export it to PDF.
We’ll begin by creating a default provider using an IFormatProvider and setting it to an instance of DocxFormatProvider. A RadFlowDocument is used as our document in the conversion from DOCX to PDF.
IFormatProvider<RadFlowDocument> fileFormatProvider = new DocxFormatProvider();
RadFlowDocument documentToConvert = new RadFlowDocument();
The DOCX document is opened from disk using the DocxFormatProvider and streamed into memory.
using (FileStream input = new FileStream("input.docx", FileMode.Open))
{
documentToConvert = fileFormatProvider.Import(input);
}
With the document in memory as a RadFlowDocument we can change our provider from a DocxFormatProviderPdfFormatProvider. Now the document can be written back to disk as a PDF.
fileFormatProvider = new PdfFormatProvider();
using (Stream output = new FileStream("output.pdf", FileMode.OpenOrCreate))
{
fileFormatProvider.Export(documentToConvert, output);
}

As you can see in the complete example, in just a few short lines of code we’re able to convert from DOCX to PDF.
static void Main(string[] args)
{
IFormatProvider<RadFlowDocument> fileFormatProvider = new DocxFormatProvider();
RadFlowDocument documentToConvert = new RadFlowDocument();
// Read DOCX
using (FileStream input = new FileStream("input.docx", FileMode.Open))
{
documentToConvert = fileFormatProvider.Import(input);
}
// Write PDF
fileFormatProvider = new PdfFormatProvider(); // change format provider to PDF
using (Stream output = new FileStream("output.pdf", FileMode.OpenOrCreate))
{
fileFormatProvider.Export(documentToConvert, output);
}
}
This method of importing and exporting documents can be used to convert between file formats. One caveat however is that there is no import functionality for PDF documents due to file format limitations. To deal with this limitation the IFormatProvider is equipped with a CanImport property that can be checked before the Import operation is performed.
See the UI for WPF and UI for WinForms WordsProcessing demos that includes additional file types and scenarios.
4. Edit Microsoft Word Docs in WPF and WinForms
Customers can sometimes ask for time-consuming project requirements, like the ability to edit Word Documents in the application without the need to leave the app and use external editors. On the surface this sounds like a feature that will take quite a bit of effort to accomplish; however, it’s as simple as adding a rich text component to your application which comes with the Telerik UI for WPF and Telerik UI for WinForms suites.

Using UI for WPF and UI for WinForms, the ability to import and export right from the rich text editor control can be accomplished with few lines of code.
DocxFormatProvider provider = new DocxFormatProvider();
using (FileStream fileStream = new FileStream(@"input.docx", FileMode.Open))
{
this.radRichTextBox1.Document = provider.Import(fileStream);
})
Exporting the content is just as simple. Simply pick the format provider for the desired format – PDF, DOCX, XAML, HTML, RTF, TXT and utilize its Export() method.
DocxFormatProvider provider = new DocxFormatProvider();
SaveFileDialog saveDialog = new SaveFileDialog() { DefaultExt = ".docx", Filter = "Documents|*.docx" };
DialogResult dialogResult = saveDialog.ShowDialog();
if (dialogResult == System.Windows.Forms.DialogResult.OK)
{
using (Stream output = saveDialog.OpenFile())
{
provider.Export(radRichTextEditor1.Document, output);
}
}
See the Telerik UI for WPF and Telerik UI for WinForms demos for more comprehensive examples that include additional editor features.
Conclusion
Whether you need to create documents from scratch or edit in the desktop app, the Telerik UI libraries make short work of any document export task for .NET developers. With the Telerik Document Processing Library new files can be created from scratch as DOCX, PDF, RTF, or TXT. Advanced features such as mail merge can reduce manual tasks with app driven automation. With the addition of Telerik UI libraries powered by UI for WPF and WinForms, documents can be edited on screen and custom export features empower users to export content with the click of a button.
Get access to the vast benefits of Telerik Document Processing and document exporting by downloading either the full Progress DevCraft bundle or any technology-specific library you need: Telerik UI for WPF or Telerik UI for WinForms.
Other Useful Resources
- SpreadProcessing — Complete Solution to Create, Modify and Export Spreadsheets -Part I
- Getting Started with RadPdfProcessing in Telerik UI for WinForms
- Getting Started with WordProcessing in UI for WinForms Vol.1
1 2 3 4 5 6 7 8 9 10 11 12 13 14 15 16 17 18 19 20 21 22 23 24 25 26 27 28 29 30 31 32 33 34 35 36 37 38 39 40 41 42 43 44 45 46 47 48 49 50 51 52 53 54 55 56 57 58 59 60 61 62 63 64 65 66 67 68 69 70 71 72 73 74 75 76 77 78 79 80 81 82 83 84 85 86 87 88 89 90 91 92 93 94 95 96 97 98 99 100 101 102 103 104 105 106 107 108 109 110 111 112 113 114 115 116 117 118 119 120 121 122 123 124 125 126 127 128 129 130 131 132 133 134 135 136 137 138 139 140 141 142 143 144 145 146 147 148 149 150 151 152 153 154 155 156 157 158 159 160 161 162 163 164 165 166 167 168 169 170 171 172 173 174 175 176 177 178 179 180 181 182 183 184 185 186 187 188 189 190 191 192 193 194 195 196 197 |
/// <summary> /// TO WORD /// </summary> Word.Application wrdApp; Word._Document wrdDoc; Object oMissing = System.Reflection.Missing.Value; Object oFalse = false; private void InsertLines(int LineNum) { int iCount; // Insert "LineNum" blank lines. for (iCount = 1; iCount <= LineNum; iCount++) { wrdApp.Selection.TypeParagraph(); } } private void FillRow(Word._Document oDoc, int Row, string Text1, string Text2, string Text3, string Text4) { // Insert the data into the specific cell. oDoc.Tables[1].Cell(Row, 1).Range.InsertAfter(Text1); oDoc.Tables[1].Cell(Row, 2).Range.InsertAfter(Text2); oDoc.Tables[1].Cell(Row, 3).Range.InsertAfter(Text3); oDoc.Tables[1].Cell(Row, 4).Range.InsertAfter(Text4); } private void button21_Click(object sender, RoutedEventArgs e) { Word.Selection wrdSelection; Word.MailMerge wrdMailMerge; Word.MailMergeFields wrdMergeFields; Word.Table wrdTable; string StrToAdd; // Create an instance of Word and make it visible. wrdApp = new Word.Application(); wrdApp.Visible = true; // Add a new document. wrdDoc = wrdApp.Documents.Add(ref oMissing, ref oMissing, ref oMissing, ref oMissing); wrdDoc.Select(); wrdSelection = wrdApp.Selection; wrdMailMerge = wrdDoc.MailMerge; // Create a MailMerge Data file. //CreateMailMergeDataFile(); // Create a string and insert it into the document. StrToAdd = "State UniversityrnElectrical Engineering Department"; wrdSelection.ParagraphFormat.Alignment = Word.WdParagraphAlignment.wdAlignParagraphCenter; wrdSelection.TypeText(StrToAdd); InsertLines(4); // Insert merge data. wrdSelection.ParagraphFormat.Alignment = Word.WdParagraphAlignment.wdAlignParagraphLeft; wrdMergeFields = wrdMailMerge.Fields; wrdMergeFields.Add(wrdSelection.Range, "FirstName"); wrdSelection.TypeText(" "); wrdMergeFields.Add(wrdSelection.Range, "LastName"); wrdSelection.TypeParagraph(); wrdMergeFields.Add(wrdSelection.Range, "Address"); wrdSelection.TypeParagraph(); wrdMergeFields.Add(wrdSelection.Range, "CityStateZip"); InsertLines(2); // Right justify the line and insert a date field // with the current date. wrdSelection.ParagraphFormat.Alignment = Word.WdParagraphAlignment.wdAlignParagraphRight; Object objDate = "dddd, MMMM dd, yyyy"; wrdSelection.InsertDateTime(ref objDate, ref oFalse, ref oMissing, ref oMissing, ref oMissing); InsertLines(2); // Justify the rest of the document. wrdSelection.ParagraphFormat.Alignment = Word.WdParagraphAlignment.wdAlignParagraphJustify; wrdSelection.TypeText("Dear "); wrdMergeFields.Add(wrdSelection.Range, "FirstName"); wrdSelection.TypeText(","); InsertLines(2); // Create a string and insert it into the document. StrToAdd = "Thank you for your recent request for next " + "semester's class schedule for the Electrical " + "Engineering Department. Enclosed with this " + "letter is a booklet containing all the classes " + "offered next semester at State University. " + "Several new classes will be offered in the " + "Electrical Engineering Department next semester. " + "These classes are listed below."; wrdSelection.TypeText(StrToAdd); InsertLines(2); // Insert a new table with 9 rows and 4 columns. wrdTable = wrdDoc.Tables.Add(wrdSelection.Range, 9, 4, ref oMissing, ref oMissing); // Set the column widths. wrdTable.Columns[1].SetWidth(51, Word.WdRulerStyle.wdAdjustNone); wrdTable.Columns[2].SetWidth(170, Word.WdRulerStyle.wdAdjustNone); wrdTable.Columns[3].SetWidth(100, Word.WdRulerStyle.wdAdjustNone); wrdTable.Columns[4].SetWidth(111, Word.WdRulerStyle.wdAdjustNone); // Set the shading on the first row to light gray. wrdTable.Rows[1].Cells.Shading.BackgroundPatternColorIndex = Word.WdColorIndex.wdGray25; // Bold the first row. wrdTable.Rows[1].Range.Bold = 1; // Center the text in Cell (1,1). wrdTable.Cell(1, 1).Range.Paragraphs.Alignment = Word.WdParagraphAlignment.wdAlignParagraphCenter; // Fill each row of the table with data. FillRow(wrdDoc, 1, "Class Number", "Class Name", "Class Time", "Instructor"); FillRow(wrdDoc, 2, "EE220", "Introduction to Electronics II", "1:00-2:00 M,W,F", "Dr. Jensen"); FillRow(wrdDoc, 3, "EE230", "Electromagnetic Field Theory I", "10:00-11:30 T,T", "Dr. Crump"); FillRow(wrdDoc, 4, "EE300", "Feedback Control Systems", "9:00-10:00 M,W,F", "Dr. Murdy"); FillRow(wrdDoc, 5, "EE325", "Advanced Digital Design", "9:00-10:30 T,T", "Dr. Alley"); FillRow(wrdDoc, 6, "EE350", "Advanced Communication Systems", "9:00-10:30 T,T", "Dr. Taylor"); FillRow(wrdDoc, 7, "EE400", "Advanced Microwave Theory", "1:00-2:30 T,T", "Dr. Lee"); FillRow(wrdDoc, 8, "EE450", "Plasma Theory", "1:00-2:00 M,W,F", "Dr. Davis"); FillRow(wrdDoc, 9, "EE500", "Principles of VLSI Design", "3:00-4:00 M,W,F", "Dr. Ellison"); // Go to the end of the document. Object oConst1 = Word.WdGoToItem.wdGoToLine; Object oConst2 = Word.WdGoToDirection.wdGoToLast; wrdApp.Selection.GoTo(ref oConst1, ref oConst2, ref oMissing, ref oMissing); InsertLines(2); // Create a string and insert it into the document. StrToAdd = "For additional information regarding the " + "Department of Electrical Engineering, " + "you can visit our Web site at "; wrdSelection.TypeText(StrToAdd); // Insert a hyperlink to the Web page. Object oAddress = "http://www.ee.stateu.tld"; Object oRange = wrdSelection.Range; wrdSelection.Hyperlinks.Add(oRange, ref oAddress, ref oMissing, ref oMissing, ref oMissing, ref oMissing); // Create a string and insert it into the document StrToAdd = ". Thank you for your interest in the classes " + "offered in the Department of Electrical " + "Engineering. If you have any other questions, " + "please feel free to give us a call at " + "555-1212.rnrn" + "Sincerely,rnrn" + "Kathryn M. Hinschrn" + "Department of Electrical Engineering rn"; wrdSelection.TypeText(StrToAdd); // Perform mail merge. //wrdMailMerge.Destination = Word.WdMailMergeDestination.wdSendToNewDocument; //wrdMailMerge.Execute(ref oFalse); wrdDoc.Saved = true; object fileName = "D:\daily_report.doc"; wrdDoc.SaveAs2(ref fileName, ref oMissing, ref oMissing, ref oMissing, ref oMissing, ref oMissing, ref oMissing, ref oMissing, ref oMissing, ref oMissing, ref oMissing); wrdDoc.Close(ref oFalse, ref oMissing, ref oMissing); wrdApp.Quit(ref oFalse, ref oMissing, ref oMissing); // Release References. wrdSelection = null; wrdMailMerge = null; wrdMergeFields = null; wrdDoc = null; wrdApp = null; // Clean up temp file. //System.IO.File.Delete("D:\DataDoc.doc"); } /// <summary> /// TO WORD (END) /// </summary> |
Разработка отчетов
Создадим новые документы ворд и сохраним их в удобном месте под названиями «Видеокарты», «Процессоры» и «Сборки». После добавим их в проект. Для это создадим новую папку и назовем её Templates.

Далее добавим созданные ранее файлы ворд в эту папку, кликнув на папку ПКМ и нажав на Добавить > Существующий элемент ... (после этого созданные файл можно удалить).

Должно получится так.

Откроем файл «Видеокарты.docx» сделав двойной клик по файлу.
Внимание
Если не открывается ворд, то кликаем ПКМ по файлу и выбираем пункт Открыть с помощью... где выбираем Word и нажимаем По умолчанию.

Заполним файл ворда следующим образом.

Выделяем таблицу и нажимаем на Зкладаки, которые находятся во вкладке Вставка.

Вводим в поле «Table» и нажимаем Добавить.

Далее выделяем надпись «[Дата печать]» в нижнем колонтитуле и нажимаем Закладки. Вводим DateTime и нажимаем Добавить.

Выделяем строки и нажимаем на значок как показано на скриншоте.

Во вкладке Положение на странице ставим галочку как на скриншоте.

Аналогично и для других файлов ворда.


Добавим ссылку на библиотеку, необходимую для работы с вордом. Кликаем ПКМ по пункту Ссылки и выбираем Добавить ссылку...

Выбираем нужную библиотеку последней версии и нажимаем ОК.

На заметку
Если у вас версия Word ниже 2016, то версия библиотеки будут отличной от той, что изображена на скриншоте. Также данная библиотека имеет обратную совместимость с предыдущими версиями Word в плоть до 2007. Это значит если ваша версия Word’а используемая при разработке допустим 2012, то разрабатываемая вами программу будет работать с версиями Word’а начиная с 2007 и до 2012, но не старше.
Далее создадим новый клас Report.

Добавим пространство имен Microsoft.Office.Interop.Word;
Report.cs
using System;
using System.Collections.Generic;
using System.Linq;
using System.Text;
using System.Threading.Tasks;
using System.Windows;
using System.Windows.Annotations;
using Word = Microsoft.Office.Interop.Word;

namespace BuildPCServrice
{
    class Report
    {
    }
}
Затем добавим следующий код.
Report.cs
class Report
{
    Word.Application app = new Word.Application();
    Word.Document doc;

    ~Report()
    {
        doc.Saved = true;
        try { app.Quit(); }
        catch { }
    }

    public void VideocardGen(IList<videocard> videocards)
    {
        if (videocards != null)
        {
            doc = app.Documents.Add(Template: $@"{Environment.CurrentDirectory}TemplatesВидеокарты.docx", Visible: true);

            Word.Range dateTime = doc.Bookmarks["DateTime"].Range;
            dateTime.Text = DateTime.Now.ToString();

            Word.Table table = doc.Bookmarks["Table"].Range.Tables[1];
            int currPage = 1;
            foreach (var item in videocards)
            {
                int page = doc.ComputeStatistics(Word.WdStatistic.wdStatisticPages);

                Word.Row row = table.Rows.Add();
                if (page > currPage) //Если запись не влазеет на текущею страницу
                {
                    row.Range.InsertBreak();
                    table = doc.Tables[doc.Tables.Count];

                    doc.Tables[1].Rows[1].Range.Copy();
                    row.Range.Paste();
                    table.Rows[2].Delete(); //Удаляем пустую строку после заголовка

                    currPage = page;
                    row = table.Rows.Add();
                }

                row.Cells[1].Range.Text = item.Name;
                row.Cells[2].Range.Text = item.Gen;
                row.Cells[3].Range.Text = item.Memory;
                row.Cells[4].Range.Text = item.Price.ToString();
            }
            doc.Bookmarks["Table"].Range.Tables[1].Rows[2].Delete(); //Удаляем строку [текст] [текст] [текст] [текст] в таблице

            app.Visible = true;
        }
    }

    public void ProcessorGen(IList<processor> processors)
    {
        if (processors != null)
        {
            doc = app.Documents.Add(Template: $@"{Environment.CurrentDirectory}TemplatesПроцессоры.docx", Visible: true);

            Word.Range dateTime = doc.Bookmarks["DateTime"].Range;
            dateTime.Text = DateTime.Now.ToString();

            Word.Table table = doc.Bookmarks["Table"].Range.Tables[1];
            int currPage = 1;
            foreach (var item in processors)
            {
                int page = doc.ComputeStatistics(Word.WdStatistic.wdStatisticPages);

                Word.Row row = table.Rows.Add();
                if (page > currPage) //Если запись не влазеет на текущею страницу
                {
                    row.Range.InsertBreak();
                    table = doc.Tables[doc.Tables.Count];

                    doc.Tables[1].Rows[1].Range.Copy();
                    row.Range.Paste();
                    table.Rows[2].Delete(); //Удаляем пустую строку после заголовка

                    currPage = page;
                    row = table.Rows.Add();
                }

                row.Cells[1].Range.Text = item.Name;
                row.Cells[2].Range.Text = item.Frequrency;
                row.Cells[3].Range.Text = item.Socket;
                row.Cells[4].Range.Text = item.Price.ToString();
            }
            doc.Bookmarks["Table"].Range.Tables[1].Rows[2].Delete(); //Удаляем строку [текст] [текст] [текст] [текст] в таблице

            app.Visible = true;
        }
    }

    public void BuildGen(IList<build> builds)
    {
        if (builds != null)
        {
            doc = app.Documents.Add(Template: $@"{Environment.CurrentDirectory}TemplatesСборки.docx", Visible: true);

            Word.Range dateTime = doc.Bookmarks["DateTime"].Range;
            dateTime.Text = DateTime.Now.ToString();

            Word.Table table = doc.Bookmarks["Table"].Range.Tables[1];
            int currPage = 1;
            foreach (var item in builds)
            {
                int page = doc.ComputeStatistics(Word.WdStatistic.wdStatisticPages);

                Word.Row row = table.Rows.Add();
                if (page > currPage) //Если запись не влазеет на текущею страницу
                {
                    row.Range.InsertBreak();
                    table = doc.Tables[doc.Tables.Count];

                    doc.Tables[1].Rows[1].Range.Copy();
                    row.Range.Paste();
                    table.Rows[2].Delete(); //Удаляем пустую строку после заголовка

                    currPage = page;
                    row = table.Rows.Add();
                }

                row.Cells[1].Range.Text = item.Name;
                row.Cells[2].Range.Text = $"{item.videocard.Name} ({item.videocard.Price} руб)";
                row.Cells[3].Range.Text = $"{item.processor.Name} ({item.processor.Price} руб)";
                row.Cells[4].Range.Text = item.Price.ToString();
            }
            doc.Bookmarks["Table"].Range.Tables[1].Rows[2].Delete(); //Удаляем строку [текст] [текст] [текст] [текст] в таблице

            app.Visible = true;
        }
    }
}
Далее добавим кнопки для вывода отчетов на форму в файле MainWindow.xaml.
Вкладка `Видеокарты`
<TabItem Header="Видеокарты" GotFocus="TabItem_GotFocus">
    <DockPanel>
        <StackPanel Orientation="Horizontal" HorizontalAlignment="Right" Margin="10" Height="25" DockPanel.Dock="Top">
            <Button Content="Отчёт" Width="100" Margin="3 0" Click="ReportButton_Click"/>
            <Button Content="Сохранить изменения" Margin="3 0" Width="150" Click="SaveChangesButton_Click"/>
            <Button Content="Отменить изменения" Margin="3 0" Width="150" Click="CancelChangesButton_Click"/>
            <Button Content="Удалить" Margin="3 0" Width="70" Click="DeleteButton_Click"/>
        </StackPanel>
        <StackPanel Width="200" DockPanel.Dock="Right">
            <!-Поля для поиска-->
        </StackPanel>
        <DataGrid x:Name="videocardsTable" CanUserResizeRows="False" AutoGenerateColumns="False" Margin="10 0 10 10">
            <!-Стоблцы в таблице-->
        </DataGrid>
    </DockPanel>
</TabItem>
Вкладка `Процессоры`
<TabItem Header="Процессоры" GotFocus="TabItem_GotFocus">
    <DockPanel>
        <StackPanel Orientation="Horizontal" HorizontalAlignment="Right" Margin="10" Height="25" DockPanel.Dock="Top">
            <Button Content="Отчёт" Width="100" Margin="3 0" Click="ReportButton_Click"/>
            <Button Content="Сохранить изменения" Margin="3 0" Width="150" Click="SaveChangesButton_Click"/>
            <Button Content="Отменить изменения" Margin="3 0" Width="150" Click="CancelChangesButton_Click"/>
            <Button Content="Удалить" Margin="3 0" Width="70" Click="DeleteButton_Click"/>
        </StackPanel>
        <StackPanel Width="200" DockPanel.Dock="Right">
            <!-Поля для поиска-->
        </StackPanel>
        <DataGrid x:Name="videocardsTable" CanUserResizeRows="False" AutoGenerateColumns="False" Margin="10 0 10 10">
            <!-Стоблцы в таблице-->
        </DataGrid>
    </DockPanel>
</TabItem>
Вкладка `Сборки`
<TabItem Header="Сборки" GotFocus="TabItem_GotFocus">
    <DockPanel>
        <StackPanel Orientation="Horizontal" HorizontalAlignment="Right" Margin="10" Height="25" DockPanel.Dock="Top">
            <Button Content="Отчёт" Width="100" Margin="3 0" Click="ReportButton_Click"/>
            <Button Content="Сохранить изменения" Margin="3 0" Width="150" Click="SaveChangesButton_Click"/>
            <Button Content="Отменить изменения" Margin="3 0" Width="150" Click="CancelChangesButton_Click"/>
            <Button Content="Удалить" Margin="3 0" Width="70" Click="DeleteButton_Click"/>
            <Button Content="Обновить цену" Margin="3 0" Width="100" Click="UpdataBuildPriceButton_Click"/>
        </StackPanel>
        <StackPanel Width="200" DockPanel.Dock="Right">
            <!-Поля для поиска-->
        </StackPanel>
        <DataGrid x:Name="videocardsTable" CanUserResizeRows="False" AutoGenerateColumns="False" Margin="10 0 10 10">
            <!-Стоблцы в таблице-->
        </DataGrid>
    </DockPanel>
</TabItem>
Кликаем на название обработчик ReportButton_Click у любой кнопки отчет в коде и нажимаем на F12. Добавляем в обработчик следующий код.
MainWindow.xaml.cs
 private void ReportButton_Click(object sender, RoutedEventArgs e)
{
    report = new Report();
    switch (currentTableType)
    {
        case TableType.Videocards:
            report.VideocardGen(Views.VideocardsView.Source as IList<videocard>);
            break;
        case TableType.Processor:
            report.ProcessorGen(Views.ProcessorsView.Source as IList<processor>);
            break;
        case TableType.Builds:
            report.BuildGen(Views.BuildsView.Source as IList<build>);
            break;
    }
}
Запускаем и проверяем. Отчеты должны выводится.


Сообщ.
#1
,
10.01.11, 16:30
Здравствуйте уважаемые участники форума на Исходниках. Поздравляю Вас всех с прошедшими праздниками.
В настоящее время я и мои товарищи разрабатываем коммерческую программу, в основе которой находится имитационное моделирование. Её предметная область не так важна. Важно лишь то, что мы работаем на лицензионном ПО и для решения своих задач так же используем либо лицензионное, либо свободно-распространяемое ПО (второе желательнее).
По окончании эксперимента (моделирования) у нас есть много данных, которые необходимо визуализировать (в виде текста, таблиц, графиков и диаграмм).
Сначала я использовал FixedDocument, заполнял его необходимыми данными (говоря простым языком, работал с ним, как с WPF-окном, добавлял в него StackPanel, наполнял его текстовыми метками, графиками и прочим). Затем отображал этот документ в DocumentViewer (где его можно было посмотреть и распечатать).
В связи с увеличением сложности программы, было принято решение о том, что отчёты стоит формировать в формате WORD (.doc), чтобы можно было их сохранять, редактировать (да и, в общем-то, делать с ними всё, что душе угодно).
Первый вопрос: как правильно (способов много, под «правильно» я подразумеваю «оптимально») формировать отчёты в формате WORD из нашей программы?
Мне приглянулась библиотека ExportToRTF .
Во-первых, она бесплатная (Вы можете посмотреть её исходные коды, или просто проверить её, подключив к проекту соответствующую DLL). Во-вторых – предельно простая. Её функционал «не ахти», но для наших задач – вполне хватит (можно использовать форматированный текст, стили, работать с таблицами и вставлять картинки). В-третьих, насколько я понял, она не требует установленного на компьютере Microsoft Office (или Open Office). Это на самом деле так (это второй вопрос)?
В отчёт необходимо включать графики. До этого (когда я работал с FixedDocument), я внедрял их следующим образом:


// …
FixedDocument report = new FixedDocument();
ReportViewer.Document = report; // ReportViewer — это экземпляр DocumentViewer
PageContent pageContent = new PageContent();
FixedPage fixedPage = new FixedPage();
// Панель вывода
StackPanel pageOne = new StackPanel();
pageOne.Margin = new Thickness(25);
// …
// График
Chart pChart = new Chart();
BarSeries pSeries = new BarSeries();
pSeries.IndependentValueBinding = new Binding(«Key»);
pSeries.DependentValueBinding = new Binding(«Value»);
pChart.Series.Add(pSeries);
List<ISShop> pShop = imWindow.Threads.Statistic.Shops;
KeyValuePair<String, Double>[] pData = new KeyValuePair<String, Double>[pShop.Count];
pSeries.ItemsSource = pData;
pChart.Title = ISShop.CustomerCount;
for (Int32 i = 0; i < pShop.Count; i++)
{
pData[i] = new KeyValuePair<string, double>(imWindow.mainWindow.Data.sale[i].BuildingTitle, pShop[i].dic[ISShop.CustomerCount].Average);
}
pSeries.LegendItems.Clear();
pChart.MinWidth = 770;
pChart.MinHeight = 400;
pageOne.Children.Add(pChart);
// …
fixedPage.Children.Add(pageOne);
((IAddChild)pageContent).AddChild(fixedPage);
report.Pages.Add(pageContent);
Для построения графиков, мы используем WPF Toolkit (я так понимаю, что он тоже бесплатный? – это вопрос №3).
В библиотеке ExportToRTF есть функция
PutImage(string PathToJpegFile);
которая, как Вы уже наверное догадались, вставляет в документ картинку формата JPG, сохранённую в указанном файле.
Следовательно, для того, чтобы вставить график, я должен получить скриншот контрола Chart из WPF Toolkit с построенным графиком, затем сохранить его в JPG файл (во временную директорию) и далее воспользоваться функцией PutImage.
Вопрос №4: Как получить скриншот компонента Chart?
Ранее, для того, чтобы получить скриншот компонента WPF, я использовал следующий алгоритм (я его привёл для рассматриваемого случая):
// …
Chart chart;
// …
RenderTargetBitmap rtbChart = new RenderTargetBitmap((int)chart.Width, (int)chart.Height, 96, 96, PixelFormats.Default);
rtbChart.Render(chart);
BitmapEncoder ChartImage = new JpegBitmapEncoder();
ChartImage.Frames.Add(BitmapFrame.Create(rtbChart));
FileStream st = new FileStream(@»D:1.jpg», FileMode.Create);
ChartImage.Save(st);
st.Close();
Однако в данном случае (см. выше), вместо контрола Chart, на скриншоте только чёрный прямоугольник.
В принципе, я догадываюсь, почему так происходит. Скорее всего, это из-за того, что сам Chart, я не размещаю в окне. Я создаю его в программе и затем пытаюсь взять с него скриншот. Если Chart находится в окне и я пытаюсь его (или всё окно) отрендерить – то всё проходит нормально, на скриншоте – нужный мне график.
Последний вопрос (он дублирует предыдущий): каким образом я могу сохранить изображение графика (компонент Chart из WPF Toolkit) в файл?
Я понимаю, что могут быть «костыли» (создать окно с одним только графиком, подождать пока он построится, взять с него скриншот показанным выше методом, и закрыть его), но, хотелось бы сразу всё сделать правильно.
Заранее выражаю огромную благодарность каждому откликнувшемуся.
- Remove From My Forums

Prepare report in WPF in a RichTextBox / FlowDocument, export to Word as RTF
-
Question
-
I am writing a report page in our application that uses the RichTextBox and a FlowDocument. The result in the application is nice, however I have two problems:
a) I used tables, and they can only auto-distribute columns horizontally. GridLength.Auto on the column width is not functioning.
b) Saving the file as an RTF results in all of the tables shrunk to 1″ column widths, and all grids on the FlowDocument have disappeared.
Are there any good examples of taking a flow document with tables and grids and printing it out in its intended format?
We’re using C#, WPF, and .NET 4.0 in VS2010.
Answers
-
Hi,
The problem of this case is you’re setting the column width to auto, which means the column width you see on the WPF window is actually lost when processing the XAML to RTF conversion. The XAML string passed to the converter only contains «Auto»
so the converter is not able to convert it to the same size of the column shown on the WPF window. The solution I can think of is to modify the XAML passed to XamlRtfConverter and leverage XamlRtfConverter to create the RFT format for you. Below is what
I modified your code to get it saves as hard coded 250 width column. You may refer to it and write more code to correct the format. As to how you get the proper width and how to modify the XAML string for other incompatible cases it should be
another topic.private void ToolStripButtonSaveClick(object sender, RoutedEventArgs e)
{// Create a SaveFileDialog to request a path and file name to save to.
var saveFile1 = new SaveFileDialog { DefaultExt = «*.rtf», Filter = «RTF Files|*.rtf» };
saveFile1.ShowDialog();
// Determine if the user selected a file name from the saveFileDialog.
if (saveFile1.FileName != string.Empty)
{
// Save the contents of the RichTextBox into the file.
var tr = new TextRange(richTextBox1.Document.ContentStart, richTextBox1.Document.ContentEnd);
//XAML
var ms = new MemoryStream();
tr.Save(ms, DataFormats.Xaml);
ms.Seek(0, SeekOrigin.Begin);
var xamlParsedToXamlRtfConverter = string.Empty;
using (StreamReader sr = new StreamReader(ms))
{
xamlParsedToXamlRtfConverter=sr.ReadToEnd();
}
// Modify xamlParsedToXamlRtfConverter to make it more friendly to the RTF format
xamlParsedToXamlRtfConverter=xamlParsedToXamlRtfConverter.Replace( «Width=»Auto»»,»Width=»»+ 250 +»»»);
var flags = BindingFlags.NonPublic | BindingFlags.Public | BindingFlags.Instance;Type t= Type.GetType(«System.Windows.Documents.XamlRtfConverter, PresentationFramework, Version=4.0.0.0, Culture=neutral, PublicKeyToken=31bf3856ad364e35»);
var ctr= t.GetConstructor(flags, null, new Type[0], null);
var instance = ctr.Invoke(null);
var mtd=t.GetMethod(«ConvertXamlToRtf», flags);
var rftResult=mtd.Invoke(instance,new object[]{ xamlParsedToXamlRtfConverter});var ms2 = new MemoryStream(Encoding.UTF8.GetBytes(rftResult.ToString()));
FileStream outStream = File.OpenWrite(saveFile1.FileName);
ms2.WriteTo(outStream);
outStream.Flush();
outStream.Close();
ms.Close();
ms2.Close();
}
}
Allen Chen [MSFT]
MSDN Community Support | Feedback to us

-
Edited by
Thursday, November 1, 2012 9:32 AM
-
Proposed as answer by
Sheldon _Xiao
Tuesday, November 6, 2012 8:10 AM -
Marked as answer by
Sheldon _Xiao
Tuesday, November 6, 2012 8:10 AM
-
Edited by
The following code from this link should help, it will allow you to create a word document with the text «Hello World» and save it to «D:MyWord.doc»
        object missing = System.Reflection.Missing.Value;
        object Visible=true;
        object start1 = 0;
        object end1 = 0;

        ApplicationClass WordApp = new ApplicationClass();
        Document adoc = WordApp.Documents.Add(ref missing, ref missing, ref missing, ref missing);
        Range rng = adoc.Range(ref start1, ref missing);

        try
        {
            rng.Font.Name = “Georgia”;
            rng.InsertAfter(“Hello World!”);
            object filename = @”D:MyWord.doc”;
            adoc.SaveAs(ref filename, ref missing, ref missing, ref missing, ref missing, ref missing,
            ref missing, ref missing, ref missing, ref missing, ref missing, ref missing, ref missing, ref missing, ref missing, ref missing);
            WordApp.Visible = true;
        }
        catch (Exception ex)
        {
            MessageBox.Show(ex.Message);
        }
- Remove From My Forums
Prepare report in WPF in a RichTextBox / FlowDocument, export to Word as RTF
-
Question
-
I am writing a report page in our application that uses the RichTextBox and a FlowDocument. The result in the application is nice, however I have two problems:
a) I used tables, and they can only auto-distribute columns horizontally. GridLength.Auto on the column width is not functioning.
b) Saving the file as an RTF results in all of the tables shrunk to 1″ column widths, and all grids on the FlowDocument have disappeared.
Are there any good examples of taking a flow document with tables and grids and printing it out in its intended format?
We’re using C#, WPF, and .NET 4.0 in VS2010.
Answers
-
Hi,
The problem of this case is you’re setting the column width to auto, which means the column width you see on the WPF window is actually lost when processing the XAML to RTF conversion. The XAML string passed to the converter only contains «Auto»
so the converter is not able to convert it to the same size of the column shown on the WPF window. The solution I can think of is to modify the XAML passed to XamlRtfConverter and leverage XamlRtfConverter to create the RFT format for you. Below is what
I modified your code to get it saves as hard coded 250 width column. You may refer to it and write more code to correct the format. As to how you get the proper width and how to modify the XAML string for other incompatible cases it should be
another topic.private void ToolStripButtonSaveClick(object sender, RoutedEventArgs e)
{// Create a SaveFileDialog to request a path and file name to save to.
var saveFile1 = new SaveFileDialog { DefaultExt = «*.rtf», Filter = «RTF Files|*.rtf» };
saveFile1.ShowDialog();
// Determine if the user selected a file name from the saveFileDialog.
if (saveFile1.FileName != string.Empty)
{
// Save the contents of the RichTextBox into the file.
var tr = new TextRange(richTextBox1.Document.ContentStart, richTextBox1.Document.ContentEnd);
//XAML
var ms = new MemoryStream();
tr.Save(ms, DataFormats.Xaml);
ms.Seek(0, SeekOrigin.Begin);
var xamlParsedToXamlRtfConverter = string.Empty;
using (StreamReader sr = new StreamReader(ms))
{
xamlParsedToXamlRtfConverter=sr.ReadToEnd();
}
// Modify xamlParsedToXamlRtfConverter to make it more friendly to the RTF format
xamlParsedToXamlRtfConverter=xamlParsedToXamlRtfConverter.Replace( «Width=»Auto»»,»Width=»»+ 250 +»»»);
var flags = BindingFlags.NonPublic | BindingFlags.Public | BindingFlags.Instance;Type t= Type.GetType(«System.Windows.Documents.XamlRtfConverter, PresentationFramework, Version=4.0.0.0, Culture=neutral, PublicKeyToken=31bf3856ad364e35»);
var ctr= t.GetConstructor(flags, null, new Type[0], null);
var instance = ctr.Invoke(null);
var mtd=t.GetMethod(«ConvertXamlToRtf», flags);
var rftResult=mtd.Invoke(instance,new object[]{ xamlParsedToXamlRtfConverter});var ms2 = new MemoryStream(Encoding.UTF8.GetBytes(rftResult.ToString()));
FileStream outStream = File.OpenWrite(saveFile1.FileName);
ms2.WriteTo(outStream);
outStream.Flush();
outStream.Close();
ms.Close();
ms2.Close();
}
}
Allen Chen [MSFT]
MSDN Community Support | Feedback to us
-
Edited by
Thursday, November 1, 2012 9:32 AM
-
Proposed as answer by
Sheldon _Xiao
Tuesday, November 6, 2012 8:10 AM -
Marked as answer by
Sheldon _Xiao
Tuesday, November 6, 2012 8:10 AM
-
Edited by
“
Продолжаем работу над приложением и сегодня изучим способы его взаимодействия с Word. Разберем основные методы программной работы с документами такого типа и попробуем применить их на практике.
Для успешного освоения материала рекомендуем вам изучить следующие понятия:
DB (Database), БД. Организованная структура, предназначенная для хранения, изменения и обработки взаимосвязанной информации, преимущественно больших объемов
Windows Presentation Foundation. Аналог WinForms, система для построения клиентских приложений Windows с визуально привлекательными возможностями взаимодействия с пользователем, графическая (презентационная) подсистема в составе .NET Framework (начиная с версии 3.0), использующая язык XAML
Демонстрация работы с документами Word в WPF
На данном занятии будет реализована возможность экспорта данных из приложения для визуализации расходов пользователей в документ Word. Расходы каждого пользователя будут экспортироваться на отдельную страницу, названием которой будет ФИО пользователя. Расходы будут просуммированы по категориям и представлены в виде таблицы. Под таблицей будет размещена информация о максимальном и минимальном платежах данного пользователя. Основные шаги построения приложения:
- Подготовительный этап
- Реализация экспорта в документ Word
- Завершение оформления документа Word
1. Подключаем библиотеку для работы с Word


Важно
Для экспорта данных в Word используется библиотека InteropWord (Object Library), расположенная во вкладке COM
2. Добавляем кнопку экспорта

Важно
Экспорт данных в Word будет осуществляться с помощью кнопки «Экспорт в Word»
3. Подключаем пространство имен для работы с Word

Важно
Требуемое пространство имен подключается с помощью директивы using
Реализация экспорта в документ Word
1. Получаем список пользователей и категорий

Важно
Список пользователей и категорий выгружается из базы данных
2. Создаем новый документ Word

Важно
После создания экземпляра Word в приложение добавляется новый документ, с которым далее происходит работа
3. Создаем параграф для хранения названий страниц

Важно
Основной структурной единицей текста является параграф, представленный объектом Paragraph. Все абзацы объединяются в коллекцию Paragraphs, причем новые параграфы добавляются с помощью метода Add. Доступ к тексту предоставляет объект Range, являющийся свойством Paragraph, а текстовое содержание абзаца доступно через Range.Text. В данном случае для хранения ФИО каждого пользователя создается новый параграф
4. Добавляем названия страниц

Важно
В качестве названия выбирается имя пользователя, к которому применяется стиль «Title», после чего добавляется новый параграф для таблицы с платежами
5. Добавляем и форматируем таблицу для хранения информации о платежах

Важно
После создания параграфа для таблицы и получения его Range, добавляется таблица с указанием числа строк (по количеству категорий + 1) и столбцов. Последние две строчки касаются указания границ (внутренних и внешних) и выравнивания ячеек (по центру и по вертикали)
6. Добавляем названия колонок и их форматирование

Важно
Таблица состоит из трех колонок с названиями «Иконка», «Категория» и «Сумма расходов». Названия колонок выделяются жирным шрифтом и выравниваются по центру
7. Заполняем первую колонку таблицы

Важно
Положение ячейки заносится в переменную cellRange. Метод AddPicture() класса InlineShape позволяет добавить изображение в ячейку. Иконки категорий размещаются в новой папке Assets, основные шаги создания которой изображены на скриншоте
8. Форматируем первую колонку таблицы

Важно
Для первой колонки устанавливаются длина, ширина, а также горизонтальное выравнивание по центру
9. Заполняем вторую и третью колонки

Важно
Сумма платежей приводится к нужному формату с указанием единиц измерения (руб.) непосредственно в коде
Завершение оформления документа Word
1. Добавляем максимальную величину платежа

Важно
Для поиска максимального платежа сначала платежи сортируются по стоимости. В случае, если такой платеж найден, добавляется новый параграф. Получается диапазон и выводится текст с информацией о наименовании платежа, его стоимости и дате совершения. В заключение устанавливается стиль и цвет текста (красный)
2. Добавляем минимальную величину платежа

Важно
Аналогично среди всех платежей данного пользователя определяется наименьший платеж и отображается шрифтом зеленого цвета
3. Делаем заключительные шаги

Важно
По завершении работы с данными пользователя добавляется разрыв страницы. Далее, разрешается отображение таблицы по завершении экспорта. Наконец, документ сохраняется в формате .docx и .pdf

“
Вы познакомились с основными программными методами работы с документами Word в WPF. Теперь давайте перейдем от теории к практике!
Для закрепления полученных знаний пройдите тест
Выберите неверное утверждение относительно работы с документами Word:
Paragraph содержит все абзацы документа
Range предоставляет доступ к тексту абзаца
Обращение к ячейке начинается с указания номера строки
Range.Text и Paragraphs являются:
К сожалению, вы ответили неправильно
Прочитайте лекцию и посмотрите видео еще раз
Но можно лучше. Прочитайте лекцию и посмотрите видео еще раз
Вы отлично справились. Теперь можете ознакомиться с другими компетенциями
This article is going to introduce how to create, write and save word document in WPF via Spire.Doc for WPF.
Spire.Doc for WPF enables users to do a large range of manipulations (such as create, write, open, edit, convert and save, etc.) on word with high performance and efficiency. In addition, as a powerful and independent library, it doesn’t require Microsoft Office or any other 3rd party tools to be installed on system.
Note: please download and install Spire.Doc correctly and add the dll file from the installation folder as reference.
First, let’s begin to create a word document in WPF.
Use namespace:
using System.Windows;
using Spire.Doc;
using Spire.Doc.Documents;
Step 1: Create a new word document instance, next add a section and a paragraph to it.
//Create New Word
Document doc = new Document();
//Add Section
Section section = doc.AddSection();
//Add Paragraph
Paragraph Para = section.AddParagraph();
Second, we’re going to write something into the document.
Step 2: Append some text to it.
//Append Text
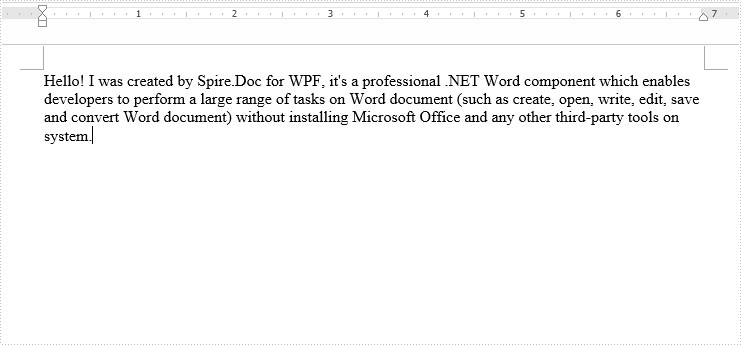
Para.AppendText("Hello! "
+ "I was created by Spire.Doc for WPF, it's a professional .NET Word component "
+ "which enables developers to perform a large range of tasks on Word document (such as create, open, write, edit, save and convert "
+ "Word document) without installing Microsoft Office and any other third-party tools on system.");
Third, save the generated document.
Step 3: Save and launch the document.
//Save and launch
doc.SaveToFile("MyWord.docx", FileFormat.Docx);
System.Diagnostics.Process.Start("MyWord.docx");
Output:
Full codes:
using Spire.Doc;
using Spire.Doc.Documents;
using System.Windows;

namespace WpfApplication1
{
    public partial class MainWindow : Window
    {
        public MainWindow()
        {
            InitializeComponent();
        }
        private void button1_Click(object sender, RoutedEventArgs e)
        {
            //Create New Word
            Document doc = new Document();
            //Add Section
            Section section = doc.AddSection();
            //Add Paragraph
            Paragraph Para = section.AddParagraph();
            //Append Text
            Para.AppendText("Hello! "
            + "I was created by Spire.Doc for WPF, it's a professional .NET Word component "
            + "which enables developers to perform a large range of tasks on Word document (such as create, open, write, edit, save and convert "
            + "Word document) without installing Microsoft Office and any other third-party tools on system.");
            //Save and launch
            doc.SaveToFile("MyWord.docx", Spire.Doc.FileFormat.Docx);
            System.Diagnostics.Process.Start("MyWord.docx");
        }

    }
}