
Перейти к содержанию
На чтение 2 мин Опубликовано 19.06.2015
В этом уроке мы расскажем, как вставить таблицу Excel в документ Word и как с ней потом работать. Также вы узнаете о том, как вставлять файлы в Microsoft Excel.
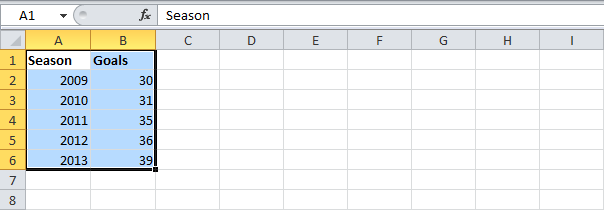
- Выделите в Excel диапазон с данными.

- Кликните по нему правой кнопкой мыши и выберите Copy (Копировать) или нажмите комбинацию клавиш Ctrl+C.
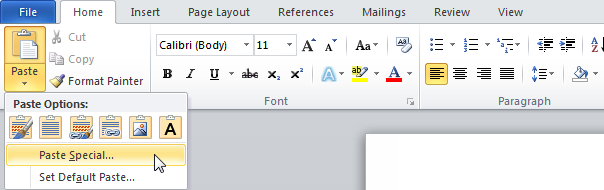
- Откройте документ Word.
- На вкладке Home (Главная) выберите команду Paste (Вставка) > Paste Special (Специальная вставка).
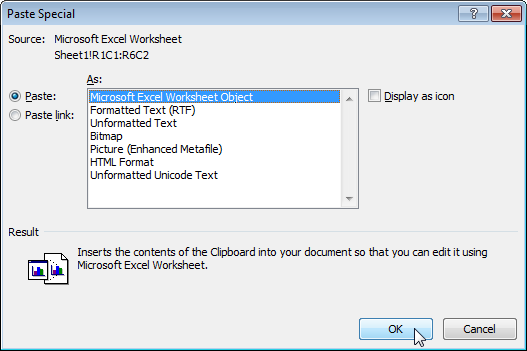
- Кликните по Paste (Вставить), а затем выберите пункт Microsoft Excel Worksheet Object (Объект Лист Microsoft Office Excel).
- Нажмите ОК.
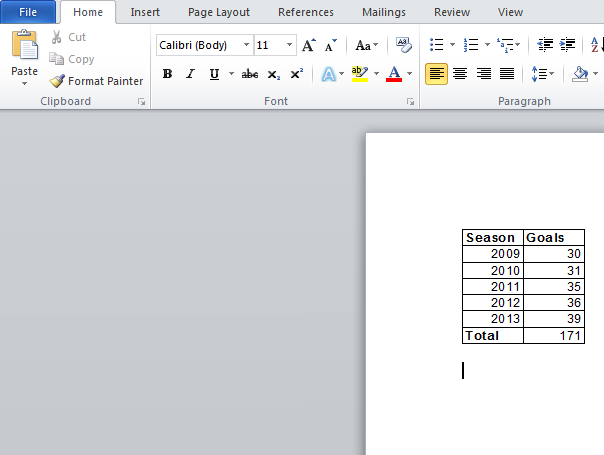
- Чтобы начать работать с объектом, дважды щелкните по нему. Теперь вы можете, к примеру, отформатировать таблицу или вставить функцию SUM (СУММ).
- Кликните в любом другом месте документа Word.
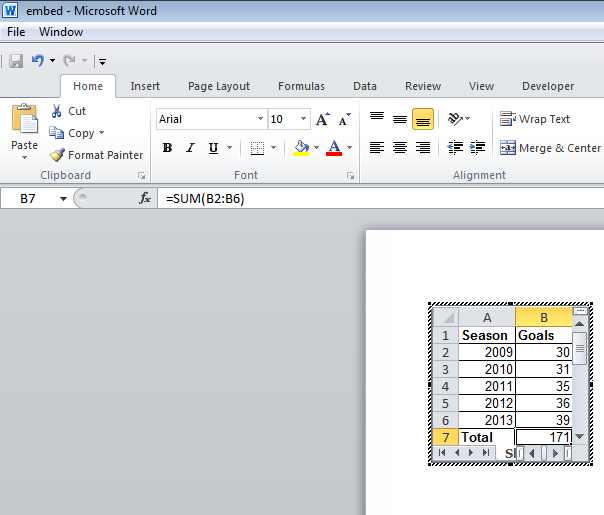
Результат:
Примечание: Встроенный объект – это часть файла Word. Он не содержит ссылку на исходный файл Excel. Если вы не хотите встраивать объект, и вам достаточно просто создать ссылку, то на шаге 5 выберите Paste Link (Связать), а затем Microsoft Excel Worksheet Object (Объект Лист Microsoft Office Excel). Теперь, если вы дважды щёлкните по объекту, откроется связанный файл Excel.
Чтобы вставить файл в Excel, на вкладке Insert (Вставка) в группе команд Text (Текст) выберите Object (Объект).
Оцените качество статьи. Нам важно ваше мнение:
How to Insert Excel Data Into Word (Tables, Files, Spreadsheets)
Microsoft Word is great for working on documents—but not so great with tables of data.
If you want to put a table into a Microsoft Word document, you can work with Word’s built-in table tools, or you can insert data directly from Excel.
Guess which one is better?
Getting your Excel data into Word is easy, makes it look better, and automatically updates. It’s a no-brainer💡
There are multiple ways of getting data from Excel into Word.
I’ll walk you through the best ones, step-by-step.
Please download my free sample workbook if you want to tag along.
Free video on inserting Excel data in a Word document
Watch my video and learn how to easily copy and paste data from an Excel file to Word.
This video walked you through how to insert an Excel table in Word so it becomes a Microsoft Word table instead.
It’s done with all the classic copy-and-paste options: keep source formatting, match destination styles,
But there are other ways of getting things from Excel to Word.
Let’s dive into those below 🤿
What is an Excel Worksheet object?
Recent versions of Microsoft Office include the capability to insert objects into documents. These objects are either embedded or linked.
Embedded objects don’t update. If you include an embedded Excel object and change data in the Excel sheet you copied it from, no changes will be applied.
Linked objects update automatically. A linked Excel object will update to reflect changes in the original Excel sheet.
You can embed and link things other than Excel worksheets, but we’ll focus on Excel objects here.
It’s worth noting that the linked spreadsheet needs to remain available for this to work.
Also, this process works in reverse, as well: you can link to Word document objects from an Excel spreadsheet and insert them there in a matter of seconds.
Embedding Excel objects in Word
We’ll start with the simpler of the two: embedding an Excel object. Let’s take a look at the example workbook to see how it works.
Open the example workbook and a blank Word document.
On the first worksheet in the Excel file, you’ll see a small table. Select and copy it.

Go to your Word document, and paste the table with Ctrl + V.
You’ll see a table like this one:

If you click into this table, nothing notable will happen—you can edit the names of the months or the numbers, and they’ll change.
If you try inputting an Excel formula, however, it will only display as text.
Head back to the Excel worksheet and copy the table again.
In Word, click the Home tab of the Ribbon, and select Paste > Paste Special. In the resulting pop-up window, click on the Worksheet Object, and click OK.

You’ll now see a table that looks a bit different:

At first, it looks like the distinguishing feature of this table is gridlines.
But if you double-click the table, you’ll get a surprising new interface:

As you can see, this gives you an embedded version of Excel within Microsoft Word.
All because it’s a linked object. Pretty cool, huh?😎
You can do all the things you’re used to in Excel: use and edit formulas, apply conditional formatting, add new rows and columns, sort and filter data, and everything else you’ve come to expect from Excel.
And source formatting (from the Excel worksheet) is transferred to the Word document.
In short, it gives you a lot more table-editing power than you get with the standard Microsoft Word interface.
To exit the Excel interface, click outside of the table, and you’ll go back to the regular editor for your document.
If you go back to the Excel spreadsheet and make an edit in the table, you’ll see that the Excel object doesn’t update. So if your calculations change, or you get new data and add it to the spreadsheet, you’ll need to update your Word document manually.
Let’s fix that.
Linking Excel objects in Word
As I mentioned before, embedded objects don’t automatically update. Linked objects, on the other hand, do.
And this can save you a lot of time.
Fortunately, linking an Excel object in Microsoft Word is easy.
The example workbook we used previously is the source Excel file.
Copy the table from the example workbook, and head back to the Word file. Again, click Paste > Paste Special in the Home tab. Again, select Microsoft Excel Worksheet Object.
This time, however, you’ll need one more click. On the left side of the window, you’ll see two radio buttons. One says Paste, and the other says Paste Link. Click the button next to Paste Link:

After hitting OK, you’ll get another table in your Word document. This one looks the same as the previous one:

There’s an important difference, however ⚠️
Let’s go back to the original Excel file and change one of the values.
We’ll change May’s value from 9 to 10.
Here’s what happens:
It might not be super clear in the GIF above, but the linked table automatically updates to match the Excel spreadsheet, while the embedded table doesn’t.
In other words, the Excel file changes are automatically applied to the Word document.
Insert an Excel worksheet in a Word document
Linking an Excel worksheet is the best way to get Excel data into Word because Excel is the best tool for working with spreadsheets.
If you want to insert a new object, you can insert a new spreadsheet into your Word document and work on it with the in-Word Excel tool.
To be completely honest, I don’t understand why you wouldn’t just work in Excel first, but I thought you might want to know anyway!
To insert a blank Excel worksheet object into the Word file, go to the Insert tab on the Ribbon.
Click the Object button in the Text group, then find the Microsoft Excel Worksheet object option.
This opens up the trusty ol’ object dialog box.

Hit OK, and you’ll get a blank worksheet in your Word document.
When you want to edit it, double-click the worksheet and you’ll open the Excel editor right inside of Word.

As before, you can do all the things you usually do in Excel right from Word in this worksheet.
And that’s an easy way of getting data from Excel to Word by making it an embedded object in the Word doc.
That’s it – Now what?
Linking data from Excel to Word documents is a simple automation that can save you a lot of time.
But obviously, it’s just a small part of Excel vast arsenal of functions and features.
The most important functions, though, are: IF, SUMIF, and VLOOKUP.
You learn all those 3 functions + how to effectively clean data in my free 30-minute Excel course sent straight to your inbox in just a few minutes.
Other relevant resources
If you want to automate your work between Word and Excel, you most definitely need to take a look at my guide to mail merge (I love mail merge💖).
Kasper Langmann2023-01-27T21:19:47+00:00
Page load link
Insert Worksheet Object In Word
November 10, 2020
by admin

21 Posts Related to Insert Worksheet Object In Word
21 Posts Related to Insert Worksheet Object In Word
Word for Microsoft 365 Outlook for Microsoft 365 Word 2021 Outlook 2021 Word 2019 Outlook 2019 Word 2016 Outlook 2016 Word 2013 Outlook 2013 Word 2010 Outlook 2010 More…Less
Depending on the version of Word or Outlook you’re using, you can insert a variety of objects (such as PDF files, Excel charts or worksheets, or PowerPoint presentations) into a Word document or an email message by linking or embedding them. To insert an object, click Object on the Insert tab.
Insert a new object
To create a new file that is inserted into your Word document or email message:
-
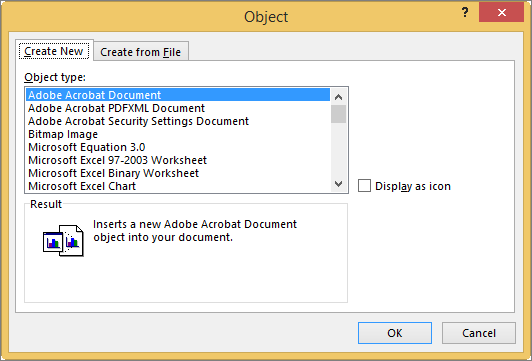
In the Object dialog box, click the Create New tab, and then select an option from the Object type list.
The default program for that file type opens, where you can enter any text or data you want. When you close the program, any added content or changes appear in your Word document or email message.
-
If you want the new file to appear as a clickable icon, rather than the first page of your new file, select Display as icon. If this check box is selected, you can choose a different icon by clicking Change Icon.
Tips:
-
The information in the Result section changes based on the selected object type and whether Display as icon is selected. Use this information to help you determine what you want to insert and how you want it to appear.
-
To edit the information in your inserted object, double-click the object.
-
In Outlook, the Display as icon option is only available if you format your email as RTF (Format Text > Format > Message Format > Rich Text).
Link or embed an existing file
To link or embed an object that’s already been created:
-
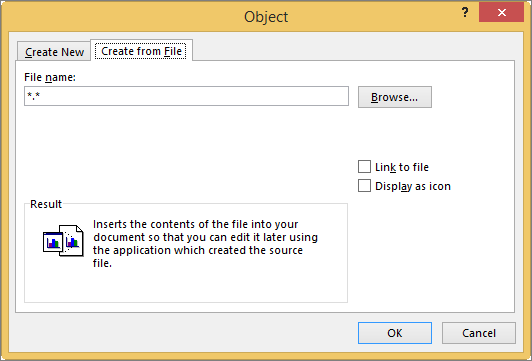
In the Object dialog box, select the Create from File tab, and then click Browse to find the file you want to insert.
-
To link to the source file, rather than embedding it into your Word document or email message, select Link to file.
-
If you want the inserted file to appear as a clickable icon, rather than the first page of the file, select Display as icon. If this check box is selected, you can choose a different icon by clicking Change Icon.
Tip: The information in the Result section changes based on whether Link to file and Display as icon are selected. Use this information to help you determine what you want to insert and how you want it to appear.
Embedded objects vs. linked objects
Embedded objects become part of the Word file or email message and, after they are inserted, they are no longer connected to any source file.
Linked objects can be updated if the source file is modified. Linked data is stored in the source file. The Word file or email message (the destination file) stores only the location of the source file, and it displays a representation of the linked data. Use linked objects if file size is a consideration.
Need more help?
Link an Excel file to a Word doc so the doc updates when the Excel data changes
Updated on March 11, 2022
What to Know
- Link: Copy cells. Right-click Link & Use Destination Styles or Link & Keep Source Formatting in Word.
- Embed: In Word, go to Insert > Object > Object > Create from File > Browse > choose Excel file > OK.
- Embed a spreadsheet table: In Word, go to Insert > Table > Excel Spreadsheet.
This article explains two ways to display Excel data in Word.
Instructions apply to Word for Microsoft 365, Word 2019, Word 2016, Word 2013, Word 2010, Excel for Microsoft 365, Excel 2019, Excel 2016, Excel 2013, and Excel 2010.
How to Link Excel to Word
To insert any part of an Excel worksheet in a Word document:
Maddy Price / Lifewire
-
Open the Word document where the worksheet will display.
-
Open the Excel worksheet that contains the data you want to link to the Word document.
-
In Excel, select and copy the range of cells to include. If you plan to insert more columns or rows into the worksheet, select the entire worksheet.
To select the entire worksheet, select the cell located in the upper-left corner at the juncture of the row numbers and column letters.
-
In the Word document, position the cursor where you want to insert the linked table.
-
Right-click and select Link & Use Destination Styles or Link & Keep Source Formatting.
Destination Styles uses the default Word table formatting, which usually results in a better-looking table. Keep Source Formatting uses the formatting from the Excel workbook.
-
The Excel data pastes directly into the Word document where the cursor was positioned. If changes are made to the source Excel file, the Word document updates with those changes automatically.
What Happens When You Link Excel to Word
Linking an Excel file to a Word document ensures that the Word document is updated every time the data in the Excel file changes. It works as a one-way link feed that brings the updated Excel data into the linked Word document. Linking an Excel worksheet also keeps your Word file small because the data doesn’t save to the Word document.
Linking an Excel worksheet to a Word document has a few limitations:
- If the Excel file moves, the link to the Word document needs to be re-established.
- If you plan to transport the Word file or use it on another computer, you must transport the Excel file along with it.
- You must do data editing in the Excel worksheet. It isn’t a problem unless you require different spreadsheet formats in the Word document.
How to Embed an Excel Spreadsheet in Word
The process of embedding an Excel worksheet in a Word document is essentially the same as linking to an Excel worksheet. It does require a few extra clicks, but it brings all data from the worksheet into your document, not only the selected range.
There are two ways to embed an Excel worksheet in Word. The first is to embed the worksheet as an object. The second is to insert a table.
When you embed a worksheet, Word uses the formatting from the Excel worksheet. Make sure that the data in the worksheet looks the way you want it to appear in the Word document.
Embed an Excel Worksheet as an Object
To embed an Excel worksheet as an object:
-
Open the Word document.
-
Go to the Insert tab.
-
Select Object > Object. In Word 2010, select Insert > Object.
-
In the Object dialog box, select the Create from File tab.
-
Select Browse, then choose the Excel worksheet that contains the data you want to embed.
-
Select OK.
-
The Excel worksheet is embedded in the Word document.
How to Embed an Excel Spreadsheet Table
An alternative is to insert the Excel worksheet as a table. This method inserts the worksheet the same way as if you embedded it as an object. The difference is that it opens a blank Excel worksheet for you to fill out. Choose this method if you haven’t created the Excel file yet.
To insert an Excel worksheet as a table in Word:
-
Open a Word document.
-
Place the cursor where you want to insert the Excel worksheet.
-
Go to the Insert tab, then select Table.
-
Select Excel Spreadsheet.
-
This menu option opens a blank Excel worksheet that you can fill with data. Either enter new data or paste data from another spreadsheet.
When you insert and fill out a new Excel worksheet, you have an Excel file that you can update at any time. The data in the Word table automatically updates to match the data in the Excel file.
FAQ
-
How do I embed a Microsoft Word document in Excel?
In Excel, select the Insert tab > Text > Object > Create from File. Next, select Browse to find the Word file > Insert > OK.
-
How do I create labels in Microsoft Word from an Excel list?
To create labels in Word from an Excel list, open a blank Word document > select Mailings > Start Mail Merge > Labels > choose the brand and product number for the labels. Then, choose Select Recipients > Use an Existing List > navigate to the Excel address list > OK. Add the merge mail fields to complete the merge.
Thanks for letting us know!
Get the Latest Tech News Delivered Every Day
Subscribe