
Открытие книги Excel из кода VBA. Проверка существования книги. Создание новой книги, обращение к открытой книге и ее закрытие. Методы Open, Add и Close.
Открытие существующей книги
Существующая книга открывается из кода VBA Excel с помощью метода Open:
|
Workbooks.Open Filename:=«D:test1.xls» |
или
|
Workbooks.Open («D:test1.xls») |
В кавычках указывается полный путь к открываемому файлу Excel. Если такой файл не существует, произойдет ошибка.
Проверка существования файла
Проверить существование файла можно с помощью функции Dir. Проверка существования книги Excel:
|
If Dir(«D:test1.xls») = «» Then MsgBox «Файл не существует» Else MsgBox «Файл существует» End If |
Или, если файл (книга Excel) существует, можно сразу его открыть:
|
If Dir(«D:test1.xls») = «» Then MsgBox «Файл не существует» Else Workbooks.Open Filename:=«D:test1.xls» End If |
Создание новой книги
Новая рабочая книга Excel создается в VBA с помощью метода Add:
Созданную книгу, если она не будет использоваться как временная, лучше сразу сохранить:
|
Workbooks.Add ActiveWorkbook.SaveAs Filename:=«D:test2.xls» |
В кавычках указывается полный путь сохраняемого файла Excel, включая присваиваемое имя, в примере — это «test2.xls».
Обращение к открытой книге
Обращение к активной книге:
Обращение к книге с выполняемым кодом:
Обращение к книге по имени:
|
Workbooks(«test1.xls») Workbooks(«test2.xls») |
Обратиться по имени можно только к уже открытой книге, а чтобы из кода VBA Excel книгу открыть, необходимо указать полный путь к файлу.
Открытая рабочая книга закрывается из кода VBA Excel с помощью метода Close:
|
Workbooks(«test1.xlsx»).Close |
Если закрываемая книга редактировалась, а внесенные изменения не были сохранены, тогда при ее закрытии Excel отобразит диалоговое окно с вопросом: Вы хотите сохранить изменения в файле test1.xlsx? Чтобы файл был закрыт без сохранения изменений и вывода диалогового окна, можно воспользоваться параметром метода Close — SaveChanges:
|
Workbooks(«test1.xlsx»).Close SaveChanges:=False |
или
|
Workbooks(«test1.xlsx»).Close (False) |
Закрыть книгу Excel из кода VBA с сохранением внесенных изменений можно также с помощью параметра SaveChanges:
|
Workbooks(«test1.xlsx»).Close SaveChanges:=True |
или
|
Workbooks(«test1.xlsx»).Close (True) |
Фразы для контекстного поиска: открыть книгу, открытие книги, создать книгу, создание книги, закрыть книгу, закрытие книги, открыть файл Excel, открытие файла Excel, существование книги, обратиться к открытой книге.
In this Article
- Open a Workbook in VBA
- Open Workbook From Path
- Open Workbook – ActiveWorkbook
- Open Workbook and Assign to a Variable
- Workbook Open File Dialog
- Open New Workbook
- Open New Workbook To Variable
- Open Workbook Syntax
- Open Workbook Read-Only
- Open Password Protected Workbook
- Open Workbook Syntax Notes
- Close a Workbook in VBA
- Close Specific Workbook
- Close Active Workbook
- Close All Open Workbooks
- Close First Opened Workbook
- Close Without Saving
- Save and Close Without Prompt
- Other Workbook Open Examples
- Open Multiple New Workbooks
- Open All Excel Workbooks in a Folder
- Check if a Workbook is Open
- Workbook_Open Event
- Open Other Types of Files in VBA
- Open a Text file and Read its Contents
- Open a Text File and Append to it
- Opening a Word File and Writing to it
In this tutorial, you will learn how to use VBA to open and close Excel Workbooks and other types of Files in several ways.
VBA allows you to open or close files using the standard methods .Open and .Close.
If you want to learn how to check if a file exists before attempting to open the file, you can click on this link: VBA File Exists
Open a Workbook in VBA
Open Workbook From Path
If you know which file you want to open, you can specify its full path name in the function. Here is the code:
Workbooks.Open "C:VBA FolderSample file 1.xlsx"This line of the code opens “Sample file 1” file from the “VBA Folder”.
Open Workbook – ActiveWorkbook
When you open a workbook, it automatically becomes the ActiveWorkbook. You can reference the newly opened workbook like so:
ActiveWorkbook.SaveWhen you reference a sheet or range and omit the workbook name, VBA will assume you are referring to the ActiveWorkbook:
Sheets("Sheet1").Name = "Input"Open Workbook and Assign to a Variable
You can also open a workbook and assign it directly to an object variable. This procedure will open a workbook to the wb variable and then save the workbook.
Sub OpenWorkbookToVariable()
    Dim wb As Workbook
    Set wb = Workbooks.Open("C:VBA FolderSample file 1.xlsx")

    wb.Save
End Sub
Assigning workbooks to variables when they open is the best way to keep track of your workbooks
Workbook Open File Dialog
You can also trigger the workbook Open File Dialog box. This allows the user to navigate to a file and open it:
Sub OpenWorkbook ()

    Dim strFile As String

    strFile = Application.GetOpenFilename()
    Workbooks.Open (strFile)

End Sub
As you can see in Image 1, with this approach users can choose which file to open. The Open File Dialog Box can be heavily customized. You can default to a certain folder, choose which types of files are visible (ex. .xlsx only), and more. Read our tutorial on the Open File Dialog Box for detailed examples.
Open New Workbook
This line of code will open a new workbook:
Workbooks.AddVBA Coding Made Easy
Stop searching for VBA code online. Learn more about AutoMacro — A VBA Code Builder that allows beginners to code procedures from scratch with minimal coding knowledge and with many time-saving features for all users!

Learn More
Open New Workbook To Variable
This procedure will open a new workbook, assigning it to variable wb:
Sub OpenNewWorkbook()
    Dim wb As Workbook
    Set wb = Workbooks.Add
End Sub
Open Workbook Syntax
When you use Workbooks.Open you might notice that there are many options available when opening the workbook:

The Filename is required. All other arguments are optional – and you probably won’t need to know most of the other arguments. Here are the two most common:
Open Workbook Read-Only
When workbook is opened read-only, you can’t save over the original file. This prevents the file from being edited by the user.
Workbooks.Open "C:VBA FolderSample file 1.xlsx", , TrueVBA Programming | Code Generator does work for you!
Open Password Protected Workbook
A workbook might be password-protected. Use this code to open the password-protected workbook:
Workbooks.Open "C:VBA FolderSample file 1.xlsx", , , "password"Open Workbook Syntax Notes
Notice that in the image above, we included a parenthesis “(” to show the syntax. If you use parenthesis when working with Workbooks.Open, you must assign the workbook to a variable:
Sub OpenWB()
    Dim wb As Workbook
    Set wb = Workbooks.Open("C:VBA FolderSample file 1.xlsx", True, True)
End Sub
Close a Workbook in VBA
Close Specific Workbook
Similarly to opening a workbook, there are several ways to close a file. If you know which file you want to close, you can use the following code:
Workbooks.Close ("C:VBA FolderSample file 1.xlsx")This line of code closes the file “Sample file 1” if it’s opened. If not, it will return an error, so you should take care of error handling.
Close Active Workbook
If you want to close the Workbook which is currently active, this line of code will enable you to do that:
ActiveWorkbook.CloseAutoMacro | Ultimate VBA Add-in | Click for Free Trial!
Close All Open Workbooks
To close all open Workbooks, you can simply use this code:
Workbooks.CloseClose First Opened Workbook
This will close the first opened/created workbook:
Workbooks(1).CloseReplace 1 with 2 to close the second opened / created workbook and so on.
Close Without Saving
This will close a Workbook without saving and without showing the save prompt:
ActiveWorkbook.Close savechanges:=FalseSave and Close Without Prompt
Similarly this will save and close a Workbook without showing the save prompt:
ActiveWorkbook.Close savechanges:=TrueNote: There are several other ways to indicate whether to save or not save a Workbook and also whether to show prompts or not. This is discussed in more detail here.
AutoMacro | Ultimate VBA Add-in | Click for Free Trial!
Other Workbook Open Examples
Open Multiple New Workbooks
This procedure will open multiple new workbooks, assigning the new workbooks to an array:
Sub OpenMultipleNewWorkbooks()
    Dim arrWb(3) As Workbook
    Dim i As Integer

    For i = 1 To 3
        Set arrWb(i) = Workbooks.Add
    Next i
End Sub
Open All Excel Workbooks in a Folder
This procedure will open all Excel Workbooks in a folder, using the Open File Dialog picker.
Sub OpenMultipleWorkbooksInFolder()
    Dim wb As Workbook
    Dim dlgFD As FileDialog
    Dim strFolder As String
    Dim strFileName As String
    Set dlgFD = Application.FileDialog(msoFileDialogFolderPicker)
    If dlgFD.Show = -1 Then
        strFolder = dlgFD.SelectedItems(1) & Application.PathSeparator
        strFileName = Dir(strFolder & "*.xls*")
        Do While strFileName <> ""
            Set wb = Workbooks.Open(strFolder & strFileName)

            strFileName = Dir
        Loop
    End If
End Sub
Check if a Workbook is Open
This procedure will test if a workbook is open:
Sub TestByWorkbookName()
Dim wb As Workbook

    For Each wb In Workbooks
        If wb.Name = "New Microsoft Excel Worksheet.xls" Then
            MsgBox "Found it"
            Exit Sub 'call code here, we'll just exit for now
        End If
    Next

End Sub
AutoMacro | Ultimate VBA Add-in | Click for Free Trial!
Workbook_Open Event
VBA Events are “triggers” that tell VBA to run certain code. You can set up workbook events for open, close, before save, after save and more.
Read our Workbook_Open Event tutorial to learn more about automatically running macros when a workbook is opened.
Open Other Types of Files in VBA
You can use the VBA to open other types of files with VBA – such as txt or Word files.
Open a Text file and Read its Contents
The VBA open method allows you to read or write to the file once you have opened it. To read the contents of a file, we can open the file for INPUT.
Sub OpenTextFile()
   Dim strFile As String
   Dim strBody As String
   Dim intFile As Integer

   strFile = "C:datatest.txt"
   intFile = FreeFile
   Open strFile For Input As intFile
   strBody = Input(LOF(intFile), intFile)
   'loop here through your text body and extract what you need
   ''some vba code here
   Debug.Print strBody
   Close intFile
End Sub
The code above will open the text file “test.txt” and then it will read the entire contents of the file to the strBody variable. Once you have extracted the file data into the strBody variable, you can use it for what you require. Using the Debug.Print command above enables us to see the contents of the strBody variable in the Immediate window in the VBE.
Open a Text File and Append to it
We can also open a text file in VBA, and then append to the bottom of the file using the Append method.
Sub AppendToTextFile()
Dim strFile As String
Dim strBody As String
Dim intFile As Integer

   strFile = "C:datatest.txt"
   intFile = FreeFile
   Open strFile For Append As intFile
'add two lines to the bottom
   Print #intFile, "This is an extra line of text at the bottom"
   Print #intFile, "and this is another one"
'close the file
   Close intFile
End Sub
The above code will open the text file and then append 2 lines of text to the bottom of the file using the #intFile variable (the # sign is the key!). The code then closes the file.
Opening a Word File and Writing to it
We can also use VBA in Excel to open a Word file.
Sub OpenWordFile()
   Dim wApp As Object
   Dim wDoc As Object
   Set wApp = CreateObject("Word.Application")
   Set wd = wApp.documents.Open("c:datatest.docx")
   wApp.Visible = True
End Sub
This code will open a copy of Word, and then open the document test.docx.
In this tutorial, I will cover the how to work with workbooks in Excel using VBA.
In Excel, a ‘Workbook’ is an object that is a part of the ‘Workbooks’ collection. Within a workbook, you have different objects such as worksheets, chart sheets, cells and ranges, chart objects, shapes, etc.
With VBA, you can do a lot of stuff with a workbook object – such as open a specific workbook, save and close workbooks, create new workbooks, change the workbook properties, etc.
So let’s get started.
If you’re interested in learning VBA the easy way, check out my Online Excel VBA Training.
Referencing a Workbook using VBA
There are different ways to refer to a Workbook object in VBA.
The method you choose would depend on what you want to get done.
In this section, I will cover the different ways to refer to a workbook along with some example codes.
Using Workbook Names
If you have the exact name of the workbook that you want to refer to, you can use the name in the code.
Let’s begin with a simple example.
If you have two workbooks open, and you want to activate the workbook with the name – Examples.xlsx, you can use the below code:
Sub ActivateWorkbook()
Workbooks("Examples.xlsx").Activate
End Sub
Note that you need to use the file name along with the extension if the file has been saved. If it hasn’t been saved, then you can use the name without the file extension.
If you’re not sure what name to use, take help from the Project Explorer.
If you want to activate a workbook and select a specific cell in a worksheet in that workbook, you need to give the entire address of the cell (including the Workbook and the Worksheet name).
Sub ActivateWorkbook()
Workbooks("Examples.xlsx").Worksheets("Sheet1").Activate
Range("A1").Select
End Sub
The above code first activates Sheet1 in the Examples.xlsx workbook and then selects cell A1 in the sheet.
You will often see a code where a reference to a worksheet or a cell/range is made without referring to the workbook. This happens when you’re referring to the worksheet/ranges in the same workbook that has the code in it and is also the active workbook. However, in some cases, you do need to specify the workbook to make sure the code works (more on this in the ThisWorkbook section).
Using Index Numbers
You can also refer to the workbooks based on their index number.
For example, if you have three workbooks open, the following code would show you the names of the three workbooks in a message box (one at a time).
Sub WorkbookName()
MsgBox Workbooks(1).Name
MsgBox Workbooks(2).Name
MsgBox Workbooks(3).Name
End Sub
The above code uses MsgBox – which is a function that shows a message box with the specified text/value (which is the workbook name in this case).
One of the troubles I often have with using index numbers with Workbooks is that you never know which one is the first workbook and which one is the second and so on. To be sure, you would have to run the code as shown above or something similar to loop through the open workbooks and know their index number.
Excel treats the workbook opened first to have the index number as 1, and the next one as 2 and so on.
Despite this drawback, using index numbers can come in handy.
For example, if you want to loop through all the open workbooks and save all, you can use the index numbers.
In this case, since you want this to happen to all the workbooks, you’re not concerned about their individual index numbers.
The below code would loop through all the open workbooks and close all except the workbook that has this VBA code.
Sub CloseWorkbooks()
Dim WbCount As Integer
WbCount = Workbooks.Count
For i = WbCount To 1 Step -1
If Workbooks(i).Name <> ThisWorkbook.Name Then
Workbooks(i).Close
End If
Next i
End Sub
The above code counts the number of open workbooks and then goes through all the workbooks using the For Each loop.
It uses the IF condition to check if the name of the workbook is the same as that of the workbook where the code is being run.
If it’s not a match, it closes the workbook and moves to the next one.
Note that we have run the loop from WbCount to 1 with a Step of -1. This is done as with each loop, the number of open workbooks is decreasing.
ThisWorkbook is covered in detail in the later section.
Also read: How to Open Excel Files Using VBA (Examples)
Using ActiveWorkbook
ActiveWorkbook, as the name suggests, refers to the workbook that is active.
The below code would show you the name of the active workbook.
Sub ActiveWorkbookName()
MsgBox ActiveWorkbook.Name
End Sub
When you use VBA to activate another workbook, the ActiveWorkbook part in the VBA after that would start referring to the activated workbook.
Here is an example of this.
If you have a workbook active and you insert the following code into it and run it, it would first show the name of the workbook that has the code and then the name of Examples.xlsx (which gets activated by the code).
Sub ActiveWorkbookName()
MsgBox ActiveWorkbook.Name
Workbooks("Examples.xlsx").Activate
MsgBox ActiveWorkbook.Name
End Sub
Note that when you create a new workbook using VBA, that newly created workbook automatically becomes the active workbook.
Using ThisWorkbook
ThisWorkbook refers to the workbook where the code is being executed.
Every workbook would have a ThisWorkbook object as a part of it (visible in the Project Explorer).
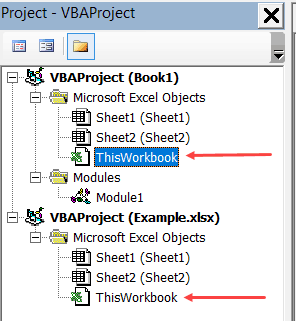
‘ThisWorkbook’ can store regular macros (similar to the ones that we add-in modules) as well as event procedures. An event procedure is something that is triggered based on an event – such as double-clicking on a cell, or saving a workbook or activating a worksheet.
Any event procedure that you save in this ‘ThisWorkbook’ would be available in the entire workbook, as compared to the sheet level events which are restricted to the specific sheets only.
For example, if you double-click on the ThisWorkbook object in the Project Explorer and copy-paste the below code in it, it will show the cell address whenever you double-click on any of the cells in the entire workbook.
Private Sub Workbook_SheetBeforeDoubleClick(ByVal Sh As Object, ByVal Target As Range, Cancel As Boolean)
MsgBox Target.Address
End Sub
While ThisWorkbook’s main role is to store event procedure, you can also use it to refer to the workbook where the code is being executed.
The below code would return the name of the workbook in which the code is being executed.
Sub ThisWorkbookName()
MsgBox ThisWorkbook.Name
End Sub
The benefit of using ThisWorkbook (over ActiveWorkbook) is that it would refer to the same workbook (the one that has the code in it) in all the cases. So if you use a VBA code to add a new workbook, the ActiveWorkbook would change, but ThisWorkbook would still refer to the one that has the code.
Creating a New Workbook Object
The following code will create a new workbook.
Sub CreateNewWorkbook()
Workbooks.Add
End Sub
When you add a new workbook, it becomes the active workbook.
The following code will add a new workbook and then show you the name of that workbook (which would be the default Book1 type name).
Sub CreateNewWorkbook()
Workbooks.Add
MsgBox ActiveWorkbook.Name
End Sub
Open a Workbook using VBA
You can use VBA to open a specific workbook when you know the file path of the workbook.
The below code will open the workbook – Examples.xlsx which is in the Documents folder on my system.
Sub OpenWorkbook()
Workbooks.Open ("C:UserssumitDocumentsExamples.xlsx")
End Sub
In case the file exists in the default folder, which is the folder where VBA saves new files by default, then you can just specify the workbook name – without the entire path.
Sub OpenWorkbook()
Workbooks.Open ("Examples.xlsx")
End Sub
In case the workbook that you’re trying to open doesn’t exist, you’ll see an error.
To avoid this error, you can add a few lines to your code to first check whether the file exists or not and if it exists then try to open it.
The below code would check the file location and if it doesn’t exist, it will show a custom message (not the error message):
Sub OpenWorkbook()
If Dir("C:UserssumitDocumentsExamples.xlsx") <> "" Then
Workbooks.Open ("C:UserssumitDocumentsExamples.xlsx")
Else
MsgBox "The file doesn't exist"
End If
End Sub
You can also use the Open dialog box to select the file that you want to open.
Sub OpenWorkbook()
If Dir("C:UserssumitDocumentsExamples.xlsx") <> "" Then
Workbooks.Open ("C:UserssumitDocumentsExamples.xlsx")
Else
MsgBox "The file doesn't exist"
End If
End Sub
The above code opens the Open dialog box. When you select a file that you want to open, it assigns the file path to the FilePath variable. Workbooks.Open then uses the file path to open the file.
In case the user doesn’t open a file and clicks on Cancel button, FilePath becomes False. To avoid getting an error in this case, we have used the ‘On Error Resume Next’ statement.
Saving a Workbook
To save the active workbook, use the code below:
Sub SaveWorkbook()
ActiveWorkbook.Save
End Sub
This code works for the workbooks that have already been saved earlier. Also, since the workbook contains the above macro, if it hasn’t been saved as a .xlsm (or .xls) file, you will lose the macro when you open it next.
If you’re saving the workbook for the first time, it will show you a prompt as shown below:
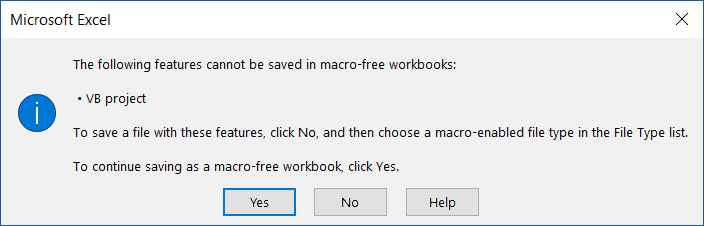
When saving for the first time, it’s better to use the ‘Saveas’ option.
The below code would save the active workbook as a .xlsm file in the default location (which is the document folder in my system).
Sub SaveWorkbook()
ActiveWorkbook.SaveAs Filename:="Test.xlsm", FileFormat:=xlOpenXMLWorkbookMacroEnabled
End Sub
If you want the file to be saved in a specific location, you need to mention that in the Filename value. The below code saves the file on my desktop.
Sub SaveWorkbook()
ActiveWorkbook.SaveAs Filename:="C:UserssumitDesktopTest.xlsm", FileFormat:=xlOpenXMLWorkbookMacroEnabled
End Sub
If you want the user to get the option to select the location to save the file, you can use call the Saveas dialog box. The below code shows the Saveas dialog box and allows the user to select the location where the file should be saved.
Sub SaveWorkbook()
Dim FilePath As String
FilePath = Application.GetSaveAsFilename
ActiveWorkbook.SaveAs Filename:=FilePath & ".xlsm", FileFormat:=xlOpenXMLWorkbookMacroEnabled
End Sub
Note that instead of using FileFormat:=xlOpenXMLWorkbookMacroEnabled, you can also use FileFormat:=52, where 52 is the code xlOpenXMLWorkbookMacroEnabled.
Saving All Open Workbooks
If you have more than one workbook open and you want to save all the workbooks, you can use the code below:
Sub SaveAllWorkbooks()
Dim wb As Workbook
For Each wb In Workbooks
wb.Save
Next wb
End Sub
The above saves all the workbooks, including the ones that have never been saved. The workbooks that have not been saved previously would get saved in the default location.
If you only want to save those workbooks that have previously been saved, you can use the below code:
Sub SaveAllWorkbooks()
Dim wb As Workbook
For Each wb In Workbooks
If wb.Path <> "" Then
wb.Save
End If
Next wb
End Sub
Saving and Closing All Workbooks
If you want to close all the workbooks, except the workbook that has the current code in it, you can use the code below:
Sub CloseandSaveWorkbooks()
Dim wb As Workbook
For Each wb In Workbooks
If wb.Name <> ThisWorkbook.Name Then
wb.Close SaveChanges:=True
End If
Next wb
End Sub
The above code would close all the workbooks (except the workbook that has the code – ThisWorkbook). In case there are changes in these workbooks, the changes would be saved. In case there is a workbook that has never been saved, it will show the save as dialog box.
Save a Copy of the Workbook (with Timestamp)
When I am working with complex data and dashboard in Excel workbooks, I often create different versions of my workbooks. This is helpful in case something goes wrong with my current workbook. I would at least have a copy of it saved with a different name (and I would only lose the work I did after creating a copy).
Here is the VBA code that will create a copy of your workbook and save it in the specified location.
Sub CreateaCopyofWorkbook()
ThisWorkbook.SaveCopyAs Filename:="C:UserssumitDesktopBackupCopy.xlsm"
End Sub
The above code would save a copy of your workbook every time you run this macro.
While this works great, I would feel more comfortable if I had different copies saved whenever I run this code. The reason this is important is that if I make an inadvertent mistake and run this macro, it will save the work with the mistakes. And I wouldn’t have access to the work before I made the mistake.
To handle such situations, you can use the below code that saves a new copy of the work each time you save it. And it also adds a date and timestamp as a part of the workbook name. This can help you track any mistake you did as you never lose any of the previously created backups.
Private Sub Workbook_BeforeSave(ByVal SaveAsUI As Boolean, Cancel As Boolean)
ThisWorkbook.SaveCopyAs Filename:="C:UserssumitDesktopBackupCopy" & Format(Now(), "dd-mm-yy-hh-mm-ss-AMPM") & ".xlsm"
End Sub
The above code would create a copy every time you run this macro and add a date/time stamp to the workbook name.
Create a New Workbook for Each Worksheet
In some cases, you may have a workbook that has multiple worksheets, and you want to create a workbook for each worksheet.
This could be the case when you have monthly/quarterly reports in a single workbook and you want to split these into one workbook for each worksheet.
Or, if you have department wise reports and you want to split these into individual workbooks so that you can send these individual workbooks to the department heads.
Here is the code that will create a workbook for each worksheet, give it the same name as that of the worksheet, and save it in the specified folder.
Sub CreateWorkbookforWorksheets()
Dim ws As Worksheet
Dim wb As Workbook
For Each ws In ThisWorkbook.Worksheets
Set wb = Workbooks.Add
ws.Copy Before:=wb.Sheets(1)
Application.DisplayAlerts = False
wb.Sheets(2).Delete
Application.DisplayAlerts = True
wb.SaveAs "C:UserssumitDesktopTest" & ws.Name & ".xlsx"
wb.Close
Next ws
End Sub
In the above code, we have used two variable ‘ws’ and ‘wb’.
The code goes through each worksheet (using the For Each Next loop) and creates a workbook for it. It also uses the copy method of the worksheet object to create a copy of the worksheet in the new workbook.
Note that I have used the SET statement to assign the ‘wb’ variable to any new workbook that is created by the code.
You can use this technique to assign a workbook object to a variable. This is covered in the next section.
Assign Workbook Object to a Variable
In VBA, you can assign an object to a variable, and then use the variable to refer to that object.
For example, in the below code, I use VBA to add a new workbook and then assign that workbook to the variable wb. To do this, I need to use the SET statement.
Once I have assigned the workbook to the variable, all the properties of the workbook are made available to the variable as well.
Sub AssigntoVariable()
Dim wb As Workbook
Set wb = Workbooks.Add
wb.SaveAs Filename:="C:UserssumitDesktopExamples.xlsx"
End Sub
Note that the first step in the code is to declare ‘wb’ as a workbook type variable. This tells VBA that this variable can hold the workbook object.
The next statement uses SET to assign the variable to the new workbook that we are adding. Once this assignment is done, we can use the wb variable to save the workbook (or do anything else with it).
Looping through Open Workbooks
We have already seen a few examples codes above that used looping in the code.
In this section, I will explain different ways to loop through open workbooks using VBA.
Suppose you want to save and close all the open workbooks, except the one with the code in it, then you can use the below code:
Sub CloseandSaveWorkbooks()
Dim wb As Workbook
For Each wb In Workbooks
If wb.Name <> ThisWorkbook.Name Then
wb.Close SaveChanges:=True
End If
Next wb
End Sub
The above code uses the For Each loop to go through each workbook in the Workbooks collection. To do this, we first need to declare ‘wb’ as the workbook type variable.
In every loop cycle, each workbook name is analyzed and if it doesn’t match the name of the workbook that has the code, it’s closed after saving its content.
The same can also be achieved with a different loop as shown below:
Sub CloseWorkbooks()
Dim WbCount As Integer
WbCount = Workbooks.Count
For i = WbCount To 1 Step -1
If Workbooks(i).Name <> ThisWorkbook.Name Then
Workbooks(i).Close SaveChanges:=True
End If
Next i
End Sub
The above code uses the For Next loop to close all the workbooks except the one that has the code in it. In this case, we don’t need to declare a workbook variable, but instead, we need to count the total number of open workbooks. When we have the count, we use the For Next loop to go through each workbook. Also, we use the index number to refer to the workbooks in this case.
Note that in the above code, we are looping from WbCount to 1 with Step -1. This is needed as with each loop, the workbook gets closed and the number of workbooks gets decreased by 1.
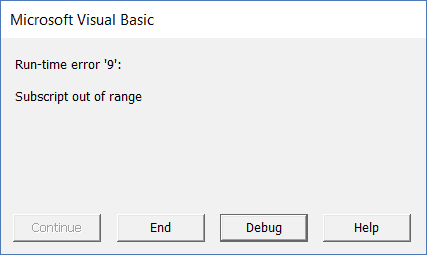
Error while Working with the Workbook Object (Run-time error ‘9’)
One of the most common error you may encounter when working with workbooks is – Run-time Error ‘9’ – Subscript out of range.
Generally, VBA errors are not very informative and often leave it to you to figure out what went wrong.
Here are some of the possible reasons that may lead to this error:
- The workbook that you’re trying to access does not exist. For example, if I am trying to access the fifth workbook using Workbooks(5), and there are only 4 workbooks open, then I will get this error.
- If you’re using a wrong name to refer to the workbook. For example, if your workbook name is Examples.xlsx and you use Example.xlsx. then it will show you this error.
- If you haven’t saved a workbook, and you use the extension, then you get this error. For example, if your workbook name is Book1, and you use the name Book1.xlsx without saving it, you will get this error.
- The workbook you’re trying to access is closed.
Get a List of All Open Workbooks
If you want to get a list of all the open workbooks in the current workbook (the workbook where you’re running the code), you can use the below code:
Sub GetWorkbookNames()
Dim wbcount As Integer
wbcount = Workbooks.Count
ThisWorkbook.Worksheets.Add
ActiveSheet.Range("A1").Activate
For i = 1 To wbcount
Range("A1").Offset(i - 1, 0).Value = Workbooks(i).Name
Next i
End Sub
The above code adds a new worksheet and then lists the name of all the open workbooks.
If you want to get their file path as well, you can use the below code:
Sub GetWorkbookNames()
Dim wbcount As Integer
wbcount = Workbooks.Count
ThisWorkbook.Worksheets.Add
ActiveSheet.Range("A1").Activate
For i = 1 To wbcount
Range("A1").Offset(i - 1, 0).Value = Workbooks(i).Path & "" & Workbooks(i).Name
Next i
End Sub
Open the Specified Workbook by Double-clicking on the Cell
If you have a list of file paths for Excel workbooks, you can use the below code to simply double-click on the cell with the file path and it will open that workbook.
Private Sub Workbook_SheetBeforeDoubleClick(ByVal Sh As Object, ByVal Target As Range, Cancel As Boolean)
Workbooks.Open Target.Value
End Sub
This code would be placed in the ThisWorkbook code window.
To do this:
- Double click on the ThisWorkbook object in the project explorer. Note that the ThisWorkbook object should be in the workbook where you want this functionality.
- Copy and paste the above code.
Now, if you have the exact path of the files that you want to open, you can do that by simply double-clicking on the file path and VBA would instantly open that workbook.
Where to Put the VBA Code
Wondering where the VBA code goes in your Excel workbook?
Excel has a VBA backend called the VBA editor. You need to copy and paste the code into the VB Editor module code window.
Here are the steps to do this:
- Go to the Developer tab.

- Click on the Visual Basic option. This will open the VB editor in the backend.
- In the Project Explorer pane in the VB Editor, right-click on any object for the workbook in which you want to insert the code. If you don’t see the Project Explorer go to the View tab and click on Project Explorer.
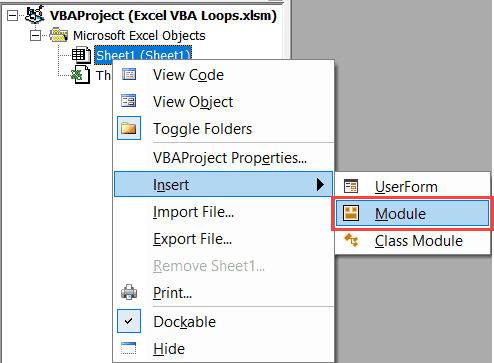
- Go to Insert and click on Module. This will insert a module object for your workbook.

- Copy and paste the code in the module window.


You May Also Like the Following Excel VBA Tutorials:
- How to Record a Macro in Excel.
- Creating a User Defined Function in Excel.
- How to Create and Use Add-in in Excel.
- How to Resue Macros by placing it in the Personal Macro Workbook.
- Get the List of File Names from a Folder in Excel (with and without VBA).
- How to Use Excel VBA InStr Function (with practical EXAMPLES).
- How to Sort Data in Excel using VBA (A Step-by-Step Guide).
“We are drowning in information but starved for knowledge.” – John Naisbitt
This post provides a complete guide to using the VBA Workbook.
If you want to use VBA to Open a Workbook then check out Open Workbook
If you want to use VBA to create a new workbook go to Create New Workbook
For all other VBA Workbook tasks, check out the quick guide below.
A Quick Guide to the VBA Workbook
The following table provides a quick how-to guide on the main VBA workbook tasks
| Task | How to |
|---|---|
| Access open workbook using name | Workbooks(«Example.xlsx») |
| Access open workbook (the one opened first) | Workbooks(1) |
| Access open workbook (the one opened last) | Workbooks(Workbooks.Count) |
| Access the active workbook | ActiveWorkbook |
| Access workbook containing VBA code | ThisWorkbook |
| Declare a workbook variable | Dim wk As Workbook |
| Assign a workbook variable | Set wk = Workbooks(«Example.xlsx») Set wk = ThisWorkbook Set wk = Workbooks(1) |
| Activate workbook | wk.Activate |
| Close workbook without saving | wk.Close SaveChanges:=False |
| Close workbook and save | wk.Close SaveChanges:=True |
| Create new workbook | Set wk = Workbooks.Add |
| Open workbook | Set wk =Workbooks.Open («C:DocsExample.xlsx») |
| Open workbook as read only | Set wk = Workbooks.Open («C:DocsExample.xlsx», ReadOnly:=True) |
| Check Workbook exists | If Dir(«C:Docsbook1.xlsx») = «» Then MsgBox «File does not exist.» EndIf |
| Check Workbook is open | See Check Workbook Open section below |
| List all open workbooks | For Each wk In Application.Workbooks Debug.Print wk.FullName Next wk |
| Open workbook with the File Dialog | See File Dialog section below function below |
| Save workbook | wk.Save |
| Save workbook copy | wk.SaveCopyAs «C:Copy.xlsm» |
| Copy workbook if closed | FileCopy «C:file1.xlsx»,«C:Copy.xlsx» |
| SaveAs workbook | wk.SaveAs «Backup.xlsx» |
VBA Workbook Webinar
If you are a member of the website, click on the image below to access the webinar.
(Note: Website members have access to the full webinar archive.)

Getting Started with the VBA Workbook
We can access any open workbook using the code Workbooks(“Example.xlsm“). Simply replace Example.xlsm with the name of the workbook you wish to use.
The following example shows you how to write to a cell on a worksheet. You will notice we had to specify the workbook, worksheet and range of cells.
' https://excelmacromastery.com/
Public Sub WriteToA1()

    ' Writes 100 to cell A1 of worksheet "Sheet1" in MyVBA.xlsm
Workbooks("MyVBA.xlsm").Worksheets("Sheet1").Range("A1") = 100

End Sub
This example may look a little be confusing to a new user but it is actually quite simple.
The first part up to the decimal point is the Workbook, the second part is the Worksheet and the third is the Range. Here are some more examples of writing to a cell
' https://excelmacromastery.com/
Public Sub WriteToMulti()

' Writes 100 to cell A1 of worksheet "Sheet1" in MyVBA.xlsm
Workbooks("MyVBA.xlsm").Worksheets("Sheet1").Range("A1") = 100

' Writes "John" to cell B1 of worksheet "Sheet1" in MyVBA.xlsm
Workbooks("MyVBA.xlsm").Worksheets("Sheet1").Range("B1") = "John"

' Writes 100 to cell A1 of worksheet "Accounts" in MyVBA.xlsm
Workbooks("MyVBA.xlsm").Worksheets("Accounts").Range("A1") = 100

' Writes the date to cell D3 of worksheet "Sheet2" in Book.xlsc
Workbooks("Book.xlsx").Worksheets("Sheet2").Range("D3") = "112016"

End Sub
You can see the simple pattern here. You can write to any cell in any worksheet from any workbook. It is just a matter of changing the workbook name, worksheet name and the range to suit your needs.
Take a look at the workbook part
Workbooks("Example.xlsx")
The Workbooks keyword refers to a collection of all open workbooks. Supplying the workbook name to the collection gives us access to that workbook. When we have the object we can use it to perform tasks with the workbook.
Troubleshooting the Workbooks Collection
When you use the Workbooks collection to access a workbook, you may get the error message:
Run-time Error 9: Subscript out of Range.
This means that VBA cannot find the workbook you passed as a parameter.
This can happen for the following reasons
- The workbook is currently closed.
- You spelled the name wrong.
- You created e new workbook (e.g. Book1) and tried to access it using Workbooks(“Book1.xlsx”). It’s name is not Book1.xlsx until it is saved for the first time.
- (Excel 2007/2010 only) If you are running two instances of Excel then Workbooks() only refers to to the workbooks open in the current Excel instance.
- You passed a number as Index and it is greater than the number of workbooks open e.g. you used Workbooks(3) and only two workbooks are open.
If you cannot resolve the error then use either of the functions in the section Finding all open Workbooks. These will print the names of all open workbooks to the Immediate Window(Ctrl + G).
Examples of Using the VBA Workbook
The following examples show what you can do with the workbook.
Note: To try this example create two open workbooks called Test1.xlsx and Test2.xlsx.
' https://excelmacromastery.com/
Public Sub WorkbookProperties()

    ' Prints the number of open workbooks
    Debug.Print Workbooks.Count

    ' Prints the full workbook name
    Debug.Print Workbooks("Test1.xlsx").FullName

    ' Displays the full workbook name in a message dialog
    MsgBox Workbooks("Test1.xlsx").FullName

    ' Prints the number of worksheets in Test2.xlsx
    Debug.Print Workbooks("Test2.xlsx").Worksheets.Count

    ' Prints the name of currently active sheet of Test2.xlsx
    Debug.Print Workbooks("Test2.xlsx").ActiveSheet.Name

    ' Closes workbook called Test1.xlsx
    Workbooks("Test1.xlsx").Close

    ' Closes workbook Test2.xlsx and saves changes
    Workbooks("Test2.xlsx").Close SaveChanges:=True

End Sub
Note: In the code examples I use Debug.Print a lot. This function prints values to the Immediate Window. To view this window select View->Immediate Window from the menu( Shortcut is Ctrl + G)


Accessing the VBA Workbook by Index
You can also use an Index number with Workbooks(). The index refers to the order the Workbook was open or created.
Workbooks(1) refers to the workbook that was opened first. Workbooks(2) refers to the workbook that was opened second and so on.
' First workbook that was opened
Debug.Print Workbooks(1).Name

' Third workbook that was opened
Debug.Print Workbooks(3).Name

' The last workbook that was opened
Debug.Print Workbooks(Workbooks.Count).Name
In this example, we used Workbooks.Count. This is the number of workbooks that are currently in the Workbooks collection. That is, the number of workbooks currently open. So using it as the Index gives us the last workbook that was opened
Using the index is not really useful unless you really need to know the order. For this reason, you should avoid using it. You should use the workbook name with Workbooks() instead.
Finding all Open Workbooks
Sometimes you may want to access all the workbooks that are open. In other words, all the items in the Workbooks() collection.
You can do this using the For Each loop.
' https://excelmacromastery.com/
Public Sub PrintWrkFileName()

    ' Prints out the full filename of all open workbooks
    Dim wrk As Workbook
    For Each wrk In Workbooks
        Debug.Print wrk.FullName
    Next wrk

End Sub
You can also use the standard For loop to access all the open workbooks
' https://excelmacromastery.com/
Public Sub PrintWrkFileNameIdx()

    ' Prints out the full filename of all open workbooks
    Dim i As Long
    For i = 1 To Workbooks.Count
        Debug.Print Workbooks(i).FullName
    Next i

End Sub
For accessing workbooks, either of these Loops is fine. The standard For loop is useful if you want to use a different order or you need to use a counter.
Note: Both examples read in the order of the first opened to the last opened. If you want to read in reverse order(last to first) you can do this
' https://excelmacromastery.com/
Public Sub PrintWrkFileNameIdxRev()

    ' Prints out the full filename of all open workbooks
    ' in reverse order.
    Dim i As Long
    For i = Workbooks.Count To 1 Step -1
        Debug.Print Workbooks(i).FullName
    Next i

End Sub
Open Workbook
So far we have dealt with workbooks that are already open. Of course, having to manually open a workbook before running a Macro, defeats the purpose of automating tasks. The Open Workbook task should be performed by VBA.
The following VBA code opens the workbook “Book1.xlsm” in the “C:Docs” folder
' https://excelmacromastery.com/
Public Sub OpenWrk()

    ' Open the workbook and print the number of sheets it contains
    Workbooks.Open ("C:DocsBook1.xlsm")

    Debug.Print Workbooks("Book1.xlsm").Worksheets.Count

    ' Close the workbook without saving
    Workbooks("Book1.xlsm").Close saveChanges:=False

End Sub
It is a good idea to check a workbook actually exists before you try to open it. This will prevent you getting errors. The Dir function allows you to easily do this .
' https://excelmacromastery.com/
Public Sub OpenWrkDir()

    If Dir("C:DocsBook1.xlsm") = "" Then
        ' File does not exist - inform user
        MsgBox "Could not open the workbook. Please check it exists"
    Else
        ' open workbook and do something with it
        Workbooks.Open("C:DocsBook1.xlsm")
    End If

End Sub
Check For Open Workbook
If you are opening a workbook as Read-Only, it doesn’t matter if it is already open. However, if you’re going to update data in a workbook then it is a good idea to check if it is already open.
The function below can be used to check if the workbook is currently open. If not, then it will open the workbook. In either case you will end up with the workbook opened.
(The code below is taken from this StackOverFlow entry.)
' https://excelmacromastery.com/
Function GetWorkbook(ByVal sFullFilename As String) As Workbook

    Dim sFilename As String
    sFilename = Dir(sFullFilename)

    On Error Resume Next
    Dim wk As Workbook
    Set wk = Workbooks(sFilename)

    If wk Is Nothing Then
        Set wk = Workbooks.Open(sFullFilename)
    End If

    On Error Goto 0
    Set GetWorkbook = wk

End Function
You can use this function like this
' https://excelmacromastery.com/
Sub ExampleOpenWorkbook()

    Dim sFilename As String
    sFilename = "C:DocsBook2.xlsx"

    Dim wk As Workbook
    Set wk = GetWorkbook(sFilename)

End Sub
This code is fine is most situations. However, if the workbook could be currently open in read-only mode or could be currently opened by another user then you may want to use a slightly different approach.
An easy way to deal this with this scenario is to insist that the file must be closed for the application to run successfully. You can use the function below to simply check is the file already open and if so inform the user that it must be closed first.
(The code below is also taken from this StackOverFlow entry)
' https://excelmacromastery.com/
' Function to check if workbook is already open
Function IsWorkBookOpen(strBookName As String) As Boolean

    Dim oBk As Workbook

    On Error Resume Next
    Set oBk = Workbooks(strBookName)
    On Error GoTo 0

    If Not oBk Is Nothing Then
        IsWorkBookOpen = True
    End If

End Function
An example of using this function is shown below. In this case, if the workbook is already open then you inform the user that is must be closed for the macro to proceed.
' https://excelmacromastery.com/
Sub ExampleUse()

    Dim sFilename As String
    sFilename = "C:tempwritedata.xlsx"

    If IsWorkBookOpen(Dir(sFilename)) = True Then
        MsgBox "File is already open. Please close file and run macro again."
        Exit Sub
    End If

    ' Write to workbook here

End Sub
If you need to check if the workbook is open in another instance of Excel you can use the ReadOnly attribute of the workbook. It will be set to true if it is open in another instance.
Close Workbook
To Close a Workbook in Excel VBA is very simple. You simply call the Close method of the workbook.
wk.Close
Normally when you close a workbook in VBA, you don’t want to see messages from Excel asking if you want to save the file.
You can specify whether to save the workbook or not and then the Excel messages will not appear.
' Don't save changes
wk.Close SaveChanges:= False

' Do save changes
wk.Close SaveChanges:= True
Obviously, you cannot save changes to a workbook that is currently open as read-only.
Save Workbook
We have just seen that you can save a workbook when you close it. If you want to save it any other stage you can simply use the Save method
wk.Save
You can also use the SaveAs method
wk.SaveAs "C:Backupsaccounts.xlsx"
The Workbook SaveAs method comes with twelve parameters which allow you to add a password, set the file as read-only and so on. You can see the details here.
You can also use VBA to save the workbook as a copy using SaveCopyAs
wk.SaveCopyAs "C:DocsCopy.xlsm"
Copy Workbook
If the workbook is open you can use the two methods in the above section to create a copy i.e. SaveAs and SaveCopyAs.
If you want to copy a workbook without opening it then you can use FileCopy as the following example demonstrates
Public Sub CopyWorkbook()
    FileCopy "C:DocsDocs.xlsm", "C:DocsExample_Copy.xlsm"
End Sub
Using the File Dialog To Open a Workbook
The previous section shows you how to open a workbook with a given name. Sometimes you may want the user to select the workbook. You can easily use the Windows File Dialog shown here.

The Windows File Dialog
The FileDialog is configurable and you can use it to
- Select a file.
- Select a folder.
- Open a file.
- “Save As” a file.
If you just want the user to select the file you can use the GetOpenFilename function.
The following function opens a workbook using the File Dialog. The function returns the full file name if a file was selected. If the user cancels it displays a message and returns an empty string.
' https://excelmacromastery.com/
Public Function UserSelectWorkbook() As String

    On Error Goto ErrorHandler

    Dim sWorkbookName As String

    Dim FD As FileDialog
    Set FD = Application.FileDialog(msoFileDialogFilePicker)

    ' Open the file dialog
    With FD
        ' Set Dialog Title
        .Title = "Please Select File"

        ' Add filter
        .Filters.Add "Excel Files", "*.xls;*.xlsx;*.xlsm"

        ' Allow selection of one file only
        .AllowMultiSelect = False

        ' Display dialog
        .Show

        If .SelectedItems.Count > 0 Then
            UserSelectWorkbook = .SelectedItems(1)
        Else
            MsgBox "Selecting a file has been cancelled. "
            UserSelectWorkbook = ""
        End If
    End With

    ' Clean up
    Set FD = Nothing
Done:
    Exit Function
ErrorHandler:
    MsgBox "Error: " + Err.Description
End Function
When you call this function you have to check for the user cancelling the dialog. The following example shows you how to easily call the UserSelectWorkbook function and handle the case of the user cancelling
' https://excelmacromastery.com/
Public Sub TestUserSelect()

    Dim userBook As Workbook, sFilename As String

    ' Call the UserSelectworkbook function
    sFilename = UserSelectWorkbook()

    ' If the filename returns is blank the user cancelled
    If sFilename <> "" Then
        ' Open workbook and do something with it
        Set userBook = Workbooks.Open(sFilename)
    End If

End Sub
You can customise the dialog by changing the Title, Filters and AllowMultiSelect in the UserSelectWorkbook function.
Using ThisWorkbook
There is an easier way to access the current workbook than using Workbooks(). You can use the keyword ThisWorkbook. It refers to the current workbook i.e. the workbook that contains the VBA code.
If our code is in a workbook call MyVBA.xlsm then ThisWorkbook and Workbooks(“MyVBA.xlsm”) refer to the same workbook.
Using ThisWorkbook is more useful than using Workbooks(). With ThisWorkbook we do not need to worry about the name of the file. This gives us two advantages:
- Changing the file name will not affect the code
- Copying the code to another workbook will not require a code change
These may seem like very small advantages. The reality is your filenames will change all the time. Using ThisWorkbook means your code will still work fine.
The following example shows two lines of code. One using ThisWorkbook and one using Workbooks(). The one using Workbooks will no longer work if the name of MyVBA.xlsm changes.
' https://excelmacromastery.com/
Public Sub WriteToCellUsingThis()

    ' Both lines do the same thing.
    Debug.Print ThisWorkbook.FullName
    Debug.Print Workbooks("MyVBA.xlsm").FullName

End Sub
Using the ActiveWorkbook
ActiveWorkbook refers to the workbook that is currently active. This is the one that the user last clicked on.
This can seem useful at first. The problem is that any workbook can become active by a simple mouse click. This means you could easily write data to the wrong workbook.
Using ActiveWorkbook also makes the code hard to read. It may not be obvious from the code which workbook should be the active one.
I hope I made it clear that you should avoid using ActiveWorkbook unless you really have to. If you must then be very careful.
Examples of the Accessing the Workbook
We’ve looked at all the ways of accessing a workbook. The following code shows examples of these ways
' https://excelmacromastery.com/
Public Sub WorkbooksUse()

    ' This is a workbook that is already open and called MyVBA.xlsm
    Debug.Print Workbooks("MyVBA.xlsm").FullName

    ' The workbook that contains this code
    Debug.Print ThisWorkbook.FullName

    ' The open workbook that was opened first
    Debug.Print Workbooks(1).FullName

    ' The open workbook that was opened last
    Debug.Print Workbooks(Workbooks.Count).FullName

    ' The workbook that is the currently active one
    Debug.Print ActiveWorkbook.FullName

    ' No workbook mentioned - the active one will be used
    Debug.Print Worksheets("Sheet1").Name

    ' A closed workbook called Book1.xlsm in folder C:Docs
    Workbooks.Open ("C:DocsBook1.xlsm")
    Debug.Print Workbooks("Book1.xlsm").FullName
    Workbooks("Book1.xlsm").Close

End Sub
Declaring a VBA Workbook variable
The reason for declaring a workbook variable is to make your code easier to read and understand. It is easier to see the advantage of using an example
' https://excelmacromastery.com/
Public Sub OpenWrkObjects()

    Dim wrk As Workbook
    Set wrk = Workbooks.Open("C:DocsBook1.xlsm")

    ' Print number of sheets in each book
    Debug.Print wrk.Worksheets.Count
    Debug.Print wrk.Name

    wrk.Close

End Sub
You can set a workbook variable with any of the access methods we have seen.
The following shows you the same code without a workbook variable
' https://excelmacromastery.com/
Public Sub OpenWrkNoObjects()

   Workbooks.Open ("C:DocsBook1.xlsm")

   Debug.Print Workbooks("Book2.xlsm").Worksheets.Count
   Debug.Print Workbooks("Book2.xlsm").Name

    Workbooks("Book2.xlsm").Close

End Sub
In these examples the difference is not major. However, when you have a lot of code, using a variable is useful particularly for worksheet and ranges where the names tend to be long e.g. thisWorkbook.Worksheets(“Sheet1”).Range(“A1”).
You can name the workbook variable to be something like wrkRead or wrkWrite. Then at a glance you can see what this workbook is being used for.
Create New Workbook
To create a new workbook you use the Workbooks Add function. This function creates a new blank workbook. It is the same as selecting New Workbook from the Excel File menu.
When you create a new workbook you will generally want to save it. The following code shows you how to do this.
' https://excelmacromastery.com/
Public Sub AddWordbook()

    Dim wrk As Workbook
    Set wrk = Workbooks.Add

    ' Save as xlsx. This is the default.
    wrk.SaveAs "C:TempExample.xlsx"

    ' Save as a Macro enabled workbook
    wrk.SaveAs "C:TempExample.xlsm", xlOpenXMLWorkbookMacroEnabled

End Sub
When you create a new workbook it normally contains three sheets. This is determined by the property Application.SheetsInNewWorkbook.
If you want to have a different number of sheets in a new workbook then you change this property before you create the new workbook. The following example shows you how to create a new workbook with seven sheets.
' https://excelmacromastery.com/
Public Sub AddWordbookMultiSheets()

    ' Store SheetsInNewWorkbook value so we can reset it later
    Dim sheetCnt As Long
    sheetCnt = Application.SheetsInNewWorkbook

    ' Set sheets in a new workbook to be 7
    Application.SheetsInNewWorkbook = 7

    ' Workbook will be created with 7 sheets
    Dim wrk As Workbook
    Set wrk = Workbooks.Add

    ' Display sheet count
    Debug.Print "number of sheets: " & CStr(wrk.Worksheets.Count)

    ' Reset to original value
    Application.SheetsInNewWorkbook = sheetCnt

End Sub
The With keyword and the Workbook
The With keyword makes reading and writing VBA code easier. Using With means you only need to mention the item once. With is used with Objects. These are items such as Workbooks, Worksheets and Ranges.
The following example has two Subs. The first is similar to code we have seen so far. The second uses the With keyword. You can see the code is much clearer in the second Sub. The keywords End With mark the finish of a section code using With.
' https://excelmacromastery.com/
' Not using the With keyword
Public Sub NoUsingWith()

   Debug.Print Workbooks("Book2.xlsm").Worksheets.Count
   Debug.Print Workbooks("Book2.xlsm").Name
   Debug.Print Workbooks("Book2.xlsm").Worksheets(1).Range("A1")
   Workbooks("Book2.xlsm").Close

End Sub

' Using With makes the code easier to read
Public Sub UsingWith()

    With Workbooks("Book2.xlsm")
        Debug.Print .Worksheets.Count
        Debug.Print .Name
        Debug.Print .Worksheets(1).Range("A1")
        .Close
    End With

End Sub
Summary
The following is a brief summary of the main points of this post
- To get the workbook containing the code use ThisWorkbook.
- To get any open workbook use Workbooks(“Example.xlsx”).
- To open a workbook use Set Wrk = Workbooks.Open(“C:FolderExample.xlsx”).
- Allow the user to select a file using the UserSelectWorkbook function provided above.
- To create a copy of an open workbook use the SaveAs property with a filename.
- To create a copy of a workbook without opening use the FileCopy function.
- To make your code easier to read and write use the With keyword.
- Another way to make your code clear is to use a Workbook variables
- To run through all open Workbooks use For Each wk in Workbooks where wk is a workbook variable.
- Try to avoid using ActiveWorkbook and Workbooks(Index) as their reference to a workbook is temporary.
You can see a quick guide to the topic at the top of this post
Conclusion
This was an in-depth post about a very important element of VBA – the Workbook. I hope you found it beneficial. Excel is great at providing many ways to perform similar actions but the downside is it can lead to confusion at times.
To get the most benefit from this post I recommend you try out the examples. Create some workbooks and play around with the code. Make changes to the code and see how the changes affect the outcome. Practice is the best way to learn VBA.
If you found this post useful then feel free to share it with others using the bar at the side.
What’s Next?
Free VBA Tutorial If you are new to VBA or you want to sharpen your existing VBA skills then why not try out the The Ultimate VBA Tutorial.
Related Training: Get full access to the Excel VBA training webinars and all the tutorials.
(NOTE: Planning to build or manage a VBA Application? Learn how to build 10 Excel VBA applications from scratch.)
 One of the most basic and common operations in Excel is opening a workbook. Regardless of their level (beginner or advanced), virtually every single Excel user has to constantly open workbooks. In fact:
You’ve probably opened a countless amount of Excel workbooks yourself.
If you’re working with VBA, it’s only a matter of time before you need to start creating macros to open Excel workbooks. This Excel tutorial focuses on this basic and common Excel operation:
How to open a workbook using VBA.
I cover this topic by explaining 2 of the most basic macros you can use to open an Excel workbook.
This Excel VBA Open Workbook Tutorial is accompanied by an Excel workbook containing the data and basic structure macros I use below. You can get immediate free access to this example workbook by clicking the button below.

Both of these macros rely on 1 or both of the following methods:
- The Workbooks.Open method.
- The Application.GetOpenFilename method.
Therefore, the second part of this tutorial analyzes both of these methods and goes through each of their parameters. The purpose of this section is to help you get some basic awareness of some of the things you can do when using these methods in your macros.
In addition to help you open workbooks using VBA, the Application.GetOpenFilename method allows you to specify the paths and names of particular Excel workbooks. You’ll likely encounter situations where knowing this (how to allow the user to specify a path and filename) can come in handy.
So let’s take a look at the exact topics that I explain in this blog post:
And let’s start by taking a look at what is, perhaps, the simplest case of opening an Excel workbook using VBA:
How To Open A Workbook Using VBA: The Basic Case
Within Visual Basic for Applications, the method that opens an Excel workbook is the Workbooks.Open method.
The Workbooks.Open method has 15 optional arguments. Each of these 15 optional arguments allows you determine a different aspect of how the Open method opens an Excel workbook.
Since taking a look at 15 arguments at once can get a little overwhelming, let’s start by taking a look at the most basic case: opening an Excel workbook whose name you know. You specify which workbook you want to open by using the Filename argument.
More specifically, the basic VBA statement syntax to open a particular workbook is:
Workbooks.Open Filename:="File_Name"
Or
Workbooks.Open "File_Name"
Where “File_Name” is the file name of the workbook that you want to open with VBA. As shown in the example below, when specifying the workbook’s file name, you must provide the full path and name of the file. I explain how to make this easier below.
The first sample statement above uses named arguments (Filename:=”File_Name”). For the reasons that I explain here, this is my preferred syntax. However, you can also use the second syntax (simply “File_Name”.
Let’s take a look at the Workbooks.Open method in practice:
The following macro (named Open_Workbook_Basic), opens the Excel workbook whose name is “Example – VBA open workbook”. This workbook is saved in the D drive.

As mentioned above, notice that when specifying the filename, you must provide the whole file path, name and extension.

The sample file path above is relatively simple. In particular, there’s no need to go through several sub-folders in order to get to the sample workbook. However…
Probably not many people are able to remember the exact file paths, names and extensions for the files in their laptop. And even then, few would want to type the whole thing every time a new Excel workbook is to be opened. In other words: Having the user type the filename (without browsing) is both:
- Tedious; and
- Prone to errors/mistakes.
Since you want to ensure that your macro receives the correct file name (including the whole path and its extension), you’ll usually use slightly more complicated macros than the sample Open_Workbook_Basic Sub procedure displayed above.
Let’s take a look at the simplest way to do this: replicating the way Excel usually works when you browse the computer drive in order to find the particular file you want to open.
How To Open A Workbook Using VBA: Get The File Path With The GetOpenFilename Method
You’re probably quite familiar with the following dialog box:

This is the Open dialog box. Excel displays this dialog whenever you browse for purposes of finding and selecting a file to open.
Usually, whenever Excel displays the Open dialog box, you simply need to:
- Navigate to the folder containing the Excel workbook you want to open.
- Select the file to be opened and click on the Open button in the lower-right corner of the Open dialog.
The following screenshot shows how the Open dialog looks like if you were to open the workbook named “Example – VBA open workbook” that the Open_Workbook_Basic macro above opens.

You’ll probably agree with me that using this method of choosing the particular Excel workbook that you want to open is much easier than remembering the full file path.
Fortunately, you can replicate this way of operating with VBA. More precisely, you do this by using the Application.GetOpenFilename method.
Excel’s Application.GetOpenFilename method does 2 things:
- Displays a customizable Open dialog box; and
- Returns the full path/name/extension of the file chosen by the user.
The Application.GetOpenFilename method doesn’t open the file chosen by the user. You still need to rely on the Workbooks.Open method explained above for purposes of actually opening the chosen file. GetOpenFilename simply gives you a mechanism/tool to ask the user for the name(s) of the file(s) that the procedure works with.
The fact that GetOpenFilename doesn’t actually open the file makes this a very versatile method. The reason is that this allows you to use this precise same method in cases in which you need to get the path/name/extension of an Excel workbook for purposes other than opening it.
Therefore, in order to open an Excel workbook through the Open dialog box while using VBA, you need to use both of the following methods:
- Item #1: The Application.GetOpenFilename method returns the name of the workbook to be opened.
- Item #2: The Workbooks.Open method actually opens the workbook whose path/name/extension is provided by the Application.GetOpenFilename method.
The Application.GetOpenFilename method has 5 variables. However, just as we did with the Workbooks.Open method, let’s take a look at a very basic piece of VBA code that allows you to:
- Browse the available drives for purposes of finding and selecting the Excel workbook you want to open; and
- Actually open the selected file.
In such a case, the syntax of the basic VBA statements that you need is as follows:
Dim my_FileName As Variant
my_FileName = Application.GetOpenFilename(FileFilter:="Excel Files,*.xl*;*.xm*")
If my_FileName <> False Then
    Workbooks.Open FileName:=my_FileName
End If
The following screenshot shows the full VBA code of a sample macro called “Open_Workbook_Dialog”.

This Excel VBA Open Workbook Tutorial is accompanied by an Excel workbook containing the data and basic structure macros I use (including the Open_Workbook_Dialog macro). You can get immediate free access to this example workbook by clicking the button below.
Let’s take a look at each of the statements that makes part of the Open_Workbook_Dialog macro to understand how it proceeds:
Statement #1: Dim my_FileName As Variant
This particular statement is a variable declaration statement. The purpose of declaring a variable in this macro is to store the file name chosen by the user.
This variable declaration statement can be divided in the following 3 items:

Item #1: Dim Statement
As I explain in this macro tutorial, the Dim statement is the most common way to declare a VBA variable.
Item #2: Variable Name
In this particular case, the name of the variable being declared is “my_FileName”.
Item #3: Data Type
my_FileName is declared as being of the Variant data type. This variable is declared as a Variant because the Application.GetOpenFilename method can return different types of data.
Statement #2: my_FileName = Application.GetOpenFilename(FileFilter:=”Excel Files,*.xl*;*.xm*”)
This VBA statement is characterized by the following 2 aspects:
- Makes an assignment to the VBA variable my_FileName; and
- Uses the GetOpenFilename method that I introduce above.
For purposes of carrying out a closer examination of this statement, I divide it in the following 3 items:

Let’s take a look at each of them separately:
Item #1: my_FileName =
The first part of the statement follows the general rule in which a value or expression is assigned to a VBA variable, by using the equal sign (=).
In these cases, the equal sign (=) is an assignment operator. Therefore, it doesn’t represent an equality.
In the case of the Open_Workbook_Dialog macro, the equal sign (=) is assigning:
- The result of the expression that appears to its right (which I explain in the next section below); to
- The VBA variable that is on the left side (my_FileName).
Let’s take a look at the items on the right side of the equal sign:
Item #2: Application.GetOpenFilename
This item is the reference to the Application.GetOpenFilename method. As explained above, this particular method:
- Displays a customizable Open dialog box; and
- Returns the file name chosen by the user (without actually opening it).
- If the user selects multiple files (you can determine this by using the MultiSelect argument I explain below, GetOpenFilename returns an array of the file names chosen by the user. This is the case even if the user only selects 1 file.
- If the user cancels the Open dialog box (for example, presses the Cancel button), GetOpenFilename returns False.
This leads us to the last item of the statement:
Item #3: (FileFilter:=”Excel Files,*.xl*;*.xm*”)
FileFilter is one of the different parameters of the GetOpenFilename method. As implied by its name, this argument allows you to specify criteria for file-filtering.
It’s an optional argument. However, I include it for purposes of specifying file filtering criteria.
If you omit the FileFilter argument when using the GetOpenFilename method, it defaults to all files (*.*).
In the sample VBA code that appears above (and throughout the rest of this Excel tutorial), I use named arguments. However, that’s not mandatory. If you don’t want to use named arguments, you can use the following statement syntax:
my_FileName = Application.GetOpenFilename("Excel Files,*.xl*;*.xm*")
Let’s take a look at the characteristics of the FileFilter argument:
Characteristic #1: What Does The FileFilter Argument Do.
As explained above, FileFilter determines what are the criteria used for filtering files when the Open dialog box is displayed.
In more practical terms, the FileFilter argument determines what appears in the Files of type drop-down list box on the lower-right corner of the Open dialog box. As shown in the image below, in the case of the Open_Workbook_Dialog macro there’s only one item in the Files of type drop-down list box (Excel Files):

Characteristic #2: Syntax Of The FileFilter Argument.
The appropriate syntax of the FileFilter Argument is determined by the following rules:
- Rule #1: Each individual filter is specified by pairing 2 strings as follows:
- Part #1: A descriptive string. You can omit this part, although I wouldn’t recommend it. In the case of the sample Open_Workbook_Dialog macro, this is “Excel Files”. Notice (in the image above) how this is the text that actually appears in the Files of the type drop-down list of the Open dialog box.
- Part #2: A comma (,) separating part #1 above and part #2 below.
- Part #3: The MS-DOS wildcard file-type filter specification. In other words, this part determines how the files are filtered, depending on their type. In the Open_Workbook_Dialog macro, this part is *.xl*;*.xm*.
- Rule #2: The structure of the file types that you use in the filter specification (part #3 above) is generally (i) an asterisk (*), (ii) a dot (.), and (iii) an indication of the file extension using an asterisk (as wildcard, if necessary) and (if necessary) letters. At the most basic level, the way to specify all files is asterisk dot asterisk (*.*). For example, the Open_Workbook_Dialog macro uses the following 2 file type specifications: *.xl* and *.xm*. Notice how, in both cases: (i) there is an asterisk (*) followed by (ii) a dot (.) and (iii) the first 2 letters of the file extension (xl and xm) followed by an asterisk (*) used as wildcard. Due to the wildcard asterisk, these 2 specifications cover any file extension beginning with .xl (such as .xlsx, .xlsm, .xlsb, .xltx, .xltm, .xls, .xlt, .xlam, .xla and .xlw) or .xm (.xml).
- Rule #3: As shown by the fact that the Open_Workbook_Dialog macro uses 2 file type specifications, you can include 1 or several file types in a particular filter. When including more than 1 file type in a particular filter, you must separate them with a semi-colon (;). Notice how this is the case in the macro under analysis. More precisely, .xl* and *.xm* are separated by a semi-colon (;) (*.xl*;*.xm*).
- Rule #4: In addition to the possibility of using multiple file-types, you can create more than 1 actual filter. In such a case, you separate the filters using commas (,). The sample Open_Workbook_Dialog macro above only has one filter. This is determined by the string pairing “Excel Files,*.xl*;*.xm*”. You can, however, separate this single filter into 2 filters (displaying “xl Files” for *.xl* and “xm Files” for *.xm*) as follows:
 The way to get these 2 filters is to replace the single string pairing “Excel Files,*.xl*;*.xm*” with the following: “xl Files,*.xl*,xm Files,*.xm*”.
 The way to get these 2 filters is to replace the single string pairing “Excel Files,*.xl*;*.xm*” with the following: “xl Files,*.xl*,xm Files,*.xm*”.
Summary Of Statement #2
The final effect of the whole statement explained above is as follows:
- #1: The Open dialog box is displayed to allow the user to select a file.
- #2: If the user selects a file, its file name is assigned to the variable called my_FileName.
This leads us to the last statement of the Open_Workbook_Dialog macro, which uses the value of the my_FileName variable.
Statement #3: If my_FileName <> False Then Workbooks.Open FileName:=my_FileName
End If
This is an If… Then… Else statement. These type of statements proceed as follows:
- Step #1: Carry out a test to determine whether a particular condition is met.
- Step #2: If the condition is met, a certain group of statements are executed. If the condition isn’t met, the statements aren’t executed.
In the case of the Open_Workbook_Dialog macro, the If… Then… Else statement proceeds as follows:
Step #1: Determine Whether The User Has Select a Workbook
Statement #2 (explained above) assigns the file selected by the user to the variable my_FileName. If the user fails to select a file (by, for example, cancelling the operation), my_FileName returns False.
The test carried out by the If… Then… Else statement under analysis checks whether the my_FileName variable has been assigned a particular file path/name/extension by testing the condition “my_FileName <> False”.
In other words, the condition “my_FileName <> False” is met only when the user has chosen a particular workbook in the Open dialog box displayed by the Application.GetOpenFilename method.
If the condition is met, the If…Then… Else statement proceeds to:
Step #2: Open Excel Workbook
The second part of the If… Then… Else statement we’re looking at is “Workbooks.Open FileName:=my_FileName”.
You already know what this statement does. It’s the Workbooks.Open method described above.
The purpose of the Workbooks.Open method is to open an Excel workbook. In this case, the workbook that is opened is that whose file name has been assigned to the variable my_FileName.
In other words, if the user selects a file when the Open dialog box is displayed, the If… Then… Else statement opens that file.
The Workbooks.Open Method: A Closer Look
As explained at the beginning of this Excel tutorial, Workbooks.Open is the method that you’ll generally use to open Excel workbooks using VBA.
We have already seen the basics of the Workbooks.Open method and its most basic use above. However, in that particular case, I mentioned that this method has 15 different parameters. So far, we’ve only checked one: FileName.
I assume that, if you’re reading this, you want to learn about some more advanced cases of opening Excel workbooks using VBA. In order to do this, let’s take a closer look at the Workbooks.Open method and its different parameters.
The Workbooks.Open Method: Full Syntax
The full syntax of the Workbooks.Open method in Visual Basic for Applications is as follows:
expression.Open(FileName, UpdateLinks, ReadOnly, Format, Password, WriteResPassword, IgnoreReadOnlyRecommended, Origin, Delimiter,Editable, Notify, Converter, AddToMru, Local, CorruptLoad)
In this case, “expression” stands for a variable representing a Workbook object. In most cases, however, you can simply rely on the syntax used in the sample Open_Workbook_Basic and Open_Workbook_Dialog macros.
In other words, you’ll generally replace “expression” with the Workbooks object itself:
Workbooks.Open
All of the parameters of the Workbooks.Open method, which appear within parentheses above, are optional. Let’s take a look at them!
Parameters Of The Workbooks.Open Method
The following table introduces the 15 optional parameters of the Workbooks.Open method.
| Position | Name | Description |
| 1 | FileName | Name of workbook to be opened. |
| 2 | UpdateLinks | Way in which external references/links in the file are updated. |
| 3 | ReadOnly | Determines whether workbook opens in read-only mode. |
| 4 | Format | Applies when opening a text file.
Determines the delimiter character. |
| 5 | Password | Password required to open protected workbook. |
| 6 | WriteResPassword | Password required to write in a write-reserved workbook. |
| 7 | IgnoreReadOnlyRecommended | Applies when a workbook is saved with Read-Only Recommended option enabled.
Determines whether the read-only recommended message is displayed. |
| 8 | Origin | Applies when opening a text file.
Indicates where the file originated. |
| 9 | Delimiter | Applied when opening a text file and the Format parameter above (No. 4) is a custom character.
Specifies what is the custom character to be used as delimiter. |
| 10 | Editable | Applies to: (i) old Excel add-ins (created in Excel 4.0) and (ii) templates.
When applied to an Excel 4.0 add-in, determines whether add-in is opened as hidden or visible. If applied to a template, determines whether template is opened for editing, or if a new workbook (based on the template) is created. |
| 11 | Notify | Applies when a file can’t be opened in read/write mode.
Determines whether file is added to file notification list (or no notification is requested). |
| 12 | Converter | Determines what file converter to try upon opening the file. |
| 13 | AddToMru | Determines whether file is added to list of recent files. |
| 14 | Local | Determines whether file is saved against language of Excel (usually local) or VBA (usually US-English). |
| 15 | CorruptLoad | Determines the processing of the file when opened |
I provide a more detailed description of the parameters in the sections below. The only exception is the FileName argument, which I explain above.
However, let’s take a closer look at the other parameters:
Argument #2: UpdateLinks
The UpdateLinks argument is the one you can use if you’re interested in determining whether the external references or links within the opened Excel workbook are or aren’t updated.
In other words, UpdateLinks determines how those external references or links are updated. The UpdateLinks parameter can take the following 2 values:
- 0: In this case, external references/links aren’t updated when the Excel workbook is opened.
- 3: When using this value, the external references/links are updated when the workbook opens.
The following screenshot shows the VBA code of the sample Open_Workbook_Basic macro where the UpdateLinks parameter has been added and is set to 3.

Since the UpdateLinks parameter isn’t required, you can omit it. In that case, Excel generally defaults to asking the user how links are updated.
Argument #3: ReadOnly
If you set the ReadOnly argument to True, the Excel workbook is opened in read-only mode.
When this argument is added to the sample Open_Workbook_Basic macro, the VBA code looks as follows:

In this case, the Excel workbook is opened as read-only, meaning that any changes made aren’t saved.
When I execute the Open_Workbook_Basic macro, Excel warns me about the opened workbook being read-only. Check out, for example, the screenshot below:

Arguments #4 and#9: Format and Delimiter
The Format argument of the Workbooks.Open method is only relevant when opening text files.
Format determines what the delimiter character is. The delimiter is what allows you to split a single piece of content into different cells. By choosing the value of the Format argument, you specify what delimiter is used.
The following are the possible Format values and the delimiter each of them represents:
- 1: Tabs.
- 2: Commas.
- 3: Spaces.
- 4: Semicolons.
- 5: Nothing.
- 6: A custom character, which you then specify by using the Delimiter argument. The Delimiter argument must be a string. Also, the Delimiter is a single character. If you enter a longer string, the first character of the string is used as delimiter.
If you omit the Format argument when opening a text file, Excel uses whatever delimiter is currently being used.
Since the Open_Workbook_Basic macro makes reference to the Excel workbook named “Example – VBA open workbook.xlxs”, the Format argument isn’t really useful. However, for illustration purposes, the following screenshot shows the VBA code behind this macro using this argument for purposes of setting spaces as the delimiter.

The following image shows how the VBA code looks like if the Format argument is set to 6 (custom delimiter) and the Delimiter argument is defined as ampersand (&).

Arguments #5 and #6: Password and WriteResPassword
You’d generally use the Password and WriteResPassword arguments when you’re working with Excel workbooks that are protected or write-reserved.
Both the Password and WriteResPassword are strings representing a particular password. Their main difference is on what type of protection the Excel workbook being opened has. More precisely:
- Password: Is the password required to open a protected Excel workbook.
- WriteResPassword: Is the password required to write in a write-reserved workbook.
If you’re opening an Excel workbook that anyway requires a password and you omit the relevant argument (Password or WriteResPassword, as the case may be), Excel asks the user for the appropriate password.
Let’s assume, for illustrative purposes, that the “Example – VBA open workbook.xlsx” opened by the Open_Workbook_Basic macro is protected by the password “VBA open workbook”. The following screenshot displays the VBA code of the macro with the appropriate Password argument:

Argument #7: IgnoreReadOnlyRecommended
Set a particular Excel workbook to be read-only recommended by activating the Read-Only Recommended option when saving the relevant workbook.
The consequence of this is that, when the read-only recommended workbook is opened, Excel displays a message recommending that the workbook is opened as read-only.

If the IgnoreReadOnlyRecommended argument is set to True, Excel doesn’t display this particular message when opening the workbook.
The following screenshot displays the VBA code of the Open_Workbook_Basic macro with the IgnoreReadOnlyRecommended argument.

Note that, in this particular case, I’ve deleted the previously added ReadOnly argument. The reason for this is that, if both the ReadOnly and IgnoreReadOnlyRecommended arguments are set to True, Excel simply opens the workbook in read-only mode as required by the ReadOnly argument.
Argument #8: Origin
The Origin argument is only applicable when opening text files. You can use Origin to specify the platform (Microsoft Windows, Mac or MS-DOS) in which the file originated. Indicating the origin of the file allows Excel to map (i) code pages and (ii) Carriage Return/Line Feed properly.
The Origin argument generally takes one of the XlPlatform values, as follows:
- 1: xlMacintosh.
- 2: xlMSDOS.
- 3: xlWindows.
If you omit the Origin argument, Excel uses the operating system of the computer that is opening the file.
The file named “Example – VBA open workbook.xlsx” that is opened by the Open_Workbook_Basic macro isn’t a text file. Therefore, I include the Origin argument in the screenshot below (specifying the origin as Microsoft Windows) only for illustrative purposes:

Argument #9 (Delimiter) is explained above.
Argument #10: Editable
The Editable argument applies to the following types of files:
- Microsoft Excel 4.0 add-ins. You’ll probably not work too much with these because it’s quite an old format. To give you an idea: Excel 4.0 was released in 1992. Editable doesn’t apply to any add-ins that have been created in later versions of Excel.
- Excel templates.
The Editable parameter of the Workbooks.Open method works differently depending on which of the above files you’re working with. The general rules are as follows:
When working with Microsoft Excel 4.0 add-ins:
- Setting Editable to True, opens the relevant add-in in a visible window.
- Setting Editable to False (which is the default value), opens the add-in as hidden. Additionally, the add-in can’t be unhidden.
When working with a template:
- Setting Editable to True opens the template for editing.
- Setting Editable to False (the default value), opens a new Excel workbook that is based on the relevant template.
The workbook opened by the sample Open_Workbook_Basic property is neither a Microsoft Excel 4.0 add-on nor a template. Therefore, the Editable parameter isn’t applicable.
However, for illustrative purposes, the following is an example of how the VBA code to open “Example – VBA open workbook.xlsx” workbooks looks like with the Editable parameter set to True:

Argument #11: Notify
The Notify argument of the Workbooks.Open method applies when you’re opening a file that can’t be opened in read/write mode. If you set the Notify argument to True, Visual Basic for Applications proceeds as follows whenever it encounters such a file:
- Step #1: The file is opened as read-only and added to the file notification list. The file notification list stores files that could only be opened in read-only mode.
- Step #2: The status of the file notification list is checked to confirm when the file is available. In more precise terms, the file notification list is polled.
- Step #3: When the file becomes available, the user is notified about this.
If you omit the Notify argument, or set it to False:
- The file isn’t added to the file notification list. In other words, no notification that the file is available is requested or received.
- The attempt to open a file that isn’t available simply fails.
The following screenshot shows the VBA code of the sample Open_Workbook_Basic macro with the Notify argument set to True:

Argument #12: Converter
The Converter argument is applicable whenever you want/need to use file converters. More precisely, you use the Converter parameter to specify the file converter that should be used first when Visual Basic for Applications tries to open a file.
In order to know how to specify a particular file converter, you need to understand the Application.FileConverters property. This property returns information about any file converters that are currently installed.
For example, if you use the Application.FileConverters property without specifying its arguments, the property returns an array with information about all the file converters that are installed. The array is organized as follows:
- The number of rows is equal to the number of installed file converters. Each converter has its own row.
- The number of columns is 3. The first column displays the long name of the relevant file converter. The second column contains the path of the converter’s DLL or code resource. The third column shows the file-extension search string.
When working with the Converter argument, you’ll be interested in the row numbers. The reason for this is the way in which you specify the first file converter to use when opening a file:
- The Converter argument is an index.
- Each file converter has such an index.
- The index is the row numbers of the file converters that the Application.FileConverters property (explained above) returns.
There may be situations in which the file converter that you specify with the Converter argument (which is tried first) doesn’t recognize the file being opened. In such cases, the other converters are tried.
Argument #13: AddToMru
AddToMru determines whether the Excel workbook that is being opened is added to the list of recently used files or not. MRU stands for Most Recently Used.
The most recently used list is the list of files that have been recently opened in Excel. You can generally find it in the Open tab of the Backstage View.

The default value of AddToMru is False. In this case, the workbook isn’t added to the list of recently used files.
In order to have the Excel workbook added to the list of recently used files, set AddToMru to True. The image below shows how this looks like in the case of the Open_Workbook_Basic macro:

Argument #14: Local
The Local parameter makes reference to language and localization settings. Therefore, you may encounter/use this argument if the macro you’re creating is to be used in an international setting where some computers may have different language settings.
More precisely, Local determines against which language are files saved. There are 2 possible values: True or False. Depending on the value you choose, files are saved as follows:
- True: Files are saved against Excel’s language. This language is generally determined from the control panel settings.
- False: Files are saved against VBA’s language. This language is generally English. There is a relatively obscure exception to this rule: When the VBA project containing the Workbooks.Open method is an old internationalized XL5/95 project. My guess is that the likelihood of you encountering such a file nowadays is about as high as that of finding the Microsoft Excel 4.0 add-ins which I refer to above.
The following image shows how the Local argument looks like when added to the sample Open_Workbook_Basic macro:

Argument #15: CorruptLoad
This is the final argument of the Workbooks.Open method. CorruptLoad determines how a file that has been corrupted is processed upon opening.
The CorruptLoad argument can take 1 of the following 3 values:
- 0: Represents xlNormalLoad. In this case, the Excel workbook is opened normally. This is the default value, and applies if you don’t specify anything else.
- 1: Stands for xlRepairFile. In such a case, the Excel workbook is opened in repair mode. In repair mode, Excel tries to recover as much as possible of the workbook being opened.
- 2: Is the value for xlExtractData. When using this processing mode, the workbook is opened in extract data mode. In extract data mode, Excel extracts the values and formulas from the workbook. Generally, you use extract data mode when the repair mode fails to recover the data/workbook appropriately.
In the following screenshot, the VBA code of the Open_Workbook_Basic macro includes the CorruptLoad parameter. In this case, CorruptLoad is set to 1 (xlRepairFile).

When executing this macro, Excel opens the “Example – VBA open workbook” file in repair mode and displays the following message:

The first time I read the arguments of the Workbooks.Open method, I was slightly surprised that there was no argument to determine whether macros are enabled or disabled upon opening an Excel workbook using VBA.
Eventually, I found out…
How To Enable Or Disable Macros In An Excel Workbook Opened With VBA
Macros are enabled by default whenever you open a file programmatically.
In order to modify the macro security setting that applies when opening an Excel workbook programmatically, you use the Application.AutomationSecurity property. This property allows you to set the security mode that Excel uses when opening files programmatically.
You can generally set the Application.AutomationSecurity property to any of the following 3 constants:
- 1: Represents msoAutomationSecurityLow which enables all macros. As mentioned at the beginning of this section, msoAutomationSecurityLow is the default value.
- 2: Stands for msoAutomationSecurityByUI. In this case, the actual security setting is set through the Security dialog box.
- 3: This is called msoAutomationSecurityForceDisable. This security mode disables all macros and doesn’t show any alerts. This restriction doesn’t apply to Microsoft Excel 4.0 macros. If you open (programmatically) an Excel workbook containing such type of macros, Excel anyway asks the user if the file should be opened or not. This is the case even if the property is set to msoAutomationSecurityForceDisable.
You may want to (generally) reset Application.AutomationSecurity to the default (msoAutomationSecurityLow) after opening the appropriate Excel workbook and before ending the relevant Sub. This reduces the risk of having problems later when a particular solution relies on that default value.
The Application.GetOpenFilename Method: A Closer Look
I introduce and explain the basics of the Application.GetOpenFilename method at the beginning of this Excel tutorial.
The main reason to use the Application.GetOpenFilename method is that it allows your users to select the Excel workbook they want to open without having to remember or type the full path/name/extension. This has 2 main advantages:
- Advantage #1: Generally, using the Application.GetOpenFilename is more user-friendly than simply relying on the Workbooks.Open method.
- Advantage #2: The Application.GetOpenFilename ensures that the FileName parameter of the Workbooks.Open method is correct. In other words, GetOpenFilename pretty much guarantees that the path/name/extension argument used by the Open method is valid.
The Application.GetOpenFilename method has 5 arguments. In the sample Open_Workbooks_Dialog macro I’ve only used 1 (FileFilter).
In order to see which other settings you can work with, let’s take a closer look at the syntax of GetOpenFilename and its 4 other parameters:
The Application.GetOpenFilename Method: Full Syntax
The following is the full syntax of the Application.GetOpenFilename method:
expression.GetOpenFilename(FileFilter, FilterIndex, Title, ButtonText, MultiSelect)
“expression” stands for a variable representing an Application object. In practice, you’re like to end up simply using the Application object itself instead of such a variable. Therefore, you’re likely to commonly use the following syntax:
Application.GetOpenFilename
This is, for example, the syntax used in the Open_Workbook_Dialog macro, as shown below:

I explain the FileFilter argument of the Application.GetOpenFilename method above. Let’s continue to dissect this helpful method by taking a look at the other 4 available parameters:
Parameters Of the Application.GetOpenFilename Method
The following table lists and introduces the 5 parameters of the GetOpenFilename method. All of these arguments are optional.
The arguments of the Application.GetOpenFilename method (generally) focus on the possibility of making some minor modifications to the Open dialog.
| Position | Name | Description |
| 1 | FileFilter | Determines file filters. |
| 2 | FilterIndex | Determines the default file filter. |
| 3 | Title | Determines the title of the (usually called) Open dialog box. |
| 4 | ButtonText | Applies only when working in the Mac platform.
Determines the text of the button. |
| 5 | MultiSelect | Determines whether the user can select multiple files (or not). |
I explain all of these arguments (except FileFilter) in more detail below.
Argument #2: FilterIndex
You determine the file filtering criteria using the FileFilter argument. Since this argument allows you to create several filters, Excel needs a way to determine which the default one is.
Here is where the FilterIndex argument comes in:
It “specifies the index numbers of the default file filtering criteria“.
To understand how the FilterIndex parameter works in practice, take a look at the following Open dialog. Notice that there are 2 filters (xl Files and xm Files) in the Files of type drop-down list box.

This Open dialog box is displayed when the following version of the Open_Workbook_Dialog macro is executed. Notice how the FileFilter parameter sets 2 file-filtering criteria but there’s no FilterIndex argument.

When you omit the FilterIndex argument, Excel displays the first filter. In the case above, this filter is xl Files.
Let’s assume, however, that you want a different filter to be displayed as default. The following image shows how you can modify the Open_Workbook_Dialog macro to add the FilterIndex argument and select the second filter (xm Files) as the default filter.

The resulting Open dialog box looks as follows. Notice that, now, the default filter is indeed xm Files, even though it continues to be in the second position within the Files of type drop-down list box.

In the image above, you may also notice that the sample Excel workbook named “Example – VBA open workbook.xlsx” doesn’t appear as it does in previous screenshots. This is because it has been filtered out by the xm Files filter.
The xm Files filter is used to display only files whose extension begins with the letters “xm”. These are generally files that use the .xml format. In fact, the xm File filter can probably be specified more specifically with the string pair “xm Files,*.xml”.
The FilterIndex argument can only take values between 1 and the number of file filters that you’ve specified with the FileFilter argument. In the case above, this upper limit is 2.
If you set a value that is larger than the number of filters that actually exist, Excel uses the first file filter. In the case of the Open_Workbook_Dialog macro above, this would happen whenever the FilterIndex parameter has a value equal to or larger than 3. The VBA code for this case appears in the following image:

In this case, the Open dialog box is as follows. Notice how, as expected, the default filter is xl Files (the first filter).

Argument #3: Title
The Title argument of the Application.GetOpenFilename method is kind self-explanatory:
It allows you to determine the title of the dialog box that is usually known as the Open dialog. As you probably expect, if you omit this parameter, the title of the dialog box is “Open”.
The following image shows how the VBA code behind the Open_Workbook_Dialog macro looks like if the Title argument is set to “Example VBA Open Workbook”:

Notice how the new title appears at the top of the (previously Open) dialog box:

Argument #4: ButtonText
The ButtonText only applies in Mac platforms. When used in Windows, the argument is ignored.
It allows you to determine the text that appears in the action button. This is the button regularly known as the Open button.

The fact that you can’t change the text of the Open button when working in Windows may lead to slightly confusing situations:
Imagine, for example, that you’re using the GetOpenFilename method for a purpose other than opening an Excel workbook. In such cases, the button will continue to say “Open”, even though the file isn’t really opened later.
Argument #5: MultiSelect
The MultiSelect argument of the Application.GetOpenFilename method allows you to determine whether the user can select multiple file names at the same time.
By default, users are only allowed to select a single file. In this case, the value of the MultiSelect parameter is False. If you want to explicitly specify that MultiSelect is False, the VBA code of the Open_Workbook_Dialog macro looks as follows:

If you set MultiSelect to True, users can select several file names. If you set MultiSelect to True, the Application.GetOpenFilename method returns an array with the selected filenames. This is the case even if you select a single file. Therefore, when you enable MultiSelect, you must make the following 2 modifications to the VBA code example that appears above:
- Set the MultiSelect parameter to True.
- Treat the my_FileName variable as an array. This involves, in particular, modifying the way in which you open the workbook(s) whose filenames are returned by the GetOpenFilename method. If you only set MultiSelect to True (#1 above) but fail to appropriately handle the array that GetOpenFilename returns, VBA is likely to return a Type mismatch error.
Conclusion
2 of the most common operations when working with Excel are:
- Opening Excel workbooks; and
- Specifying file paths and names.
Workbooks.Open and Application.GetOpenFilename are the basic methods that you use for purposes of carrying out these operations with VBA. Therefore, you’re likely to use both of these methods quite bit when creating macros and working with Visual Basic for Applications.
Fortunately, if you’ve read this Excel tutorial, you’re knowledgeable enough to use both the Open and GetOpenFilename methods. In addition to knowing what their purpose is, you’ve seen what each of their parameters is and what they allow you to specify.