
Excel for Microsoft 365 Word for Microsoft 365 Outlook for Microsoft 365 PowerPoint for Microsoft 365 Excel 2021 Word 2021 Outlook 2021 PowerPoint 2021 Excel 2019 Word 2019 Outlook 2019 PowerPoint 2019 Excel 2016 Word 2016 Outlook 2016 PowerPoint 2016 Office 2016 More…Less

To extend content across multiple rows or columns in a table, merge cells to create a larger cell. Or, split cells into smaller cells.
Merge cells
-
Select the cells that you want to merge.
-
Select Layout > Merge Cells.
To unmerge cells, select the cells and select Unmerge Cells.
Note: In Excel, select the cells you want and select Merge & Center. To unmerge cells, select the cells and select Unmerge Cells.
Split cells
-
Select the cell that you want to split.
-
Select Layout > Split Cells.
-
Enter the number of columns or rows that you want to split the selected cell into, and then select OK.
Want more?
Merge or split cells in a table
Word training
PowerPoint training
Excel training
Outlook training
You can merge or split table cells however you’d like, to better organize your table.
For example, to make Monthly Sales the header for all of the months rather than for a single column.
Select the cells you want to combine.
Select Layout, and then Merge Cells.
And center the heading, Monthly Sales.
To add a quarterly sales heading, select the header row, and then select Split Cells.
To have a column for quarter 1 and one for quarter 2, leave the number of columns as 2 and select OK.
And add your header text: «Q1 Sales» and «Q2 Sales»
In Excel, you can’t merge cells in tables, but you can in spreadsheets.
To make Monthly Sales the header for all of the months, select the cells you want to merge, and then in Home, select Merge & Center. When you merge cells, you lose any data in the second cell.
To unmerge them, select Unmerge Cells.
Need more help?
![]()
Download Article
A user-friendly guide to create two separate text columns on Microsoft Word
![]()
Download Article
- Using a Computer
- Using the Mobile App
- Q&A
- Tips
|
|
|
Do you want to split text into multiple columns in Microsoft Word? With the «Columns» feature, you can easily do so in a few simple steps. With the desktop version of Word, you’ll be able to create columns with selected text. On mobile, you’ll need to change the whole document layout. This wikiHow will show you how to make two or more columns in your Microsoft Word document using your Windows, Mac, iPhone, or Android device.
Things You Should Know
- On desktop, highlight the text you want to split. Click «Layout» → «Columns» → «Two.»
- On mobile, tap ••• → «Home» → «Layout» → «Columns» → «Two».
- You can only split selected text on desktop. Creating columns on mobile will change the entire document layout.
-

1
Open the Microsoft Word document you want to edit. Find the Word document you want to edit on your computer, and double-click on its icon to open it.[1]
- If you don’t have Microsoft Word on your Windows or Mac computer, you can download it or use the free web version at https://www.office.com.
- You can also add images to your document if you’re planning to create a «news column» type document.
-
2
Select all the text you want to split into columns. Click the beginning of the text you want to edit, and drag your mouse until the end of it. Selected parts will be highlighted.
- If you want to select the whole document, you can use a keyboard shortcut.
- On Mac, press Command + A.
- On Windows, press CTRL + A.
Advertisement
- If you want to select the whole document, you can use a keyboard shortcut.
-
3
Click the Layout tab at the top. This button is located above the toolbar at the top of your document.
- Depending on your version of Word, this button may also be labeled Page Layout.
-
4
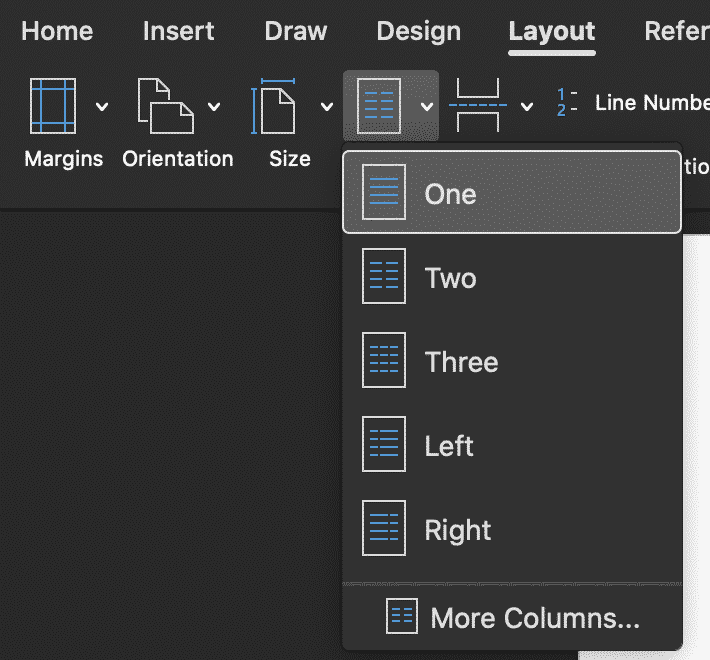
Click the Columns button on the Layout toolbar. This looks like a rectangle with horizontal lines divided in two sets.
- A drop-down menu will open.
-
5
Select Two on the drop-down menu. This will split the selected text into two columns.
- Alternatively, you can select another option here, and create even more columns. You can select: One (default), Two, Three, Left, Right, or More Columns.
-
6
Change the size of your columns (optional). You can click and drag the edges of the ruler at the top of your document to change the size of your columns.
- If you don’t see the ruler, click the View tab, then click the box next to Ruler in the Show section.
- Make sure you still have your column text selected when you adjust the size.
- This is an optional adjustment. If you prefer not to change the column sizes, your columns will be equal in size by default.
- Be sure to save your Word document when you’re finished.


Advertisement
-
1
Open a document in the Microsoft Word app. This looks like a blue notebook next to a W. Microsoft Word is available for iOS in the App Store and for Android in the Google Play Store.
- Tap Blank document to open a new document or tap a file to open an existing document.
- You can’t put specific text into two columns on the mobile app. This method will adjust the entire document’s layout without needing to select text.
-
2
Tap ••• . This can be found above the keyboard, to the right.
- If you don’t see your keyboard, tap the document to bring it up.
- A new menu will open.
-
3
Tap Home. This will be to the left of the formatting window.
- A drop-down menu will open.
-
4
Tap Layout. You’ll see a list of options you can make to your page layout.
-
5
Tap Columns. This will be next to the icon of horizontal lines divided in two sets.
-
6
Tap Two. This will split the selected text into two columns.
- Alternatively, you can select another option here, and split your text into more columns. You can select: One (default), Two, Three, Left, or Right.
- Your page layout will now have two columns. When you enter text, it will fill the left column first, then continue onto the right column.


Advertisement
Add New Question
-
Question
My layout key does not have the option for columns. How do I add that?

You are probably using the web version. It doesn’t have a lot of special options. The best solution is just to get the Word app and try again.
-
Question
How to create a two columns with separate texts?
This is very simple. When typing in each column, type different things. If it tries to connect them, just start a new paragraph.
-
Question
I want to change back to a full document after the columns. Then change back to columns and so forth (Recipe title and serving size, then columns for actual recipe; then another recipe on same page.)
At the bottom of the advanced column settings, there is a dropdown box labeled «Apply to:». Set the column number and click this to select the section you want to update. The easiest option is to highlight a section and select the «selected text» option.
See more answers
Ask a Question
200 characters left
Include your email address to get a message when this question is answered.
Submit
Advertisement
Thanks for submitting a tip for review!
Advertisement
About This Article
Thanks to all authors for creating a page that has been read 384,324 times.
Is this article up to date?
I am trying (and failing) to create a Microsoft Word document that has two columns on the first page, and one column on every succeeding page.
The idea is that the first page has a list of people in the organization down the left-hand edge of the page in a narrow column, and the wider right-hand column has the text (letter or report text).
I can sort-of make this work if I insert a section break at the page break, but the section break keeps moving down the document, and I want to explicitly change sections at the second page (so that each succeeding page is just normal text in one column).
I thought I could put a section break at the end of the page, but that doesn’t seem to be an option.
Failing that, if someone has any other suggestions as to how to achieve what I need, that’d be great!
If it makes a difference, I’m using MS Word for Mac 2015.
I’ll admit it — I’m not a big fan of adding columns in Microsoft Word. Not that there’s anything wrong with columns, per se. Columns work fine (until they don’t). But in a legal office environment, I usually format blocks of information with tables because they’re a bit easier to control.
That said, I have seen lots of legal professionals insert multiple columns in Microsoft Word to format things like service lists in Certificates of Service. Hey, to each her [his] own.
So if you want to format text with columns in Microsoft Word documents, here’s what you need to know:
Inserting columns: the basic primer
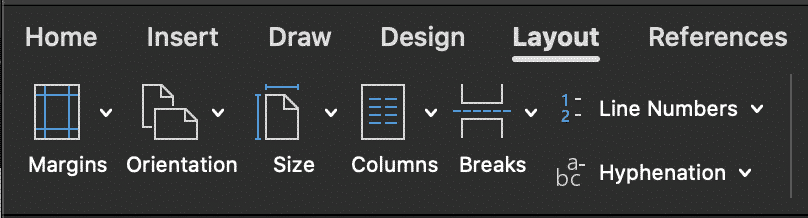
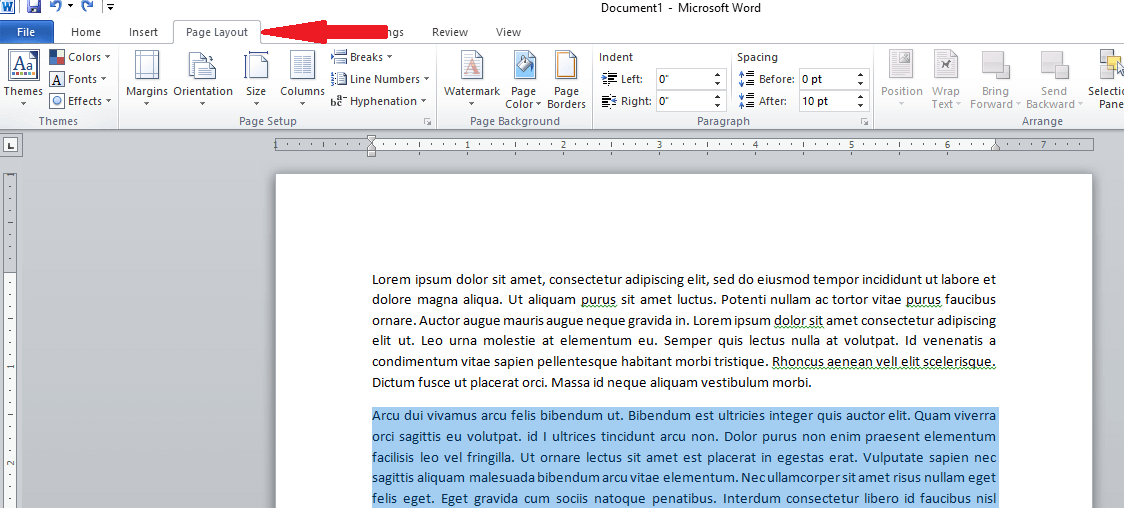
Everything starts from the Layout tab (known as Page Layout in versions 2007-2010) on the Ribbon:

Click on More Columns, and you’re taken to a dialog box that allows you to set up your columns exactly the way you want them.
The default is one column — just a regular document. You can use one of the presets (the two-column layout is useful for the service list application I mentioned above). Or you can customize it within an inch of its life. Width? Space between columns 1 and 2, or 2 and 3, or …? How about a line between them (like a newsletter would have)? You decide!
(If you don’t want your columns to all be the same width, be sure to uncheck the “Equal column width” checkbox at the bottom of the dialog box. Then, you’ll be able to customize the width of each column separately.)

Navigating between columns
Once you’ve set up your columns, you come to the tricky part. This is part of the reason I usually opt for tables rather than columns. If you use tables, moving between the cells is easy — just use the Tab key. To insert a column, however, you need to know a few tricks.
Say you’re typing in the first column of your document and you want to end that column there and start typing in the second column. To do that, you have to insert a column break. You can insert a column break in one of two ways:
- Press CTRL-SHIFT-ENTER simultaneously; or
- Go to the Layout tab, click Breaks, and choose Column

Personally, I’d go with Option 1 (assuming I remember the key combination in the heat of the moment).
Once you’ve inserted a column break, your cursor is in the next column, ready for you to type. When you insert a column break in your last column (the one farthest to the right), the cursor will go to the first column on the next page.
Viewing column boundaries
To me, it’s tough to work with columns (or tables, for that matter) if I can’t really see them. To turn on the column boundaries so you can see your columns laid out on the page, go to the File tab (or click the Office button in version 2007) and click Options, then go to Advanced and check the box next to Show text boundaries:

When columns are only part of your document
But what if only part of your document consists of multiple columns?
If you go back to the Columns dialog box (via Layout > Columns > More Columns), you’ll notice a drop-down at the bottom of the box:

If you choose This Point Forward, that will allow you to insert columns at the point your cursor is sitting in. Once you’ve inserted your columnar data, then go back to the Format Columns dialog box and choose the One Column format (being careful to once again choose This Point Forward in that bottom drop-down), and your document will return to the single-column format without disturbing the multi-column insertion you’ve just worked so hard on.
But what if you want to insert a two- or three- (or more-) column block of text into the middle of a one-column, normal document?
You may want to use a slightly different procedure, depending on whether you’re creating a brand-new document or you’re inserting a multi-column layout into the middle of an existing single-column document. You’re using the same dialog box, but if you’re editing an existing document and placing a multi-column layout in the middle, you’ll need to take a couple of extra precautions to ensure you don’t inadvertently create a formatting nightmare.
Inserting multi-columns into a new document
Let’s say you’re typing along in a brand-new document and decide that the next bit of text needs to be in two (or more) columns. There’s no text after the point where your cursor is right now, so you can switch back to single-column format once you get done inserting the multi-column section.
If you go back to the Columns dialog box (via Layout > Columns > More Columns), you’ll notice a drop-down at the bottom of the box:
If you choose This Point Forward, that will allow you to insert columns at the point your cursor is sitting in. Once you’ve inserted your columnar data, then go back to the Format Columns dialog box and choose the One Column format (being careful to once again choose This Point Forward in that bottom drop-down), and your document will return to the single-column format without disturbing the multi-column insertion you’ve just worked so hard on.
Inserting columns into the middle of an existing document
If you’re editing an existing document and you want to insert a multi-column layout somewhere in the middle of text you’ve already got typed, the “this point forward” method may result in a temporary and fixable but still infuriating mess.
Here’s how to avoid it: Insert section breaks before and after the point at which you want to insert your columns:

… then in Apply to:, choose This section instead:

Here’s a video demonstration:
Video: Inserting a column into the middle of an existing document (without creating a mess)
How do you see yourself using columns in your documents?
Lesson 16: Columns
/en/word2013/breaks/content/
Introduction
Sometimes the information you include in your document is best displayed in columns. Not only can columns help improve readability, but some types of documents—like newspaper articles, newsletters, and flyers—are often written in column format. Word also allows you to adjust your columns by adding column breaks.
Optional: Download our practice document.
To add columns to a document:
- Select the text you want to format.
 Selecting text to format
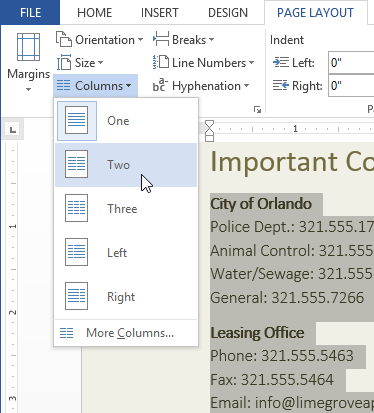
 - Select the Page Layout tab, then click the Columns command. A drop-down menu will appear.
- Select the number of columns you want to create.
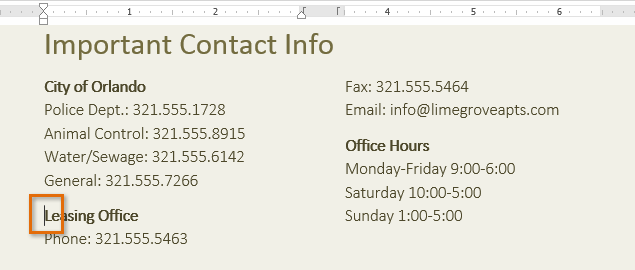
 Formatting text into columns
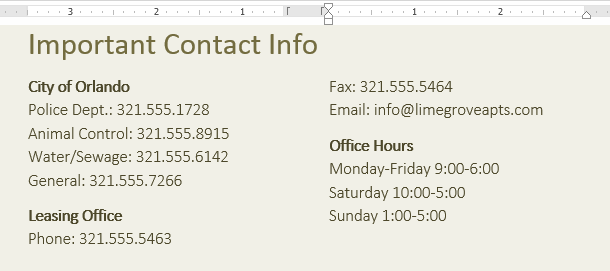
 - The text will format into columns.
 The formatted text

To remove column formatting, place the insertion point anywhere in the columns, then click the Columns command on the Page Layout tab. Select One from the drop-down menu that appears.
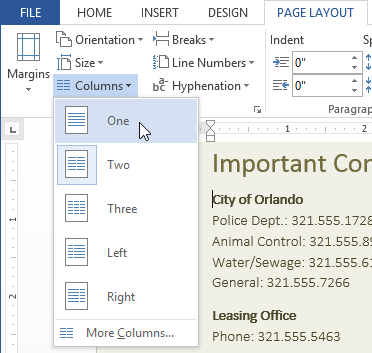 Removing column formatting
Your column choices aren’t limited to the drop-down menu that appears. Select More Columns… at the bottom of the menu to access the Columns dialog box. Click the arrows next to the Number of columns: to adjust the number of columns.
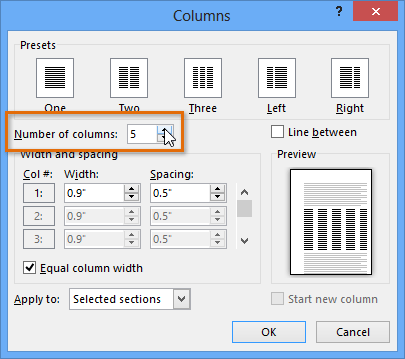 The Columns dialog box
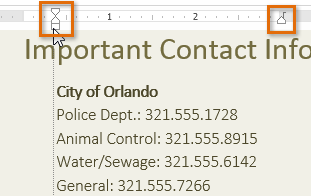
If you want to adjust the spacing and alignment of columns, click, hold, and drag the indent markers on the Ruler until the columns appear the way you want.
 Adjusting the column
Adding column breaks
Once you’ve created columns, the text will automatically flow from one column to the next. Sometimes, though, you may want to control exactly where each column begins. You can do this by creating a column break.
To add a column break:
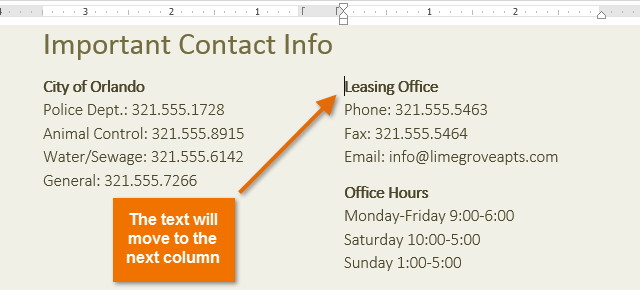
In our example below, we’ll add a column break that will move text to the beginning of the next column.
- Place the insertion point at the beginning of the text you want to move.
 Placing the insertion point
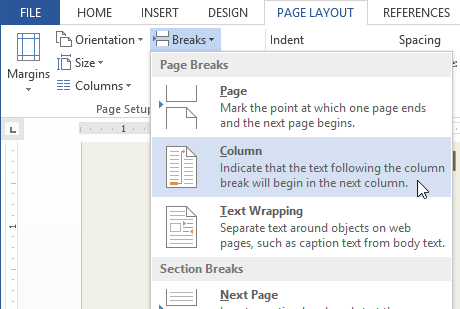
 - Select the Page Layout tab, then click the Breaks command. A drop-down menu will appear.
- Select Column from the menu.
 Adding a column break
 - The text will move to the beginning of the column. In our example, it moved to the beginning of the next column.
 After adding a column break
To learn more about adding breaks to your document, visit our lesson on Breaks.
Challenge!
- Open an existing Word document. If you want, you can use our practice document.
- Select the text you want to format into columns. If you’re using the example, select the two bulleted lists in the New Online Resident Portal section.
- Format the selected text into two columns.
- Add a column break. If you’re using the example, add a column break before Communicate with Lime Grove staff.
/en/word2013/headers-footers-and-page-numbers/content/
If you are working on a text heavy document, or would like to make better use of your page by splitting it in half adding a column is your answer.
Columns split your page into a newspaper style layout, the text will run down two or three narrow columns which can be useful if you are trying to split your content across one page, create a flyer, brochure, report, step by step instructions or even a terms and conditions document.
When inserting a column, Microsoft will spit your page vertically with the text running down the first column before starting at the top of the second and so on.
In this post we will show you how to add one or multiple columns to your Microsoft Word document.
Adding a Column to your Word Document
- Open Microsoft Word
- Click the Insert Tab
- Under the Insert Tab, Click Columns
- Select the number of Columns you would like to insert
Microsoft Word’s Column Options Explained
One, Two, Three will insert that number of even vertical columns into your document
Left, Right will insert a column smaller on the described side and larger on the other. For example, a Left column will create two columns with the left side covering around a quarter of your document leaving the right side covering the remaining space.
More Columns will give you the option to insert more than three columns and customise.
Looking for an easier way to Merge your Microsoft Word Documents together?
These days we are all about finding the most efficient way of doing things, from saving our eyes with dark mode so we can work without straining them to collaborating with your team on a Microsoft Word document without having to worry about merging two files together at the end.
It’s a simple ask, that Microsoft hasn’t quite solved for just yet.
Microsoft has a feature called ‘merge’ that shows you the differences between the two documents and allows you to manually pull across the accepted changes from each. Its a start, but it’s still fairly manual and can be time-consuming.

With that in mind, the smart guys over at Simul Docs – a very fancy new tool that makes collaborating in Word easy added a simple, merge feature to save you time.
Simul Docs will automatically pick up when two people are simultaneously working on the same document, create two new, separate versions for you, then flag with the document owner that there are now two versions that require their review before they can be merged.

See Simul won’t automatically merge the two files for you without asking, because it also knows you may not want to accept all of the changes in both. So it gives you the chance to run your eyes over both files, take as much or as little time as you like and then when you are happy – press merge. At the click of a button, you can merge the two documents back into one and continue collaborating with ease.

When you merge two documents in Simul, rest assured that all of the tracked changes, comments and fancy formatting will remain the same. Nothing will be lost during the process, unless of course you decided during your review process that you didn’t want to take that comment or change over in the merge. Its completely up to you!
Simul also offers some other pretty fancy features to help you collaborate such as version control, tracked changes, edits and comments, easy sharing and accessibility.

Because so many of us do find ourselves working offline, it’s important to Simul Docs that you can access and collaborate from anywhere, even where there isn’t a strong internet connection.
Simul is accessible from anywhere, if you are offline that’s ok, Simul will allow you to continue working as normal, with all of their nifty features and then the moment your device finds a connection Simul will update a live file and share it with the team.

With the ability to work offline, comes the risk of two or more team members working on the document at once without us knowing. Which is why the merge function exists, so you don’t have to worry about who is working when, or from where. Simul has you covered.
With Simul in your team, you can collaborate without concern. Knowing that Simul will have you covered, making merging, collaboration and working offline as easy as it should be.
You may find yourself needing to separate your document, or at least part of it, into parallel columns, the good thing is Word makes it easy to do so. When separating the text into columns, it flows from one column and continues to the other one next to it. You can also separate just a part of your text. This is useful for writing a newsletter, a scientific paper, or just separating your content and making it easier to read.
So, in this guide, you will learn how to create columns in Word using different methods.
How to make two columns in Microsoft Word
With this method, you will be able to split your Word document into two separate columns.
- First, we have to open the document we want to edit. It can be a blank document but it needs to have some text first to separate it into columns.
- Select the text that you want to separate into columns.

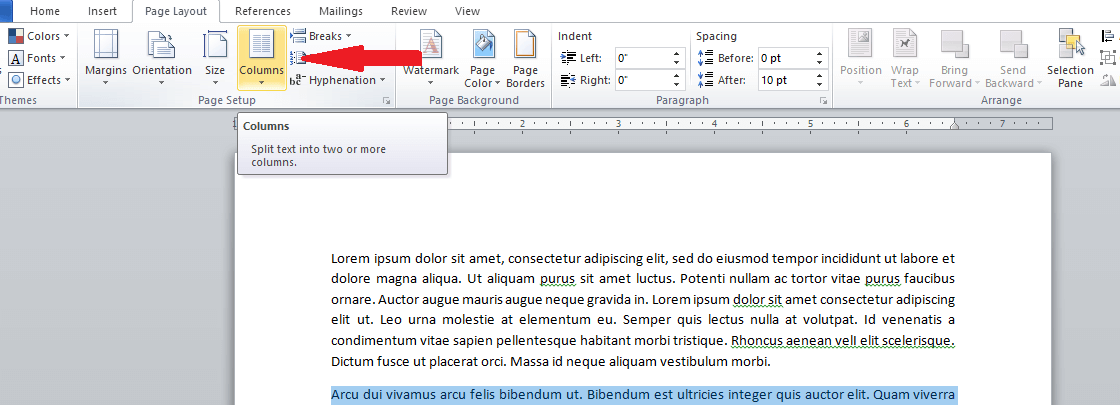
- Click on the Layout tab (Formerly Page Layout for Word 2007 and 2010)
- Click the Columns button on the Page Setup section

- This opens up a list that lets you select the number of columns you want to separate your text. We will choose two columns.

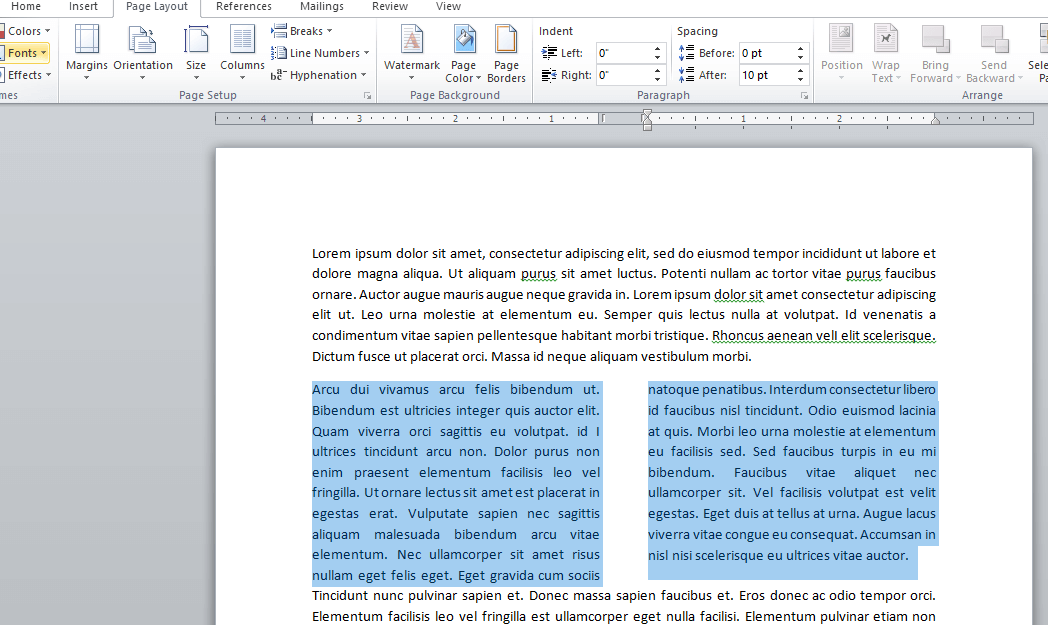
- Once you have selected two columns, Word will separate your text into two columns.
- The text you write in will go from the left column to the right.


How to make three columns or more in Microsoft Word
Sometimes you are in the need of separating your text into more than two columns. The amazing thing about Word is that it lets you separate it into three or more columns. Here are the steps for doing so:
- Open up the document you want to edit
- Select the text you want to separate into columns
- Click on the Layout tab (Formerly Page Layout for Word 2007 and 2010)

- Click the Columns button on the Page Setup section
- If you need to separate the text into three columns, click on Three, and the text will be separated into 3 columns.

- If you need to have more than 3 columns, click on More columns
- There you will be able to manually enter the number of columns you want.

Pro tip: In this section, you can also specify the Width and Spacing of the columns - You can select if you want to apply the columns to the selected text only, the whole document, or from a specific point forward.


Now you may be asking, “how do I control where the column ends?”. Well, Microsoft Word has a function that lets you do that, and it’s called Break. Let’s break it down
How to make a column break on Microsoft Word
If you are using columns and want the text you have to start atop the next column, you can use a column break. Here are the steps
- Click on the beginning of the text you want to start the next column

- Click the Layout tab (formerly known as Page Layout for Word 2007 and Word 2010)

- In the Page Setup section, you will find the Break button. This will show you the different options for Page breaks and section breaks. In the Page break portion, click on Column

- Now the column will start at the point you have selected


And that’s it! You are now a pro at creating columns in Microsoft Word. You can repeat these steps anytime you need them.
If you are still craving more tips on how to use Word or other Office apps, why don’t you subscribe to our newsletter by entering your email below? You can also check the SoftwareKeep Blog to help you boost your productivity!
Showing the content in full width of a document may quickly bore the reader. Sometimes, it is a good idea to create your document like newspaper layout with multiple columns. This is one of the easy ways to show attractive content similar to newsletters and brochures. It helps to add different types of content in a single page and highlight the actionable part. In this article, we will explain how to insert columns in Word documents and arrange text using columns. If you have a long content, then make sure to add table of contents for easy accessibility of headings.
Using Default Templates with Columns
Though creating a custom column layout is easier, it takes
time to setup the layout. However, Microsoft offers predefined column templates
that you can choose for your use.
- Launch your Word application. On the backstage view, you can see the predefined layouts to select under “Featured” section. If you do not see backstage view, navigate to “File > New” menu and look under “Featured” section. You can also search for the column layouts using the search box.

- Select the template and Word will download it from the Microsoft Office library.
- As you can see, there are lot of beautiful columned layouts for resumes, brochures and events that you can choose from and modify.

Creating
Columns in Your Documents
If you do not want to use the template and start from the
scratch, you can create your column layout. It is possible to set a whole text,
a selected area or a section into columns. Let us take an example document
having two text paragraph like below:

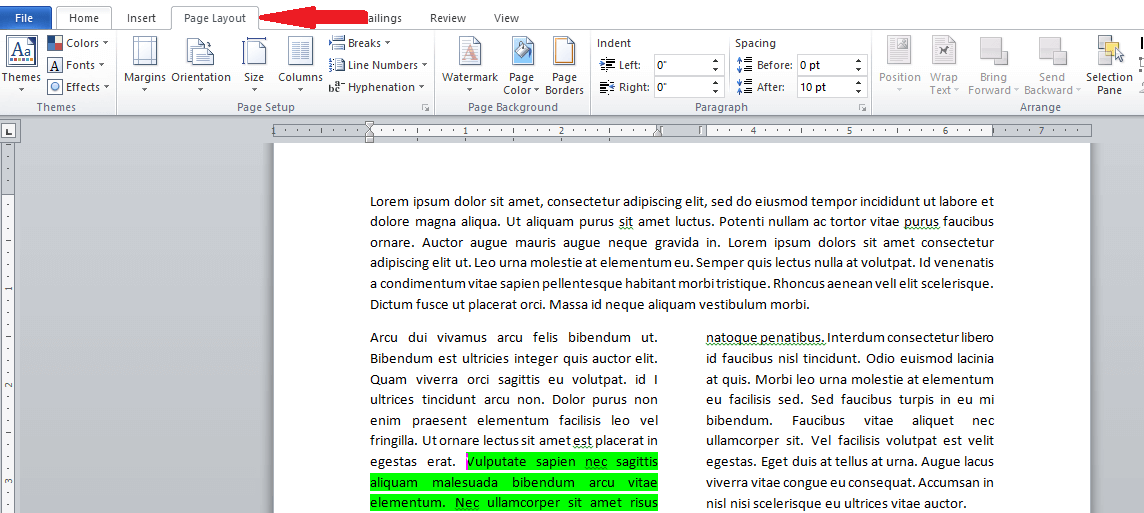
In order to break the two paragraphs into two columns, simply
go to “Layout” menu. Click on “Columns” dropdown and select “Two”. Word will
automatically split the two paragraphs into two columns as shown below.

Related: How to create eBook in Word?
Inserting
Manual Column Break
In the above example, you do not have to highlight the
section when you have two paragraphs. Just place the cursor in the section to
split into two columns based on the previous section break. If this does not
work for you or you want to manually decide the column break point, then follow
the below instructions.
- First click on the search box on the top menu and type
“show”. Select “Show All” option to show all formatting markups on your
document.

- Position your cursor where you want to create a column
break. - Switch to the “Layout” tab and click on the “Breaks”
list box. - Select “Columns” option to set a column break in the
selected cursor position.

- You can see the “Column Break” markup on your document
and Word will move the content below the column break to next page. - Now go to “Layout > Columns” and select “Two” to
create two columns at the column break point.

You will notice that Word continue the content from the first
column to next. The column break will make your document like a newsletter or
newspaper layout that continues from one column to next. However, you can also
manually type different content after creating columns.
Adjusting
the Column Width
By default, Word will adjust the columns to have equal width.
However, you can change the width of each column as per your need. In order to
adjust the column width, go to “Layout > Columns > More Columns” option.

You can customize the following options:
- Presets – choose one of the existing preset layout options.
- Number of columns – change the number of columns.
- Line between – enable the checkbox to insert a line between the columns.
- Equal column width – disable this checkbox and setup custom width and spacing for your columns.
- Apply to – apply the changes to whole document or only to this section.
After customizing your column layout, you can continue to
type in a columned layout.

Related: How to change embedded file name in Office?
Using
Markers in the Ruler
When you are working with columns, Word will split the
document into sections. You can view the width of the sections on the marker
available in top ruler.
Simply, double click on the ruler marker to open “Columns”
pop-up box to customize the options as explained above. Alternatively, you can
also set the width by dragging the markers in the ruler using mouse.

Undoing
Column Layout
If
you do not need the distribution into columns anymore, you can simply undo this
setting. Afterwards your text will appear in the original structure.
- In order to do so, open the “”Layout > Columns” list box and select the entry “One”.
- The formatting markups will remain intact. You can remove the column break by placing the cursor in front of the formatting symbol and remove it using the delete key.
Creating
Mixed Layout
You
can also easily create columns and full width layout sections in a single
document.
- In order to exit the column layout and go to full width section,
position your cursor at the end of the last column. - Go to “Breaks > Continuous” and apply a section break on the same
page. Now your cursor will go to next section and you can see a section break
in the formatting markup. - Go to “Columns” and select “One” to disable the columns and continue in
a full width.

Tips and Tricks
- In order to divide a section of your document into columns, select it with the mouse and create columns. When creating columns, Word defines the area automatically for individual sections.
- You can apply column break only to particular section of your document when your document has multiple sections.
- Use keyboard shortcuts, “Control + Shift + Enter” to create a column break.
- You can adjust the column width via the markers in the ruler only when you have selected “Equal column width” checkbox in the “Columns” dialogue window.
- Column changes are an important element to structure texts with multiple columns.