
Содержание
- Как убрать перенос слов в Ворде
- Вариант 1: Автоматически расставленные переносы
- Вариант 2: Расставленные вручную или «смещенные»
- Заключение
- Вопросы и ответы

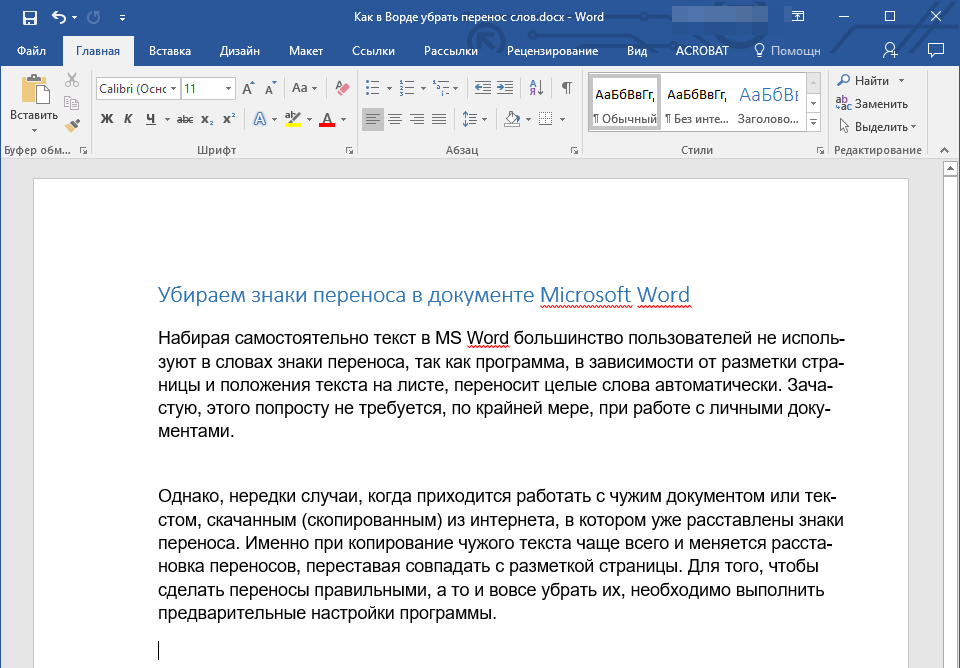
Набирая самостоятельно текст в MS Word, большинство пользователей не используют знаки переноса, так как программа, в зависимости от разметки страницы и положения текста на листе, переносит целые слова автоматически. Зачастую наличия этих символов и не требуется, по крайней мере, если речь идет о работе с личными документами. Но бывает и так, что эти знаки уже расставлены, но они не нужны, а потому их следует убрать. Сегодня расскажем о том, как это сделать.
Как убрать перенос слов в Ворде
Время от времени многим приходится работать с чужим документом или текстом, скачанным (скопированным) из интернета, в котором предварительно были расставлены знаки переноса. В последнем случае чаще всего меняется расстановка этих символов — она может попросту перестать совпадать с разметкой и типов выравнивания содержимого страницы, превратившись в произвольно расставленные дефисы. Для того чтобы это исправить или же вовсе избавится от ненужных знаков, даже если их расположение на страницах правильное, нужно выполнить несколько простых действий. Сложнее дела обстоят, если переносы были расставлены вручную, но и здесь решение есть. Далее рассмотрим обе ситуации и то, как нужно действовать в каждой из них.
Читайте также: Выравнивание текста в документе Microsoft Word
Вариант 1: Автоматически расставленные переносы
Итак, у вас есть текст, в котором переносы были расставлены автоматически, то есть самой программой (Ворд это был или нет — не столь важно). Чтобы убрать из текста эти ненужные знаки, выполните следующие действия:
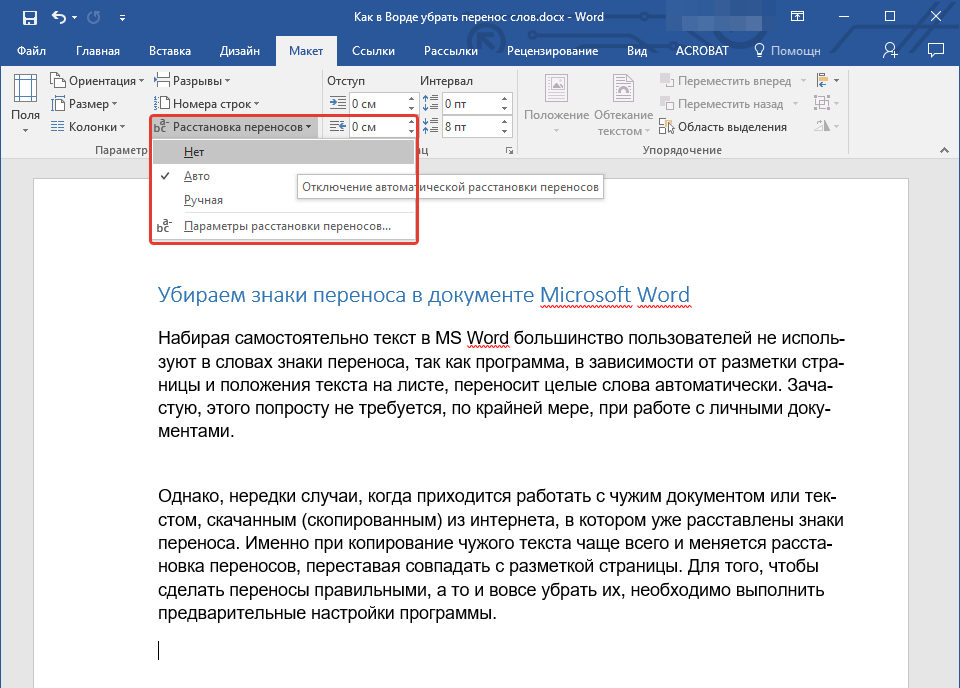
- Перейдите из вкладки «Главная» на «Макет».
- В группе «Параметры страницы» найдите пункт «Расстановка переносов» и разверните его меню.

Примечание: Чтобы убрать перенос слов в Ворде 2003 — 2007, из вкладки «Главная» перейдите во вкладку «Разметка страницы» и найти там одноименный пункт «Расстановка переносов».
- Выберите пункт «Нет», чтобы убрать автоматический перенос слов.
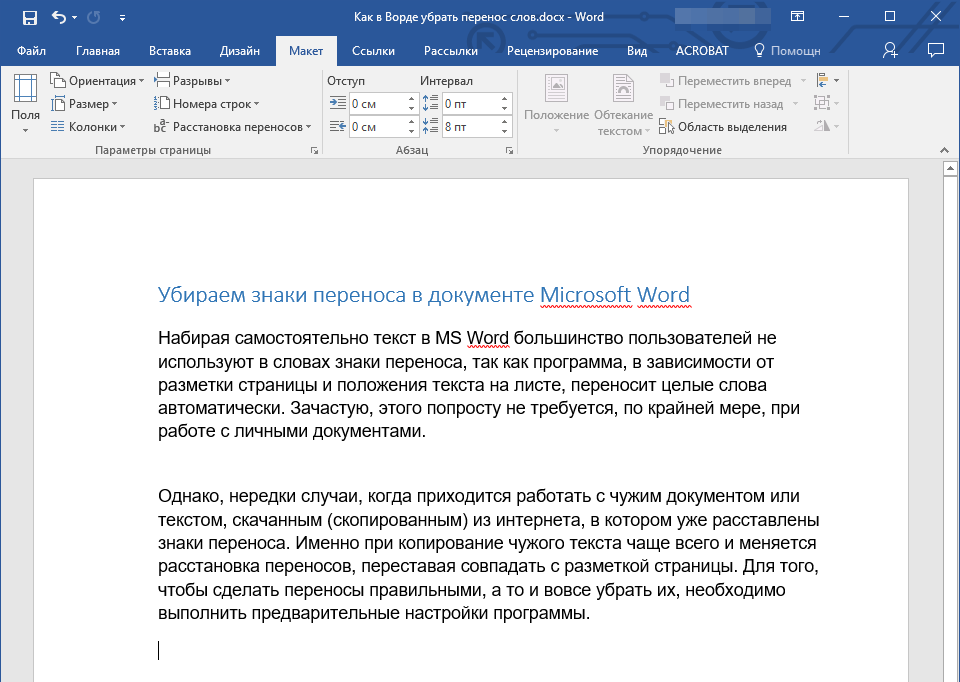
Переносы исчезнут, а текст будет выглядеть так, как мы его привыкли видеть в Word и на большинстве интернет-ресурсов.
Вариант 2: Расставленные вручную или «смещенные»
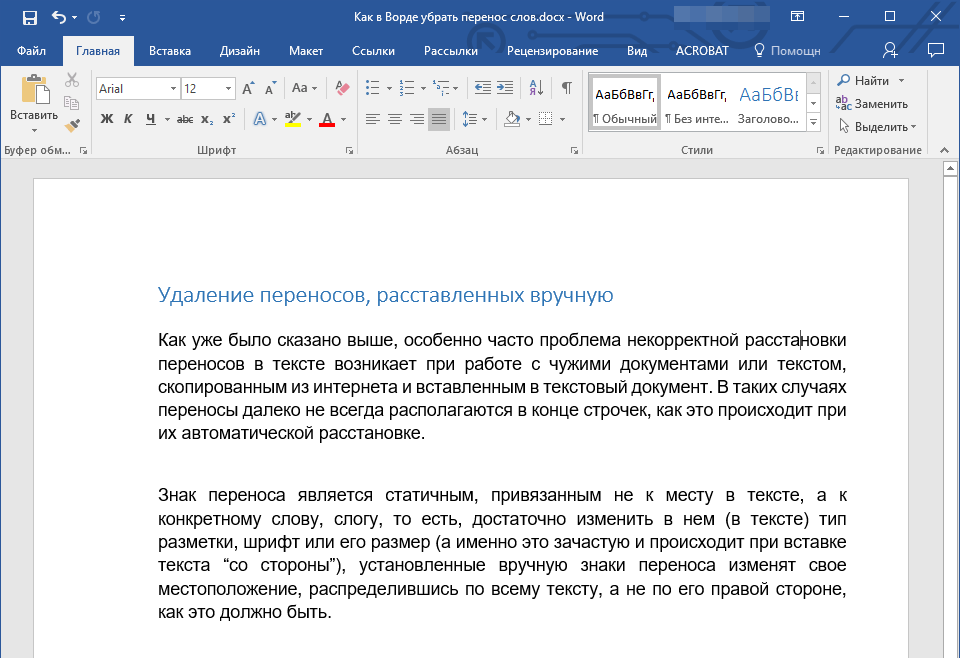
Как уже было сказано выше, особенно часто проблема некорректной расстановки переносов в тексте возникает при работе с чужими файлами или текстом, скопированным из интернета и вставленным в текстовый документ. В таких случаях переносы далеко не всегда располагаются в конце строчек, как это происходит при их автоматической расстановке.
Знак переноса является статичным, привязанным не к месту в тексте, а к конкретному слову, слогу, то есть достаточно изменить тип разметки страницы, шрифт или его размер (а именно это зачастую и происходит при вставке текста «со стороны»), как установленные вручную знаки переноса изменят свое местоположение, распределившись по всему тексту, а не по правой стороне страницы, как это должно быть. Выглядеть это может примерно следующим образом:
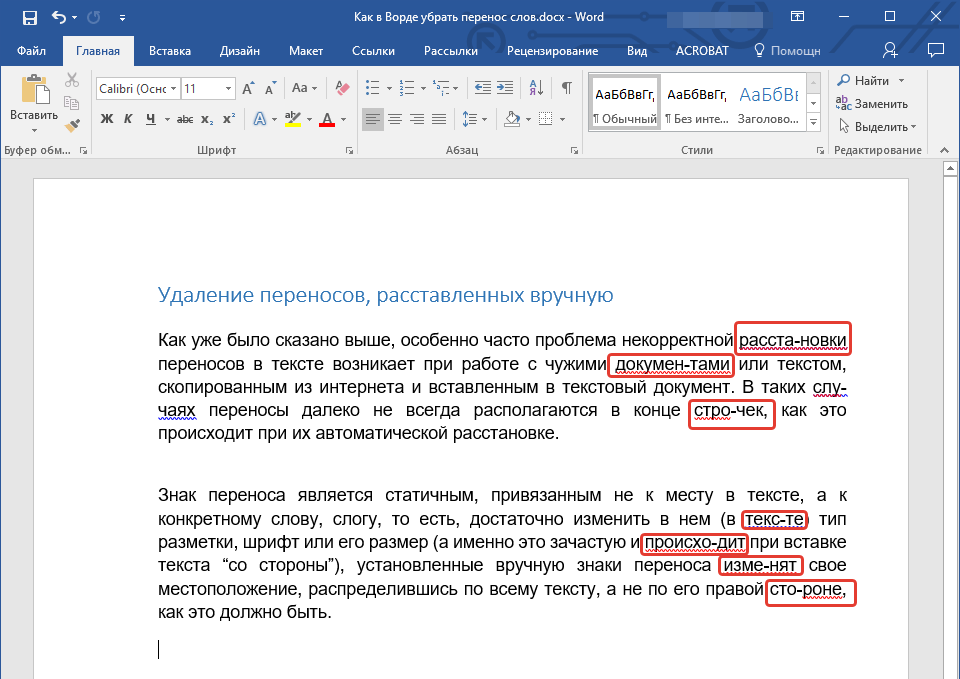
Из примера на скриншоте видно, что знаки переноса находятся не в самом конце строчек. Конечно, можно попытаться вручную подогнать форматирование текста так, чтобы все встало на свои места, но это практически невозможно, или же просто удалить эти символы вручную. Да, с небольшим фрагментом текста сделать это будет несложно, но что, если у вас в документе десятки, а то и сотни страниц с неправильно расставленными переносами? Для решения нашей задачи достаточно воспользоваться функцией поиска и замены.
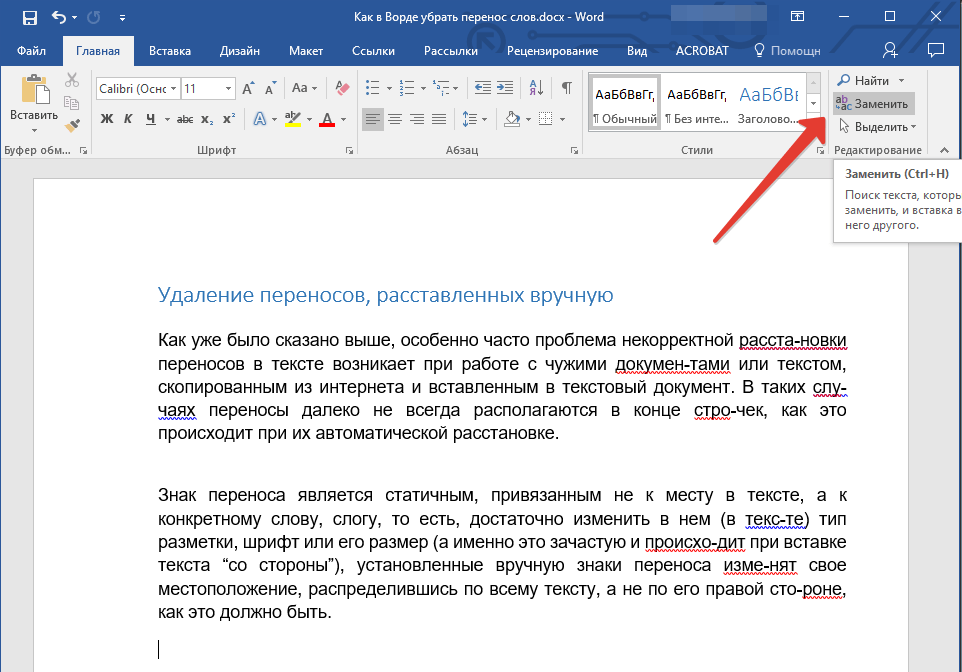
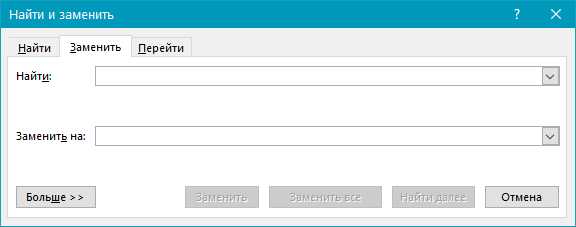
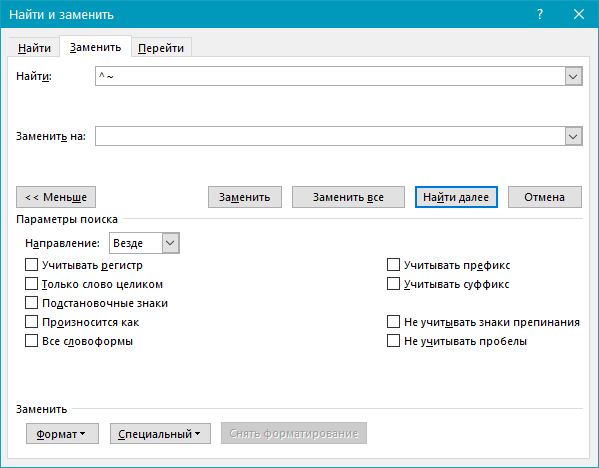
- В группе «Редактирование», расположенной во вкладке «Главная», нажмите кнопку «Заменить» (или нажмите «CTRL+H»).
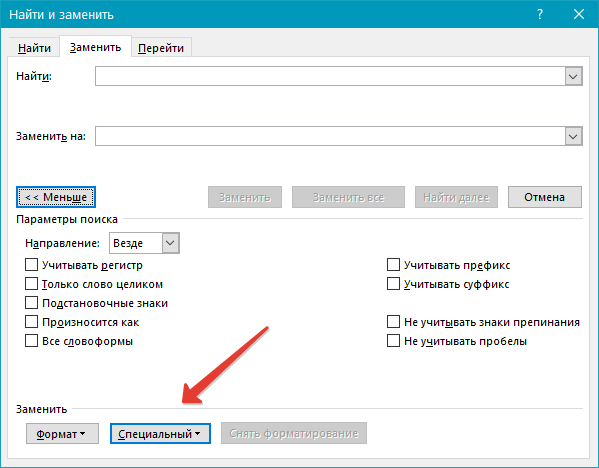
- Кликните по кнопке «Больше», расположенной снизу слева, и в расширенном окне выберите «Специальный».
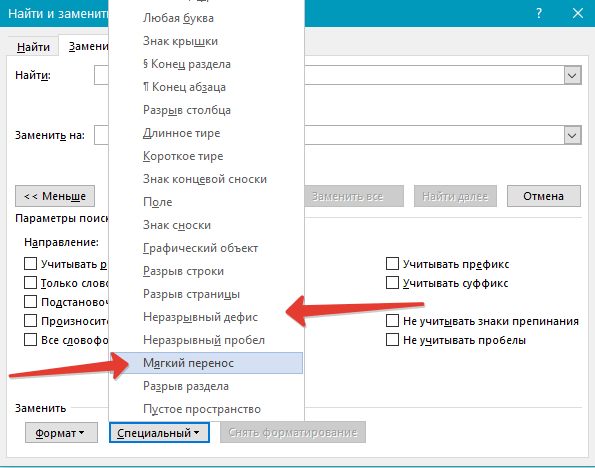
- В появившемся списке выберите символ, который вам нужно удалить из текста — «Мягкий перенос» или «Неразрывный дефис».
- Поле «Заменить на» следует оставить пустым.
- Нажмите «Найти далее», если вы просто хотите увидеть эти символы в тексте. «Заменить» — для того чтобы удалять их поочередно, или «Заменить все», чтобы удалить сразу все знаки переноса из текста.
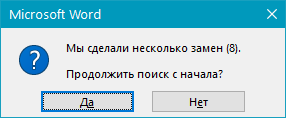
- По завершении проверки и замены (удаления) появится небольшое окно, в котором вам нужно нажать «Да» или «Нет», в зависимости от того, планируете ли вы дальше перепроверять этот текст на наличие переносов (лучше это сделать).

Примечание: Иногда можно столкнуться с тем, что ручные переносы в тексте расставлены не с помощью «правильных» знаков («Мягкий перенос» или «Неразрывный дефис»), а с помощью обычного короткого тире «-» или знака «минус». В таком случае в поле «Найти» необходимо вводить именно этот символ «-» без кавычек, после чего уже можно нажимать на выбор «Найти далее», «Заменить» или «Заменить все», в зависимости от того, что вы хотите сделать. Правда, нужные дефисы после этого тоже будут удалены. Но, так как слова без них будут помечены как ошибки (подчеркнуто красным), найти их и исправить не составит труда.
Читайте также: Как включить проверку орфографии в Майкрософт Ворд
Таким образом, используя возможности инструмента «Найти — заменить» в Word, можно легко избавиться от всех некорректно расставленных переносов в словах. К слову, сфера применения данной функции куда более широка, о чем мы писали ранее.
Подробнее: Поиск и замена слов и символов в Ворде
Заключение
Собственно, на этом все. Теперь вы знаете, как убрать перенос в Microsoft Word, будь это версии 2003, 2007, 2010 или 2016 годов, а также «подписочные» Office 365 и 2019. Рассмотренные в статье варианты решения нашей сегодняшней задачи помогут вам с легкостью преобразить любой текст и сделать его действительно пригодным для работы и чтения.
I feel silly for not being able to figure this out, but how do I turn off wordwrap? the css word-wrap property can be forced on with break-word, but cannot be forced off (only can be left alone with normal value).
How do I force word wrap off?
![]()
Jon
425k79 gold badges733 silver badges803 bronze badges
asked Jan 10, 2011 at 23:19
![]()
Alexander BirdAlexander Bird
38k42 gold badges124 silver badges159 bronze badges
2
You need to use the CSS white-space attribute.
In particular, white-space: nowrap and white-space: pre are the most commonly used values. The first one seems to be what you ‘re after.
answered Jan 10, 2011 at 23:21
![]()
0
Added webkit specific values missing from above
white-space: -moz-pre-wrap; /* Firefox */
white-space: -o-pre-wrap; /* Opera */
white-space: pre-wrap; /* Chrome */
word-wrap: break-word; /* IE */
answered Jul 7, 2015 at 15:07
![]()
I wonder why you find as solution the «white-space» with «nowrap» or «pre», it is not doing the correct behaviour: you force your text in a single line!
The text should break lines, but not break words as default. This is caused by some css attributes: word-wrap, overflow-wrap, word-break, and hyphens. So you can have either:
word-break: break-all;
word-wrap: break-word;
overflow-wrap: break-word;
-webkit-hyphens: auto;
-moz-hyphens: auto;
-ms-hyphens: auto;
hyphens: auto;
So the solution is remove them, or override them with «unset» or «normal»:
word-break: unset;
word-wrap: unset;
overflow-wrap: unset;
-webkit-hyphens: unset;
-moz-hyphens: unset;
-ms-hyphens: unset;
hyphens: unset;
UPDATE: i provide also proof with JSfiddle: https://jsfiddle.net/azozp8rr/
answered May 12, 2018 at 9:55
![]()
zodzod
3773 silver badges4 bronze badges
2
white-space: nowrap;: Will never break text, will keep other defaults
white-space: pre;: Will never break text, will keep multiple spaces after one another as multiple spaces, will break if explicitly written to break(pressing enter in html etc)
answered Nov 13, 2020 at 20:28
![]()
1
This worked for me to stop silly work breaks from happening within Chrome textareas
word-break: keep-all;
answered Oct 2, 2019 at 21:54
![]()
If you want a HTML only solution, we can just use the pre tag. It defines «preformatted text» which means that it does not format word-wrapping. Here is a quick example to explain:
div {
    width: 200px;
    height: 200px;
    padding: 20px;
    background: #adf;
}
pre {
    width: 200px;
    height: 200px;
    padding: 20px;
    font: inherit;
    background: #fda;
}
<div>Look at this, this text is very neat, isn't it? But it's not quite what we want, though, is it? This text shouldn't be here! It should be all the way over there! What can we do?</div>
<pre>The pre tag has come to the rescue! Yay! However, we apologise in advance for any horizontal scrollbars that may be caused. If you need support, please raise a support ticket.</pre>answered Nov 4, 2020 at 19:41
![]()
corn on the cobcorn on the cob
1,8043 gold badges19 silver badges26 bronze badges
Such a basic requirement is not found in any of the menus.
asked Nov 11, 2010 at 4:04
![]()
6
Word holds document text in pages.
Disabling word wrap would cause the text to fall off of the page.
This is not possible.
answered Nov 11, 2010 at 4:06
![]()
SLaksSLaks
7,9142 gold badges35 silver badges59 bronze badges
I think what you are looking for is a text editor, not a word processor like Word, which is meant for formatting documents to fit on certain paper sizes.
Notepad comes as standard on Windows, but there are probably hundreds to choose from. Here’s a non-exhaustive list.
answered Nov 11, 2010 at 4:43
![]()
paradroidparadroid
22.5k10 gold badges72 silver badges113 bronze badges
In the bottom left corner are 4 icons. One of them will turn off word wrap just on the page. It will still wrap the text to the screen though. I believe the one to try is the Web Layout, but without 2003 anymore, I can’t test
answered Jul 19, 2012 at 6:34
![]()
Canadian LukeCanadian Luke
24k39 gold badges116 silver badges168 bronze badges
Updated: 08/02/2020 by
Word wrap may refer to any of the following:
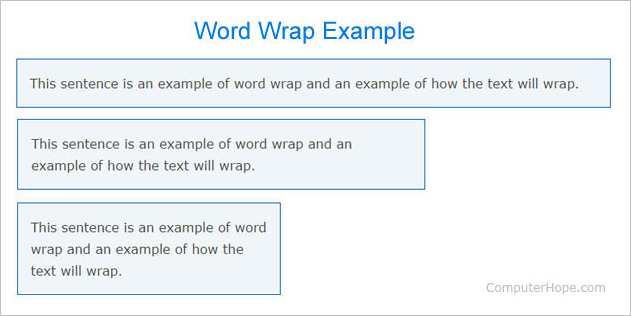
1. Sometimes called a run around and wrap around, word wrap is a feature in text editors and word processors. It moves the cursor to the next line when reaching the end without requiring you to press Enter. For example, in the picture below, as each section shrinks, the sentence is wrapped, so it doesn’t extend past the border. You can see a live example of how text wraps by resizing the browser window on this page.
- Live example of word wrap
- Why is word wrapping used?
- Turning off word wrap.
- Why would someone turn off word wrap?
- How to wrap text at a certain number of characters.
Live example of word wrap
In textarea fields, the cursor automatically moves to the next line when it reaches the edge of the box. You can test this in the textarea below.
Why is word wrapping used?
Word wrapping is used to help contain text within an area and to prevent text from being cut off or missed. For example, all of the text on this page is wrapped in an HTML div tag for easy reading. If there were no word wrapping, you would have to scroll horizontally (left-to-right) instead of vertically (up and down) on any long line of text.
Turning off word wrap
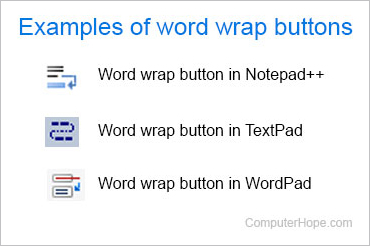
Word wrap is often set up by default and can be turned off by enabling hyphenation, clicking the word wrap button, or adjusting the program’s settings. The picture shows an example of what a word wrap button may look like or resemble for programs that have the option.
Note
If word wrap is disabled, when typing, the line of text continues horizontally on the same line until Enter is pressed.
Why would someone turn off word wrap?
When working with files that contain long lines of text, it may be easier to view and find text with word wrap turned off. For example, if you had a .csv file with several values per line, you can see the beginning of each row more easily if you disable word wrap.
How to wrap text at a certain number of characters
You can use our text tool to wrap any text at a certain length. For example, if you wanted to wrap your text at 100 character length you can paste your text into the tool and enter «100» into the «wrap text at» section.
2. In Microsoft Excel and other spreadsheet programs, word wrap is more commonly called Wrap Text.
Alignment, Soft return, Text wrap, Word, Word processor terms
Guest
-
#1
I know I should be able to turn off word wrap, like you can in Notepad, but I
have not been able to locate this option? Please help.
Thank you,
Brenda
Advertisements
Tony Jollans
-
#2
With word wrap off in Notepad lines will disappear into the blue yonder if
you don’t have a carriage return. Word has nothing like that and will always
wrap. The choices you have are «Wrap to Window» (under Tools > Options >
View tab) or wrap as the printed page.
Want to reply to this thread or ask your own question?
You’ll need to choose a username for the site, which only take a couple of moments. After that, you can post your question and our members will help you out.
Ask a Question
Microsoft Excel includes a text-wrapping command that you can use to view all of your text in a single cell without adjusting the column width. Turning off the word wrap option and widening the column width allows more characters to display in a row and displays more rows of data on the screen. Likewise, Microsoft Word includes hyphenation options that disable word wrapping and insert hyphens in long words at the end of a line. These alignment and page setup tools help you to prepare your text for optimum readability for your clients and colleagues.
Excel
-
Open your Excel worksheet and click the cell you want to format.
-
Click the “Home” tab on the ribbon.
-
Click the “Wrap Text” button in the Alignment group to cancel the word-wrapping option. This button is marked with two rectangles and a curved arrow.
Word
-
Open your Word document and click the “Page Layout” tab on the ribbon.
-
Click the “Hyphenation” button in the Page Setup group to open a list of options.
-
Click the “Automatic” option to automatically insert hyphens as needed at the end of each line.
Word wrapping is one of the many essential features that every single text editor should have. And yes, of course a popular source code editor such as VSCode has that feature built-in. Yet, some of you may not be familiar with the interface and how to configure settings in VSCode.
This short article is going to show you how to quickly toggle word wrapping on and off, as well as customize word wrap settings in VSCode.
Quickly turn on/off word wrap in VSCode
You can toggle word wrap for the VS Code session by pressing a key combination. On Windows or Linux, simply press Alt+Z. On MacOS, you can also press Option ⌥ + Z.
Alternatively, one can enable/disable word wrapping by selecting View > Word Wrap from the Menu.

Advanced word wrap settings
Most of the time, the word wrap feature just works out of the box without any additional configuration. But VSCode allows you to fine-tuning it even more by using a few other settings flags.
To further customize VSCode word wrap, you need to access VSCode settings first. You can do that by accessing File > Preferences or press Ctrl + , key combination. Alternatively, open Command Palette and find Open Settings (JSON) to open settings.json.
If you enabled word wrapping, there should be a key editor.wordWrap set to on in the settings.json file. It can be customized with the following options.
"editor.wordWrap"controls how the lines should wrap."editor.wordWrap": "off"turns off word wrapping. Lines would not be wrapped."editor.wordWrap": "on"– Lines will wrap at the viewport width."editor.wordWrap": "wordWrapColumn"– Lines will wrap at the"wordWrapColumn"width, no matter how the window are resized."editor.wordWrap": "bounded"– Lines will wrap at the minimum of viewport andeditor.wordWrapColumn.
"wordWrapColumn": 80– Lines will wrap if the line length exceed 60 characters."editor.wrappingIndent"– Controls the indentation of wrapped lines. You can set this option to “none”, “same”, “indent” or “deepIndent”."editor.wrappingIndent": "none": No indentation. Wrapped lines begin at column 1."editor.wrappingIndent": "same": Wrapped lines get the same indentation as the parent line."editor.wrappingIndent": "indent": Wrapped lines get +1 indentation toward the parent line."editor.wrappingIndent": "deepIndent": Wrapped lines get +2 indentation toward the parent line.
The end result should look like this
"editor.wordWrap": "bounded",
"editor.wrappingIndent": "same",
"editor.wordWrapColumn": 60,Code language: JavaScript (javascript)
Once you’ve done inserting the settings into settings.json, save the file and restart VSCode to see the result.
Hard wrap lines in VSCode
Currently, VSCode only supports softwrapping out of the box. Users who are familiar with Vim may want something called “hard wrap”. Hard wrapping means a newline would be automatically inserted at the closest word boundary if a line exceed a specified length. The feature can be helpful if you’re writing in Markdown or other markup language.
In order to enable hard wrap in VSCode, you have to install an extension called Vim. If you didn’t know how to do that yet, we had a guide on how to install VSCode extensions to help.
Once you have Vim emulation installed, open settings.json and insert the following line
"vim.textwidth": 80,Code language: JavaScript (javascript)Remember to replace 80 with the line length you want. I personally find 80 to be the best setting.
Alternatively, you can use Rewrap by stkb extension if Vim inteferes with your current settings.

We hope that this article helped you learn how to set up word wrap in VSCode to build up a better programming workflow. You may also want to see our guide on Spell Check Extensions for VSCode, how to integrate ZSH terminal to VSCode and how to format JSON in VSCode.
pdishee
Smack-Fu Master, in training
-
Add bookmark
-
#1
Hey,<BR>I basically want my microsoft word document to behave like a notepad document with word wrap off. In other words, I want my word document to allow my sentences to hang off the page, and then use the horizontal scroll bar to go to and fro across the page. How do I do this?
-
Add bookmark
-
#2
I really do not believ you can do this in any of the settings or anything.
-
Add bookmark
-
#3
Use wordpad, if you don’t need any of the text formatting that Word does, use a different app. — View image here: http://episteme.arstechnica.com/infopop/emoticons/icon_smile.gif —
pdishee
Smack-Fu Master, in training
-
Add bookmark
-
#5
Word treats your documents like pieces of paper, so you would have to get around that to use Word that way.
me2
Ars Tribunus Militum
-
Add bookmark
-
#6
…which you could do by just making the page really wide.
-
Add bookmark
-
#7
You can make the paragraph right indent some very large negative number to effectively disable word wrap. You’ll have to use Normal View to see the text hanging off the page; it will not be shown in Print Layout View.