![]()
Download Article
![]()
Download Article
In Microsoft Word, you can do a lot more than simple word processing—you can create charts and graphs, add media, and draw and format shapes. These quick, easy steps will show you how to draw a 3D shape or add 3D effects to existing shapes. Before beginning, make sure you have updated to the latest version of Microsoft Word.
-

1
Select Insert > Shape. You’ll find the “Insert” menu at the top of the screen.
- Mac users will see a menu of shapes appear on the right side of the screen.
- PC users will see a drop down menu of shapes.
-
2
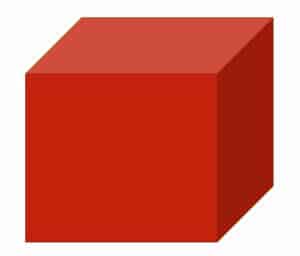
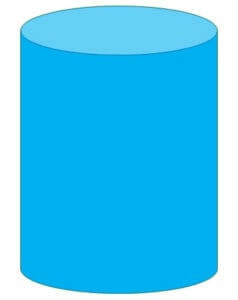
Select a 3D shape. As you scroll through the available shapes, you’ll see a small selection of pre-formatted 3D objects, including a cube, a cylinder (“can”), and a bevel. Click on your desired shape to select it.
Advertisement
-
3
Draw your 3D shape. Click anywhere on your document and your shape will appear in previously determined measurements, usually equalling or close to 1”x1”.
- You can also click and drag to draw your shape in the desired dimensions.
-
4
Modify your shape. You can modify your shape by clicking on it to reveal resize boxes. Click and drag any of these to resize your object and also change the direction it’s facing.


Advertisement
-
1
Select Insert > Shape. You’ll find the “Insert” menu at the top of the screen.
- Mac users will see a menu of shapes appear on the right side of the screen.
- PC users will see a drop down menu of shapes.
-
2
Draw a 2D object. Click on a 2D object that you’d like to convert to three dimensions. Click on your document and your shape will appear.
-
3
Open the format menu. Right click (for Mac users, Ctrl + click) the shape and select “Format Shape”.
-
4
Rotate your object in three dimensions. Select “3-D Rotation” and use the rotation buttons to turn your shape along the X, Y, and Z axes. Play with the rotation until your shape is facing the desired direction.
- You need to rotate the shape along the X or Y axis to see the depth you are about to add.
-
5
Add depth to your object. Still in your “Format Shape” menu, select 3-D Format > Depth and Surface. Increase the “Depth” value to your desired depth and watch your 2D shape become 3D.
- You can experiment with the depth amount and the X, Y, and Z angles until you are satisfied with the look of your 3D object.
- The 3-D Format > Bevel menu allows you to add more 3D effects to the top and bottom of your object.
-
6
Click “Ok” when you are finished.


Advertisement
-
1
Add a Text Box or WordArt. Select Insert > Text Box or Insert > WordArt. You’ll find the “Insert” menu at the top of the screen. Draw your box and type your desired text in the box.
-
2
Add 3D effects to the box. Right click (for Mac users, Ctrl + click) your WordArt or Text Box and choose “Format Shape” from the drop down menu. Under «3-D Rotation», change the X and/or Y axis numbers; under «3-D Format», increase the value of the depth.
- You can experiment with the depth amount and the X, Y, and Z angles until you are satisfied with the look of your 3D object.
- To better see the 3D effects you’ve added to the object, change the fill color in the «Format Shape» menu.
-
3
Add 3D effects to the letters. Right click (for Mac users, Ctrl + click) your WordArt or Text Box and select “Format Text Effects” from the drop down menu. Under «3-D Rotation», change the X and/or Y axis numbers; under «3-D Format», increase the value of the depth.
- To better see the 3D effects you’ve added to the object, change the fill color in the «Format Text Effects» menu.


Advertisement
Add New Question
-
Question
Can I divide the cube into 12 x 12 text boxes in each part?

You have to click the insert button and click INSERT CHART. Then you have to choose the 12 by 12 cube, and you’re done!
Ask a Question
200 characters left
Include your email address to get a message when this question is answered.
Submit
Advertisement
-
If you haven’t made 3D objects before, it is best to start with a simple shape.
-
You can experiment with coloring and shading in Format Shape > Fill and Format Shape > 3-D Format > Depth and Surface.
Thanks for submitting a tip for review!
Advertisement
About This Article
Thanks to all authors for creating a page that has been read 200,141 times.
Is this article up to date?
Download PC Repair Tool to quickly find & fix Windows errors automatically
Adobe Illustrator offers so many ways to help you bring out your creativity. You can have multiple ways to make your personal or business projects stand out. This article will be exploring how you can write in any shape using Illustrator. This technique can be used to create interesting logos because you can create unique shapes to write in.

Using Illustrator you can shape text into a shape or fill a shape with text. Let us see how to warp and convert Text to Shape in Illustrator.
Write in any Shape using Illustrator
Writing in shapes can attract the interest of people. Something is interesting about a word written in a shape. You will be able to write in any shape of your choice after reading this article. The steps are easy to follow and require no advanced skills.
- Prepare the Text
- Choose the Shape
- Merge The text and Shape
- Finalize
How to make text into a shape in Illustrator
1] Prepare the Text
When writing in shapes, it is good to choose a nice full text that will look fill in the shape. Choose a text that is not narrow, choose one that will fill out the shape nicely. Avoid texts that are joined together, look for ones that are readable whether you will be writing in all caps or first letter caps.
2] Choose the Shape
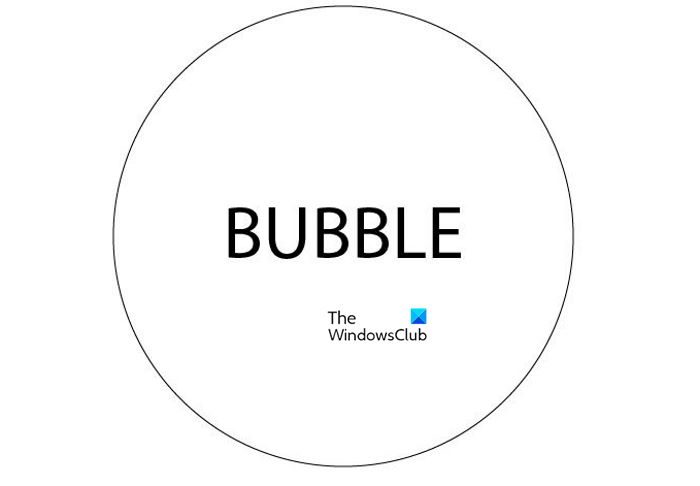
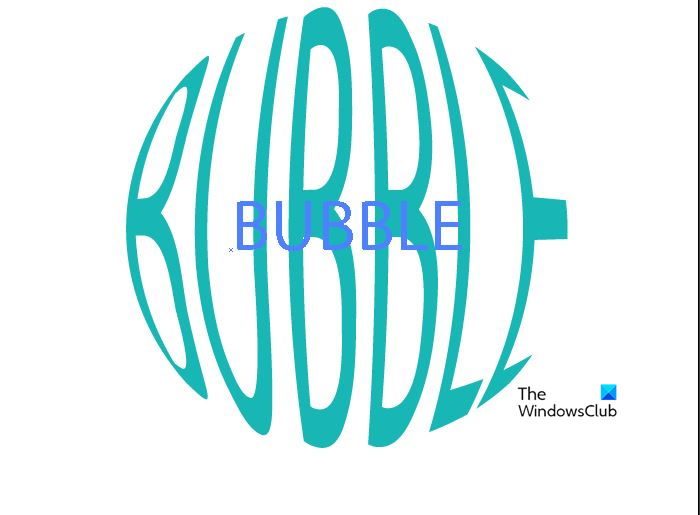
Choose the shape that fits your project, you may be working on a soap advertisement so you may want to write in a circle to represent a bubble. This will add some style and interest to your artwork and the package will attract more customers. Note that you do not want to distort too much because you want the text to be readable.
Open Illustrator and choose the options that best fit your project.
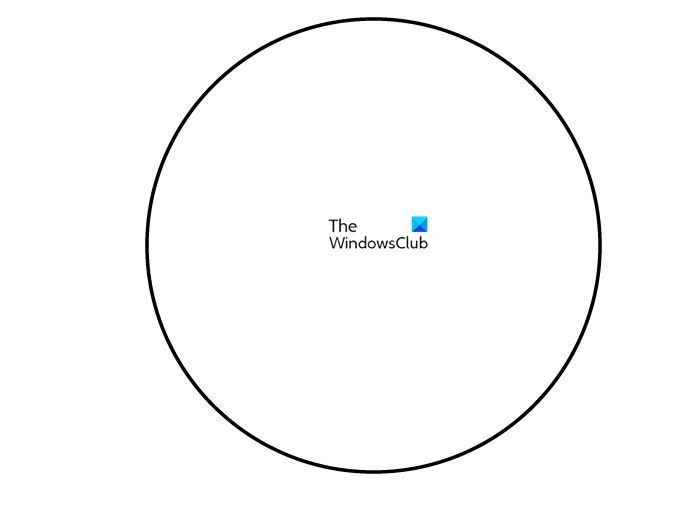
Draw the shape you want by using the tools that are there like the Ellipse Tool or the Polygon Tool. You may also create your own custom shape to write in.
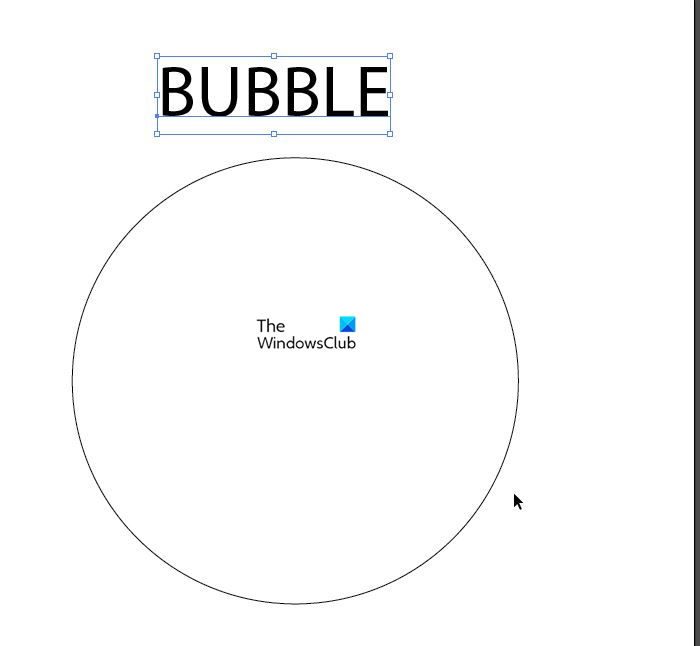 Write the word that you want to be in the shape.
3] Merge the Text and Shape
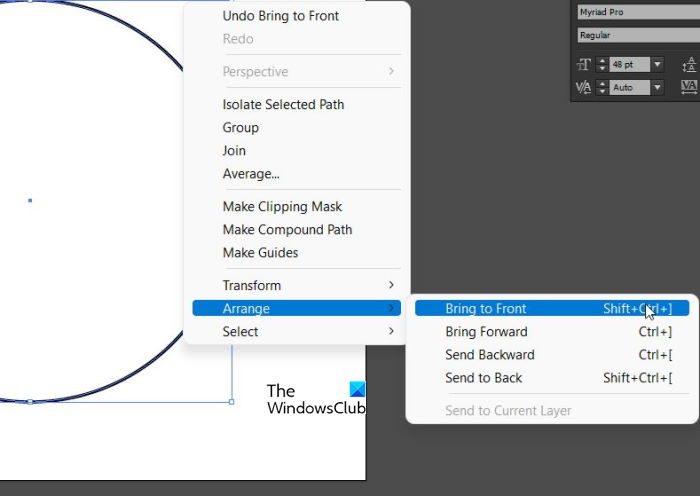
Make sure that the shape will be in front of the word. You can do this by right-clicking the shape, click Arrange then click Bring to front. Since the shape will be in front of the text, make sure that the shape has no fill color as it will hide the word?
Select the shape then hold Shift and select the word and this will make sure that both are selected. Go to the Align Window or click Shift + F7 to bring it up. Align both the word and shape to the center vertically and horizontally.
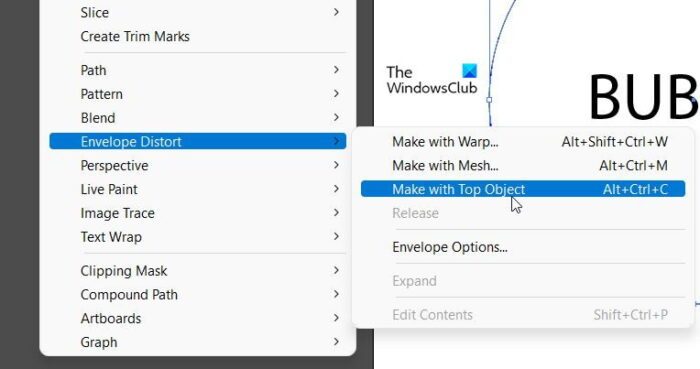
When both are selected go to Object then Envelope Distort click Make With Top Object.
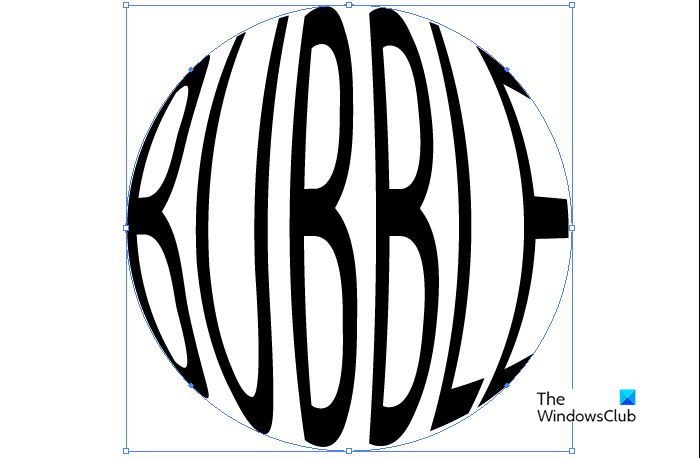
This is the finished product. The word is now in the shape of the circle and the circle has disappeared.
4] Finalize
 You can now add whatever else you need to add to the text to make it fit into your project. You can add color and other layer styles to make it look like what you want.
 You may wonder what would happen if you had a spelling error in the word. Well, you can edit the shaped word and even change the text completely to a new word if you want to. Double click with the Selection Tool at the center of the warped word and you will see the original word show up.

This will make the original word always visible when you hover at the center of the warped word. You can use the Text Tool and click the original word and make whatever changes you like. When you are finished editing just click the Selection Tool.
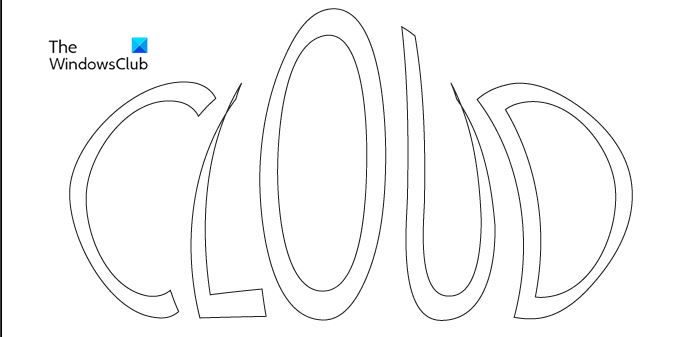
Here is another example using a cloud shape that was made using the shapes in Illustrator and then merged with the Shape Building Tool.
Now read: How to Warp and Convert multiple Words to one Shape in Illustrator
What can Writing in Shapes be used for?
Writing in shapes can be used for a lot of things. Writing in shapes can be used as logos, it can be used to add some interest to your artwork. Writing the word apple in the shape of an apple can also invoke the memory of an apple in an advertisement.
Read: How to type inside a Shape using Photoshop
How Hard is it to write in Shapes?
This article shows how easy it is to write in any shape. Before this method was available in Illustrator. you would have to use the warp tool to manually fix text into shape. Following these steps will help you to make your own text into any shape.
Read: How to make a Chef Hat in Illustrator.

Yulando is a graduate of Computers & Information Technology and has worked for many years creating, maintaining, and repairing computers and networks, and in Web site designing. He has also managed a printery and done graphics designing. He is trained in Advanced Microsoft Word, Access, and Excel.
You can use WordArt with a Transform text effect to curve or bend text around a shape. If you want the text to circle the shape, you can also do this, but it’s a little bit more work. You can also insert WordArt multiple times to wrap text around shapes with straight edges.

-
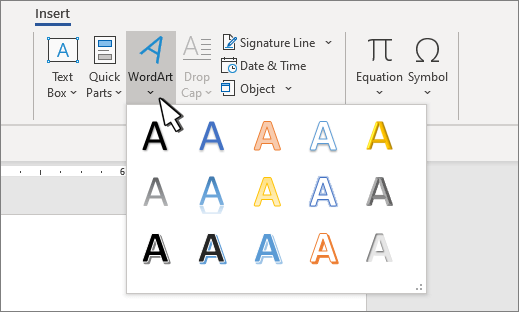
Go to Insert > WordArt, and pick the WordArt style you want.
Note: The WordArt icon is located in the Text group, and it may appear different depending on the version you’re using and the size of your screen. The icon may also look like this
or . -
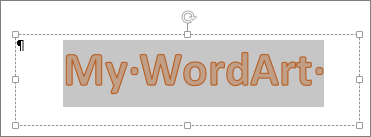
Replace the WordArt placeholder text with your own text.
-
Select your WordArt text.
-
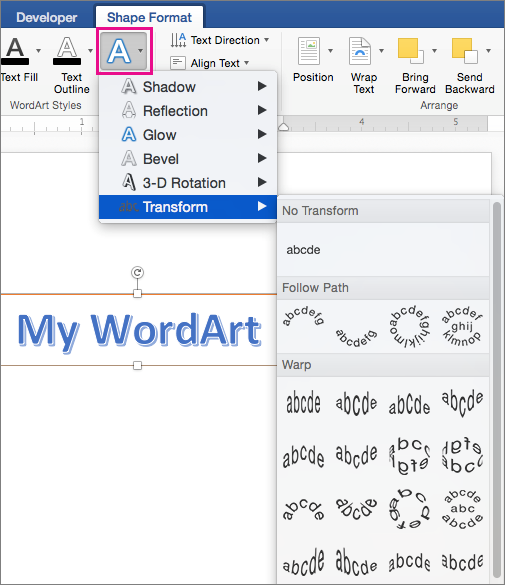
Go to Shape Format or Drawing Tools Format, select Text Effects >Transform and pick the look you want.
 or
or  .
.
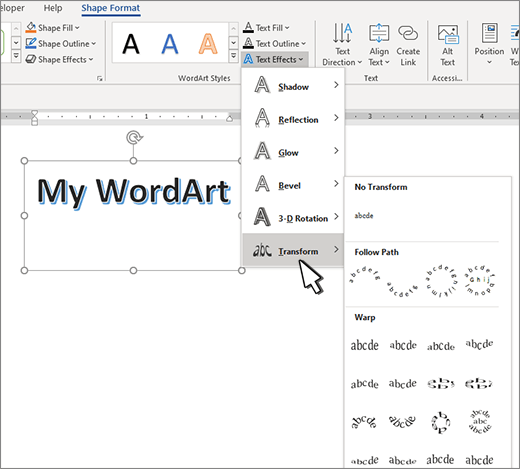
Note: Depending on your screen size, you might only see the icons for WordArt Styles.

Advanced techniques
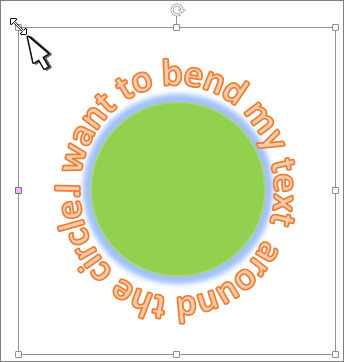
Wrap around a circle To create text that completely circles your shape, choose Circle under Follow Path, and then drag any of the sizing handles until your WordArt is the size and shape you want.
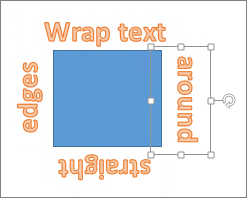
Wrap around straight edges To wrap text around a shape that has straight edges, such as a rectangle, insert WordArt objects for each edge. In this example, WordArt is inserted four times, one for each side of the shape.
Group moves and copy To move or copy multiple WordArt objects as a single shape, see Group or ungroup shapes, pictures, or other objects .
Precise angle control You can control the angle of your WordArt text in relation to your shape with precision by using the Rotate tool.
If you need very precise control or are creating a complex combination of shapes and text, you’ll want to use a third-party drawing or graphics program to create the text around your shape and then copy and paste it into your Office document.
See Also
Add shapes
Insert WordArt
Create curved or circular WordArt
-
Go to Insert > WordArt.
-
Pick the WordArt style you want.
-
Type your text.
-
Select the WordArt.
-
Go to Shape Format > Text Effects > Transform and pick the effect you want.


Advanced techniques
Wrap around a circle To create text that completely circles your shape, choose Circle under Follow Path, and then drag any of the sizing handles until your WordArt is the size and shape you want.
Wrap around straight edges To wrap text around a shape that has straight edges, such as a rectangle, insert WordArt objects for each edge. In this example, WordArt is inserted four times, one for each side of the shape.
Group moves and copy To move or copy multiple WordArt objects as a single shape, see Group or ungroup shapes, pictures, or other objects .
Precise angle control You can control the angle of your WordArt text in relation to your shape with precision by using the Rotate tool.
If you need very precise control or are creating a complex combination of shapes and text, you’ll want to use a third-party drawing or graphics program to create the text around your shape and then copy and paste it into your Office document.
In Word for the web you can see WordArt that’s already in your document, but to add more WordArt you need to open or edit the doc in the desktop version of Word.
You can use the Font features on the Home tab to change the font color and size, and apply bolding, italics, or underlines to your text.
Vocabulary Builder Courses
Today we’re going to do a vocabulary with pictures lesson to help you learn and pronounce names of shapes in English, both two-dimensional and three-dimensional ones.
You’ll learn both the noun form (the name of the shape itself) and the adjective form (how to describe something else with this shape) – in some cases those are the same, and in other cases they’re different.
Have you ever wanted to say something in English, but you just couldn’t think of the right word? That’s a vocabulary problem, and it can be really frustrating! If you want to expand your vocabulary fast, come join my Vocabulary Builder Courses.
Not only do they have lessons that are full of useful words and pictures, but they also have quizzes and exercises to help you put the new words into practice right away.
2D shapes in English
Let’s start with our basic shapes – make sure to listen and repeat after me to practice pronouncing them.
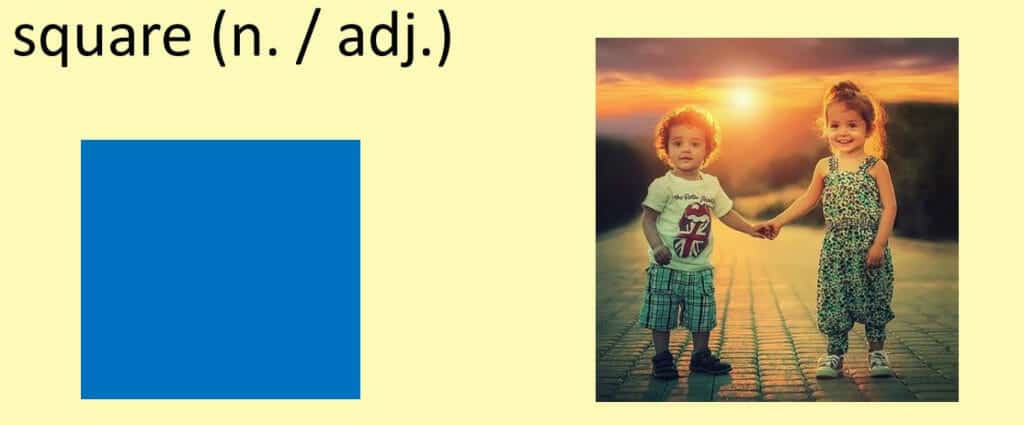
square (n. / adj.)
The word square is both a noun and an adjective. So we would say “this is a blue square” and “this is a square photo.”
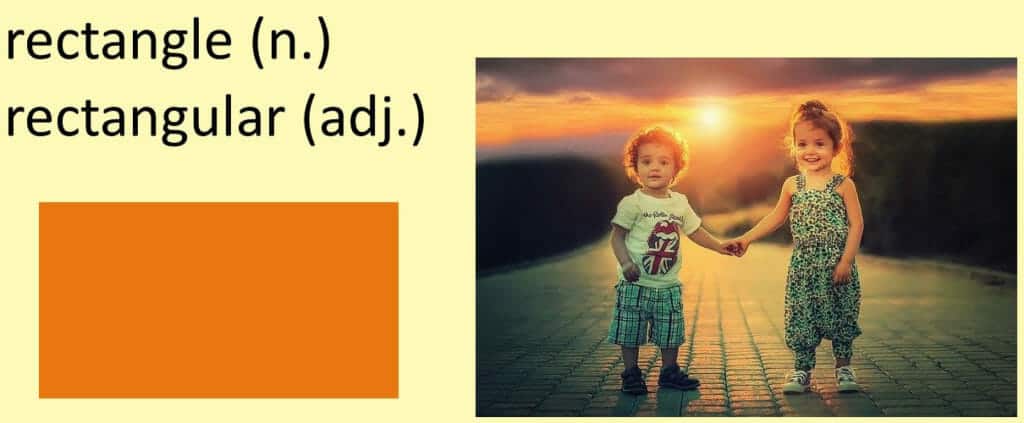
rectangle (n.) / rectangular (adj.)
The noun is rectangle and the adjective is rectangular. So we would say “this is an orange rectangle” and “this is a rectangular photo.” – the adjective, rectangular, describes something else (the photo)
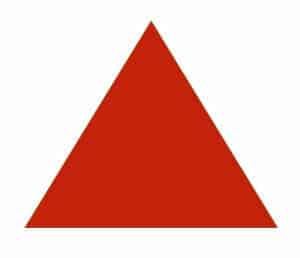
triangle (n.) / triangular (adj.)
circle (n.) / circular (adj.)

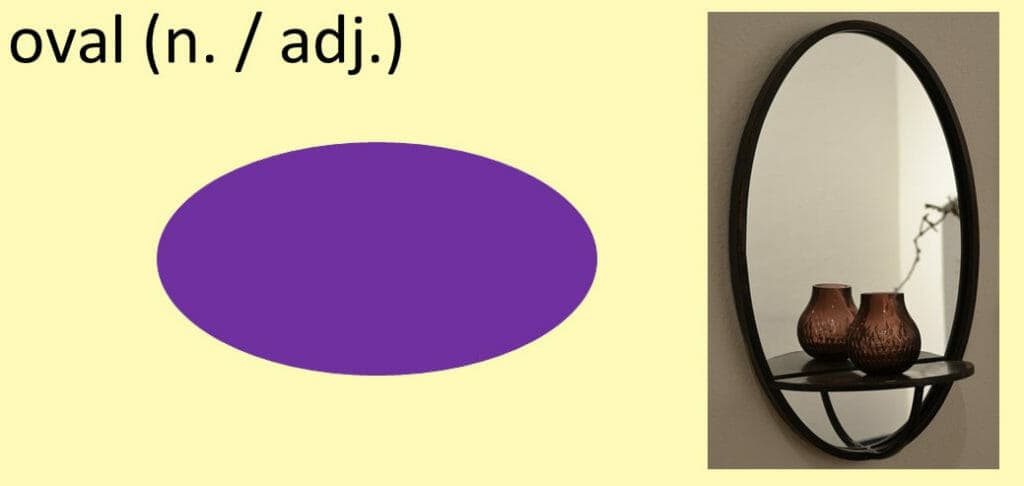
oval (n. / adj.)
The noun and adjective form are the same – this is an oval mirror.
semicircle (n.) / semicircular (adj.)

crescent (n.) / crescent-shaped (adj.)

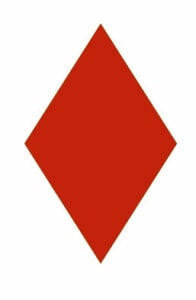
diamond (n.) / diamond-shaped (adj.)
pentagon (n.) / pentagonal (adj.)

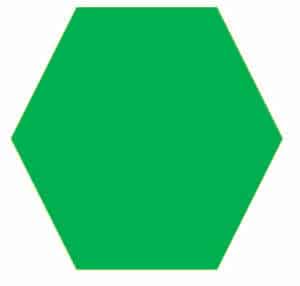
hexagon (n.) / hexagonal (adj.)
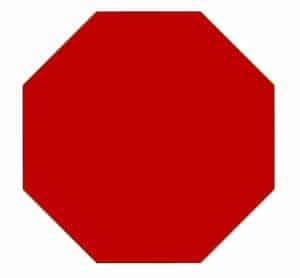
octagon (n.) / octagonal (adj.)
trapezoid (n.) / trapezoidal (adj.)

parallelogram (n.)

We don’t use this one as an adjective.
3D shapes in English
cube (n.) / cubic (adj.)
sphere (n.) / spherical (adj.)

cylinder (n.) / cylindrical (adj.)
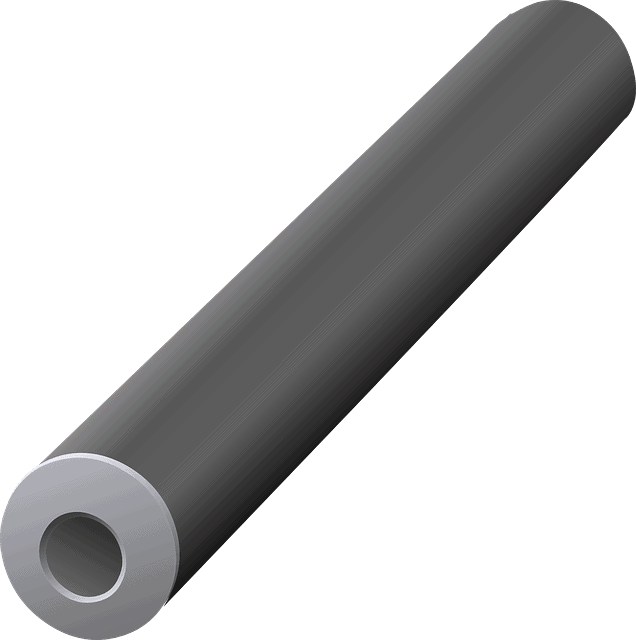
tube (n.) / tubular (adj.)
cone (n.) / conical (adj.)

pyramid (n.)

We don’t really use this as an adjective, but I suppose you could say pyramid-shaped
torus (n.) / donut (n.) – more common

This shape is technically called a torus, but most people outside the fields of math and physics would just call it a donut, or describe something as donut-shaped.
Now if you really want to go crazy and get into geometry, there are some other terms for more unusual shapes, but here at Espresso English I always want to teach you the most common and practical vocabulary that we actually use in daily life.
And that’s the approach I used when I created my Vocabulary Builder Courses – out of the hundreds of thousands of words in the English language, I selected very useful ones that will help you express yourself better. So go check out the Vocabulary Builder to continue learning.
All right, that brings us to the end of today’s lesson. Thanks for watching and I’ll talk to you in the next one!
Updated: 03/05/2023 by
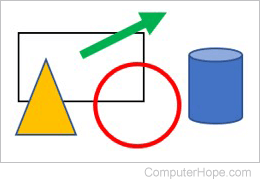
When creating a document in Microsoft Word, or a spreadsheet in Microsoft Excel, users can add many types of shapes to highlight important items. Bringing attention to those items helps readers to better understand the content of the document or spreadsheet. After a shape is added, it can be modified by changing features, such as size, color, and fill.
To add and edit a shape in Microsoft Word and Microsoft Excel, select a link below for help.
Add shapes in Microsoft Word
Select the version of Microsoft Word you’re using below and follow the steps to learn how to add a shape in a document.
- Microsoft Word Online.
- Microsoft Word desktop application.
Microsoft Word Online
- In Microsoft Word Online, click the Insert tab at the top of the window.
- On the Insert tab, in the Illustrations group, click the Drawings option.
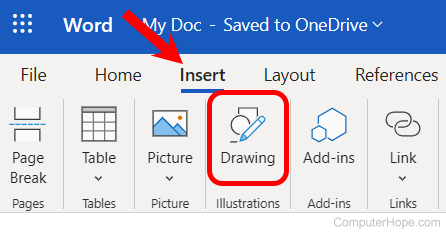
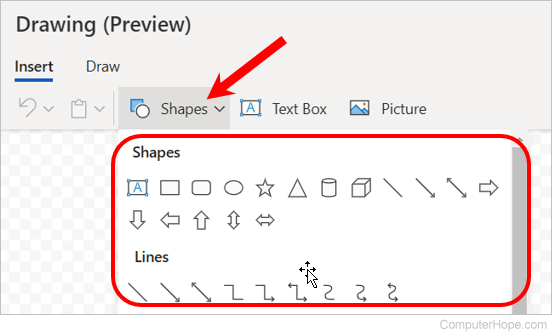
- In the Drawings (Preview) window, click the Shapes option, and select the type of shape you want to add or draw from the drop-down menu that appears.
- After selecting the desired type of shape, draw the shape in the Drawing window, then click the Save and Close button to add the shape in your Word Online document.
Microsoft Word desktop application
- In Microsoft Word, click the Insert tab at the top of the program window.
- On the Insert tab, in the Illustrations group, click the Shapes option.
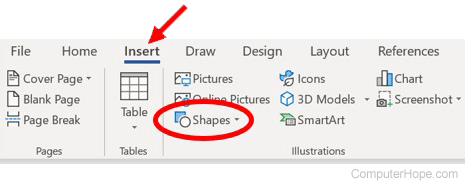
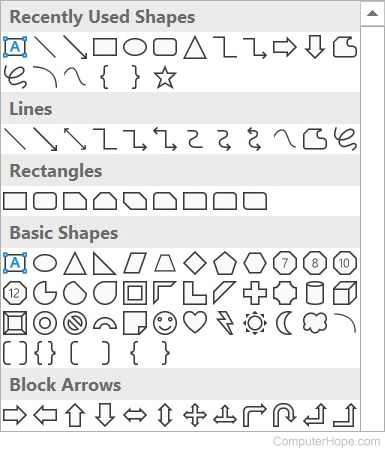
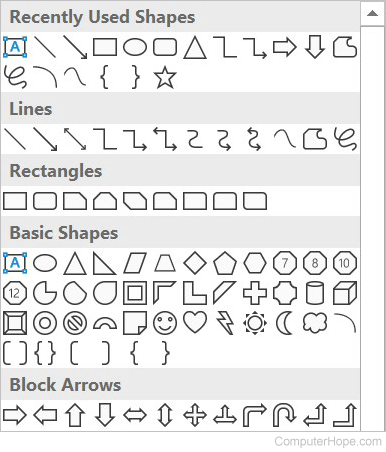
- Select the type of shape you want to add or draw from the drop-down menu that appears.
Add shapes in Microsoft Excel
The following steps help you add a shape to a spreadsheet in Microsoft Excel Online or the desktop application.
- In Microsoft Excel, click the Insert tab at the top of the program window.
- On the Insert tab, click the Illustrations option, then click the Shapes option.
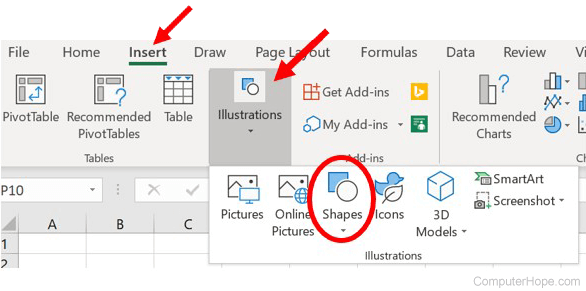
- Select the type of shape you want to add or draw from the drop-down menu that appears.
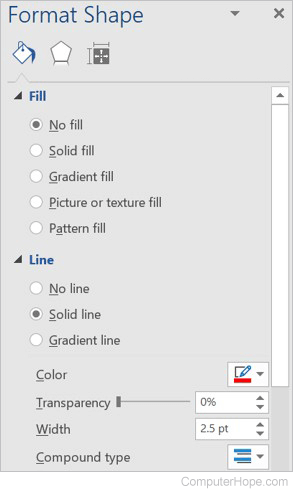
Edit shapes in Microsoft Word and Excel
- Click the shape to select it.
- Right-click the shape and select Format Shape in the pop-up menu.
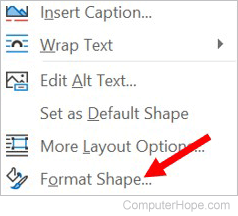
- The Format Shape section opens on the right side of the program window. You can change the shape’s fill, select the type and fill color (or no fill at all), and the size, color, and shape’s lines. You can also add shadow, glow, reflection, and other effects.