
Word for Microsoft 365 Word 2021 Word 2019 Word 2016 Word 2013 Word 2010 Word 2007 More…Less
You can often improve the look of your document by keeping certain words and paragraphs together on the page or across page breaks. Also, you can use hyphenation to improve overall readability.
Word automatically breaks the text at a space or a hyphen at the end of a line. To keep two words or a hyphenated word together on one line, you can use a nonbreaking space or nonbreaking hyphen instead of a regular space or hyphen.
-
Click where you want to insert the nonbreaking space.
-
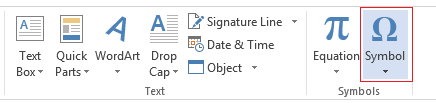
On the Insert tab, in the Symbols group, click Symbol.

-
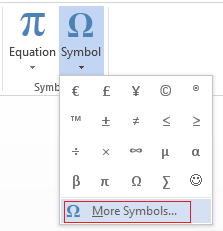
In the box that opens, click More Symbols.
-
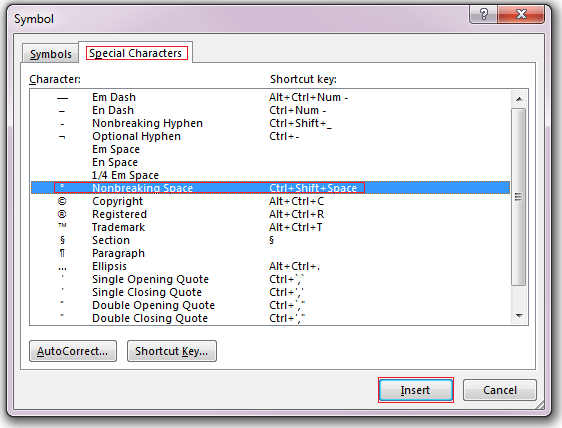
In the Symbol dialog box, on the Special Characters tab, click the Nonbreaking Space row to highlight it, and then click Insert.
-
Click Close.
Tip: You can also use the keyboard shortcut. Click where you want to insert the nonbreaking space, and press Ctrl+Shift+Spacebar.
Sometimes you want a hyphenated word to stay together on one line, without it breaking across lines.
-
Click where you want to insert the nonbreaking hyphen.
-
On the Insert tab, in the Symbols group, click Symbol.
-
In the box that opens, click More Symbols.
-
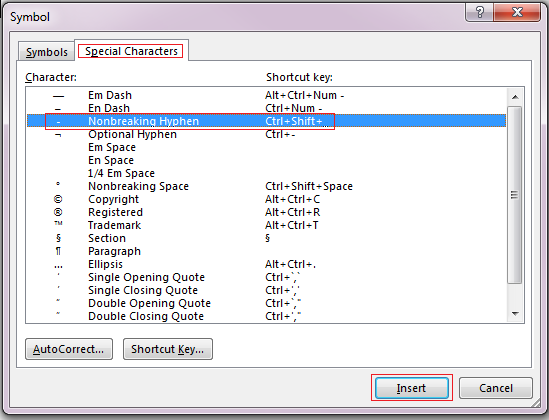
In the Symbol dialog box, on the Special Characters tab, click the Nonbreaking Hyphen row to highlight it, and then click Insert.
-
Click Close.
Tip: You can also use the keyboard shortcut. Click where you want to insert the nonbreaking hyphen, and press Ctrl+Shift+Minus Sign.
Word automatically breaks paragraphs at the end of a page, so a paragraph that started on one page continues on to the next page. To keep the whole paragraph on the same page, follow these steps.
-
Right-click the paragraph that you want to keep together. In the box that opens, select Paragraph.
-
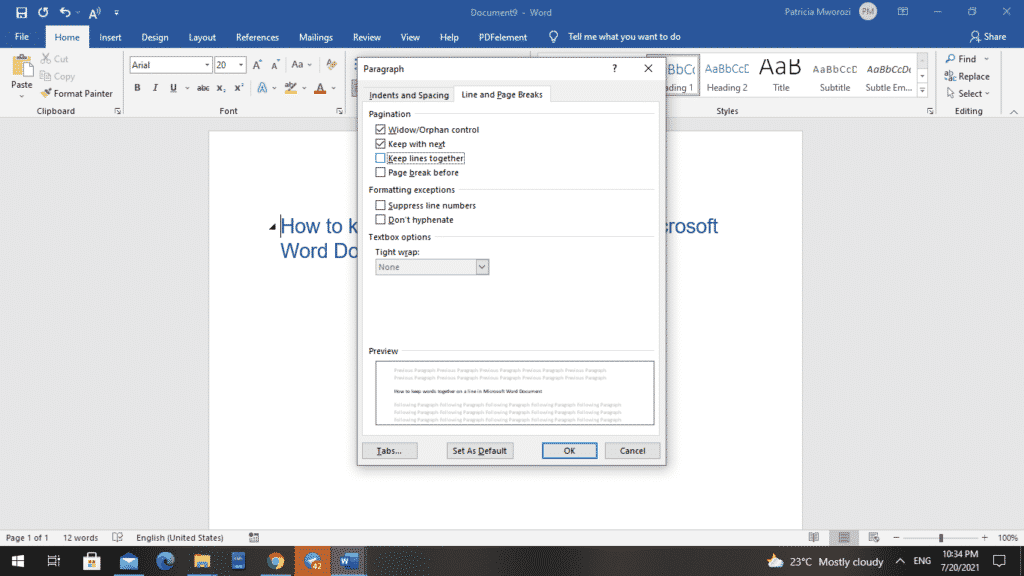
In the Paragraph dialog box, click the Line and Page Breaks tab.
-
In the Pagination section, select the Keep lines together check box, and click OK.
If two consecutive paragraphs or a subhead and a paragraph are closely related, you might want to keep them on the same page.
-
Right-click the paragraph or subhead that you want to keep with the content that follows it. In the box that opens, select Paragraph.
-
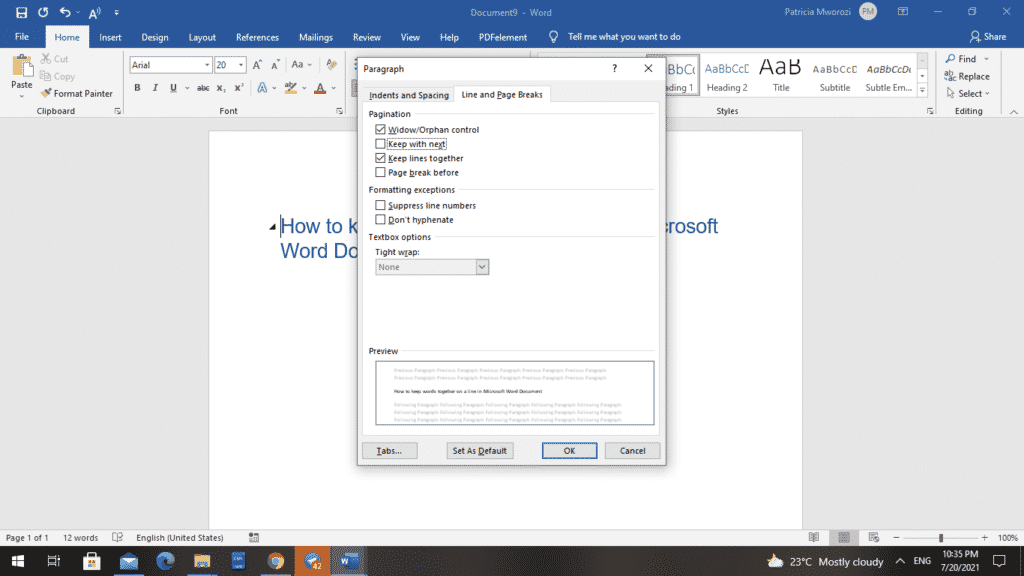
In the Paragraph dialog box, click the Line and Page Breaks tab.
-
In the Pagination section, select the Keep with next check box, and click OK.
Tip: It’s best not to add additional line breaks between your paragraphs because Word interprets each line break as a beginning of a new paragraph, and page breaks might not occur properly. If you want spaces between paragraphs, use the Paragraph Spacing controls. For more information, see Change spacing between paragraphs.
If a paragraph has a page break in the middle so that only the last line appears at the top of the following page, this lonely line is called a “widow.” If, on the other hand, a paragraph has a page break in the middle so that only the first line appears at the bottom of a page while the rest of the paragraph appears on the next page, this lonely line is called an “orphan.”
If you want to avoid widow and orphan lines in your document, follow these steps.
-
Right-click the paragraph in which you want to avoid widows and orphans. In the box that opens, select Paragraph.
-
Click the Line and page breaks tab.
-
In the Pagination section, select the Widow/Orphan control check box.
-
Click OK.
If a word is too long to fit at the end of a line, Microsoft Office Word 2007 moves the word to the beginning of the next line instead of hyphenating it. However, you can use the Hyphenation feature to automatically or manually hyphenate the text, insert optional or nonbreaking hyphens, and set the maximum amount of space allowed between a word and the right margin without hyphenating the word.
With automatic hyphenation, Office Word 2007 automatically inserts hyphens where they are needed. If you edit the document later and change line breaks, Office Word 2007 will re-hyphenate the document.
-
Make sure that no text is selected.
-
On the Page Layout tab, in the Page Setup group, click Hyphenation, and then click Automatic.
An optional hyphen is a hyphen that is used to control where a word or phrase breaks if it falls at the end of a line. For example, you can specify that the word «nonprinting» breaks as «non-printing» instead of «nonprint-ing.» When you insert an optional hyphen in a word that is not at the end of a line, the hyphen will be visible only if you turn on Show/Hide.
-
On the Home tab, in the Paragraph group, click Show/Hide.
-
Click in the word where you want to insert the optional hyphen.
-
Press CTRL+HYPHEN.

To automatically hyphenate part of a document, do the following:
-
Select the text that you want to hyphenate.
-
On the Page Layout tab, in the Page Setup group, click Hyphenation, and then click Automatic.
When you manually hyphenate text, Office Word 2007 searches for text to hyphenate. After you indicate where you want to hyphenate the text, Word inserts an optional hyphen. If you later edit the document and change line breaks, Office Word 2007 displays and prints only the optional hyphens that still fall at the end of lines. Word doesn’t re-hyphenate the document.
-
Select the text you want to hyphenate.
-
On the Page Layout tab, in the Page Setup group, click Hyphenation, and then click Manual.
-
If Office Word identifies a word or phrase to hyphenate, do one of the following:
-
To insert an optional hyphen in the location that Office Word proposes, click Yes.
-
To insert an optional hyphen in another part of the word, move the insertion point to that location, and then click Yes.
-
Nonbreaking hyphens prevent hyphenated words, numbers, or phrases from breaking if they fall at the end of a line of text. For example, you can prevent 555-0123 from breaking; instead, the entire item will move to the beginning of the next line.
-
Click where you want to insert a nonbreaking hyphen.
-
Press CTRL+SHIFT+HYPHEN.
The hyphenation zone is the maximum amount of space Office Word 2007 allows between a word and the right margin without hyphenating the word. You can change the hyphenation zone to make it wider or narrower. To reduce the number of hyphens, make the hyphenation zone wide. To reduce the raggedness of the right margin, make the hyphenation zone narrower.
-
On the Page Layout tab, in the Page Setup group, click Hyphenation, and then click Hyphenation Options.
-
In the Hyphenation zone, type the amount of space you want.
You can remove all automatic hyphenation and each instance of manual hyphenation, such as optional and nonbreaking hyphens.
-
To remove automatic hyphenation, on the Page Layout tab, in the Page Setup group, click Hyphenation, and then click None.

-
To remove manual hyphenation, on the Home tab, in the Editing group, click Replace.
-
If you don’t see the Special button, click More.
-
Click Special, and then click either Optional Hyphen to remove manual hyphens, or Nonbreaking Hyphen to remove nonbreaking hyphens.
-
Leave the Replace box empty.
-
Click Fix Next, Replace, or Replace All.
See Also
Line and page breaks
Insert a page break
Change spacing between paragraphs
Need more help?
Want more options?
Explore subscription benefits, browse training courses, learn how to secure your device, and more.
Communities help you ask and answer questions, give feedback, and hear from experts with rich knowledge.
Two ways to put left and right aligned text on the same line in Microsoft Word. There’s the commonly used option and the less well-known choice. BONUS: putting left, center and right aligned text on one line.
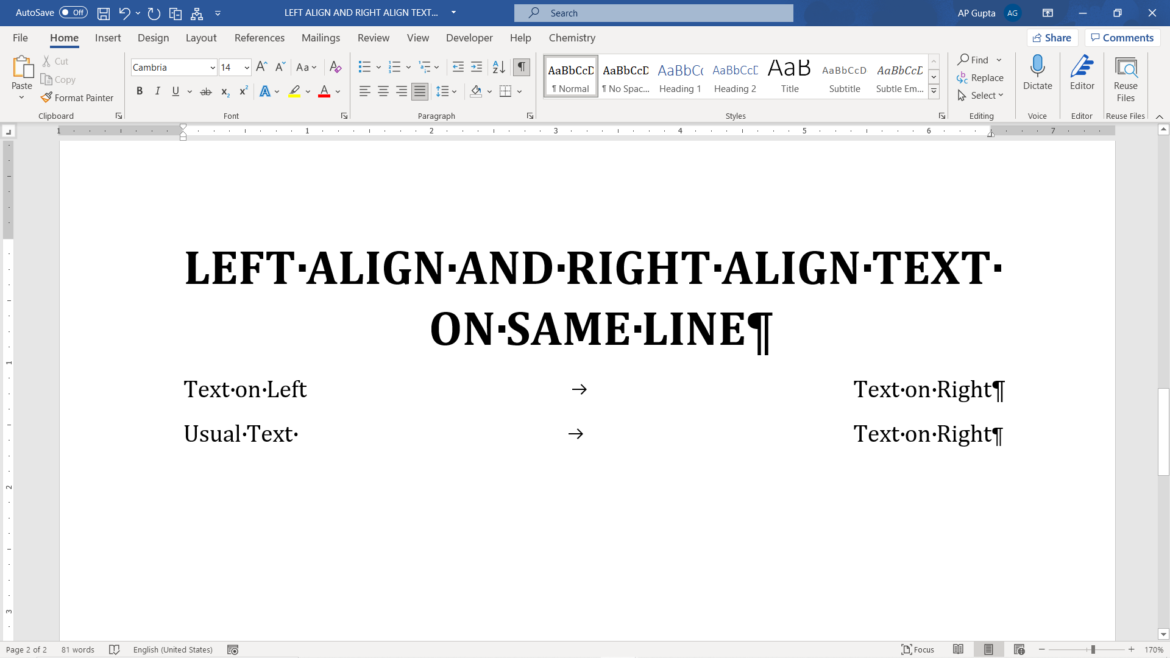
We’ll show how to make Left and Right aligned text looking like this.

You’ll often see it in Header or Footer.
As a bonus (because we can’t help ourselves) we’ll also have examples of Left, Right and Center positioning on the same line.
- Table with left and right positioning
- Table with left, center and right positioning
- Tabs with Left and Right text positions
- Tabs with Left, Right and Center positions
- Downside of tabs for right and center margin alignments
Table with left and right positioning
The easiest and most commonly used option is a table. Office Watch readers know we’ve written many times about how tables with no borders or gridlines can solve many Word formatting conundrums.
Here’s how we created the above example, this time with the table gridlines showing.

Each line is a single row table with two cells. The cells can have their own paragraph formatting (left, center, right or justified).
Make this by:
- Insert a 2×1 table with one row and two columns.

- The first cell has Paragraph Left setting. Type in the text or field codes you want.
- The second cell has Paragraph Right formatting. Add text to the cell.

- Select the table (use the handle at top left of the table) and remove all borders with Paragraph | Borders | No Border.

The Table Gridlines are visible in Word but won’t appear in any printed or PDF version.
Table with left, center and right positioning
Clever readers will have guessed the same trick can be used to have left, center and right text on the same line. Use a 3×1 table. The center cell has Center text positioning.

Word in-depth book Formatting Magic with Word has a whole chapter devoted to Tables including using them for formatting text in unusual ways.
Tabs with Left and Right text positions
The alternative is using Tabs. Tabs are a hidden formatting marks that position text along a line.
If you’re old enough to remember a manual typewriter, there was a bar with tabs that you slid along the bar. Pressing the Tab key moved the paper along to the next tab stopper.
Word also has Tab stops but they have more power than the old typewriter stops.
Modern Word has Tab stops which can have different alignment settings. The old typewriter tabs could only be Left tabs – meaning text comes to the right of the tab.

As you can see in the Tab dialog, Word has FIVE different types of tab. We’ll use three of them for single line positioning; Left, Center and Right.
Here’s some left and right text positioning using a Right align tab.

The left text is already left aligned against the left margin. Nothing needed there.
Make the right tab by clicking on the ruler to make a tab.
Double click on that tab to open the Tabs dialog.

- Click on the tab stop position you just created.
- Change Alignment to Right.
- Click Set
Now enter the text you need:
- Type the text for the left side
- Press Tab – the cursor should jump to the right side of the page.
- Type the text for the right side.
If the formatting doesn’t end up the way you want, choose Home | Paragraph | Show All – that will show the tab markers (right pointing arrows) across the page. There should only be one.

Tabs with Left, Right and Center positions
A single line with Left, Center and Right alignments is also possible with Tab stops.
Add a Tab stop in the middle of the line and change it to a Center alignment.

A Center tab alignment means the text is centered either side of the tab stop.

The great book Formatting Magic with Word has a whole chapter devoted to Tabs, all the uses and options.
Downside of tabs for right and center margin alignments
Tabs look like a great solution to positioning, but they have a major disadvantage. All Tab stops are absolute measurements in inches, centimetres etc. There’s no way to drop a tab into a relative position like Center or Right as you can with Word objects.
If the page size or left/right margins are changed, the center and right tabs will be out of position. They’ll have to be reset manually.
That’s not a problem with a table because the whole table (single row in this case) is set to 100% of the page width by default.
Four Word fixes for stretched out last line
Free sign to keep in touch with customers while in lockdown
Merge or Split cells in Word tables
Make a Table or list of Tables in a Word document
If you have some special needs in designing such as merging two lines of text into one line, this small trick I’m going to share may be helpful.
Assuming that I’m writing a resume, I want to put my phone number and email address in one single line – one in the upper half part and another in the lower half part.
Click Home – Asian Layout, you can find two options available for this situation: Combine Characters… and Two Lines in One…

In Combine Characters you can only input 6 characters at most. So I choose Two Lines in One this time.

Input the content you want in Text. You can see the result in Preview synchronously.

Hit OK and make a little bit adjustment. Here’s the result.

Please note that if there’s only one space in the text, the space will be regarded as the separation of the two lines. But if there’re more spaces, the text will be split from the middle according to the number and width of characters.

Copyright Statement: Regarding all of the posts by this website, any copy or use shall get the written permission or authorization from Myofficetricks.
Связывание слов и абзацев
Документы часто выглядят лучше, если определенные слова или абзацы отображаются на странице вместе (до или после разрывов). Кроме того, можно добавить в текст переносы, чтобы упростить его чтение.
В Word текст автоматически переносится на следующую строку, если в конце текущей ввести пробел или дефис. Если вы хотите отображать два слова или составное слово с дефисом в одной строке, вместо обычных знаков следует использовать неразрывный пробел или неразрывный дефис.
Щелкните место, где требуется вставить неразрывный пробел.
На вкладке Вставка в группе Символы нажмите кнопку Символ.
В появившемся меню выберите пункт Другие символы.

В диалоговом окне Символ на вкладке Специальные знаки выберите Неразрывный пробел и нажмите кнопку Вставить.

Нажмите кнопку Закрыть.
Совет: Для аналогичного эффекта можно также использовать специальное сочетание клавиш. Щелкните место, где требуется вставить неразрывный пробел, и нажмите клавиши CTRL+SHIFT+ПРОБЕЛ.
Иногда требуется, чтобы слово с дефисом отображалось в одной строке, а не переносилось на другую строку.
Щелкните место, где требуется вставить неразрывный пробел.
На вкладке Вставка в группе Символы нажмите кнопку Символ.
В появившемся меню выберите пункт Другие символы.
В диалоговом окне Символ на вкладке Специальные знаки выберите Неразрывный дефис и нажмите кнопку Вставить.

Нажмите кнопку Закрыть.
Совет: Для аналогичного эффекта можно также использовать специальное сочетание клавиш. Щелкните место, где требуется вставить неразрывный дефис, и нажмите клавиши CTRL+SHIFT+ЗНАК «МИНУС».
В Word абзацы автоматически разрываются в конце страницы, поэтому абзацы, начавшиеся на одной странице, часто продолжаются на следующей. Если вы хотите, чтобы весь абзац отображался на одной странице, сделайте следующее:
Щелкните правой кнопкой мыши абзац, который требуется отображать на одной странице. В контекстном меню выберите пункт Абзац.

В диалоговом окне Абзац перейдите на вкладку Положение на странице.
В разделе Разбивка на страницы установите флажок не отрывать от следующего и нажмите кнопку ОК.
Если два последовательных абзаца или подзаголовок и абзац близко связаны, может потребоваться отображать их на одной странице.
Щелкните правой кнопкой абзац или подзаголовок, который требуется отображать на странице вместе с последующим контекстом. В контекстном меню выберите пункт Абзац.
В диалоговом окне Абзац перейдите на вкладку Положение на странице.
В разделе Разбивка на страницы установите флажок не отрывать от следующего и нажмите кнопку ОК.
Совет: Между абзацами лучше не добавлять дополнительные разрывы строк: каждый такой знак считается в Word началом нового абзаца, поэтому при их наличии разрывы страниц могут отображаться не так, как требуется. Если вы хотите вставить пробелы между абзацами, используйте элементы управления для изменения интервала между абзацами. Дополнительные сведения см. в статье Изменение интервала между абзацами.
Последняя строка абзаца, из-за разрыва отображаемая на следующей странице, называется «верхней висячей строкой». В свою очередь, первая строка абзаца, из-за разрыва находящаяся в нижней части предыдущей страницы, называется «нижней висячей строкой».
Если вы хотите исключить подобные строки в своем документе, сделайте следующее.
Щелкните необходимый абзац правой кнопкой мыши. В контекстном меню выберите пункт Абзац.
Откройте вкладку Положение на странице.
В разделе Разбивка на страницы установите флажок запрет висячих строк.
Нажмите кнопку ОК.
Если слово не умещается на строке, Microsoft Office Word 2007 переносит его в начало следующей строки, вместо того чтобы вставлять перенос. Тем не менее вы можете автоматически или вручную расстанавливать переносы в тексте, вставлять мягкие переносы или неразрывные дефисы, а также задавать максимальное расстояние между словом и правым полем, при котором слово не будет переноситься.
При использовании автоматической расстановки переносов Office Word 2007 автоматически вставляет дефисы там, где они нужны. Если впоследствии отредактировать документ и изменить разрывы строк, Office Word 2007 повторно расставит переносы.
Убедитесь в том, что не выделен ни один фрагмент текста.
На вкладке Разметка страницы в группе Параметры страницы нажмите кнопку Расстановка переносов и выберите значение Автоматически.
Мягкий перенос определяет, где будет переноситься слово или фраза, если они не будут помещаться в строке. Например, можно указать, что слово «непечатаемый» должно переноситься как «не-печатаемый», а не как «непеча-таемый». Если мягкий перенос вставлен в слово, которое не находится в конце строки, дефис будет отображаться только в том случае, если вы нажмете кнопку Показать или скрыть.
На вкладке Главная в группе Абзац нажмите кнопку Показать или скрыть.
Щелкните слово, в которое вы хотите вставить мягкий перенос.
Нажмите клавиши CTRL+ДЕФИС.
Чтобы автоматически расставить переносы в части документа, сделайте следующее:
Выделите текст, в котором нужно расставить переносы.
На вкладке Разметка страницы в группе Параметры страницы нажмите кнопку Расстановка переносов и выберите значение Автоматически.
При расстановке переносов вручную Office Word 2007 ищет слова, в которых требуется перенос. Когда вы укажете, где нужно добавить переносы, Word вставит мягкие переносы. Если позже вы измените документ и измените разрывы строк, Office Word 2007 отображает и печатает только необязательные дефисы, которые по-прежнему находятся в конце строк. Word не расстанавливает переносы в документе повторно.
Выделите текст, в котором нужно расставить переносы.
На вкладке Разметка страницы в группе Параметры страницы нажмите кнопку Расстановка переносов и выберите значение Вручную.
Если Office Word находит слово или фразу, в которые нужно добавить перенос, выполните одно из следующих действий:
Чтобы вставить мягкий перенос в предложенном месте, нажмите кнопку Да.
Чтобы вставить мягкий перенос в другой части слова, переместите точку вставки в нужное место и нажмите кнопку Да.
Неразрывный дефисы предотвращают перенос слов и чисел с дефисами, которые находятся в конце строки. Например, можно предотвратить перенос в числе 555-0123; вместо этого все число переместится в начало следующей строки.
Щелкните место, в которое нужно вставить неразрывный дефис.
Нажмите клавиши CTRL+SHIFT+ДЕФИС.
Зона переноса слов — это максимальное расстояние между словом и правым полем, при котором оно не переносится. Вы можете настроить ширину зоны переноса слов. Чтобы уменьшить число переносов, расширьте зону переноса слов. Чтобы край правого поля был более ровным, сделайте зону переноса слов уже.
На вкладке Разметка страницы в группе Параметры страницы нажмите кнопку Расстановка переносов и выберите значение Параметры расстановки переносов.
В поле Ширина зоны переноса слов введите нужное значение.
Вы можете удалить все автоматически расставленные переносы и каждый из переносов, добавленных вручную, то есть мягких переносов и неразрывных дефисов.
Чтобы удалить переносы, расставленные автоматически, на вкладке Разметка страницы в группе Параметры страницы нажмите кнопку Расстановка переносов и выберите значение Нет.
Чтобы удалить переносы, добавленные вручную, на вкладке Главная в группе Редактирование выберите команду Заменить.
Если кнопка Специальный не отображается, нажмите кнопку Больше.
Нажмите кнопку Специальный и щелкните Мягкий перенос или Неразрывный дефис.
Поле Заменить на оставьте пустым.
Нажмите кнопку Найти далее, Заменить или Заменить все.
Как уместить текст в одну строку независимо от ширины символов в ней
Добрый день!
Уважаемы форумчане, просьба помочь в решении следующей задачи.
Я написал макрос, который вставляет строку в шаблон word. Теперь мне необходимо сделать так, что бы строка всегда умещалась на одну строчку (извиняюсь за каламбур). Т.е. если вставляемый текст не умещается на одну строку в worde, то необходимо обрезать часть этого текста.
Вопрос в следующем, как отловить момент, когда текст переносится на вторую строку? (конечно есть вариант подсчитать кол-во символов, которое может уместиться в строке, но встает проблема с размером символов, символ «Щ» гораздо шире символа «1»).
Помощь в написании контрольных, курсовых и дипломных работ здесь.
Соотношение ширины ячейки и количества символов, которые в нее поместятся в одну строку
Я полагаю, зависимости такие: 1) Название Шрифта. 2) Размер шрифта 3) Жирный или нет, курсив или.
Как уместить эти данные в одну строку??
Добрый день Не подскажете как уместить имеющиеся данные в одну строку То есть имеются значения.
Создать строку, состоящую из символов, которые входят как в одну, так и в другую строку (не string-ом)
Условие: Заданы две строки. Построить новую строку, состоящую из символов, которые входят как в.
Как закрыть строку символов, чтобы не было в ней лишнего?
Еще раз всем здравствуйте. Помогите, плз. Пока пытаюсь отладить часть программы где пользователь.
Помощь в написании контрольных, курсовых и дипломных работ здесь.
Как вывести многострочный текст в одну строку?
Привет! Нужно многострочный текст перевести в одну строку. Как это сделать?
Как можно хранить константную строку из символов кириллицы и работать с ней?
1. Как можно хранить константную строку из символов кириллицы и работать с ней? const char msg =.
Как уместить текст на одной строке в ворде
Сообщения: 27164
Благодарности: 7921
как разместить два слова на одной строке, »
В документе Word? Ответ будет зависеть от конкретных обстоятельств.
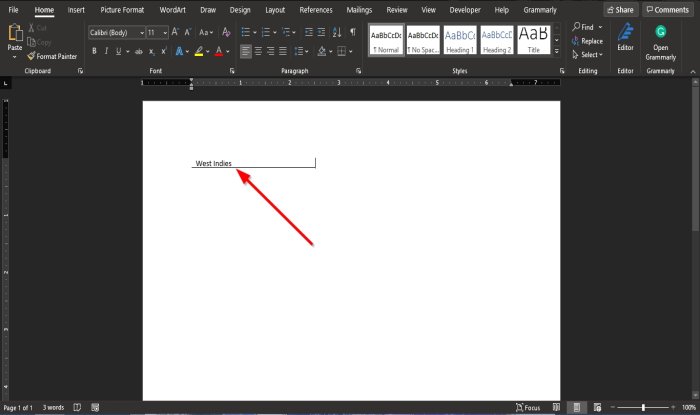
Например, в первом абзаце больше двух слов. Мы вставляем разрыв строки («Shift-Enter») после второго слова и выравниваем абзац по ширине.
Другой вариант. Во втором абзаце ровно два слова. Мы вставляем между первым и вторым словом табуляцию («Ctrl-Tab») и добавляем позицию табуляции «По правому краю» вровень с правой границей абзаца.
Банальный вариант выравнивания с двухстолбцовой таблицей я даже не описываю из-за банальности.
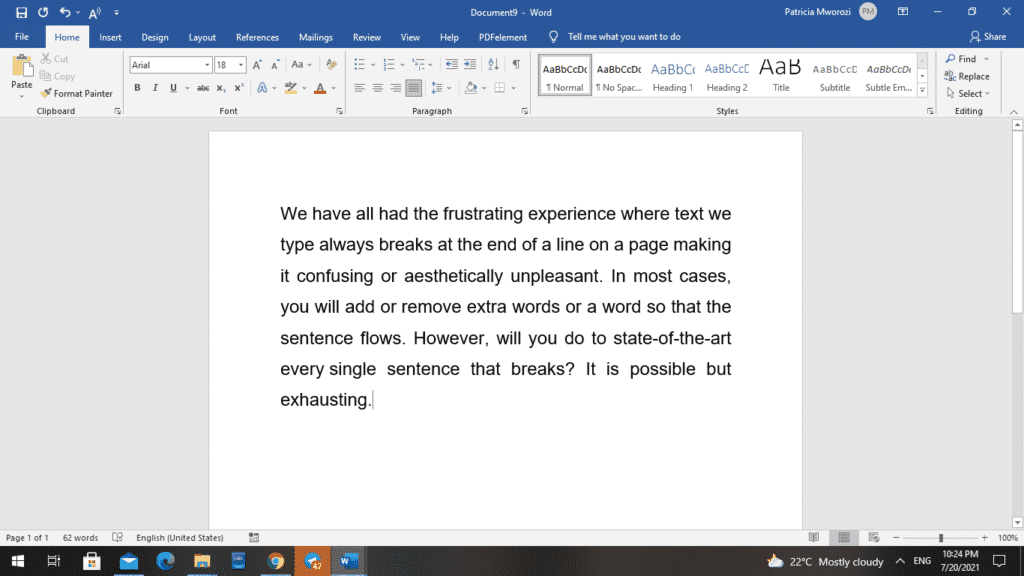
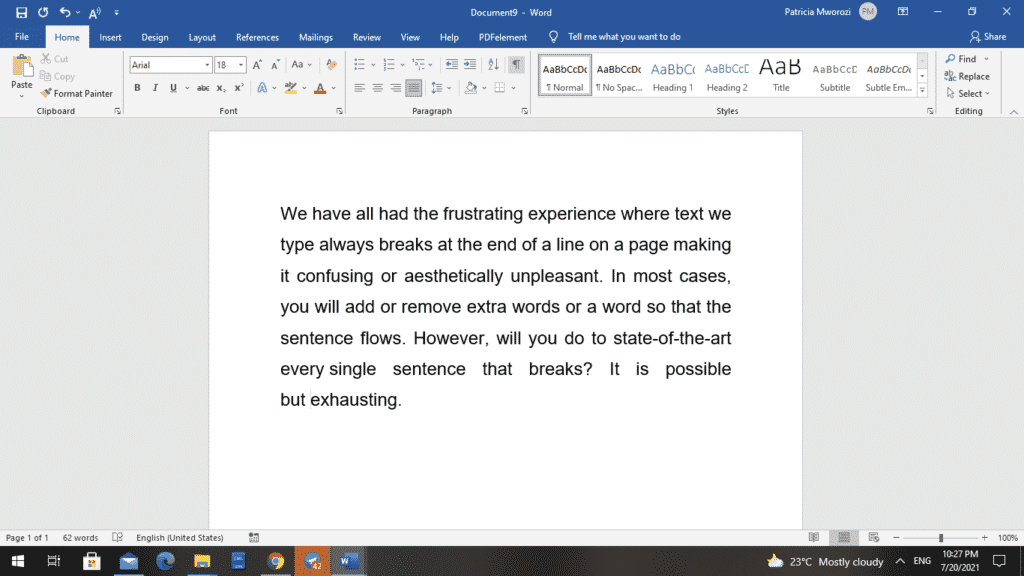
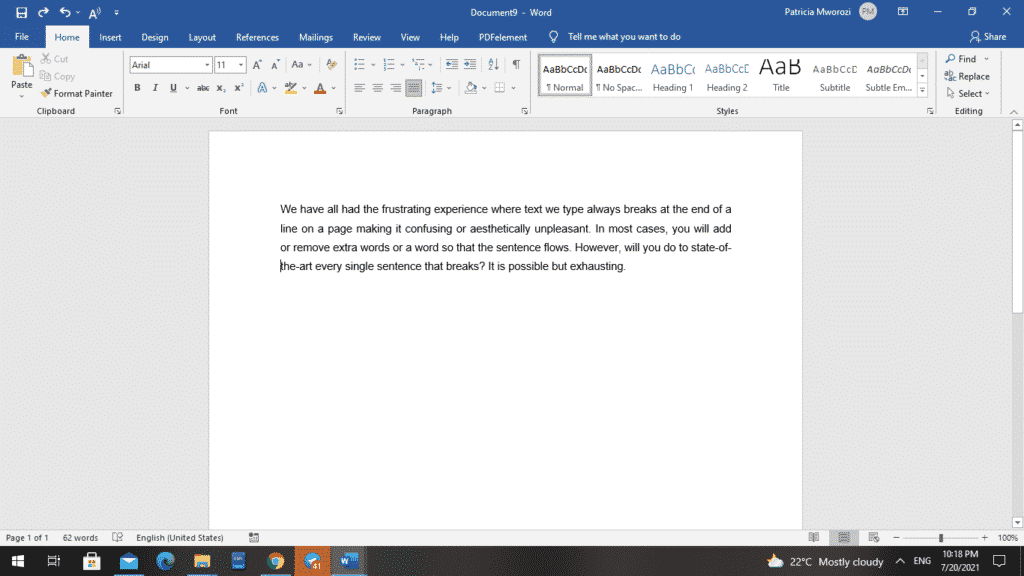
We have all had the frustrating experience where the text breaks at the end of a line on a page, making it confusing or aesthetically unpleasant. In most cases, you will add or remove extra words or a word so that the sentence flows. However, will you do this for every single sentence that breaks? It is possible but exhausting.
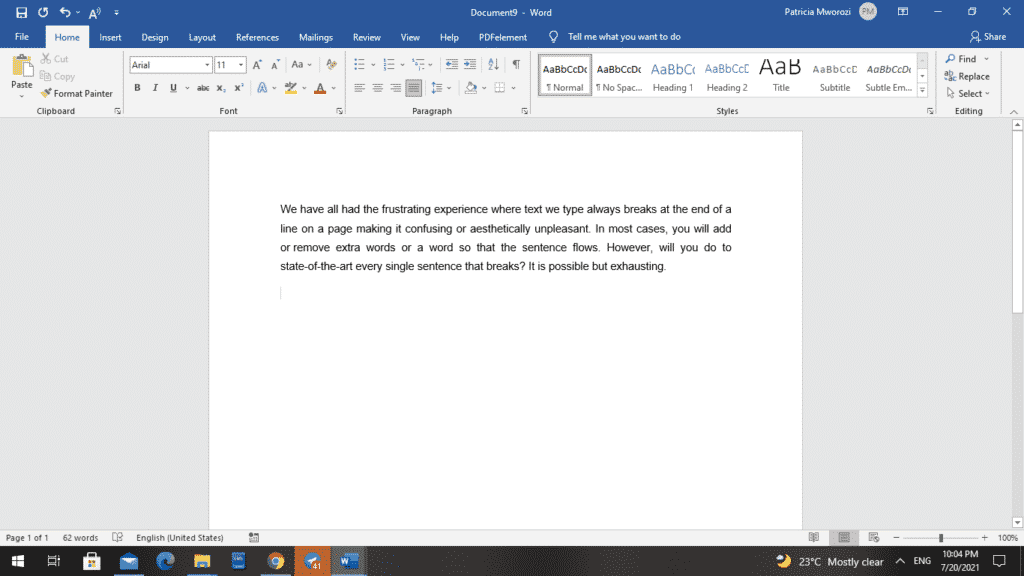
Below are three ways to keep words together on a line.
1. Non-breaking space
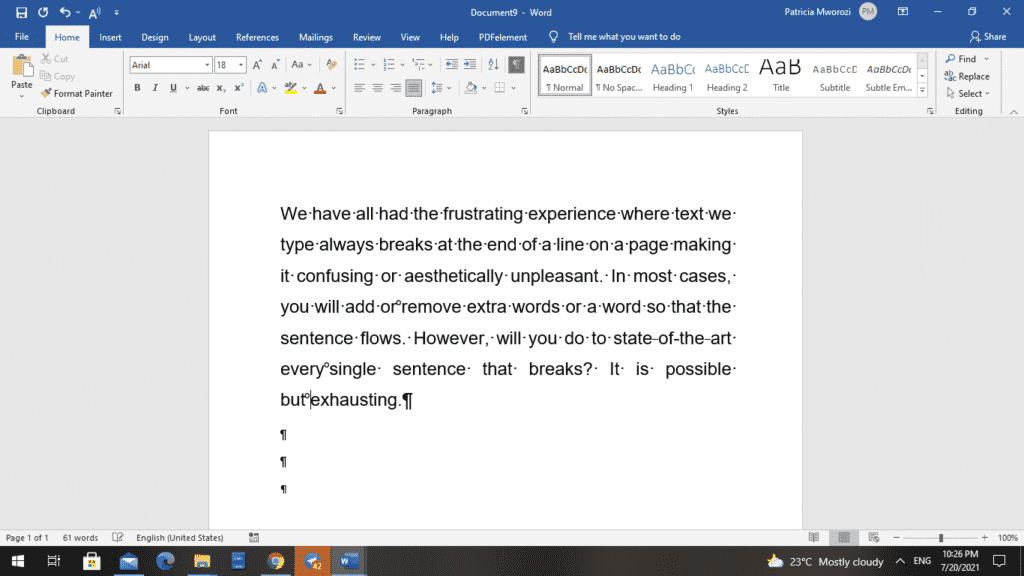
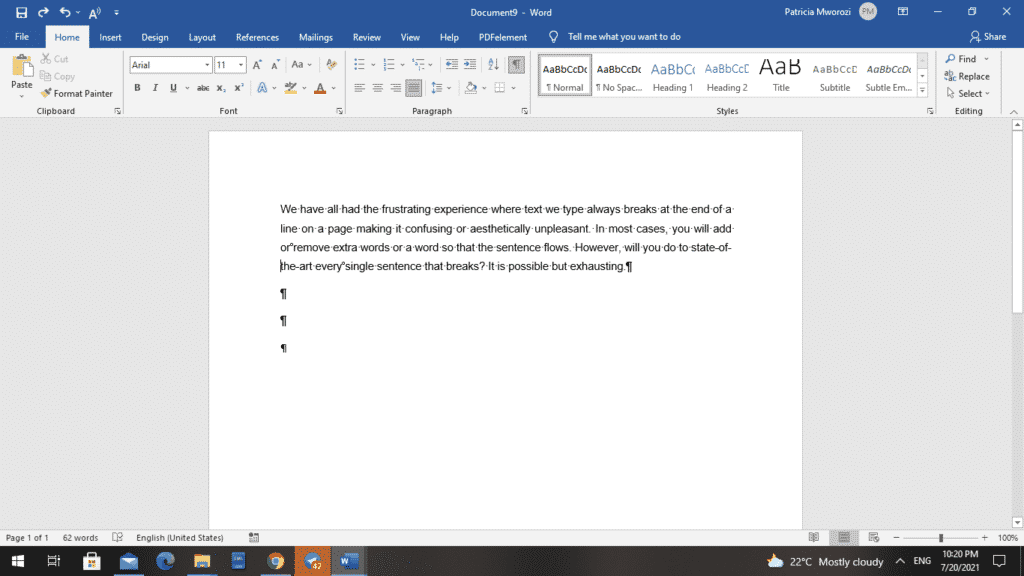
The first step is to turn on a feature called ‘Show Hide in the Home tab in the group for paragraph features. This will display non-printing characters. However, they won’t be displayed when the document is printed. By enabling this, we can see that we have what is called soft spaces: that is, where dots appear between those words. We are going to delete them where we want to put a non-breaking space.
- Go to the end of the sentence where you want to keep words together.
- Remove the space between the two words you want to keep together.

- Turn on ‘Show Hide.’
- Place the cursor between the words.
- Press CTRL +Shift + Space
The two words will remain together, regardless of the changes you make to the paragraph.
Doing this adds a character that looks like the degree symbol. This is your non-breaking space. It is only visible when you turn on Show Hide.
2. Non-breaking hyphens
This is the same with non-breaking spaces but for words that are separated by hyphens. Such words breaking at the end of a sentence are aesthetically displeasing. To make sure the words stay together, we will follow these simple steps using state-of-the-art.
- Remove the hyphens between ‘state-of-the-art.’
- Turn on ‘Show Hide.’
Before
After
- After removing the first hyphen, press CTRL + Shift + Hyphen.
- Repeat this for the remaining hyphens as this does not work for all the hyphens at once.
The block will then remain unaffected regardless of the changes made to the paragraph.
3. Non-breaking lines and paragraphs
Another challenge we might have with line breaks and page breaks is when we might have headings on one page, and the rest of the content is on another or where paragraphs might split between two different pages.
The goal is to keep that heading attached to or glued to the paragraph below it.
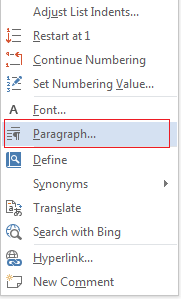
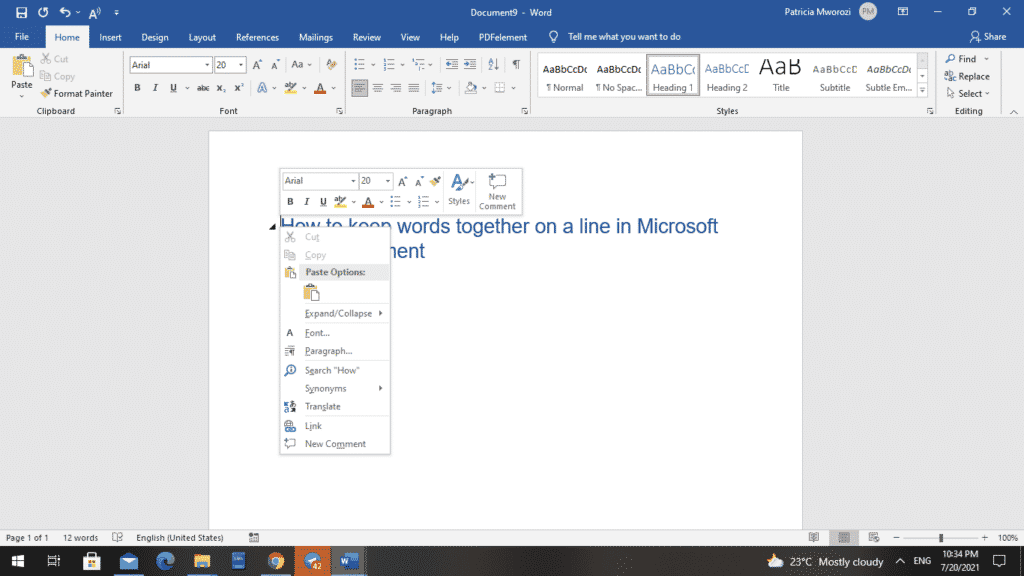
In the Home tab, we can click on the downward-facing arrow in the corner to take us to the dialog paragraph box.

Another option would be to right-click anywhere on that paragraph, and on your shortcut menu, left-click on the paragraph.
In this dialog box, you can adjust indents, line spacing. However, our interest is in the line, and the page breaks on the other tab.
What we are interested in is ‘Keep with next.’ By selecting ‘Keep with next,’ this heading will automatically move to the following line.
Another thing to try is ‘Keep lines together.’ This means if you have one or more paragraphs highlighted, the lines within that paragraph will stay on one page together.
Are you physically unable to do group work during the pandemic because of the lockdowns?
Simul Docs is here to help you smoothly work with your classmates. With Simul Docs, it will feel like you are in the library compiling ideas and notes.
With Simul Docs, even your initial thoughts can be documented and retained. After writing your first draft in Microsoft Word, upload it to Simul Docs. This will automatically make it the first version. Now, another colleague can open it and make their edits. This will create another version different from the first. Every time another person opens a version and makes edits, a new version is created, with the latest changes. The best part is, even if you forget to turn on tracked changes, they are automatically documented!
If another co-worker is supposed to include their input, but they do not have Simul Docs. All you have to do is download the document or forward it by email. Alternatively, you can upload it to any storage software like one drive, and once their changes have been made, they can forward it to you once again, and you can open it in Simul Docs.
Once all the necessary edits have been made, you can save the final version containing all the modifications with one click.
Visit simuldocs.com and simplify your group edits today.
Ever wondered how to align text left and right on same line in Ms Word. The trick is to use tab spacing and is explained in following steps.
Setting up tab space to align text left and right align on same line in Word
1: Make sure the “Ruler” is visible. Navigate to View Tab and check the box against “Ruler” to display ruler.
2: Change “Left Tab” to “Right Tab” by clicking in icon shown below.
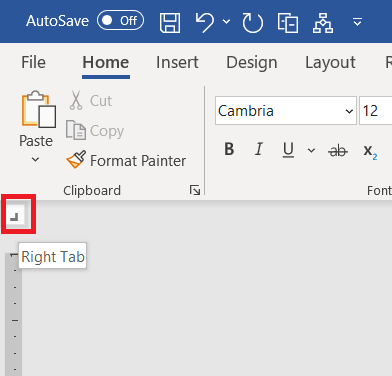
3: Right click anywhere on the top ruler to get tab marker shown below.
4: Drag the tab marker to the right margin.
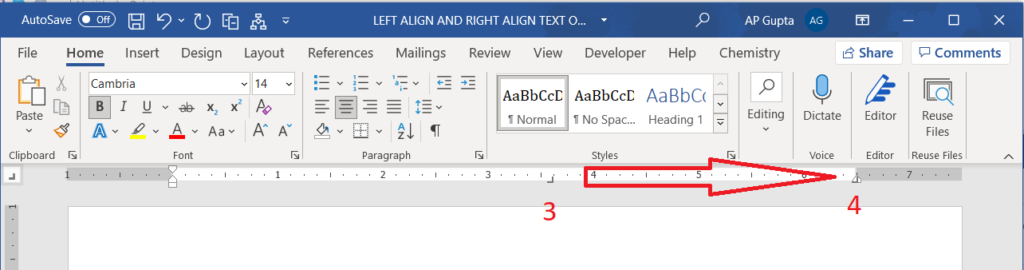
Now you are ready. Text typed on any line will be aligned left. Press tab to move to the right margin and text typed thereafter will be right aligned.
I have lines of text in Word 2010 in which I want to have text aligned on the left, center, and right sides of the page.
A previous question details how to align to the left and right sides of the page, but I haven’t been able to figure out how to also have a section in the middle.
Some text to float on left side 1       center text 1                    some right text 1
Some text to float on left side 2       center text 2                    some right text 2
![]()
asked Jan 6, 2017 at 0:22
![]()
StevoisiakStevoisiak
13.2k37 gold badges97 silver badges152 bronze badges
Keep clicking the tab button left to the ruler till you are in a symbol looking like a flipped T.
Click on the mid in the ruler where you like to position the middle text. You’ll use key tab to do so.
answered Jan 6, 2017 at 12:35
![]()
Download PC Repair Tool to quickly find & fix Windows errors automatically
Have you tried to type over a line in Microsoft Word, but the text is not staying on the line but keeps on moving and creating space, and you are wondering how can I get the text on the line without the line moving and creating space? In this tutorial, we will discuss some techniques to write over the line.
Open Microsoft Word.
Draw a line in your document.
The first technique we will use is to write on the line; notice, when you are typing on the line the text, is not staying on the line, and the line keeps on moving.
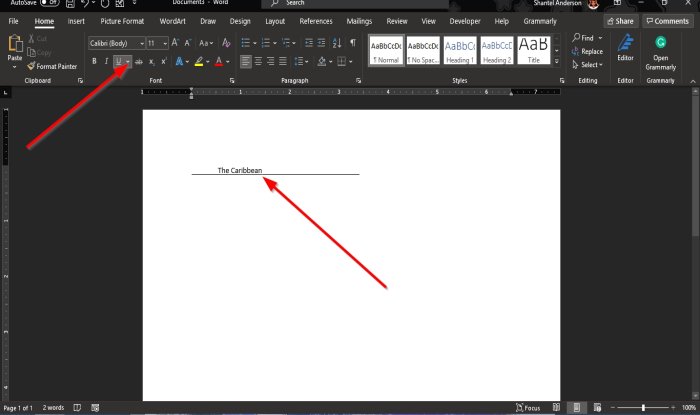
Highlight the text and click the Underline button on the Home tab in the Font group, and you will notice that the text will be on the line.
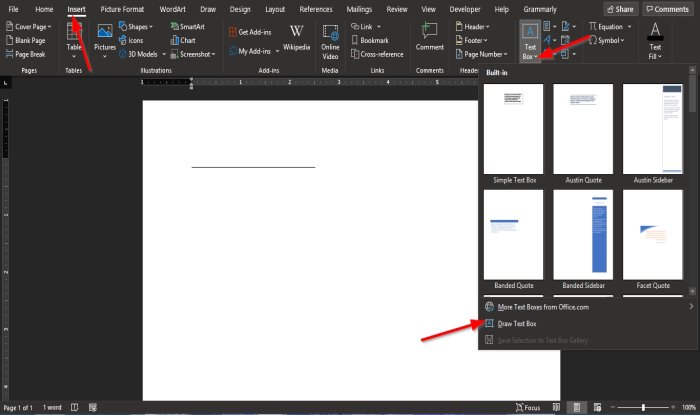
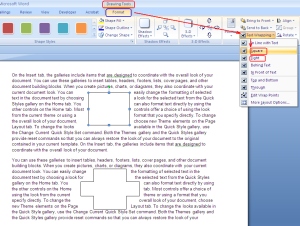
The second technique is to click the Insert tab and click the Text box button in the Text group.
In the drop-down list, select Draw Text Box.
A text box will appear in the document.
Move the text box over the line; ensure that the bottom of the text box matches the line.
We do not want the text box to have an outline; we will click the Shape Format tab.
The Shape Format tab appears whenever the shape is selected, including the text box.

On the Shape Format tab in the Shape Styles group, click the Shape Outline button, and in the drop-down list, select No Outline.
Notice that the text box lines become invisible.
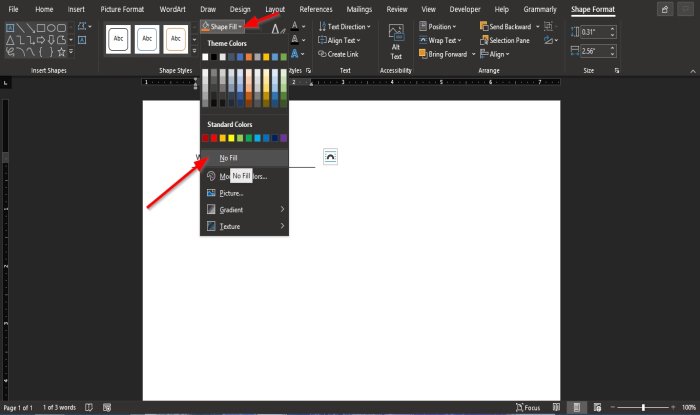
Then click the Shape Fill button, and in the drop-down list, click No Fill.
Drag the text box closer to the line.
Now, we have the text on the line.
We hope this tutorial helps you understand how to type over lines in Microsoft Word.
Read next: How to add Citations & References in Word.

Shantel has studied Data Operations, Records Management, and Computer Information Systems. She is quite proficient in using Office software. Her goal is to become a Database Administrator or a System Administrator.
by Dawn Bjork, MCT, MOSM | The Software Pro

Most of the time, we want text in a Microsoft Word document to automatically wrap, that is, to move to the next line when it is too long to fit on one line. Word wrap is great except when it breaks up text we want to stay together such as dates, names, phone numbers, phrases, formulas, titles or other text that should remain together on the same line. Fortunately, Word has some easy ways to keep text together.
Some examples of text you might want to keep together and not break up on separate lines:
- September 2, 2018
- Christopher A. Jones, Ph.D.
- (555) 123-4567
- state-of-the-art
Your options for keeping text together in Microsoft Word include:
- Non-breaking spaces
- Non-breaking hyphens
- Non-breaking paragraphs & lines
Non-Breaking Spaces & Non-Breaking Hyphens
The common solution: what most people do to keep text together is move to the beginning of the text and press [Enter] to start a new line. This is fine until any of the text changes and causes breaks in the wrong place. And, this doesn’t work well if you have paragraph formatting or styles that adds space between paragraphs.
The right solution: keep text together with special characters. Specifically, replace normal spaces and hyphens with non-breaking spaces or non-breaking hyphens:
- Non-breaking space: [Ctrl] + [Shift] + [Spacebar]
- Non-breaking hyphen: [Ctrl] + [Shift] + [Hyphen]
As the name implies, non-breaking characters connects or “glues” the text together and it will all automatically move to the next line together but only as needed.
To view non-breaking space and hyphen characters in a document, click Show/Hide in the Paragraph group (Home tab). Word represents non-breaking space characters with a degree symbol (°) and non-breaking hyphen characters with a double‑length hyphen (these are a bit harder to distinguish from regular text).
Non-Breaking Paragraphs and Lines
Next, let’s go one step further. When you don’t want a paragraph or even several lines of text to break between two pages, try the following Word tricks:
- Select the paragraph or section of text you want to keep together.
- On the Home tab in Word, click the Paragraph group’s dialog launcher (the small arrow at the bottom-right of the group). Or, right-click on the selected text and then left-click on Paragraph.
- Pick the Line and Page Breaks
- Check the Keep lines together option and click OK.
- If you have multiple paragraphs selected, for instance, a title with following text, also click on Keep with next which will keep the paragraphs together on the same page.
Bonus Word Tricks
To find non-breaking spaces and non-breaking hyphens in your text, use the Find feature as follows:
- On the Home tab, click the Find icon in the Editing group on the right or press the keyboard shortcut [Ctrl] + F.
- In the Navigation Pane to the left, enter one of the following: ^s to find non-breaking space; ^~ to find non-breaking hyphens.
- Use the Navigation Pane to move through the results.
Make sure you have the Show/Hide non-printing characters features turned on so you can see the hidden characters for these non-breaking symbols.
Find more Microsoft Word shortcuts, tips, and techniques at TheSoftwarePro.com/Word.
IAAP works with the best trainers in the industry to ensure you have relevant, engaging, practical content at your fingertips. This blog is written by a speaker with a program in the IAAP Approved Programs database. Search by name or keyword to find their contact information and book them for your Branch or Region event.
If you’d like to attend one of these events, you can find one in your area here.
Dawn Bjork is The Software Pro®, a Microsoft Certified Trainer (MCT), and is a certified Microsoft Office Specialist (MOSM) Master and Microsoft Office expert. Dawn is passionate about sharing smart and easy ways to increase your software productivity through her work as a technology speaker, software trainer, computer consultant, and author of nine books. Discover more software tips, techniques, and timesavers at TheSoftwarePro.com. Dawn also shares oodles of daily tips on Twitter and Facebook.
Related posts
![]()


There are two ways you can insert a text into a Word document
First method:
From the Ribbon, under the tab Insert, within the group Text, click the Text Box icon. You can view a gallery of built-in text boxes in a drop-down list. From the ribbon under the tab insert within the group text click the text box icon you can view a gallery of built in text boxes in a drop-down list
- Click to insert one of these into your document. Depending on the Text Wrapping property of the selected text box, it may sit on top of text, behind the text, in line with text, surrounded by text, etc.
- Now, to reveal the text wrapping property of the inserted text box, click the text box on the borders. Text Box Tools tab appears on the Ribbon.
- Click the Format tab under this. Under the Format tab, within the group Arrange, click the Text Wrapping icon. From the drop-down menu, you can view various text-wrapping styles and the one highlighted is the default style. You can change this property as required.

You can also create a new empty text box from the gallery drop-down. Click Draw Text Box from the bottom of the drop-down. The mouse pointer changes to a plus symbol and you can draw a text box.

Note: Text wrapping styles are: In Line with Text, Square, Tight, Behind Text, In Front of Text, Top and Bottom, and Through. All these style are self-explanatory.
Difference between Square and Tight
You may wonder about the difference between Square and Tight styles, as in both case text surrounds the box. Difference lies in the manner that text surrounds. With Square, text takes the shape of a square around the box (irrespective box shape). With Tight, surrounding text takes the shape of the box (e.g. star shaped box, trapezoid, hexagon, etc.)
Second method:
- From the Ribbon, under the tab Insert, within the group Illustrations, click Shapes. From the gallery of Shapes, under Basic Shapes, click the Rectangle shape.
- The mouse pointer changes to a plus symbol and you can draw a rectangular shape in your document. What you can draw is a basic rectangular shape and you cannot enter text readily.
- Right-click the shape and from the right-click menu, select Add Text. The shape transforms to a text box and you can enter text.
- Change the text-wrapping property of the text boxes as explained above.
How to fix text boxes in one line
If you select the text wrapping style of a text box to In Line with Text, the text box gets fixed to that line. So, the text box will move only with the line.
Formatting text boxes
You can design a text box with fill color, gradient color, border color, shadow, 3D effects, and many more.
- Right-click on the borders of the text box and from the right-click menu, select Format Text Box. Format Text Box dialog box appears.
- From the Colors and Lines tab, apply fill color, change transparency of color, add border line color, change border line pattern, etc.
- From the Size tab, select height and width of the text box, lock aspect ratio,
- In the Layout tab, you can select the text wrapping type as discussed above. You can also specify height and width of the text box relative to the page, page margin, etc.
- In the Text Box tab, set the left, right, bottom, and top margins the text inside the text box. Also, set the vertical alignments: Top, Center, or Bottom.
Use built in text box styles
You can select the built in text box styles from the Text Box Styles group under Text Box Tools tab >> Format tab >> Tex Box Styles
Change direction of text inside text box
If you want the text inside text box to appear vertically (from top or bottom), under the Format tab, within group Text, click Text Direction.
Flow text from one box to another
Select a text box and from the Format tab, within group Text, click Create Link. A coffee cup icon appears. Then click the next text box (should be a empty text box) to which you want the text to flow from the first text box. Done. It links the first text box to the second. Want to break the link, right-click on the first text box, then from the right click menu, select Break Forward Link.

Cut, Copy, and Paste text boxes
Click on the borders of text box and then right-click. From the right-click menu, select Copy to copy text box, select Cut to delete text box, and select Paste to paste the check box at the point of insertion.
Changing the text box shape
Under Text Box Tools tab >> Format tab >> Tex Box Styles, click Change Shape. From the drop-down, select any of the shapes. Text box takes the selected shape.
Grouping text boxes
If you are using multiple text boxes in one place to create a design, flow chart, etc., you can group all to manage them easily, move them all together. To group, press CTRL and click on the borderlines of all text boxes one by one. Release the CTRL button and right-click on the selected text boxes. From the right-click menu, select Group under Grouping.