
Insert a Word Document’s File Name and Path using Fields
by Avantix Learning Team | Updated October 14, 2022
Applies to: Microsoft® Word® 2010, 2013, 2016, 2019, 2021 or 365 (Windows)
In Microsoft Word, you can insert a document’s file name and path using fields. The path can be displayed in the body of the document or in the header or footer. You can also customize the Quick Access Toolbar and display the file path.
Recommended article: How to View Word Count in Microsoft Word (4 Ways)
Do you want to learn more about Microsoft Word? Check out our virtual classroom or in-person classroom Word courses >
Insert a document file name and path in a Word document using the FileName field
To insert the FileName field and display the current document’s file name and path:
- Position the cursor where you want to display the file name and path. You can insert the field in the document or in a header or footer.
- Click the Insert tab in the Ribbon and click Quick Parts in the Text group. A drop-down menu appears.
- Select Field. A dialog box appears.
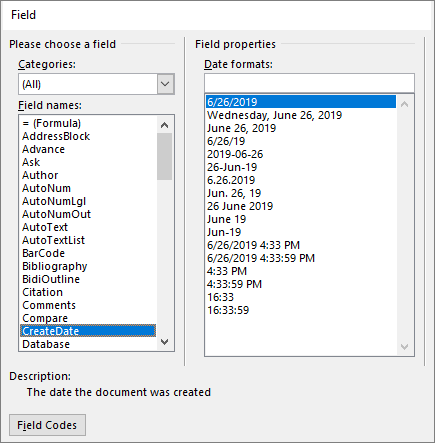
- Select FileName in the Field Names list. Options appear for the field.
- Select a format in the Format list.
- To display the full path, check or select the Add Path to filename check box.
- Click OK.
Below is the Field dialog box:

Hide Field Codes
A file name would normally appear similar to the following example:
C:UsersDavidDesktopABCCompanyProjectsARCProject.docx
If field codes appear instead, you can hide the field codes by pressing Alt + F9.
Update the FileName field
If the document’s name or path has changed, you’ll need to update the field.
To update the field, right-click the field and select Update or click the field and press F9. You can also press Ctrl + A and then press F9 to update all fields in your document.
Add a File Path button to the Quick Access Toolbar
You can also add a button in the Quick Access Toolbar to display the file path.
To customize the Quick Access Toolbar to display the file path:
- Click the arrow to the right of the Quick Access Toolbar (which is normally above the Ribbon by default) and choose More Commands. In the dialog box that appears, Quick Access Toolbar should be selected on the left.
- Click the arrow below Choose commands from and then select All Commands.
- Select Document Location in the list of commands.
- Click Add.
- Click OK. A document location or file path will now display in the Quick Access Toolbar.
Below is the Options dialog box where you can add buttons to the Quick Access Toolbar:

You may want to display the Quick Access Toolbar below the Ribbon by clicking the arrow to the right of the Quick Access Toolbar and selecting Show Below the Ribbon.
This article was first published on October 4, 2017 and has been updated for clarity and content.
Subscribe to get more articles like this one
Did you find this article helpful? If you would like to receive new articles, JOIN our email list.
More resources
How to Insert a Check Mark in Word (5 Ways)
How to View Word Count in Microsoft Word (4 Ways)
How to Superscipt or Subscript in Word (with Shortcuts)
How to Insert or Type an Em Dash in Word (4 Ways with Shortcuts)
10+ Great Microsoft Word Navigation Shortcuts for Moving Around Quickly in Your Documents
Related courses
Microsoft Word: Intermediate / Advanced
Microsoft Excel: Intermediate / Advanced
Microsoft PowerPoint: Intermediate / Advanced
Microsoft Access: Introduction
VIEW MORE COURSES >
Our instructor-led courses are delivered in virtual classroom format or at our downtown Toronto location at 18 King Street East, Suite 1400, Toronto, Ontario, Canada (some in-person classroom courses may also be delivered at an alternate downtown Toronto location). Contact us at info@avantixlearning.ca if you’d like to arrange custom instructor-led virtual classroom or onsite training on a date that’s convenient for you.
Copyright 2023 Avantix® Learning
Microsoft, the Microsoft logo, Microsoft Office and related Microsoft applications and logos are registered trademarks of Microsoft Corporation in Canada, US and other countries. All other trademarks are the property of the registered owners.
Avantix Learning |18 King Street East, Suite 1400, Toronto, Ontario, Canada M5C 1C4 | Contact us at info@avantixlearning.ca
Using document info
For common information, such as Author name, File name, date, or file path, follow these steps:
-
Double-click the header or footer .
-
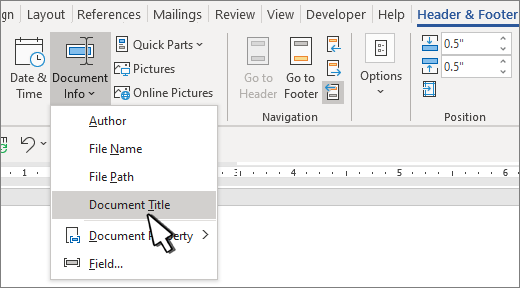
Select Document Info, and choose the information you want.

Note: Select Document Property to select additional information, such as Title, Company, or Subject.
-
Select Close Header and Footer or press Esc to exit.
Using field codes
If you don’t find the info you want, such as file size or who it was last saved by, you can use field codes to add a variety of document properties.
Note: If you already added a header or footer from the gallery, this procedure may replace or change the formatting of the current header or footer.
-
Go to Insert > Header or Footer.
-
Select Edit Header or Edit Footer.
-
Select Quick Parts, and select Field.
-
In the Field names list, choose the field you want (such as FileName, Date, Author, or Title), choose the format you want in the Field properties section.
-
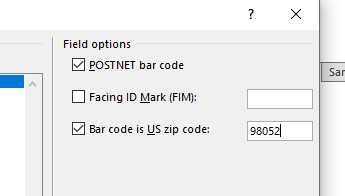
If a field property has addition options, choose any you like in the Field options section.
-
Select OK.
-
Select Close Header and Footer or press Esc to exit.

Word for the web doesn’t support adding file names and other document properties to a header or footer.
Select Open in Word to open your document in the desktop version of Word if you have it and follow the steps here on the Windows tab.


When you open a Word document, Word displays its name in the title bar. If it’s a new blank document, Word displays a generic name, documentx, until you name the file. That’s adequate for most of us, but occasionally, you’ll want the document’s name to print with the content or you’ll want the entire path in the title bar. Unfortunately, both requirements often leave users scratching their heads in frustration. That’s because what seems simple has some unexpected kinks. In this article, I’ll show you solutions to these requirements and warn you when they don’t work as expected.
I’m using Word 2016 on a Windows 10 64-bit system, but you can apply these solutions all the way back to Word 2003. You can use any file you want or you can download the demonstration .doc, .docm, and .cls files. The solutions discussed in this article aren’t compatible with 365.
Use {FILENAME} field
When you want to display the document’s name and path in the file itself, you can type it, but if you change the filename, you must remember to update the name in your document. If you use the {FILENAME} field instead, it doesn’t update automatically either. You must remember to update the field–how is that any better than typing it manually? One advantage is clear when you’re working with multiple instances of a filename: Updating the field once updates it throughout the document.
Let’s use this field to display the filename in a document’s header and see what happens:
- Double-click the header area to open it in edit mode and position the cursor where you want to display the filename. In Word 2003, choose Header And Footer from the View menu.
- Click the Insert tab and choose Field from the Quick Parts dropdown in the Text group (Figure A). In Word 2003, you’ll find this setting in the AutoText options.
- Select FileName from the Field Names list.
- If you want to display the full path, check the Add Path To FileName Option (Figure B).
- Click OK to return to the document.
- Double-click outside the header to close the header.
Figure A

Field codes are part of the Quick Parts feature.
Figure B

You can display the filename with or without the full path.
As you can see in Figure C, Word displays the name and path in the document’s header, so it’ll be visible on every page of the document. Later, I’ll show you how to display it conditionally.
Figure C

Word displays the filename and path in this document’s header.
Unfortunately, if you save the file using a different name, you must update the field manually to display the new name. To do so, open the header, right-click the field, and choose Update Field (Figure D). If you’re using our demo file, be sure to open the header and update the field to see the correct path for your system.
Figure D

Update the field if you change the file’s name.
If you’re likely to forget to update the field and it’s important that the file print with the right name, you can set a print option to update fields before printing, as follows:
- Click the File tab.
- Click Print in the left pane.
- Click Page Setup at the bottom.
- On the Paper tab, click Print Options.
- In the Printing Options section, check Update Fields Before Printing (Figure E).
- Click OK twice.
Figure E
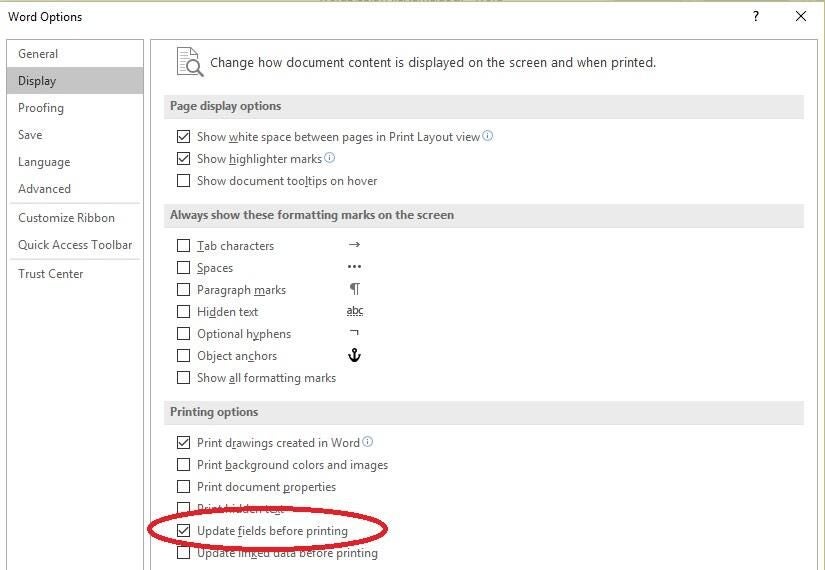
Set this option to update fields before printing the document.
Without a lot of effort, this is the best you can hope for. You might consider adding an ActiveDocument.Fields.Update event to the FileSaveAs event, but the timing’s wrong and it won’t work. VBA updates the fields before saving the new name. The file won’t update the field the next time you open it either, so you might consider adding the Update event to an AutoOpen macro, so at the very least, the document displays the correct name when opened. However, doing so won’t help if the field is in the header or footer. The update method updates fields only in the document body.
There’s no silver bullet because each document will be unique regarding fields. Since our example field is in the header, we’ll add a VBA procedure that updates fields in the header (or footer). Add the sub procedure in Listing A to the document’s AutoOpen event in the ThisDocument module as follows:
- Open the Visual Basic Editor (VBE) by pressing [Alt]+[F11] or clicking Visual Basic in the Code group on the Developer tab.
- Click ThisDocument (if necessary) in the Explorer window.
- Enter the code in Listing A. To avoid errors in the VBE, don’t cut and copy the code from this web page. Enter the code manually or download the demonstration document or class file.
- Return to the document and save it as a macro-enabled file. If you’re using Word 2003, this step isn’t necessary.
Listing A
Sub AutoOpen()
‘Update field in header on first page.
ActiveDocument.Sections(ActiveDocument.Sections.Count). _
Headers(1).Range.Fields.Update
End Sub
Opening the document triggers the AutoOpen procedure and the Update method updates only the fields in the header section. The value 1 represents the page number. If the header isn’t on page 1, update this value argument. If you’re using the footer section, change Headers(x) to Footers(x). It’s a can of worms you’d almost rather not open, but for simple documents, this solution works.
Conditional display
You might not want to display the filename on every page; perhaps you’d like to see it only on the last page, which seems reasonable. When this is the case, you can wrap the field in an {IF} expression. For instance, the following expression will display the filename only on the last page of the document:
{ IF { PAGE } = { NUMPAGES } { FILENAME P * MERGEFORMAT } }
This is just one of many possibilities. We’re not going to cover an extensive list of expressions, but it’s important to know that expressions give you more flexibility and control over where the document displays the field.
SEE: Microsoft Office 365: The smart person’s guide
Use VBA for title bar display
Displaying the filename in the document will be adequate for most of us. If you need a bit more, consider using VBA to display the full path and filename in the title bar. Using the directions from above to open the VBE, add the code in Listing B and Listing C to a document when you want to display the full pathname in the title bar… except, the solution doesn’t always work.
Listing B
Sub FileSaveAs()
‘Display file name in title bar.
‘Usurps save as command.
If Dialogs(wdDialogFileSaveAs).Show = 0 Then Exit Sub
System.Cursor = wdCursorNormal
ActiveWindow.Caption = ActiveDocument.FullName
End Sub
Listing C
Sub AutoOpen()
‘Display filename in title bar.
ActiveWindow.Caption = ActiveDocument.FullName
End Sub
Saving the file triggers an internal event, FileSaveAs. The code is Listing B usurps this event and allows Word to display the document’s FullName property in the title bar. For better or worse, this simple macro most likely will not display the full path; I have never seen it work consistently. Because Word will display the document’s name automatically, there’s little use for it. I’ve included it for the sake of discussion only–it’s one of those kinks I mentioned. If you must have the pathname in the title bar, you can find an excellent solution by Graham Mayor, MVP in a discussion at the Microsoft Office Community. The good news is that the AutoOpen event in Listing C does display both the filename and path in the title bar, as you can see in Figure F, when you open the file. Unfortunately, you lose it as soon as you save the file.
Figure F

The AutoOpen event displays the path; the FileSaveAs event usually doesn’t.
No panacea
These solutions might satisfy your simplest requirements, but they have inherent problems that are difficult to work around. Next month, watch for a solution that displays the file’s location on the Quick Access Toolbar. It’s certainly easier, even though it works only in the most recent versions.
Send me your question about Office
I answer readers’ questions when I can, but there’s no guarantee. Don’t send files unless requested; initial requests for help that arrive with attached files will be deleted unread. When contacting me, be as specific as possible. For example, “Please troubleshoot my workbook and fix what’s wrong” probably won’t get a response, but “Can you tell me why this formula isn’t returning the expected results?” might. Please mention the app and version that you’re using. I’m not reimbursed by TechRepublic for my time or expertise when helping readers, nor do I ask for a fee from readers I help. You can contact me at susansalesharkins@gmail.com.
Also read…
- How to add Office macros to the QAT toolbar for quick access
- How to print one or more labels for one or more Access records
- Excel tips: How to select cells and ranges efficiently using VBA
- How to take advantage of six new functions in Excel 2016
На чтение 2 мин Опубликовано 17.10.2015
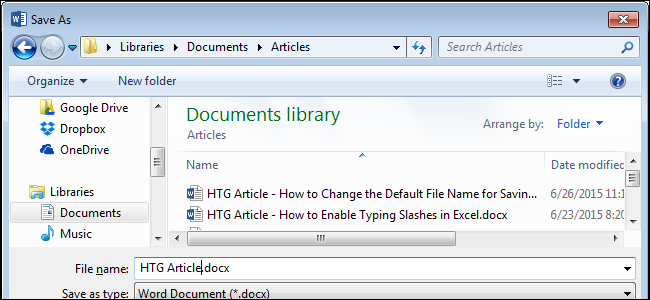
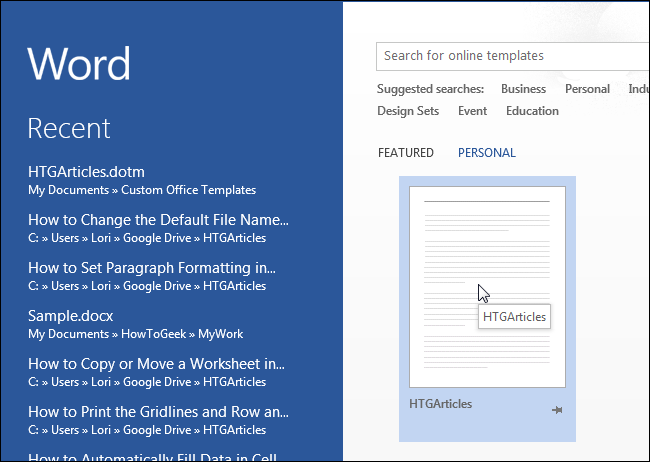
Вероятно, Вы замечали, что при первом сохранении документа Word предлагает имя для файла в диалоговом окне Сохранение документа (Save As). Как правило, это имя складывается из слов первого абзаца. На самом деле, это второй из вариантов, которые Word предлагает в качестве имени файла.
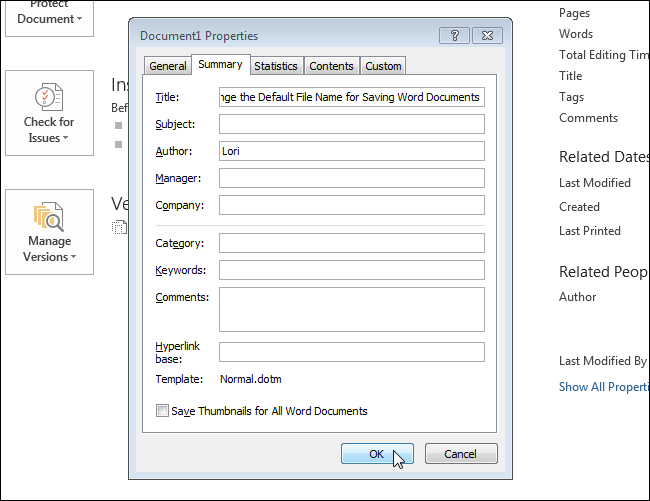
Если Вы указали Заголовок (Title) в свойствах документа, то Word предложит его в качестве имени файла при первом сохранении документа. Например, на рисунке ниже в поле Заголовок (Title) мы указали заголовок данной статьи (английский вариант).
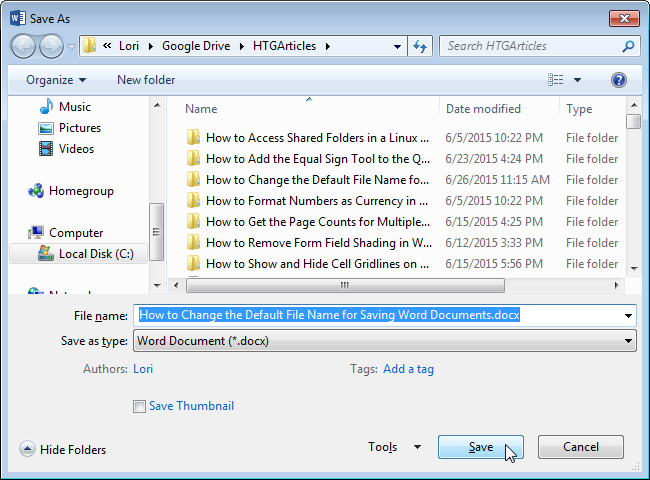
При первом сохранении статьи в Word, текст, указанный в поле Заголовок (Title), будет предложен в качестве имени файла (см. рисунок ниже).
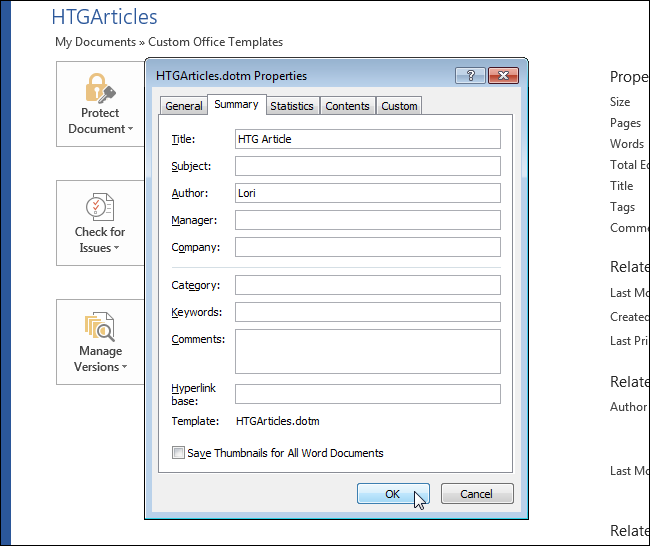
Если Вы хотите настроить шаблонное имя для файла, которое будет использоваться для всех документов определённого типа, то можете создать шаблон для таких документов и задать ему свойство Заголовок (Title).
Замечание: Не нужно добавлять расширение .docx в поле Заголовок (Title). Word автоматически добавляет его к каждому имени файла.
Когда Вы создаёте новый документ на основе этого шаблона …
… и впервые сохраняете его, текст, содержащийся в поле Заголовок (Title) используется для создания имени файла.
Вам остаётся лишь подкорректировать это имя для каждого сохраняемого документа.
Замечание: Если в Вашем документе совсем нет текста и в свойствах не заполнено поле Заголовок (Title), то Word создаст имя файла по шаблону ДокументX.docx (DocX.docx), где Х – это номер, который зависит от того, как много новых документов Вы создали в текущей сессии работы в Word. Если перезапустить Word, число сбросится до 1.
Оцените качество статьи. Нам важно ваше мнение:
Using Word’s headers or footers for file-specific information
Word document headers and footers can be helpful for providing file- or document-specific information such as page numbers, dates, and author’s name. The header is a section of a document that appears in the top margin, while the footer appears in the bottom margin. Material placed in the header or footer will appear on each page of your document unless you choose to exempt the first page. Below, we’ll show you how to place the document’s file name, either with or without the full document path, within the header or footer of your document.
Placing a Word document’s file name and path in the header or footer
Inserting a file name and path is a simple task that can greatly benefit anyone using your document. Using the file name can help identify different versions of a document, or simply identify the electronic file name on a printed copy.
A great reason to use the file path is to ensure everyone working on a similar project knows where the file is located. For example, perhaps your department is working on a project, and you and another co-worker are tasked with modifying a document that relates to other project files. If project files are stored in the same project folder or directory, it can be helpful to include the file path, anyone with access to that directory can quickly navigate to all of the associated documents.
How to insert file name and path in your document
Navigate to the header or footer in one of two ways:
- Select Header or Footer from the Insert tab and choose the Edit option toward the bottom of the drop-down menu (Option 1), OR double-click in the header or footer space of the document (Option 2).
Option 1:

OR Option 2:

- Use the tab key to move the cursor to the desired location within your header or footer, or use the alignment tools on the Home tab as shown below.

- In the Insert group, within the Header and Footer tab, click the Document Info button.

- Choose File Name or File Path to have the appropriate information added to the header or footer of your document.


- To exit the header or footer, select the Close Header and Footer button on the ribbon or double click the body of the document.


Bonus: As you can see from the above menu, you can also easily insert Author and other Document information using the steps above and choosing and a different option from the menu. The Field… option also provides access to different properties.
Additional Productivity Resources
- We have more Microsoft Word tips in our Recent Posts and Categories sections. These are on the right side of your screen if viewing from a desktop.
- To learn about upcoming classes on Word, Outlook, PowerPoint, and other Microsoft applications, please visit our Course Schedule page.
- To schedule a custom class for any Microsoft application on your organization’s campus, please contact our Training Team.
Be sure to look through our other Software Tips for more on Microsoft Office.
Subscribe to Monthly Training Updates
Receive monthly productivity and training insights, software tips, and notices of upcoming classes!
 One of the frequent questions I hear about formatting Microsoft Word documents is “How do I add a filename to a Word document?” Think about how helpful this would be–files are often stored in many different folders and locations that can be challenging to manage. And how many times have you named a file with what seemed like a descriptive label, only to waste minutes or even hours trying to locate the document later? How many times have you clicked through multiple drives and folders looking for an important file?
And it can be even more frustrating to find a file now that documents can be stored in so many places–network drives, external drives, OneDrive, SharePoint, and in the cloud.
Now, with just a few steps, you can add a descriptive filename to a Word document header or footer. Another choice is to add the document filename at the end of the Word file to simplify filing and tracking whether the document is printed or shared digitally. Sounds like a great idea? It is if you could just find this non-intuitive, hidden option in Microsoft Word.
Follow these steps to add a filename to a Word document:
- Move to the location where you want to see the filename and optional file path. This might be the document header or footer or any other location in the file, such as the end of the document.
- Click on the Insert tab and choose Field from the Quick Parts drop-down list (found in the Text group on the Ribbon).
- Choose these options from the Field dialog box:
- Categories = Document Information
- Field name = FileName
- The Format is optional but includes a number of text displays: Uppercase, Lowercase, First capital, and Title case.
- To include the file path, also choose the option Add path to filename.
- Choose OK to add the field to your document.
Here’s an example of the field results with a lowercase format:
c:usersdawndocumentsoffice example fileschocolate.docx
The same field reads a bit different with a Title Case format:
C:UsersDawnDocumentsOffice Example FilesChocolate.Docx
The filename field will automatically update if a file is saved with a new name or in a different location. If you click on the field, it will display as shaded to indicate this is an automatic document field; the shading will not show when your work is printed to a paper or digital file. Although we’re printing out fewer files to a hard copy, this filename and path document information are still tremendously helpful when a document is shared as a PDF file which may be stored in many different locations.
Bonus Tip: Explore other Field choices, including Date and Time. From here, you can add specific options such as the Date (current date) or the SaveDate.
Now, with just a few clicks, you can easily identify and locate files by adding the filename to your Word documents.
Discover more ways to save time editing and formatting your Word documents at: TheSoftwarePro.com/Word
© Dawn Bjork, MCT, MOSM, CSP®, The Software Pro®
Microsoft Certified Trainer, Productivity Speaker, Certified Speaking Professional
Dawn Bjorkhttps://www.TheSoftwarePro.com
A Microsoft Certified Trainer (MCT) and Certified Speaking Professional (CSP), Dawn Bjork is known as The Software Pro® for her work as a productivity speaker, software trainer, virtual presenter, and author of numerous training courses and videos. In addition to these credentials, Dawn is also a certified Microsoft Office Specialist Master (MOSM) and Certified Virtual Presenter (CVP).
When she’s not busy sharing her expert knowledge on software with the world, Dawn can be found hiking the Colorado mountains, trying to master Pilates, or attempting to play golf.

При первом сохранении файла вы, возможно, заметили, что Word предлагает вам имя файла в диалоговом окне «Сохранить как». Это имя файла обычно берется из первого абзаца в вашем документе. Тем не менее, это на самом деле второй вариант Word для предлагаемых имен файлов.
Если вы установили свойство «Заголовок» для документа , Word использует его в качестве рекомендуемого имени файла при первом сохранении документа. Например, мы устанавливаем для свойства «Заголовок» этой статьи заголовок статьи.

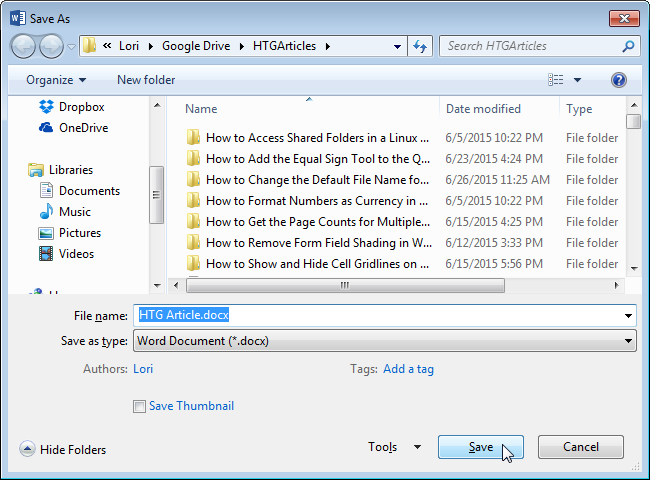
Когда мы сохраняем статью в первый раз (нажмите «Ctrl + S» и выберите место или нажмите «Обзор» на экране «Сохранить как»), это свойство «Заголовок» вводится как имя файла в «Имя файла». »В диалоговом окне« Сохранить как ».

Если вы хотите, чтобы одно и то же имя файла по умолчанию использовалось для всех документов определенного типа, вы можете создать шаблон для использования с этими документами и установить свойство «Заголовок» в шаблоне.
ПРИМЕЧАНИЕ. Вам не нужно добавлять расширение файла (.docx) к «Заголовку». Word автоматически добавляет это к каждому имени файла.

Когда вы создаете новый документ с этим шаблоном …

… И когда вы сохраняете документ в первый раз, текст, введенный вами в свойство «Заголовок», вводится как имя файла по умолчанию в поле редактирования «Имя файла» в диалоговом окне «Сохранить как».

Вы можете просто добавить или изменить имя файла для каждого документа при его сохранении.
ПРИМЕЧАНИЕ. Если в вашем документе нет текста, а свойство «Заголовок» не задано, Word добавляет в качестве имени файла «DocX.docx», где «X» — это число, которое зависит от количества новых документы, которые вы создали во время текущего сеанса Word. Этот номер возвращается к «1» после закрытия всех открытых документов Word.
Bill, a work colleague, asked:
How do I insert the file path and file name into a footer? It was easy in Word 2003 but I can’t find a way in Word 2007. This is just to remind me where the hell I put it!!
I walked Bill through the steps, and also got him to turn on field shading so he would always know when any apparent text was actually a field.
Here’s how to insert a file path and file name into your Word 2007 document:
- Place the cursor where you want to insert the file path/name (this might be the main body of the document, the header or the footer).
- Go to the Insert tab > Text group.
- Click the Quick Parts button, then click Field near the bottom of the drop-down list.
- On the Field window, scroll down the list of Field Names and select FileName, then select the Add path to filename check box. (Adding the file path to the file name is very useful for everyone, but especially for those who save their documents on large corporate networks.)

- Click OK.
- The field is inserted into your document. If it’s a new document that you haven’t saved yet, you’ll see DocumentX as the file path (where X is the document number):
- Save the document, then place your cursor anywhere in the field and press F9 to update the field (or right-click in the field and select Update field). The field updates with the correct file name and path.


If you want the file name/path field to update automatically, you’ll need to do any of these:
- Switch to Print Preview then back
- Add a macro — see http://support.microsoft.com/kb/832897 for details
- Switch to Draft mode, select all (Ctrl+A), then press F9 to update ALL fields in the document. Switch back to Page Layout mode when the update has finished.
- See https://cybertext.wordpress.com/2008/01/25/update-fields-in-headers-and-footers/ for other alternatives.
Update: You can add this footer to your footer ‘Quick Parts’ gallery so that you don’t have to go through these steps every time.
- Once you’ve done all the steps above, select the footer contents.
- Click the small drop-down arrow to the right of Footer in the Header and Footer group on the Design tab.
- At the bottom of the drop-down list, click Save Selection to Footer Gallery.
- Complete the details and click OK. (Hint: If you want your footer to show at the top of this list in future, add a space or underscore before the name.)
- When you next want to add this footer to a document, open the footer, then just choose it from the Footer list (step 2).


(Thanks to James’ comment on 1 June 2012 for these steps.)
From Wikipedia, the free encyclopedia
The following is a list of filename extensions used by programs in the Microsoft Office suite.
Word[edit]
- Legacy
- Legacy filename extensions denote binary Microsoft Word formatting that became outdated with the release of Microsoft Office 2007. Although the latest version of Microsoft Word can still open them, they are no longer developed. Legacy filename extensions include:
- .doc – Legacy Word document; Microsoft Office refers to them as «Microsoft Word 97 – 2003 Document»
- .dot – Legacy Word templates; officially designated «Microsoft Word 97 – 2003 Template»
- .wbk – Legacy Word document backup; referred as «Microsoft Word Backup Document»
- OOXML
- Office Open XML (OOXML) format was introduced with Microsoft Office 2007 and became the default format of Microsoft Word ever since. Pertaining file extensions include:
- .docx – Word document
- .docm – Word macro-enabled document; same as docx, but may contain macros and scripts
- .dotx – Word template
- .dotm – Word macro-enabled template; same as dotx, but may contain macros and scripts
- .docb – Word binary document introduced in Microsoft Office 2007
- .pdf – PDF documents
- .wll – Word add-in
- .wwl – Word add-in
Excel[edit]
- Legacy
- Legacy filename extensions denote binary Microsoft Excel formats that became outdated with the release of Microsoft Office 2007. Although the latest version of Microsoft Excel can still open them, they are no longer developed. Legacy filename extensions include:
- .xls – Legacy Excel worksheets; officially designated «Microsoft Excel 97-2003 Worksheet»
- .xlt – Legacy Excel templates; officially designated «Microsoft Excel 97-2003 Template»
- .xlm – Legacy Excel macro
- .xll_ – Excel 4 for Mac add-in
- .xla_ — Excel 4 for Mac add-in
- .xla5 – Excel 5 for Mac add-in
- .xla8 – Excel 98 for Mac add-in
- OOXML
- Office Open XML (OOXML) format was introduced with Microsoft Office 2007 and became the default format of Microsoft Excel ever since. Excel-related file extensions of this format include:
- .xlsx – Excel workbook
- .xlsm – Excel macro-enabled workbook; same as xlsx but may contain macros and scripts
- .xltx – Excel template
- .xltm – Excel macro-enabled template; same as xltx but may contain macros and scripts
- Other formats
- Microsoft Excel uses dedicated file formats that are not part of OOXML, and use the following extensions:
- .xlsb – Excel binary worksheet (BIFF12)
- .xla – Excel add-in that can contain macros
- .xlam – Excel macro-enabled add-in
- .xll – Excel XLL add-in; a form of DLL-based add-in[1]
- .xlw – Excel work space; previously known as «workbook»
PowerPoint[edit]
Legacy
- .ppt – Legacy PowerPoint presentation
- .pot – Legacy PowerPoint template
- .pps – Legacy PowerPoint slideshow
- .ppa – PowerPoint (2007?) add-in
- .ppam – PowerPoint 2007 add-in with macros enabled
OOXML
- .pptx – PowerPoint presentation
- .pptm – PowerPoint macro-enabled presentation
- .potx – PowerPoint template
- .potm – PowerPoint macro-enabled template
- .ppam – PowerPoint add-in
- .ppsx – PowerPoint slideshow
- .ppsm – PowerPoint macro-enabled slideshow
- .sldx – PowerPoint slide
- .sldm – PowerPoint macro-enabled slide
- .pa – PowerPoint add-in
Access[edit]
Microsoft Access 2007 introduced new file extensions:
- .ACCDA – Access add-in file
- .ACCDB – The file extension for the new Office Access 2007 file format. This takes the place of the MDB file extension.
- .ACCDE – The file extension for Office Access 2007 files that are in «execute only» mode. ACCDE files have all Visual Basic for Applications (VBA) source code hidden. A user of an ACCDE file can only execute VBA code, but not view or modify it. ACCDE takes the place of the MDE file extension.
- .ACCDT – The file extension for Access Database Templates.
- .ACCDR – is a new file extension that enables you to open a database in runtime mode. By simply changing a database’s file extension from .accdb to .accdr, you can create a «locked-down» version of your Office Access database. You can change the file extension back to .accdb to restore full functionality.
- .ACCDU – Access add-in file
- .MDA – Access add-in file
- .MDE – Access add-in file
OneNote[edit]
- .one – OneNote export file
Outlook[edit]
- .ecf – Outlook 2013+ add-in file
Billing[2][edit]
Publisher[edit]
- .pub – a Microsoft Publisher publication
XPS Document
- .xps – a XML-based document format used for printing (on Windows Vista and later) and preserving documents.
See also[edit]
- Microsoft Office
- Microsoft Office XML formats
- Filename extension
- Alphabetical list of file extensions
- Office Open XML
External links[edit]
- Introducing the Microsoft Office (2007) Open XML File Formats
- Introduction to new file-name extensions
References[edit]
- ^ «Excel 2007 XLL Software Development Kit Documentation». MSDN. Microsoft. Retrieved 4 June 2013.
- ^ Stross, Randall (2014). Planet google : one company’s audacious plan to organize everything we know. Free Press. ISBN 978-1-4165-8047-8. OCLC 893105047.
__NO

When saving a file for the first time, you may have noticed Word suggesting a file name to you in the “Save As” dialog box. This file name is typically taken from the first paragraph in your document. However, this is actually Word’s second choice for suggested file names.
If you’ve set the “Title” property for the document, Word uses that as the suggested file name when you first save the document. For example, we set the “Title” property for this article to the title of the article.

When we save the article the first time (press “Ctrl + S” and select a location or click “Browse” on the “Save As” screen), that “Title” property is entered in as the file name in the “File name” edit box on the “Save As” dialog box.
If you want the same default file name to be used for all documents of a specific type, you can create a template for use with those documents and set the “Title” property in the template.
NOTE: You do not need to add the file extension (.docx) to the “Title”. Word automatically adds that to every file name.
When you create a new document with that template attached…
…and you save the document for the first time, the text you entered into the “Title” property is entered as the default file name in the “File name” edit box on the “Save As” dialog box.
You can simply add to or change the file name for each document when you save it.
NOTE: If your document does not have any text in it and you haven’t set the “Title” property, Word inserts “DocX.docx” as the file name, where the “X” is a number that depends on how many new documents you have created during your current Word session. This number is set back to “1” after you close all open Word documents.
READ NEXT
- › How to Get a Refund on the PlayStation Store
- › Discord Direct Message Won’t Go Away? Here’s the Fix
- › Save Hundreds on Elegoo’s New PHECDA Laser Engraver Through Kickstarter
- › The New Winamp Is Here, but It’s Not What You’d Expect
- › Windows 11 Has a New Photo Gallery in the File Explorer
- › Android’s Nearby Share Has (Unofficially) Arrived on Mac
How-To Geek is where you turn when you want experts to explain technology. Since we launched in 2006, our articles have been read billions of times. Want to know more?