
A text box is an element you can insert and position anywhere in a document. Text boxes are great for calling special attention to a quote or a whole block of text.
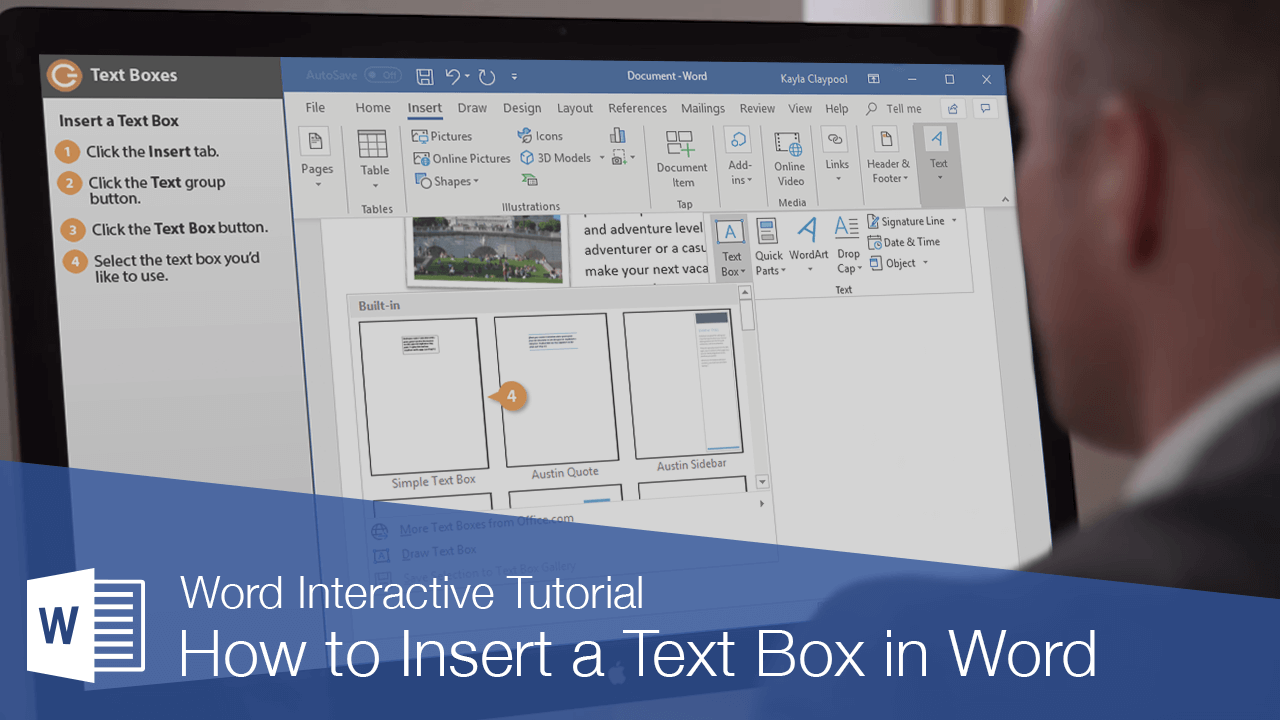
Insert a Text Box
- Click the Insert tab.
- Expand the Text group, if necessary.
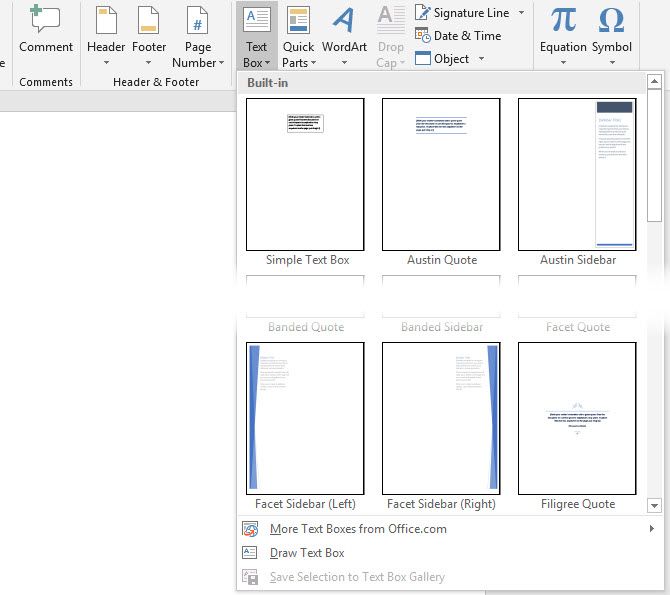
- Click the Text Box button.
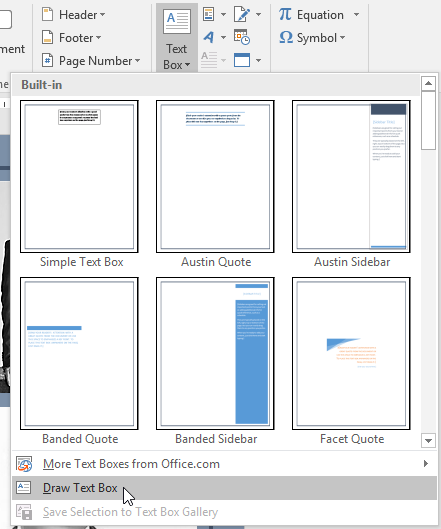
- Select the text box you’d like to use.

- Click the text box and type to replace the placeholder text.
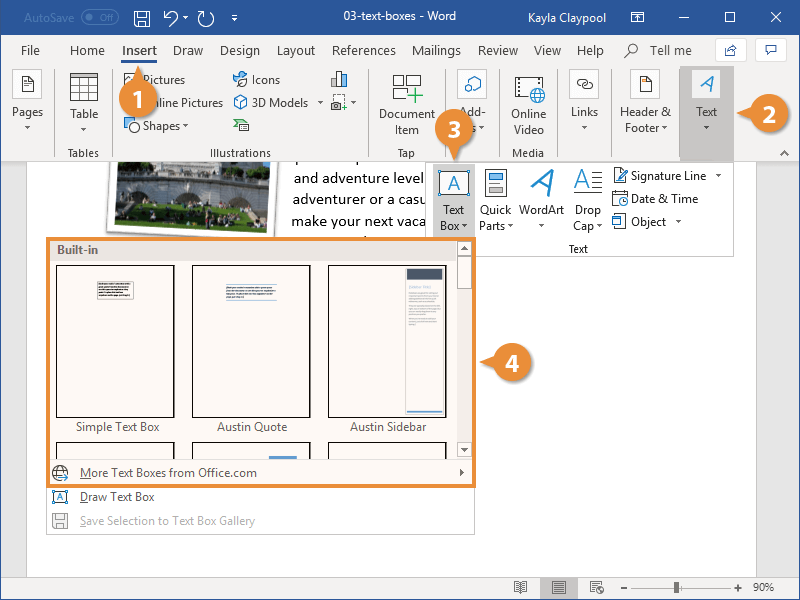
A gallery of text box styles appears. The styles range from simple text boxes to stylized sidebars.
The text box is automatically inserted.
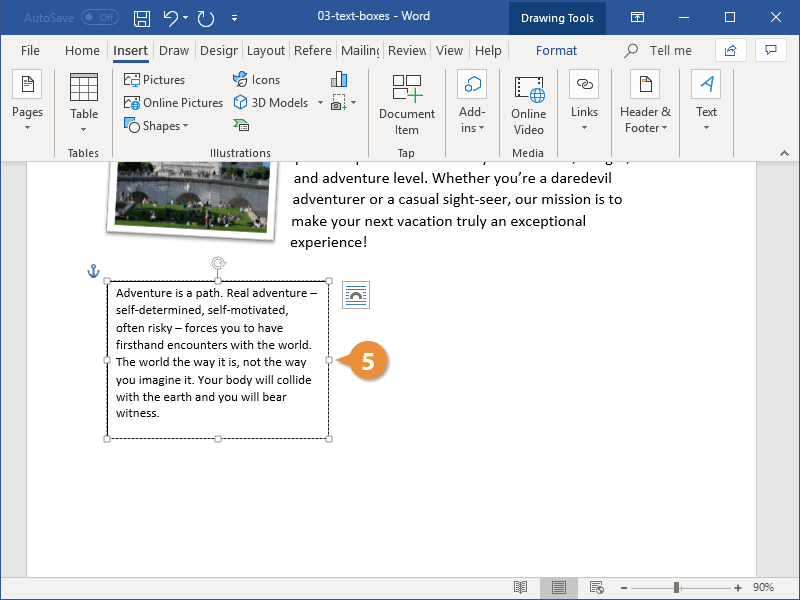
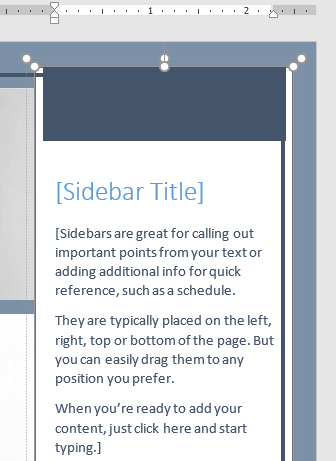
The placeholder text disappears as soon as you start typing.
Text boxes can be sized, moved, arranged, and styled just like shapes and pictures.
Draw Text Boxes
You don’t have to use one of Word’s built-in text boxes; you can create one from scratch.
- From the Insert tab, expand the Text group, if necessary.
- Click the Text Box button.
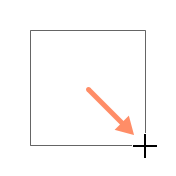
- Select Draw Text Box.
- Click and drag in your document to create the text box.
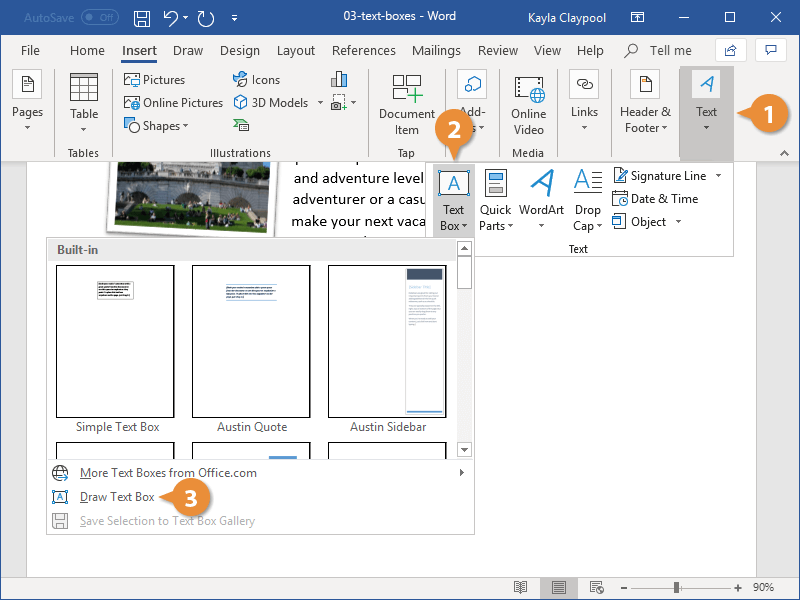
The pointer changes to a crosshair, indicating that you can draw the text box.
The text box is inserted.
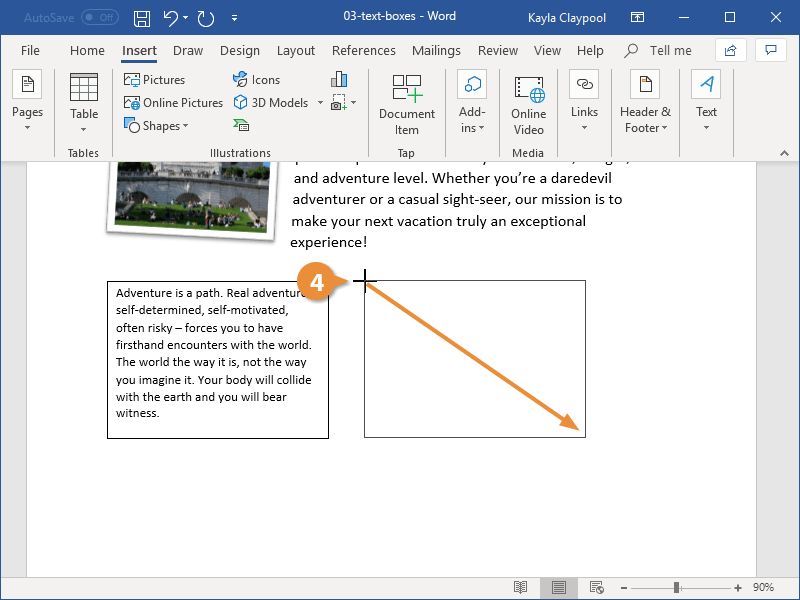
Link Text Boxes
Linking text boxes allows text to flow between them. For example, you could make the text of a long article flow through several smaller text boxes in a more advanced layout.
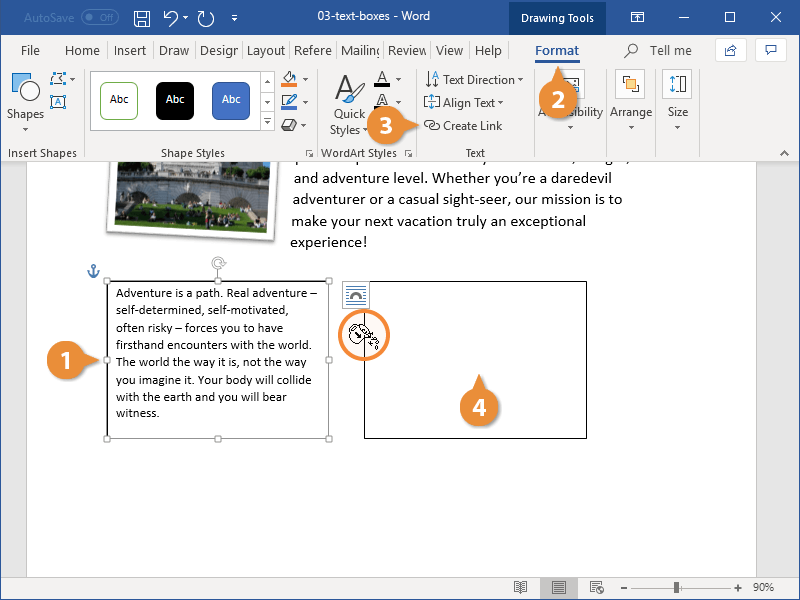
- After you have created two or more text boxes, select the first one.
- Click the Format tab in the Drawing Tools ribbon group.
- Click Create Link from the Text group.
- Click the second text box with the new cursor.
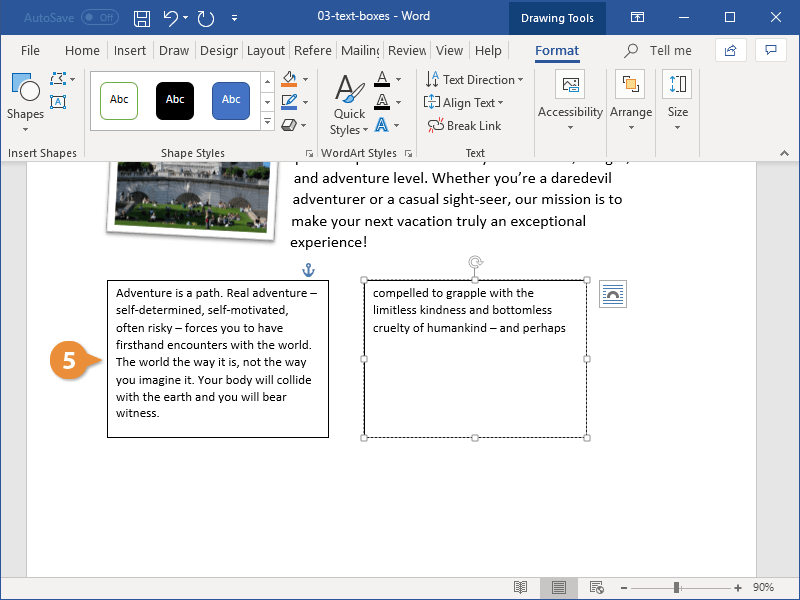
- Switch back to the first text box and type into it.
The second text box must be empty, so make sure to remove any text in it before proceeding.
The cursor changes into a tiny pitcher full of letters. Moving the cursor over the second text box reveals that you can “pour” additional text into it.
The two text boxes are linked. Now, once enough text is entered into the first text box, it will automatically overflow into the second.
You can format the text in a text box just as you would any other text by using the Font and Paragraph groups on the Home tab.

FREE Quick Reference
Click to Download
Free to distribute with our compliments; we hope you will consider our paid training.
Achieve more control and flexibility with your documents
Updated on September 11, 2022
What to Know
- Select Insert > Text Box > choose a text box template. Select and drag box to the position you want.
- To resize text, select and drag circles around the edge. To rotate text, select and drag the circular arrow.
- Place the cursor inside the text box and type the information you want to appear.
This article explains how to use text boxes in Microsoft Word. Instructions apply to Word for Microsoft 365, Word 2019, Word 2016, and Word 2013.
How to Insert a Text Box in Word
Start by opening the document you want to add a text box to. Then follow the steps below.
-
On the ribbon, select Insert.
-
In the Text group, select Text Box, then choose a text box template.
-
The new text box appears in the middle of the text, and the Shape Format tab is automatically selected.
-
Select and drag the box to the position you want. To resize the text box, select and drag the circles around the edge. To rotate the text box, select and drag the circular arrow at the top of the box.
-
Place the cursor inside the text box and type the information you want to appear there.
Why Use Text Boxes?
When you type text in Microsoft Word, you have options for making it look a particular way on the page (such as changing the page margins), but those options are limited. Text boxes expand your formatting repertoire by offering additional control and flexibility for how your text appears. You can place a text box anywhere within a document and format it with different colors and fonts. This feature is especially helpful for creating a blockquote or a sidebar.
Customize a Text Box
After you create a text box, you can customize it in a number of ways.
-
To bring up options, place the cursor inside the text box and right-click. Choose an option and follow the screen prompts to add a border, change the style, or adjust the way the text box interacts with the other text on the page.
Alternatively, use the controls on the Shape Format tab.
-
To go directly to the Layout Options menu, select the text box, then select the Layout Options icon (it looks like a horseshoe and is located to the right of the text box).
-
Change the text, make more adjustments, or move the box to another location at any time. To delete a text box, select its border, then press Delete on the keyboard.
Thanks for letting us know!
Get the Latest Tech News Delivered Every Day
Subscribe
If you’ve never used text boxes in Microsoft Word, you’re missing out on a handy feature. Here’s a quick introduction to using them.
It’s dead simple to type up a document in Microsoft Word: just click on a blank document and start typing. Of course, Word provides tons of options for formatting, fonts, and more to make your documents stand out.
One of these options is the text box. Why would you need a specific tool for inserting text when you can type it anywhere in a Word document? Let’s take a quick look at how to add customizable text boxes and why you might want to.
How to Add a Text Box in Word
With a Word document open, switch to the Insert tab. In the Text section, you’ll see a Text Box entry.
Once you click this, you’ll see a variety of built-in options. These range from the basic Simple Text Box to more involved options like Banded Sidebar. Simply click the one you want to insert it into your document.
Word will place the text box into a default position with some generic text. Next, you can customize it to your needs.
How to Customize Text Boxes in Word

With a text box inserted into your document, you can click and drag the outline to move it anywhere on the page. Grab one of the handles and you can resize the box too.
Double-click inside the box to select the placeholder text and insert your own. When you’re working inside a text box, use the Format bar at the top of the page to change the colors, font style, alignment, and more.
Why Use Text Boxes in Microsoft Word?
For simple documents with standard layouts, you probably don’t need text boxes. But they can add a nice touch for more dynamic papers. They’re perfect for pull quotes, calling attention to the most important parts of your piece. You might use them for a statistical aside or graphically different text instead.
Try text boxes in your next document for an exciting touch! For more on Microsoft Word, check out hidden Microsoft Word features that make life easier and how to add watermarks to Word documents.
Image Credit: dennizn/Depositphotos
|
2 / 2 / 1 Регистрация: 01.03.2020 Сообщений: 72 |
|
|
1 |
|
|
01.03.2020, 18:36. Показов 3767. Ответов 17
Здравствуйте, все. Подскажите, пожалуйста, возможно ли в макросе VBA MS Word заменить область перечисляющихся значений в области Shapes. Range(Array(«Text box 1», «Text box 2», «Text box 3», «итд) ) , если заранее известно, что они точно идут все,и по порядку от 1 до n не перечисляя все их, а указав только от первого до последнего «text box». Заранее благодарю
0 |

|
Programming Эксперт 94731 / 64177 / 26122 Регистрация: 12.04.2006 Сообщений: 116,782 |
01.03.2020, 18:36 |
|
Ответы с готовыми решениями: Private Sub CommandButton3_Click() TextBox1.Text = TextBox1.Text + «A» + Str(ActiveCell.Row) End Sub Combo box или «Выпадающий список с контекстным поиском» Отметить полужирным шрифтом в исходном тексте слова имеющие приставки «пре», «при», «на», «не» Microsoft Text ODBC Driver, ошибка «Не удается найти указанный поставщик» 17 |
 Нашел такую замечательную штуку, как Combo Box. Создал…
|
2 / 2 / 1 Регистрация: 01.03.2020 Сообщений: 72 |
|
|
01.03.2020, 18:44 [ТС] |
2 |
|
Здравствуйте, все. Подскажите, пожалуйста, возможно ли в макросе VBA MS Word заменить область перечисляющихся значений в области Shapes. Range(Array(«Text box 1», «Text box 2», «Text box 3», «итд) ) , если заранее известно, что они точно идут все,и по порядку от 1 до n не перечисляя все их, а указав только от первого до последнего «text box». Или если это невозможно, то подскажите, пожалуйста, как в цикле for реализовать автоматическое формирование такой длинной записи по порядку скажем от «Text box 1» до «Text box 4» в кавычках и через запятую, чтобы после уже последнего «Text box 4» перед закрывающейся скобкой не вылазила запятая) и потом уже это сформированное значение Подставлять в Shapes. Range(Array( ss) ) и работало, как нужно все) Заранее благодарю)
0 |
|
1813 / 1135 / 346 Регистрация: 11.07.2014 Сообщений: 4,002 |
|
|
01.03.2020, 19:07 |
3 |
|
Inna1998, а вот интересно вам действительно удалось имена текстбоксов сделать с пробелами или это просто ваши фантазии? Добавлено через 12 минут
0 |
|
pashulka 4131 / 2235 / 940 Регистрация: 01.12.2010 Сообщений: 4,624 |
||||
|
01.03.2020, 19:48 |
4 |
|||
|
Burk, Вы тоже можете создать текстовые поля, с пробелами в именах
Inna1998, Откройте тайну, что именно Вы хотите сделать с этими текстовыми полями ?
0 |
") но они не имеют никакого отношения к контролам.
но они не имеют никакого отношения к контролам. |
1813 / 1135 / 346 Регистрация: 11.07.2014 Сообщений: 4,002 |
|
|
01.03.2020, 19:58 |
5 |
|
pashulka, я почему-то решил, что речь идет об UserForm.
0 |
|
2 / 2 / 1 Регистрация: 01.03.2020 Сообщений: 72 |
|
|
01.03.2020, 20:32 [ТС] |
6 |
|
Так записал обработчик в word при записи макроса, с пробелами как раз при выделении «Text box #») Добавлено через 13 минут Ну или на крайней случай, чтобы длинная запись такая, содержащая все 100 текст боксов была сформированна автоматически в цикле напримен for ,именно в таком формате(стиле) Добавлено через 10 минут
0 |
|
pashulka 4131 / 2235 / 940 Регистрация: 01.12.2010 Сообщений: 4,624 |
||||
|
01.03.2020, 21:12 |
7 |
|||
|
Можно просто перебрать все фигуры и изменять нужные параметры только у текстовых полей. Разумеется, если других фигур нет, то и проверка не имеет особого смысла.
1 |
|
2 / 2 / 1 Регистрация: 01.03.2020 Сообщений: 72 |
|
|
01.03.2020, 22:41 [ТС] |
8 |
|
Спасибо огромное. Наверное буду делать так. У меня действительно только эти объекты есть поэтому можно заменить во всех, как сделал ваш код уже у меня на компьютере, действительно он работает! Однако, еще обнаружил, то что вот скажем номера этих Text Box очень непостоянная вещь в MS Word, что в принципе и логично)) просто я не знал это и тут вот сейчас обнаружил, что скажем когда я днем создавал эти «Text Box» удалял снова создавал экспериментировал)) — и были одни номера у них, например «Text box 3988» и тд, то теперь они у меня после повторного вкл компьютера вечером — «Text box 4034» например. И если мне бы нужно было скажем отделить одни Text box от других по номерам, как я это и хотел, пока сейчас не обнаружил что они каждый раз могут изменится.. Это была бы очень непростая задачка предполагаю для многих даже тут или не совсем как считаете?Например, определить последние 10 созданных Text Box в ActiveDocument , и уже в них, определив номера конкретные ,изменить то или иное форматирование под определенными десятью последними «Text Box ????» номерами…
0 |
|
pashulka 4131 / 2235 / 940 Регистрация: 01.12.2010 Сообщений: 4,624 |
||||
|
01.03.2020, 22:59 |
9 |
|||
|
Не надо людей брать на слабо.
1 |
|
2 / 2 / 1 Регистрация: 01.03.2020 Сообщений: 72 |
|
|
01.03.2020, 23:58 [ТС] |
10 |
|
Спасибо снова большое вам) Вы просто Бог в програмировании этом. Но последний код считает еще и рисунки обычные(( Попробовала добавить к
0 |
|
pashulka 4131 / 2235 / 940 Регистрация: 01.12.2010 Сообщений: 4,624 |
||||
|
02.03.2020, 08:52 |
11 |
|||
|
Вы говорили, что окромя текстовых полей (они же надписи), ничего нет. Если же появились ещё и рисунки, то можно попробовать что-то вроде :
1 |
|
2 / 2 / 1 Регистрация: 01.03.2020 Сообщений: 72 |
|
|
02.03.2020, 13:10 [ТС] |
12 |
|
Последний код работает абсолютно супер и полно, как и предыдущие два конечно в меру своей требуемой на каждом этапе полноты:-) Добавлено через 10 минут Благодарю за столь быстрое и качествено оказанную помощь в програмировании без корыстно) это Просто огонь для снова веры в чистое и светлое будущее для меня и других людей)!!!
0 |
|
2 / 2 / 1 Регистрация: 01.03.2020 Сообщений: 72 |
|
|
02.03.2020, 20:23 [ТС] |
13 |
|
pashulka, Добрый вечер, Павел. Извините, пожалуйста, а вы не могли бы еще подсказать то как возможно выделить и затем сгруппировать объекты типа «Text box» и затем выделить и сгруппировать объекты например типа «Line», после чего обнаружить и выделив две эти последние созданные группы и объеденить их в одну макрогруппу? Наверно, для простоты условимся что выдялем и группируем ВСЕ объекты находящиеся на странице, а не последние 10. С последними, как я поняла, не знаю справедливо ли, возможно только перебрать каждый отдельно один за другим меняя поочередно свойство каждого, на единое при этом для всех 10. Что ,если это действительно так, то не может быть подходящим для группировки, когда обязательным условием должно быть выделение сразу всех или той части объектов shapes, которую группируем в один момент времени сразу все. А это подошло бы или может даже ускорило выполнение предыдущих кода по изменению сразу во всех последних 10″ text box».., шрифта и цвета рамки, а не перебором по одному..если было бы это возможно. Добавлено через 10 минут
0 |
|
pashulka 4131 / 2235 / 940 Регистрация: 01.12.2010 Сообщений: 4,624 |
||||
|
02.03.2020, 20:26 |
14 |
|||
|
Пробуйте упрощённый вариант. Но имейте ввиду, что линий много разных, надо смотреть их типы
1 |
|
Inna1998 2 / 2 / 1 Регистрация: 01.03.2020 Сообщений: 72 |
||||
|
02.03.2020, 23:26 [ТС] |
15 |
|||
|
pashulka,
— » Microsoft Visual Basic А подскажите в каком месте мы задаем тип линии, или объекта shapes?) Раньше мы задавали словом «msoTextbox» в явном виде и было сразу понятно, что именно ищем и выделяем, а тут что это номера после Case 1, -2 номера фигур или нет? ((
0 |
|
4131 / 2235 / 940 Регистрация: 01.12.2010 Сообщений: 4,624 |
|
|
02.03.2020, 23:48 |
16 |
|
я не поленился, проверил, у меня фигуры стали сгруппированы. 1 и -2 это значения констант. смотрите свойство AutoShapeType Подобную ошибку можно получить — если попытаться сгруппировать фигуры, которые уже являются частью группы. И ещё Word не даёт группировать фигуры, находящиеся на разных страницах. P.S. А так, лучше говорить предметно, пока никакого документа с фигурами, нет.
0 |
|
Inna1998 2 / 2 / 1 Регистрация: 01.03.2020 Сообщений: 72 |
||||
|
02.03.2020, 23:51 [ТС] |
17 |
|||
|
Пришлю файл сейчас еще вордовский сам с фигурами этими и надписями, сейчас вот в записи макроса примерно сформировала, что я хочу макросом сделать, но чтобы естественно эти номера были любые последние, возможно так будет чуточку яснее)
0 |
|
pashulka 4131 / 2235 / 940 Регистрация: 01.12.2010 Сообщений: 4,624 |
||||
|
02.03.2020, 23:54 |
18 |
|||
|
Вариант группировки постранично. для первой страницы.
0 |
|
IT_Exp Эксперт 87844 / 49110 / 22898 Регистрация: 17.06.2006 Сообщений: 92,604 |
02.03.2020, 23:54 |
|
Помогаю со студенческими работами здесь MS Acces VBA. Как вывести поле «фамилия» и «группа» из таблицы «студенты» в Access ? как строкувую переменой aa=»form2.text2.text» переоброзовать на (как в foxpro bb=&aa) AA=’2′ Проверить, содержит ли строка символы отличные от «+», «-«, «*» и «/» вот начал, дальше не знаю что делать Sub rr() Dim s As String,…
Искать еще темы с ответами Или воспользуйтесь поиском по форуму: 18 |
") Выборка уникальных дат из строк листа «l1» и помещение их в лист «l3», Не получается. На листе «l3» вставляет
Выборка уникальных дат из строк листа «l1» и помещение их в лист «l3», Не получается. На листе «l3» вставляетLesson 21: Text Boxes
/en/word2016/shapes/content/
Introduction
Text boxes can be useful for drawing attention to specific text. They can also be helpful when you need to move text around in your document. Word allows you to format text boxes and the text within them with a variety of styles and effects.
Optional: Download our practice document.
Watch the video below to learn more about text boxes in Word.
To insert a text box:
- Select the Insert tab, then click the Text Box command in the Text group.

- A drop-down menu will appear. Select Draw Text Box.

- Click and drag anywhere on the document to create the text box.
- The insertion point will appear inside the text box. You can now type to create text inside the text box.
- If you want, you can select the text and then change the font, color, and size by using the commands on the Format and Home tabs. To learn more about using these formatting commands, see our Formatting Text lesson.
- Click anywhere outside the text box to return to your document.


You can also select one of the built-in text boxes that have predefined colors, fonts, positions, and sizes. If you choose this option, the text box will appear automatically, so you will not need to draw it.
To move a text box:
- Click the text box you want to move.
- Hover the mouse over one of the edges of the text box. The mouse will change into a cross with arrows.
- Click and drag the text box to the desired location.

To resize a text box:
- Click the text box you want to resize.
- Click and drag any of the sizing handles on the corners or sides of the text box until it is the desired size.

Modifying text boxes
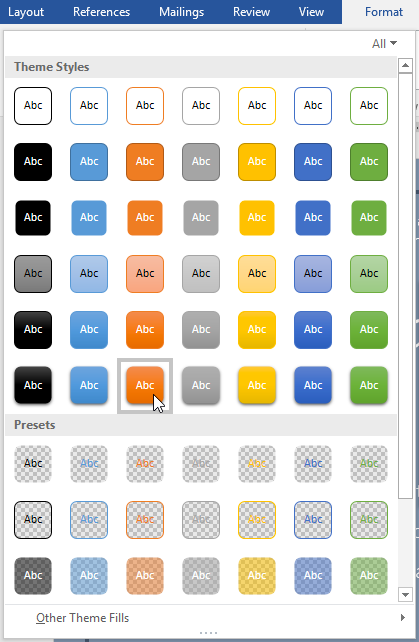
Word offers several options for changing the way text boxes appear in your document. You can change the shape, style, and color of text boxes or add various effects.
To change the shape style:
Choosing a shape style allows you to apply preset colors and effects to quickly change the appearance of your text box.
- Select the text box you want to change.
- On the Format tab, click the More drop-down arrow in the Shape Styles group.
- A drop-down menu of styles will appear. Select the style you want to use.
- The text box will appear in the selected style.


If you want to have more control over text box formatting, you can use any of the shape formatting options such as Shape Fill and Shape Outline. To learn more, see our Shapes lesson.
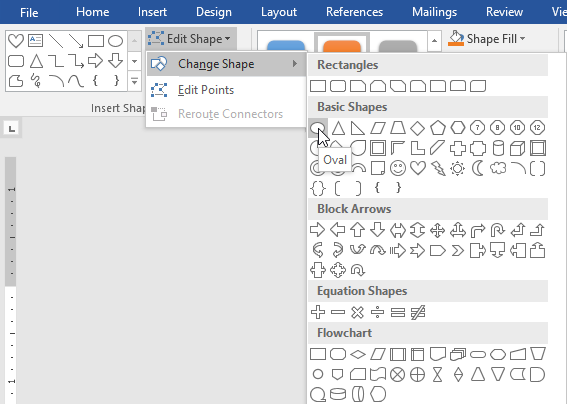
To change the text box shape:
Changing the shape of a text box can be a useful option for creating an interesting look in your document.
- Select the text box you want to change. The Format tab will appear.
- From the Format tab, click the Edit Shape command.
- Hover the mouse over Change Shape, then select the desired shape from the menu that appears.
- The text box will appear formatted as the shape.


Challenge!
- Open our practice document.
- Insert a Simple Text Box.
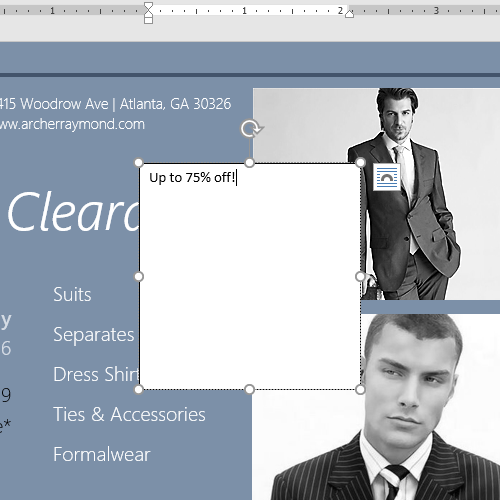
- In the text box, type Get an additional 25% off when you mention this ad!
- Change the font to Gadugi, 20 pt, Center Align.
- Change the shape of the text box to Double Wave from the Stars and Banners group.
- Change the text box style by selecting any style in the Intense Effect row.
- Drag the text box to the space below Buy 1, Get 1 Free* and Formalwear.
- When you’re finished, your document should look something like this:


/en/word2016/aligning-ordering-and-grouping-objects/content/
I have Excel Workbook from where I am running following code below. I have logo and page numbering already in Word document so I do not need to paste the whole range from Excel. I have two Text Boxes where data from spreadsheet should be inserted.
-
I need to copy
Worksheets("Other Data").Range("A58:A60")and paste it to «Text Box 1» that I have in Word documents header. Three sentances on different rows. Text Box should be wrapped? -
I need to copy
Worksheets("Other Data").Range("A68")and paste it to «Text Box 2» that I have in Word documents header. One sentance. -
AutoFitWindows doesn’t work. There have to be something with variables but I can’t figure what exactly is wrong. Tried different ways with no success.
Here is my code:
Sub excelToWord_click()

    Dim head As Excel.Range
    Dim foot As Excel.Range
    Dim WordTable As Word.Table
    Set wdApp = CreateObject("Word.Application")
    wdApp.Documents.Open FileName:=ThisWorkbook.Path & "" & "MyDOC" & ".docx"
    wdApp.Visible = True

    Set head = ThisWorkbook.Worksheets("Other Data").Range("A58:A60")

    head.Copy

    '|| I need to paste copied cells to "Text Box 1" in my Word document ||'

    With wdApp.ActiveDocument.Sections(1)
        .Headers(wdHeaderFooterIndex.wdHeaderFooterPrimary).Range.Shapes("Text Box 1").Activate
        head.Paste
    End With

    '|| ---------------------------------------------------------------- ||'

        Set head2 = ThisWorkbook.Worksheets("Other Data").Range("A68")

    head2.Copy

    '|| I need to paste copied cells to "Text Box 2" in my Word document ||'

    With wdApp.ActiveDocument.Sections(1)
        .Headers(wdHeaderFooterIndex.wdHeaderFooterPrimary).Range.Shapes("Text Box 2").Activate
        head2.Paste
    End With

    '|| ---------------------------------------------------------------- ||'

        Set foot = ThisWorkbook.Worksheets("Other Data").Range("A62:H65")
    foot.Copy

    With wdApp.ActiveDocument.Sections(1)
    .Footers(wdHeaderFooterIndex.wdHeaderFooterPrimary).Range.Paste
    End With

    '|| Autofit table to page in Footer ||'

    WordTable.AutoFitBehavior (wdAutoFitWindow)

    '|| ---------------------------------------------------------------- ||'

    'restore Word
    If wdApp.ActiveWindow.View.SplitSpecial <> 0 Then
        wdApp.ActiveWindow.Panes(2).Close
    End If
    If wdApp.ActiveWindow.ActivePane.View.Type = 1 _
    Or wdApp.ActiveWindow.ActivePane.View.Type = 2 Then
        wdApp.ActiveWindow.ActivePane.View.Type = 3
    End If
    wdApp.WordBasic.AcceptAllChangesInDoc
    'wdApp.ActiveDocument.PrintOut, Copies:=1

    wdApp.ActiveDocument.ExportAsFixedFormat outputfilename:=ThisWorkbook.Path & "" & Sheets("MAIN").Range("D14").Value & ", " & Sheets("MAIN").Range("D11").Value & "_" & "Document" & "_" & ".pdf", exportformat:=wdExportFormatPDF

    wdApp.ActiveDocument.SaveAs ThisWorkbook.Path & "" & Worksheets("MAIN").Range("D14").Value & ", " & Worksheets("MAIN").Range("D11").Value & "_" & "Document" & "_" & ".docx"

        wdApp.Quit '<--| quit Word
    Set wdApp = Nothing '<--| release object variable
    'wdApp.ActiveWindow.Close savechanges:=False
End Sub
![]()
Pᴇʜ
56k9 gold badges49 silver badges73 bronze badges
asked Nov 20, 2018 at 14:27
![]()
4
Your problem is because you are late binding your word application object rather than installing the Word reference to the VBA IDE.
This means that any references to word constants without qualification to the variable you are using for your word app will be interpreted as the default (0 or Null) value.
The simplest way to resolve this issue is in the VBA IDE; goto Tools.References and make sure that the check box next to Microsoft Word …… is ticked.
If you would prefer to qualify your variables then you need to change word constants so that they are prefixed with WdApp, your variable for the Word Application.
e.g. wdApp.wdHeaderFooterIndex.wdHeaderFooterPrimary
With the Word reference installed you can just say
wdHeaderFooterPrimary.
![]()
Pᴇʜ
56k9 gold badges49 silver badges73 bronze badges
answered Nov 20, 2018 at 14:35
![]()
freeflowfreeflow
4,0933 gold badges10 silver badges17 bronze badges
2