
Publisher for Microsoft 365 Publisher 2021 Publisher 2019 Publisher 2016 Publisher 2013 Publisher 2010 Publisher 2007 More…Less
When a text box or AutoShape contains more text than it can display, Publisher stores the extra text in overflow. You can move your text out of overflow and back into your publication by moving text into another text box, fitting text automatically, enlarging the text box, changing the text size, changing the margins within the text box, or deleting some of the text in the text box.
Move text from the overflow into another text box
When a text box has too much text, a little box with ellipses appears in the lower right of the text box. You can link text boxes so that the overflow text flows from one box to another.
-
Create a new text box:
-
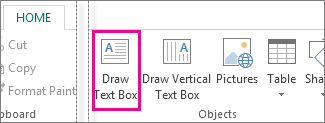
Click Home > Draw Text Box, and drag the cross shaped cursor to draw a box where you want text.

-
-
Click the overflow indicator and your cursor becomes a pitcher.
-
Move to the new text box and click.

The overflow text will appear in the new text box.
Now as you add text, words flow from one text box to another. If you run out of room in the second box you can link to another text box, and the text will flow through all three boxes.
Fit text automatically
-
Click anywhere in the text.
-
On the Text Box Tools Format tab, click Text Fit, and do one of the following:
-
To reduce the point size of text until there is no text in overflow, click Shrink Text on Overflow.
-
To shrink or expand text to fit in the text box when you resize the box, click Best Fit.
-
Make the text box or AutoShape larger
-
Click the object to select it.
-
Position the mouse pointer over one of the handles until you see the Resize pointer
. -
Do one of the following:
-
To resize the object proportionally, select a corner handle, and hold down Shift, and then proceed to step 4.
-
To stretch the object, select a top, bottom, or side handle, and then proceed to step 4.
-
-
Hold down the mouse button and drag the handle to resize the object.
 .
.Change the text size
-
Do one of the following:
-
To change the text size for a single word, place the insertion point within that word.
-
To change the text size for several words or a few characters, highlight the text to select it.
-
-
On the Text Box Tools Format tab, enter a size in the Font Size box
.
 .
.Note: You can type font sizes that are different from those listed in the Font Size box, to a precision of 0.1 pt. For example, you can type a font size of 9.3 pt.
Change the margins within a text box or AutoShape
-
Right-click the text box.
-
On the menu, click Format text box. The Format Text Box dialog box appears.
-
Click the Text Box tab.
-
Under Text Box Margins, enter the settings for the left, right, top, and bottom margins.
Delete some of the text
-
Select the text.
-
Press Delete.
Move text from the overflow into another text box
-
If needed, create a new text box:
-
On the Objects toolbar, click Text Box
. -
In your publication, click where you want one corner of the text to appear, and then drag diagonally until you have the box size you want.
-
-
Click in the text box with the overflow.
-
On the Connect Text Boxes toolbar, click Create Text Box Link
.The mouse pointer changes to a pitcher
. -
Click in the text box you want as the next in the story.
This text box is now connected to the first box and any text in the overflow now appears in the next box.
-
To connect more text boxes to the story, repeat steps 3 and 4.
 .
. .
.Fit text automatically
-
Click anywhere in the text.
-
On the Format menu, point to AutoFit Text, and do one of the following:
-
To reduce the point size of text until there is no text in overflow, click Shrink Text on Overflow.
-
To shrink or expand text to fit in the text box when you resize the box, click Best Fit.
-
Make the text box or AutoShape larger
-
Click the object to select it.
-
Position the mouse pointer over one of the handles until you see the Resize pointer
. -
Do one of the following:
-
To resize the object proportionally, select a corner handle, and hold down SHIFT, and then proceed to step 4.
-
To stretch the object, select a top, bottom, or side handle, and then proceed to step 4.
-
-
Hold down the mouse button and drag the handle to change the object.
Change the text size
-
Do one of the following:
-
To change the text size for a single word, place the insertion point within that word.
-
To change the text size for several words or a few characters, highlight the text to select it.
-
-
On the Formatting toolbar, enter a size in the Font Size box
.
Note: You can type font sizes that are different from those listed in the Font Size box, to a precision of 0.1 pt. For example, you can type a font size of 9.3 pt.
Change the margins within a text box or AutoShape
-
Right-click the text box or AutoShape.
-
On the shortcut menu, click Format <object type>.
-
Click the Text Box tab.
-
Under Text Box Margins, enter the settings for the left, right, top, and bottom margins.
Delete some of the text
-
Select the text.
-
Press Delete.
Need more help?
I want to write some text to an existing word textbox using C#.
Actually nothing happens and I don’t know why.
Maybe someone can help me?
My method:
Microsoft.Office.Interop.Word.Application oWord = new Microsoft.Office.Interop.Word.Application();
Microsoft.Office.Interop.Word.Document oWordDoc = new Microsoft.Office.Interop.Word.Document();

void SearchTextBox(Microsoft.Office.Interop.Word.Document oDoc, string name, string newContent)
{
    foreach (Microsoft.Office.Interop.Word.Shape shape in oDoc.Shapes)
    {
        if (shape.Name == name)
        {
            shape.TextFrame.TextRange.Text = newContent;
            return;
        }
    }
}
Call:
SearchTextBox(oWordDoc, "tbTest", "Please write some Text");

![]()
daniele3004
12.8k12 gold badges66 silver badges74 bronze badges
asked Feb 26, 2016 at 11:01
![]()
3
Here the solution:
using Word = Microsoft.Office.Interop.Word

var WORD = new Word.Application();
Word.Document doc   = WORD.Documents.Open(@PATH_APP);
doc.Activate();

foreach (Microsoft.Office.Interop.Word.Shape shape in WORD.ActiveDocument.Shapes)
{
    if (shape.Type == Microsoft.Office.Core.MsoShapeType.msoTextBox)
    {
        if (shape.AlternativeText.Contains("MY_FIELD_TO_OVERWRITE_OO1"))
        {
             shape.TextFrame.TextRange.Text="MY_NEW_FIELD_VALUE";
        }

    }
}

doc.Save();
answered Mar 26, 2019 at 7:16
![]()
daniele3004daniele3004
12.8k12 gold badges66 silver badges74 bronze badges
Textbox — Formatting Tools
Review and use the Textbox Formatting tools available on the ribbon.
When to use
There are some creative options available when it’s time to format a text box. Use these features often.
Instructions
Click into any textbox (or click Insert ribbon, Draw Textbox) and review the tools available to format textboxes.
Text Fit Text Direction
Hyphenation
Font Group
Alignment Group Margins
Columns
Tip: When working with columns, turn on “Boundaries”.
- View Ribbon.
- Boundaries.
- Then the column dividers are viewable.
Linking: Create a link to handle Overflow Text.
Overflow Text
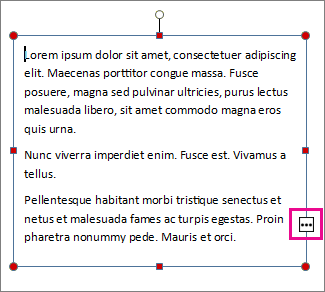
- When a text box is too small for the text length, it will appear with red handles to warn you that some of the text is not viewable.
- By activating the tiny ellipsis button on the text box, you can “spill” the text into another textbox. Essentially creating overflow text to a new box.
- To find where the original text came from, a new handle on the overflow box will appear.
Login to download
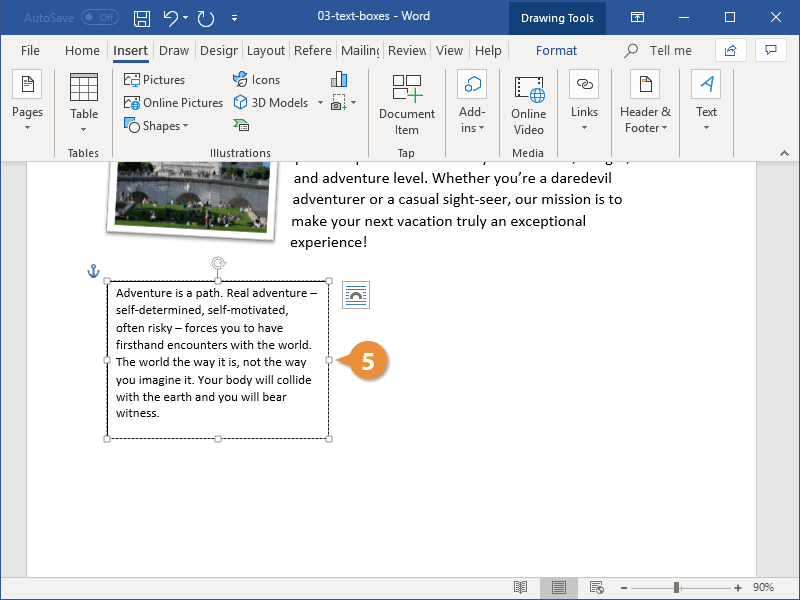
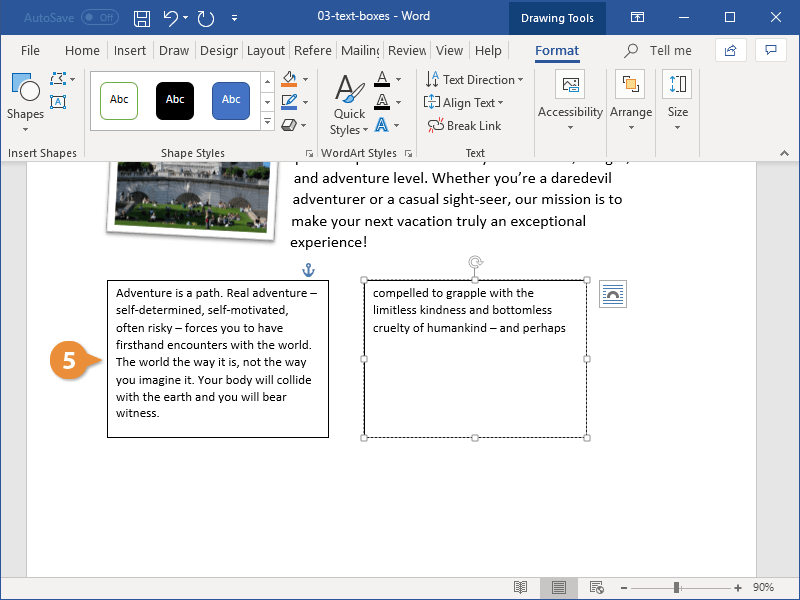
A text box is an element you can insert and position anywhere in a document. Text boxes are great for calling special attention to a quote or a whole block of text.
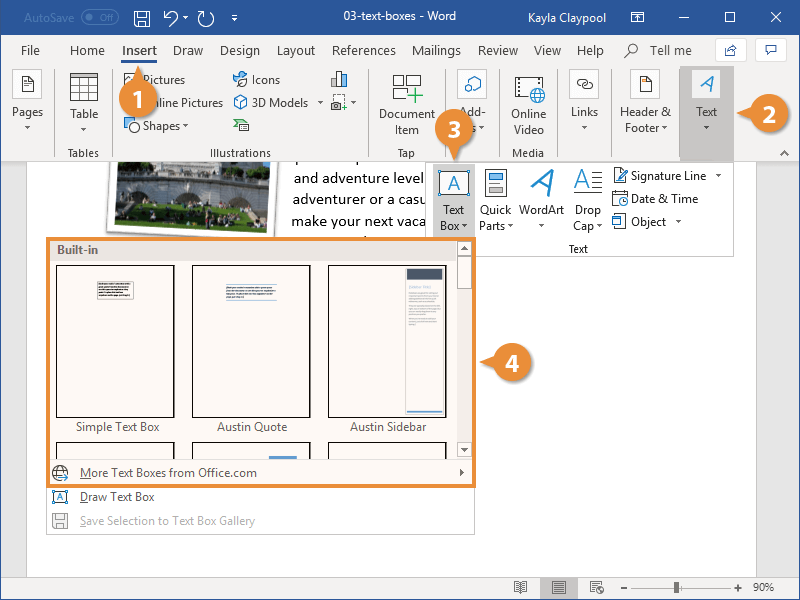
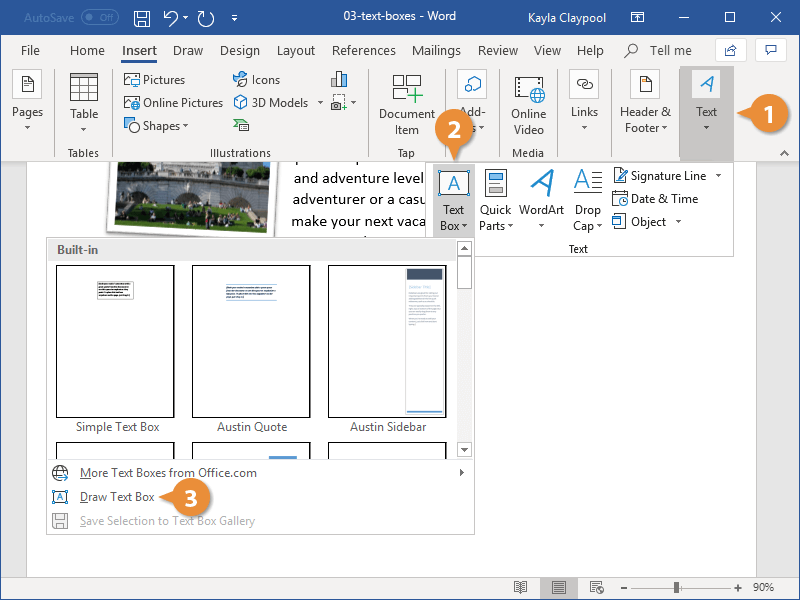
Insert a Text Box
- Click the Insert tab.
- Expand the Text group, if necessary.
- Click the Text Box button.
- Select the text box you’d like to use.

- Click the text box and type to replace the placeholder text.
A gallery of text box styles appears. The styles range from simple text boxes to stylized sidebars.
The text box is automatically inserted.
The placeholder text disappears as soon as you start typing.
Text boxes can be sized, moved, arranged, and styled just like shapes and pictures.
Draw Text Boxes
You don’t have to use one of Word’s built-in text boxes; you can create one from scratch.
- From the Insert tab, expand the Text group, if necessary.
- Click the Text Box button.
- Select Draw Text Box.
- Click and drag in your document to create the text box.
The pointer changes to a crosshair, indicating that you can draw the text box.
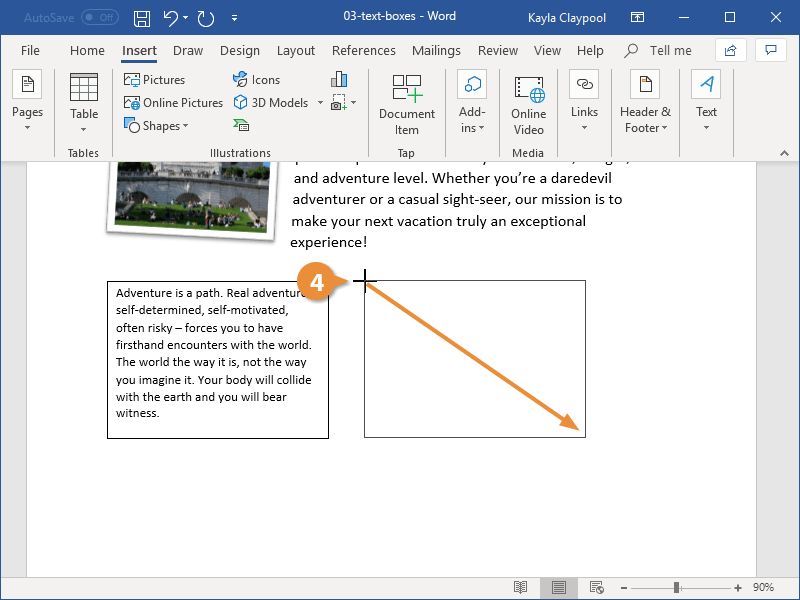
The text box is inserted.
Link Text Boxes
Linking text boxes allows text to flow between them. For example, you could make the text of a long article flow through several smaller text boxes in a more advanced layout.
- After you have created two or more text boxes, select the first one.
- Click the Format tab in the Drawing Tools ribbon group.
- Click Create Link from the Text group.
- Click the second text box with the new cursor.
- Switch back to the first text box and type into it.
The second text box must be empty, so make sure to remove any text in it before proceeding.
The cursor changes into a tiny pitcher full of letters. Moving the cursor over the second text box reveals that you can “pour” additional text into it.
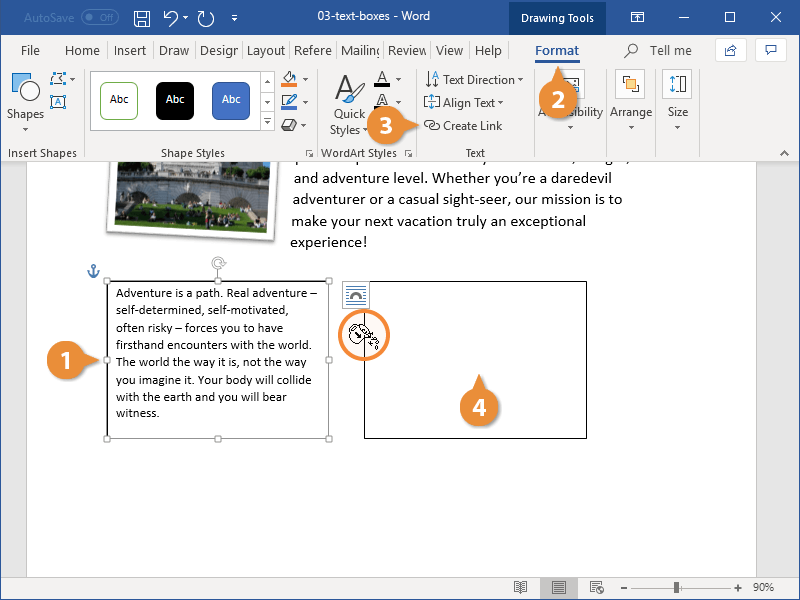
The two text boxes are linked. Now, once enough text is entered into the first text box, it will automatically overflow into the second.
You can format the text in a text box just as you would any other text by using the Font and Paragraph groups on the Home tab.

FREE Quick Reference
Click to Download
Free to distribute with our compliments; we hope you will consider our paid training.
DigitalOcean provides cloud products for every stage of your journey. Get started with $200 in free credit!
The text-overflow property in CSS deals with situations where text is clipped when it overflows the element’s box. It can be clipped (i.e. cut off, hidden), display an ellipsis (‘…’, Unicode Range Value U+2026) or display an author-defined string (no current browser support for author-defined strings).
.ellipsis {
  text-overflow: ellipsis;

  /* Required for text-overflow to do anything */
  white-space: nowrap;
  overflow: hidden;
}
Note that text-overflow only occurs when the container’s overflow property has the value hidden, scroll or auto and white-space: nowrap;.
Text overflow can only happen on block or inline-block level elements, because the element needs to have a width in order to be overflow-ed. The overflow happens in the direction as determined by the direction property or related attributes.
The following demo displays the behavior of the text-overflow property including all the possible values. Browser support varies!
Setting overflow to scroll or auto will display scrollbars to reveal the additional text, while hidden will not. The hidden text can be selected by selecting the ellipses.
Old Stuff
An old version of the spec says you could use an URL to an image for the ellipsis, but it looks as if that was dropped.
There is a two-value syntax, e.g. text-overflow: ellipsis ellipsis;, that would control the overflow on the left and right sides of the same container. I’m not sure how that would be possible to achieve. Perhaps centered text in a too-small container? The new spec says this, as well as defining a string, is “at risk.”
I’m not sure where ellipsis-word came from. It’s not in the spec or in any other documentation other than on WebPlatform.org.
The text-overflow property used to be shorthand for the combination of text-overflow-mode and text-overflow-ellipsis, but not anymore and those separate properties don’t exist.
Related Properties
white-spaceoverflowword-breakwidth
Other Resources
- W3C Candidate Recommendation Spec
- MDN Docs
- Web Platform Docs
- Caniuse.com
- CSS-Tricks Line Clampin’
- Manage Multi-Line Ellipsis in Pure CSS
- Truncate String with Ellipsis
Browser Support
| Chrome | Safari | Firefox | Opera | IE | Android | iOS |
|---|---|---|---|---|---|---|
| 25+ | 5.1+ | 19+ | 12.1+ | IE8+ | 2.1+ | 3.2+ |
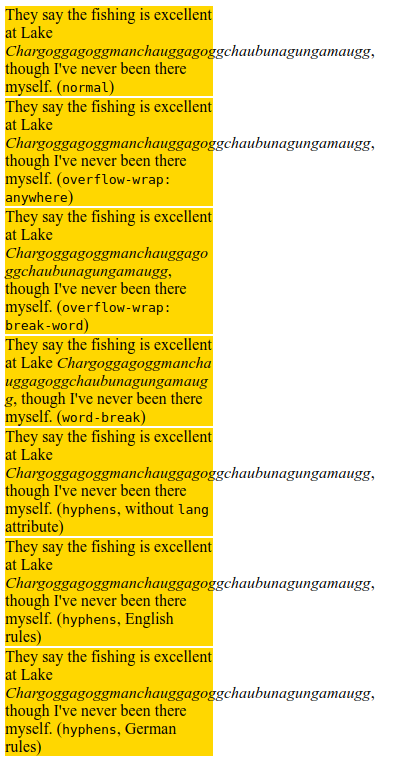
Свойство overflow-wrap применяется к встроенным элементам, определяя, должен ли браузер вставлять разрывы строк в неразрывную строку, чтобы текст не переполнял ее строку.
Демо
Текст
- hanging-punctuation
- hyphens
- letter-spacing
- line-break
- overflow-wrap
- paint-order
- tab-size
- text-align
- text-align-last
- text-indent
- text-justify
- text-size-adjust
- text-transform
- white-space
- word-break
- word-spacing
- letter-spacing
- text-decoration
- text-decoration-color
- text-decoration-line
- text-decoration-style
- text-decoration-thickness
- text-decoration-skip
- text-decoration-skip-ink
- text-emphasis
- text-emphasis-color
- text-emphasis-position
- text-emphasis-style
- text-indent
- text-rendering
- text-shadow
- text-underline-position
- text-transform
- white-space
- word-spacing
Синтаксис
/* Keyword values */
overflow-wrap: normal;
overflow-wrap: break-word;
overflow-wrap: anywhere;

/* Global values */
overflow-wrap: inherit;
overflow-wrap: initial;
overflow-wrap: unset;
Значения
normal- Строки могут разрываться только в обычных точках разрыва слов (например, пробел между двумя словами).
anywhere- Во избежание переполнения неразрывная строка символов — например, длинное слово или URL-адрес — может быть разбита в любой точке, если в строке нет других приемлемых точек разрыва. В точке останова символ переноса не вставляется. Возможности мягкого переноса, представленные разрывом слов, учитываются при расчете собственных размеров минимального содержимого.
break-word- То же самое, что и в любом месте, с обычно неразрывными словами, которые можно разбивать в произвольных точках, если в строке нет других приемлемых точек разрыва, но возможности мягкого переноса, представленные разрывом слова, НЕ учитываются при вычислении внутренних размеров минимального содержимого.
Спецификация
- CSS Text Module Level 3
Пример
HTMLCSSРезультат
<p>
  They say the fishing is excellent at Lake
  <em class="normal"
    >Chargoggagoggmanchauggagoggchaubunagungamaugg</em
  >, though I've never been there myself.
  (<code>normal</code>)
</p>
<p>
  They say the fishing is excellent at Lake
  <em class="ow-anywhere"
    >Chargoggagoggmanchauggagoggchaubunagungamaugg</em
  >, though I've never been there myself. (<code
    >overflow-wrap: anywhere</code
  >)
</p>
<p>
  They say the fishing is excellent at Lake
  <em class="ow-break-word"
    >Chargoggagoggmanchauggagoggchaubunagungamaugg</em
  >, though I've never been there myself. (<code
    >overflow-wrap: break-word</code
  >)
</p>
<p>
  They say the fishing is excellent at Lake
  <em class="word-break"
    >Chargoggagoggmanchauggagoggchaubunagungamaugg</em
  >, though I've never been there myself.
  (<code>word-break</code>)
</p>
<p>
  They say the fishing is excellent at Lake
  <em class="hyphens"
    >Chargoggagoggmanchauggagoggchaubunagungamaugg</em
  >, though I've never been there myself.
  (<code>hyphens</code>, without
  <code>lang</code> attribute)
</p>
<p lang="en">
  They say the fishing is excellent at Lake
  <em class="hyphens"
    >Chargoggagoggmanchauggagoggchaubunagungamaugg</em
  >, though I've never been there myself.
  (<code>hyphens</code>, English rules)
</p>
<p class="hyphens" lang="de">
  They say the fishing is excellent at Lake
  <em class="hyphens"
    >Chargoggagoggmanchauggagoggchaubunagungamaugg</em
  >, though I've never been there myself.
  (<code>hyphens</code>, German rules)
</p>
p {
  width: 13em;
  margin: 2px;
  background: gold;
}

.ow-anywhere {
  overflow-wrap: anywhere;
}

.ow-break-word {
  overflow-wrap: break-word;
}

.word-break {
  word-break: break-all;
}

.hyphens {
  hyphens: auto;
}
См. также
word-breakhyphenstext-overflow
Ссылки
overflow-wrapMDN (рус.)
- Remove From My Forums
-
Question
-
Hi.
I have a 4 page document, 2 pages are technical jargon. I would like to insert the 2 pages of text into a text box. I need a scroll bar enabled for continuous reading. The text box should appear in the middle of my document.
Can someone walk me through how to create a simple Text box *(with up/down scrolls)in MS Word?
How would I move my existing text to the Text box? Copy/paste?
When I send my main document (to another user), do I highlight the Text box to copy?
Your «Body» text box is exactly what I’m looking to create.
Thanks.
Tc.
Example
Use of the text-overflow property:
div
{
white-space: nowrap;
overflow:
hidden;
text-overflow: ellipsis;
}
Try it Yourself »
More «Try it Yourself» examples below.
Definition and Usage
The text-overflow property specifies how overflowed content that is not
displayed should be signaled to the user. It can be clipped, display an ellipsis
(…), or display a custom string.
Both of the following properties are required for text-overflow:
- white-space: nowrap;
- overflow: hidden;
Show demo ❯
| Default value: | clip |
|---|---|
| Inherited: | no |
| Animatable: | no. Read about animatable |
| Version: | CSS3 |
| JavaScript syntax: | object.style.textOverflow=»ellipsis» Try it |
Browser Support
The numbers in the table specify the first browser version that fully supports the property.
Numbers followed by -o- specify the first version that worked with a prefix.
| Property | |||||
|---|---|---|---|---|---|
| text-overflow | 4.0 | 6.0 | 7.0 | 3.1 | 11.0 9.0 -o- |
CSS Syntax
text-overflow: clip|ellipsis|string|initial|inherit;
Property Values
| Value | Description | Demo |
|---|---|---|
| clip | Default value. The text is clipped and not accessible | Demo ❯ |
| ellipsis | Render an ellipsis («…») to represent the clipped text | Demo ❯ |
| string | Render the given string to represent the clipped text | |
| initial | Sets this property to its default value. Read about initial | |
| inherit | Inherits this property from its parent element. Read about inherit |
More Examples
Example
Text-overflow with a hover effect (show entire text on hover):
div.a {
white-space: nowrap;
overflow: hidden;
text-overflow: ellipsis;
}
div.a:hover {
overflow: visible;
}
Try it Yourself »
Related Pages
CSS tutorial: CSS Text Effects
HTML DOM reference: textOverflow property
The text-overflow CSS property sets how hidden overflow content is signaled to users. It can be clipped, display an ellipsis (‘…‘), or display a custom string.
Try it
The text-overflow property doesn’t force an overflow to occur. To make text overflow its container, you have to set other CSS properties: overflow and white-space. For example:
overflow: hidden;
white-space: nowrap;
The text-overflow property only affects content that is overflowing a block container element in its inline progression direction (not text overflowing at the bottom of a box, for example).
Syntax
The text-overflow property may be specified using one or two values. If one value is given, it specifies overflow behavior for the end of the line (the right end for left-to-right text, the left end for right-to-left text). If two values are given, the first specifies overflow behavior for the left end of the line, and the second specifies it for the right end of the line.
text-overflow: clip;
text-overflow: ellipsis ellipsis;
text-overflow: ellipsis " [..]";

/* Global values */
text-overflow: inherit;
text-overflow: initial;
text-overflow: revert;
text-overflow: revert-layer;
text-overflow: unset;
- one of the keyword values:
clip,ellipsis,fade - the function
fade(), which is passed a<length>or a<percentage>to control the fade distance - a
<string>.
Values
clip-
The default for this property. This keyword value will truncate the text at the limit of the content area, therefore the truncation can happen in the middle of a character. To clip at the transition between characters you can specify
text-overflowas an empty string, if that is supported in your target browsers:text-overflow: '';. ellipsis-
This keyword value will display an ellipsis (
'…',U+2026 HORIZONTAL ELLIPSIS) to represent clipped text. The ellipsis is displayed inside the content area, decreasing the amount of text displayed. If there is not enough space to display the ellipsis, it is clipped. <string>
Experimental
-
The
<string>to be used to represent clipped text. The string is displayed inside the content area, shortening the size of the displayed text. If there is not enough space to display the string itself, it is clipped. fade
Experimental
-
This keyword clips the overflowing inline content and applies a fade-out effect near the edge of the line box with complete transparency at the edge.
fade( <length> | <percentage> )
Experimental
-
This function clips the overflowing inline content and applies a fade-out effect near the edge of the line box with complete transparency at the edge.
The argument determines the distance over which the fade effect is applied. The
<percentage>is resolved against the width of the line box. Values lower than0are clipped to0. Values greater than the width of the line box are clipped to the width of the line box.
Formal definition
| Initial value | clip |
|---|---|
| Applies to | block container elements |
| Inherited | no |
| Computed value | as specified |
| Animation type | discrete |
Formal syntax
text-overflow =
  clip      |
  ellipsis
Examples
One-value syntax
This example shows different values for text-overflow applied to a paragraph, for left-to-right and right-to-left text.
HTML
<div class="ltr">
  <h2>Left to right text</h2>
  <pre>clip</pre>
  <p class="overflow-clip">
    Lorem ipsum dolor sit amet, consectetur adipisicing elit.
  </p>
  <pre>ellipsis</pre>
  <p class="overflow-ellipsis">
    Lorem ipsum dolor sit amet, consectetur adipisicing elit.
  </p>
  <pre>" [..]"</pre>
  <p class="overflow-string">
    Lorem ipsum dolor sit amet, consectetur adipisicing elit.
  </p>
</div>

<div class="rtl">
  <h2>Right to left text</h2>
  <pre>clip</pre>
  <p class="overflow-clip">
    Lorem ipsum dolor sit amet, consectetur adipisicing elit.
  </p>
  <pre>ellipsis</pre>
  <p class="overflow-ellipsis">
    Lorem ipsum dolor sit amet, consectetur adipisicing elit.
  </p>
  <pre>" [..]"</pre>
  <p class="overflow-string">
    Lorem ipsum dolor sit amet, consectetur adipisicing elit.
  </p>
</div>
CSS
p {
  width: 200px;
  border: 1px solid;
  padding: 2px 5px;

  /* Both of the following are required for text-overflow */
  white-space: nowrap;
  overflow: hidden;
}

.overflow-clip {
  text-overflow: clip;
}

.overflow-ellipsis {
  text-overflow: ellipsis;
}

.overflow-string {
  text-overflow: " [..]";
}

body {
  display: flex;
  justify-content: space-around;
}

.ltr > p {
  direction: ltr;
}

.rtl > p {
  direction: rtl;
}
Result
Two-value syntax
This example shows the two-value syntax for text-overflow, where you can define different overflow behavior for the start and end of the text.
To show the effect we have to scroll the line so the start of the line is also hidden.
HTML
<pre>clip clip</pre>
<p class="overflow-clip-clip">
  Lorem ipsum dolor sit amet, consectetur adipisicing elit.
</p>
<pre>clip ellipsis</pre>
<p class="overflow-clip-ellipsis">
  Lorem ipsum dolor sit amet, consectetur adipisicing elit.
</p>
<pre>ellipsis ellipsis</pre>
<p class="overflow-ellipsis-ellipsis">
  Lorem ipsum dolor sit amet, consectetur adipisicing elit.
</p>
<pre>ellipsis " [..]"</pre>
<p class="overflow-ellipsis-string">
  Lorem ipsum dolor sit amet, consectetur adipisicing elit.
</p>
CSS
p {
  width: 200px;
  border: 1px solid;
  padding: 2px 5px;

  /* Both of the following are required for text-overflow */
  white-space: nowrap;
  overflow: scroll;
}

.overflow-clip-clip {
  text-overflow: clip clip;
}

.overflow-clip-ellipsis {
  text-overflow: clip ellipsis;
}

.overflow-ellipsis-ellipsis {
  text-overflow: ellipsis ellipsis;
}

.overflow-ellipsis-string {
  text-overflow: ellipsis " [..]";
}
JavaScript
// Scroll each paragraph so the start is also hidden
const paras = document.querySelectorAll("p");

for (const para of paras) {
  para.scroll(100, 0);
}
Result
Specifications
| Specification |
|---|
| CSS Overflow Module Level 3 # text-overflow |
A previous version of this interface reached the Candidate Recommendation status. As some not-listed-at-risk features needed to be removed, the spec was demoted to the Working Draft level, explaining why browsers implemented this property unprefixed, though not at the CR state.
Browser compatibility
BCD tables only load in the browser
See also
- Related CSS properties:
overflow,white-space - CSS properties that control line breaks in words:
overflow-wrap,word-break