
You can change the look of a shape or text box by changing its fill or by adding effects to it, such as shadows, glows, reflections, soft edges, bevels, and three-dimensional (3-D) rotations.
A fill is a color, pattern, texture, picture, or gradient applied to the interior of a shape. A gradient is a gradual progression of colors and shades, usually from one color to another color, or from one shade to another shade of the same color.

Changing the fill color of a shape affects only the inside or front of the shape. If you add an effect to a shape, such as a shadow, and want a different color for that effect, you must change the color of the shadow separately from the fill color.
A 3-D effect adds depth to a shape. You can add a built-in combination of 3-D effects to your shape, or you can add individual effects. You can add combinations of individual effects to your shape in these programs: Excel, Outlook, Word, and PowerPoint.
Add a fill or effect
To add a fill or effect, click your shape, click Format, click the arrow next to Shape Fill or Shape Effects, and select a color, gradient, texture, or effect.
-
Click the shape that you want to fill. To add the same fill to multiple shapes, click the first shape, and then press and hold Ctrl while you click the other shapes.
-
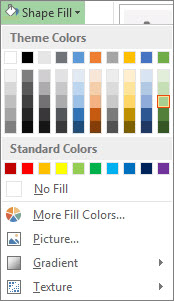
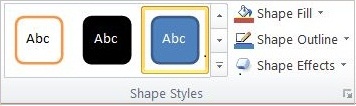
On the Format tab, in the Shape Styles group, click the arrow next to Shape Fill.

-
Do one of the following:
-
To add or change a fill color, click the color you want.
-
To choose no color, click No Fill.
-
To use a color that isn’t one of the theme colors, click More Fill Colors, and then either click the color that you want on the Standard tab, or mix your own color on the Custom tab. Custom colors and colors on the Standard tab do not update if you later change the document theme.
-
To adjust the transparency of the shape, click More Fill Colors. At the bottom of the Colors dialog box, move the Transparency slider, or enter a number in the box next to the slider. You can vary the percentage of transparency from 0% (fully opaque, the default setting) to 100% (fully transparent).
-
To add or change a fill picture, click Picture, locate the folder that contains the picture that you want to use, click the picture file, and then click Insert.
-
To add or change a fill gradient, point to Gradient, and then click the gradient variation that you want. To customize the gradient, click More Gradients, and then choose the options that you want.
-
To add or change a fill texture, point to Texture, and then click the texture that you want. To customize the texture, click More Textures, and then choose the options that you want.
-
Top of page
For more information about adding a fill or effect, select an item from the drop-down list:
-
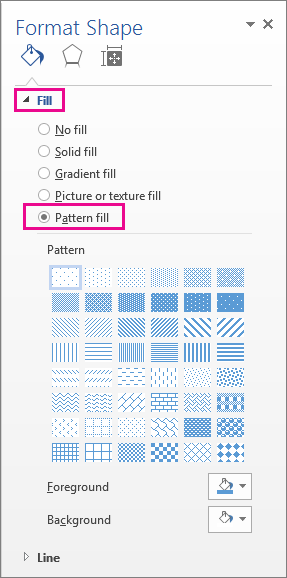
Right-click the shape that you want to add a pattern fill to and select Format Shape.
-
In the Format Shape pane, click Fill, and then click Pattern Fill.
-
Select a pattern, and if you like, click the arrows next to Foreground and Background and select a color combination.
Top of page
You can add a variety of effects to your text boxes and shapes, such as beveled edges or reflections.
-
Click the shape that you want to add an effect to. To add the same effect to multiple shapes, click the first shape, and then press and hold Ctrl while you click the other shapes.
-
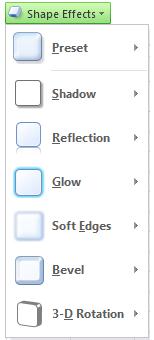
On the Format tab, in the Shape Styles group, click Shape Effects, and select an option from the list.
-
To add or change a built-in combination of effects, point to Preset, and then click the effect that you want.
To customize the built-in effect, click 3-D Options, and then choose the options that you want.
-
To add or change a shadow, point to Shadow, and then click the shadow that you want.
To customize the shadow, click Shadow Options, and then choose the options that you want.
-
To add or change a reflection, point to Reflection, and then click the reflection variation that you want.
To customize the reflection, click Reflection Options, and then choose the options that you want.
-
To add or change a glow, point to Glow, and then click the glow variation that you want.
To customize the glow, click Glow Options, and then choose the options that you want.
-
To add or change a soft edge, point to Soft Edges, and then click the size and color of the edge that you want.
To customize the soft edges, click Soft Edges Options, and then choose the options that you want.
-
To add or change an edge, point to Bevel, and then click the bevel that you want.
To customize the bevel, click 3-D Options, and then choose the options that you want.
-
To add or change a 3-D rotation, point to 3-D Rotation, and then click the rotation that you want.
To customize the rotation, click 3-D Rotation Options, and then choose the options that you want.
Notes:
-
To create a custom effect by adding multiple individual effects, repeat step two above.
-
If you add a 3-D effect, such as a bevel, to the shape and then add a soft edge, you will not see any visual change to the shape because the 3-D effect takes precedence. However, if you delete the 3-D effect, the soft edge effect will be visible.
-
-
Top of page
-
Click the shape that you want to delete a fill from. To delete the same fill from multiple shapes, click the first shape, and then press and hold Ctrl while you click the other shapes.
-
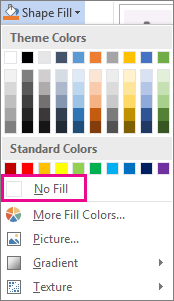
On the Format tab, in the Shape Styles group, click the arrow next to Shape Fill, and then click No Fill.
Top of page
-
Click the shape that you want to delete the effect from. To delete the same effect from multiple shapes, click the first shape, and then press and hold Ctrl while you click the other shapes.
-
On the Format tab, in the Shape Styles group, click Shape Effects, and then do one of the following.
-
To delete a built-in combination of effects from the shape, point to Preset, and then click No Presets.
Note: When you click No Presets, you do not remove any shadow effects that have been applied to your shape. To remove shadows on a shape, follow the step below.
-
To delete a shadow, point to Shadow, and then click No Shadow.
-
To delete a reflection, point to Reflection, and then click No Reflection.
-
To delete a glow, point to Glow, and then click No Glow.
-
To delete soft edges, point to Soft Edges, and then click No Soft Edges.
-
To delete an edge, point to Bevel, and then click No Bevel.
-
To delete 3-D rotation, point to 3-D Rotation, and then click No Rotation.
-
Note: If you have added multiple individual effects, repeat step two above to delete all the effects.
Top of page
See also
-
To add a shape, see Add shapes.
-
To learn about other shapes with effects, see Insert WordArt or Learn more about SmartArt graphics.
-
To change the look of a picture, see Apply an artistic effect to a picture.
-
To change the look of a text box, see Change the colors in a text box or shape.
-
To change the border around a text box or shape, see Remove or change the border on a text box or shape.
-
To create a moving effect in PowerPoint, see Animate text or objects.
Add or change a shape fill
-
Click the shape that you want to add a fill to.
To add the same fill to multiple shapes, click the first shape, and then press and hold CTRL while you click the other shapes.
-
Under Drawing Tools, on the Format tab, in the Shape Styles group, click the arrow next to Shape Fill, and then do one of the following:
If you do not see the Drawing Tools or Format tabs, make sure that you have selected the shape. You might have to double-click the shape to open the Format tab.
-
To add or change a fill color, click the color that you want, or to choose no color, click No Fill.
To change to a color that is not in the theme colors, click More Fill Colors, and then either click the color that you want on the Standard tab, or mix your own color on the Custom tab. Custom colors and colors on the Standard tab do not update if you later change the document theme.
Tip: You can also adjust the transparency of the shape by clicking More Fill Colors. At the bottom of the Colors dialog box, move the Transparency slider, or enter a number in the box next to the slider. You can vary the percentage of transparency from 0% (fully opaque, the default setting) to 100% (fully transparent).
-
To add or change a fill picture, click Picture, locate the folder that contains the picture that you want to use, click the picture file, and then click Insert.
-
To add or change a fill gradient, point to Gradient, and then click the gradient variation that you want.
To customize the gradient, click More Gradients, and then choose the options that you want.
-
To add or change a fill texture, point to Texture, and then click the texture that you want.
To customize the texture, click More Textures, and then choose the options that you want.
-

Top of page
For more information about adding a fill or effect, select an item from the drop-down list.
-
Right-click the shape that you want to add a pattern fill to and select Format Shape.
-
In the Format Shape dialog box, click the Fill tab.
-
In the Fill pane, select Pattern fill and then select a pattern, foreground color, and background color for your pattern fill.
Top of page
-
Click the shape that you want to add an effect to.
To add the same effect to multiple shapes, click the first shape, and then press and hold CTRL while you click the other shapes.
-
Under Drawing Tools, on the Format tab, in the Shape Styles group, click Shape Effects, and then do one of the following:
If you do not see the Drawing Tools or Format tabs, make sure that you have selected the shape. You might have to double-click the shape to open the Format tab.
-
To add or change a built-in combination of effects, point to Preset, and then click the effect that you want.
To customize the built-in effect, click 3-D Options, and then choose the options that you want.
-
To add or change a shadow, point to Shadow, and then click the shadow that you want.
To customize the shadow, click Shadow Options, and then choose the options that you want.
-
To add or change a reflection, point to Reflection, and then click the reflection variation that you want.
To customize the reflection, click Reflection Options, and then choose the options that you want.
-
To add or change a glow, point to Glow, and then click the glow variation that you want.
To customize the glow, click Glow Options, and then choose the options that you want.
-
To add or change a soft edge, point to Soft Edges, and then click the size and color of the edge that you want.
To customize the soft edges, click Soft Edges Options, and then choose the options that you want.
-
To add or change an edge, point to Bevel, and then click the bevel that you want.
To customize the bevel, click 3-D Options, and then choose the options that you want.
-
To add or change a 3-D rotation, point to 3-D Rotation, and then click the rotation that you want.
To customize the rotation, click 3-D Rotation Options, and then choose the options that you want.
Notes:
-
To create a custom effect by adding multiple individual effects, repeat step two above.
-
If you add a 3-D effect, such as a bevel, to the shape and then add a soft edge, you will not see any visual change to the shape because the 3-D effect takes precedence. However, if you delete the 3-D effect, the soft edge effect will be visible.
-
-
Top of page
-
Click the shape that you want to delete a fill from.
To delete the same fill from multiple shapes, click the first shape, and then press and hold CTRL while you click the other shapes.
-
Under Drawing Tools, on the Format tab, in the Shapes Styles group, click the arrow next to Shape Fill, and then click No Fill.
If you do not see the Drawing Tools or Format tabs, make sure that you have selected the shape. You might have to double-click the shape to open the Format tab.
Top of page
-
Click the shape that you want to delete the effect from.
To delete the same effect from multiple shapes, click the first shape, and then press and hold CTRL while you click the other shapes.
-
Under Drawing Tools, on the Format tab, in the Shape Styles group, click Shape Effects, and then do one of the following:
If you do not see the Drawing Tools or Format tabs, make sure that you have selected the shape. You might have to double-click the shape to open the Format tab.
-
To delete a built-in combination of effects from the shape, point to Preset, and then click No Presets.
Note: When you click No Presets, you do not remove any shadow effects that have been applied to your shape. To remove shadows on a shape, follow the step below.
-
To delete a shadow from the shape, point to Shadow, and then click No Shadow.
-
To delete a reflection from the shape, point to Reflection, and then click No Reflection.
-
To delete a glow from the shape, point to Glow, and then click No Glow.
-
To delete soft edges from the shape, point to Soft Edges, and then click No Soft Edges.
-
To delete an edge from the shape, point to Bevel, and then click No Bevel.
-
To delete 3-D rotation from the shape, point to 3-D Rotation, and then click No Rotation.
-
Note: If you have added multiple individual effects, repeat step two above to delete all the effects.
Top of page
Add or change a fill
Select a Microsoft Office application from the drop-down list.
-
Click the shape or text box that you want to add a fill to.
To add the same fill to multiple shapes or text boxes, click the first one, and then press and hold SHIFT while you click the others.
-
Under Drawing Tools, on the Format tab, in the Shape Styles group, click Shape Fill, and then do one of the following:
-
To add or change a fill color, click the color that you want, or to choose no color, click No Fill.
To change to a color that is not in the theme colors, click More Fill Colors, and then either click the color that you want on the Standard tab, or mix your own color on the Custom tab. Custom colors and colors on the Standard tab do not update if you later change the document theme.
You can also adjust the transparency of the fill by clicking More Fill Colors. At the bottom of the Colors dialog box, move the Transparency slider, or enter a number in the box next to the slider. You can vary the percentage of transparency from 0% (fully opaque, the default setting) to 100% (fully transparent).
-
To add or change a fill picture, click Picture, locate and click the picture that you want to use, and then click Insert.
-
To add or change a fill gradient, point to Gradient, and then click the gradient variation that you want.
To customize the gradient, click More Gradients, and then choose the options that you want.
-
To add or change a fill texture, point to Texture, and then click the texture that you want.
To customize the texture, click More Textures, and then choose the options that you want.
-

Top of page
-
Click the shape or text box that you want to add a fill to.
To add the same fill to multiple shapes or text boxes, click the first one, and then press and hold SHIFT while you click the others.
-
Under Drawing Tools or Text Box Tools, on the Format tab, in the Shape Styles or Text Box Styles group, click Shape Fill, and then do one of the following:
-
To add or change a fill color, click the color that you want, or to choose no color, click No Fill.
To change to a color that is not in the theme colors, click More Fill Colors, and then either click the color that you want on the Standard tab, or mix your own color on the Custom tab. Custom colors and colors on the Standard tab do not update if you later change the document theme.
You can also adjust the transparency by clicking More Fill Colors. At the bottom of the Colors dialog box, move the Transparency slider, or enter a number in the box next to the slider. You can vary the percentage of transparency from 0% (fully opaque, the default setting) to 100% (fully transparent).
-
To add or change a fill picture, click Picture, locate the folder that contains the picture that you want to use, click the picture file, and then click Insert.
-
To add or change a fill gradient, point to Gradient, and then click the gradient variation that you want.
To customize the gradient, click More Gradients, and then choose the options that you want.
-
To add or change a fill texture, point to Texture, and then click the texture that you want.
To customize the texture, click More Textures, and then choose the options that you want.
-
To add or change a pattern, click Pattern, and then click the options that you want.
-

Top of page
-
Click the shape or text box that you want to add a fill to.
To add the same fill to multiple shapes or text boxes, click the first one, and then press and hold SHIFT while you click the others.
-
Under Drawing Tools, on the Format tab, in the Shape Styles group, click Shape Fill, and then do one of the following:
-
To add or change a fill color, click the color that you want, or to choose no color, click No Fill.
To change to a color that is not in the theme colors, click More Fill Colors, and then either click the color that you want on the Standard tab, or mix your own color on the Custom tab. Custom colors and colors on the Standard tab do not update if you later change the document theme.
You can also adjust the transparency of the fill by clicking More Fill Colors. At the bottom of the Colors dialog box, move the Transparency slider, or enter a number in the box next to the slider. You can vary the percentage of transparency from 0% (fully opaque, the default setting) to 100% (fully transparent).
-
To add or change a fill picture, click Picture, locate and click the picture that you want to use, and then click Insert.
-
To add or change a fill gradient, point to Gradient, and then click the gradient variation that you want.
To customize the gradient, click More Gradients, and then choose the options that you want.
-
To add or change a fill texture, point to Texture, and then click the texture that you want.
To customize the texture, click More Textures, and then choose the options that you want.
-
Top of page
-
Click the shape or text box that you want to add a fill to.
To add the same fill to multiple shapes or text boxes, click the first one, and then press and hold SHIFT while you click the others.
-
Under Drawing Tools or Text Box Tools, on the Format tab, in the Shape Styles or Text Box Styles group, click Shape Fill, and then do one of the following:
-
To add or change a fill color, click the color that you want, or to choose no color, click No Fill.
To change to a color that is not in the theme colors, click More Fill Colors, and then either click the color that you want on the Standard tab, or mix your own color on the Custom tab. Custom colors and colors on the Standard tab do not update if you later change the document theme.
You can also adjust the transparency by clicking More Fill Colors. At the bottom of the Colors dialog box, move the Transparency slider, or enter a number in the box next to the slider. You can vary the percentage of transparency from 0% (fully opaque, the default setting) to 100% (fully transparent).
-
To add or change a fill picture, click Picture, locate the folder that contains the picture that you want to use, click the picture file, and then click Insert.
-
To add or change a fill gradient, point to Gradient, and then click the gradient variation that you want.
To customize the gradient, click More Gradients, and then choose the options that you want.
-
To add or change a fill texture, point to Texture, and then click the texture that you want.
To customize the texture, click More Textures, and then choose the options that you want.
-
To add or change a pattern, click Pattern, and then click the options that you want.
-
Top of page
Add or change an effect
Select a Microsoft Office application from the drop-down list.
-
Click the shape or text box that you want to add an effect to.
To add the same effect to multiple shapes or text boxes, click the first one, and then press and hold SHIFT while you click the others.
-
Under Drawing Tools, on the Format tab, in the Shape Styles group, click Shape Effects, and then do one of the following:
-
To add or change a built-in combination of effects, point to Preset, and then click the effect that you want.
To customize the built-in effect, click 3-D Options, and then choose the options that you want.
-
To add or change a shadow, point to Shadow, and then click the shadow that you want.
To customize the shadow, click Shadow Options, and then choose the options that you want.
-
To add or change a reflection, point to Reflection, and then click the reflection variation that you want.
-
To add or change a glow, point to Glow, and then click the glow variation that you want.
To customize the glow colors, click More Glow Colors, and then choose the color that you want. To change to a color that is not in the theme colors, click More Colors, and then either click the color that you want on the Standard tab, or mix your own color on the Custom tab. Custom colors and colors on the Standard tab do not update if you later change the document theme.
-
To add or change a soft edge, point to Soft Edges, and then click the size of the edge that you want.
-
To add or change an edge, point to Bevel, and then click the bevel that you want.
To customize the bevel, click 3-D Options, and then choose the options that you want.
-
To add or change a 3-D rotation, point to 3-D Rotation, and then click the rotation that you want.
To customize the rotation, click 3-D Rotation Options, and then choose the options that you want.
Notes:
-
To create a custom effect by adding multiple individual effects, repeat step two above.
-
If you add a 3-D effect, such as a bevel or 3-D rotation, and then add a soft edge, you will not see any change to the shape or text box because the 3-D effect takes precedence. However, if you delete the 3-D effect, the soft edge effect is visible.
-
-
Top of page
-
Click the shape or text box that you want to add an effect to.
To add the same effect to multiple shapes or text boxes, click the first one, and then press and hold SHIFT while you click the others.
-
Under Drawing Tools or Text Box Tools, on the Format tab, in the Shape Styles or Text Box Styles group, click Shape Fill, and then do one of the following:
-
To add or change a shadow, in the Shadow Effects group, click Shadow Effects, and then choose the shadow that you want.
To customize the shadow color, point to Shadow Color, and then click the color that you want.
To change to a color that is not in the theme colors, click More Shadow Colors, and then either click the color that you want on the Standard tab, or mix your own color on the Custom tab. Custom colors and colors on the Standard tab do not update if you later change the document theme.
-
To add or change a 3-D effect, in the 3-D Effects group, click 3-D Effects, and then choose the options that you want.
-
Top of page
-
Click the shape or text box that you want to add an effect to.
To add the same effect to multiple shapes or text boxes, click the first one, and then press and hold SHIFT while you click the others.
-
Under Drawing Tools, on the Format tab, in the Shape Styles group, click Shape Effects, and then do one of the following:
-
To add or change a built-in combination of effects, point to Preset, and then click the effect that you want.
To customize the built-in effect, click 3-D Options, and then choose the options that you want.
-
To add or change a shadow, point to Shadow, and then click the shadow that you want.
To customize the shadow, click Shadow Options, and then choose the options that you want.
-
To add or change a reflection, point to Reflection, and then click the reflection variation that you want.
-
To add or change a glow, point to Glow, and then click the glow variation that you want.
To customize the glow colors, click More Glow Colors, and then choose the color that you want. To change to a color that is not in the theme colors, click More Colors, and then either click the color that you want on the Standard tab, or mix your own color on the Custom tab. Custom colors and colors on the Standard tab do not update if you later change the document theme.
-
To add or change a soft edge, point to Soft Edges, and then click the size of the edge that you want.
-
To add or change an edge, point to Bevel, and then click the bevel that you want.
To customize the bevel, click 3-D Options, and then choose the options that you want.
-
To add or change a 3-D rotation, point to 3-D Rotation, and then click the rotation that you want.
To customize the rotation, click 3-D Rotation Options, and then choose the options that you want.
Notes:
-
To create a custom effect by adding multiple individual effects, repeat step two above.
-
If you add a 3-D effect, such as a bevel or 3-D rotation, and then add a soft edge, you will not see any change to the shape or text box because the 3-D effect takes precedence. However, if you delete the 3-D effect, the soft edge effect is visible.
-
-
Top of page
-
Click the shape or text box that you want to add an effect to.
To add the same effect to multiple shapes or text boxes, click the first one, and then press and hold SHIFT while you click the others.
-
Under Drawing Tools or Text Box Tools, on the Format tab, in the Shape Styles or Text Box Styles group, click Shape Fill, and then do one of the following:
-
To add or change a shadow, in the Shadow Effects group, click Shadow Effects, and then choose the shadow that you want.
To customize the shadow color, point to Shadow Color, and then click the color that you want.
To change to a color that is not in the theme colors, click More Shadow Colors, and then either click the color that you want on the Standard tab, or mix your own color on the Custom tab. Custom colors and colors on the Standard tab do not update if you later change the document theme.
-
To add or change a 3-D effect, in the 3-D Effects group, click 3-D Effects, and then choose the options that you want.
-
Top of page
Delete a fill
Select a Microsoft Office application from the drop-down list.
-
Click the shape or text box that you want to delete a fill from.
To delete the same fill from multiple shapes or text boxes, click the first one, and then press and hold SHIFT while you click the others.
-
Under Drawing Tools, on the Format tab, in the Shape Styles group, click Shape Fill, and then click No Fill.
Top of page
-
Click the shape or text box that you want to delete a fill from.
To delete the same fill from multiple shapes or text boxes, click the first one, and then press and hold SHIFT while you click the others.
-
Under Drawing Tools or Text Box Tools, on the Format tab, in the Shape Styles or Text Box Styles group, click Shape Fill, and then click No Fill.

Top of page
-
Click the shape or text box that you want to delete a fill from.
To delete the same fill from multiple shapes or text boxes, click the first one, and then press and hold SHIFT while you click the others.
-
Under Drawing Tools, on the Format tab, in the Shape Styles group, click Shape Fill, and then click No Fill.
Top of page
-
Click the shape or text box that you want to delete a fill from.
To delete the same fill from multiple shapes or text boxes, click the first one, and then press and hold SHIFT while you click the others.
-
Under Drawing Tools or Text Box Tools, on the Format tab, in the Shape Styles or Text Box Styles group, click Shape Fill, and then click No Fill.
Top of page
Delete an effect
Select a Microsoft Office application from the drop-down list.
-
Click the shape or text box that you want to delete the effect from.
To delete the same effect from multiple shapes or text boxes, click the first one, and then press and hold SHIFT while you click the others.
-
Under Drawing Tools, on the Format tab, in the Shape Styles group, click Shape Effects, and then do one of the following:
-
To delete a built-in combination of effects, point to Preset, and then click No Presets.
-
To delete a shadow, point to Shadow, and then click No Shadow.
-
To delete a reflection, point to Reflection, and then click No Reflection.
-
To delete a glow, point to Glow, and then click No Glow.
-
To delete soft edges, point to Soft Edges, and then click No Soft Edges.
-
To delete an edge, point to Bevel, and then click No Bevel.
-
To delete 3-D rotation, point to 3-D Rotation, and then click No Rotation.
-
To delete multiple individual effects, repeat step two above.
Top of page
-
Click the shape or text box that you want to delete the effect from.
To delete the same effect from multiple shapes or text boxes, click the first one, and then press and hold SHIFT while you click the others.
-
Under Drawing Tools or Text Box Tools, on the Format tab, do one of the following:
-
To delete a shadow, in the Shadow Effects group, click Shadow Effects, and then click No Shadow Effect.
-
To delete a 3-D effect, in the 3-D Effects group, click 3-D Effects, and then click No 3-D Effect.
-
Note: If you do not see the Drawing Tools, Text Box Tools, or Format tabs, make sure that you clicked the shape or text box.
Top of page
-
Click the shape or text box that you want to delete the effect from.
To delete the same effect from multiple shapes or text boxes, click the first one, and then press and hold SHIFT while you click the others.
-
Under Drawing Tools, on the Format tab, in the Shape Styles group, click Shape Effects, and then do one of the following:
-
To delete a built-in combination of effects, point to Preset, and then click No Presets.
-
To delete a shadow, point to Shadow, and then click No Shadow.
-
To delete a reflection, point to Reflection, and then click No Reflection.
-
To delete a glow, point to Glow, and then click No Glow.
-
To delete soft edges, point to Soft Edges, and then click No Soft Edges.
-
To delete an edge, point to Bevel, and then click No Bevel.
-
To delete 3-D rotation, point to 3-D Rotation, and then click No Rotation.
-
To delete multiple individual effects, repeat step two above.
Top of page
-
Click the shape or text box that you want to delete the effect from.
To delete the same effect from multiple shapes or text boxes, click the first one, and then press and hold SHIFT while you click the others.
-
Under Drawing Tools or Text Box Tools, on the Format tab, do one of the following:
-
To delete a shadow, in the Shadow Effects group, click Shadow Effects, and then click No Shadow Effect.
-
To delete a 3-D effect, in the 3-D Effects group, click 3-D Effects, and then click No 3-D Effect.
-
Note: If you do not see the Drawing Tools, Text Box Tools, or Format tabs, make sure that you clicked the shape or text box.
Top of page
Lesson 15: Text Boxes and WordArt
/en/word2010/working-with-shapes/content/
Introduction
You may want to insert a text box into your document to draw attention to specific text or have the ability to easily move text within a document. Text boxes are basically treated the same as shapes, so you can add the same types of effects to them and can even change their shape.
In this lesson, you will learn how to insert a text box and format it in various ways, including resizing and moving it, as well as changing the text box shape, color, and outline. You will also learn how to create and format WordArt.
Text boxes
Text boxes are useful for helping to organize your document. They are basically treated the same as shapes, so when you insert a text box you can format it by changing its fill color, outline color, and shape style, as well as create WordArt and add 3D effects.
To insert a text box:
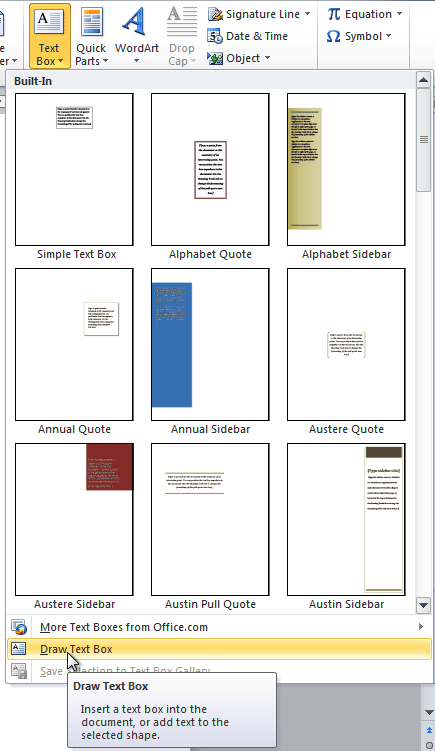
- Select the Insert tab on the Ribbon.
- Click the Text Box command in the Text group. A drop-down menu will appear.
- Select Draw Text Box.
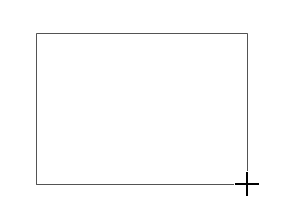
Creating a blank text box
- Click and drag on the document to create the text box.
Drawing the text box
- You can now start typing to create text inside the text box.
From the drop-down menu, you can also select one of the built-in text boxes that have predefined colors, fonts, positions, and sizes. If you choose this option, the text box will appear automatically so you will not need to click and drag to draw it.
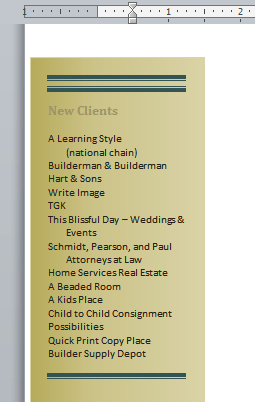 A built-in text box
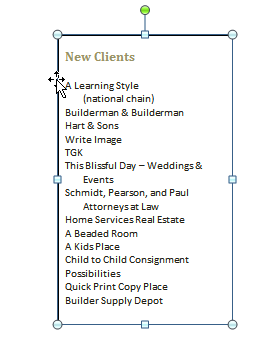
To move a text box:
- Click the text box.
- Hover the mouse over one of the edges of the text box. The mouse pointer becomes a cross with arrows on each end .
- Click and drag the text box to the desired location on the page.
Moving a text box
 .
.
To resize a text box:
- Click the text box.
- Click and drag one of the sizing handles on the corners or sides of the text box until it is the desired size.
Resizing a text box
If you drag the sizing handles on any of the four corners, you will be able to change the height and width at the same time. The sizing handles on the top or bottom of the text box will only allow you to resize vertically, while the handles on the left and right sides will resize the text box horizontally.
Changing a text box’s appearance
To change the text box shape:
- Select the text box. A new Format tab appears with Drawing Tools.
- Go to the Format tab.
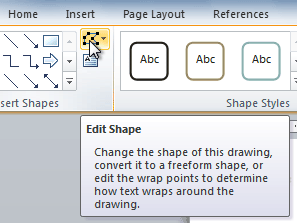
- Click the Edit Shape command.
The Edit Shape command
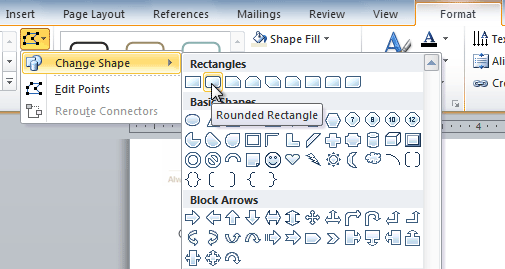
- Click Change Shape to display a drop-down list.
Choosing a different shape for the text box
- Select the desired shape from the list.
To choose a shape style:
Choosing a shape style allows you to apply a preset fill and outline color, and in some cases other effects such as beveling and shadow. You don’t have to pick a style for your text box, but it can help you save time or experiment with different appearances.
- Select the text box. The Format tab appears.
- Select the Format tab.
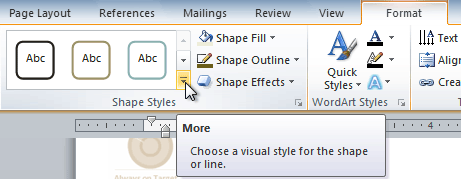
- Click the More drop-down arrow in the Shape Styles group to display more style options.
Viewing the Shape Styles
- Hover your mouse over the styles to see a live preview.
- Select the desired style.
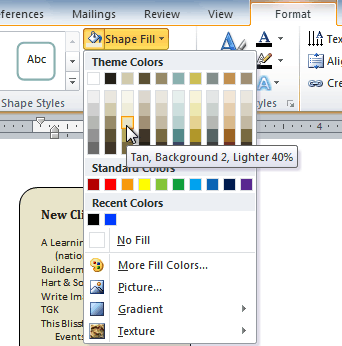
To change shape fill:
- Select the text box. The Format tab appears.
- Click the Format tab.
Changing the fill color
- Click the Shape Fill command to display a drop-down menu.
- From the drop-down menu, you can select a color from the list, choose No Fill, or select More Fill Colors to use a color that’s not on the list.
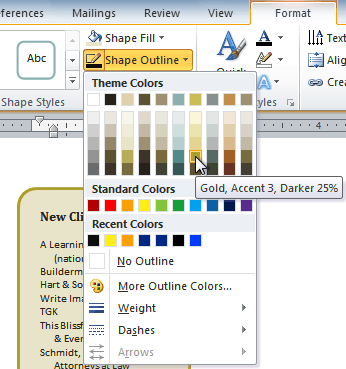
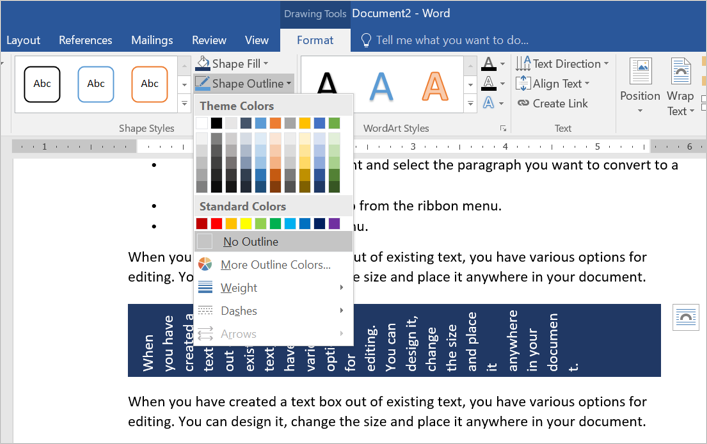
To change the shape outline:
- Select the text box. The Format tab appears.
- Click the Shape Outline command to display a drop-down list.
Changing the outline color
- Select a color from the list, choose No Outline, or select More Outline Colors to use a color that’s not on the list.
- From the drop-down menu, you can change the outline color, weight (thickness), and whether it is a dashed line.
To change shadow effects:
- Select the text box. The Format tab appears.
- Select the Format tab.
- Click the Shape Effects command.
- Click Shadow.
- Move your mouse over the menu options to see a live preview in your document.
Adding a shadow
- Click the desired option to select the shadow effect.
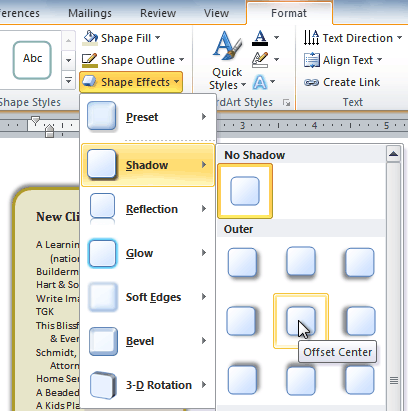
To choose a different shadow color for your shape, select Shadow Options from the drop-down menu, then click the Color button.
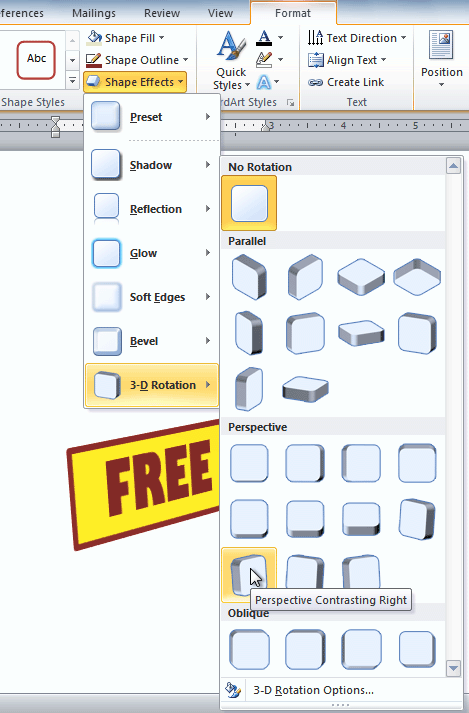
3D effects
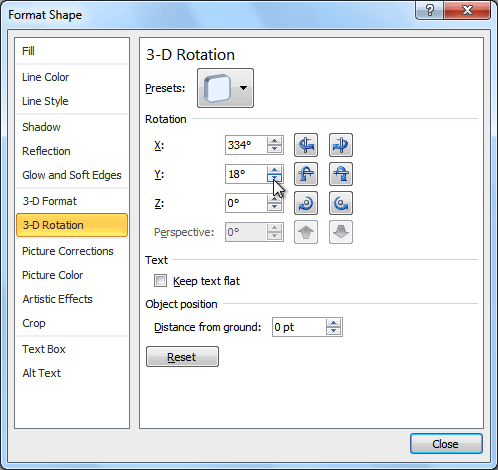
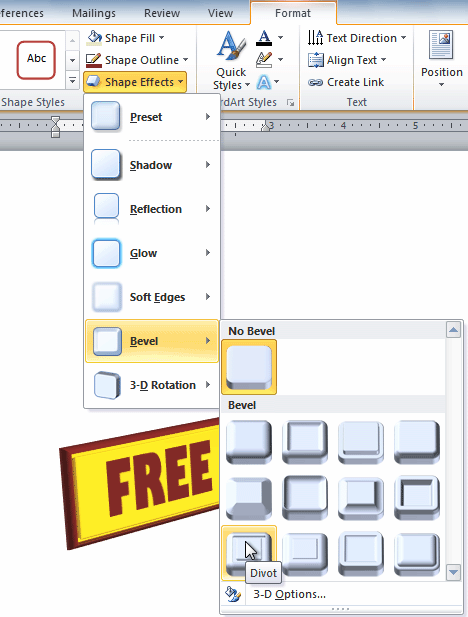
Just like other types of shapes, text boxes can have 3D effects. There are two types of effects you can apply to your shapes to give them a 3D appearance: 3-D Rotation and Bevel. 3-D Rotation gives the appearance that you are viewing an object from a different angle, and it can be applied to any shape. Bevel adds thickness and a rounded edge to shapes; however, it doesn’t work with every type of shape.
To use 3-D Rotation:
- Select the text box.
- Select the Format tab.
- Click Shape Effects from the Shape Styles group.
- Hover your mouse over 3-D Rotation. A drop-down menu will appear.
Applying 3-D Rotation to a text box
- Select the desired rotation preset from the drop-down menu. You can also click 3-D Rotation Options if you would prefer to type custom values.
3-D Rotation Options
To use bevel:
- Select the text box.
- Select the Format tab.
- Click Shape Effects from the Shape Styles group.
- Hover your mouse over Bevel. A drop-down menu will appear.
Adding bevel to a text box
- Select the desired bevel preset from the drop-down menu. You can also click 3-D Options if you would prefer to type custom values.
If you click 3-D Options, you’ll also be able to change the shape’s Material to give it a metal, plastic, or translucent appearance, and you can choose the Lighting type to change how the shape is illuminated.
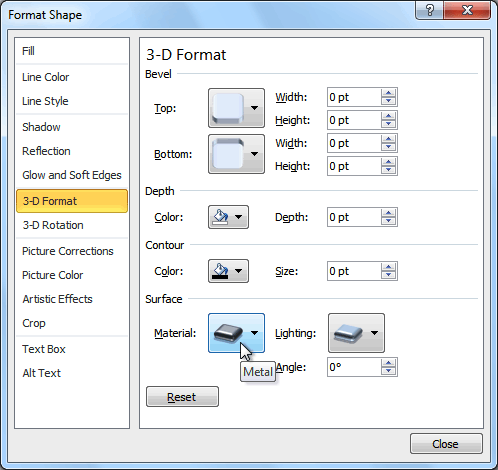 3-D Format Options
Creating WordArt
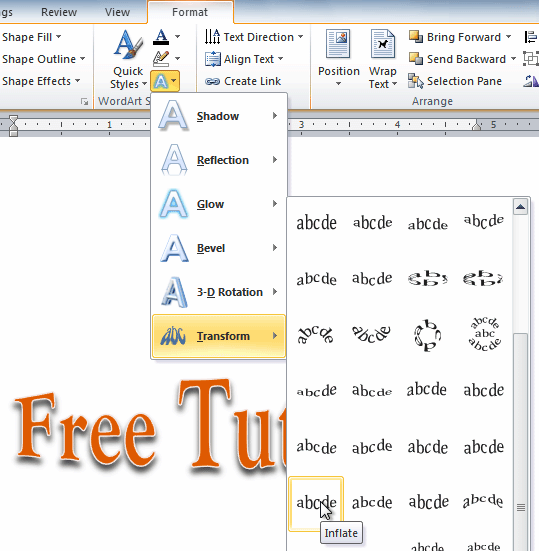
In addition to adding effects to a text box, you can add effects to the text inside the text box, which is known as WordArt. For the most part, the types of effects you can add are the same as the ones you can add to shapes or text boxes (shadow, bevel, etc.). However, you can also Transform the text to give it a wavy, slanted, or inflated look.
To apply a quick style to text:
A quick style will automatically apply several effects to your text at once. You can then refine the look of your text by adding or modifying text effects.
- Select the text box, or select some text inside of the text box. The Format tab will appear.
- Click the Format tab.
- Click the Quick Styles command in the WordArt Styles group. A drop-down menu will appear.
Selecting a Quick Style
- Select the desired style preset to apply the style to your text.

After you have applied a quick style, you can still modify the font or font color from the Home tab if you want.
To convert regular text into WordArt:
For text to be formatted as WordArt, it needs to be inside of a text box. However, there’s a shortcut that allows you to convert text into WordArt even if it’s not in a text box.
- Select the text you want to convert.
- Click the Insert tab.
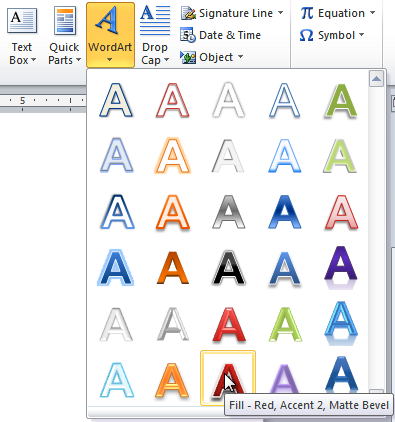
- Click the WordArt command. The Quick Styles drop-down menu will appear.
Converting text to WordArt
- Select the desired quick style.
- Word will automatically create a text box for your text and apply the style to the text.
After converting to WordArt

Some effects, such as shadows, can be added from the Text Effects menu in the Home tab. When you add effects in this way, it will not place the text in a text box.
To add or modify text effects:
- Select the text box, or select some text inside of the text box. The Format tab will appear.
- Click the Format tab.
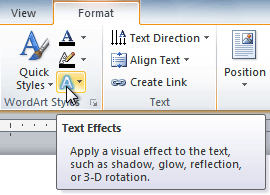
- Click the Text Effects command in the WordArt Styles group. A drop-down menu will appear, showing the different effect categories.
The Text Effects command
- Hover over an effect category. A drop-down menu will appear. You can hover the mouse over the different presets to see a live preview.
Adding an effect
- Select the desired effect preset. The effect will be applied to your text. If you want, you can combine several effects.
The finished WordArt

Challenge!
- Create a new document.
- Insert a text box.
- Enter some text into the text box.
- Move the text box to the desired location.
- Change the outline of the text box to a different color.
- Change the fill color of the text box.
- Add some WordArt effects to the text.
/en/word2010/inserting-clip-art-and-pictures/content/
In Word, text boxes can contain many different types of elements and are handy when you need to insert information in a specific place on the page. You can format text boxes in dozens of ways to make them appear just how you need. The following articles cover how to efficiently work with text boxes in Word.
Tips, Tricks, and Answers
The following articles are available for the ‘Text Boxes and Frames’ topic. Click the
article»s title (shown in bold) to see the associated article.
Adding a Drop Shadow to a Text Box
Drop shadows add a nice touch to text boxes, making it seem like they are hovering above the page. Here’s the simple steps you need in order to add a drop shadow to your text boxes.
Adding Endnotes in Text Boxes
Text boxes and endnotes are both great tools you can use within a document. Problem is, you cannot use them together—Word doesn’t allow you to add endnotes within a text box. This tip looks at how you can get round this problem.
Adding Sidebars
When designing your document, you may want to use sidebars like you see in magazines and some books. This tip explains the easiest way to create your own sidebars, using text boxes.
Automatically Adjusting Height for Text Boxes
Text boxes are often used to enhance the layout of documents. You may want a text box that adjusts its height automatically based on the text it contains. Here’s how to get just what you want.
Boxes in Boxes
When you insert a text box within another text box, you may expect any text in the outer text box to wrap around the inner text box. Word doesn’t work that way, however. Here’s why, along with a couple of workarounds you can use.
Changing Defaults for Text Boxes and Callouts
Do you find yourself frequently creating text boxes and callouts? This tip describes how to change the default settings and how you can easily create text boxes that exactly meet your common requirements.
Changing Orientation of a Text Box
Want to change how a text box is oriented on the page? You can’t do it, but you can adjust the dimensions of the box manually.
Columns in a Text Box
Want to divide a text box into columns? Word doesn’t allow you to do this, but there are ways to work around the limitation.
Comments in Text Boxes
If you use text boxes in your documents, you may sometime want to place a comment in the text box, the same as you can do with text not in the text box. Word doesn’t allow you to add comments to text boxes, but there are a couple of workarounds you can use to get the same result.
Creating See-through Text Boxes
When laying out your document, you may want to use a text box that appears to be positioned over your text, but to be transparent so you can see what is behind the text box. Here’s how to create just that type of element.
Creating Sideheads
A sidehead can be used as a layout element for a document. You can create sideheads in a document by using text boxes, as described in this tip.
Creating Usable Figure Captions
Many people add both images and figure captions within text boxes so they can be easily positioned within a document. Doing so, however, has drawbacks as the figure captions are not as easily accessible for cross referencing or for inclusion in a Table of Figures. This tip describes how you can rectify this situation so that the captions are again usable.
Different Layout for a Portion of a Page
Got a document layout that requires a portion of the page to be in one layout and another portion to be in a different layout? While Word is better at word processing than at document design, there are some things you can do to get the layout to appear the way you want.
Find and Replace in Text Boxes
Find and Replace can work great, but not necessarily for text within text boxes. This tip discusses all the ins and outs of working with text boxes when it comes to finding text within them.
Finding an Invisible Text Box
Text boxes can be a great aid in designing the layout of your document. What do you do when you can’t find a text box that you want to delete, however? Here are a variety of approaches you can use to finding that errant text box.
Finding Text Boxes
Need to search for various text boxes in your document? It’s easy to do with the handy macro provided in this tip.
Hanging Indents in Wrapped Text
If you use hanging indents for some of your paragraphs, you may wonder why they don’t look right when they wrap on the right side of a text box or graphic. Here’s the reason and what you can do to correct the formatting.
Including Text Box Text in Word Counts
If you use text boxes in the layout of your documents, you should know that any word counts you perform do not include any words in those text boxes. If you want to include those words in your counts, you need the information in this tip.
Inserting a Text Box
Text boxes are a great way to implement non-standard ways of laying out your document. They allow you to put text at virtually any point on a page, and have it be treated as a graphic element. This tip explains the different ways you can add text boxes to your documents.
No-border Text Boxes by Default
Text boxes can be a great design element when laying out your documents. If you want those text boxes to have no borders (or a different border than Word uses as a default), here’s how to create your own default.
Repeating the First Column of a Table
Need the first column of a table to be repeated on multiple pages? You can’t do it automatically in Word, but you can use a workaround to get the desired result.
Resizing a Text Box
Text boxes allow you to «segment» information in your document and lay it out differently. You can easily resize these boxes by following the simple instructions in this tip.
Rotating Fractions in a Text Box
Rotating graphics in Word is not always straight-forward, but it can be done. The tools on the Drawing toolbar allow you to modify the graphics in your document to your needs.
Selecting a Graphic Behind a Text Box
How to select a graphic that is obscured by a text box can be perplexing. Here’s an overview of the different ways you can select just the graphic and nothing else.
Selecting Text in Linked Text Boxes
Text boxes are often used as design elements in a document layout. If you have linked text boxes, you may have noticed that it isn’t as easy to select text where the selection spans the text box boundaries. Here’s how you can still make those selections.
Spell Checking with Text Boxes
Text boxes are a common design element in a document. You may wonder if the text you place in a text box can be spell checked. The answer is definitely positive, as discussed in this tip.
Understanding Frames and Text Boxes
What is the difference between frames and text boxes? Why use one over the other? Find out here.
Wrapping Text around a Graphic in a Text Box
Word allows you to wrap text around a graphic or around a text box, but it won’t allow you to wrap text in a text box around a graphic in a text box. This may seem confusing, but the explanation is quite simple, once you understand how Word deals with objects in a document.
Wrapping Text Around a Text Box or Frame
Text boxes and frames can be used for all sorts of information and objects in a document. You can wrap text around the text box or frame, but the wrapping doesn’t occur by default. Here’s how to get just the wrap you want.
-
1
Click the Insert tab.
-
2
On the right side of all of the things you can insert, look for ‘Text Box.’
Advertisement
-
3
Select the text box that you want to use and double click on it.
-
4
Cut and paste the text into the text box.


Advertisement
Ask a Question
200 characters left
Include your email address to get a message when this question is answered.
Submit
Advertisement
Video
-
To change the size of the text box, click on it once, and drag one of the 8 circles.
-
You can change the design of the text box you have selected by going into the format tab.
Thanks for submitting a tip for review!
Advertisement
About This Article
Thanks to all authors for creating a page that has been read 98,536 times.
Is this article up to date?
wikiHow Tech Help Pro:
Level up your tech skills and stay ahead of the curve
Let’s go!
Reading
a lengthy text document can make anyone bored in minutes. However, there are
few simple ways to make your documents more attractive and appealing to the
reader. One such option is to add colorful text boxes in-between paragraphs.
This is a useful way to show important action points on full text based
documents. In this article, let us explore how to create text box in Word
document.
Related: How to quickly add dividers in Word?
We
will discuss the following options based on Word 2016 or later version.
- Create text box from existing text
- Creating empty text box
- Changing text box size and position
- Changing text direction
- Deleting borders
Creating
Text Box from Existing Text
You can convert any of the existing text paragraph and list to a text box in Word. Let’s see how to do that.
- First open your document and select the paragraph you want to convert to a text box.
- Switch to the “Insert” tab from the ribbon menu.
- Open the “Text Box” menu.
- Word offers a selection of predefined text boxes, for example for creating sidebars with quotes.
- However, for converting the existing text, select the entry “Draw Text Box” in the lower pane.

This will instantly add a bordered text box around
the selected text. Word treats text boxes as a drawing and you can design the
box as per your need using the “Drawing Tools” menu. You can move the text
boxes anywhere in the document, depending on the layout. This can be useful for
the design of flyers and brochure.
Creating
Empty Text Box
Of course, you do not necessarily need existing text to
create a new text box. Alternatively, you can also create empty text boxes and
enter the text into them later.
- Place the cursor where you want to insert a text box.
- Reopen the “Insert” menu and select “Text Box” option.
- Click the “Draw Text Box” menu item. You will see the cursor now changed to cross hair shape.
- Draw out the text box while holding down the left mouse button.
- Then enter the text into the text box.
- You can look at the various options in the context menu of your text box for designing your text box.

Changing
Text Box Size and Position
When
you have created a text box out, you have various options for editing. You can
design it, change the size and place it anywhere in your document.
- You can change the size of the box using the handles on the edges of it. Word will automatically adjust the text content inside the box.
- It is also possible to freely move the box using the mouse. You can hover over the mouse to change the cursor into a star shape, allowing you to drag the box.
- Formatting is also possible as usual, for example, right-click on the selected text to use the Mini toolbar and format the text in bold or change the alignment.
- You can click on the “Layout Options” button on the side of the text box to wrap text box with the content on your document.

Changing
Text Direction
Within
a text box, you can also influence the text direction. Besides the default
horizontal alignment the text can also run vertically.
- What about if you want to rotate the text inside text box? This is also
very easy. Open the “Text Direction”. - Double click on the text box to open “Drawing Tools” menu. Click on the
“Text Direction” menu and select the entry, “Rotate all text 270°”. - The text is now set vertically in the text box and you can adjust the
format and position of the box.
- You can move the text box between paragraphs or columns by dragging the
box while keeping the left mouse button pressed.
Related: How to embed Excel table in Word document?
Deleting
Borders and Content
By
default, text boxes are displayed with borders, but you do not have to keep
them. You can easily remove the borders.
- Click on the text box to open the “Drawing Tools” and select “Shape Outline”
button under “Format” menu. - Now, select the entry “No Outline” to remove the borders from the box.
- You can also apply different colors, weight and styles to the border if
you want. - In order to delete a text box content, simply click inside the box and
edit or delete the content. Alternatively, select the text box by clicking on
the border and press delete to completely delete the box. - In this respect, text boxes behave in the same way as other drawing
objects.
Using Text Box Templates
The best and easy way to use text box in Word is to
select one of the predefined text box template. You can select from one of the good-looking
templates from the “Text Box” menu dropdown.

For example, you can use text box in a sidebar
format or choose one of the colorful formats. You can adjust the layout
positions to align the content beside the box.

You can also customize the text box and create a
custom template as a Quick Parts.
- First, select the box you want to use as templates.
- Go to “Insert > Text Box” and choose “Save Selection to Text Box Gallery” option.
- Fill up the details to create a new building block.
- You can view the saved template under “Text Box” menu dropdown from next time onwards.
Other Formatting Options
The “Formatting Tools” menu offers various
additional options for customizing your text box content. You can double click
on any text box to view the menus applicable for drawing object. Below are some
of the activities you can do with the formatting tools:
- Apply shape styles like fill, effects and borders.
- Create WordArt inside text box.
- Change text direction.
- Position and wrap the content around the text box.
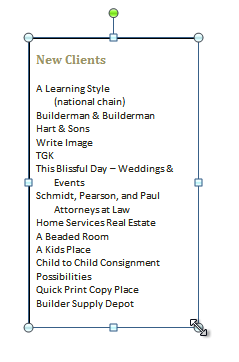
A text box is a graphical container that holds text and works like a minidocument you can place anywhere within a regular document. Although it holds text, a text box itself is actually a graphic; the text it contains is independent from the document’s body text. You can format a text box’s text in most of the same ways you can format a document’s normal text. But because the box is a shape, you can drag it to a different position, resize it, and format it like other shapes.
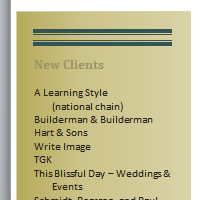
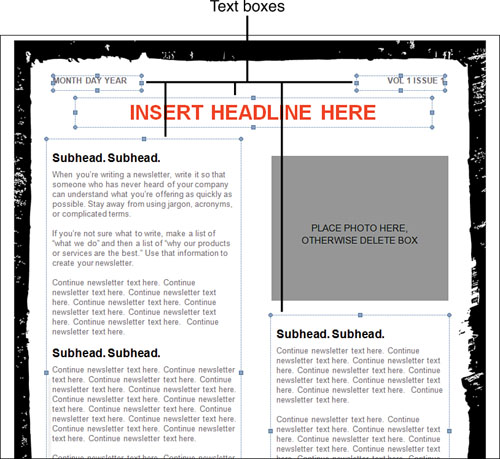
The text box is one of the secret weapons of great document layouts. In fact, lots of multicolumn documents, such as the newsletter template shown in Figure 1, don’t use columns at all. Instead, they are laid out with text boxes. In the figure, the newsletter is just a series of text boxes, sized and formatted in different ways, but neatly arranged to imitate a two-column design.
Figure 1. A newsletter template laid out with text boxes rather than columns. Each text box is indicated by its handles and borders.
The following sections show you how to insert a text box into a document, resize and move it, format the box itself and the text inside it, and other cool tricks.
Inserting a Text Box
You can create a text box in two ways. The first (and quicker) way is to insert a building block that is already formatted. The second (and slower) way is to draw a text box with your pointer and do all the formatting yourself. Either way, when a text box is selected, the Drawing Tools Format tab appears on the Ribbon and the text box is surrounded by a thin border and selection/sizing handles.
Creating a Text Box from a Building Block
If you create a text box from a building block, most of the work is done for you. The building blocks used for text boxes are preformatted with a border (and sometimes a fill) that coordinates with the document’s theme colors. The text is already formatted, too. All you need to do is add your own text. Here’s how to create a text block from a building block:
|
1. |
On the Insert tab, click Text Box. A menu drops down, showing thumbnail versions of Word’s built-in building blocks for text boxes, as shown in Figure 2. Figure 2. Selecting a building block from the Text Box menu.
|
|
2. |
In the Built-In section of the menu, click one of the thumbnails. The new text box contains sample text, so you can see how it is formatted. The sample text is selected so you can delete it or type over it. If you select the Simple Text Box building block, Word inserts a box in the middle of the page, in front of the document’s text. If you select any other building block, it is inserted as shown in the Text Box menu; the document’s text wraps around the block according to that block’s default text wrapping setting. |
|
3. |
Press Del to delete the sample text from the box. A blinking insertion point appears in its place. |
|
4. |
Type your text into the text box. |
|
5. |
Click outside the text box to deselect it. |
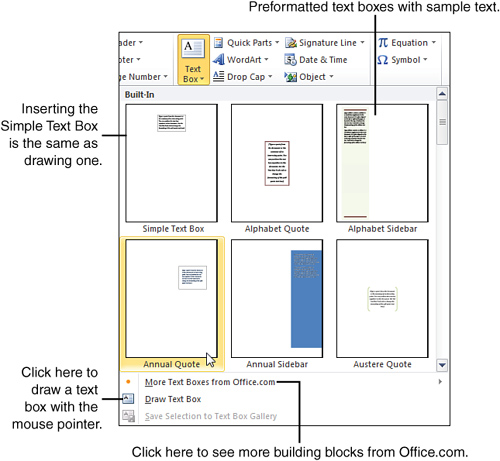
If you want to see more building blocks, click More Text Boxes From Office.com on the Text Box menu. A submenu pops out, showing a selection of text boxes available from the Office.com website. Click any building block to add it to the document.
Drawing a Text Box
You can draw a text box with your pointer, but you’ll have to do all the formatting when you’re done. Here’s how to draw a text box:
|
1. |
On the Insert tab, click Text Box. |
|
2. |
Click Draw Text Box. The pointer changes to a crosshair. |
|
3. |
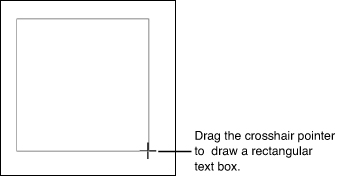
Drag the pointer to draw a box, as shown in Figure 3. When you release the mouse button, the insertion point appears inside the finished text box. Figure 3. Drawing a text box.
|
|
4. |
Type your text into the text box. |
|
5. |
Click outside the text box to deselect it. |
When you draw a text box, Word inserts the box wherever you draw it and places the box in front of the document’s text.
Resizing a Text Box
The way you can resize a text box depends on how you created it:
- If you drew the box (or inserted the Simple Text Box building block), resize it by doing any of the following:
- Drag any of its handles.
- On the Format tab, click the Size button; then use the Height and Width spin controls to set specific dimensions for the box.
- Click the Size group’s dialog box launcher to open the Layout dialog box. On the Size tab, set specific dimensions in the Height and Width sections, or use the Scale section to set the text box’s size as a percentage of its current size. Click OK when you finish.
- If you created the text box from a building block, its sizing options may be restricted, as shown in Figure 4. If you can’t resize the box by dragging its handles or by using the Size tools on the Format tab, open the Layout dialog box. On the Size tab, click Absolute in both the Height and Width sections; then click OK. Now you can resize the box as if it were drawn.
Figure 4. By default, a building block’s height or width may be set to Relative, restricting your ability to resize it.

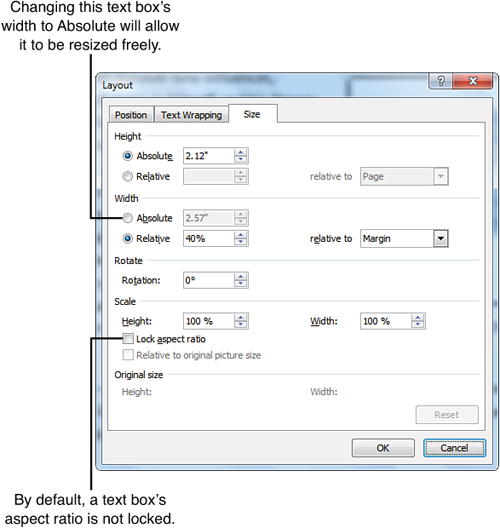
For some building blocks, the height and/or width may be set to Relative in the Layout dialog box. The Relative option ensures that the box’s height or width always stays in proportion to some aspect of the page. For easy resizing, change the text box’s Height and Width options to Absolute.
By default, a text box’s aspect ratio is not locked; if you leave it that way, you can resize the text box freely by dragging.
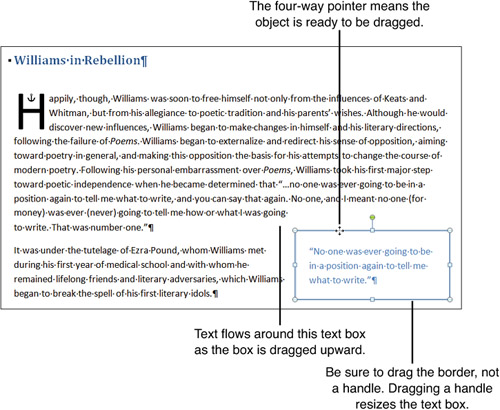
Moving a Text Box
To move a text box, click its border and drag it to a new location, as shown in Figure 5. If the text box was created from a building block (other than the Simple Text Box building block), the document’s text wraps around the box as determined by the building block’s text wrapping setting.
Figure 5. Moving a text box by dragging its border.
If you created the box by drawing it or by using the Simple Text Box building block, the box appears in front of the document’s text. You can change this by applying a different text wrapping option to the text box. Then you can move the text box by dragging.
Formatting a Text Box
A text box is basically the same thing as an AutoShape (a rectangle), but this shape is special because it’s already set up to hold text. You can format a text box by using the shape-formatting tools on the Format tab.
By default, Word formats a text box with an outline and a fill. The outline and fill can be the same or different colors, or you can apply a special effect to either one. However, in some cases, it’s a good idea to remove both the outline and the fill. For example, if your document has a colored background, you can make the background show through the text box by removing its shape formats. If you ever use text boxes for laying out a page (as shown back in Figure 1), the document will look cleaner if you omit the fills and outlines from the text boxes.
Formatting Text in a Text Box
Text in a text box is basically the same as text in a document; it just fits in a smaller space. A text box can hold multiple paragraphs, including numbered and bulleted lists. You can format a text box’s text in just about all the same ways you format a document’s body text. Select the text in the box; then apply formats from the Font and Paragraph groups of the Home tab. Text in a text box can be formatted with styles, too.
You can also do a couple of neat tricks with a text box’s text:
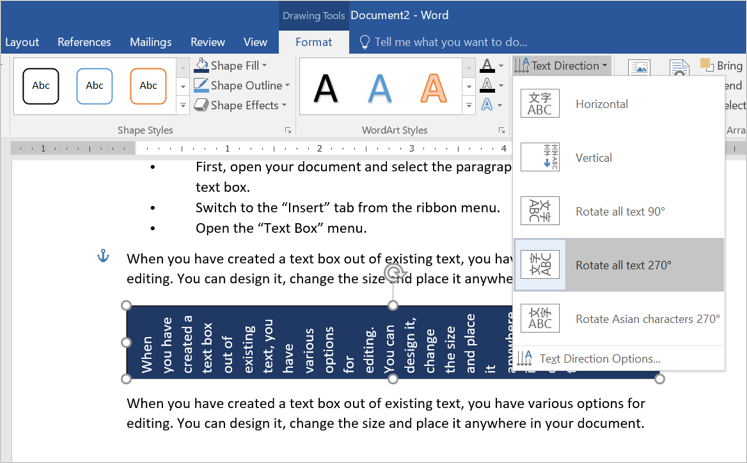
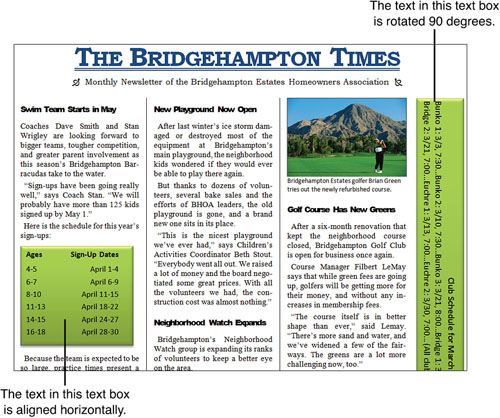
- Change text direction: By default, text is aligned horizontally in a text box. You can set text to run vertically, reading either from top to bottom (rotated 90 degrees) or from bottom to top (rotated 270 degrees). Figure 6 shows an example of how rotated text can be used to create a cool effect and make use of limited page space. To change text direction, click the text box to activate the Format tab, click Text Direction, and then choose an option from the drop-down menu.
Figure 6. In the text box along the right-hand edge of this newsletter, the text is rotated 90 degrees.

- Change text alignment: You can vertically align text at the top, center, or bottom of a text box. To set the alignment, go to the Format tab, click Align Text, and then choose an option from the drop-down menu.
Linking Text Boxes
You can use multiple text boxes to create fancy or complicated-looking layouts. For example, if you’re designing a multicolumn document but don’t want to mess with columns, you can use text boxes instead. Or if you want to create a boxed “sidebar” that spans two pages of a document, you can use two text boxes (one on each page) to hold the sidebar’s content.
The key to tricks like this is linking. When you link two or more text boxes, Word treats them as though they are a single box. When you fill the first box with text, just keep typing; the text jumps to the next box and continues there.
Creating Linked Text Boxes
To make the linking process easy, start by creating all the text boxes you’re going to need. Here’s a simple example:
|
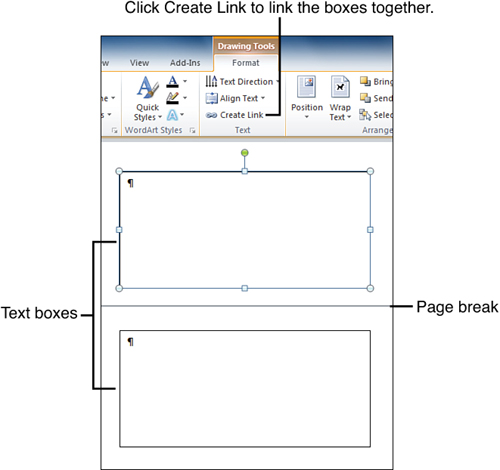
1. |
Create two text boxes. Figure 7 shows two empty text boxes; the first is at the bottom of one page, and the second is at the top of the following page. Figure 7. Two text boxes, ready for linking.
|
|
2. |
Click the first text box. The Format tab appears on the ribbon. |
|
3. |
Click Create Link. The mouse pointer changes to the shape of a pitcher. |
|
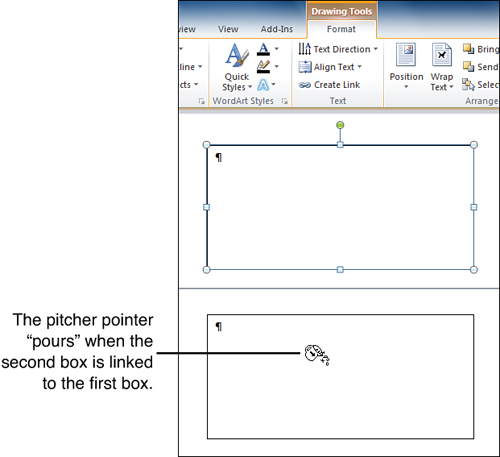
4. |
Point to the second text box, and notice that the pitcher is tilted to look like its contents are pouring into the second text box, as shown in Figure 8. Figure 8. Linking the second text box to the first one.
|
|
5. |
Click the second text box. It is now linked to the first text box. |
The linking process goes a little differently if you need to link three or more boxes. Suppose you have four boxes; in this case, you would start by linking box 3 to box 4, then link box 2 to box 3, and finally link box 1 to box 2. Sounds crazy, but it works
Achieve more control and flexibility with your documents
Updated on September 11, 2022
What to Know
- Select Insert > Text Box > choose a text box template. Select and drag box to the position you want.
- To resize text, select and drag circles around the edge. To rotate text, select and drag the circular arrow.
- Place the cursor inside the text box and type the information you want to appear.
This article explains how to use text boxes in Microsoft Word. Instructions apply to Word for Microsoft 365, Word 2019, Word 2016, and Word 2013.
How to Insert a Text Box in Word
Start by opening the document you want to add a text box to. Then follow the steps below.
-
On the ribbon, select Insert.
-
In the Text group, select Text Box, then choose a text box template.
-
The new text box appears in the middle of the text, and the Shape Format tab is automatically selected.
-
Select and drag the box to the position you want. To resize the text box, select and drag the circles around the edge. To rotate the text box, select and drag the circular arrow at the top of the box.
-
Place the cursor inside the text box and type the information you want to appear there.
Why Use Text Boxes?
When you type text in Microsoft Word, you have options for making it look a particular way on the page (such as changing the page margins), but those options are limited. Text boxes expand your formatting repertoire by offering additional control and flexibility for how your text appears. You can place a text box anywhere within a document and format it with different colors and fonts. This feature is especially helpful for creating a blockquote or a sidebar.
Customize a Text Box
After you create a text box, you can customize it in a number of ways.
-
To bring up options, place the cursor inside the text box and right-click. Choose an option and follow the screen prompts to add a border, change the style, or adjust the way the text box interacts with the other text on the page.
Alternatively, use the controls on the Shape Format tab.
-
To go directly to the Layout Options menu, select the text box, then select the Layout Options icon (it looks like a horseshoe and is located to the right of the text box).
-
Change the text, make more adjustments, or move the box to another location at any time. To delete a text box, select its border, then press Delete on the keyboard.
Thanks for letting us know!
Get the Latest Tech News Delivered Every Day
Subscribe

If you want to get creative with your text or simply have more flexibility, consider adding a customizing a text box in Word.
If you want more flexibility with certain text in your Word document, why not use a text box? Since a text box is considered an object, you can move it wherever you like in your document. This is handy for placing text in areas you normally wouldn’t.
You can use a text box to call attention to something in your document, rotate snippets of text, or create a unique appearance. Microsoft Word also provides formatting options for text boxes that give them their own nifty style or useful function.
Here, we’ll show you how to add or draw a text box and then format it to your liking in Microsoft Word.
With Word on Windows, you can either insert a preformatted text box or draw one of your own. Either way, you can customize it afterward, so choose the best option for you.
Go to the spot in your document where you want the text box and select the Insert tab. Click the Text Box drop-down arrow and pick a Built-In style or Draw a Text Box.

If you’re using Word on Mac, go to the Insert tab, click the Text drop-down arrow, and then the Text Box arrow. You can then choose to draw a simple text box or one where the text inside is vertical.

To draw your text box on either platform, drag the crosshairs to create the size you want. You can resize the text box any time after you draw it too.

When your text box appears, click inside to add your own words.
Format and Customize a Text Box in Word
Once you insert or draw your text box, select it and go to the Shape Format tab to view all of your formatting options. You’ll find the following features in Word on Windows, which may differ slightly in Word on Mac.

Shape Styles
Choose a theme or preset style for your text box. These options include filling colors and various effects.

Or you can use the Shape Fill, Outline, and Effects options to create your own distinctive style. From gradients and patterns to dashed lines and scribbles, you have many terrific options for customizing the appearance of your text box.

Note: Some options in the Shape Styles section may not be available if you select a preset text box.
WordArt Styles
Along with making the text box itself look snazzy, you can do the same with the text inside of it. Check out the Quick Styles in the WordArt Styles for premade options.

Or use the Text Fill, Outline, and Effects to make the text really pop. You can do things like add a shadow and glow or warp the text, so it’s curvy and cool.

Text, Accessibility, Arrange, and Size
The remaining sections of the ribbon allow you to change the direction of the text inside the box, use text wrapping with other elements in your document, rotate the text box, and adjust its exact size. You can also use the Alt Text Accessibility option to describe the text box.

Edit Your Text Box
After you customize your text box, you can still edit it anytime. Just note that when you select the text box to make changes, it may appear without some of the elements or effects you’ve applied. This is to make text editing simpler.
Once you complete your edits and deselect the text box, it will return to normal with your customizations.

Add Text Anywhere, Any Way in Word
Text boxes in Microsoft Word let you place text anywhere in your document without worries of margins or other normal text limitations. And because you can completely format the text box almost any way you want, it can be both a fun and useful addition to your document.
If you use Google Docs and Microsoft Word, take a look at how to work with text boxes in Docs too!
![]()
Most of your Word documents are likely set in standard, drab Times New Roman or Calibri typography, perhaps with the occasional cheesy Word Art thrown in for variety. Yet Word actually includes a number of text effect tools that give you everything you need to make beautiful art from your words.
In this tutorial, I’ll show you how to create the cool text effects you want in every modern version of Microsoft Word, using its advanced type and typography formatting features. Once you’re done, you’ll know the tricks that I used to make Word templates that look great.
How to Make a Stylish Text Effect in MS Word (Quick Video)
In this quick screencast video, you’ll learn how to go beyond default Word Art options and make a cool text effect in Microsoft Word, using text formatting tools to create stylish typography:
For more detailed information on how to make beautiful Word text effects, review the step-by-step instructions below.
How to Make MS Word Text Effects (Step by Step)
Learn how to apply both standard text effects and more advanced options inside Microsoft Word’s Format pane, such as Drop Shadow and Reflection. Discover how to transform your text into cool typography art. Let’s get started:
1. Set Up a New Page in MS Word
Start by creating a new document by either clicking File > New or pressing the Control-N shortcut. To set properties like the page orientation and the page size, jump into the Layout tab.
.jpg)
.jpg)
.jpg)
If you plan to print your document and you already know the final paper size, it is important to set it as a first step. Why? Microsoft Word lets you easily scale any object, but
some properties, like the outline width, remain unchanged. Font size also
stays the same during the resizing, and has to be updated manually. Working in
the final paper size right from the beginning helps save time in the
future.
There are two things you need to know about the Layout tab before we set the final page size values. First, the Size drop-down menu contains only the paper sizes which are possible to print with the currently selected printer. In other words, you cannot set an A3 paper size when your printer can only print up to A4 documents. To fix that, you can jump to the File > Print menu and change the printer to a different one for a second, for example the Microsoft XPS Document Writer, which is a «virtual printer» that only saves files locally to your computer.
.jpg)
.jpg)
.jpg)
Don’t print anything, but once you’ve chosen a different printer, go back (using the left arrow in the top left corner), and open Layout > Size again. The list of available sizes should be much larger now.
.jpg)
.jpg)
.jpg)
Then, the other thing worth noting is that the drop-down menus for Margins, Orientation and Size may not be enabled all the time. If you have a Text Box placed and selected inside the document, some Layout options will be disabled. I’m specifically pointing this out because we will use Text Box objects all the time, and jumping to the Layout tab and seeing those options disabled can be quite frustrating.
.jpg)
.jpg)
.jpg)
Now you know how to always be able to set a page Size. Set the size to A4
and the Orientation to Landscape. Your page is now set up the way you’ll want for your custom Word text effect art, and you’ll know how to tweak it again next time.
.jpg)
.jpg)
.jpg)
2. Change the Font and the Font Size
Now, it’s time to add your text and start tweaking it. Type anything you want, select the text, and pick the font and size you want. Most of the text effects look best in large sizes, so don’t be afraid to
use either the Increase Font Size button
or the font size drop-down menu to make the text really big.
If the maximum
value of 72 pt is not enough, type in any number you want, for example
250 pt (only type the number). You can also use non-integer values, such as 198.5, if you want to get the largest possible text without wrapping.
.jpg)
.jpg)
.jpg)
3. What Is Kerning? (How to Set It in Word)
Let’s look at an important concept for setting typography in Word. When a type designer creates a font, every letter has its own width set to make sure the gaps between the letters are even. This works fine in most cases, except for the combination
of letters with less «rectangular» shapes, like «V» and «A».
Thus, type designers add “kerning” features, which specify that those two letters when placed next to each other will have the gap smaller (or bigger). In a perfect world, an application uses this kerning and everything looks fine. Well, not everything functions as expected in the real world.
.jpg)
.jpg)
.jpg)
If you only need to know one thing about kerning, remember this—it should always be enabled, but it is off by default in Microsoft Word. To turn it on, open the Font dialog (Control-D) Advanced tab, and check Kerning for fonts X points and above.
When you check this checkbox, a current font size is filled into the edit box, but you probably want to change it to 1 pt instead—just to make sure it will be really enabled all the time for
any text. Then click the Set as Default button. For more information about kerning, see Quick Tip: Typography Skills, Basic Kerning.
.jpg)
.jpg)
.jpg)
It is important to know that the kerning also has to be enabled this way for every text box in the document. If you accidentally or on purpose delete everything in your document
(Control-A > Delete), the kerning is again turned off.
4. Apply Standard Text Effects in Microsoft Word
Before we start adding our own text effect, let’s briefly take a look what Word offers us in the Text Effect and Typography drop-down menu on the Home tab on the ribbon. There are 15 pre-defined text effects with different outlines, fills, and shadow effects, and some of the presets also include 3D effects. The colors of those presets always reflect the selected color theme.
.jpg)
.jpg)
.jpg)
You can jump to the Design tab and select a different color scheme from the Colors drop-down menu. Jump back to the Home tab, open the Text Effects and Typography drop-down menu, and it should look a bit different.
.jpg)
.jpg)
.jpg)
This is nice, but unfortunately there’s no way to adjust those presets. The items in this list cannot be edited or deleted, and you cannot add new presets. Those 15 presets can be helpful
if you need a nice looking header and you only have two minutes of your time, but you will learn nothing new about the text
effects just by using them.
5. Body Text vs. a Text Box
The text can be placed in a document in two different ways. The usual way is to create a new document and start typing. We can call this type of text «body text«. While the text effects can be added to this body text quite easily, they are limited, and thus using body text is not a preferred option.
The second way is to use a Text Box object and write into this text box. To insert a new Text Box, select Insert > Shapes > Text Box, and draw a new text box the same way you draw for example a rectangle.
.jpg)
.jpg)
.jpg)
The text placed inside a text
box has several advantages. It can be moved around the document freely without
any restrictions (even off the document or over the margins), and it can be
rotated. Moreover, some additional text effects like the 3D rotate options are
available.
If you do not like the default appearance of the text box—especially the white fill and the black outline—both can be easily set to none on the Format tab. Use the Shape Fill and the Shape Outline drop-down menus.
.jpg)
.jpg)
.jpg)
To select a text box with no fill and no outline, click over the text, which will show the text box
borders as a dotted line. Clicking over this dotted line to select a text box should be easy now.
6. Change Your Page Background in Word
The standard white paper color may seem a little bit boring for our text effect, and it may be a good idea to set it to a different color. Go to the Design tab, and from the Page Color drop-down menu, select a dark gray color. As for any other color
drop-down, the first two columns with grays are still the same, but the eight columns on the right side change depending on the chosen color palette. After changing the background, the black text inside the text box is almost invisible now, but that’s fine—we’ll fix it in a minute.
.jpg)
.jpg)
.jpg)
7. Master the Almighty Format Pane
The Format tab in Word allows us to format the text box as well as the text itself. There are drop-down menus for the text fill, outline, and all the other possible effects, and there are submenus and submenus and submenus. It is definitively not an easy way to tweak the effects,
and we only have access to a limited number of presets and options. There is
a better place to adjust the setting—the Format Pane.
The Format Pane is an essential pane for setting all the advanced options, yet there is no standard way to display this pane. In short, every «More…» item on the Format tab (More Lines, More Gradients, More Textures) opens the Format Pane,
but since we have the Text Box inside our document, we might as well right click
the text box border and select Format Shape.
.jpg)
.jpg)
.jpg)
Before we move on, remember there is only one Format Pane,
but the content of this pane changes depending on the selected content. It’s
different for the text box, for body text, and for an image.
I say it to
prevent any confusion, because the name of this Format Pane also changes—it
can be Format Shape, Format Text Effects or Format Picture. Because this will
be our base station for setting all the effect, it is a good habit to keep this
pane open all the time.
8. Set the Text Fill and the Outline
With the background color set and a Format Pane still open,
select the text box and type in any word, for example “Effect”. Keep the font set to
Calibri and set the size to 72 pt. In the Format Pane, select Text Options,
open the Text Fill settings, and change the Text fill from the Solid Fill to the
Gradient Fill. From the Preset Gradients drop-down menu, select a yellow top
spotlight. This will create a subtle shading, as if there was a light source
shining from the top.
.jpg)
.jpg)
.jpg)
To make the text a little bit more interesting, we will also add an outline. Change the Text
Outline from No Line to Solid Line, raise the Width to a bigger number,
for example 3 pt, and change the Color to white.
.jpg)
.jpg)
.jpg)
The outline is nice, but too
strong. We can open the Compound Type drop-down menu and select Double, which
will split the outline into two: one visible over the text, and one outside the
text. To get rid of the ugly joins, change the Join type to Round instead of the default Bevel.
.jpg)
.jpg)
.jpg)
All we need to do now
is to increase the Transparency to make this outline less visible. A value
around 60% seems to be just fine.
.jpg)
.jpg)
.jpg)
9. Add More Cool Word Text Effects
With the text box
still selected and the Format Pane still open, switch to the Text Effects
tab. As a first effect, we will add a simple drop shadow below the text. Open
the Shadow effect properties, and from the presets drop-down menu, select Outer:
Offset Bottom. Because the page background color is quite dark, the effect is
quite subtle, which is fine, and probably does not need any additional tweaking.
.jpg)
.jpg)
.jpg)
If you want, you can
also try to add a Reflection effect. Select any preset, but increase the Blur
value to make the reflection less visible and not too distracting.
.jpg)
.jpg)
.jpg)
In just a few steps, we have a nice looking text effect, and we can call it done.
.jpg)
.jpg)
.jpg)
10. Share the Document (.docx vs .pdf)
When sharing your
document with your friends, you can choose between two main formats: the Word
native .docx, or Adobe Acrobat .pdf file. The document saved in .docx format
keeps the effects fully dynamic, but depending on the effects used, the other
person often needs to have the latest version of Microsoft Word installed.
Otherwise, the document can look different (and most likely ugly).
The biggest advantage
of the document saved in a .pdf format is that it will look exactly the same on
every device, in any application. However, you lose the ability to edit the
text effects, and probably also the ability to edit the text. Microsoft Word
can export as well as import the .pdf files, but the ability to edit the text with the applied effects is in most cases lost. For more information, please read this helpful tutorial:
To save the document
in the .docx format, simply hit the save button—it should be the default
format. To save the document as a .pdf file, select File > Export >
Create PDF/XPS, and then choose PDF in the file type drop-down when saving the file.
.jpg)
.jpg)
.jpg)
Key Takeaways: For Making Your Own MS Word Text Effects
We’ve only scratched
the surface of the text effects in Microsoft Word, but you should have a solid
knowledge of the Word basics needed for future effects. Here is a list of
the main takeaways:
- When possible, set
the paper size as a first step. Resizing the objects afterwards can bring
unexpected complications. - Most text effects look best in very large sizes.
- Always be sure to enable kerning and good typography practices when working with text in Word.
- There is a
difference between «body text» and text placed inside a
Text Box. For text effects, text placed inside a Text Box is preferred. - The Format Pane is the
best place to change any formatting—make sure to have this pane
visible all the time. - Share your creations
in Word .docx format to keep the ability to edit, or Adobe Acrobat .pdf format to
make sure everything will look the same at all times.
Enjoy creating your own text effects using these steps, and leave a comment below if you have any trouble making your own text effects in Word!
To learn more about Microsoft Word, study the
following tutorials:
Editorial Note: This post was originally published in 2014. It has been comprehensively revised by our staff to make it current, accurate, and up to date—with special assistance from Laura Spencer.
Did you find this post useful?
![]()
Hello, I’m Vaclav, graphics designer from Czech Republic, mainly focused on GUI design. Despite everything I’ve created in Photoshop, my most well-known creation is a viral video «Was iOS7 created in Microsoft Word?».