
Try the following options to help determine the problem:
Test printing in other programs
-
Open WordPad.
-
In a new document, type This is a test.
-
On the File menu, select Print.
-
Select OK or Print to print the file.
If you couldn’t print from WordPad, the printing problem is not specific to your Microsoft 365 app. You can try fixing the problem by following steps in Fix printer connection and printing problems in Windows.
If you were able to print from WordPad, continue to the next step.
Test printing another file
-
In the same Microsoft 365 app, open a new blank file.
-
Type the following text: This is a test.
-
Save the file, and then try to print.
If you don’t have problems printing the test file, try changing the font so it’s the same as the original file. Also, if the original file has a table, clip art, or a drawing object, make sure the test file includes this as well.
Once you’ve made those changes, save the file, and then try to print.
If you’re able to print the test file, the original file may be damaged. For information about how to troubleshoot damaged Microsoft 365 files, go to one of the following articles:
-
For Excel: Repairing a corrupted Excel workbook
-
For Word: How to troubleshoot damaged documents in Word
-
For PowerPoint: How to troubleshoot a damaged presentation in PowerPoint
If you have problems printing the test file and the original file, continue to the next step.
Run an online repair
Follow the steps in Repair an Office application to run an online repair and then try to print the file.
In this article we’ll assume that you’ve already checked a few of the obvious things such as:
-
Is the printer turned on?
-
Is there paper, ink and/or toner in the printer?
-
All cables to the printer and the computer are securely connected?
Note: If your printer is displaying an error message please contact the manufacturer of the printer for support of that specific error message.
This article is for troubleshooting when you can’t get your document to print at all. If you have questions about how to print a document in Office for Mac or how to do special things like print on both sides of the page (duplex) see Print a document in Word for Mac.
Make sure you have all Apple software updates installed
The first thing to do in troubleshooting print issues is to make sure you have all of your Apple software updates installed. To do that: click the Apple button at the top left corner and choose Software Update. Walk through the Software Update wizard and have it download and install any updates that it finds.
Once the updates are complete, reboot your computer then try your print job again. If it still won’t print your printer may be paused or another print job may be holding up the queue.
Make sure your printer isn’t paused
-
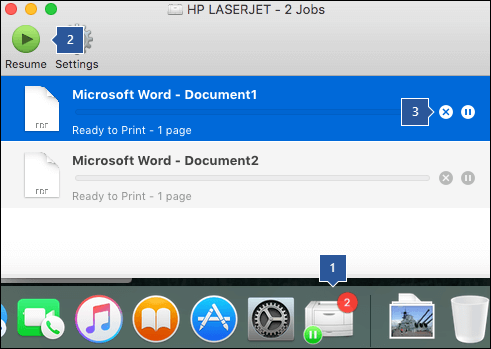
Click the printer’s icon in the Dock to open the printer’s queue window
 .
. -
If you see the Resume button in the toolbar
that suggests that the printer is paused. Click the Resume button and see if printing proceeds.
 .
. that suggests that the printer is paused. Click the Resume button and see if printing proceeds.
If the printer isn’t paused, but print jobs are stacking up anyhow, it’s possible that another print job is holding up the queue because of an error with that job. To clear that job select it, then click the Delete Job button on the right  .
.
Test printing in a new document
It’s possible that the problem is in your document, so let’s try printing from a different document to test that idea.
-
Create a new file in the Office program (Word, Excel, PowerPoint etc.) that you’re having trouble printing from. To do that click File > New
-
Type a few words of random text
-
Try to print the document
If it prints successfully that tells us that the problem is in your existing document. See how to Recover your Word files and documents.
If it doesn’t print successfully try changing the font of your text by selecting your sample text, choosing the Font drop down on the ribbon, and selecting a different font. Try printing again. If it prints successfully that tells us the problem is with the font you’re using. The easiest solution is to use a different font for your text.

Try printing from another program
To test whether another program can communicate with the printer, and whether the printer driver is functioning, try to print from another program such as Notes. Start the Notes app on your Mac, open an existing note or create a new note with some sample text, then click File> Print and see if it will print.
If it prints successfully from Notes that tell us that you have a problem with your installation of Microsoft Office. In that case you may need to uninstall Office 2016 from your Mac and then reinstall it. See Troubleshoot Office 2016 for Mac issues by completely uninstalling before you reinstall.
If it does not print successfully from other programs that suggests there may be a problem with the printer drivers or configuration.
Delete the printer and reinstall it in OSX
To delete and add the printer, follow these steps:
-
Click the Apple logo in the upper-left of the screen
-
Click System Preferences
-
Click Printers & Scanners
-
Select the printer that you want to remove
-
Click Delete (-)
-
To add a new printer and test it, Click Add (+)
-
In the Connection Method list, click the connection method that your printer uses
-
In the Printer list, click the printer that you want to add, and then click Add
Go back to your Microsoft Office application and try printing to the printer you just re-added. If it still won’t print, it may be that you need to replace your print driver files.
Remove and reinstall your print driver files
Deleting and reinstalling your printer resets that printer’s settings but may not always replace the print driver files. Follow these steps to replace those:
-
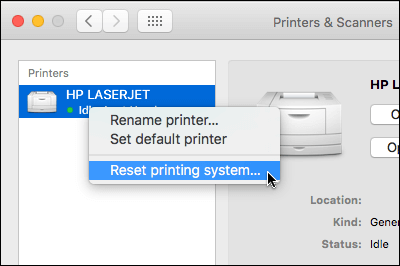
Click the Apple logo in the upper-left of the screen
-
Choose System Preferences
-
Choose Printers & Scanners
-
Control+Click anywhere in the device list. Choose Reset printing system from the shortcut menu.
-
In Finder choose Go > Go to Folder and go to the /Library/Printers/ folder.
-
In the Printers folder that appears click Edit > Select All then choose File > New folder with Selection to create a new folder containing those drivers. The folder will be named «New Folder With Items» by default, which is fine for our purposes. When we’re done you can delete that folder to save space.
-
Repeat the process you did for deleting and reinstalling the printer. This time your system will download and install new printer drivers too.
Go back to Office and test your printing again. If it still doesn’t work your printer preference files might be causing the problem.
Replace the printer preference files
Corrupted printer preference files may cause printing issues. To replace the printer preference files, follow these steps:
-
On the desktop, click File, click New Folder, type Print Prefs, and then press RETURN on your keyboard
-
On the Go menu, click Home
-
Open Library
Note: The Library folder is hidden in MAC OS X Lion. To display this folder, hold down the OPTION key while you click the Go menu
-
Click Preferences
-
Hold down the Apple or Command key, and then click each com.apple.print.*.plist file. For example, hold down the Apple key, click com.apple.print.PrintCenter.plist, and then click com.apple.print.PrintingPrefs.plist. In this example, the com.apple.print.PrintCenter.plist and com.apple.print.PrintingPrefs.plist files should be highlighted
-
Drag the files that you highlighted in step 5 to the Print Prefs folder that you created in step 1.
-
Restart your Mac
Try printing again from Microsoft Office for Mac.
See also
Resolve printer issues on your Mac
www.TestsTestsTests.com

Free Microsoft Word Test – Printing Basics Test – MS Word 2010
a) Pressing Ctrl+P will print your document.
b) Pressing Ctrl+P will paste the contents of your document.
c) Pressing Ctrl+P will launch the Print area of the Backstage view.
d) Pressing Ctrl+P will open the Page Layout dialogue box..
a) Unfortunately this is a formatting issue and you will need to reformat the document to ensure it fits on the page.
b) Change the paper size to A4 (8.27″ x 11.69″).
c) Change the margins to Wide Margins in the Printing area of the Backstage view.
d) Change the page to Landscape Orientation in the Printing area of the Backstage view.
a) The Wide Margins setting.
b) The Narrow Margins setting.
c) The Reduced Margins setting.
d) The Normal Margins setting.
a) He needs to type: 23-26 in the Pages box below Print Custom Range.
b) He needs to type: 23:26 in the Pages box below Print Custom Range.
c) He needs to type: 23, 24, 25,26 in the Pages box below Print Custom Range.
d) He needs to type: pages 23-26 of 93 in the Pages box below Print Custom Range.
a) Use this button to set the page margin type. It is currently set to Legal Margins.
b) Use this button to format the document in a specific way. The current format is Legal.
c) Use this button to set the paper size that the document will be printed on. The current paper size is Legal.
d) None of the options listed above are correct.
a) Reformat the document by changing the font or adding text.
b) Change the page margins of the document, either making them wider or narrower.
c) Change the page orientation of the document from portrait to landscape or vice versa.
d) Choose which printer to print your document to if your computer is linked to more than one printer.
a) Unfortunately not. Word automatically accepts track changes when a document is printed.
b) Yes, if Casey changes the paper size to Legal, the track changes will print.
c) Unfortunately not. Track Changes is a view type and view types cannot be printed.
d) Yes, if she clicks on the What to Print button in the Print area and tick the Print Markup option in the list, the track changes will print.
a) The setting Narrow Margins need to be changed to Wide Margins.
b) The Paper Size needs to be changed to A4. It is currently set to print on an envelope.
c) The Portrait Orientation needs to be changed to Landscape in order to print the page as A4.
d) All of the above options are correct.
a) If multiple copies of the same document are printed, Collated will print each copy as a set whilst Uncollated will print sets of individual pages.
b) If multiple copies of the same document are printed, Collated will print sets of individual pages whilst Uncollated will print each copy as a set.
c) Collated will print landscape pages separate from portrait pages, whilst uncollated will print mixed portrait and landscape pages.
d) None of the above options are completely accurate.
a) Press the Escape key on your keyboard.
b) Press the Print button to print the document.
c) Press on the Home tab on the Ribbon.
d) All of the above options are correct.
* More from TestsTestsTests.com
If your Microsoft Office Word documents are not printing correctly or properly, here are some solutions you can try to fix the problem. The problem could be a driver issue, font problem, the Word document itself, or even a general PC issue. However, before we go ahead, we suggest you go to System > Troubleshoot > Other Troubleshooters. Click the Printer Troubleshooter option, and then click on the Run button. Then try to print and see if it works. If it doesn’t, go ahead with the advanced troubleshooting.

Follow these suggestions if the Microsoft Office Word documents are not printing correctly or properly:
- Test printing of other documents
- Test in WordPad
- Test printing from other programs
- Repair Office
- Test for problems in Windows
- Test printing with different printer drivers
You will need an administrator account to get this done.
1] Test printing of other documents
If your documents or graphics contain damaged fonts, this can cause printing problems in Microsoft Word. Before reinstalling your drivers or software, try testing Word’s printing ability. You can achieve this by testing in a new word document.
- Open Word, and then click the new blank document template.
- To insert ten paragraphs of sample text on the document’s first line, type
=rand(10)and press Enter. - Turn on the Printer, and use Ctrl + P to check if the document prints.
- If the document prints, then you need to try with different objects that Word supports. The list includes
- Clip art, a table
- Drawing object
- Fonts
- Online Photos and so on.
- Try to print again and check if this works.
These tests determine whether Microsoft Word can print documents correctly. They may also reveal issues with specific fonts or graphics not printing correctly.
If you are not receiving any errors when trying to print a document, but the document will not print, the document may be damaged. Even if you can print the same document on another computer, this may be due to file damage that is not apparent on all computers. In this case, check out how you can fix the damaged Word documents.
Additionally, if the printer works when you change the font, you must remove it from the PC and reinstall it to check. If it doesn’t, choose a different font.
If none of these works, check out the second method.
2] Test in WordPad
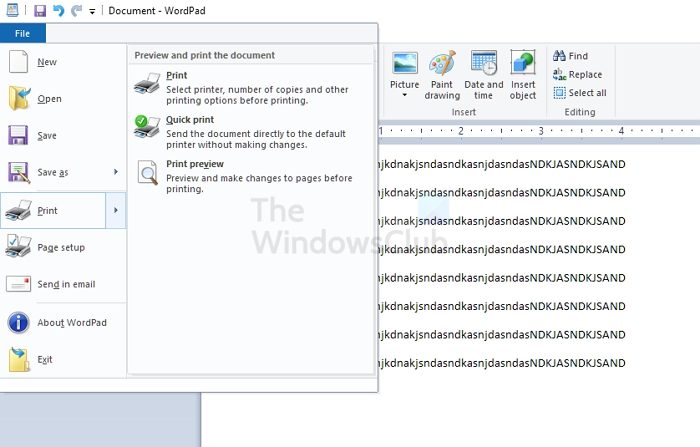
- Click on the Start button.
- In the Search box, type Wordpad.
- In the list of programs, click on WordPad.
- In the WordPad document, type some random words
- On the File menu, click Print.
- In the Print dialog box, click OK or Print.
If this is the first time you use WordPad, you may be prompted to select the printer. Done that, you can also add images and other supported objects to check if the print works.
If this doesn’t work, we need to check if the print is working from another program.
3] Test printing from other programs
After you finish creating the document in WordPad, you can test the print functions in your web browser or another Office program. You can also try to print a test page for your printer. To print a text page, follow these steps:
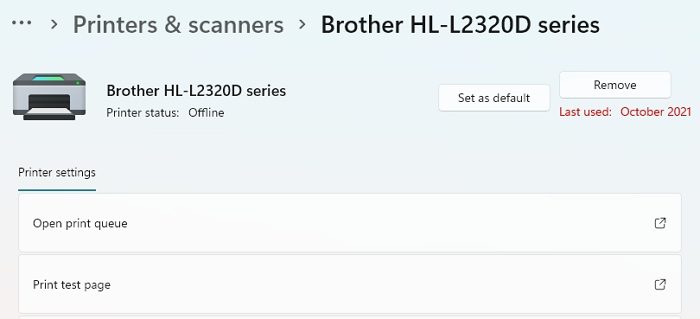
- Open Windows Settings using Win + I
- Navigate to Bluetooth and devices > Printers and Scanners
- Select your printer to expand the option
- Click on select Print Test Page.
If this doesn’t work, then the issue is with the printer. You must reinstall the printer driver and check if the issue is resolved. However, if this solution works, you can print from anywhere except Microsoft Word. Check out the following suggestion to fix the issue.
4] Repair Office
If the printing problem continues, follow these steps to run the repair program and reinstall any missing or damaged program files.
- Exit all Office programs.
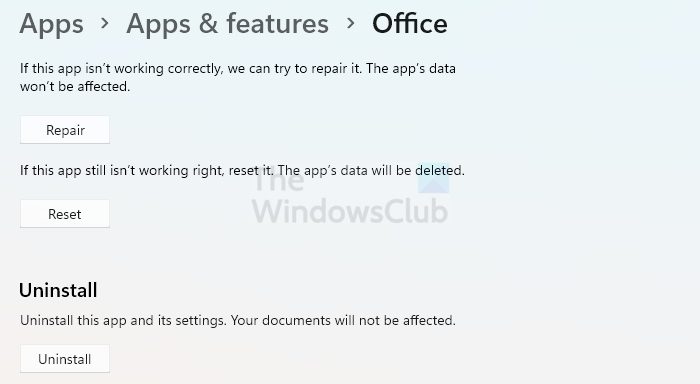
- Open Windows Settings, navigate to Apps > Apps & features list,
- Locate, and select the Office and then click on the three-dot menu and click on Advanced Options
- Scroll, look for the Repair button, click on it, and let the wizard complete the process.
Once done, open Word again and check if you can print.
5] Test for problems in Windows

To troubleshoot potential issues with your device drivers or memory-resident programs, you can start Windows in safe mode and test printing to a file in Word. To start Windows in safe mode, follow the steps below.
- Remove all USB devices from your computer, and then restart your computer.
- Restart your PC, and press the F8 keys as the computer boots.
- Keep it pressed unless you see the Advanced Boot Options screen
- You can then navigate to Safe Mode by going to Troubleshoot
- Log on to your PC, and try printing from Word again.
If you don’t experience the Word printing problem when you start Windows in safe mode, you can use the same steps to troubleshoot after you do a clean start. It will help you determine the source of the problem.
6] Test printing with different printer drivers
To determine whether the printer driver is the cause of the problem, you can test different drivers. You can start by updating the printer driver, and if that doesn’t work, you need to use the generic, text-only printer driver to test printing from Word. To do this, follow these steps:
- Open Power Menu using Win + X
- Click on Device Manager
- Expand the Printers section, and select the printer
- Right-click and click on Update driver > Browser for drivers on your computer
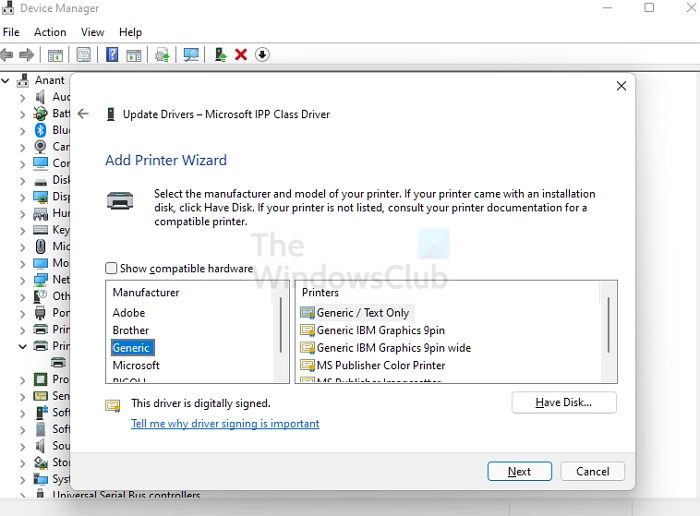
- Then click on Let me pick from the list of available drivers on my computer
- Uncheck Show Compatible Hardware

- Click on Generic and then select Generic / Text only
- Click next to apply the changes, and then try to print.
If you see an error message when you try to print a file that only contains text but not when you use the generic, text-only printer driver, your printer driver may be damaged. In this case, contact the manufacturer to help remove the printer driver and install an updated version.
Why is my Microsoft Word not opening?
When Word’s document cannot be opened, it may be because of corrupted documents or mistakes like using a picture as a document’s icon. Other reasons include using Word with other programs and add-ons.
Where are unsaved Word documents stored?
These Word files can be found via File > Open and click the Recover Unsaved Documents button at the bottom of the Recent File List.
Содержание
- Print a document in Word
- Preview your document
- Print your document
- See also
- Troubleshoot why Word does not print
- Step 1: Test printing in other documents
- Word 2007 through Word 2019
- Step 2: Test printing in other programs
- Test in WordPad
- Print a plain text file
- Print specific fonts or images
- Printing from other programs
- Print a test page from the printer
- Step 3: Test printing with different printer drivers
- Test printing in Windows 10
- Test printing in Windows 8, Windows 7, and Windows Vista
- Step 4: Test the Word program files and settings
- Word 2019, 2016, 2013, and 2010
- Word 2007
- Step 5: Test for problems in Windows
- Test for problems in Windows 10
- Test for problems in Windows 8, Windows 7, and Windows Vista
Print a document in Word
Before you print, you can preview your document and specify which pages you want to print.
Preview your document
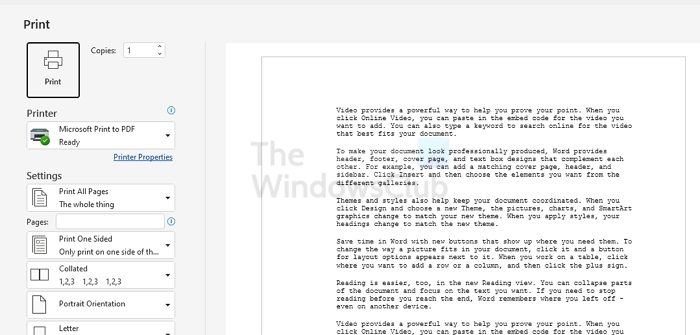
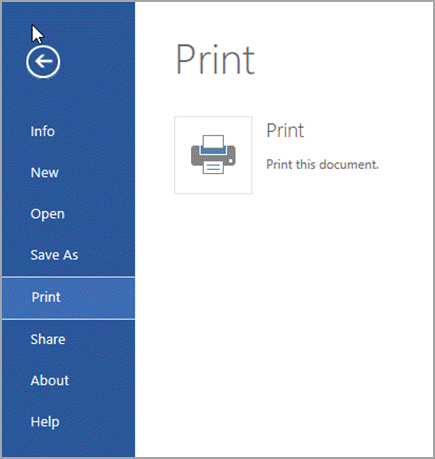
Click File > Print.
To preview each page, click the forward and backward arrows at the bottom of the page.
If the text is too small to read, use the zoom slider at the bottom of the page to enlarge it.

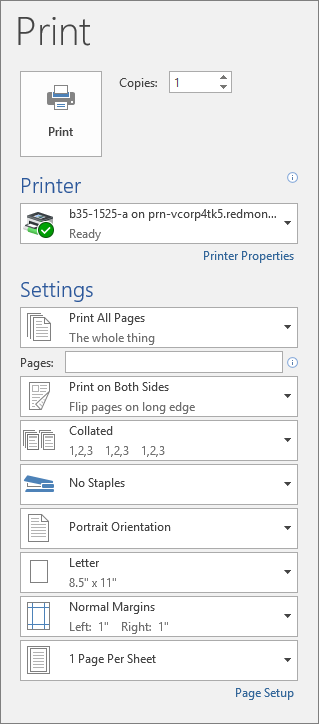
Choose the number of copies, and any other options you want, and click the Print button.
Click File > Print.
To print only certain pages, print some of the document’s properties, or print tracked changes and comments, click the arrow under Settings, next to Print All Pages (the default), to see all of your options.
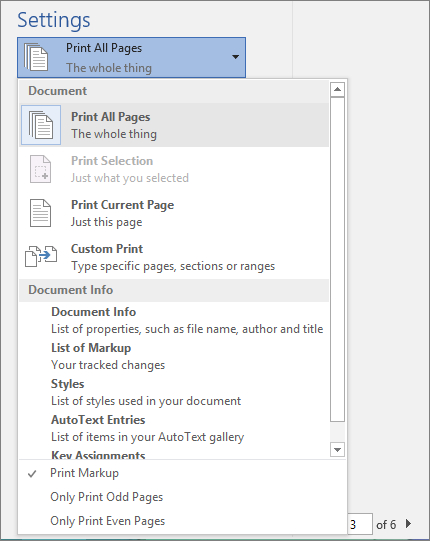
To print only certain pages, do one of the following:
To print the page shown in preview, select Print Current Page.
To print consecutive pages like 1 -3, select Custom Print and enter the first and last page numbers in the Pages box.
To print individual pages and a range of pages (like page 3, and pages 4-6) at the same time, select Custom Print, and enter the page numbers and ranges separated by commas (e.g. 3, 4-6).
Note: If the printer you’ve chosen under Printer supports color, black and white, and grayscale printing options, the options will appear in the list under Settings.
Click File > Print.
Under Settings, choose the color printing option, and any other options you want, and click the Print button.
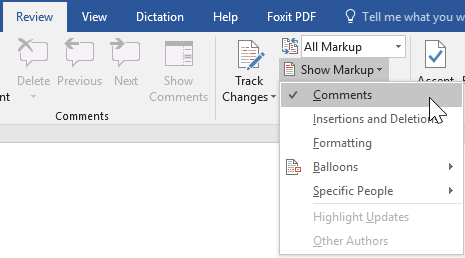
Open a document that has comments. If the comments option doesn’t show immediately, go to Review > Show Markup, and select only Comments from the list.
You can choose to print comments from one specific reviewer by selecting the reviewer under Specific people.
Click File > Print.
Under Settings, select Print Markup.
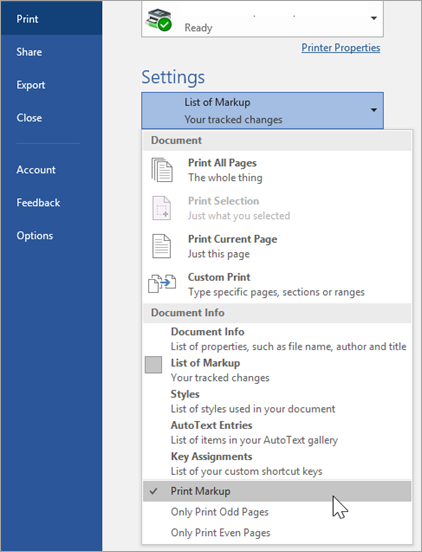
Your document will print with comments.
Note: If you want to print your document without any comments, go to Review > Tracking > No Markup and then print your document.
Printing from Word for the web may seem a little confusing. That’s because it first creates a PDF to preserve the layout and formatting, and then you print the PDF.
Note: If you’re using Internet Explorer on Windows 7 or an earlier operating system, you’ll need to download and install the free Adobe Reader app before you can print your document.
Print your document
Click File > Print > Print.
If you’re in Reading view, click Print near the top of your screen.

Word for the web generates a PDF copy of your document.
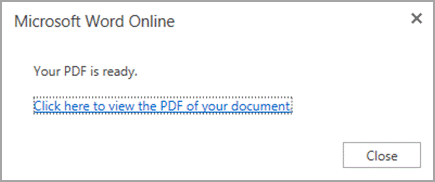
Click Click here to view the PDF of your document to open the PDF preview of your document.
Tip: If your default PDF viewer is Word, cancel the Word for the web print job, open the document in Word ( Edit Document > Edit in Word) and print it from Word ( File > Print).
Print your document:
On Windows 7, choose a printer and change or keep any other settings you want, and then click Print.
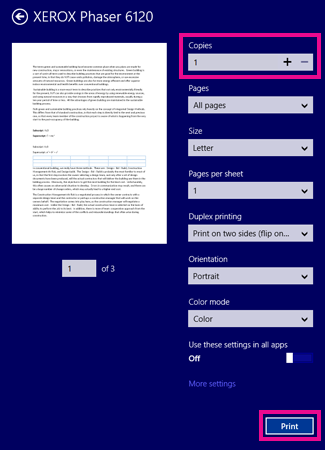
On Windows 8, in the Reader app, swipe up from the bottom of the screen (or right-click anywhere) and select Print. On the Print page, choose a printer, choose the settings you want, and then click Print.

On Windows 10, in the Reader app, swipe up from the bottom of the screen (or left-click anywhere) and select Print. On the Print page, choose a printer, choose the settings you want, and then click Print.
If you want multiple copies of a printout, change the number of copies in the Print page:
On Windows 7 or earlier, at the top of the Print page is a box labeled Copies with up and down arrows for you to choose how many copies of the document you want. Make your choice (either by entering a number or using the arrows), and then click Print.

On Windows 8 or Windows 10, choose how many copies to print (either by entering a number or using the + and – buttons), and then click Print.
Note: If the printer you’ve chosen under Printer supports color, black and white, and grayscale printing options, the options will appear in the list under Settings.
Click File > Print.
Under Settings, choose the color printing option, and any other options you want, and click the Print button.
See also
Your printer manufacturer’s website (where you can find updated printer drivers)
Troubleshoot why Word does not print
If you are using Microsoft 365 (Microsoft Word for Office 365 with Windows 10), see Troubleshoot print failures in Word for Office 365 on Windows 10.
This article describes how to diagnose print failures in Microsoft Word. It also explains how to isolate the cause of the print failure and how to resolve the issue.
Examples of print failure include the following situations:
- You receive error messages and other messages when you try to print a file.
- The printer doesn’t respond.
- A file is printed as meaningless symbols.
This article does not discuss printer output issues, such as envelope-positioning problems, missing graphics, or inaccurate page numbers.
To resolve a print failure in Word, you must determine its cause. Causes typically fit into one of the following categories:
- Corrupted files or corrupted content in documents
- The Word program itself
- The printer driver
- The Windows operating system
- Connectivity or hardware
Do not make assumptions about what is causing your printing problem. Instead, rely on systematic troubleshooting to reveal the cause.
Use the following tests to help determine the cause of the printing failure.
Step 1: Test printing in other documents
Corrupted files or documents that contain corrupted graphics or fonts can cause print errors in Word. Before you reinstall drivers or software, test whether Word can print. To do this, follow these steps for your version of Word.
Word 2007 through Word 2019
Open a new document in Word.
On the first line of the document, type =rand(10), and then press Enter:
The =rand(10) command inserts 10 paragraphs of sample text.
Try to print the document.
If the document prints successfully, change to a different font, or insert clip art, a table, or a drawing object.
To change the font, follow these steps:
- Select the sample text.
- Open the Home tab.
- In the Font group, select a different font in the font list.
To insert clip art, follow these steps:
- Open the Insert tab, and then select Online Pictures. (In Word 2010 and Word 2007, select the Insert tab, and then select Clip Art.)
- On the Clip Art task pane, leave the Search text box blank, and then select Go. (In Word 2013, type a term in the Office . com Clip Art search box, and then select Search.)
- Right-click one of the pictures, and then select Insert.
- Close the Clip Art task pane.
To insert a table, follow these steps:
- Select Insert, select Table, and then select Insert Table.
- Select the number of columns and rows that you want, and then select OK.
To insert a drawing object, follow these steps:
- Select Insert, and then select Shapes.
- Double-click one of the shapes.
Test the print function again.
The success or failure of these tests shows whether Word can print generally. These tests may also give you clues about certain fonts or graphics that Word cannot print.
If you don’t receive errors in the test document but still cannot print the original document, the file may be corrupted. This situation might be true even if you can print the same document on another computer because the symptoms of file corruption don’t necessarily appear on all computers.
For more information about how to troubleshoot corrupted Word files, see How to troubleshoot damaged documents in Word.
If Word cannot print at all, or if Word cannot print a certain font or a specific type of graphic, go to the next step.
Step 2: Test printing in other programs
The scope of the printing problem may reveal its cause. For example, some printing problems affect only Word, whereas other printing problems affect several of or all Windows-based programs.
The following tests can help determine whether this problem involves programs other than Word.
Test in WordPad
Print a plain text file
Select Start, point to Programs, point to Accessories, and then select WordPad.
- In Windows 8, press the Windows key to open the Start menu, type WordPad, and then select the WordPad icon.
- In Windows 7, point to All Programs, point to Accessories, and then select WordPad.
In the blank WordPad document, type This is a test.
On the File menu, select Print.
Select OK or Print to print the file.
Print specific fonts or images
If Step 1 indicated that the print problem involves only certain fonts or certain graphics images, try to reproduce this problem in WordPad. To do this, apply the same font, or insert the same kind of graphics image. (To select a different font in WordPad, use the same method that you use in Word.)
To insert a graphics image in WordPad, follow these steps:
On the Insert menu, select Object.
In Windows 8 and Windows 7, select Insert Object on the Home tab.
Follow one or both of the following steps:
- To create a new graphics image, select Create New, and then select one of the object types from the list. For example, select Paintbrush Picture to create a test bitmap in the Microsoft Paint program.
- To insert a graphics image from a file, select Create from File, and then select Browse to select the file.
On the File menu, select Print.
Select OK or Print.
Printing from other programs
If you still cannot print from WordPad, test the print functions from either your web browser, or your other Office programs.
Print a test page from the printer
You can also try to print a test page on your printer. To print a test page, follow these steps:
Select Start, point to Settings, and then select Printers.
- In Windows 8, press the Windows key to go to the Start Screen, type Printers, select Settings, and then select Devices and Printers.
- In Windows 7, select Start, and then select Devices and Printers.
- In Windows Vista, select Start, and then select Printers.
Right-click the icon for your printer, and then select Properties.
On the General tab, select Print Test Page.
If you can’t print a test page, or if you cannot print in several or all Windows-based programs, the problem might be related to a printer driver, hardware, the operating system, or internet connectivity.
If the problem is limited to a particular font, a corrupted font file may be the cause. For more information about how to test and reinstall fonts, see How to install or remove a font in Windows.
If you can print without problems in all programs except Word, go to the next step.
You might be able to use Windows printing help and troubleshooters to resolve the printing problem:
Select Start > Settings.
Type printer problems, and then select Find and fix problems with printing.
- To correct printer connection and printing problems in Windows 10, see Fix printer connection and printing problems in Windows 10.
- In Windows 8 and Windows 7, you can run the printing troubleshooting wizard by selecting Start, typing printing, and then selecting Find and fix printing problems.
- In Windows Vista, select Start, select Help and Support, and search on printing or printing troubleshoot.
Step 3: Test printing with different printer drivers
If Word is the only program on your computer that cannot print, be aware that Word is a very printer-intensive program. Therefore, a minor problem in the printer driver tends to affect Word before it affects other programs.
To determine whether the printer driver is the cause of the problem, you can test different drivers. If the Word printing problem occurs only when you print documents that use a certain font or a specific type of graphics image, try to print to another printer.
If no other printer is available, contact the manufacturer to determine whether there is an updated version of the driver or a different driver for your printer model.
If the Word printing problem occurs even when you print documents that contain only text, you can use a generic, text-only printer driver to test printing from Word. To do this, follow these steps for your version of Windows.
On some versions of Windows, these steps may require access to the Windows installation CD-ROM or access to a network drive that contains the Windows installation files.
Test printing in Windows 10
- In the Windows search box, type printers, and then select Printers & scanners.
- Select Add a printer or scanner.
- Under “Printers & scanners,” select Generic/Text Only.
- Open a Word document, and then try to print to the Generic/Text Only printer option.
- Name the file Test.prn, and save it to your Documents folder.
Test printing in Windows 8, Windows 7, and Windows Vista
Take one of the following actions, as appropriate for your situation:
- For Windows 8 and Windows 7: Select Start, and then select Devices and Printers.
- For Windows Vista: Select Start, and then select Printers.
On the first screen of the Add Printer wizard, select Add a printer.
Select Add a local printer on the first screen of the Add Printer Wizard.
Make sure that the Use an existing port check box is selected, change the dropdown option to File: (Print to file), and then select Next.
In the Manufacturers list, select Generic, and then select Next.
Leave the default printer name, select Next, and then select Finish.
When the driver installation is complete, open a document in Word, and then do the following, as appropriate for your situation:
- For Word 2013 and later versions: On the File menu, select Print.
- For Word 2010: Select the printer dropdown menu, and then select Print.
- For Word 2007: Select the Microsoft Office Button, and then select Print.
- For other Word versions: Select the Print to File check box, and then select OK.
Change the location to My Document, and then name the file Test.prn.
Select OK or Print (depending on your version of Word).
If you receive an error message in Word when you print files that contain only text, but you do not receive the error message when you print by using the generic, text-only printer driver, your printer driver might be corrupted. If this is the case, contact the manufacturer for help with removing the printer driver and install an updated version.
If the printing problem occurs when you use a different printer driver, go to the next step.
Step 4: Test the Word program files and settings
After you verify that the printing problem is not limited to a particular document or to a particular printer driver, and that the problem is limited to the Word program, test the Word program by using resetting the user options.
For more information about how to reset the user options, see How to reset user options and registry settings in Word.
If the printing problem continues to occur, run Detect and Repair to reinstall the missing or corrupted program files. To run Detect and Repair, follow these steps for your version of Word.
Word 2019, 2016, 2013, and 2010
- Exit all Office programs.
- Select Start, and then type add remove.
- Open the Add or Remove Programs item.
- Select Change or Remove Programs, select Microsoft Office (Microsoft Office Word) or the version of Office or Word that you have in the Currently installed programs list, and then select Change or Modify.
- Select Repair or Repair Word (Repair Office), and then select Continue or Next.
Word 2007
- Start Word 2007.
- Select the Microsoft Office button, and then select Word Options.
- Select Resources, select Diagnose, and then follow the prompts on the screen.
If the printing problem continues to occur after you repair the Word installation or the Office installation, go to the next step.
Step 5: Test for problems in Windows
To look for device drivers or memory-resident programs that might be interfering with the Word print function, start Windows in safe mode, and then test print to a file in Word. To start Windows in safe mode, follow these steps for your version of Windows.
Test for problems in Windows 10
To start Windows 10 in safe mode, see Start your PC in safe mode in Windows 10.
Test for problems in Windows 8, Windows 7, and Windows Vista
Remove all DVDs, CDs, floppy disks, and any other external media from your computer, and then restart your computer.
Select Start, select the arrow next to the Lock button, and then select Restart.
In Windows 8, select Settings from the Charms menu, select Power, and then select Restart.
Press and hold the F8 key as your computer restarts.
You must press the F8 key before the Windows logo appears. If the Windows logo appears, you must restart the computer. To do this, wait until the Windows logon prompt appears, and then shut down and restart the computer.
On the Advanced Boot Options screen, use the arrow keys to select the Safe Mode option, and then press Enter.
Sign in to your computer by using a user account that has administrative credentials.
If the Word printing problem does not occur when you start Windows in safe mode, use clean-boot troubleshooting to help determine the source of the problem.
For more information about how to perform a clean restart in Windows, see How to perform a clean boot in Windows.
Does your printer produce Microsoft Word documents with strange fonts, jumbled paragraphs, missing text, or almost nothing? Try these potential fixes.
There are many reasons for Microsoft Word documents to print out strangely. Some involve errors with the program; others could hint at more far-reaching issues.
If your Microsoft Word documents are printing out incorrectly on Windows, try these troubleshooting options to get perfect prints every time.
Finding Out What the Problem Is
Before we begin, you should know that a few of these troubleshooting techniques to find out why Microsoft Word isn’t printing correctly involve some test printing. If you want to conserve printer toner or ink, here’s how to change settings to make Microsoft Word print in black and white.
Print a Test Page
Before you try any other potential fix, it’s best to rule out an error with your printer. This will give you an idea of where the issue lies. Follow these steps to print a test page on your printer.
- Click on the Start menu and type ‘control panel.’
- Click on the Control Panel app.
- In Category view, look under Hardware and Sound for the View devices and printers option. In Icon view, it is called Devices and Printers.
- Right-click on your printer and select Printer properties. (Make sure your printer is connected to your computer and switched on. The printer will be grayed out if it is not.)
- Under the General tab, click on the Print Test Page button.
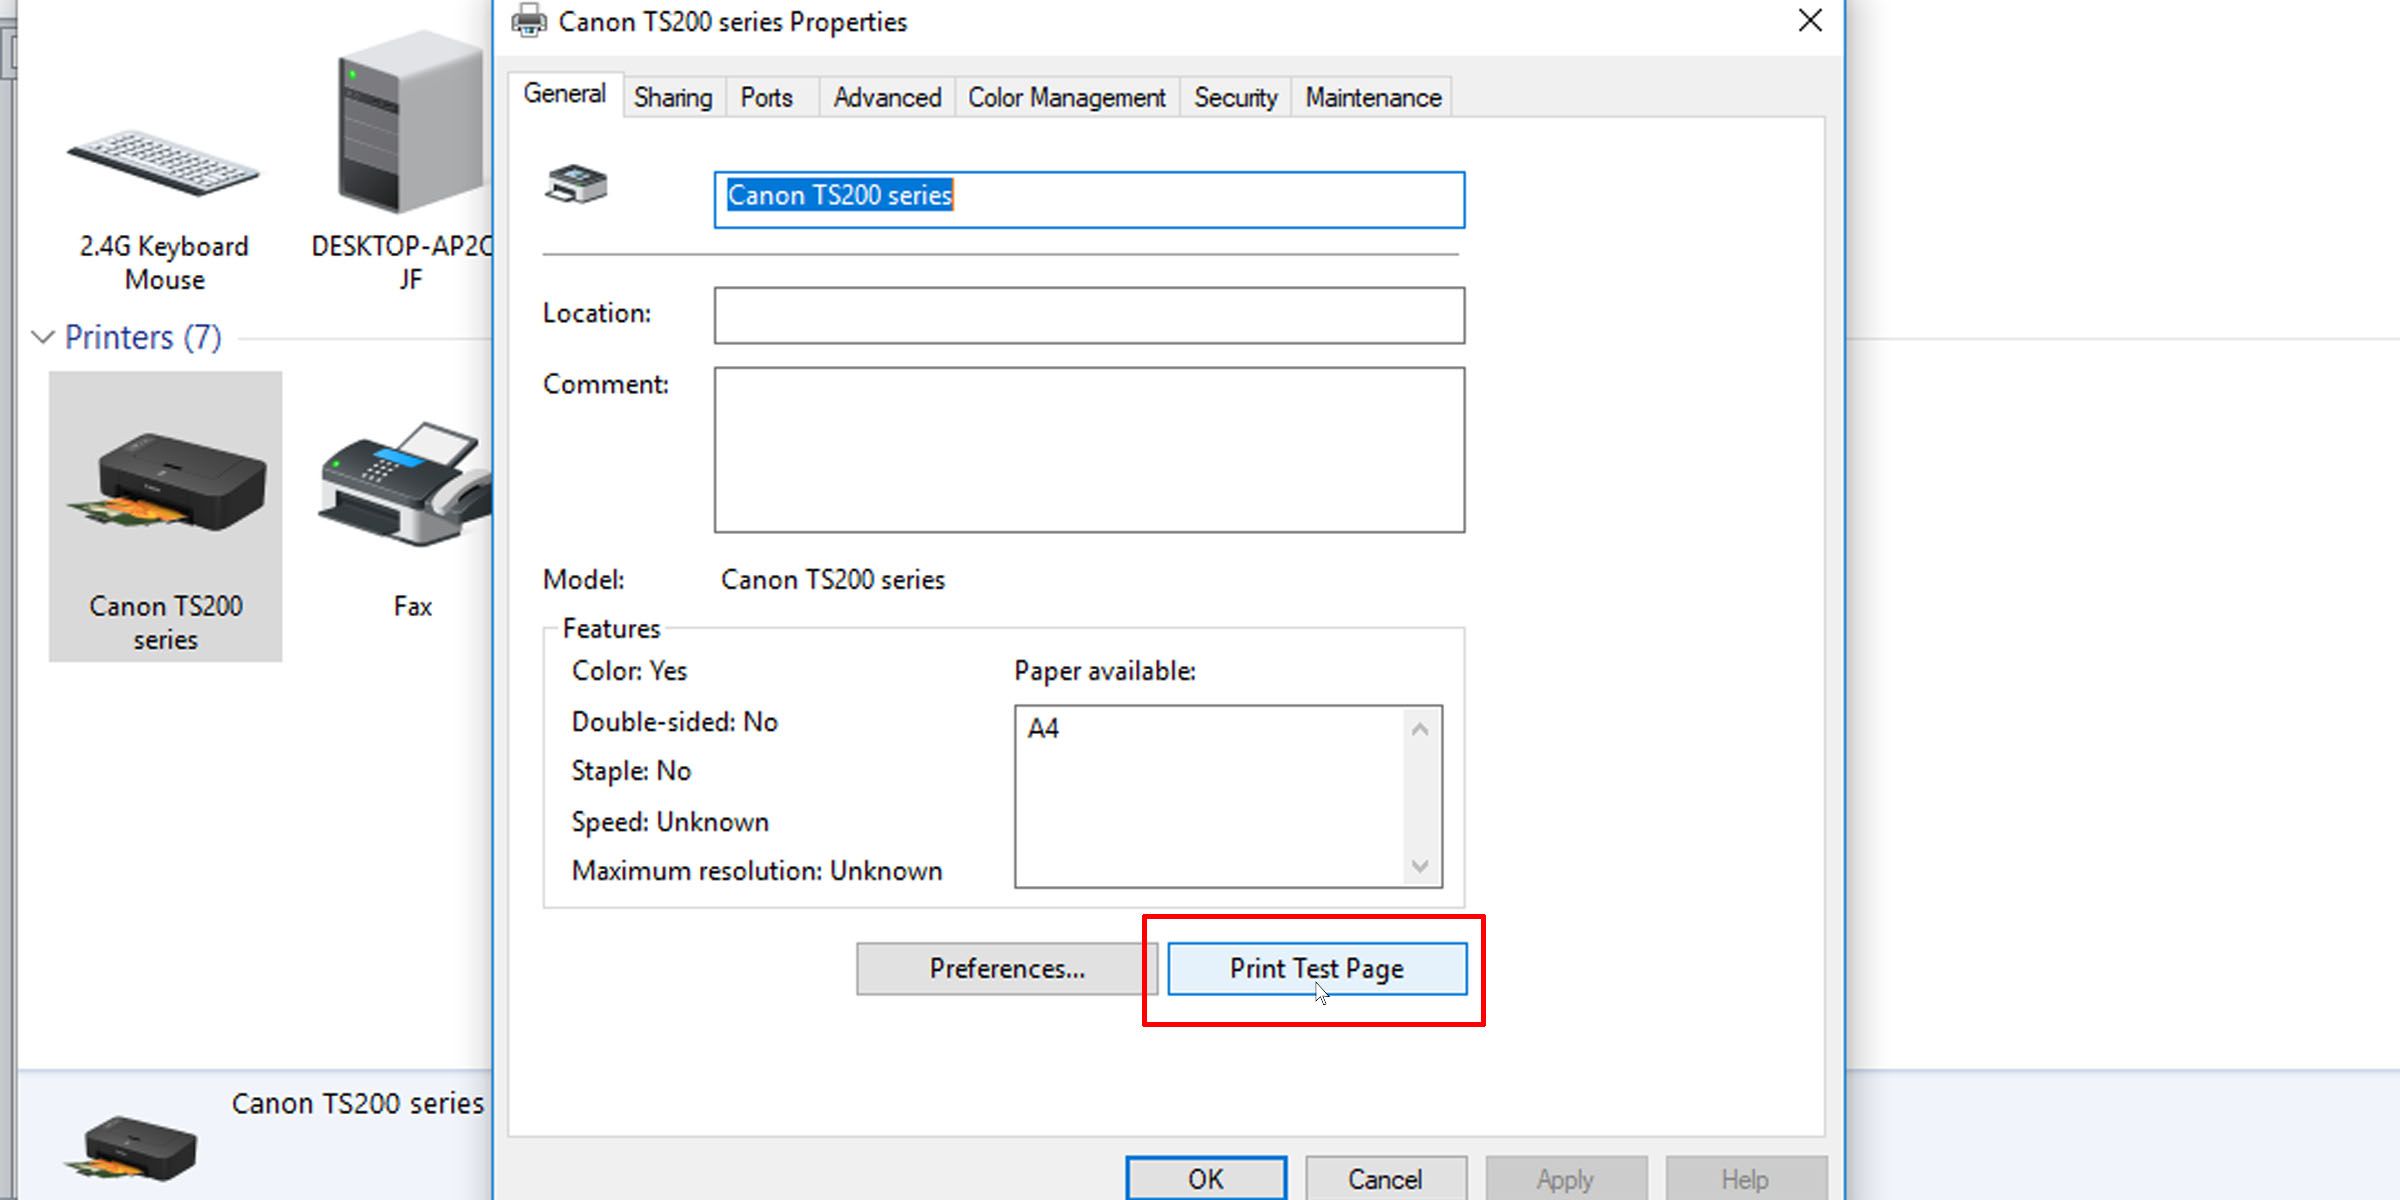
The test page should tell you whether your printer has been installed correctly. If there is an issue with your printer, this guide on what to do when your printer is not working should help you resolve the issue.
If the test page prints out correctly, the issue is probably not with your printer. It could be Microsoft Word or even Windows that is causing the print error.
Fixes You Can Try to Fix Printing Issues in Microsoft Word
1. Print Other Microsoft Word Documents
Is the problem with a specific document? A particular file may have corrupted contents, or the file itself may be corrupted. This could cause printing errors with Microsoft Word. Try the following fix:
- Open a new Microsoft Word file.
- Copy and paste your text and other data into the new Word document.
- Print the newly created document.
If your document prints out as desired, it may be an error with the original file. This probably means that the print error was an isolated issue, and this should resolve it.
If the page doesn’t print out correctly, it could be an issue with Microsoft Word or some of its settings.
2. Print Documents in Other Formats
To know whether the printing issue you are having is Microsoft Word-specific, try printing another document on your computer, maybe a PDF file or even a website. Pressing Ctrl + P on most web pages should pull up the print options.
If PDF documents print out correctly, here’s a temporary fix: When you’ve finalized the contents in your Microsoft Word document, covert it to PDF and print that instead.
Here’s how to convert a Microsoft Word document into a PDF document. In Microsoft Word on Windows, simply go to File > Save As, then choose PDF at the Save as type dropdown.
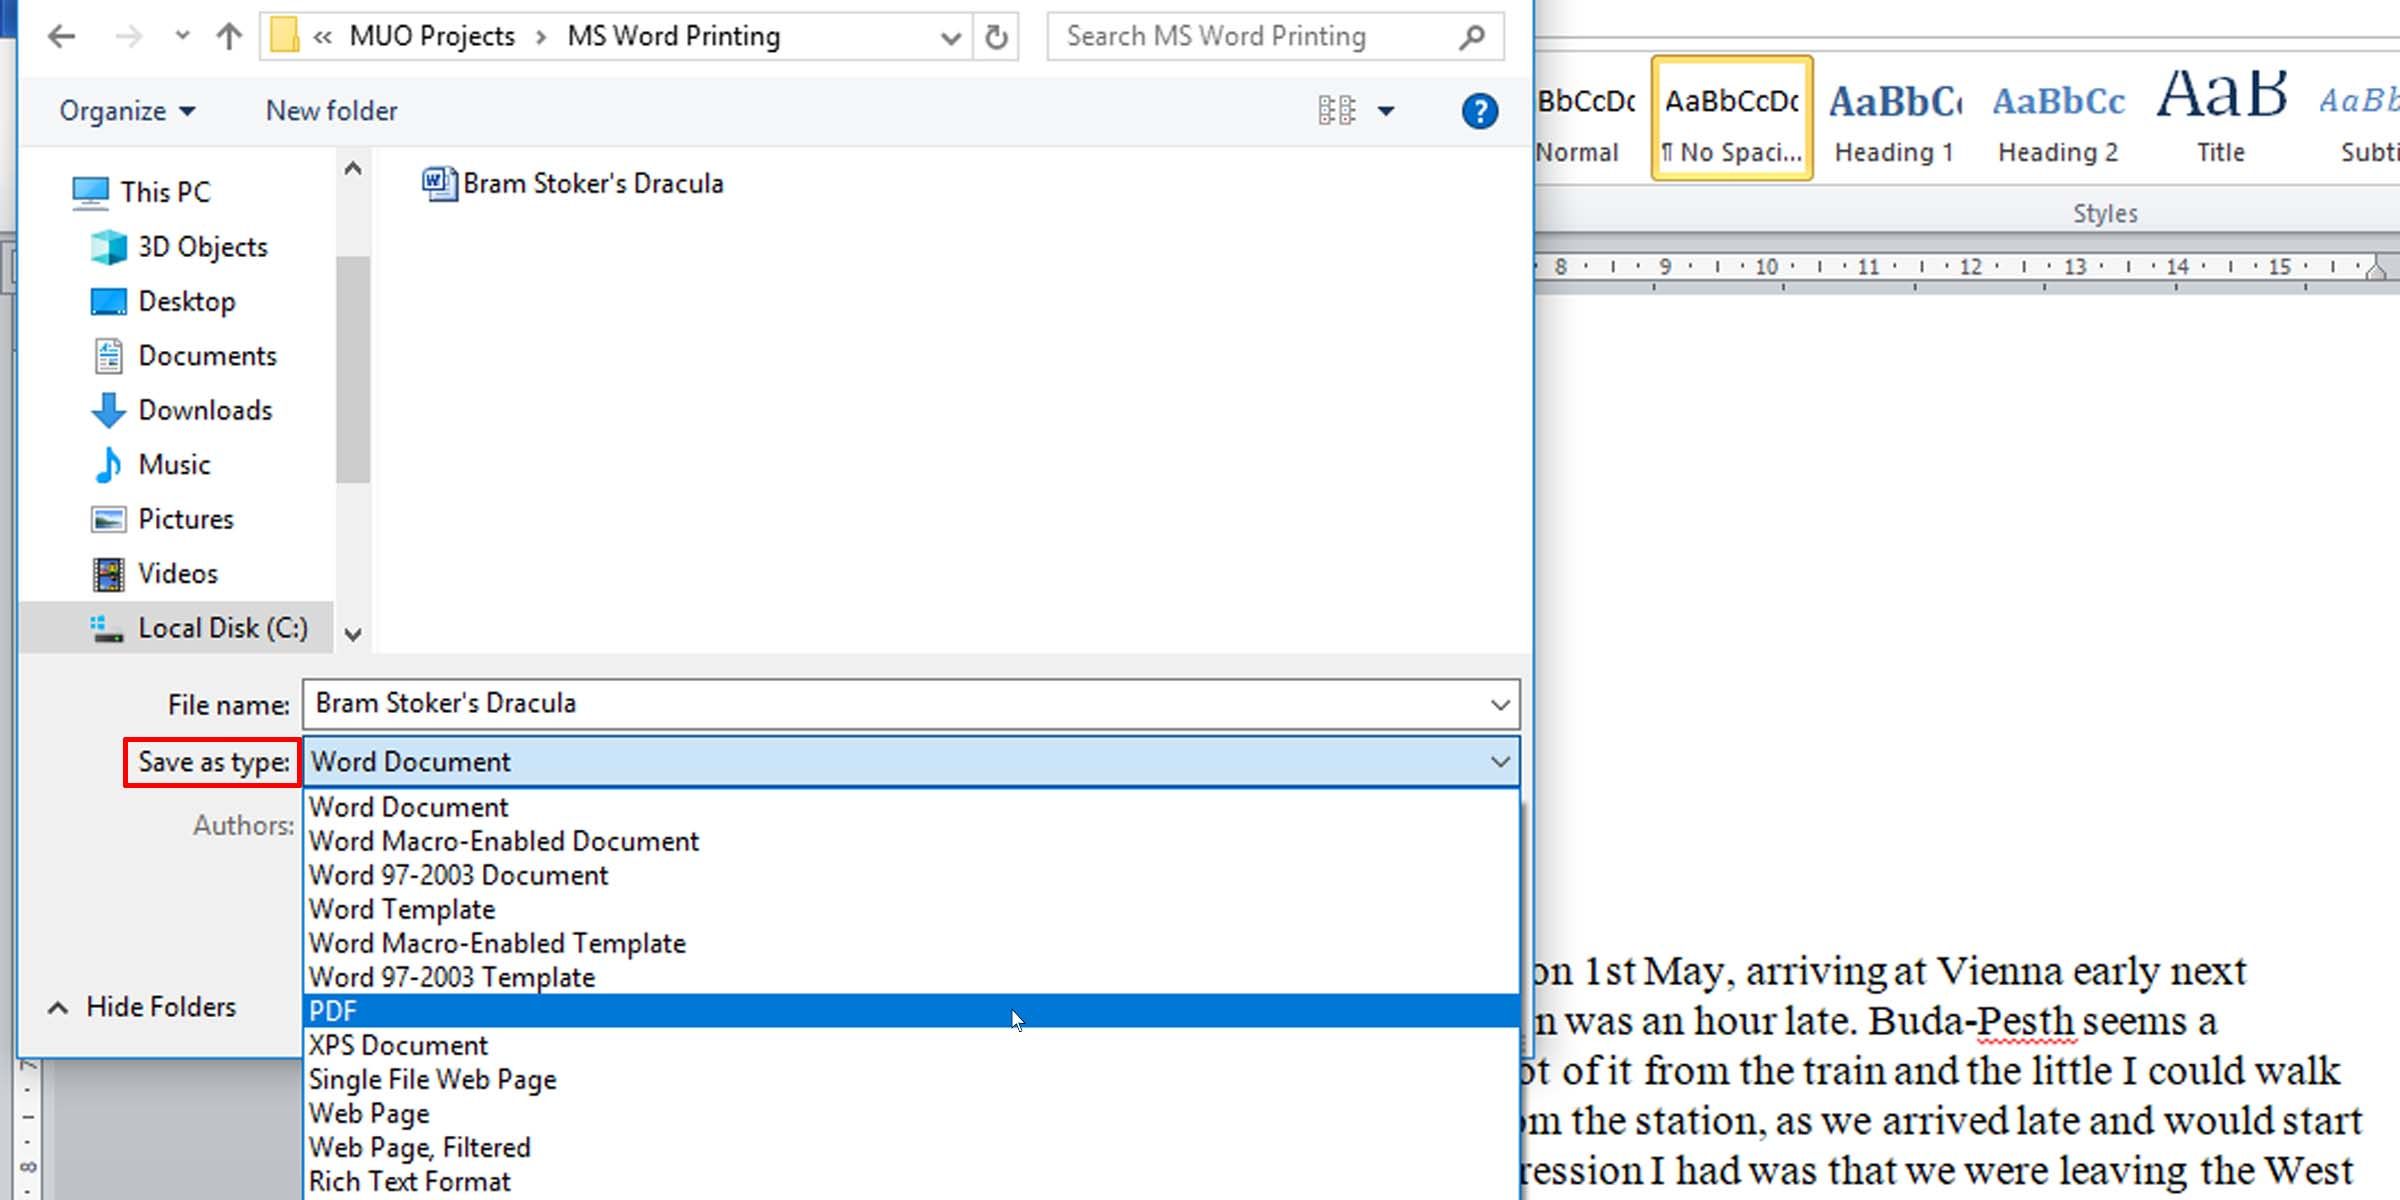
Here’s a helpful article on how to convert Word files to PDF on a Mac computer.
3. Check Printer Drivers
If other documents are printing out correctly, a potential fix may be to uninstall and reinstall either your printer drivers or your printer, or both. As Microsoft themselves put it, “Word is a very printer-intensive program. Therefore, a minor problem in the printer driver tends to affect Word before it affects other programs.”
Here’s a guide on fixing printer driver issues and getting your printer functioning normally again on Windows.
4. Check for Problems With Windows
The problem might be add-ons that you’ve installed with Microsoft Word or even misbehaving device drivers. Follow this guide to get in and out of Safe Mode in Windows 10 to test why Microsoft Word won’t print documents correctly.
If you are able to print properly in Safe Mode, you may want to perform a clean boot to isolate and identify the cause of your problem.
5. Scaled Printing Issue
A less common issue is when pages print at a fraction of the actual size, taking up only a small portion of the printed paper. This is possibly a problem with scaling factors. Here’s how to check and remove the scaling on Microsoft Word documents when printing.
- Press Ctrl + P or go to File > Print when working in the Word document.
- Click on Printer Properties under your printer.
- Under the Page Setup tab, in the Page Layout section, make sure the Scaled option isn’t selected. If it is, switch it to Normal-size.
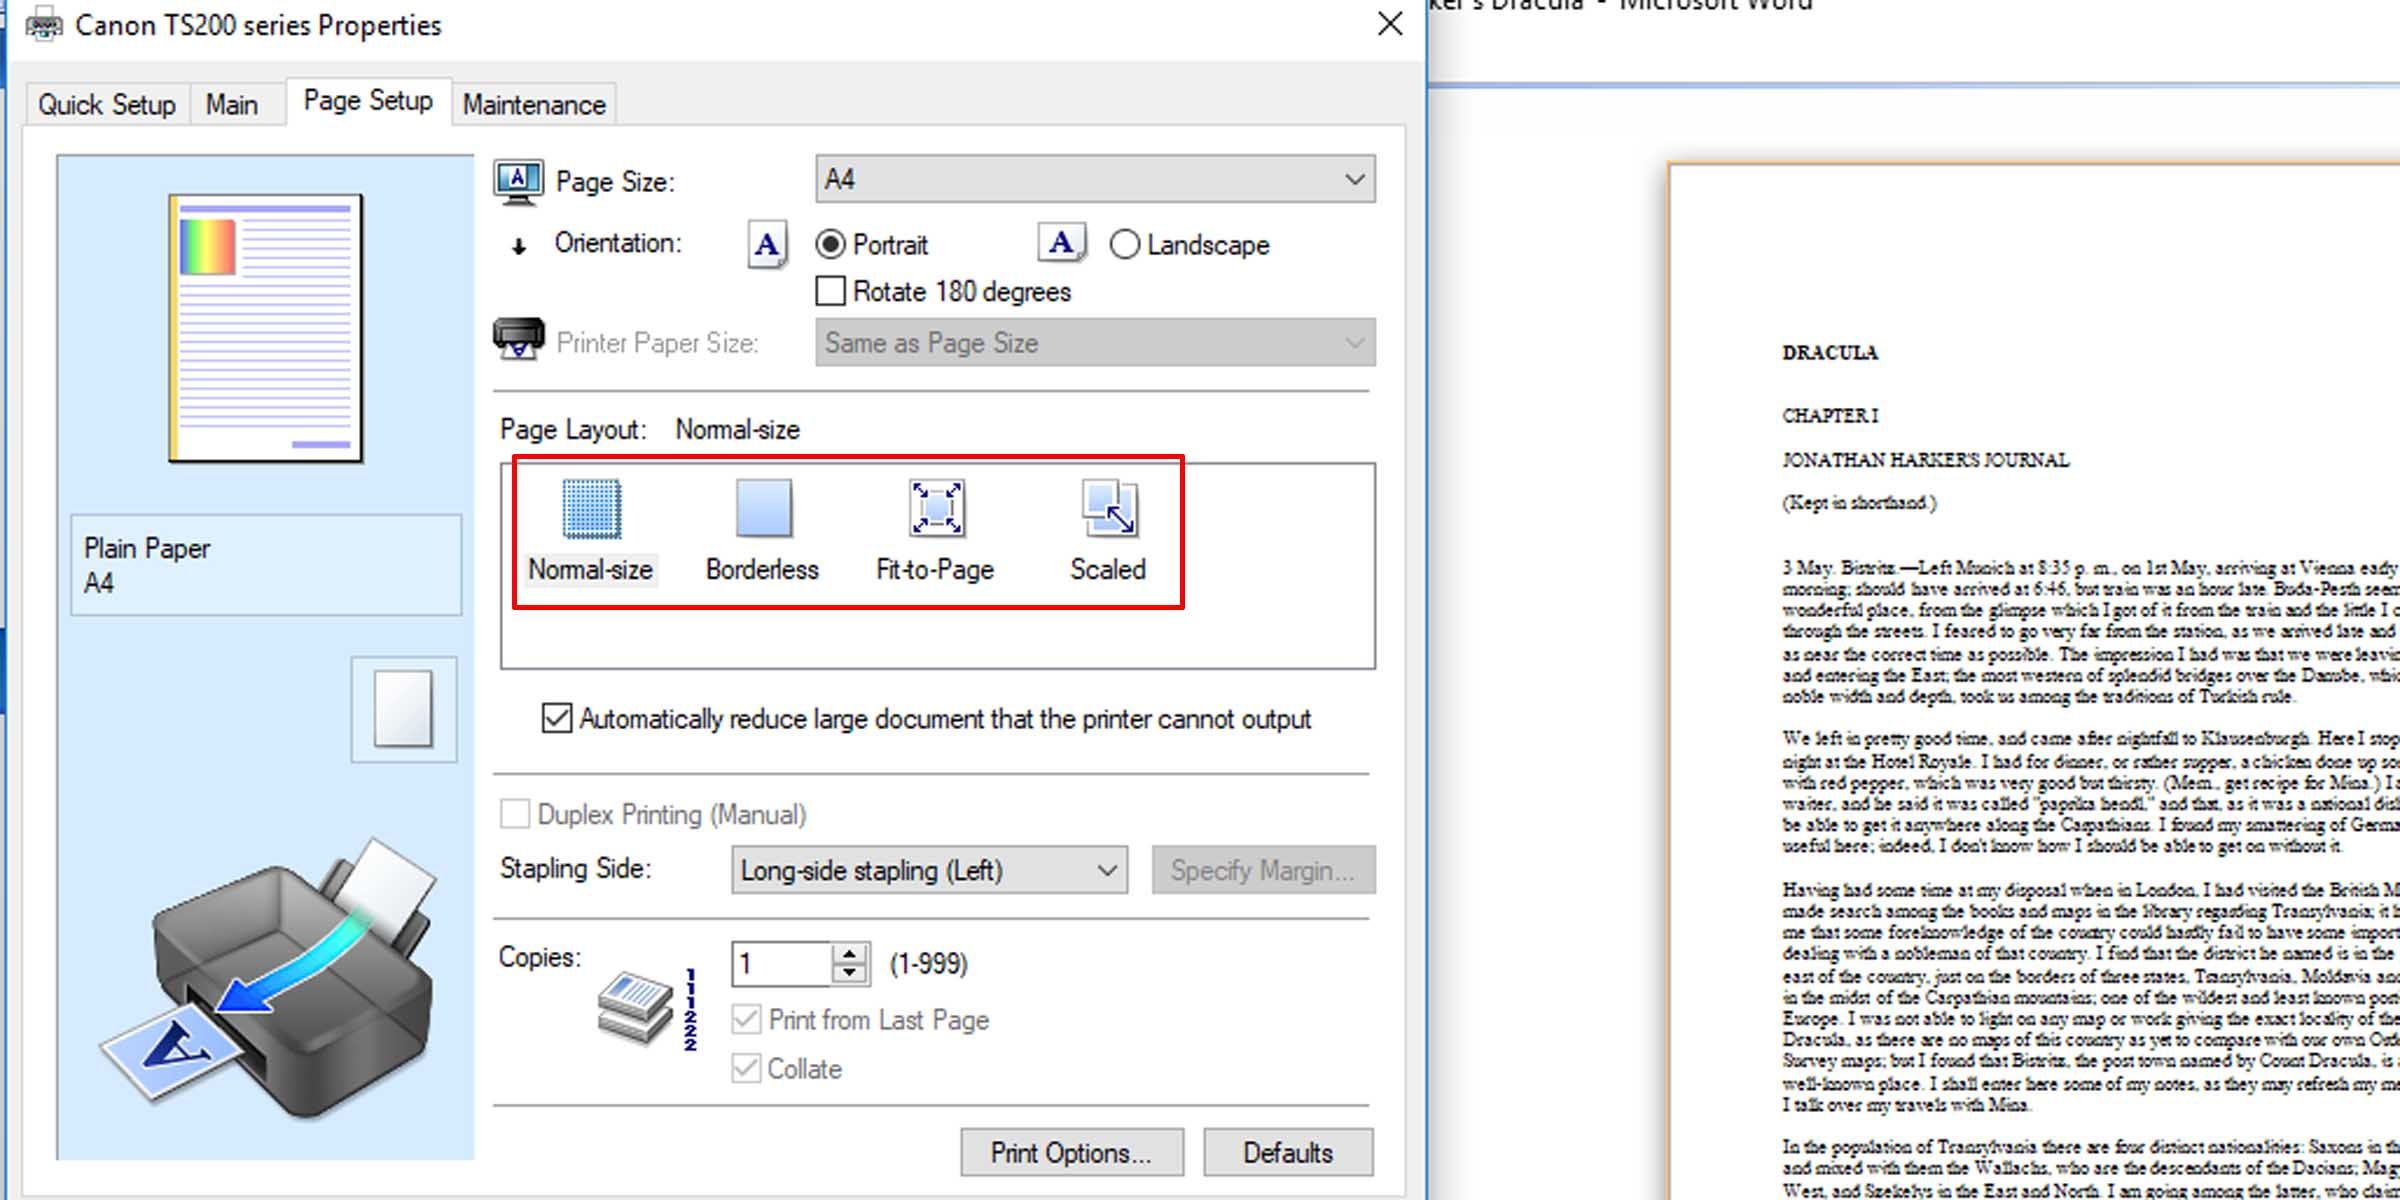
This should make the pages print at full size, with text and any graphics filling the entire page.
6. Check for Hidden Text
Microsoft Word affords the option of hiding text on the page. The hidden text has the same properties as formatting marks, which are characters that take up space in a document but don’t appear when printed, such as spaces, line breaks, and tab characters.
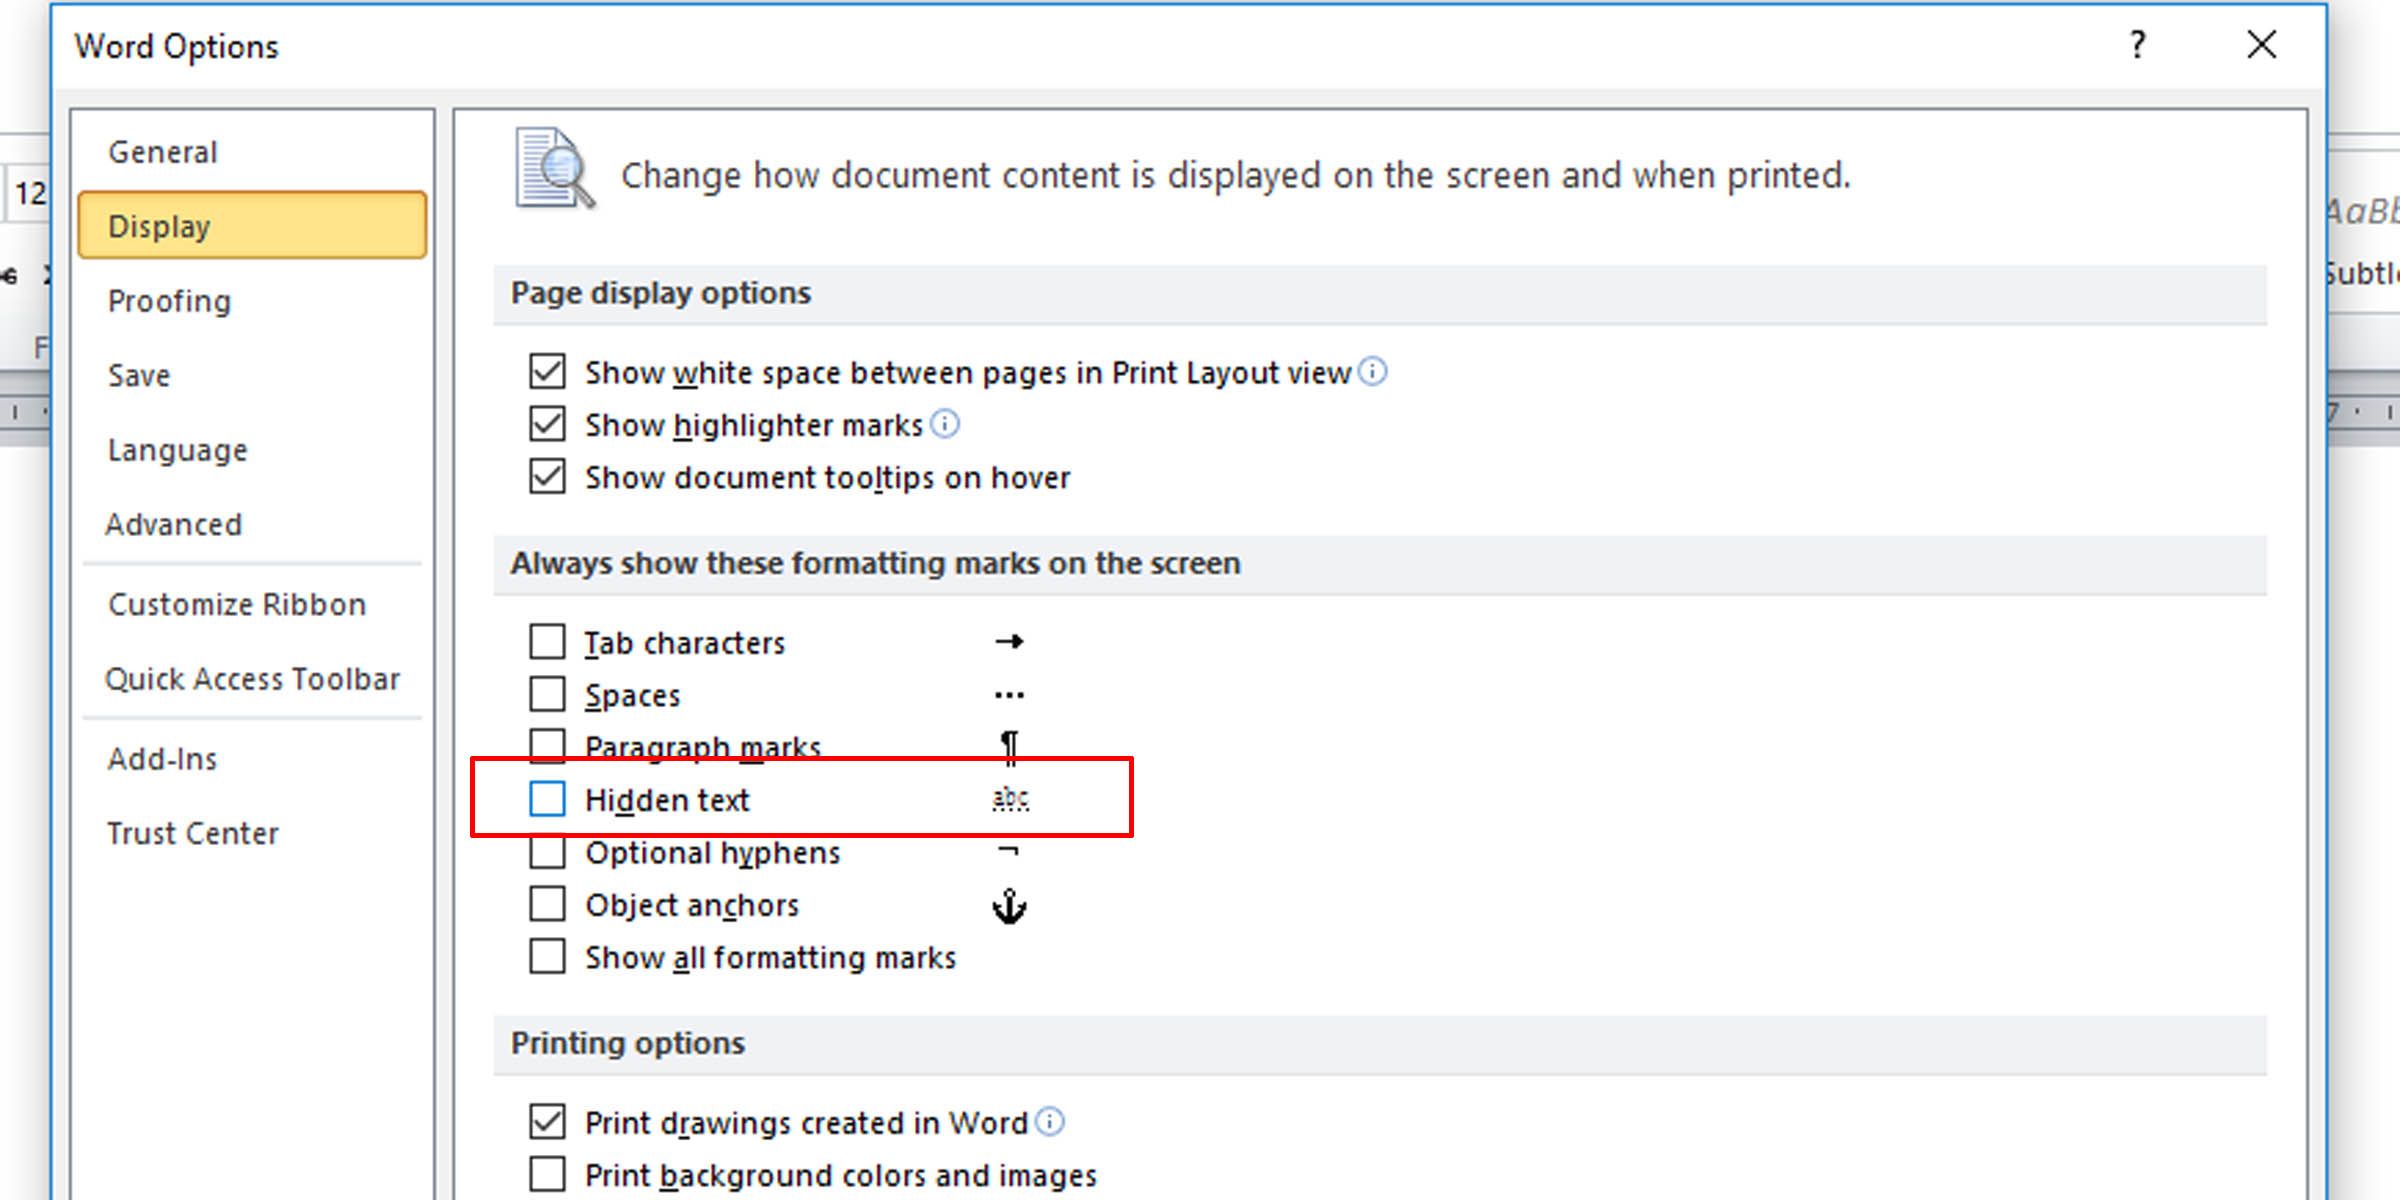
If your prints are missing part of your soft copy text, here’s how to check whether you have text hidden in the document.
- In the Word document you want to check, click on File > Options.
- Under the Display tab, make sure the Hidden text option in unchecked.
-

Print the document to see if this fixes the problem.
This informative article gives more background on non-printing or invisible characters in word processors.
7. Check Form Data Print Options
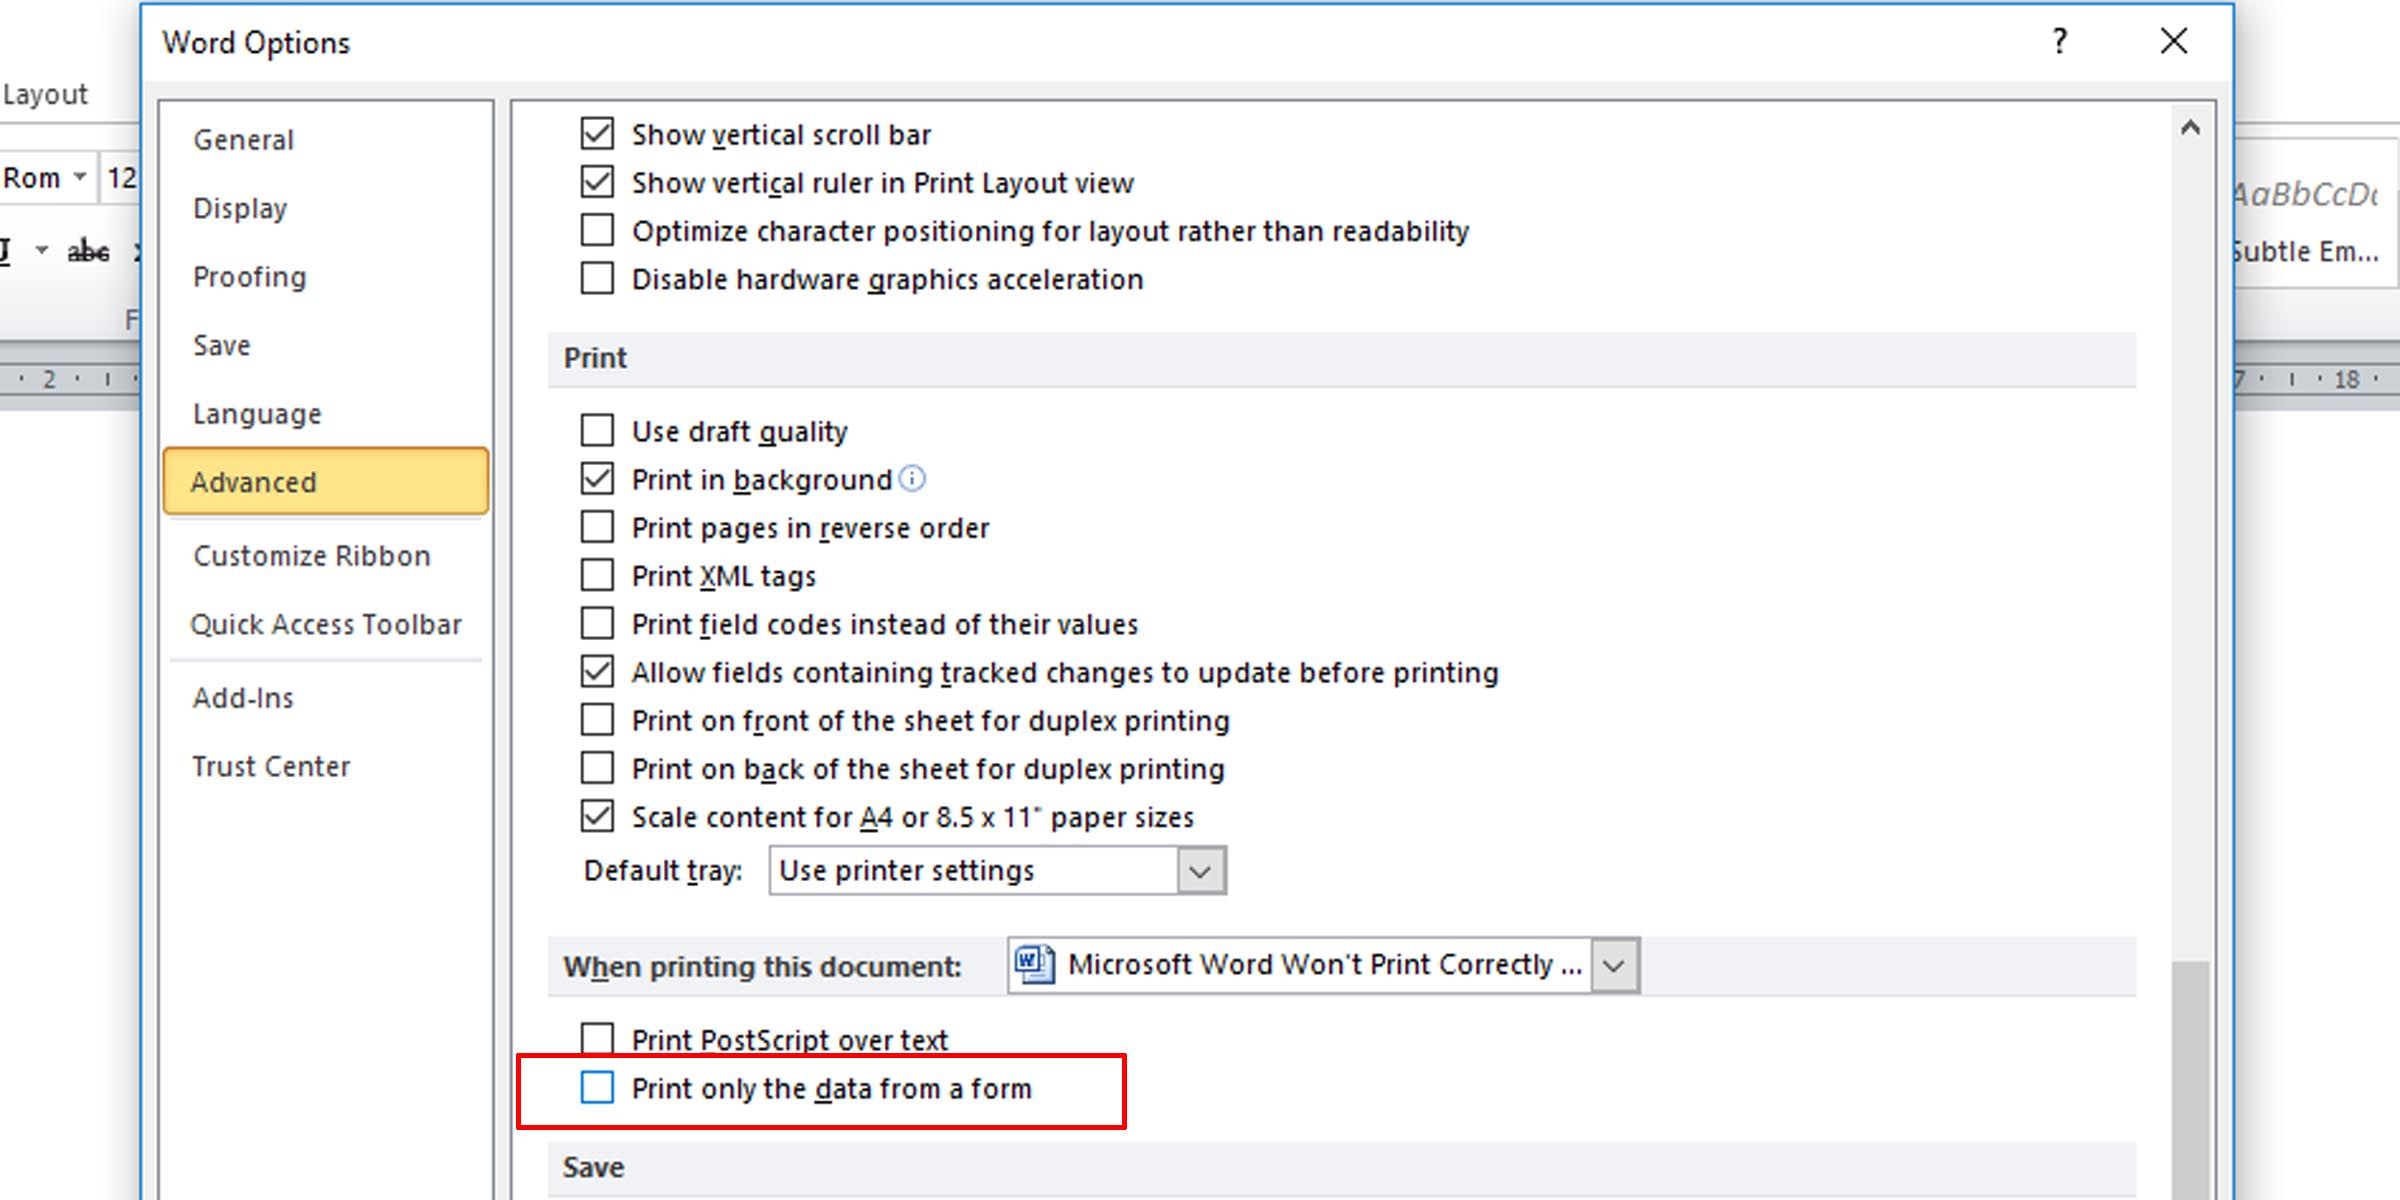
A not-so-common occurrence is table borders not showing up in final prints. This can be easily remedied.
- In the Word document, go to File > Options.
- Under the Advanced tab, scroll down to the Print section.
- Make sure that the checkbox for printing only the data from a form is unchecked.
8. Print Directly to the Printer
Some errors when printing Microsoft Word documents causes pages to have only portions of text. This might be because of a spooling issue.
- Open the Control Panel app.
- Click on the option for devices and printers.
- Right-click on your printer and select Printer properties.
- Under the Advanced tab, select Print directly to the printer.
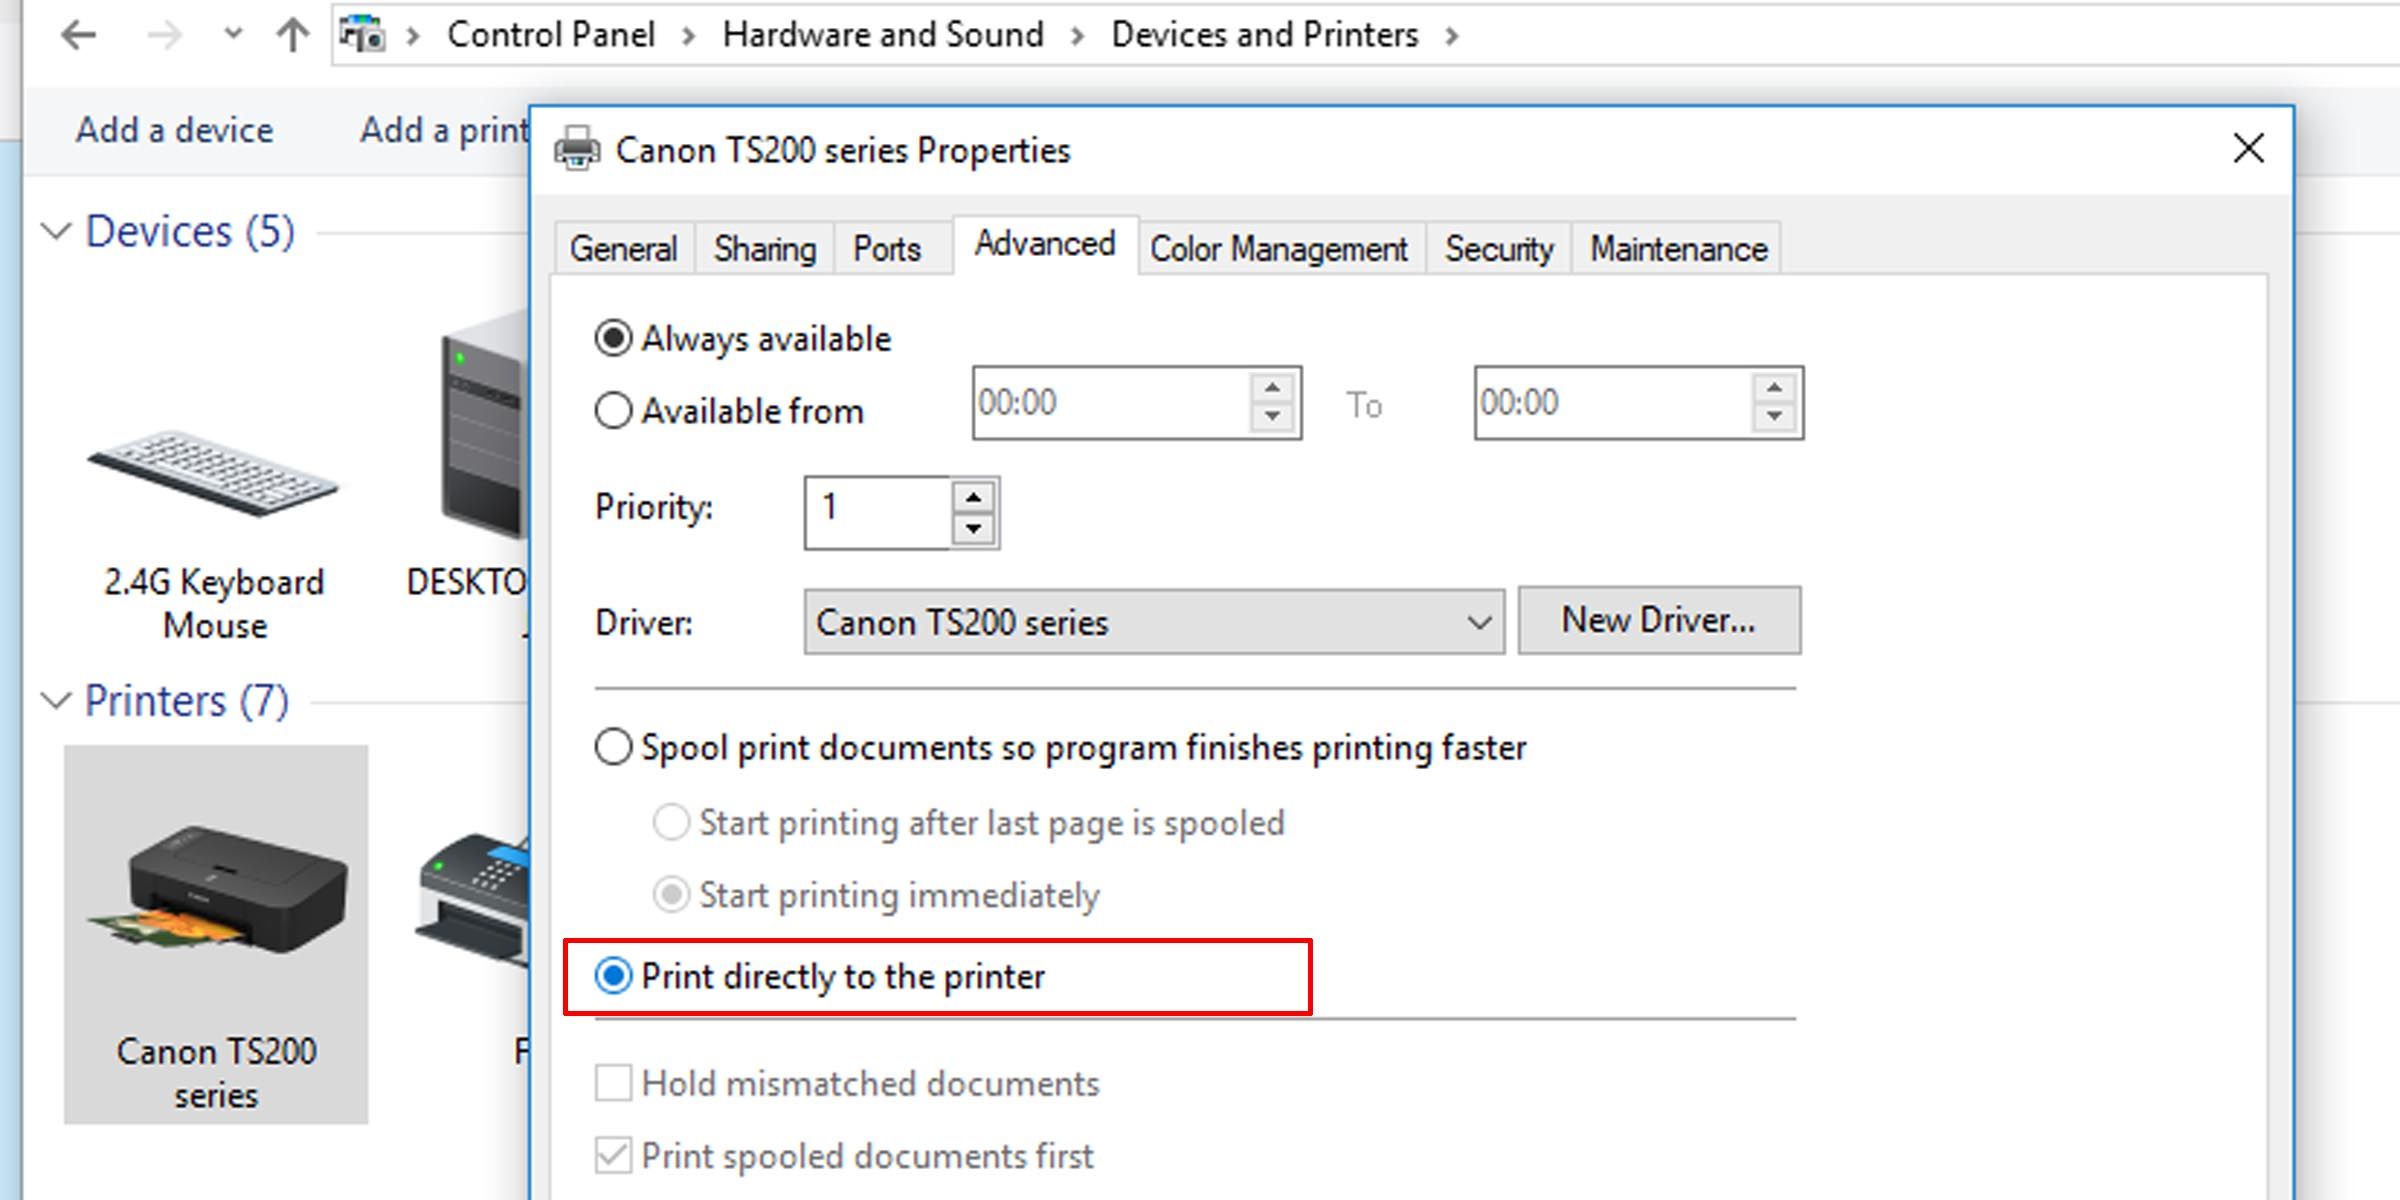
If your computer is connected directly to a printer, you don’t need the spool print option turned on. However, turning it off may slow down your PC when printing.
9. Repair Microsoft Office Suite
If you’ve tried all these potential fixes for Microsoft Word not printing properly and the issue persists, repairing your copy of Microsoft Word might solve the problem. To detect problems and repair Word on your Windows PC, do the following:
- Click on the Start menu and type «control panel.”
- Click on the Uninstall a program option under the Program heading in Category view, or the Programs and Features option in Icon view.
- Search for your Microsoft Office suite or Word program; right-click it and select Change or Modify.
- Select the Repair option and click Continue.
This will reset the settings on the 2010, 2013, 2016, and 2019 editions of Microsoft Word.
Get Printing Again
Hopefully, one of these troubleshooting tips should serve its purpose and resolve your printing issue, and you’ll be printing error-free pages just as you see them on your computer.