
Word for Microsoft 365 Outlook for Microsoft 365 Word 2021 Outlook 2021 Word 2019 Outlook 2019 Word 2016 Outlook 2016 Word 2013 Outlook 2013 Word 2010 Outlook 2010 Word 2007 Outlook 2007 More…Less
To set or change table options in Word or Outlook, right-click a table and choose Table Properties.
Note: If you want to set properties for a particular row, column, or cell, click in that row, column, or cell before making changes in the Table Properties dialog box.
In this article
-
Table properties
-
Row properties
-
Column properties
-
Cell properties
-
Alt text
Table properties

Click the Table tab to apply settings to your entire table:
-
Under Size, set the table’s overall width by selecting Preferred width and choosing a size. In the Measure in box, choose whether you want to measure the width in inches or a percentage of the page.
-
Under Alignment, choose whether you want to align your table to the left, center, or right of page. If you select Left, you can select an indentation distance in the Indent from Left box.
-
Under Text wrapping, select Around if you want nearby text on your page to wrap around your table; you can make text wrapping more precise by clicking Positioning, and then choosing options in the Table Positioning dialog box. If you don’t want text wrapping, select None.
-
Click Borders and Shading to change the border style, line color, and line width of your table.
-
Click Options to set more table properties, including top and bottom cell margins, cell spacing, and automatic resizing of cell contents.
Top of Page
Row properties
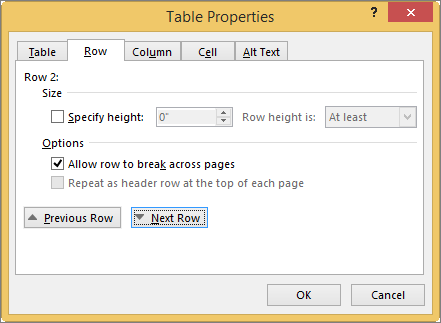
First, click in the row or select the rows you want to change, right-click, choose Table Properties, and then click the Row tab.
-
Under Size, set the row’s height by selecting Preferred height and choosing a size; you can further refine the height by selecting an option in the Row height is box.
-
Under Options, select options for breaking rows across pages or creating header rows.
-
To display the currently selected row at the top of the tab and navigate between rows without leaving the Table Properties dialog box, click Previous Row or Next Row.
Top of Page
Column properties
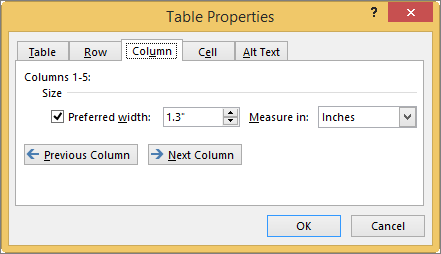
First, click in the column or select the columns you want to change, right-click, choose Table Properties, and then click the Column tab.
-
Under Size, set the column’s width by selecting Preferred width and choosing a size. In the Measure in box, choose whether you want to measure the width in inches or a percentage.
-
To display the currently selected column or columns at the top of the tab and navigate between columns without leaving the Table Properties dialog box, click Previous Column or Next Column.
Top of Page
Cell properties
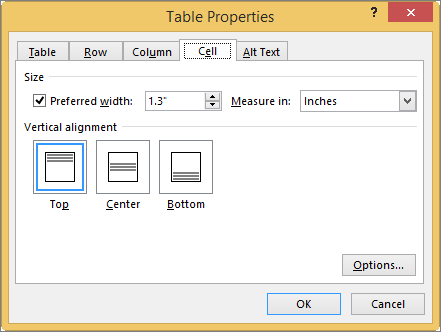
First, click in the cell that you want to change, right-click, choose Table Properties, and then click the Cell tab.
-
Under Size, set the cell’s width by selecting Preferred width and choosing a size. In the Measure in box, choose whether you want to measure the width in inches or a percentage.
-
Under Vertical alignment, choose an alignment option for the cell contents—Top (the default alignment), Center, or Bottom.
-
Click Options to set more cell properties, including top and bottom cell margins and text wrapping and fit options.
Top of Page
Alt text
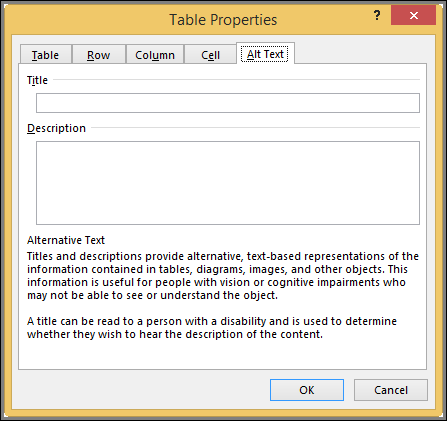
You can create alternative text (alt text) for your table to help people with screen readers understand the content of the table.
-
In the Description box, enter an explanation of the table.
-
In the Title box, enter a brief summary of the table.
Note: Unless you have a complex table, you will usually want to enter text in just the Description box. When you have complex content to describe, filling in the Title field is useful so that reading the full description is not necessary unless desired.
Top of Page
Need more help?
Tables in Word are useful in so many situations. In this post you’ll discover how to create tables, then manipulate and design them in the quickest and easiest way to provide that visual punch.
Clickable Table of Contents
Enhance your Word tables with these advanced features
1. What are tables in Word good for?
Tables are useful for 2 distinct reasons.
- To show an actual table of data, or
- To organise and postion text, images and other elements on the page.
Many years ago, typewriters ruled the world. And a feature of a good typewriter was the tab stop, which was a device that essentially let you control indentation.
Over the years many people have continued to use tabs to indent text, because of its convenience, but they are hard work to set up properly.
Tables provide a much easier way to organise content on a page.
1. Select the Insert tab.
2. Click the Tables icon in the Tables group.
3. Move your mouse pointer into the table grid until the required number of rows and columns are highlighted orange, then left-click.

An empty table is inserted into the document.
Two new tabs, Design and Layout are also added to the ribbon area, under the banner of Table Tools.


3. MOVING AROUND A Word TABLE
- While the table is empty, you can use the cursor keys to move around the cells. However, when the cells contain information, using the cursor keys will move through the cell content first before moving to the next cell
- You can left-click in any cell to position the cursor.
- Press Tab to move to the next cell. The cursor will move across and then down the table.
- Press Shift + Tab to move to the previous cell.

NB. Using Tab is better than using the cursors as it will move to the next/previous cell regardless of whether there is information in the cells.
NB2. If you press Tab while you are in the last cell, a new row will be added to the bottom of your table
4. SELECTING A CELL, ROW, COLUMN OR THE ENTIRE TABLE
To select a cell:
1. Position the mouse pointer inside the cell on the bottom-left corner of the cell.
The pointer will change shape to a solid black arrow that points up and right.
2. Left-click.

To select a row of a table:
1. Position the mouse pointer in the left margin in line with the row you want to select.
The mouse pointer will change to a white arrow that points up and right.
2. Left-click.

To select a column
1. Position the mouse pointer so that it rests on the top border of the table, above the column you want to select.
The mouse pointer will change to a solid black arrow pointing down.
2. Left-click.

To select the entire table:
1. Position your mouse pointer over the 4-headed arrow icon situated at the top-left of the table.
2. Left-click.

5. INSERTING AN EXTRA ROW OR COLUMN
To insert an extra row:
1. Position the cursor in a cell.
2. Select the Layout tab, under the Table Tools banner.
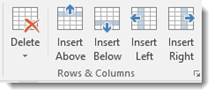
3. Click Insert Above or Insert Below in the Rows and Columns group

Here is a quick way to insert new rows:
1. Position the cursor to the left of the table, but in close proximity.
2. A plus symbol will appear above or below the mouse pointer indicating where the new row will be added.

3. Nudge the mouse pointer up or down to move the plus sign above or below.
4. Left-click to insert the new row,
To insert an extra column:
1. Position the cursor in a cell.
2. Select the Layout tab, under the Table Tools banner.
3. Click Insert Left or Insert Right in the Rows and Columns group

Here is a quick way to insert a new column:
1. Position the cursor above a column, but in close proximity to the table.
2. A plus symbol will appear to the left or right of the mouse pointer indicating where the new column will be added.
3. Nudge the mouse pointer left or right to move the plus sign to the left or the right of the column.
4. Left-click to insert the new column,

6. DELETING A ROW OR COLUMN
To delete the current row or column:
1. Position the cursor in any cell of the row you want to delete.
2. Select the Layout tab, under the Table Tools banner.
3. Click the Delete icon in the Rows and Columns group.

4. Choose Delete Row or Delete Column from the drop-down menu.
7. Quickly fORMATTING tables in Word
Word provides you with a number of pre-set table designs. This means that it formats the headings and the data, applies a variety of borders and colours the cells in a way that makes it look like a professionally produced table. As a beginner this simple technique will give you a good-looking table.
1. Position the cursor in any cell in the table.
2. Select the Design tab under the Table Tools banner.
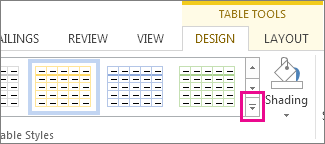
The Table Styles group lists a number of table designs. To get the full list, click the More button beneath the table styles scroll bar
The default table style is Table Grid in the Plain Tables category which adds simple gridlines but no shading to your table.
Live Preview allows you to hover over a design and see it applied to your table. If you like what you see, click to select the table design.

In the Table Style Options group of the Design tab, tick the components that you have in your table. For example, if your table has column headings, tick Header Row. In doing this, the various parts of your table are formatted accordingly

Header Row
This will emphasise the header row by making the text bold or applying a different cell colour (depending on the table style selected.
Total Row
This will emphasise the bottom table row by making the text bold or applying a different cell colour (depending on the table style selected.
First Column
This will emphasise the first column (for labels etc.) by making the text bold or applying a different cell colour (depending on the table style selected.
Last Column
This will emphasise the last column (for row totals etc.) by making the text bold or applying a different cell colour (depending on the table style selected.
Banded Rows
This will make odd rows one colour and even rows a different colour. This helps readability.
Banded Columns
This will make odd columns one colour and even columns a different colour. This helps readability.
8. SETTING THE BORDERS AND SHADING
The Table Styles Gallery allows you to completely format a table with one click. Whereas you used to need some nous, anybody can now create a professional looking design.
However, you will often still need to apply your own border and shading, and manually change a table design. With a little effort can add a lot of flavour to your page and dramatically enhance the overall appearance of the document.
To set the borders for tables in Word:
1. Select the portion of the table that you wish to set the borders for. This may be the entire table, a row or rows, a column or columns or a selection of cells.
2. Select the Design tab under the Table Tools banner.
3. Select the Borders icon. A drop-down list appears. This list shows every combination of border that can be turned on or off. The icons with a shaded background are currently switched on. The rest are switched off.
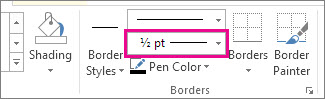
4. Click any icon to switch the border on or off. The border style that is applied is the default style (½ pt solid black line ) or the last style that was used.

5. To apply customised borders, with different colours, styles and widths, click the Borders & Shading option at the bottom of the list to display the Borders and Shading dialog box.


Your selection will always have an outer border, and if you selected more than one cell, you will have some inside borders as well. The easiest way to use the dialog box is to start on the bottom-middle and work your way up and right.
1. Select the colour and width (thickness) that you would like for your border.

2. Choose a style (e.g. dotted, dashed, double, solid etc.)

3. Paint your borders. There are two ways to do this.
- The first way is to click directly on a border in the Preview itself.
- The second way is to click the appropriate icon around the edge of the Preview section that represents each border. Depending on which cells you selected in your table, some of these icons may not be available.

On the left-hand side of the dialog box, there are some pre-defined border combinations which you can use to save yourself some time. Depending on your selection of cells, the pre-defined options may differ. Here’s a run-down:

To shade the cells of tables in Word:
1. Select the portion of the table that you wish to shade. This may be the entire table, a row or rows, a column or columns or a selection of cells.
2. Select the Design tab under the Table Tools banner.
3. Click the Shading icon.
The colours that you see displayed match the current them of the document. Themes were discussed earlier in the course.
4. Click a colour in the palette.
While you can pick any colour, it is recommended to stick with the light colour shades, otherwise your tables will appear very loud and ugly, like they’re shouting in your face. Subtle is the order of the day. The exception to this is column headings or other cells that you wish to differentiate. Under these circumstances, you can use a dark colour, but use a light font with it.

If you cannot find the exact colour you need,
- Click the More Colours link underneath the palette. This displays a larger, more accurate colour palette.
- And if that’s not enough, click the Custom tab and you’ll get a really fine selection of colours (you can even enter your own RGB settings if you know them)

9. REPEATING table HEADINGS ON EVERY PAGE WHEN PRINTING
When you have large tables that occupy two or more pages, many people insert manual page breaks, then copy and paste their table header rows at the top of each page.
When rows are added or removed from tables in Word, the table headers end up half way down the page.
There is a simple tool that will eliminate this problem
1. Ensure that the table is a single table, with no manual page breaks in the middle, and one header at the top. The table header may occupy more than one row, it doesn’t affect the way this feature works.
2. Position the cursor somewhere in the top row of the table.
3. Select the Layout tab under the Table Tools banner.
4. Click the Repeat Header Rows icon ion the Data group.

Now, it doesn’t matter how many rows tables in Word contain, if the table ever spills across into another page, the header row (which normally displays the column headings) will always appear at the top of the table.
10. All the key points again
- Tables in Word serve 2 distinct purpose: to display a table of data and to organise and position items on the page
- To create table, select 2 tabs — Design and Layout under the Table Tools banner.
- There are 2 tabs — Design and Layout under the Table Tools banner.
- You can press the TAB key to move direct to the next cell and SHIFT and TAB together to move backwards through a table.
- The four elements of a table are cells, rows, columns and the whole table. Each can be selected.
- Rows can be inserted by selecting the Layout tab under Table Tools, then clicking the Insert Above or Insert Below icons. Alternatively, hover to the left of a row and click the plus symbol that appears above or below the mouse pointer.
- Columns can be inserted by selecting the Layout tab under Table Tools, then clicking the Insert
Left or Insert Right icons. Alternatively, hover above a table column and click the plus symbol that appears to the left or right of the mouse pointer. - Columns and rows and be removed from the table, by positioning the cursor in the row or column to be removed, then clicking the Delete icon on the Layout tab of Table Tools and choosing Delete
Row or Delete Column. - Tables can be formatted using the Table Style gallery or by manually setting the shading and borders manually. Both sets of tools are found on the Design ribbon of the Table Tools.
- When using the Microsoft Table Styles, you can control the behaviour of the formatting by setting the Table Style options – 6 tick boxes that define the structure of your table.
- For long tables that spill across onto subsequent pages, the top row, which normally contains the column headings can be set to repeat automatically. So there is no excuse for cutting and pasting headings midway through your table or taping pages together to make sense of the table!
I hope you found plenty of value in this post. I’d love to hear your biggest takeaway in the comments below together with any questions you may have.
Have a fantastic day.


About the author
Jason Morrell
Jason loves to simplify the hard stuff, cut the fluff and share what actually works. Things that make a difference. Things that slash hours from your daily work tasks. He runs a software training business in Queensland, Australia, lives on the Gold Coast with his wife and 4 kids and often talks about himself in the third person!
SHARE
 Please Note:
This article is written for users of the following Microsoft Word versions: 2007, 2010, 2013, 2016, 2019, and Word in Microsoft 365. If you are using an earlier version (Word 2003 or earlier), this tip may not work for you. For a version of this tip written specifically for earlier versions of Word, click here: Setting a Default Table Border Width.
![]()
Written by Allen Wyatt (last updated August 28, 2021)
This tip applies to Word 2007, 2010, 2013, 2016, 2019, and Word in Microsoft 365
When you insert a table in Word, a border is automatically created for each cell in the table. This border is a single line, one-half point in weight. Unfortunately, Word provides no way for you to change the default line width you use when creating the table. While it is true you can pick a line width in the Borders and Shading dialog box, this weight is reset to one-half point when you insert a new table.
If you want some other line width, such as three-quarters of a point, you have a problem. You must manually select any new table and format the borders, so they are the desired width. If you work with lots of tables, this can quickly become a hassle. You could, of course, create a table style, but applying a table style can give uneven results if all you want to do is change the line width or if you are working with a document where there has been a lot of explicit formatting applied to the tables.
Perhaps the best way around this problem is to write a macro. Even though this may not be the most ideal solution, it certainly is easier than manually changing every table in the document.
The following macro, FixCellBorders, steps through every cell in every table in your document and makes sure the minimum line weight is three-quarters of a point. It does this by checking out the current line settings, and then making the adjustment only if necessary.
Sub FixCellBorders()
   On Error Resume Next
    ' Work through all tables in document
    For Each objTable In ActiveDocument.Tables
        ' Work through all cells in each table
        For Each objCell In objTable.Range.Cells
            ' Work through all borders in each cell
            For Each objBorder In objCell.Borders
                ' Check if line weight is less than 0.75 pt
                If objBorder.LineWidth = wdLineWidth025pt _
                  Or objBorder.LineWidth = wdLineWidth050pt Then
                    ' too thin, change it
                    objBorder.LineWidth = wdLineWidth075pt
                End If
            Next objBorder
        Next objCell
    Next objTable
End Sub
As you can imagine, the macro is not terribly fast since it looks at all four borders for every cell in every table of your document. The advantage, however, is that the macro will only modify the weight of any cell border that is at one-quarter or one-half point. This means that any manual formatting you have done for different line widths will not change.
If you are looking for a bit faster macro, the following (FixTableBorders) will do the trick. Instead of looking at individual cells, it works on entire tables. The difference, however, is that it resets every border of every table to three-quarters of a point, using a single line. If this fits your needs, however, it is definitely the easier (faster) way to go.
Sub FixTableBorders()
   On Error Resume Next
    For Each objTable In ActiveDocument.Tables
        With objTable
            With .Borders(wdBorderLeft)
                .LineStyle = wdLineStyleSingle
                .LineWidth = wdLineWidth075pt
            End With
            With .Borders(wdBorderRight)
                .LineStyle = wdLineStyleSingle
                .LineWidth = wdLineWidth075pt
            End With
            With .Borders(wdBorderTop)
                .LineStyle = wdLineStyleSingle
                .LineWidth = wdLineWidth075pt
            End With
            With .Borders(wdBorderBottom)
                .LineStyle = wdLineStyleSingle
                .LineWidth = wdLineWidth075pt
            End With
            With .Borders(wdBorderHorizontal)
                .LineStyle = wdLineStyleSingle
                .LineWidth = wdLineWidth075pt
            End With
            With .Borders(wdBorderVertical)
                .LineStyle = wdLineStyleSingle
                .LineWidth = wdLineWidth075pt
            End With
        End With
    Next objTable
End Sub
If you would like to know how to use the macros described on this page (or on any other page on the WordTips sites), I’ve prepared a special page that includes helpful information. Click here to open that special page in a new browser tab.
WordTips is your source for cost-effective Microsoft Word training.
(Microsoft Word is the most popular word processing software in the world.)
This tip (13081) applies to Microsoft Word 2007, 2010, 2013, 2016, 2019, and Word in Microsoft 365. You can find a version of this tip for the older menu interface of Word here: Setting a Default Table Border Width.
Author Bio
With more than 50 non-fiction books and numerous magazine articles to his credit, Allen Wyatt is an internationally recognized author. He is president of Sharon Parq Associates, a computer and publishing services company. Learn more about Allen…
MORE FROM ALLEN
Find and Replace in Headers
Using Find and Replace is something quite routine in Excel, as it easily allows you to find and replace information in …
Discover More
Losing Data in a Shared Workbook
When you create a shared workbook, you run the risk of losing some of the data in that workbook. Here’s a discussion …
Discover More
Understanding Font Styles
Fonts, by default, come with one or more styles that define variations of how that font is displayed in your document. …
Discover More
Select the table
- Using the mouse: Move the mouse over the table until you see the table selection icons in the upper-left corner of the table and click it:

Note: You can also click on the table selection icon in the bottom-right corner (resizing handle) for the same effect.
- Using the keyboard: To select table elements, on the Table Layout tab, on the Table group, click the Select button, then select the option you prefer:

- Select Cell
- Select Column
- Select Row
- Select Table
Format the table
After positioning the cursor anywhere in a table or selecting a table element, Word shows two tabs: Table Design and Layout. E.g.:

See also Select and format table elements in Word.
Apply a predefined Table style
There are several predefined styles you can use for the table. Styles include a variety of borders, colors, and other attributes that give a table a very professional appearance.
To choose any of the predefined styles, do the following:
1. Select the table.
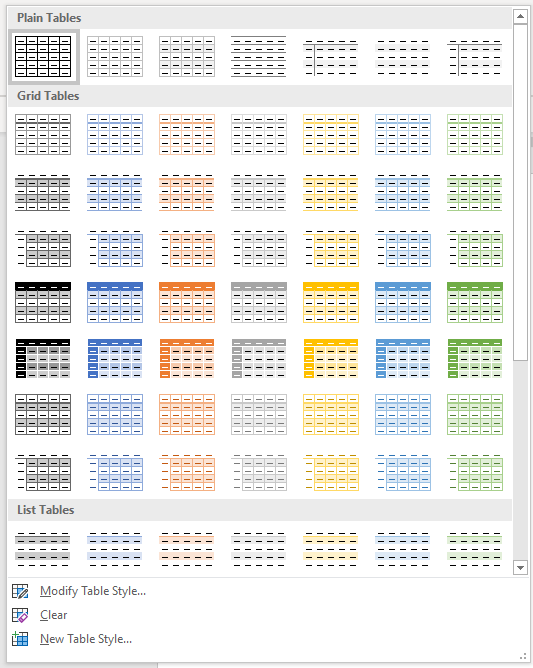
2. On the Table Design tab, in the Table Styles group, in the Styles Gallery, click the More arrow to see the complete list of styles:

3. Select the table style you want:

The Table Styles gallery includes three categories of styles:
- Plain Tables have minimal formatting.
- Grid Tables include vertical separators between columns.
- List Tables do not include vertical column separators:

Note: The selected style overrides any previously added style changes for the table.
Modify the table style options
To change the table or selected style, on the Table Design tab, in the Table Style group, click Modify Table Style…:

In the Modify Style dialog box, make changes you want:

Note: Click the Format button at the bottom of the dialog box to change other options such as Font or Paragraph. See also how to clear formatting.
Customize the table formatting
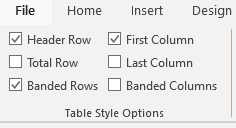
After applying a table style, you can turn various options on or off to change their appearance. On the Table Design tab, in the Table Style Options group, there are six options:

- Header Row is the first row of the table that contains Headers that helps identify the contents of a particular column. Usually, the Header Row is formatted differently and should be repeated at the beginning of each new page for tables that extend beyond one page.
Note: According to most requirements, data tables should have a header row to provide a contextual structure that aids navigation.
- Total Row is the last row of the table. If this option is selected, the last row will be formatted differently from the body rows, designed to summarize the rows above it (see how to insert formulas).
- First Column used special formatting to the column. Usually, the First Column contains the row headings.
- Last Column applies special formatting to the column to summarize the earlier columns (see how to insert formulas).
- Banded Rows and Banded Columns alternate the background color of rows and columns (see how to change the background color for the selected cells below).
Note: Certain Table Style Options may have a different effect depending on the Table Style you’ve chosen. You might need to experiment to get the look you want.
Apply the border styles
To apply and remove cell borders, do the following:
1. Select the cells or entire table to which you want to add a border.
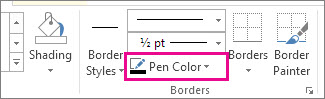
2. On the Table Design tab, in the Borders group, choose the desired Border Styles, Line Style, Line Weight, and Pen Color:

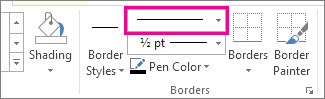
- Select the predefined Line Style, Line Weight, and Line Color from the Border Styles dropdown list:

- Select the Line Style:

- Select a border thickness from the Line Weight dropdown list:

- Select the border color from the Pen Color dropdown list:

- Select the borders from the Borders dropdown list:

Note: Select No Borders from the Borders dropdown list to remove borders from the selected cells.
- Draw the border where you want:
- After selecting border style or color, the Border Painter button is automatically checked, or
- If all that you want is selected already, just click the Border Painter button by yourself:

After any of these actions, your cursor changes to the brush. Now, draw the border where you need it:

Note: Use the Eraser button in the Draw group on the Table Layout tab to remove the unnecessary border:


Apply background colors and shading
To change the background color for some table elements, select them, then on the Table Design tab, in the Table Styles group, click the Shading button, then select the background color you prefer:

Note: To use a pattern instead of a solid color, on the Table Design tab, in the Borders group, click the dialog box launcher:

In the Borders and Shading dialog box, on the Shading tab, select a pattern in the Style list:

Layout of the table
The Table Layout tab includes commands for changing the entire table format, as well as commands for changing the appearance of individual table components such as cells, columns, rows:

See Select and format table elements in Word for more details.
Resize a table
- Using the mouse: To resize a table in a Word document, move the mouse over the table until you see the table resizing icons (handle) in the bottom-right corner of the table and click it:

Drag the table to the size you need, and then release the handle.
- Using the keyboard: Select a table (see also how to resize individual cells, specific rows, or columns); the do one of the following:
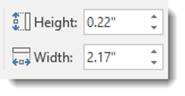
- On the Layout tab, in the Cell Size group, change the values in the Height and Width fields:

- Open the Table Properties dialog box by doing one of the following:
- On the Table Layout tab, in the Table group, click the Properties button:

- Right-click the table and select Table Properties… in the popup menu:

In the Table Properties dialog box, on the Table tab, in the Size section, select the Preferred width check box, then:
- In the Preferred width field, type or select the value you need,
- In the Measure in dropdown list, select one of the items:
- Percent to specify the percentage of the table width,
- Inches to fix the column width:

- On the Table Layout tab, in the Table group, click the Properties button:
- On the Layout tab, in the Cell Size group, change the values in the Height and Width fields:


See how to resize table elements for more details.
Freeze the table
Some Word tables change the width of their columns according to the data. To stop changing the table size when new data is inserted, do the following:
1. Select the table.
2. Open the Table Properties dialog box.
3. In the Table Properties dialog box, on the Table tab, click the Options… button:

4. In the Table Options dialog box, deselect the Automatically resize to fit contents check box:

See also how to fix the height of table rows.
Move a table
To move a table to a new page or a new document, select it, then use the Cut and Paste commands. You can also use the Copy command to leave a copy of the table in the original location.
Depending on the program you’re using, you can add a border to a table by using the Border Styles gallery, you can apply a pre-designed table style, or you can design your own custom border.
Word
Use the Border Styles gallery to add a border
The quickest way to add borders in Word is from the Border Styles gallery.
-
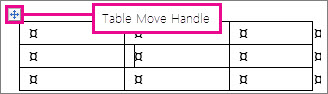
Click in the table, and then click the Table Move Handle to select the table.

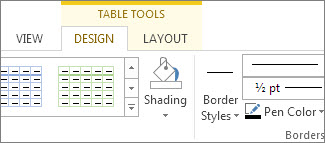
The Table Tools Design tab appears. (In Office for Mac, the Table Design and Layout tabs appear. Click the Table Design tab.)
-
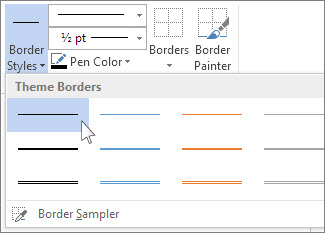
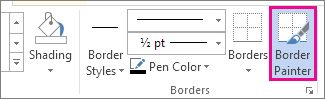
Click Border Styles and choose a border style.
-
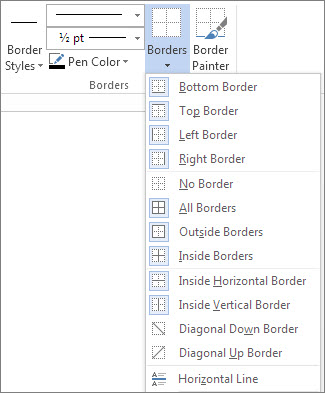
Click Borders and choose where you want to add the borders.
Tip: To change or add borders for part of your table, check that Border Painter is selected and then, in the table, click each border that you want to change or add. Word applies the border style you’ve already chosen, and you don’t need to select the table first.
Use a table style to add a border
Applying a pre-designed table style is another quick way to make your table stand out. Table styles add coordinating borders, shading, and text formatting.
-
Click inside a table, and then click the Table Tools Design tab (the Table Design tab in Office for Mac).
-
In the Table Styles gallery, click a table style. To see more gallery styles, click the More arrow. (This arrow appears below the gallery in Office for Mac.)
Add a custom border
To design your own custom border, choose the color, width, line style, and where you want to apply the borders.
-
In Word or Outlook, click in the table, and then click the Table Move Handle to select the table.
In PowerPoint, click anywhere on the outside border of the table to select it. (The Table Move Handle does not appear in PowerPoint.)
-
Click the Table Tools Design tab (the Table Design tab in Office for Mac).
-
Design your border.
Click Line Style (Pen Style in PowerPoint) and choose a style.
Click Line Weight (Pen Weight in PowerPoint) and choose the border width you want.
Click Pen Color and choose a color.
-
Click Borders and choose the borders you want.
Tip: To change or add borders for part of your table, check that Border Painter is selected and then click each border in the table. Word adds a border in the style, width, and color you’ve already chosen, and you don’t need to select the table first.
PowerPoint
Use a table style to add a border
Applying a pre-designed table style is a quick way to make your table stand out. Table styles add coordinating borders, shading, and text formatting.
-
Click inside a table, and then click the Table Tools Design tab (the Table Design tab in Office for Mac).
-
In the Table Styles gallery, click a table style. To see more gallery styles, click the More arrow. (This arrow appears below the gallery in Office for Mac.)
Add a custom border
To design your own custom border, choose the color, width, line style, and where you want to apply the borders.
-
In Word or Outlook, click in the table, and then click the Table Move Handle to select the table.
In PowerPoint, click anywhere on the outside border of the table to select it. (The Table Move Handle does not appear in PowerPoint.)
-
Click the Table Tools Design tab (the Table Design tab in Office for Mac).
-
Design your border.
Click Line Style (Pen Style in PowerPoint) and choose a style.
Click Line Weight (Pen Weight in PowerPoint) and choose the border width you want.
Click Pen Color and choose a color.
-
Click Borders and choose the borders you want.
Tip: To change or add borders for part of your table, check that Border Painter is selected and then click each border in the table. Word adds a border in the style, width, and color you’ve already chosen, and you don’t need to select the table first.
You can add custom borders in Word or PowerPoint.
Word
Add borders to a whole table or to selected table cells
-
Click the table or select the cells to which you want to add borders.
-
On the Tables tab, under Draw Borders, click Borders, and then click the borders that you want.
Add or change the line style
-
Click the table or select the cells where you want to add or change borders.
-
On the Tables tab, under Draw Borders, on the Line Style pop-up menu, click the line style that you want.
-
On the Tables tab, under Draw Borders, click Borders, and then click the borders that you want.
Add or change the line width
-
Click the table or select the cells where you want to add or change borders.
-
On the Tables tab, under Draw Borders, on the Line Weight pop-up menu, click the line weight that you want.
-
On the Tables tab, under Draw Borders, click Borders, and then click the borders that you want.
Remove a border
-
Click the table or select the cells in which you want to remove borders.
-
On the Tables tab, under Draw Borders, click Borders, and then click None.
PowerPoint
Add borders to a whole table or to selected table cells
-
Click the table or select the cells to which you want to add borders.
-
On the Tables tab, under Draw Borders, click the arrow next to Borders
, and then click the borders that you want.
 , and then click the borders that you want.
Add or change the line style
-
Click the table or select the cells where you want to add or change borders.
-
On the Tables tab, under Draw Borders, on the Line Style pop-up menu, click the line style that you want.
-
On the Tables tab, under Draw Borders, click the arrow next to Borders
, and then click the borders that you want.
Add or change the line width
-
Click the table or select the cells where you want to add or change borders.
-
On the Tables tab, under Draw Borders, on the Line Weight pop-up menu, click the line weight that you want.
-
On the Tables tab, under Draw Borders, click the arrow next to Borders
, and then click the borders that you want.
Add or change the line color
-
Click the table or select the cells where you want to add or change borders.
-
On the Tables tab, under Draw Borders, click the arrow next to Line Color
, and then click the line color that you want. -
On the Tables tab, under Draw Borders, click the arrow next to Borders
, and then click the borders that you want.
 , and then click the line color that you want.
Remove a border
-
Click the table or select the cells in which you want to remove borders.
-
On the Tables tab, under Draw Borders, click the arrow next to Borders
, and then click No Border .
 .
.
By default, when you insert a table, there is a simple, black border around all the cells in the table. However, you may want to change or remove the borders, and there are a few easy ways you can do this.
NOTE: We used Word 2013 to illustrate this feature.
If you have removed all or some of the borders from your table, or you want to change the style or thickness of the borders, place the cursor in any cell in the table. The table handle displays on the upper-left corner of the table. Click on the table handle to select the entire table. If you only want to apply borders to a specific portion of the table, place the cursor in the first cell of this portion and drag over the rest of the cells you want to include in your selection.

The “Table Tools” tabs become available on the ribbon. Make sure the “Design” tab is active and click “Border Styles”. Select a border style from the drop-down box of “Theme Borders”.
Once you select a “Border Style”, the “Border Painter” tool automatically turns on.
The cursor changes to a paintbrush. Click the cursor on any cell borders to which you want to apply the chosen border style.
Once you’ve chosen a border style, you can also use the “Borders” button on the “Design” tab and select an option from the drop-down menu to apply borders to specific parts of the table or “All Borders” on the table. To remove all the borders from the table, click “Borders” and select “No Border” from the drop-down menu.
NOTE: As you move your mouse over the options in the “Borders” drop-down menu, the results of each choice are displayed on the selected table so you can see what the selected borders will look like.
NOTE: You can also access the same border options using the “Borders” button in the “Paragraph” section of the “Home” tab. Just make sure you’ve selected the part of the table to which you want to apply the borders first.
To manually customize the borders on your table, use the “Line Style” drop-down list.
Select the style of line from the “Line Style” drop-down list. Notice that there are more easily available styles using this option.
Click the “Line Weight” drop-down list (right below the “Line Style” drop-down list) and select the desired thickness for the selected line style.
Once you’ve selected the “Line Style” and “Line Weight”, click “Pen Color” and then click on a color to use that color for the selected line style.
Click the cursor on any cell borders to which you want to apply the manually chosen border style. Again, you can use the “Borders” button to apply borders to multiple parts of the table at once.
NOTE: If you want to apply borders to certain parts of the table, you don’t necessarily have to select the entire table. Simply place the cursor in any cell in the table to activate the “Table Tools” tabs and select a border style using either of the methods mentioned above. Then, click “Border Painter” on the “Design” tab and click on any cell borders to which you want to apply the selected style.
There’s a quick and easy way to apply not only borders to a table, but shading and colors as well. Make sure the cursor is in one of the cells of the tables and the “Design” tab is active. Click the down arrow (or “More” arrow button) in the “Table Styles” section.
Select a style from one of the sections (“Plain Tables”, “Grid Tables”, or “List Tables”) on the “Table Styles” drop-down list.
The borders, shading, and colors are automatically changed on the entire table to match the style you selected.
NOTE: When you use table styles, the chosen style is automatically applied to any new rows and columns you add to the table.
These methods allow you to quickly and easily customize the look of your Word tables to make them stand out.
You can also show and hide the cell gridlines on all tables in Word, freeze the size of the cells in a table, and quickly move a row in a table.
READ NEXT
- › How to Nest a Table Within a Table in Word
- › How to Create a Basic Survey in Microsoft Word
- › How to Remove Borders in Microsoft Word
- › How to Put a Border Around Text in Microsoft Word
- › How to Draw a Custom Table in Microsoft Word
- › How to Add a Border to an Entire Page in Word
- › How to Create a Table Template in Microsoft Word
- › Discord Direct Message Won’t Go Away? Here’s the Fix
In this chapter, we will discuss how to apply table borders and shades in Word 2010. Microsoft Word allows you to place a border on any or all of the four sides of a table very similar to text, paragraphs, and pages. You can also add shades to table rows and columns. This chapter will teach you how to add borders (left, right, top or bottom) around a table and how to add different shades to various rows and columns of the table.
Add Borders to Table
The following steps will help you add borders in a table cell available in Word document.
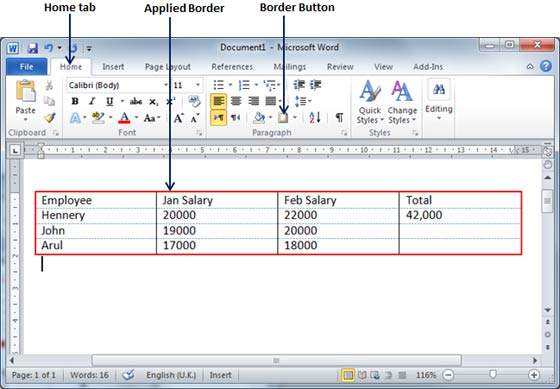
Step 1 − Select the table to which you want to add border. To select a table, click over the table anywhere which will make the Cross icon visible at the top-left corner of the table. Click this cross icon to select the table.
Step 2 − Click the Border button to display a list of options to put a border around the selected table. You can select any of the option available by simply clicking over it.
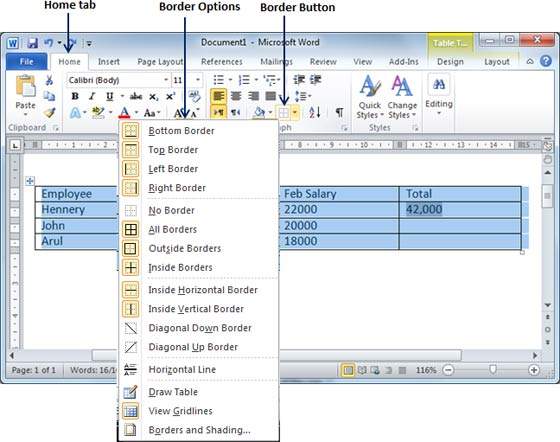
Step 3 − Try to add and remove different borders like left, right, top or bottom by selecting different options from the border options.

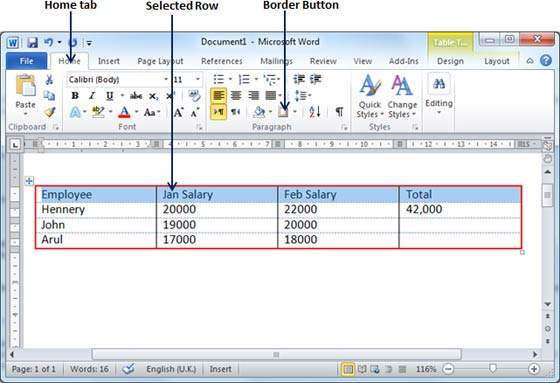
Step 4 − You can apply border to any of the selected row or column. You can try it yourself.
Step 5 − To delete the existing border, simply select the No Border option from the border options.
Using Border Options
You can add borders of your choice to word table by following the simple steps given below.
Step 1 − Click the Border button to display a list of options to put a border. Select the Border and Shading option available at the bottom of the list of options as shown in the above screenshot. This will display a Border and Shading dialog box. This dialog box can be used to set borders and shading around a selected table.

Step 2 − Click the Border tab; this will display a list of border settings, styles and options whether this border should be applied to the table or text or paragraph.
Step 3 − You can use the Preview section to disable or enable left, right, top or bottom borders of the selected table or row or column. Follow the given instructions in the preview section itself to design the border you like.
Step 4 − You can customize your border by setting its color, width by using different width thickness available under the style section.
Add Shades To Table
The following steps will help you add shades on a selected table or its rows or columns.
Step 1 − Select a row or column where you want to apply a shade of your choice.
Step 2 − Click the Border button to display a list of options to put a border. Select the Border and Shading option available at the bottom of the list of options. This will display a Border and Shading dialog box. This dialog box can be used to set borders and shading around selected row(s) or column(s).
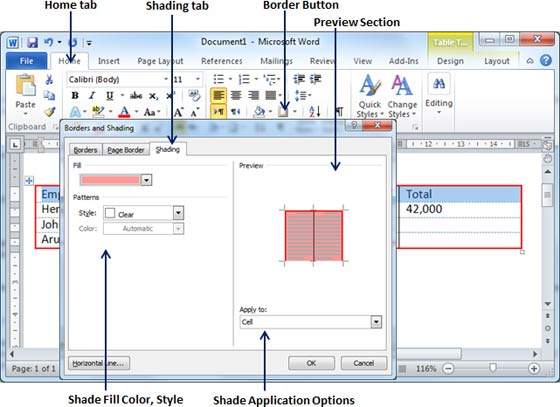
Step 2 − Click the Shading tab which will display options to select fill, color and style and whether this border should be applied to cell or table or selected portion of text.
Step 3 − You can use the Preview section to have an idea about the expected result. Once you are done, click the OK button to apply the result.
If you’ve ever seen a spreadsheet, or used a program such as Excel, then you’re probably pretty familiar with tables. That’s all tables are, after all—simply a grid arranged into columns and rows. You can use them to organize and emphasize certain pieces of information. More than that, you can use tables to do complex page layout operations that almost rival expensive professional publishing programs like Adobe InDesign.
Inserting Tables
Before we identify the different parts of a table, let’s go ahead and insert one into our document. To do this, position the cursor at the point in the document where you want to put the table. Don’t worry if it’s not exactly right—you can always move or manipulate it later.
You’ll find tables under the Insert tab in the Tables group. The Tables button looks like this:

Click the Tables button.
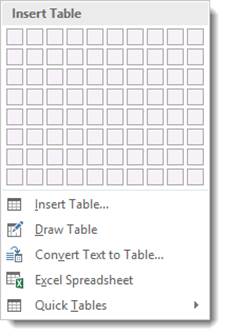
You’ll see a bunch of boxes at the top.
The easiest way to insert a table is to drag your mouse over the rows and columns until you have the amount you want.
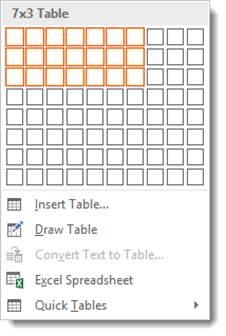
As you can see above, we dragged our mouse to make a table that has seven columns and three rows, or 7×3.
As we drag the table appears on our document:
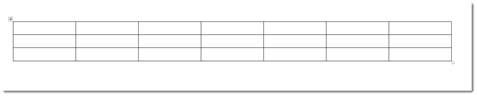
To insert this simple table, click the mouse.
We now have a basic table.
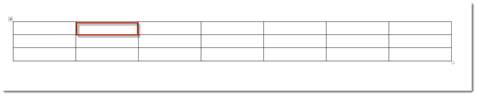
Let’s identify the parts.
Each box that you see in a table is called a «Cell.» There are 21 cells in the table above. We have highlighted a cell in the snapshot below.
The «Rows» go from top to bottom. There are three rows. Rows go horizontally across the screen.
Columns go from left to right. There are seven columns above. Columns are vertical.
So now that we’ve identified the parts of a table, let’s take a look at the other ways in which we can add them.
Using the Insert Table Dialogue
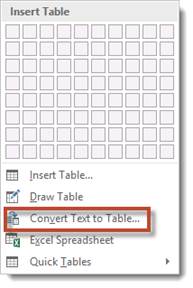
Once again, we’re going to move the cursor to the point in the document where we want the table to appear. Now go back to the Insert tab, click the Table button, and select «Insert Table» instead of dragging your mouse over the boxes (which really represent cells, as we learned a second ago.)
A dialogue launches in the center of your screen. It looks like this.
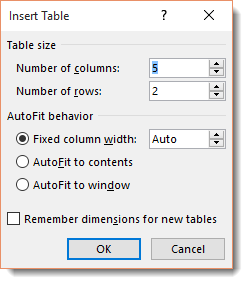
From here you can select the number of rows and columns. In this example, there are going to 5 columns, and 2 rows. Select your preferences in the AutoFit behavior section. You can set a fit column width, make the width of the cells and table fit to the content, or make the table size fit to the window.
Click OK.
Drawing a Table
If you know your table is not going to be uniform (regularly sized columns and rows), you can «draw» a table. This is particularly helpful when using tables to create complex page layouts.
To do this, click the Table button and select Draw Table. Your mouse pointer will transform into a pencil tool and you’ll be able to draw individual cells anywhere in your document. You can even draw cells within cells.
Click and hold the left mouse button, drag the cell into the desired size and shape, and then release. It’s that simple.
Selecting parts of tables
To select part of a table, simply click inside the upper left cell that represents the first cell you want to select. Hold the left mouse button down and drag across the remaining cells you want to select.
Adding Text to a Table
Adding text to a table is as easy as clicking into a cell and then typing. You will be able to change any attributes of that text, too, and even apply a Quick Style.
Position Text within a Cell
Just like in an ordinary document, you can choose whether to center text within a cell, or whether to align it right or left, or toward the top or the bottom. Go to the Alignment group under the Table Layout tab.
To reach the Table Layout tab, click the box above the left top corner of the table. This selects the table.

The Alignment group is pictured below.
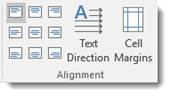
Using the graphics on the left as guides, select how you want text positioned within cell in your table.
NOTE: You can format the text position for just one cell, multiple cells (by selecting the cells), or the entire table (by selecting the table).
Converting Text into a Table
You can convert text into a table. This is especially handy if you’ve already written information that you think would be more effectively conveyed in a table.
To do this, you’ll have to carve up the text into columns and rows using commas and new paragraphs. That’s how you tell Word to separate the text into individual cells. Simply place a comma between the text you want to put into a column and place a paragraph where you want to begin a new row. An example of the text might look like this:

Now select the text, click the Tables button under the Insert tab. From the dropdown menu, choose «Convert Text To Table.»
You can now specify the number of columns, as well as how to separate text. You can separate text into cells by paragraphs, commas, tabs, etc.
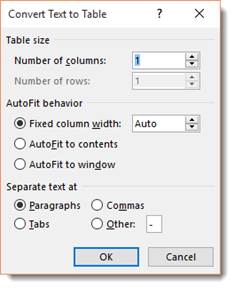
We chose two columns and to separate text at commas.
Look at the example below to see the final result.

Quick Tables
Word 2016 comes with a group of table templates for you to use and quickly customize to fit your needs. You can access them by clicking the Tables tool and choosing Quick Tables. Scroll through the templates and choose the one that best suits your needs. As with other kinds of tables, Word automatically inserts Quick Tables wherever the cursor is positioned in the document.
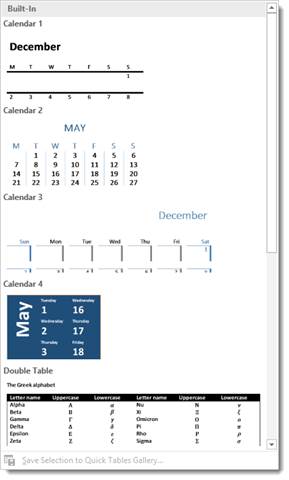
Once the Quick Table has been created, click the template text and start typing to replace it… You can also create your own Quick Tables by selecting a table that you’ve created and clicking the Save to Quick Table Gallery button at the bottom of the Quick Table menu.
Formatting Tables with the Table Tools
Whenever you create or select a table, the Table Tools will open automatically over the Design and Layout tabs in the tool bar. It allows you to easily apply table styles, borders, and shading attributes and more. Below is an example of the Design and Layout tools available for tables.

The Design tab (shown above) lets you customize the look and appearance of your table.
Let’s look at the Table Style Options group. But first, look at our table below:

In the Table Style Options group, we see that Header Row, First Column, and Banded Rows are checked.
Let’s learn what all these options mean so you can decide what you want checked – and what you don’t.
-
A Header Row is the first row in a table that contains headings (labels) for all the columns, as shown our table above.
-
When First Column is checked, it means the first column is also headers or labels. Same goes for the Last Column.
-
You can also choose to have banded rows or columns. Banded Rows formats even and odd rows differently so they are easier to read. If you choose Banded Columns, it formats even and odd columns differently.
-
Total Row means to create a row for mathematical totals.
In the Table Styles group, you can pick a new table style or apply shading to your table by clicking the Shading button.
In the Borders group, you can use Border Styles add borders to rows and columns to customize the look of your table.
Now, let’s click the Layout tab.

The Layout tab, when associated with the Table Tools, allows you to easily insert rows and columns, and format text and objects within cells.
Selecting Cells, Rows, and Columns
Selecting cells, rows, and columns in Word 2016 is easy.
To select a cell, click within the cell so the mouse cursor is blinking.
Go to the table Format tab, then the Table group. Click Select>Select Cell
To select a row, click in the first cell in a row go to Select>Select Row.
To select a column, click the first cell in a column, then go to Select>Select Column.
The Border Painter Tool
The Border Painter tool was a feature added in Word 2013. It makes applying different widths and borders to your table easier than ever before. To find the tool, select your table and go to the Table Tools Design tab.

To use the border painter, first apply formatting to some borders in your table, then click the Border Painter button. Click on any border to apply the formatting. You can also click and drag the mouse to apply it to a whole line.
Border Sampler
The Border Sampler works with the Border Painter tool. The Border Sampler is located at the bottom of the Border Styles Gallery. To access it, click the Border Styles button in the Borders group under the Table Tools Design tab.
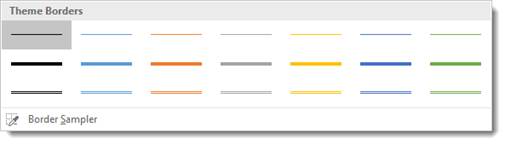
Simply click on Boarder Sampler. An eyedropper will appear. Click on a table border that you want to sample. Word then switches to the Border Sampler. You can apply the same formatting somewhere else in the table.
Adjusting the Width of Individual Columns
There are several ways to adjust the width of individual columns:
1. Position your mouse pointer over the edge of the column and then drag it to the desired width.
2. Select the column, then go to the Table Tools Layout tab, then the Cell Size group. Enter in a new width (in inches)
Adjusting Width of All Columns
To fix the width of all of the columns at once, select the entire table and use the Width box under the Layout tab to adjust the columns to the desired size.
You can also use the Distribute Columns button to make all of the columns the same size.
Adjust rows in the same way, except use the Height field.
Adding Rows and Columns
There are two ways to add a new row or column to a table.
You can select a cell, row, or column and right click on it, then select Insert from the menu.
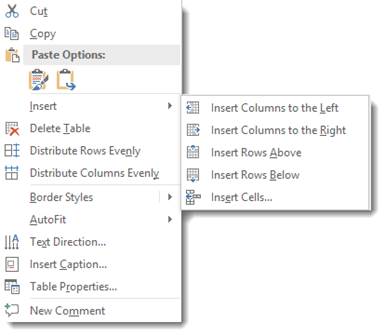
You can then choose to:
-
Insert Columns to the Left
-
Insert Columns to the Right
-
Insert Rows Above
-
Insert Rows Below
-
Insert Cells
In addition, you can also select a cell, row, or column, then go to the Table Tools Layout tab. Choose an option from the Rows & Columns group.
You can also add rows or columns simply by mousing over a row or column.
Look at the snapshot below.

When we moused over the row, look at the little plus sign that appeared.

Click the plus sign to add a row.
For columns, move to the top or bottom of the column and the plus sign will appear.
Deleting Cells, Rows or Columns
To delete a Cell, Row or Column, simply select it, navigate to the Layout tab, go to the Delete group, then select if you want to delete cells, rows, or columns, or the entire table from the dropdown menu.
You will then have the option of deleting a cell, a row, a column, or the entire table. You can also delete cells, rows and columns by right-clicking inside a cell. In the menu select Delete Cells. Click the appropriate command and click Ok.
Merging Cells and Splitting Cells
To merge cells, drag your mouse over the cells while holding the left mouse button to select them. In the Layout tab, select the Merge Cells button from the ribbon. It looks like this:

The Merge Cells button is located in the Merge group on the ribbon. Alternatively, select the cells you’d like to merge and click the right mouse button. Select the Merge Cells from the menu.
To split a cell, select it by clicking on it, then click the Split Cell button on the ribbon.

This button is also found in the Merge group. Choose the number of rows and columns you’d like to split the cell into then click OK.
Split a table by clicking the Split Table button. It looks like this:

The Split Table button is located in the Merge group under the Table Tools Layout tab.
Doing Math in a Table
You can do math in tables in much the same way that you do in spreadsheets and Excel. However, Word’s math commands are simpler, so they’re easier to use.
For this example, let’s do a sum.
To figure out a sum of values in a table, create the table and add the values you want to add. You can put values in rows or columns. You should go ahead and do the layout and design for your table at this time. Just make sure the last cell in the row or column (wherever you’re doing your values) is empty.
Now, click in the cell where you want to place the mathematical formula.
Go to the table Layout tab.
Go to the Data group. Click the Formula button.
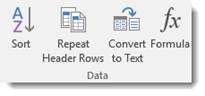
Select Sum from the Paste Function menu, then click OK.

Create, Modify and Apply Table Styles in Word Documents
by Avantix Learning Team | Updated August 21, 2022
Applies to: Microsoft® Word® 2013, 2016, 2019, 2021 or 365 (Windows)
You can apply table styles to your Word tables to format them quickly and consistently. Word is shipped with several built-in table styles or you can create your own. You can edit table styles by modifying borders, shading, character formatting, paragraph formatting and table properties. If your document includes multiple tables, table styles can save a lot of time.
Note: Buttons and Ribbon tabs may display in a different way (with or without text) depending on your version of Word, the size of your screen and your Control Panel settings. For newer versionns of Word, Ribbon tabs may appear with different names. For example, the Table Tools Design tab may appear as Table Design.
Recommended article: How to Keep a Microsoft Word Table Together on One Page
Do you want to learn more about Microsoft Word? Check out our virtual classroom or live classroom Word courses >
Table styles and themes
Every Word document uses a document theme which includes a font theme and color theme. The colors used in table styles are based on the color theme.
You can select document themes, color themes and font themes using the Themes, Colors or Fonts drop-down menus on the Design tab in the Ribbon:

You can also create your own custom color themes so your tables can be formatted using your organization’s colors.
Display gridlines
When you are working with tables, it’s a good idea to turn gridlines on. Borders, which are a format, will print. Gridlines do not print.
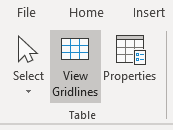
To display gridlines:
- Click in a table.
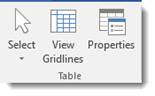
- Click the Table Tools Layout or Table Layout tab.
- Click View Gridlines. Gridlines will stay on for all Word documents.
View Gridlines appears on the Table Tools Layout or Table Layout tab when you click in a table:
Apply a table style
If your Word document contains multiple tables that you want to format in a consistent way, it’s best to use table styles rather than applying manual or direct formatting to each table.
To apply a table style to a table:
- Click in the table.
- Click the Table Tools Design or Table Design tab in the Ribbon.
- Click the More down arrow on the bottom right in the Table Styles gallery. A drop-down menu appears.
- Hover over the various table styles. The table formatting will change as you move over different table styles in the gallery.
- Click the table style you want to apply.
Below is the Table Styles gallery (the current theme is the Office theme):
Note: Table styles do not include row height, column width or custom cell formatting for individual cells. If a user applies manual or direct formatting to a table (such as fills and borders) on the Table Tools Design or Table Design tab, this formatting will override the table style.
Apply Table Style Options
Once you have selected a table style, you can select or check different Table Style Options (which are affected by the formats in the selected table style).
The six Table Style Options that you can apply are: Header Row, Total Row, Banded Rows, First Column, Last Column and Banded Columns. If you have selected a plain table style, you may not notice any changes in the table formatting if you select different Table Style Options.
Table Style Options appear on the Table Tools Design or Table Design tab as follows when you click in a table:
To select Table Style Options:
- Click in the table.
- Click the Table Tools Design or Table Design tab in the Ribbon.
- In Table Style Options, check or uncheck Header Row. If this option is checked, the header row will be formatted differently from the body rows.
- In Table Style Options, check or uncheck Total Row. If this option is checked, the last row will be formatted differently from the body rows.
- In Table Style Options, check or uncheck Banded Rows or Banded Columns for alternate row or column shading.
- In Table Style Options, check First Column or Last Column if you want the first or last column formatted differently from the other columns.
In the following table, Header Row and Banded Rows are checked in Table Style Options:

Modify a table style
You can modify a table style in a Word document and all tables using that table style will change.
To modify a table style:
- Click in the table.
- Click the Table Tools Design or Table Design tab in the Ribbon.
- Click the More down arrow on the bottom right in the Table Styles gallery. A drop-down menu appears.
- Click Modify Table Style. A dialog box appears. You can also right-click a table style and select Modify.
- From the Apply Formatting to drop-down menu, select the element that you want to modify (such as Header row).
- Select the desired formatting such as font, font size, font color, fill and border.
- From the Apply Formatting to drop-down menu, select the next element that you want to modify.
- Select the desired formatting such as font, font size, font color, fill and border.
- Repeat for other elements.
- Select Only in this document or New documents based on this template. If you select Only in this document, the modified style will only be available for the current document. If you select New documents based on this template, then the table style will be modified for future documents based on the current template (usually the Normal template).
- Click OK.
Below is the Modify Style dialog box:
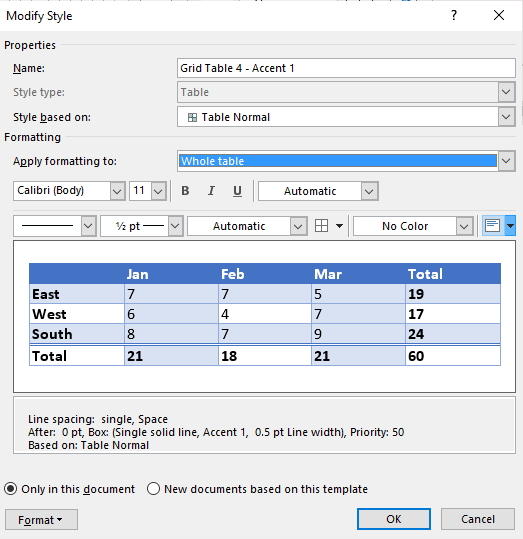
You can also click Format at the bottom of the dialog box and choose other options such as Font or Paragraph.
If you modify a table style and the tables using that style do not change, it’s likely that direct or manual formatting has been applied to the table which then overrides the table style. You may need to clear formatting in the table by selecting the table and clicking Clear Formatting on the Home tab in the Font group.
You can also modify Table Properties in a table style. Table properties include table alignment, row settings and cell margins.
To modify Table Properties in a table style:
- Click in the table.
- Click the Table Tools Design or Table Design tab in the Ribbon.
- Click the More down arrow on the bottom right in the Table Styles gallery. A drop-down menu appears.
- Click Modify Table Style. A dialog box appears. You can also right-click a table style and select Modify.
- Click Format on the bottom left of the dialog box. A drop-down menu appears.
- Click Table Properties. A dialog box appears.
- Click the Table tab and select an Alignment.
- Click the Row tab and select the desired options. For example, turn off Allow row to break across pages.
- Select any other formatting options you want to apply to the entire table.
- Click OK.
- Select Only in this document or New documents based on this template.
- Click OK.
Below is the Table Properties dialog box with the Table tab selected:

Create a new table style
You can also create a new or custom table style.
To create a custom table style:
- Click in the table.
- Click the Table Tools Design or Table Design tab in the Ribbon.
- Click the More down arrow on the bottom right in the Table Styles gallery. A drop-down menu appears.
- Click a table style to apply it as a base style.
- Click the More down arrow on the bottom right in the Table Styles gallery. A drop-down menu appears.
- Click New Table Style. A dialog box appears.
- Enter a name for the new table style in the Name box.
- Select the desired formatting.
- Select Only in this document or New documents based on this template.
- Click OK.
New Table Style appears at the bottom of the Table Styles gallery:
The new table style will appear in the Table Styles gallery under Custom (at the top of the gallery). If you want to delete it, right-click it in the gallery and select Delete Table Style.
Clear a table style
To clear a table style and remove formatting:
- Click in the table.
- Click the Table Tools Design or Table Design tab in the Ribbon.
- Click the More down arrow on the bottom right in the Table Styles gallery. A drop-down menu appears.
- Click Clear.
Clear appears at the bottom of the Table Styles gallery:
Set a default table style
You can also set a default table style for new tables in the current document or all new documents.
To set a default table style:
- Click in the table.
- Click the Table Tools Design or Table Design tab in the Ribbon.
- Click the More down arrow on the bottom right in the Table Styles gallery. A drop-down menu appears.
- Right-click the table style you want to use as the default style and select Set as Default from the drop-down menu. A dialog box appears.
- Select This document only or All documents based on the Normal.dotm template (the default template in Word is the Normal template).
- Click OK.
If you are working with documents with multiple tables, formatting with table styles can ensure that your tables are formatted consistently and save a lot of time.
Subscribe to get more articles like this one
Did you find this article helpful? If you would like to receive new articles, JOIN our email list.
More resources
4 Ways to Create a Table in Word
14 Shortcuts to Quickly Select Text in Microsoft Word
How to Create Headings in Word (Using Heading Styles)
How to Quickly Remove Hard Returns in Word Documents
10 Microsoft Word Tips, Tricks and Shortcuts for Selecting in Tables
Related courses
Microsoft Word: Intermediate / Advanced
Microsoft Excel: Intermediate / Advanced
Microsoft PowerPoint: Intermediate / Advanced
Microsoft Word: Long Documents Master Class
Microsoft Word: Styles, Templates and Tables of Contents
Microsoft Word: Designing Dynamic Word Documents Using Fields
VIEW MORE COURSES >
Our instructor-led courses are delivered in virtual classroom format or at our downtown Toronto location at 18 King Street East, Suite 1400, Toronto, Ontario, Canada (some in-person classroom courses may also be delivered at an alternate downtown Toronto location). Contact us at info@avantixlearning.ca if you’d like to arrange custom instructor-led virtual classroom or onsite training on a date that’s convenient for you.
Copyright 2023 Avantix® Learning
Microsoft, the Microsoft logo, Microsoft Office and related Microsoft applications and logos are registered trademarks of Microsoft Corporation in Canada, US and other countries. All other trademarks are the property of the registered owners.
Avantix Learning |18 King Street East, Suite 1400, Toronto, Ontario, Canada M5C 1C4 | Contact us at info@avantixlearning.ca