
Apply styles

Try it!
Styles give your document a consistent, professional look.
-
Select the text you want to format.
Tip: If you place your cursor in a paragraph, the style is applied to the whole paragraph. If you select specific text, only the selected text is formatted.
-
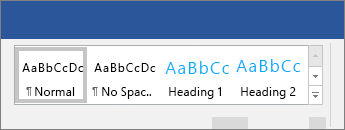
On the Home tab, point to a style to preview it.

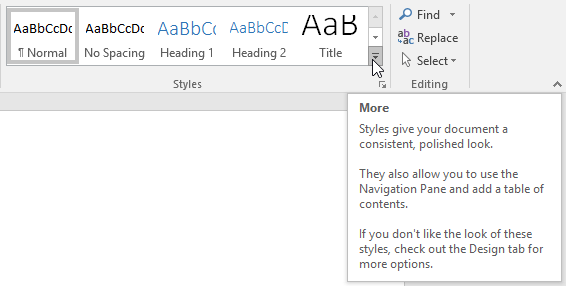
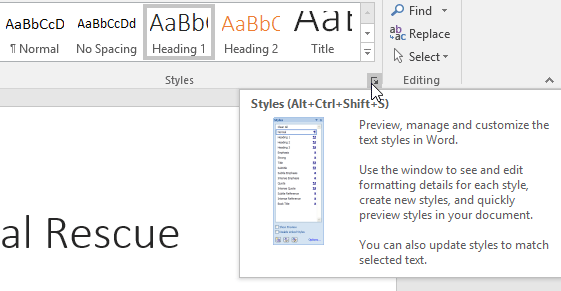
If you don’t see a style you want, click the More button
to expand the gallery. -
Select a style.
 to expand the gallery.
Using Headings allows you to move parts of the document around by using View > Navigation Pane and then moving the listed headings up or down in the doc. Headings also can be used in creation of a table of contents.
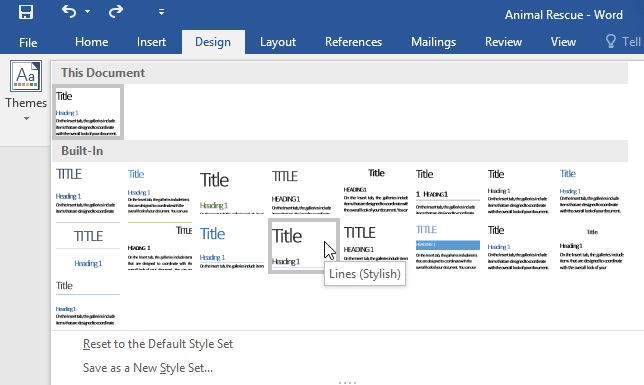
Note: If you need a different look, go to Design > Themes and select a new one. Each Theme has its own set of Styles.
Want more?
Use the Navigation pane in Word
Apply themes
Customize or create new styles in Word
Insert a table of contents
Need more help?
Want more options?
Explore subscription benefits, browse training courses, learn how to secure your device, and more.
Communities help you ask and answer questions, give feedback, and hear from experts with rich knowledge.
Lesson 29: Applying and Modifying Styles
/en/word2016/smartart-graphics/content/
Introduction
A style is a predefined combination of font style, color, and size that can be applied to any text in your document. Styles can help your documents achieve a more professional look and feel. You can also use styles to quickly change several things in your document at the same time.
Optional: Download our practice document.
Watch the video below to learn more about using styles in Word.
To apply a style:
- Select the text you want to format, or place your cursor at the beginning of the line.
- In the Styles group on the Home tab, click the More drop-down arrow.
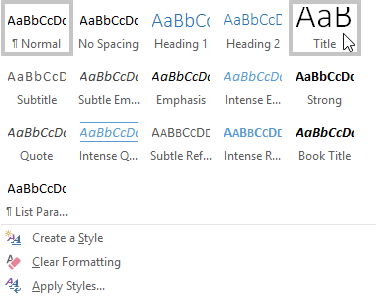
- Select the desired style from the drop-down menu.
- The text will appear in the selected style.

To apply a style set:
Style sets include a combination of title, heading, and paragraph styles. Style sets allow you to format all elements in your document at once instead of modifying each element separately.
- From the Design tab, click the More drop-down arrow in the Document Formatting group.
- Choose the desired style set from the drop-down menu.
- The selected style set will be applied to your entire document.


To modify a style:
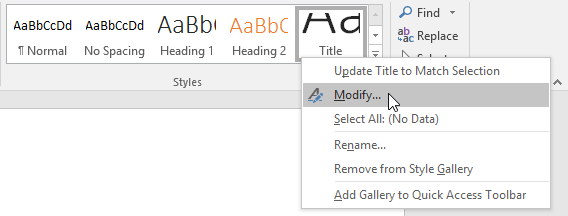
- In the Styles group on the Home tab, right-click the style you want to change and select Modify from the drop-down menu.
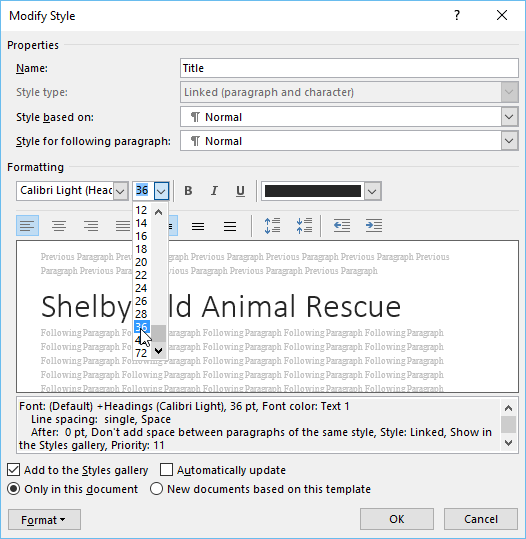
- A dialog box will appear. Make the desired formatting changes, such as font style, size, and color. If you want, you can also change the name of the style. Click OK to save your changes.
- The style will be modified.

When you modify a style, you’re changing every instance of that style in the document. In the example below, we’ve modified the Normal style to use a larger font size. Because both paragraphs use the Normal style, they’ve been updated automatically to use the new size.
To create a new style:
- Click the arrow in the bottom-right corner of the Styles group.
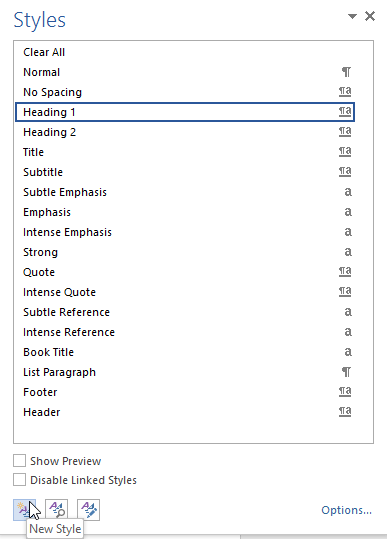
- The Styles task pane will appear. Select the New Style button at the bottom of the task pane.
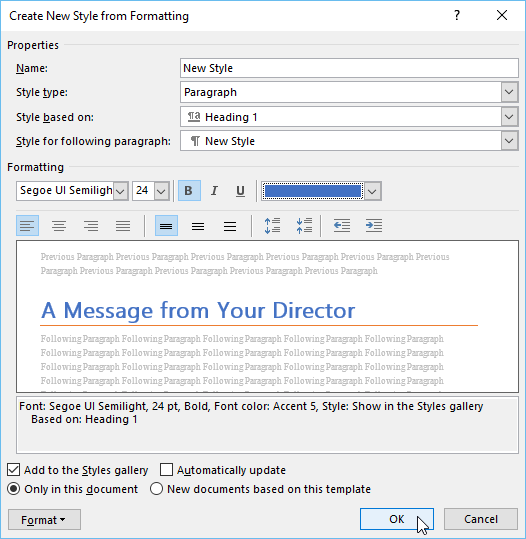
- A dialog box will appear. Enter a name for the style, choose the desired text formatting, then click OK.
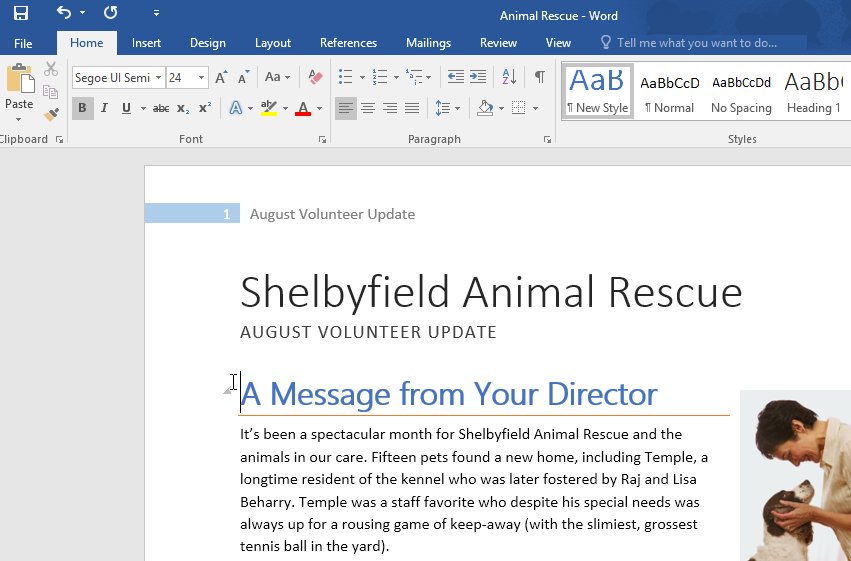
- The new style will be applied to the currently selected text. It will also appear in the Styles group.

You can also use styles to create a table of contents for your document. To learn how, review our article on How to Create a Table of Contents in Microsoft Word.
Challenge!
- Open our practice document. If you already downloaded our practice document, be sure to download a fresh copy by clicking the link again.
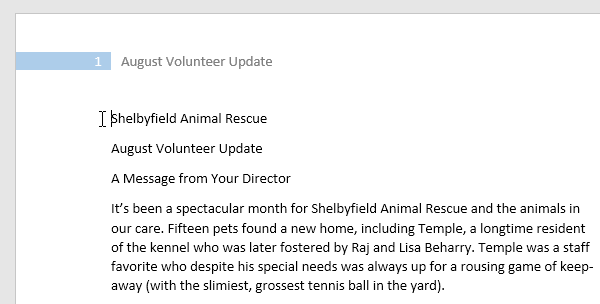
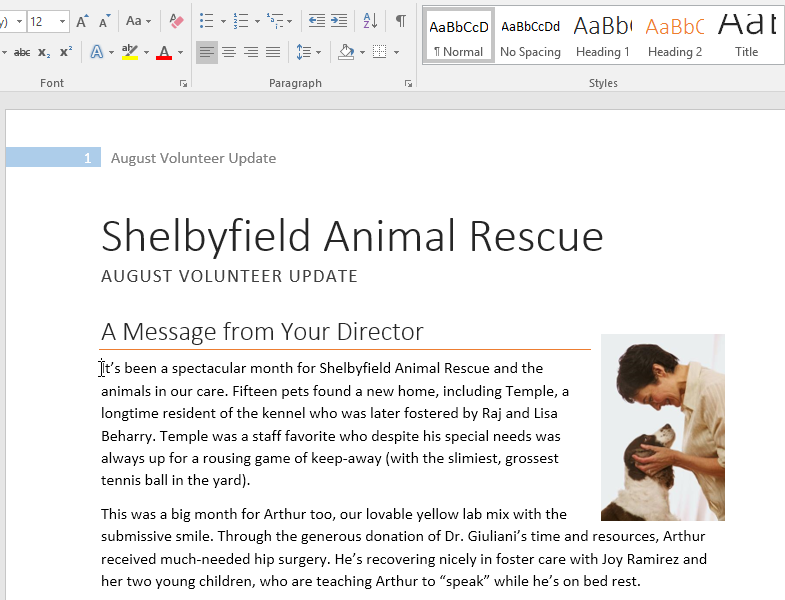
- On page 1, select the first line of text Shelbyfield Animal Rescue and change the style to Title.
- Select the second line that says August Volunteer Update and change the style to Heading 1.
- Select the third line that says A Message From Your Director and change the style to Heading 2.
- In the Design tab, change the style set to Casual.
- Modify the Normal style so the font is Cambria and the font size is 14 pt.
- When you’re finished, the first page of your document should look like this:

- Optional: Modify the Heading 3 style any way you want. You can change the font, font size, color, and more. This heading appears throughout the document, so try to choose formatting that complements the body text.

/en/word2016/mail-merge/content/
MS Word — это программа для обработки текстов, которая позволяет создавать документы различных типов и видов. Один из способов упростить создание и форматирование текста — использовать стили. Стили в Ворде позволяют быстро и легко применять форматирование к тексту, а также сохранять его в коллекции стилей для дальнейшего использования. В этой статье мы рассмотрим, как использовать стили в Word и как создать новые стили.
Для чего предназначены стили в MS Word
1) Стили в Word используются для облегчения форматирования текста в документе. Если вы хотите, чтобы текст выглядел определенным образом, вы можете создать стиль с нужными параметрами форматирования и применять его к нужным участкам текста.
Примечание! На практике в документообороте настраивается только стиль по умолчанию – «Обычный», и заголовки 1, 2, и 3 уровня. Это связано с тем, что лучше что бы весь текст был в одном стиле, и если вдруг изменятся какие-то требования к форматированию текст, то стоит лишь поменять стиль, как поменяется форматирование у всего текста. Это очень удобно, особенно когда документа на десятки страниц.
2) Стили предназначены для создания автоматического Оглавления. Word может автоматически создавать содержания по заголовкам документа. Это очень удобная и практичная функция, главное заголовки помечать в специальный стиль Заголовок 1, Заголовок 2 и т.д.
Где находятся родные стили
В MS Word есть ряд родных стилей, которые можно использовать для форматирования текста. Некоторые из них включают в себя «Заголовок 1», «Заголовок 2», «Заголовок 3», «Обычный», «Сноска» и т.д. Коллекция стилей в Ворде можно найти в панели «Стили» на вкладке «Главная» в ленте Word.

Справа есть кнопки перелистывания стилей, вторая кнопка вниз, подсвеченная как «Дополнительные параметры» раскрывает всю коллекцию стилей:

Так же можно вывести целое окно «Стилей», для этого нужно нажать на стрелку в низ в правом нижнем углу блока Стили:

Примечание! Отдельное окно «Стиль» не исчезает само, а сами стили используются в форматировании не так часто, поэтому это не очень удобно в работе.
Как изменить стиль текста в Ворде
Для изменения существующего стиля нужно нажать правой клавишей мыши по стилю и выбрать: «Изменить»:

Затем у вас появится окно «Изменение стиля», в данном окне представлены основные (самые часто используемые) варианты форматирования текста:

В этом же окне есть и возможность применять вообще любые свойства форматирования таких окон как «Шрифт», «Абзац», «Табуляция», «Граница» и т.д. Для этого нужно нажать на кнопку «Формат» в левом нижнем углу, у вас откроется выбор диалоговых окон. Вы можете выбрать любое, и применить абсолютно любое форматирование, которое понадобится:

Для примера давайте применим «Двойное зачеркивание», и отступ справа 1 см.


В результате у нас поменялся весь текст (потому что редактировали главный стиль «Обычный»). Вот что получилось:

Примечание! В окне изменения стиля можно выставить. Что бы стиль применялся ко всем документам. Для этого нужно нажать на пункт «В документах, использующих тот шаблон». Но лучше этого не делать, т.к. это слишком глобальные изменения, и могут доставить много проблем в будущем.
2 варианта — как создать новый стиль в Word
Первый вариант создания стиля в Word
Для создания стиля в Ворде необходимо нажать на вторую стрелку в низ (которая подсвечивается как «дополнительные параметры» и нажать на кнопку «Создать стиль»:

После чего выходит окно создания стиля, для примера назовем его ProWord 1:

Далее новый стиль изменяем, подгоняя под свои нужды. Про то, как изменять стиль, вы ознакомились выше в статье. Для примера применим к этому стилю только Полужирность.
Второй вариант создания стиля в Word
Функция активируется и с окна «Стили»:

Выходит окно, где можно сразу отформатировать стиль. Для примера к новому стилю применим Курсив

И вот что получим:

Вывод: Создание нового стиля рекомендуется, когда вы хотите некоторые абзацы (фрагменты текста) сделать с особым форматированием. В этом случае проще создать новый стиль, изменить форматирование, а затем применять его к нужным фрагментам текста.
Стили в ворде
Просмотров 9.5к. Обновлено 4 сентября 2020
Стиль Word является предопределенным сочетанием шрифтов стиля, цвета и размера , которые могут быть применены к любому тексту в документе. Стили могут помочь вашим документам получить более профессиональный вид. Вы также можете использовать стили, чтобы быстро изменить несколько вещей в документе одновременно.
Содержание
- Как применяются стили в ворде
- Применить набор стилей
- Как создать стиль в ворд
- Изменить существующий стиль
Как применяются стили в ворде
Существующие стили в Word доступны в меню «Стили» на вкладке «Главная». Чтобы применить стиль, просто выделите текст и нажмите на выбранный шаблон. Используемая модель вставляется в рамку с выделенными краями.
Чтобы увидеть больше стилей Word, используйте стрелку в правой части меню «Стили» или откройте меню, нажав на стрелку меню.
Применить набор стилей
Наборы стилей включают комбинацию стилей заголовка и абзаца. Наборы стилей позволяют форматировать все элементы в документе одновременно, а не изменять каждый элемент отдельно.
На вкладке «Дизайн» щелкните стрелку раскрывающегося списка в группе «Форматирование документа».
Выберите нужный набор стилей из выпадающего меню.
Выбранный набор стилей будет применен ко всему документу.
Как создать стиль в ворд
Если вы хотите, применить параметры форматирования, которые недоступны в стилях Word, вы можете без проблем создать их и вставить в галерею стилей:
- Нажмите на меню «Главная» в разделе «Стили» на стрелке в правом нижнем углу.
- Выберите значок «Создать стиль» в «Стилях».
Дайте стилю имя и нажмите изменить.
Определите тип стиля. Вы можете выбрать между «Абзац», «Знак», «Связанный» (абзац и символ), «Таблица» и «Список».
- Если стиль основан на существующем, вы можете установить его в разделе «Стиль на основе».
- Вы также можете выбрать стиль для следующего абзаца в разделе «Стиль для следующего абзаца».
- Определитесь с типом шрифта, размером и другими типами форматирования.
- После подтверждения нажатием «OK» найдите свой новый стиль в меню «Стили».
Изменить существующий стиль
В Word вы также можете изменить уже существующие стили в коллекции стилей.
В группе «Стили» на вкладке «Главная» щелкните правой кнопкой мыши стиль, который хотите изменить, и выберите «Изменить» в раскрывающемся меню.
Появится диалоговое окно. Сделайте необходимые изменения форматирования, такие как стиль шрифта, размер и цвет. Если вы хотите, вы также можете изменить название стиля. Нажмите кнопку ОК, чтобы сохранить изменения.
Когда вы изменяете стиль, вы изменяете каждый экземпляр этого стиля в документе. Если в вашем документе где-то использовался этот стиль и вы поменяли, например, размер шрифта, то он автоматически обновится.
Most folks go through life doing things in inefficient ways. For tasks you complete once in a blue moon, efficiency doesn’t really matter. But when you do something frequently, finding the most effective and efficient method is worthwhile.
Styling text in Microsoft Word is one of those things. If you edit Word documents regularly, you’ll want to know how to style them correctly. Using the appropriate built-in Style tools often resolves a percentage of the “problems” users have with Word. It also makes your documents easier to edit and improves the user experience. Styling correctly also lets you structure long documents for easy navigation by author and reader.
Using and Adjusting Existing Styles in Microsoft Word
We’ll be doing a lot of our work in the “Styles” pane which is found in the “Home” ribbon.

Applying existing styles
The built-in styles are perfectly serviceable. You can apply them just by clicking.
1. Select the text you want to change. Selecting the text you want to modify will always be the first step for any text-styling task.

2. Click on the appropriate style icon in the “Styles” pane.

Modifying styles
Most users don’t want to be limited to the built-in styles. While there are other styles available in the Design menu of the ribbon, users can make their own. Making a new style from scratch is a pain: you’re better off modifying an existing style. You’ll use the same method for updating your own styles as you tweak them.
1. Apply the matching style you want to change.

2. Make the appropriate changes to the text with the direct styling tools.

3. Right-click on the style you applied and choose “Update [Style] to Match Selection.”

This will change the style to match and automatically sync that change to every other instance of the Style in your document. It will also update the Style’s preview icon.

Advanced Options
You can also apply some advanced styling options to your Styles, making them more useful and functional. All of these changes can be propagated across styles by modifying existing styles, as shown in the previous step. Here are a few choice examples.
Add space below a heading without Return
Most of the time you want a little space between your headings and your body copy. Don’t use the Return key to make it! Apply that space in the Paragraph menu.
1. Select the heading you want to add space after.
2. Open the Paragraph Options by clicking on the tiny arrow in the lower-right of the Paragraph ribbon pane.

3. Adjust the value in the “Spacing After” box. You can also use the “Line spacing” tool next to it for less nuanced control.

Add a horizontal rule
Add a page-width underline to your text.
1. Select the text you want to underline.
2. Click the “Borders” icon in the Paragraph ribbon menu.

3. Click “Bottom border” in the dropdown menu.

Expand letter spacing
Give your text some breathing room, which is useful for headings.
1. Select the appropriate text to change.
2. Open Font Options by clicking on the tiny arrow in the lower-right of the Font ribbon pane.

3. Click on the “Advanced” tab.

4. Click the dropdown next to “Spacing” and choose “Expanded.”

5. Adjust the point value until satisfied.

Create an all-caps style
Headings often look nice set in all caps. You can apply this in the same Font Options menu you just visited.
1. Click on the “Font” tab in the “Font Options” menu, if necessary.
2. Tick the “All Caps” box.

Saving and Sharing Style Templates
Once you’ve created a set of styles that you like, you can save it as part of a template. Save the file as a template (.dotx), then create a new file with that template. These files can also be shared among users. Learn more about templates in our guide.
Applying Your Styles by Default
To apply your own styles for every new document you create, modify the Normal template.
1. In Word, click “File -> Open.”
2. Click the “Browse” button.

3. Paste “%APPDATA%MicrosoftTemplates” into the address bar and press “Enter.”

4. Open the file named “Normal.dotm.” Make the changes to fonts, margins and other styling details.

5. When done, delete all the text (and white space), and choose “File -> Save.”
If you totally mess things up, delete your “Normal.dotm” file. Word will replace it with a fresh one using the application’s defaults.
Conclusion
Make sure you apply your styles appropriately: the style names aren’t meaningless! They also create the structure of your document. Headings with higher numbers are nested “inside” headings with lower numbers in outlining terms. For example, using “Heading 1” for the most important heading(s), “Heading 2” for secondary headings and so on. Careful use lets you generate a Table of Contents, zoom through long documents with the Navigation Pane and much, much more.

Alexander Fox
Alexander Fox is a tech and science writer based in Philadelphia, PA with one cat, three Macs and more USB cables than he could ever use.
Subscribe to our newsletter!
Our latest tutorials delivered straight to your inbox
Whether you’re a one-person business operating out of your kitchen, or a billion-dollar company on Wall Street, the expectation is the same. Your business documents must be the paragon of professionalism and competence.


This expectation shouldn’t be a cause for worry. With applications like Microsoft Word you can create professional-looking documents with your own computer. Through the years, Word has become more powerful, yet more intuitive. Anyone with basic computer skills can use Word to create well-designed documents.
In this article, you’ll learn how to format text in Word to make your business documents easier to read and understand. You’ll also pick up tips on how to make sure your formatting doesn’t look amateurish—even if you’re getting started with Word.
Formatting Text in Word
Formatting text in Microsoft Word refers to controlling how text appears in your document. This includes the size, color, and font of the text. It also covers text alignment, spacing, and letter case.
Microsoft Word styles make it easy to change and apply styles throughout a document. A “style” is a set of formatting settings applied to a specific kind of text.
For example, you can set up a style for headings that’s bold, 14 points, aligned left, and uses the Tahoma font. This means all text in your document with the heading style will be formatted the same way. You don’t have to manually format each heading in your document.
In this post, you’ll see how to use MS Word styles.
How to Format Text in Word
To show you how to format text in Word, we’ll walk through formatting a completely unformatted business document file.
This is what my marketing report looks like without any formatting in Word:


As you can see, it’s plain and boring. Nobody would be inspired to read it, let alone act on the findings of the report!
Some basic Word text formatting can fix that.
1. How to Apply Typographic Emphasis
1. For starters, let’s use typographic emphasis (bold, italic, underline) to make the report title stand out.
To do this, select the text you want to emphasize. Click on the bold button on the Microsoft Word ribbon.


Note that the ribbon also has the buttons to apply italic, underline, strikethrough, and other formatting effects for text. Follow the same steps to apply those effects.
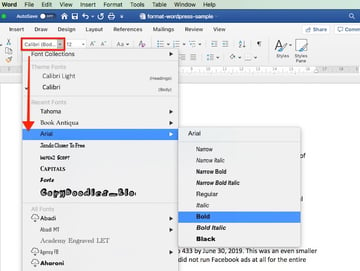
2. Now, let’s change the font, font size, and color of the title.
Again, select the text. Click the drop-down arrow on the font section of the ribbon, then select the font you want to apply. In this case, I’m using Arial bold.


3. To change the font size, highlight the text. Click the drop-down arrow on the font size indicator on the ribbon. Click on the font size of your choice.


Or, after highlighting the text, you can type the font size into the font size indicator on the ribbon. This is especially useful when the font size you want isn’t available in the font size selector.


4. You can also use the Increase Font Size or Decrease Font Size buttons on the ribbon to quickly change the font size.


5. We can easily change the font color as well.
Highlight the text, then click the down arrow beside the Font Color selector. Click on the color of your choice.


Choose More Colors… if you wish to apply a custom color.
2. How to Change Capitalization in Word
Microsoft Word also allows you to easily and quickly change the capitalization of your text. For example, if we want to make the title all uppercase, we don’t have to retype it.
Highlight the title, then click the Change Case button on the ribbon.


Or, highlight the text, go to Format > Change Case…


… then click on the radio button for the case you want to apply. Click OK.


Now the title is looking much better. It’s the most prominent part of the document and commands the reader’s attention. However, we can still improve its readability.
3. How to Format Paragraphs
One way to make your document easier to read is by increasing white space around lines and paragraphs.
1. To adjust the line spacing, select the text. Click on the arrow on the Line and Paragraph Spacing button. Select the line spacing you wish to apply.


2. To change the spacing around a paragraph, select the paragraph. Click on the arrow on the Line and Paragraph Spacing button > Line Spacing Options…. Then, type the amount of spacing before and after the paragraph. (Tip: You can adjust other settings from this dialog box as well.)
For the title, I’ll add a generous amount of space after the paragraph, to set it apart from the rest of the document.


3. Finally, let’s change the alignment of the title. Select the text, click on either the Align Left, Center Text, Align Right, or Justify button on the ribbon. Since this is a title, let’s use Center Text.


These simple formatting effects make the title stand out from the rest of the document.
4. How to Work With MS Word Styles
As much as Word makes it easy to format text, if you need to apply formatting effects on the entire document, the process becomes tedious.
Word solves that through styles. MS Word Styles allow you to define a set of formatting commands and apply them automatically to every item in the document with that style.
Let’s look at a specific example:
1. How to Modify a Paragraph Style
Let’s follow the steps above to define a style for the main headings of the report with the following characteristics:
- Font: Arial
- Size: 14 points
- Color: Blue-grey
- Typographic Emphasis: Bold
- Case: Capitalize each word
- Alignment: Left
- Line spacing: Single
- Paragraph spacing: 6 pts before paragraph, 0 pts after paragraph
It would look like this:


One way to apply this exact formatting on every main heading is to modify the existing Heading 1 style in our document. Place your cursor anywhere in the main heading. Go to Styles, right-click on Heading 1, then choose Update Heading 1 to Match Selection.


You can also modify any style by going to Format > Style…. The Style dialog box opens.


Select the style you want to modify from the Style list. This gives you a preview of the paragraph and character, as well as a description of the current style settings of the selected style.
Click Modify…. The Modify Style dialog box pops up.


Change the text and paragraph format settings. You can control the font, font size, font color, typographic emphasis, alignment, and spacing. When you’re done, click OK.
2. How to Apply a Paragraph Style
Now, go to each main heading in the document and apply the Heading 1 style to it. Place the cursor on a heading, go to Styles > Heading 1.


The selected text instantly takes on the formatting of Heading 1.


3. How to Create a List Paragraph Style
You can also create a new paragraph style from scratch, instead of modifying an existing one. To demonstrate, let’s create a list-type paragraph style.
1. Go to Format > Style…. Fill in the Properties section of the dialog box that opens. For Style based on, you may wish to use one of the pre-existing list styles as a starting point.


2. Next, change the formatting options. The box below gives you a preview of what the list paragraph would look like with those settings. There’s also a summary of the formatting properties you’ve specified.


You also have the option to do the following for this style:
- Add to template. Adds the style you’re creating to the document template.
- Add to Quick Style list. Shows the new style to the Quick Style list, making it quickly accessible from the ribbon.
- Automatically update. Automatically updates the style when you manually format a paragraph with that style.
When you’re happy with the settings you’ve made, click OK. Notice how the new Bullet style you created is now included in the Quick Style popup.


Once the bullet style is applied, our list now looks like this:


4. How to Use Character Styles in Microsoft Word
You can also define a style to an individual word or a block of text, rather than a paragraph. In the next example, I’d like to apply a character style for every URL in the document.
1. Select the text. Then, go to Format > Styles…. From the Style dialog, click New…. The Create New Style from Formatting dialog opens.


2. Give the new character style a name. For Style type, choose Character. Then, make the formatting settings you want to apply to this character. Note that you can’t change alignment and spacing for a character style. The preview box shows you a sneak peek of the text based on the settings you specified.


3. When you’re done, click OK.


To apply the character style, place your cursor in a word or select a set of words. Go to Format > Style…. Find the character style you wish to apply. Click Apply.


Tip: To quickly find the MS Word styles you’ve created, for List, choose User-defined styles.
5. How to Use Table Styles in Word
We can also define a table style to provide a consistent look to the tables in our document.
1. Create the table. Go to Insert > Table…, then indicate the number of columns and rows you need in your table (you can always add or remove these later). Click OK.


2. Add your text to the table. If necessary, click and drag any of the borderlines to adjust the width or a column, or the height of a row.
3. To apply a table style, click anywhere on the table, then go to Table Design. The Table Design ribbon appears.


4. Click on the down-arrow for table styles to display the table styles gallery.


5. Click on any style to apply it to your table.


Expand the table styles gallery again to change the existing style, clear the style you applied, or create your own table style.
Discover Great Microsoft Word Templates for 2020
Some experts say it’s a good idea to set up your formatting styles in Word first before typing or copying the text into the document. One quick way to do this is by starting with a Microsoft Word template. Templates come pre-formatted by professional designers to look current and impressive.
You can find thousands of Word templates for all kinds of business documents in Envato Elements.


For a small monthly subscription fee, you get unlimited downloads of all the templates at Elements. You also have unlimited access to everything else in the Elements catalog:
- presentation templates
- web templates
- fonts
- photos
- graphics
- other digital assets
Use as many of these assets as you want, as often as you want, without paying more. This makes Elements a terrific source for all the creative assets you need to create remarkable marketing and communication materials.
You can also pay as you go at GraphicRiver. This marketplace also offers a huge library of templates for Microsoft Word and other digital assets for all your marketing and communication needs. The difference is, you only pay each time you use an item. This can be a very economical option.
Below are some of the best print templates for Word available on Envato Elements and GraphicRiver:
After downloading any of these Microsoft Word templates, you can apply what you’ve learned about formatting text in Word. This way, you can personalize the template so that it aligns with your visual branding and preferences. You now know how to take any Word template and make it your own!
5 Top FAQs on Formatting Text in Microsoft Word
Below are some of the questions that come up as people format text in Word.
1. How Do You Make a Word Document Easier for the Reader to Scan?
Your primary goal when formatting text in Word is to make it easy for people to scan, read, and understand the content of the document. The different formatting options in Word help you achieve this:
- Use typographic emphasis like bold, italics, and underline to emphasize specific text and add variety to your document.
- Break up the document into sections with headings and sub-headings to help the reader scan and navigate their way through it.
- Use either bulleted or numbered lists where appropriate to shorten paragraphs and make lists easier to comprehend.
- Set up line and paragraph spacing so that there’s plenty of white spaces throughout the document.
2. How Many Fonts Should I Use in a Word Document?
It’s easy—and fun—to apply different fonts in Word. Too easy, in fact, that you could end up overwhelming your reader and making your document look like someone played with the formatting.
Avoid this by sticking to a maximum of two different fonts in a single document. For instance, you could choose a sans serif font for your title and headings, and a serif font for all other text. You could even use one font for the entire document, relying on typographical emphasis and color to distinguish different types of text from each other.
3. Why Should I Use Microsoft Word Text Styles?
Use Microsoft Word text styles because they let you apply formatting settings globally throughout your document. This is important in long documents, where formatting each line or paragraph is too onerous. With text styles, you only need to determine what style you want for each piece of text. Word will do the rest.
4. How Can I Make My Document Formatting Consistent?
Using MS Word styles, as you’ve learned in this article, is an easy way to make your document formatting consistent. You decide and set how you want each type of text to be formatted. Then you can apply those styles consistently through your entire document.
Beyond Microsoft Word styles, also make sure that the recurring parts of your document are consistent as well. These include your headers and footers, for example. You must also be consistent with the placement of images: Do they have borders? Are they always within the document’s margins or do they bleed to the edge of the page?
When you use a Word template, these design decisions are already made for you. So, if you want a consistent design without all the hard work, then starting with a template for Word is the way to go.
5. How do You Copy text into Word without also copying junk code?
When you copy text from one application and paste it into Word, you run the risk of also copying the underlying formatting code for it. This code or set of formatting commands is invisible so you won’t know you’re copying it inadvertently. This can mess up your formatting in Word. Soon, you’ll be pulling your hair wondering why Word won’t “follow” your commands.
To avoid this grief, make sure you strip all formatting when you copy and paste the text into Word. Here’s how: Copy the text. In Word, click Edit > Paste and Match Style.


That’s all there is to it!
Using Microsoft Word, Style Your Business Document for Maximum Impact
You’ve learned how to format a document in Word to make it easier to scan and read. Good formatting is also essential to make sure the final document represents you and your business in a favorable light.
You’ve seen how doable formatting is, even if you’re starting from scratch with completely unformatted text. You’ve also discovered that you can rely on professional designers to make the formatting decisions for you by starting with a template for Word.
For unlimited downloads of print templates for Word at a fixed subscription fee, look to Envato Elements. Here, you can also have your fill of fonts, icons, photos, and other design assets you’ll need without having to pay more. Or, get your premium Word templates from GraphicRiver on a pay-per-use basis. You also get a wide range of choices without having to commit to a subscription.
With Microsoft Word styles and formatting tools, there’s no more excuse to have poorly designed business documents. Make your next business document one you’ll be proud of.
Стиль в ворде – это предопределенная комбинация стиля шрифта, его цвета и размера, которая может быть применена к любому тексту документа MS Word. Стили в ворде могут помочь вашим документам достичь более профессионального внешнего вида.
Как применить стиль
- Выберите текст, который вы хотите отформатировать.

Стили в Word – Выделение текста для применения стиля
- В группе «Стили» на вкладке «Главная» нажмите стрелку «Больше».

Стили в Word – Коллекция стилей в ворде
- Выберите нужный стиль в раскрывающемся меню.

Стили в Word – Выбор стиля в ворде
- Текст будет отображаться в выбранном стиле.

Стили в Word – Текст с выбранным стилем
Как применить набор стилей
Наборы стилей в ворде включают сочетание стилей заглавия, заголовка и абзаца. Наборы стилей позволяют вам форматировать все элементы в документе одновременно, а не изменять каждый элемент отдельно.
- На вкладке «Дизайн» нажмите стрелку «Больше» в группе «Форматирование документа».

Стили в Word – Коллекция наборов стилей в ворде
- Выберите понравившийся стиль в раскрывающемся меню.

Стили в Word – Выбор набора стиля
- Выбранный набор стиля будет применен ко всему документу.

Стили в Word – Использование набора стиля в документе
Как изменить стиль
- Найдите и щелкните правой кнопкой мыши стиль, который вы хотите изменить, в группе «Стили», а затем выберите «Изменить…» в раскрывающемся меню.

Стили в Word – Изменить стиль
- Появится диалоговое окно «Изменение стиля». Сделайте необходимые изменения форматирования, такие как стиль шрифта, размер и цвет. Если вы хотите, вы также можете изменить название стиля.
- Нажмите «ОК», чтобы сохранить изменения.

Стили в Word – Окно Изменение стиля
- Стиль в ворде будет изменен.
Как создать стиль
- Нажмите стрелку в нижнем правом углу группы «Стили».

Стили в Word – Параметры стилей
- Появится панель задач «Стили». Выберите кнопку «Создать стиль» в нижней части панели задач.

Стили в Word – Создать стиль
- Появится диалоговое окно «Создание стиля». Введите имя стиля и выберите нужное форматирование текста.
- И для создания стиля нажмите «ОК».

Стили в Word – Окно создание стиля
- Новый стиль появится в группе «Стили».

Стили в Word – Мой стиль
Использование стилей в ворде позволяет сэкономить много времени, при изменении форматирования документа. Также правильное использование стилей и наборов стилей в ворде – лучший способ создать хорошо форматированные документы в Microsoft Word.
Встроенные стили. Первое знакомство
Мы познакомились с понятием Стили текста, научились пользоваться готовыми стилями, создавать собственные стили. Стили, которые мы создаём, называются Пользовательские стили. Но разработчики Word побеспокоились о нас и создали свои стили с готовыми характеристиками, которые встроили в программу и которые так и называются Встроенные стили.
По окончании урока вы сможете:
- Вызвать диалоговое окно Параметры области стилей
- Перечислить режимы отображения стилей и дать характеристику каждому режиму
- Перечислить особенности Встроенных стилей
1. Диалоговое окно Параметры области стилей
- Создайте новый документ (просто запустите Microsoft Word).
- Включите режим Непечатаемые символы.

- Включите область задач Стили


Наверняка вы увидите такую картину:

Вы не забыли, что мы уже настраивали шаблон, (Урок 3. Шаблон документа и его изменение) который открывается при запуске Word? Шрифт у нас Times размером 12 пунктов, и параметры страницы, как заказывали.
Внизу области задач Стили есть группа из трёх кнопок и надпись синим цветом Параметры…

Кнопку Создать стиль мы уже нажимали. О кнопках Инспектор стилей и Управление стилями я расскажу на других уроках. А сейчас нас интересует команда синего цвета Параметры. Нажмите эту команду и на экране появится окно Параметры области стилей.
Из названия можно понять, что это окно настраивает область задач Стили. Мы будем ещё не раз обращаться к этому окну.
2. Режимы отображения стилей и характеристика каждого режима
Нажмите кнопку выпадающего меню, обозначенную красным кружком.

Мы увидели выпадающий список.
Краткая характеристика каждого пункта:
- Рекомендованные
- В области задач будут отображаться стили, которые рекомендуют нам к использованию разработчики программы. Рекомендую не прислушиваться к этим рекомендациям. Разработчики в конце концов живут в другой стране на другом континенте, а у нас свои стандарты и свои национальные особенности.
- Используемые
- Стиль, напомню, это характеристика (или набор форматирования) абзаца. Стили абзацев хранятся в положенном месте, а вот присваивать или не присваивать стили конкретному абзацу – это наше желание. И может случится так, что каким-либо стилем мы не воспользуемся. Так что, выбирая эту команду, мы можем посмотреть, какие конкретно стили используем мы в своём документе. Очень полезная команда.
- В текущем документе
- Если мы выберем эту команду, то в области задач Стили мы увидим все стили, которые заданы в этом документе, как используемые, так и неиспользуемые. Чаще всего я работаю именно в этом режиме, так как тщательно слежу за количеством стилей в документе и не держу попусту лишних стилей. То есть в моём наборе стилей только те, которые я использую в данном документе.
- Все
- Название говорит само за себя.

Выберите эту команду, нажмите ОК и вы увидите:
Я не поленилась, посчитала – 116 встроенных стилей. Готовых, отформатированных. Но пользоваться таким количеством стиле просто нереально. Да и отформатированы эти стили чаще всего не по нашим потребностям.
3. Встроенные стили. Особенности встроенных стилей
- Форматирование Встроенного стиля можно изменять по своему усмотрению (совсем как у собственных стилей, смотри Урок 7. Изменение стиля текста)
- Название Встроенного стиля нельзя заменить. Ваши изменения в названии Встроенного стиля только добавятся к названию Встроенного стиля.
 Автор этого документа очень хотел переименовать встроенные стили и, видимо делал это неоднократно. В результате запутался.
Как переименовывать стили, научимся позже. Ведь может случиться так, что, создавая собственный стиль, мы допустим орфографическую ошибку. В этом случае просто необходимо уметь переименовывать стили - В Word можно удалить любой стиль, созданный пользователем. Word применяет стиль «Обычный» ко всем абзацам, в которых использовался удалённый стиль, и убирает его определение из списка в области задач Стили.
Запомните! Встроенные стили можно удалить из конкретного документа, но нельзя удалить из программы Word! - Встроенные стили можно условно разделить на 4 типа.
 Автор этого документа очень хотел переименовать встроенные стили и, видимо делал это неоднократно. В результате запутался.
4. Встроенные стили. Типы
Тип 1. Стили заголовков

На стили Заголовок 1,2,3 …9 обратите внимание. Заголовки очень важны:
- Определяют структуру документа
- Определяют навигацию в документе
- Соотносятся со структурой презентации в Point’е
Об этом мы будем говорить в следующих уроках
Тип 2. Стили текста

Наиболее распространенными являются стили Обычный и Основной текст, а также их модификации.
Тип 3. Стили списков

Позволяют быстро придать оформление маркированным и нумерованным спискам.
Тип 4. Стили гиперссылок

Стиль Гиперссылка используется для оформления ссылок на web-документы. Стиль Оглавление определяет навигацию в документе.
Теперь вы сможете:
- Вызвать диалоговое окно Параметры области задач
- Дать определение понятию Встроенные стили
- Перечислить режимы отображения стилей и дать характеристику каждому режиму
- Перечислить особенности и типы Встроенных стилей