
Total Number of words that start with STYLE found =12
STYLE comprises of 5 letters. Below are Total 12 words Starting with STYLE (Prefix) found after searching through all the words in english. STYLE is itself is a word in english. style is made up of letters S, T, Y, L and E. Where S is 19th , T is 20th , Y is 25th , L is 12th and E is 5th Letter of Alphabet series
Also see: Words ending with Style | Words containing Style | Words made out of letters used in Style
15 letter Words starting with style
1). Stylelessnesses
13 letter Words starting with style
1). Stylelessness
10 letter Words starting with style
1). Stylebooks
9 letter Words starting with style
1). Stylebook 2). Styleless
7 letter Words starting with style
1). Stylers 2). Stylets
6 letter Words starting with style
1). Styler 2). Styled 3). Styles 4). Stylet
5 letter Words starting with style
1). Style
Style :- An instrument used by the ancients in writing on tablets covered with wax- having one of its ends sharp- and the other blunt- and somewhat expanded- for the purpose of making erasures by smoothing the wax. Hence- anything resembling the ancient style in shape or use. A pen; an author’s pen. A sharp-pointed tool used in engraving; a graver.
Frequently asked questions:
- Which words starts with style?
- What are the words having prefix style?
- List of all words Begining with style.
Wordmaker is a website which tells you how many words you can make out of any given word in english. we have tried our best to include every possible word combination of a given word. Its a good website for those who are looking for anagrams of a particular word. Anagrams are words made using each and every letter of the word and is of the same legth as original english word. Most of the words meaning have also being provided to have a better understanding of the word. A cool tool for scrabble fans and english users, word maker is fastly becoming one of the most sought after english reference across the web.
sty, styl, style,
The Problem:
Okay, I’ve got the hang of direct formatting: bold, italic, and all the font jazz; indents, line spacing, keep-with-next-and-don’t-leave-it-hanging-out-alone-at-the-end-or-start-of-a-page, space before and after, and all that. But I can’t get the hang of styles. How do I add them to the formatting I’ve applied?
The Solution:
You don’tit’s the other way around. Styles should be the basis of all the formatting you apply in Word. You’ll be able to lay out your documents far faster, and with much less effort, by using styles rather than direct formatting.
Here’s the best way to start using styles:
-
Make a list of all the different paragraph types you’ll need to use in a particular set of documents: headings, body text, various types of lists (numbered, bulleted, sublists, etc.), figures, tables, captions, notes, and so on. You will create paragraph, list, and table styles for each of these items.
-
Make a second list of all the items within paragraphs that will need different formatting appliedfor example, bold, italic, bold and italic, subscript, superscript, or underline. You will create character styles for all of these items.
-
Create a new template for the documents. Save it, but don’t close it.
-
In the template, create a new paragraph, list, or table style (or modify an existing style) for each of the elements.
-
Still in the template, create a new character style for each of the character styles you identified.
-
Turn off the «Update automatically» option for each style (more on this shortly).
-
Test the template by entering text in it and applying the styles. Change the styles as necessary.
-
Delete the text in the template, and set the remaining paragraph to the style with which you want each new document based on the template to start.
-
Save the template, close it, and start a document based on it.
Create a new style
To create a new style, take the following steps:
-
With the template open, choose Format » Styles and Formatting to display the Styles and Formatting task pane, and then click the New Style button to display the New Style dialog box (see Figure 4-10). In Word 2000, choose Format » Style, and then click the New button in the Style dialog box.
-
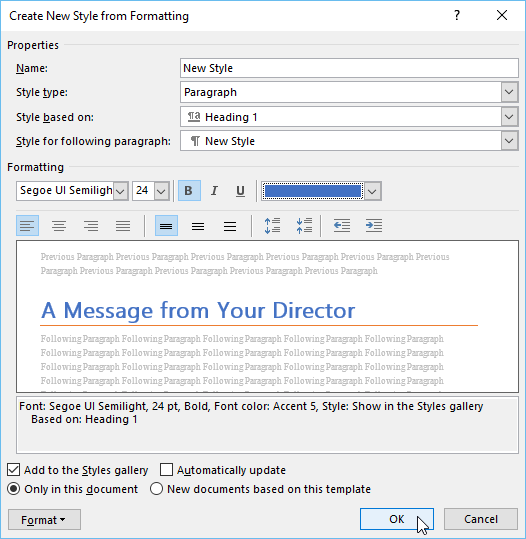
In the New Style dialog box, type a descriptive name for the style and specify the style type: Paragraph, Character, Table, or List.
By giving your styles names that start with a word they have in common, you can make them appear close to each other in Word’s style lists. For example, styles named «Body Italic» and «Body Special» will appear close to each other and be easy to apply, whereas «Italic Body» and «Special Body» will be widely separated and harder to find in the list.
Figure 4-10. Set up the formatting of a new style in the New Style dialog box. The Modify Style dialog box offers almost exactly the same controls.
-
For a paragraph style or a table style, select the style on which the new style is based. The new style picks up all the formatting of the base style, which you can then change as needed. This enables you to create new styles quickly, but bear in mind that if you change the base style afterwards, the new style will inherit those changes. For a paragraph style, select the style for the following paragraph as well. For example, after a heading style, you might want a body text style.
-
Use the controls in the Formatting area to adjust the font formatting, alignment, spacing, and indentation. To make further adjustments, click the Format drop-down list and choose the appropriate item from the pop-up menu.
The «Add to template» box controls whether a change you make to the style in a document is added to the document’s template. When you’re editing a style within a document, you must check this box to make Word save the changes back to the style in the template. When you’re editing a style in the template itself, you don’t need to check this box (although there’s no harm in checking it).
-
If you want Word to update the style automatically when you change a paragraph that has the style applied, and then reapply the style throughout the document, check the «Automatically update» box. Usually it’s best to uncheck this box and to update your styles manually. (This box doesn’t apply to character styles.)
-
Click the OK button to close the New Style dialog box, and then save your changes to the template.
Modify an existing style
You can modify either one of the styles you’ve already created or one of Word’s built-in styles. To do so:
-
In Word 2003 or Word XP, choose Format » Styles and Formatting, click the style, click the drop-down arrow button, and choose Modify from the pop-up menu to display the Modify Style dialog box.
-
In Word 2000, choose Format » Style to display the Style dialog box, select the style in the Styles list, and click the Modify button to display the Modify Style dialog box.
If you’re working in a document rather than in the template itself, remember to check the «Add to template» box if you want Word to apply the change to the template as well as to the document in which you’re working.
by updated Aug 01, 2016

Style is a playable Scrabble Word!
A list of words that start with style for Scrabble that can also be used while playing
Words With Friends. Here’s a list of words that begin with style
of all different lengths.
Contents
- Highest scoring words starting with Style
- 7-letter words starting with Style
- 6-letter words starting with Style
- 5-letter words starting with Style
- 10-letter words starting with Style
- 9-letter words starting with Style
- FAQs about words starting with Style
The highest scoring words starting with Style
Want to go straight to the words that will get you the best score? Here are all the highest scoring words with style,
not including the 50-point bonus if they use seven letters.
| Top Words Starting with Style | Scrabble Points | Words With Friends Points |
|---|---|---|
| styles | 9 | 9 |
| stylers | 10 | 10 |
| style | 8 | 8 |
| stylebook | 18 | 19 |
| stylet | 9 | 9 |
| stylets | 10 | 10 |
| styleless | 12 | 13 |
| stylebooks | 19 | 20 |
| styler | 9 | 9 |
| styled | 10 | 10 |
10 Scrabble words starting with Style
5 Letter Words That Start With Style
- style8
FAQ on words starting with Style
What are the best Scrabble words starting with Style?
The highest scoring Scrabble word starting with Style is Stylebooks, which is worth at least 19 points without
any bonuses.
The next best word starting with Style is stylers, which is worth 10 points.
Other high score words starting with Style are
style (8),
stylebook (18),
stylet (9),
stylets (10),
styleless (12),
styler (9),
and
styled (10).
How many words start with the
letters Style?
There are 10 words that start with the letters
Style in the Scrabble dictionary.
Of those
2 are 7 letter
words,
4 are 6 letter
words,
1 is a 5 letter
word,
1 is a 10 letter
word,
and
2 are 9 letter
words.
You might format a document while you type, or change fonts for things like headings. Here’s a better way to get your document looking smart: Quick Styles.
Don’t change fonts, use Quick Styles
-
You might format a document while you type, or change fonts, font size, or colors for things like headings. Here’s a better way to get your document looking smart: Quick Styles.
-
Give it a try by clicking the Style buttons in the ribbon on the HOME tab.
Want more?
Move around in a document using the Navigation pane
Introduction to Tables of Contents (TOCs)
Take tables of contents (TOCs) to the next level
There’s a mantra I kind of use.
I think it is attributed to Stephen King who says, “Don’t get it right (air quotes right), get it written.”
Here is another thing. Don’t get it formatted, get it written. Work on formatting your document afterwards.
It’s a little tough if you come from the old typewriter age, or if you are a kid, I know, because I have a couple of teenagers. As soon as they click this thing, and they look at fonts they’re gone for five minutes, right?
But what I am going to show you is the advantages of doing that.
So, here we have an unformatted document about the Solar system.
Here’s what I would normally do if I didn’t know about styles.
I might take my title here and okay I want to center that.
Okay, I’ll make it big. I don’t know how big.
I guess that looks good.
Here is my author thing and I am going to try to center that, and I’ll make a little smaller, I guess.
Okay, now, I have all these headings.
What should I do for a heading? Well, let’s make it a color.
I like colors.
So let’s kind of I don’t know about that.
Let’s make that a little bigger.
I don’t know…16 point font, maybe. Maybe?
Oh some spacing.
I could do a carriage return.
Carriage returns are bad, especially if you’re continuing typing because now you’re in that font.
That’s bad.
So let’s get away from the carriage return and maybe you know about, ooh, spacing.
If you go up to the paragraph in the ribbon here in this little triangle on the bottom right-hand corner, that will open your Paragraph settings.
And after I am going to put a little six point. Sure. I don’t know what that is. Sure.
Okay, that gives it a little spacing.
Now if I have to do this for each of my headings, I know about Format Painter, so I can take this format, go over up here to Format Painter in the ribbon, click on that and now everything I touch will be painted like that.
Oops. So that’s cool.
I can do that.
But if I am doing that for a lot of headings, I have to go through my entire document.
That can be kind of troublesome.
I can do all those steps: change font, change spacing, change color with headings.
I am going to go up here to the Quick Styles, which is up here in the ribbon.
The Planets here, I’m going to hit Heading 1 and it has just given me some spacing.
It has changed the font.
It has changed the color.
Kind of just what I did there with three steps, I can do with styles.
So let me click Asteroids and hit Heading 1 again.
So I can go through my document this way.
Now The Planets, that’s going to be a different heading, so I can do Heading 2 and I don’t have to worry about well it’s 16 point font for Heading 1, what should…
Should this be 14 point font? Should it be a different color? I don’t have to worry about that.
I can just go through my document and choose the heading.
So here’s a planet. That’s going to be…
Oops I hit something on the ribbon here.Heading 2. The Earth is Heading 2. Now the moons that will be another part. That’s going to be Heading 3. So you got the idea here. So Mars is Heading 2.
And the Phobos and Deimos, which are the moons of Mars. They will have Heading 3.
Here at RedLine, we work with Word every day, so I figured it was high time for—drum roll, please—a Microsoft Word Styles Tutorial.
You might be wondering what Word Styles are and what purpose they serve. Well, you’re in the right spot.
Read on for our full Microsoft Word Styles tutorial or click below to skip right to a specific section.
I: Introduction
II: Applying Styles
III: Modifying Styles
IV: Creating Your Own Styles
V: Next Steps
Once you finish this tutorial, learn how to work with a table of contents in Word.
Microsoft Word Styles Tutorial
I: Introduction
Definition
Throughout this guide, I’ll be using Styles (uppercase) and styles (lowercase). So what’s the difference?
- Styles refers only to the Microsoft Word feature that deals with text formatting attributes.
- styles refers to formatting attributes, too, but in a general sense. For example, I might talk about good heading styles to use in your Word doc (or a Publisher or InDesign file, for that matter).
Benefits to Using Styles in MS Word
The Styles pane appears in the Home tab. This prominent position should give you a clue as to how important the folks at Microsoft think it is.
Here are four reasons why you should use Styles in Microsoft Word:
- You’ll save a lot of time, especially in long documents.
- You can automatically generate a table of contents based on your headings.
- Your formatting will be much more consistent than if you were to set text attributes manually.
- You can use them in Word templates for consistency across documents.
II: Applying Styles
Understanding Heading Hierarchy
No how-to article—especially a detailed Microsoft Word Styles tutorial—would be any good if it didn’t help you do something. So in this section you’ll learn how to apply styles in MS Word.
My example here is an outline for an article about household pets.
My article has different sections (see Figure 1), such as Section 1: Dogs and Cats and Section 2: Hamsters, Gerbils, and Guinea Pigs. These are my level-1 headings, which I’ll call H1 heads for short.

Figure 1. All headings are in a logical order but have not yet been formatted.
Within each section are more specific sections. In the section on dogs and cats, for example, I’ve got a subsection called Dogs and another subsection called Cats. These are my H2 heads, because they fit logically as “children” under the “parent” category above them.
Then, under each of those sections, I’ve listed even more specific subsections: Short-Haired Breeds and Long-Haired Breeds under Dogs, for example. These are my H3 heads.
Finally, under those sections, the content is more specific still: Beagle, Bloodhound, Irish Terrier, and so on. They fit logically under Short-Haired Breeds and are H4 heads.
I’m talking about my content (the words and ideas) here, not how it’s formatted (font, color, etc.). But it’s important to spend time on this concept because it will inform your formatting choices.
In fact, any self-respecting Microsoft Word Styles tutorial should have at least a bit of information on why you should use styles in the first place: it makes reading easier!
Using Word’s Built-In Styles
This hierarchy of headings displays content to your reader in a logical, sequential way. And the formatting that you’ll apply will reflect that, from broadest (biggest) to most specific (smallest).
MS Word comes prepackaged with a Styles pane in the Home tab. In it you’ll find little windows with labels such as “Title,” “Heading 1, “Heading 2,” “Normal,” etc. You’ll also see dummy text that shows what each Style looks like.
Let’s start applying Word Styles to our example text. (Mine may not look like yours—I’ve styled and restyled these elements several times.)
First, I’ll apply the “Heading 1” Style to the headings that are uppermost in the hierarchy.
Put your cursor anywhere within the line of text that you want to style and then click on “Heading 1.”
Use Word’s built-in styles to format your H1 heads.
Then, I’ll do the same for my H2, H3, and H4 heads using “Heading 2,” “Heading 3,” and “Heading 4,” respectively.
Again, put your cursor in the text to which you want to apply a style and click the style you want.
All headings, from H1 to H4, have been styled.
Pro tip: Use shortcut keys, not mouse clicks, to quickly apply styles in your Word doc.
III: Modifying Styles
What if you’re like me and you don’t like Word’s built-in styles? Then change them!
To modify a style, right-click it in the Styles pane and select “Modify”.
Right-click on the style you wish to change and select “Modify.”
MS Word lets you modify all attributes of a style, including typeface, font color and size, paragraph spacing, and tabs.
A “Modify Style” window will open. Here, you can change the global attributes for that style, including format, font, paragraph, tabs, and so on.
One of the most useful features in Styles is the ability to set a shortcut key. Instead of clicking multiple times with your mouse, you can set a key combination (Ctrl + 1, for example) for the H1 style.
Then, to format all of the H1 heads in your document, you only have to hit Ctrl + 1.
(In the reports that RedLine formats—some of which are over 100 pages—this is a big time saver, so we set up shortcut keys for the most common page elements.)
In my example, I’ve changed the color of the H1 style from blue to dark grey.
Modifying the color of any style changes all instances of that style in your document.
Pro tip: Any change that you make to a style will change all instances of that style throughout your document. (So if there’s any attribute of that style that you don’t want to apply elsewhere, then either create a new style or change the formatting manually.)
IV: Creating Your Own Styles
The next section in our Microsoft Word Styles tutorial has to do with creating your own styles. Moreover, you can base these new styles on existing styles.
Why Create a New Style?
For example, let’s say that you have a long document consisting of a main report and several annexes. For consistency, the headings in the document should be styled the same regardless of whether they appear in the main report or in an annex.
But you may not want your annex headings to populate the table of contents. What you can do is create two separate styles that look identical but that have different names.
How to Create a New Style in MS Word
I’ll use the same document as before. This time, though, it has ballooned from a feature article into a downloadable resource guide for would-be pet owners, so I’ll need a table of contents (TOC).
However, I don’t want every single heading within the annex to appear in the TOC. Solution? Create a new style.
In my example, I’m creating a new style specifically for headings in the annex. The first one is based on the Heading 2 style, so I put my cursor in the text that reads Dogs (it’s styled as an H2) and then click on the “Styles Pane” button (Figure 7). (In Office 2016 for Mac, this appears to the right of the Quick Styles pane.)

Figure 7. Open MS Word’s Styles Pane to create a new style.
Then, within Properties, I change the name of the style from “Heading 2” to “Heading 2 Annex” (Figure 8). Again, it looks like Heading 2—same typeface, same color, same spacing, etc. But now I can control whether it appears in the table of contents.
Figure 8. Give a descriptive name to your new style.
Pro tip: Click within your “template style” (the style on which your new style is based) before you create the new style. This will automatically base the new style on the highlighted style.
V. Next Steps
Well, you’ve reached the end of this little Microsoft Word Styles tutorial.
Download the dummy article I “wrote” for this post to see how the different headings are styled. Then try the following for yourself:
- Apply a style: Put your cursor in a heading and click a different style in the Styles pane to see what happens.
- Modify a style: Pick any style in the document and modify it. (For example, change the color of the H3 heads from red to blue.)
- Create a new style: Create a style called “Heading 3 Annex”. (It will look identical to Heading 3; it will just have a different name.)
This may not be the only Microsoft Word Styles tutorial you’ve read, but I hope it’s been helpful. (Feel free to ask me questions in the comments if you need help on a specific problem.)
If you need help styling your reports, let us know. The majority of our report formatting work is in MS Word. Thanks for reading!
If you’d like to read more content about Microsoft Word, see how to work with nonbreaking spaces.
Lesson 29: Applying and Modifying Styles
/en/word2016/smartart-graphics/content/
Introduction
A style is a predefined combination of font style, color, and size that can be applied to any text in your document. Styles can help your documents achieve a more professional look and feel. You can also use styles to quickly change several things in your document at the same time.
Optional: Download our practice document.
Watch the video below to learn more about using styles in Word.
To apply a style:
- Select the text you want to format, or place your cursor at the beginning of the line.
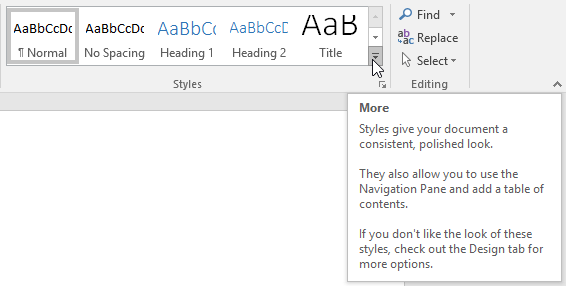
- In the Styles group on the Home tab, click the More drop-down arrow.
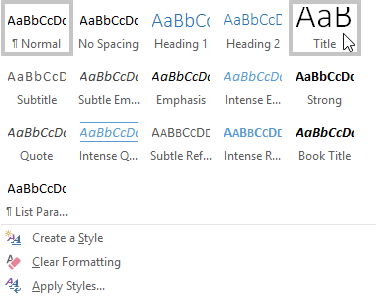
- Select the desired style from the drop-down menu.
- The text will appear in the selected style.
To apply a style set:
Style sets include a combination of title, heading, and paragraph styles. Style sets allow you to format all elements in your document at once instead of modifying each element separately.
- From the Design tab, click the More drop-down arrow in the Document Formatting group.
- Choose the desired style set from the drop-down menu.
- The selected style set will be applied to your entire document.

To modify a style:
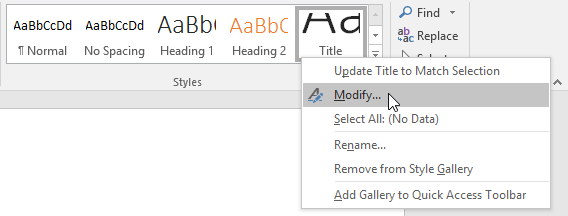
- In the Styles group on the Home tab, right-click the style you want to change and select Modify from the drop-down menu.
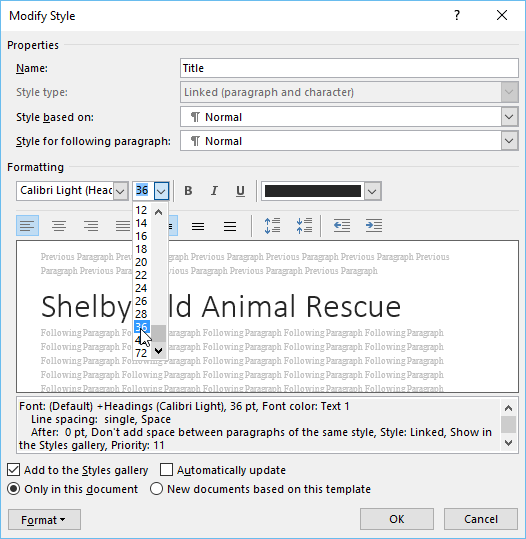
- A dialog box will appear. Make the desired formatting changes, such as font style, size, and color. If you want, you can also change the name of the style. Click OK to save your changes.
- The style will be modified.

When you modify a style, you’re changing every instance of that style in the document. In the example below, we’ve modified the Normal style to use a larger font size. Because both paragraphs use the Normal style, they’ve been updated automatically to use the new size.
To create a new style:
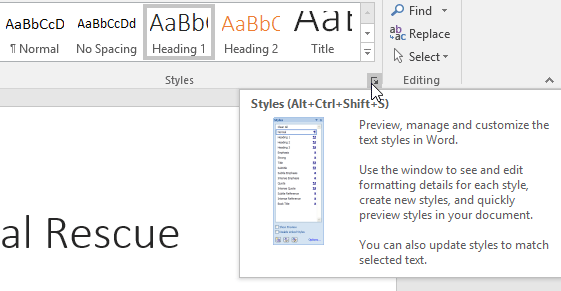
- Click the arrow in the bottom-right corner of the Styles group.
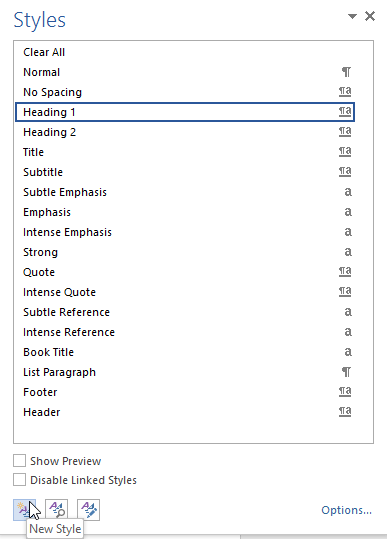
- The Styles task pane will appear. Select the New Style button at the bottom of the task pane.
- A dialog box will appear. Enter a name for the style, choose the desired text formatting, then click OK.
- The new style will be applied to the currently selected text. It will also appear in the Styles group.

You can also use styles to create a table of contents for your document. To learn how, review our article on How to Create a Table of Contents in Microsoft Word.
Challenge!
- Open our practice document. If you already downloaded our practice document, be sure to download a fresh copy by clicking the link again.
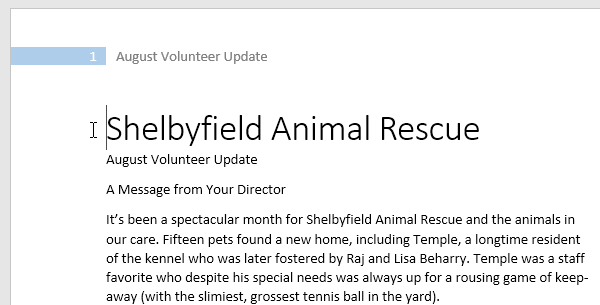
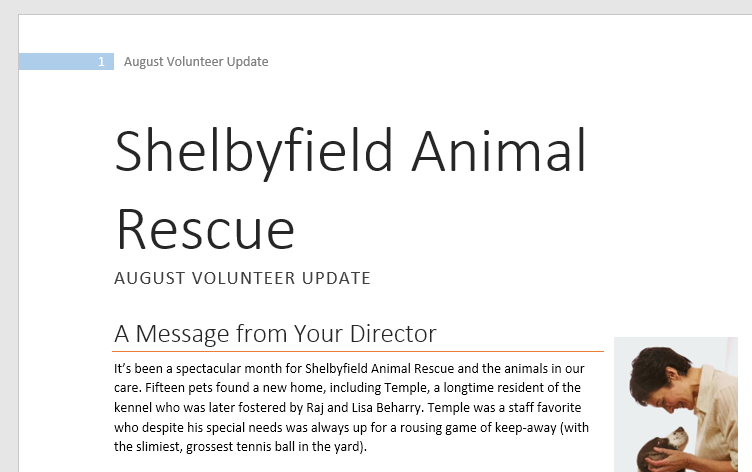
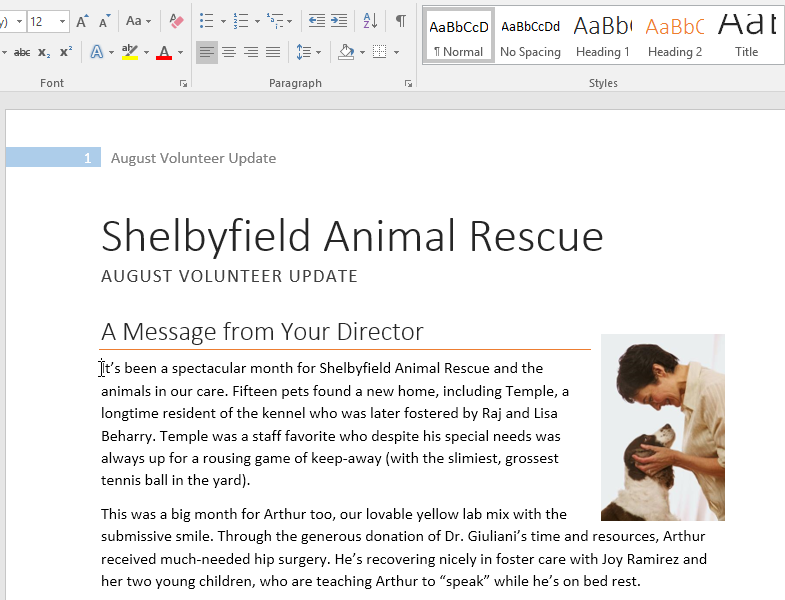
- On page 1, select the first line of text Shelbyfield Animal Rescue and change the style to Title.
- Select the second line that says August Volunteer Update and change the style to Heading 1.
- Select the third line that says A Message From Your Director and change the style to Heading 2.
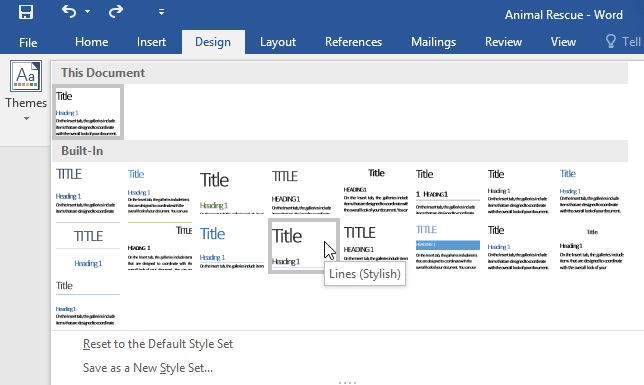
- In the Design tab, change the style set to Casual.
- Modify the Normal style so the font is Cambria and the font size is 14 pt.
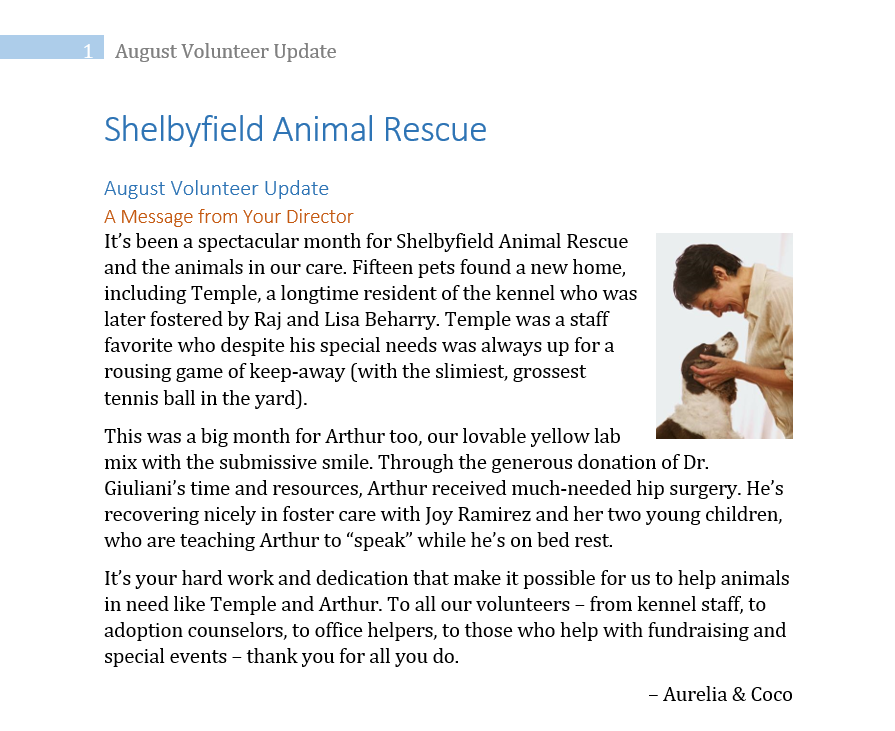
- When you’re finished, the first page of your document should look like this:

- Optional: Modify the Heading 3 style any way you want. You can change the font, font size, color, and more. This heading appears throughout the document, so try to choose formatting that complements the body text.
/en/word2016/mail-merge/content/
Here’s the basics of Styles in Word for paragraph, character or both (Linked) plus Tables and Lists. I know talking about styles in Word makes eyes glaze over but they are a really useful part of Word (plus Excel, PowerPoint and Outlook).
Today I watched an ‘experienced’ Word user reformatting a document. He laboriously worked through the document, selecting paragraphs, phrases and even individual words then clicking on the ribbon to change the look. It took 10 minutes or more. With styles it would have taken a few seconds.
Styles have been around for all of Word’s history. They have changed and expanded over the years but the fundamentals are the same.
In this article we’ll explain the different types of styles including at least one that sneaked in without many people noticing. From just one type in the early days of Word, there’s five different style types in modern Microsoft Word.
What is a Style?
A style is just a collection of formatting settings under a single name.
For example ‘Heading 1’ has these default values in Word (choose Heading 1 style, right-click and choose ‘Modify Style’.
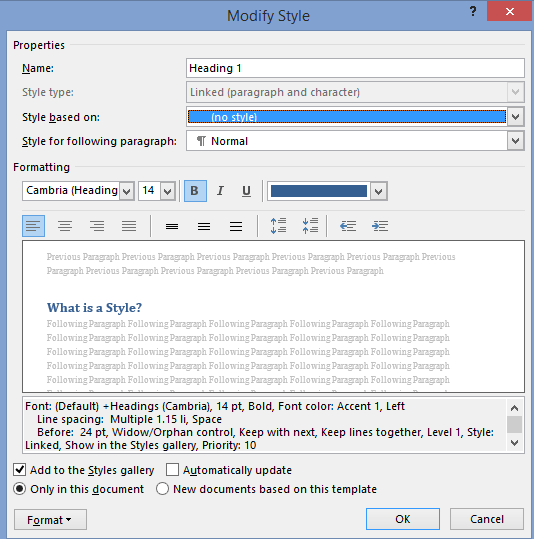
So ‘Heading 1’ means Cambria font, 14pt, Bold with a color setting, Left justified, 1.15 line spacing and 24pt line space before the text, plus other settings.
Instead of having to apply all those separate formatting options for each main heading, just apply the ‘Heading 1’ style.
Even better, if you decide to change the look of the headings, change the ‘Heading 1’ settings and all the headings with that style will be changed automatically.
Paragraph and Character styles
There are different types of style that can be applied to different parts of a document. Originally there were only Paragraph styles – styles you could apply to an entire paragraph.
That was OK but no help if you wanted consistent formatting for words in a paragraph like a product name Office-Watch.com or just emphasis.
So Microsoft added character styles. These are styles that can be applied to a word or even a single letter. A character style could be called ‘Product Name’ to ensure all references to a product or service look consistent.
Character styles have all the attributes of paragraph styles that are applicable to individual characters. Things like font, size, color, bold, italic etc are in both character and paragraph styles. Line spacing, Left/Right/Center/Justify etc. can only apply to entire paragraphs.
Linked styles
Adding character styles created a new problem. Microsoft discovered that users sometimes had two styles with the same name – one as a paragraph style, the other as a character style. Or people would have two styles such as ‘QuoteP’ and QuoteC’ with the same settings, one for paragraphs and another for word/characters.
So Word 2007 introduced ‘Linked Styles‘ which act as both a paragraph style and character style, depending on the situation.
A linked style acts like a paragraph style when a paragraph/s is selected and the style applied.
It acts like a character style when less than a paragraph (a character/word/phrase) is selected and the style applied.
Gone is the need for ‘twin’ styles – now you can have a single style that can applied to any text in a document.
The best example of a linked style is already in Word 2007 and later. All the Heading styles were changed to linked styles. Here’s an example of ‘Heading 1’ style used as both a paragraph and character style at the same time.

Both the paragraph and words were changed to the same style by selecting them and pressing the ‘Heading 1’ shortcut Ctrl + Alt + 1 . The Style Gallery or styles list could have been used to do the same thing.
In the Modify Style dialog you’ll see the style type just under the name.

‘Linked’ isn’t the best choice of terms for this type of style. Most styles are already ‘linked’ to others through style inheritance. ‘Merged’ or ‘Combined’ might have been clearer to most people – but we’re stuck with ‘Linked’.
Which is which?
On the styles list, the three types of style have their own markers.
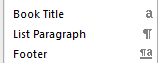
The lower case ‘a’ next to a character style.
The ‘backwards P’ or Pilcrow is used as an end of paragraph mark in Word and also serves to denote a Paragraph style.
The combined pilcrow and a is, unsurprisingly, for a linked style.
Alas, the Style Gallery on the ribbon isn’t as clear. Among various (ignored) complaints about the Style Gallery is the inconsistent marking.
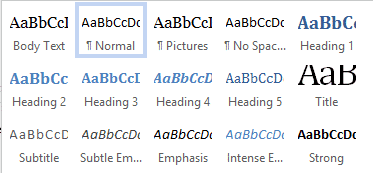
Paragraph styles (e.g. Normal, Pictures etc.) have the pilcrow next to the style name.
Linked paragraphs (Heading styles etc.) have no marking next to the name.
But neither do the character styles! In the above image there’s no way to know that ‘Subtle Emphasis’ is a character style.
Inheritance
A brief mention of style inheritance.
Styles are normally based on an existing style so only changes from the inherited style need to be made. This lets you apply broader changes to a document a lot faster.
For example, here’s settings for Heading 2

Heading 2 is based on the Heading 1 style, so all the settings for Heading 1 are used for Heading 2 as a starting point.
The settings like ’13pt, Not Bold …’ etc. are only the differences between Heading 1 and what’s been changed to the look for Heading 2.
If the font for Heading 1 is changed then the font for Heading 2 will also change due to style inheritance.
In a standard Word document, styles can usually be traced back to some base Word styles like Normal and Default Paragraph Font (paragraph and character styles respectively). However you can create a style ‘from scratch’ with no inheritance. Here’s the same Heading 2 style with the ‘Style based on’ removed.

Now you can see all the formatting attributes in detail.
Unlinking styles might seem like a good idea that makes things simpler, but experienced Word users almost never do it. Style inheritance can be a nuisance at times, but its more helpful than a hindrance.
What’s going on?
Sometimes the formatting can get confusing. What’s a paragraph setting, what’s a character style and what is directly applied with no style? WordPerfect had a ‘Reveal Codes’ feature which Microsoft resisted copying but finally added to Word.
There’s two options for exposing what Word is up to. The Style Inspector (Word 2007 and later) and Reveal Formatting. Here’s both in action side-by-side.
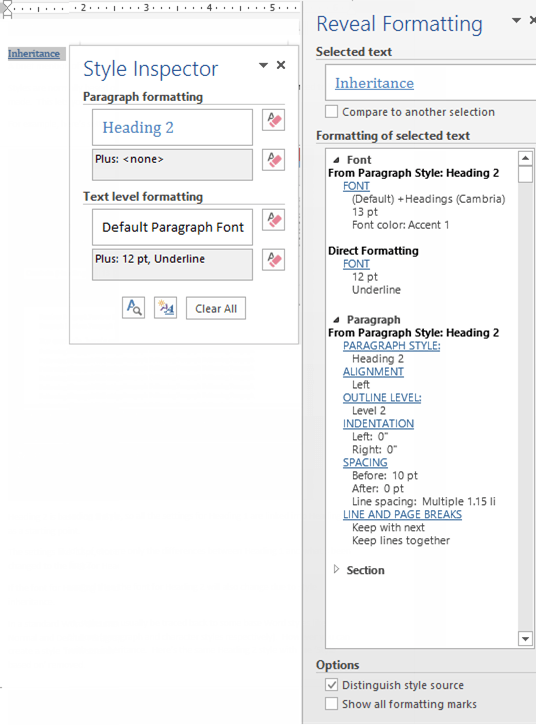
As you can see the Style Inspector is a small box that can be dragged around the screen. Open the Style Inspector from the button at the bottom of the Styles pane:

Reveal Formatting has a lot more detail and sits in the right-hand pane. There’s a button for Reveal Formatting on the Style Inspector box.
The Shift + F1 shortcut will open the Reveal Formatting pane. This shortcut has worked since Word 2002 (XP).
Table and List styles
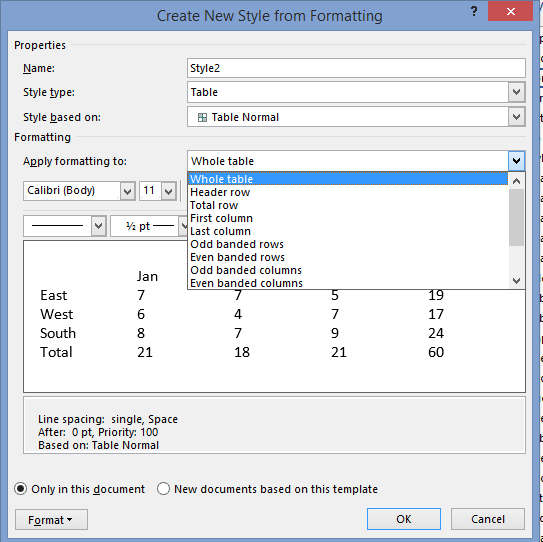
Added in Word 2007 were two more styles.
Table styles, let you group together all the many formatting options for tables.
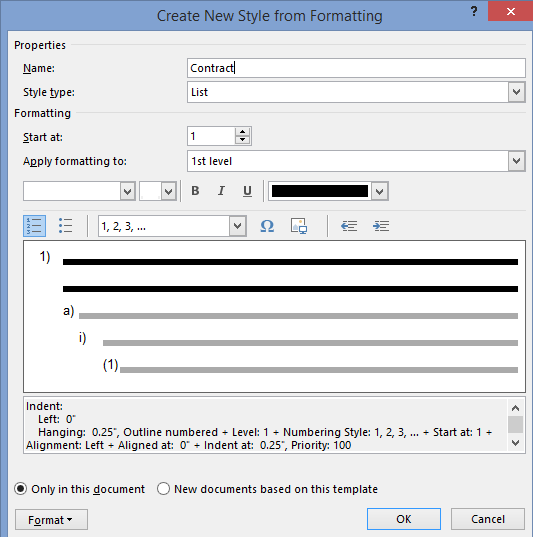
Similarly, all the options for list formatting were a nightmare until Word 2007 when List Styles were introduced. Now all the, sometimes complex, choices for lists (numbering, indenting at each level) can be more easily and consistently applied.
Fix your Word Style Gallery
Word style renaming and alias tricks
Show a Word style marked ‘Hide until used’.
What does Word style ‘Automatically update’ really mean?
Change Word style to match current paragraph