
MS Word is a well-known word processor. Tables are a popular element in Word. Word allows you to insert tables.Tables are made up of rows and columns to effectively display tabular data.However, inserting two tables side by side may be difficult.
Also, there is no direct method for putting two tables side by side at this time, which may be difficult for someone nearby.Stick with me and ourtechroom will show you how to insert two tables side by side in minutes.
Scenario 1 : Create two table side by side
If you haven’t already created a table and want to insert them side by side, follow these steps:
1 First create two column table in Word
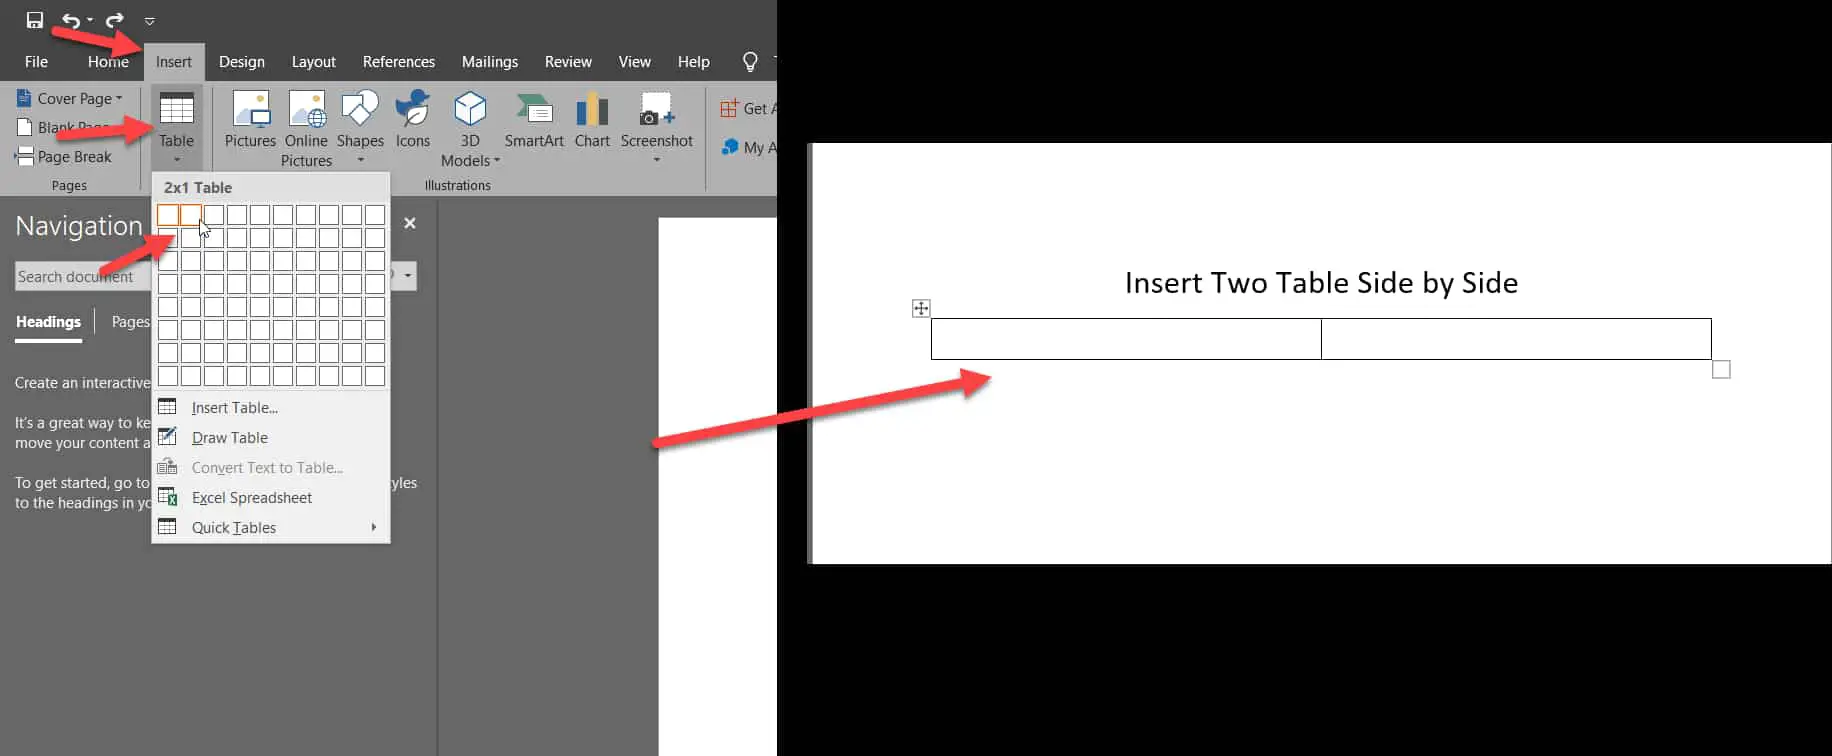
Open MsWord and click on Insert from the menu then click on Table icon , then select 2 * 2 size two column table.
Then table will be generated as shown below.
2 Next, Right click on Generate table and select Table Properties from the dropdown.

3 Under Table tab, click on Border and Shading button.
4 In the next box «Borders and Shading» , under Borders tab Select None from the Setting:
This will hide your table border.

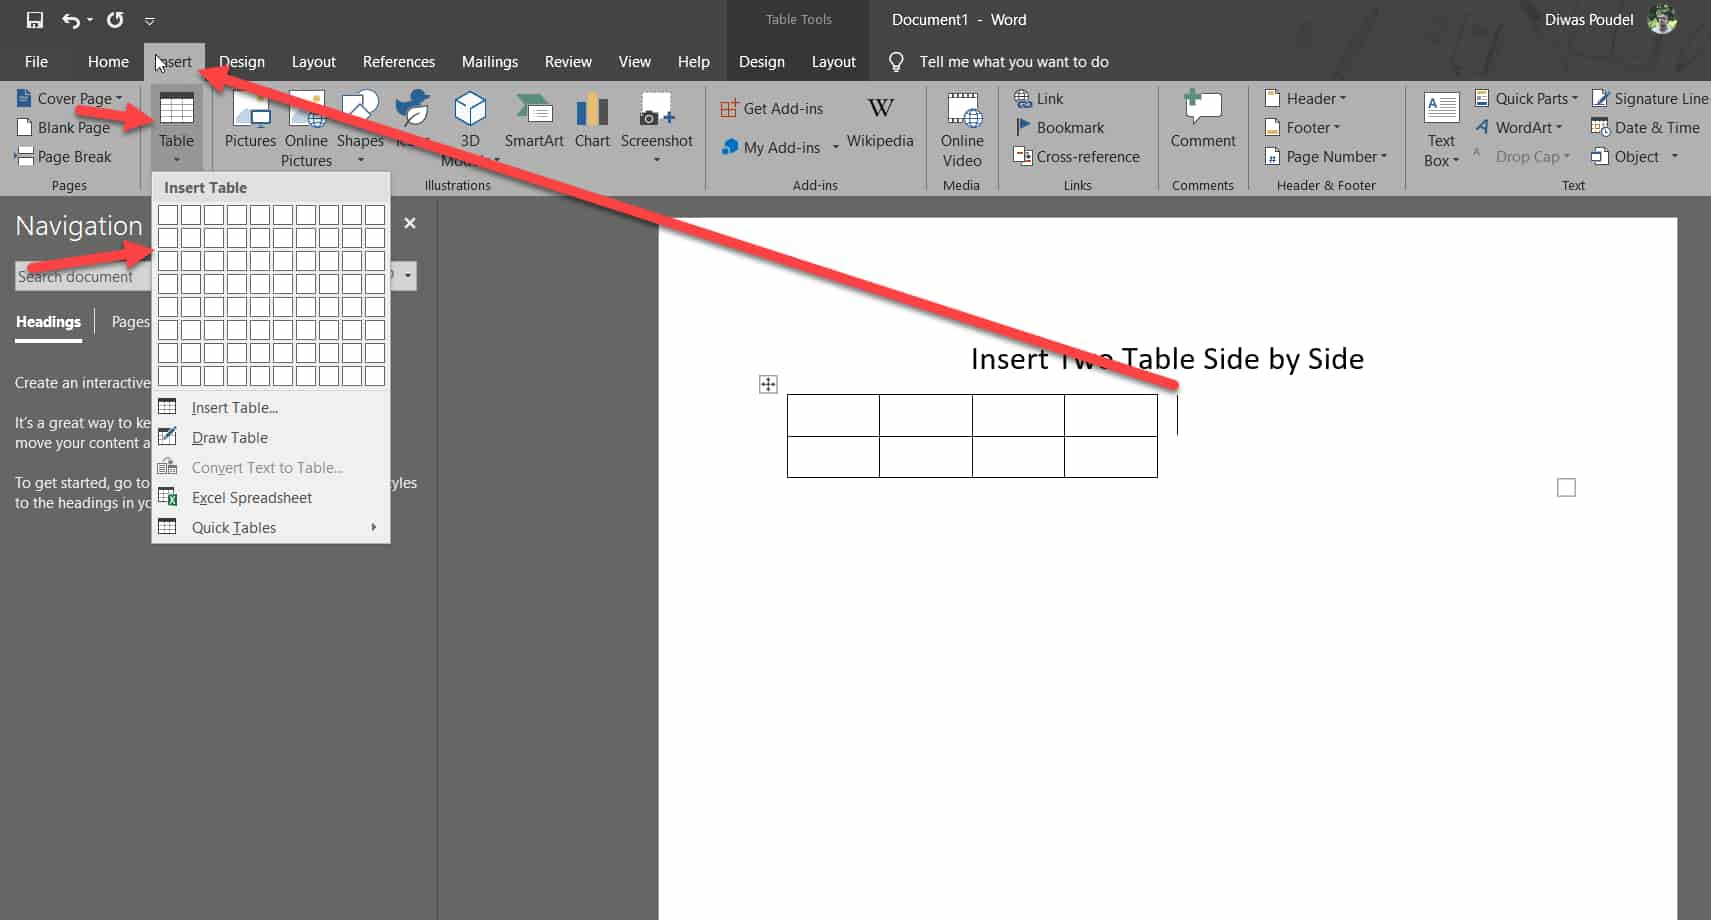
5 Next click on first column of invisible table. Then click on Insert and add desire size table row and column.
In my case I have selected 1*4 table as shown below.
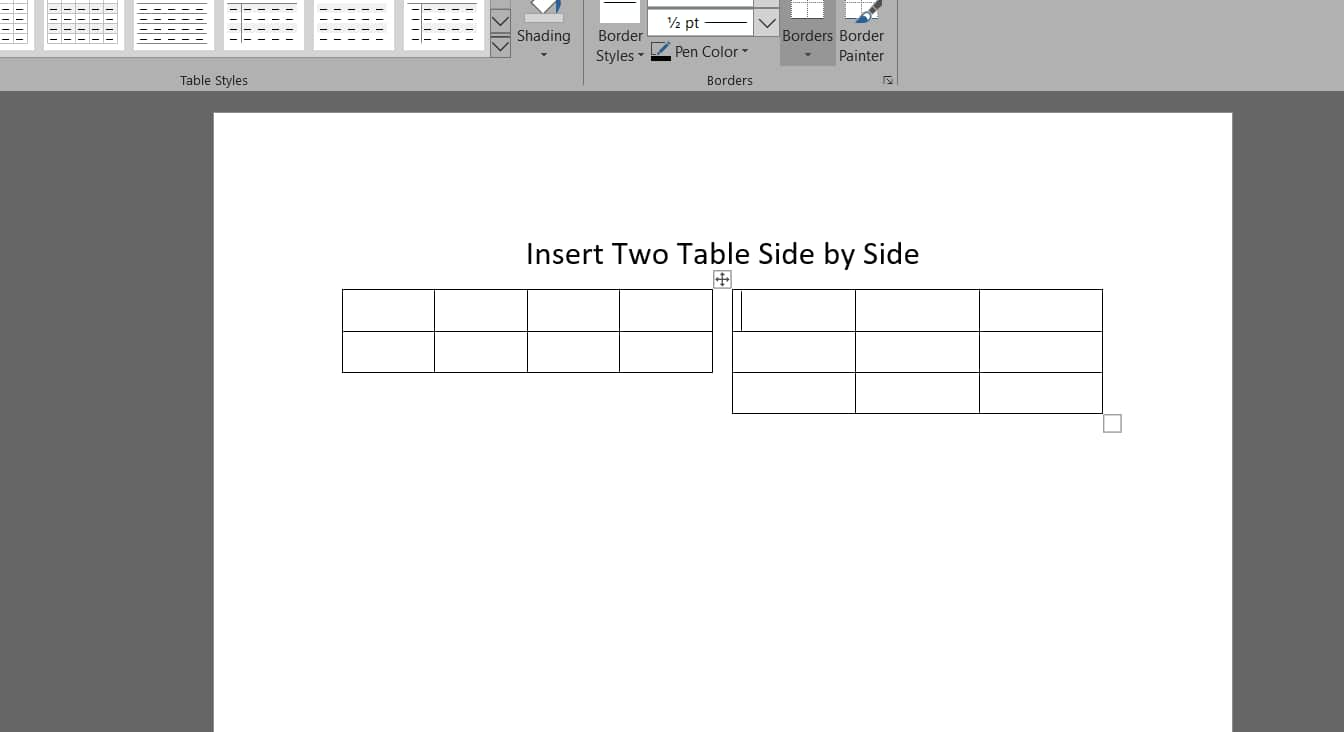
6 Next click on second column of invisible table. Then click on Insert and add desire size table row and column.
In my case I have selected 2*3 table as shown below.
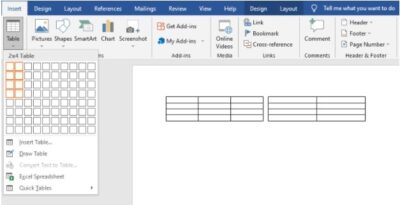
So we have successfully created two table side by side or adjacently as shown below.
Scenario 2: Align two table side by side from existing table
Suppose you have two table one below another and you just want to set these two table side by side then follow below steps:
1 Resize first table to fit second table next to it.
2 Drag second table next to first table.

Scenario 3 : Make 50% table side by side in MsWord
Steps are as follow.
1. Right click on First table, then click on Table Properties.
Note: At this point you should have only one table on a row.
2 Under Table tab, in Size property , Check in Preferred Width and set the value 50 and then in Measure in select Percent and then click on OK.

3 Drag second table to the right of first and repeat 1 and 2 Steps.
Conclusion:
In this manner, we are able to make two tables that are either side by side, left to right, or adjacent to one another.
Creating a table in the word is very simple, but what if you want to create multiple tables and want to place them side by side?
There are several ways to create multiple tables side by side. Here we show the two easiest ways to create more than one table side by side.
1. Create Multiple Tables Side by Side in Word With Table Caption.
By using word table caption we put multiple tables side by side. Now we show the live preview below. And follow those tricks step by step.
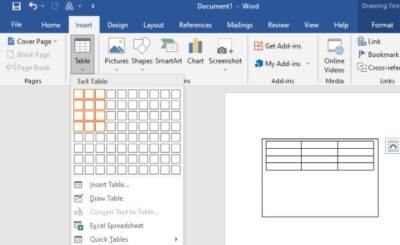
Step 1: Go to the insert option.

Step 2: Click on the table and select how much you want rows and columns. Here we select 2 rows and 1 column.

Step 3: On the table left corner see a box. Click the box with the right button and select table properties. And click the borders and shading option.

Step 4: Now select none to remove the out-of-borders of the tables and click ok. And insert two tables into individual cells.

Step 5: Select table 1 and right-click to go for insert caption. The caption will be auto-generated. Similarly, you can add captions to the 2nd table.

Step 6: Now you can edit your caption to bold, italic, underline, and also can change the text color. Now you show two tables side by side in word.

2. Generate the Movable and Multiple Tables Side by Side in Word.
Step1: Here we share the tricks on how you can do this easily. First, you have to go to the insert option and click the text box to select a simple text box.
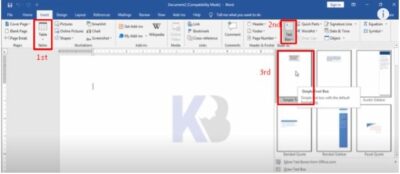
Step 2: Now we add a table to this box. As like 1st method you can select the row and column as you need. You move and resize it easily. Similar way you can add tables with a text box.
Step 3: Here we create three tables. But show the box outline.

Step 4: To remove the box outline at first select it and go to the format option. Now select the none(no fill and no outline) option from shape fill and shape outline.

Step 5: Similar way, remove the text outline from other tables. That’s why we create multiple tables and can move them as we want.

I want to insert two tables side by side on a single page. The tables are pretty large, 46 rows by 4 columns. I created them in Excel, but found that they can’t be imported directly and have to be pasted into an existing table (Table > Excel Spreadsheet). I did the same and got them in the document.
Now the problem is that they can’t be placed side by side (perfectly). When I do not have any break (section break, page break or even a line break), they do get side by side, but one of them is shifted down by one row. I tried using columns, but it didn’t help.
I’m using Office 2019 Version 1905.
The document1.
(As the table to the right is shifted down by one row, the last row can’t be seen)
Thanks.
1 Some fonts might not be there on your computer.
Excel for Microsoft 365 Word for Microsoft 365 Excel 2021 Word 2021 Excel 2019 Word 2019 Excel 2016 Word 2016 Office 2016 More…Less

Try it!
If you’re working on more than one document or spreadsheet at the same time, it can help to see them side-by-side.
See windows side by side in Windows 10
-
Drag one of the windows to the edge of your screen.
-
Select the app you want to see next to it.
See two documents side by side in Word
-
Open the 2 documents.
-
Select View > View Side by Side.
If you scroll up or down, the other scrolls as well. If you want them to scroll separately, select Synchronous Scrolling to turn it off.
Split your window into panes in Word and Excel
-
Select View > Split.
-
To resize the panes, just drag the border.
Want more?
View two or more worksheets at the same time
Split panes to lock rows or columns in separate worksheet areas
Word training
Excel training
PowerPoint training
Outlook training
Need more help?
Bullet point is a common type of word style to display a list in an easy to organize manner. Bullet points are everywhere but they tends to waste a lot of blank space on the document, roughly half of the page is served just for the list.
But you can make the most of it by making the list(s) appear side by side. This practice is extremely helpful if you have multiple lists or a list that has tons of points. That way, the document would look more dense and organized.
Here are the tips to make bullet points in Microsoft Word positioned side by side in one page.
1. First, write the list. It could be a single list or multiple lists.

2. Then, select the list (blockquote).

3. Now, go to Layout > Columns > Two.

4. Now the lists appear side by side equally.

The beauty of this method is it won’t affect the rest of the document since only selected text that converted into columns. Therefore, it won’t suddenly turn your document into a mess.

The guide you just see above is just a basic tip of using the Columns feature on Microsoft Word. You can explore many of its combinations by visiting Layout > Columns > More Columns…