
Excel for Microsoft 365 Word for Microsoft 365 Outlook for Microsoft 365 PowerPoint for Microsoft 365 Project Online Desktop Client Excel for Microsoft 365 for Mac Word for Microsoft 365 for Mac PowerPoint for Microsoft 365 for Mac Excel for the web PowerPoint for the web Excel 2021 Word 2021 Outlook 2021 PowerPoint 2021 Project Professional 2021 Excel 2021 for Mac Word 2021 for Mac PowerPoint 2021 for Mac Excel 2019 Word 2019 Outlook 2019 PowerPoint 2019 Project Professional 2019 Excel 2019 for Mac Word 2019 for Mac PowerPoint 2019 for Mac Excel 2016 Word 2016 Outlook 2016 PowerPoint 2016 Project Professional 2016 Excel 2016 for Mac Word 2016 for Mac PowerPoint 2016 for Mac Excel 2013 Word 2013 Outlook 2013 PowerPoint 2013 Project Professional 2013 Project Standard 2013 Excel 2010 Word 2010 Outlook 2010 PowerPoint 2010 More…Less
You can add shapes, such as boxes, circles, and arrows, to your documents, email messages, slide shows, and spreadsheets. To add a shape, click Insert, click Shapes, select a shape, and then click and drag to draw the shape.
After you add one or more shapes, you can add text, bullets, and numbering to them, and you can change their fill, outline, and other effects on the Format tab.
Tip: You can add individual shapes to a chart, or add shapes on top of a SmartArt graphic to customize the chart or the graphic.
Add a shape in Excel, Outlook, Word, or PowerPoint
-
On the Insert tab, click Shapes.

-
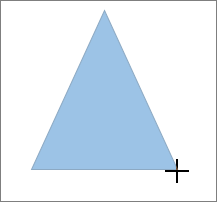
Click the shape you want, click anywhere in the workspace, and then drag to place the shape.
To create a perfect square or circle (or constrain the dimensions of other shapes), press and hold Shift while you drag.


To follow these steps, you need to open or create a report. To do that, on the Report tab, click Recent to open an existing report, or click More Reports to select a report from the list in the Reports dialog box or create a new report.
-
In the open report, on the Design tab, click Shapes.
-
Click the shape you want, click anywhere in the workspace, and then drag to place the shape.
To create a perfect square or circle (or constrain the dimensions of other shapes), press and hold Shift while you drag.
Insert a shape, or click an existing shape, and then enter text.
-
Right-click the shape and click Add Text or Edit Text, or just start typing.
Note: The text that you add becomes part of the shape — if you rotate or flip the shape, the text rotates or flips also.
-
To format and align your text, click the Home tab, and then choose options from the Font, Paragraph, or Alignment groups, depending on the program you’re using and what kind of formatting you want to apply. (Text formatting options are limited in Project.)
Note: These commands aren’t available in Project.
-
Click the shape you want to change.
To change multiple shapes, press Ctrl while you click the shapes that you want to change.
-
On the Format tab, in the Insert Shapes group, click Edit Shape
, point to Change Shape, and then click the new shape that you want.
 , point to Change Shape, and then click the new shape that you want.
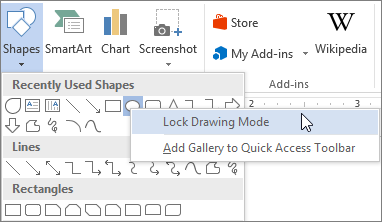
If you need to add the same shape repeatedly, you can do so quickly by using Lock Drawing Mode.
Note: Instead of adding individual shapes to create a drawing, you might want to Choose a SmartArt graphic. In a SmartArt graphic, the arrangement of the shapes and the font size in those shapes is updated automatically as you add or remove shapes and edit your text.
-
On the Insert tab, click Shapes.
-
Right-click the shape you want to add, and then click Lock Drawing Mode.
-
Click anywhere in the workspace, and then drag to place the shape.
-
Repeat step 3 to add the shape as many times as you like.
Tip: To create a perfect square or circle (or constrain the dimensions of other shapes), press and hold Shift while you drag.
-
After you add all the shapes you want, press Esc to turn off Lock Drawing Mode.
Note: This feature isn’t available in Project.
-
Select the text in the shape that you want to add bullets or numbering to.
-
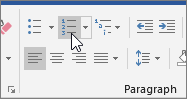
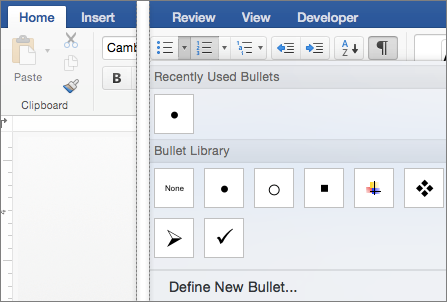
Select the Home tab on the ribbon, and in the Paragraph group, select Bullets or Numbering.
You can find different bullet styles and numbering formats by clicking the down arrow next to Bullets or Numbering.
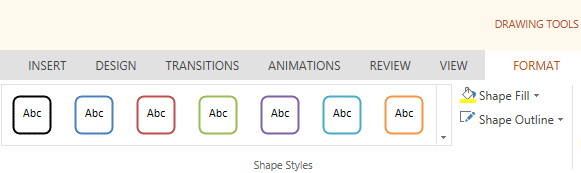
Quick Styles let you apply a style to your shape with one click. You’ll find the styles in the Quick Style gallery. When you rest your pointer over a Quick Style thumbnail, you can see how the style affects your shape.
-
Click the shape you want to change.
-
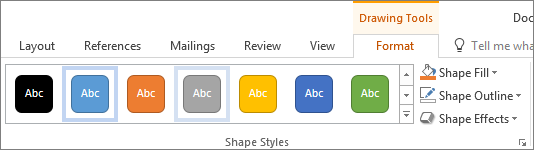
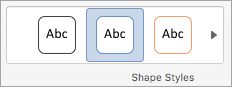
Select the Format tab, and in the Shape Styles group, select the Quick Style you want to use.
To see more Quick Styles, click the More button
.
 .
.Click the shape that you want to delete, and then press Delete. To delete multiple shapes, press Ctrl while you click the shapes that you want to delete, and then press Delete.
See Also
Draw or delete a line, connector, or freeform shape
Rotate a text box, shape, WordArt, or picture
Change the colors in a text box or shape
Draw a decorative line in Word or Outlook
Choose a SmartArt graphic
Create a chart from start to finish
Add clip art to a file
Draw and sketch notes on a page
After adding a shape to a document, you can modify it by adding connector lines, changing the style, adding a mirror image, changing the color, and applying a variety of other effects, such as shadows, glow, and 3-D.
Add a shape
-
On the Insert tab, click Shapes.
-
Click the shape you want, click anywhere in the workspace, and then drag to place the shape.

-
Right-click the shape and click Add Text or Edit Text, or just click inside the shape and start typing .
Note: The text that you add becomes part of the shape — if you rotate or flip the shape, the text rotates or flips also.
-
To format and align your text, click the Home tab, and then choose the available formatting options. For example, you can change font color, styles, sizes, change alignment or indentation, change the text orientation, to name a few.
-
Click the shape you want to change.
To change multiple shapes, press
while you click the shapes you want to change. -
On the Shape Format tab, click
, point to Change Shape, and click the new that you want.
 while you click the shapes you want to change.
 , point to Change Shape, and click the new that you want.
-
Select the shape you want to copy.
-
Press the option key and drag the shape anywhere you want. Release the mouse, and a copy of the shape is created. You can drag and release the shape as many times as necessary.
Note: Adding lists is not available in Excel 2016 for Mac.
-
Select the text in the shape that you want to add bullets or numbering to.
-
On the Home tab, click the arrow next to Bullets or Numbering.
-
Press Enter every time you want a new bullet or number, or press Enter twice to end the list.
-
Click the shape you want to change.
-
Click the Shape Format tab, and in the style gallery, click the style you want.
To see more styles, click
below the style gallery.
 below the style gallery.
-
Click the shape you want to change.
-
Click the Shape Format tab, and click
(Shape Fill icon). -
Do one of the following:
-
To use a different fill color, under Theme Colors or Standard Colors, click the color that you want to use.
-
To remove the color from the selected chart element, click No Fill.
-
To use a fill color that is not available under Theme Colors or Standard Colors, click More Fill Colors. In the Colors dialog box, use the available options to pick a color, and then click OK.
-
To fill the shape with a picture, click Picture. In the Insert Picture dialog box, click the picture that you want to use, and then click Insert.
-
To use a gradient effect for the selected fill color, click Gradient, and then click the gradient style that you want to use.
For additional gradient styles, click More Gradients, and then in the Format Chart Area pane, under Fill, click the gradient options that you want to use.
-
To use a texture fill, click Texture, and then click the texture that you want to use.
-
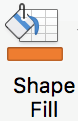 (Shape Fill icon).
-
Click your shape, and then click the Shape Format tab.
-
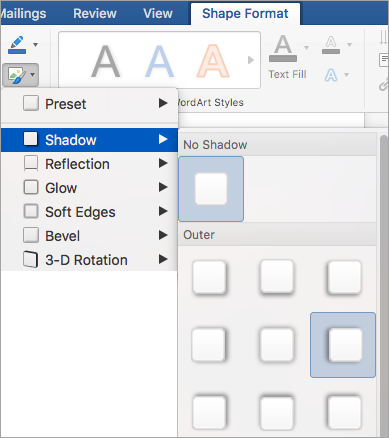
In the Shape Styles group, click Shape Effects, point to an effect category, and then click the effect that you want.
-
On the Shape Format tab, click Format Pane.
-
In the Format Shape pane, click the Fill & Line tab, and then click either Fill or Line.
-
Drag the Transparency slider to achieve the effect you want.


Click the shape that you want to delete, and then press Delete. To delete multiple shapes, press Command while you click the shapes that you want to delete, and then press Delete.
See also
Change the size of an object
Crop a picture
Move, rotate, or group a picture, text box, or other object
Align objects in Word for Mac
Group or ungroup objects
You can add shapes, such as boxes, circles, and arrows, to your workbooks and presentations. (Word for the web doesn’t support shapes.) To add a shape, select Insert on the ribbon, select Shapes, and then choose a shape.
After you add a shape, you can move it and resize it; add text, bullets, or numbering; and you can change the fill color or outline.
-
On the Insert tab, select Shapes.
-
Select the shape you want from the drop-down gallery.
A default-sized shape is immediately inserted in the middle of the visible page.
-
Select a sizing handle on the perimeter of the shape and drag inward or outward to change the size of the shape.
To create a perfect square or circle (or constrain the dimensions of other shapes), press and hold Shift while you drag.
-
To move the shape, point the mouse at it until the pointer turns into a four-headed arrow. Then click and drag to move the shape where you want it.
When a shape is selected in your document, a Shape tab appears on the toolbar ribbon. It has buttons for things you can do with the shape such as adding a fill color or outline, or choosing a predefined shape style.
Note: If you have the Simplified Ribbon turned off, the tab name in step #4 is Format. For more information on the Simplified Ribbon see The new look of Microsoft 365.

Insert a shape, or click an existing shape, and then enter text, as follows:
-
Right-click the shape and select Edit Text.
A blinking cursor appears in the center of the shape.
-
Type the text you want to add to the shape.
-
To format and align your text, select the Home tab, and then choose options from the Font, Paragraph, or Alignment groups.
Quick Styles let you apply a style to your shape with one click. You’ll find the styles in the Shape gallery.
-
Select the shape you want to change.
-
On the Shape tab (or the Format tab if you have the Simplified Ribbon turned off), open the Shape Style gallery and select the Quick Style you want to use.
Select the down arrow on the end of the gallery to open it and see the complete list of options:
You can pause the mouse pointer over an option in the gallery to see a short description of it.

-
Select the shape you want to change.
-
On the Shape tab (or the Format tab if you have the Simplified Ribbon turned off), select the down arrow next to Fill to open the gallery of fill colors.
-
Select a color.
-
To make the shape transparent, select No Fill at the bottom of the color gallery.
-
Select the shape you want to change.
-
On the Shape tab, (or the Format if you’re still using the classic ribbon) select the down arrow next to Outline to open the gallery of outline colors.
-
Select a color.
-
At the bottom of the gallery there are also options for the thickness (Weight) of the outline, and whether the outline is solid, dotted, or a dashed line. Point at Weight or Dashes to see a pop-out list of options.
Click the shape that you want to delete, and then press the Delete key. To delete multiple shapes, press Ctrl while you select the shapes that you want to delete, and then press Delete.
Need more help?
Want more options?
Explore subscription benefits, browse training courses, learn how to secure your device, and more.
Communities help you ask and answer questions, give feedback, and hear from experts with rich knowledge.
Updated: 03/05/2023 by
When creating a document in Microsoft Word, or a spreadsheet in Microsoft Excel, users can add many types of shapes to highlight important items. Bringing attention to those items helps readers to better understand the content of the document or spreadsheet. After a shape is added, it can be modified by changing features, such as size, color, and fill.
To add and edit a shape in Microsoft Word and Microsoft Excel, select a link below for help.
Add shapes in Microsoft Word
Select the version of Microsoft Word you’re using below and follow the steps to learn how to add a shape in a document.
- Microsoft Word Online.
- Microsoft Word desktop application.
Microsoft Word Online
- In Microsoft Word Online, click the Insert tab at the top of the window.
- On the Insert tab, in the Illustrations group, click the Drawings option.
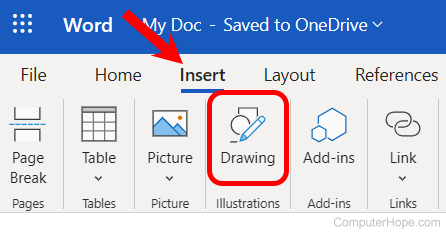
- In the Drawings (Preview) window, click the Shapes option, and select the type of shape you want to add or draw from the drop-down menu that appears.
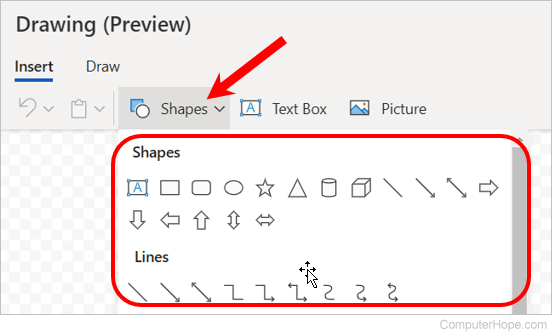
- After selecting the desired type of shape, draw the shape in the Drawing window, then click the Save and Close button to add the shape in your Word Online document.
Microsoft Word desktop application
- In Microsoft Word, click the Insert tab at the top of the program window.
- On the Insert tab, in the Illustrations group, click the Shapes option.
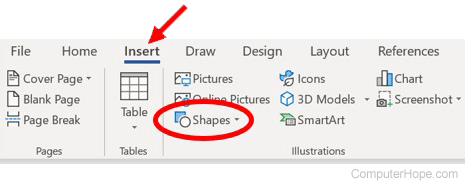
- Select the type of shape you want to add or draw from the drop-down menu that appears.
Add shapes in Microsoft Excel
The following steps help you add a shape to a spreadsheet in Microsoft Excel Online or the desktop application.
- In Microsoft Excel, click the Insert tab at the top of the program window.
- On the Insert tab, click the Illustrations option, then click the Shapes option.
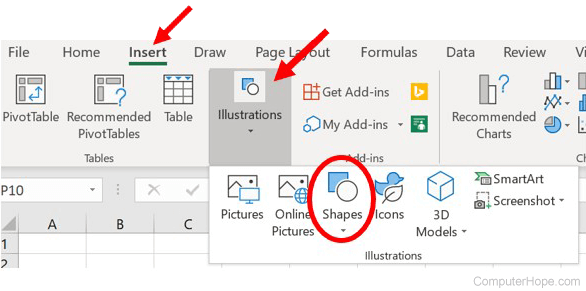
- Select the type of shape you want to add or draw from the drop-down menu that appears.
Edit shapes in Microsoft Word and Excel
- Click the shape to select it.
- Right-click the shape and select Format Shape in the pop-up menu.
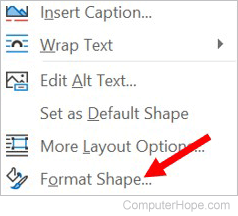
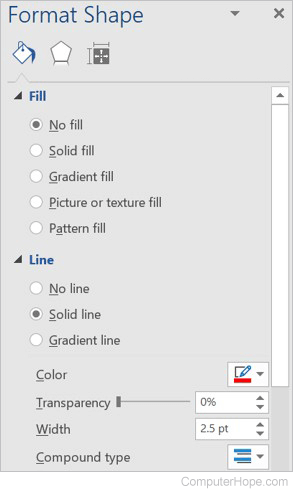
- The Format Shape section opens on the right side of the program window. You can change the shape’s fill, select the type and fill color (or no fill at all), and the size, color, and shape’s lines. You can also add shadow, glow, reflection, and other effects.
Everyday in business or in another field there are lots of information or documentation files that are required to store for future use. For anyone, it is very difficult to store that information for a long time. Earlier letters, office files, documents, projects, and information are stored in a form of a registrar, file, or by paperwork but finding it may be difficult for us. It takes a lot of time. To resolve this issue Microsoft brings software called MS Word.
Microsoft Word is a software tool that allows users to create documents like articles, letters, projects files very easily. It has various features like editing and formatting, graphics, designs, fonts styles, printing documents, etc.

Features of MS Word
- Various Page Designs, page numbers, border
- Tables
- 3D models, charts, and icons
- WordArt
- Page Layout formats
- Inserting Online pictures and video
- Text color and many more.
- Date and Time
- Page Designs
- Different text fonts
What are Shapes in MS Word?
Microsoft Word has a special feature called shapes in which users can insert many different types of shapes in the document. A shape highlights the important item of the document. It attracts the attention of the readers for a better understanding of the content of the document.
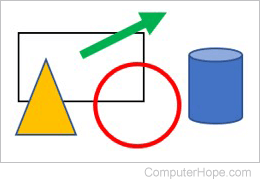
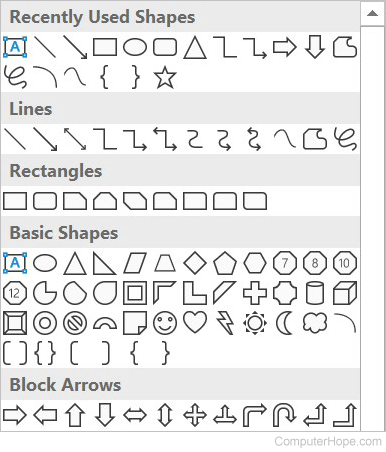
MS Word contains many different types of shapes such as boxes, rectangles, callouts, circles, arrows, lines, triangles, curves, equations shapes, and many more. Once the shape is added, you can modify it by changing features like color, style format, size, outline, etc.
So you should use different types of shapes in your document. The figure below shows the different types of shapes that are available in MS Word.
Some examples of shapes are:


Steps to Add Shapes in MS Word
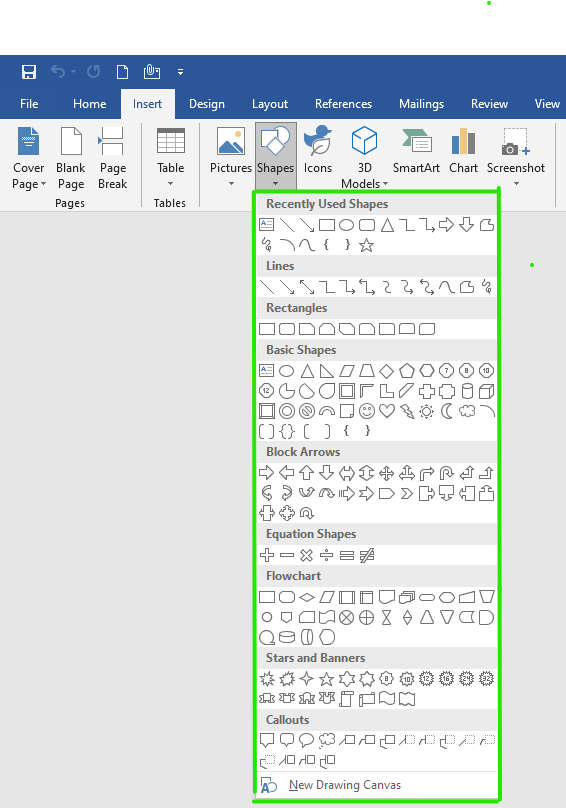
Step 1: On the navigation menu click on the insert option.

Step 2: In the illustration section select the shapes option as shown in the figure:
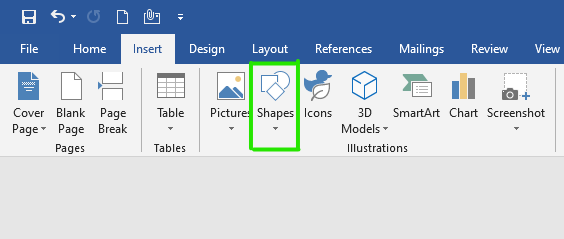
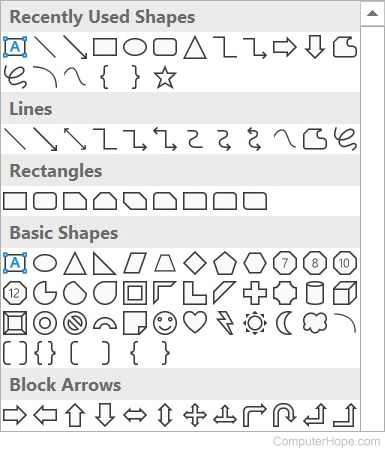
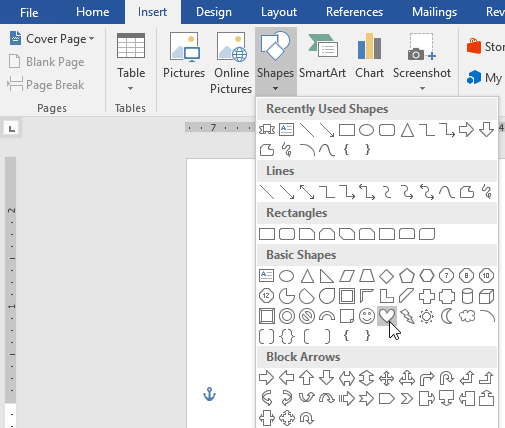
Step 3: A list of shapes will pop up on the screen where you can select different types of shapes.
There are total of 8 sections in shapes:
- Lines
- Rectangles
- Basic Shapes
- Block Arrows
- Equation Shapes
- Flowcharts
- Stars and Banners
- Callouts
Step 4: Now select a shape as per your need.

Step 5: Next drag the cursor on your current page to draw the shape.
Step 6: Finally shape is added on the current page of the document as shown in the figure:

Step 7: Now click on the drag button to set the size of the shape as shown in the figure:

Step 8: On the navigation menu click on the format option to give color, layout, style to the shape.

Step 9: Under the shape style section click on the drop-down arrow to open the style panel.

Step 10: A theme style color panel will open where you can select different types of color styles for the shape as shown in the figure:
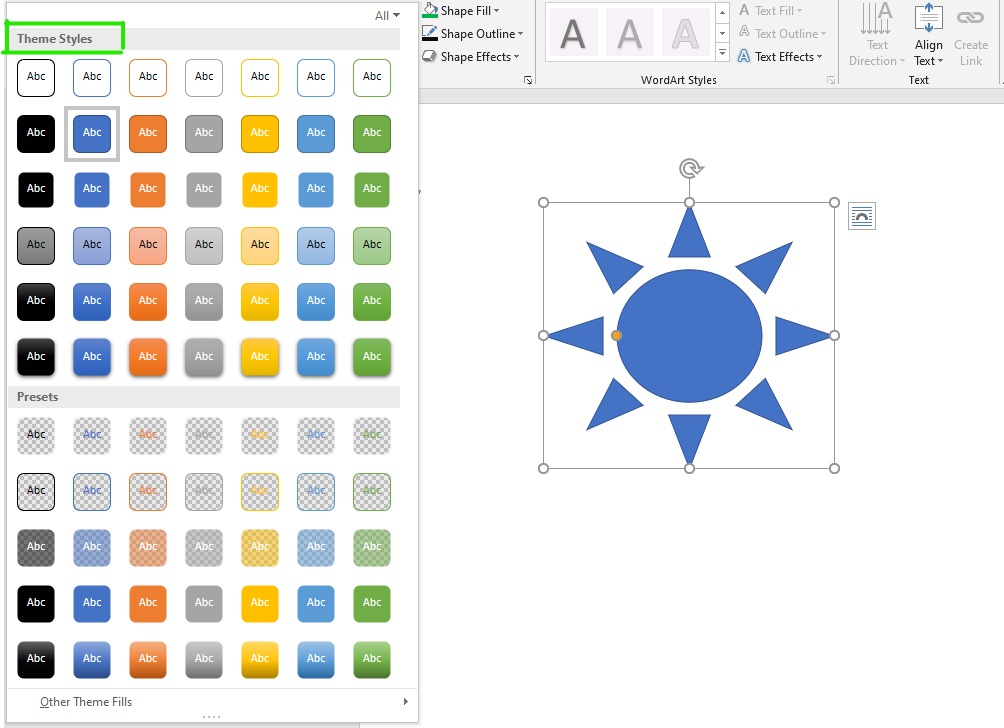
Step 11: Select the color of your choice.

Step 12: You can also choose a different color pattern from other theme fills options as shown in the figure:

Step 13: You can also select a different color from the shape fill option.

Step 14: Next click on the shape outline option to give an outline to the shape.

Step 15: Select the color from the theme colors panel as shown in the figure:

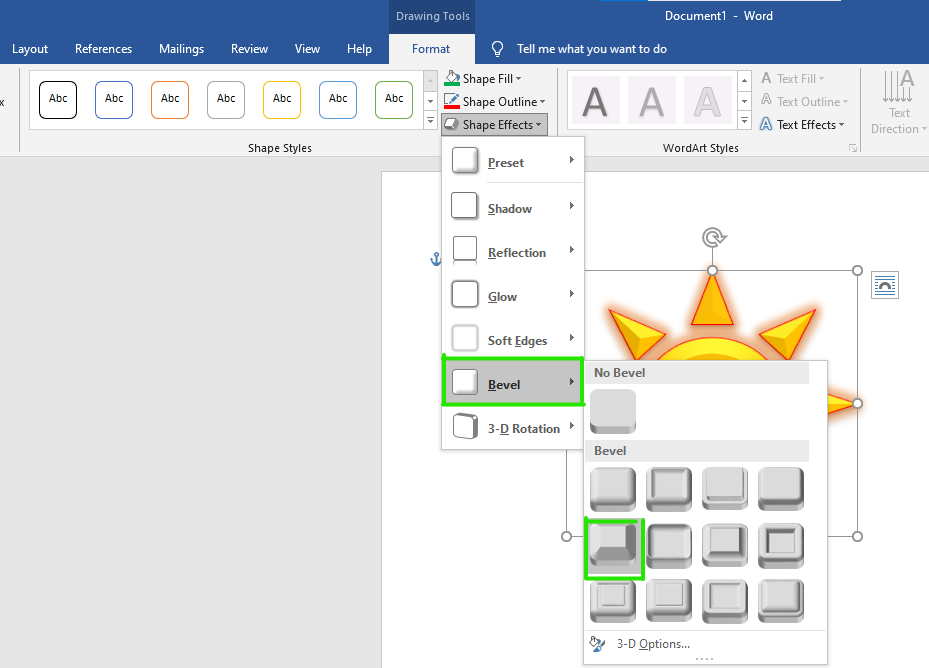
Step 16: Next click on the shape effects option.

Step 17: Now select the option from the menu as per your requirement.

Finally, the shape is inserted in your document.
These are some of the steps to insert a shape in an MS Word document.
Lesson 20: Shapes
/en/word/formatting-pictures/content/
Introduction
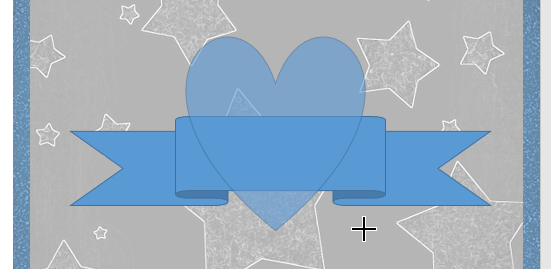
You can add a variety of shapes to your document, including arrows, callouts, squares, stars, and flowchart shapes. Want to set your name and address apart from the rest of your resume? Use a line. Need to create a diagram showing a timeline or process? Use flowchart shapes. While you may not need shapes in every document you create, they can add visual appeal and clarity.
Optional: Download our practice document.
Watch the video below to learn more about using shapes in Word.
To insert a shape:
- Select the Insert tab, then click the Shapes command. A drop-down menu of shapes will appear.
- Select the desired shape.
- Click and drag in the desired location to add the shape to your document.
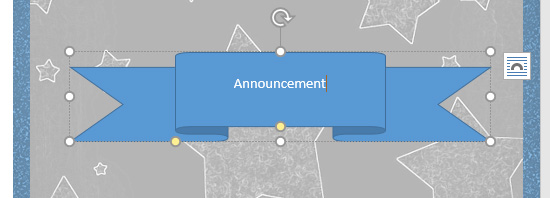
If you want, you can enter text in a shape. When the shape appears in your document, you can begin typing. You can then use the formatting options on the Home tab to change the font, font size, or color of the text.
To change the order of shapes:
If one shape overlaps another, you may need to change the ordering so the correct shape appears in front. You can bring a shape to the front or send it to the back. If you have multiple images, you can use Bring to Front or Send to Back to adjust the ordering. You can also move a shape in front of or behind text.
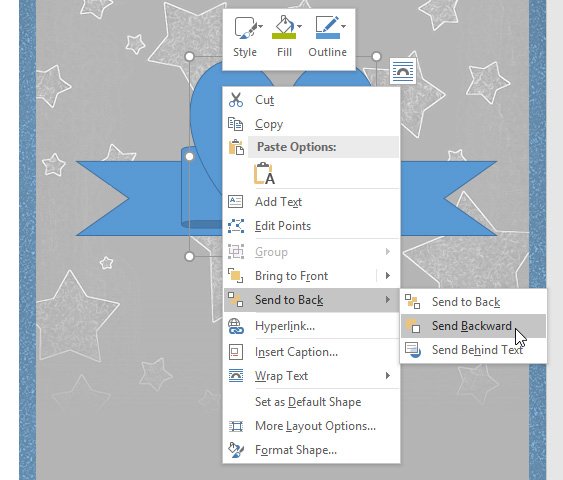
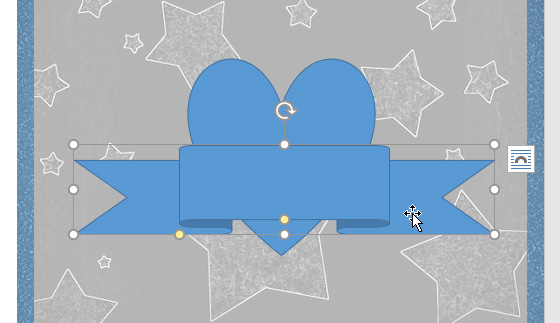
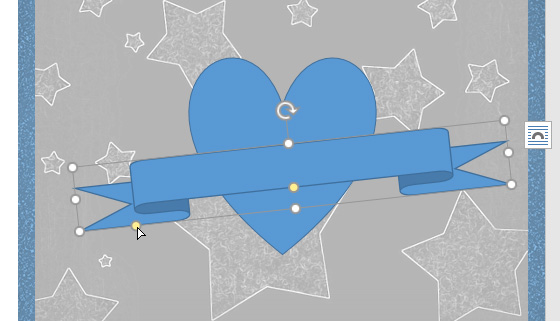
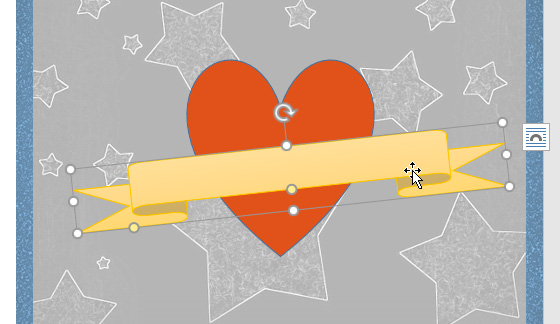
- Right-click the shape you want to move. In our example, we want the heart to appear behind the ribbon, so we’ll right-click the heart.
- In the menu that appears, hover over Bring to Front or Send to Back. Several ordering options will appear. Select the desired ordering option. In this example, we’ll choose Send to Back.
- The order of the shapes will change.

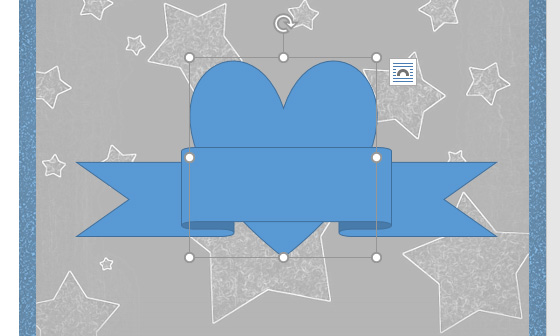
In some cases, the ordering option you select will not affect the ordering of the shapes. If this happens, try selecting the same option again or try a different option.
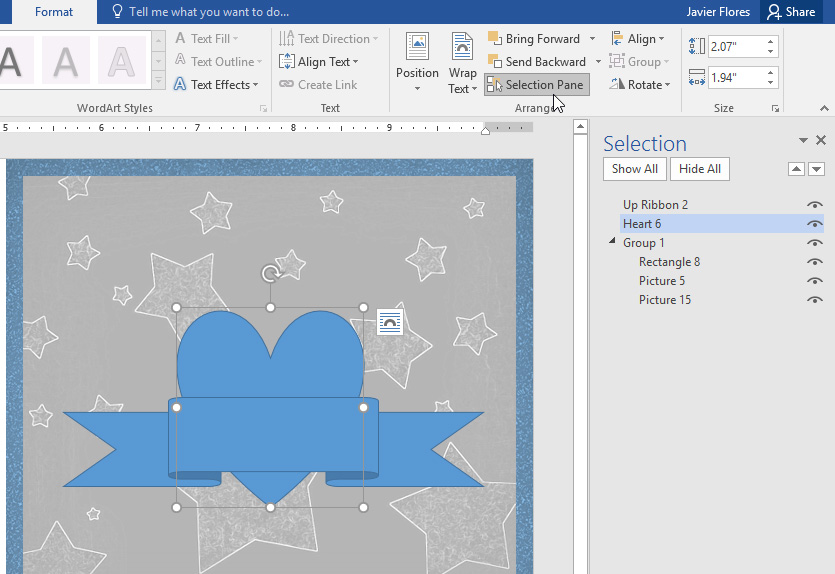
If you have several shapes placed on top of each other, it may be difficult to select an individual shape. The Selection pane allows you to select a shape and drag it to a new location. To access the Selection pane, click Selection Pane on the Format tab.
To resize a shape:
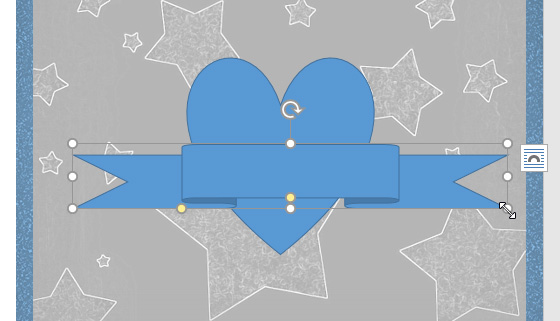
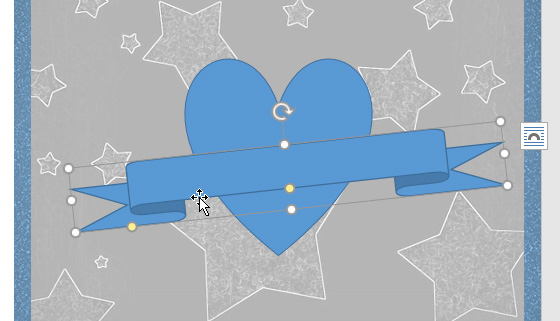
- Select the shape you want to resize. Sizing handles will appear on the corners and sides of the shape.
- Click and drag the sizing handles until the shape is the desired size. You can use the corner sizing handles to change the shape’s height and width at the same time.
- To rotate the shape, click and drag the rotation handle.
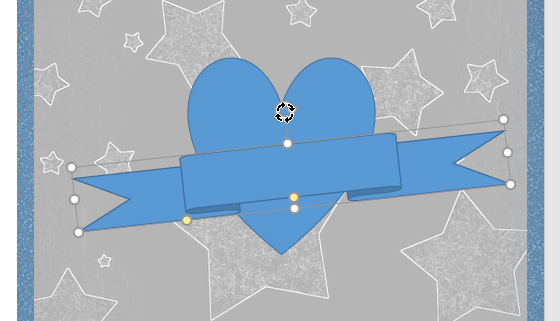
Some shapes also have one or more yellow handles that can be used to modify the shape. For example, with banner shapes you can adjust the position of the folds.
Modifying shapes
Word allows you to modify your shapes in a variety of ways so you can tailor them to your projects. You can change a shape into a different shape, format a shape’s style and color, and add various effects.
To change the shape style:
Choosing a shape style allows you to apply preset colors and effects to quickly change the appearance of your shape.
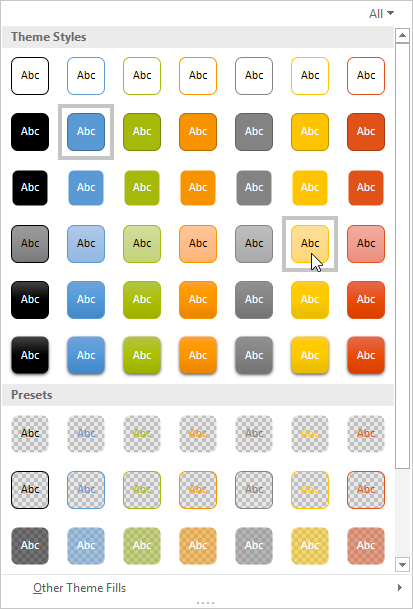
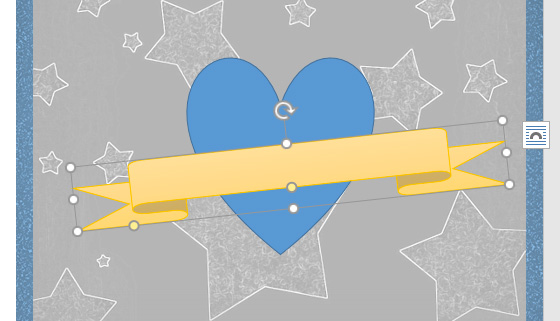
- Select the shape you want to change.
- On the Format tab, click the More drop-down arrow in the Shape Styles group.
- A drop-down menu of styles will appear. Select the style you want to use.
- The shape will appear in the selected style.

To change the shape fill color:
- Select the shape you want to change.
- On the Format tab, click the Shape Fill drop-down arrow. Select the color you want to use. To view additional color options, select More Fill Colors.
- The shape will appear in the selected fill color.

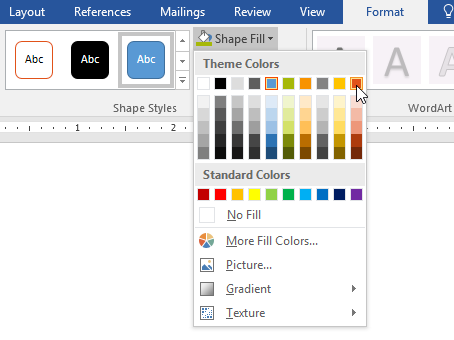

If you want to use a different type of fill, select Gradient or Texture from the drop-down menu. You can also select No Fill to make it transparent.
To change the shape outline:
- Select the shape you want to change.
- On the Format tab, click the Shape Outline drop-down arrow. The Shape Outline menu will appear.
- Select the color you want to use. If you want to make the outline transparent, select No Outline.
- The shape will appear in the selected outline color.
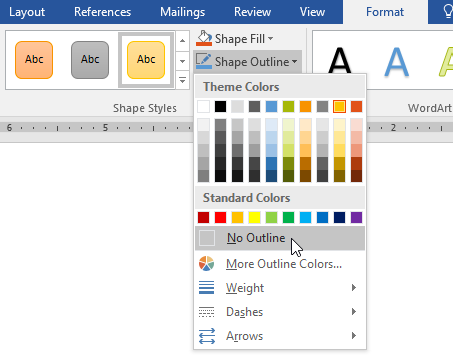

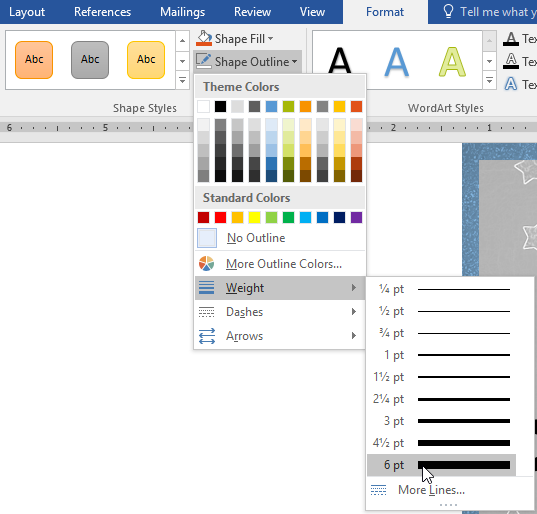
From the drop-down menu, you can change the outline color, weight (thickness), and whether it is a dashed line.
To add shape effects:
- Select the shape you want to change.
- On the Format tab, click the Shape Effects drop-down arrow. In the menu that appears, hover the mouse over the style of effect you want to add, then select the desired preset effect.
- The shape will appear with the selected effect.

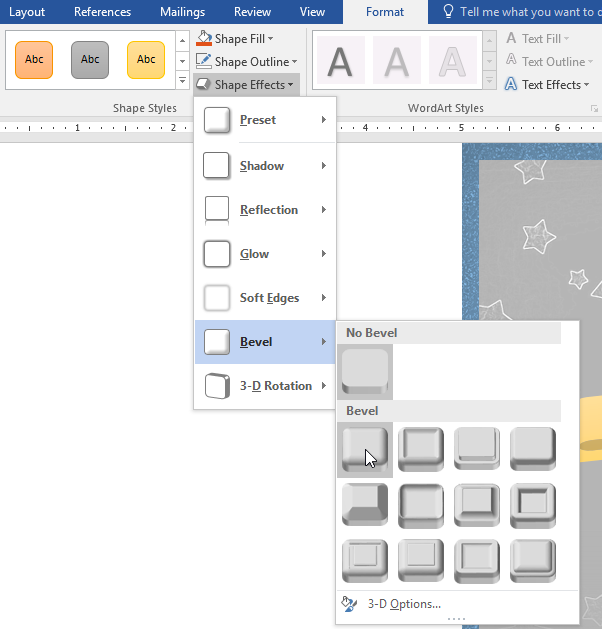

To further adjust your shape effects, select Options at the end of each menu. The Format Shape pane will appear, allowing you to customize the effects.
To change to a different shape:
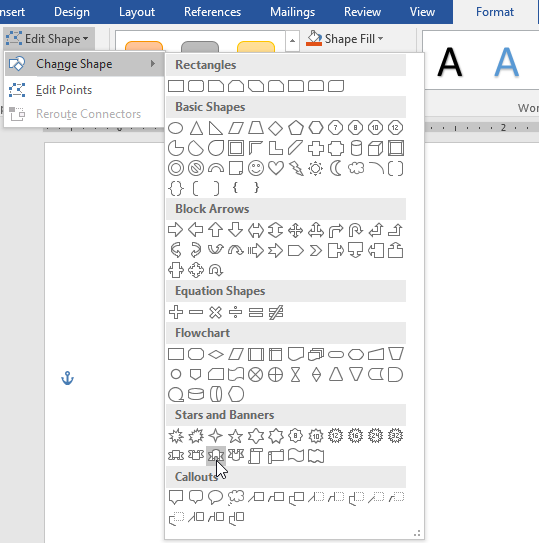
- Select the shape you want to change. The Format tab will appear.
- On the Format tab, click the Edit Shape command. In the menu that appears, hover the mouse over Change Shape, then select the desired shape.
- The new shape will appear.


Challenge!
- Open our practice document.
- On the right side of the page, insert a cloud shape from the Basic shapes group. Hint: Shape names appear when you hover over them.
- Change the shape outline to gray.
- Change the shape fill to white.
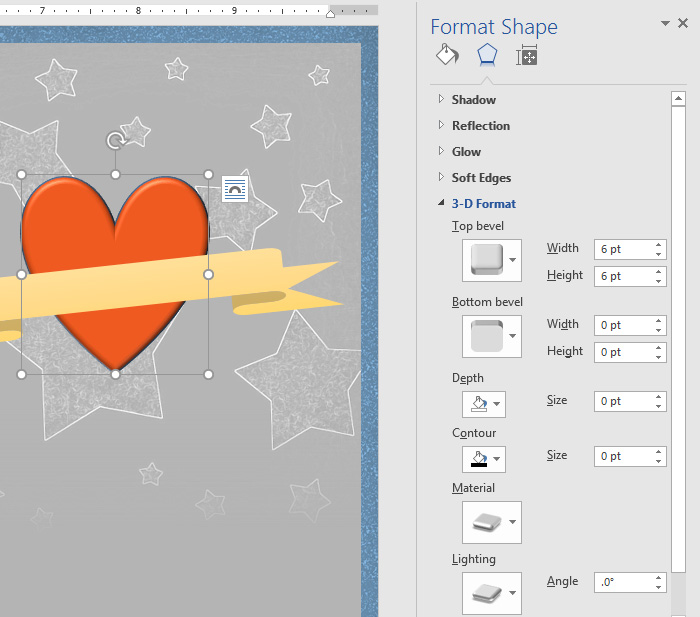
- Under the Shape Effects drop-down menu, add a Circle Bevel.
- On top of the cloud, insert a Sun shape from the Basic shapes group.
- Change the shape style to your choice of a Gold style. Hint: Style names appear when you hover over them. Make sure the style name has the word Gold in it.
- Send the sun shape backward so it is behind the cloud shape.
- If needed, move the cloud shape so the sun is peeking out from behind it.
- When you’re finished, your image should look something like this:

/en/word/text-boxes/content/
Доброго времени суток всем читателям и подписчикам блога scriptcoding.ru. В этой статье мы рассмотрим работу с коллекцией Shapes, которая позволяет добавлять различные графические объекты в Word документ.
По сути, используя методы данной коллекции, мы можем делать вставку таких графических объектов в Word как авто-фигуры, выноски, рисунки, диаграммы, полотна и многое другое. Также стоит уточнить, что по ходу статьи, под словом «фигура» будут подразумеваться все графические Word объекты (полотно, WordArt, SmartArtи так далее). Я не привожу примеров программного кода, самим программированием мы займемся, когда будет изучать по отдельности работу с каждым графическим объектом Word, которые создаются с помощью коллекции Shapes.
Содержание
- Коллекция Shapes – графические объекты в Word
- Shapes – свойства, работа с графическими объектами Word
- Shapes — методы, создание графических объектов в Word
Коллекция Shapes – графические объекты в Word
Shapes – свойства, работа с графическими объектами Word
Count— Возвращает количество фигур в коллекции.
Shapes — методы, создание графических объектов в Word

Основной функционал коллекции заключается в ее методах, большинство из которых будут возвращать класс Shape, а тот в свою очередь, будет предоставлять нужные свойства для конкретной фигуры. Например, мы добавили новое полотно в документ, для обработки данного полотна используется свойство CanvasItems, которое хранит ссылку на CanvasShapes. При добавлении новой линии в документ, нам нужно обратиться к свойству Line, которое хранит ссылку на класс LineFormat, который отвечает за обработку линий. И так далее, это логично, так как у каждого графического объекта в Word, например, выноски и WordArt есть различные возможности.
AddCanvas(Left, Top, Width, Height, Anchor) — Добавляет новое полотно в документ.
Anchor – Содержит ссылку на класс Range, который представляет текст, к которому нужно привязать полотно.
AddSmartArt(Layout, Left, Top, Width, Height, Anchor) – Вставка таких графических объектов Word в активный документ, как рисунок SmartArt. Начиная с версии Word 2010.
Layout – Ссылка на класс SmartArtLayout.
AddCallout(Type, Left, Top, Width, Height) – Добавляет текстовую выноску с линиями.
Type – Данный параметр определяет тип линии. Значения константы MsoCalloutType:
- msoCalloutOne — 1 – Горизонтальная линия слева.
- msoCalloutTwo — 2 – Горизонтальна линия с наклоном лева.
- msoCalloutThree — 3 – Линия состоит из двух отрезков слева (один отрезок с наклоном, а другой горизонтальный).
- msoCalloutFour — 4 — Линия состоит из трех отрезков справа (один отрезок с наклоном, другой горизонтальный и третий вертикальный).
AddLine(BeginX, BeginY, EndX, EndY) – Рисует линию с указанными начальными и конечными координатами.
AddConnector(Type, Left, Top, Width, Height) – Рисует соединительную линию.
Type – Тип линии, значение константы MsoConnectorType:
- msoConnectorStraight — 1 — Прямая линия.
- msoConnectorElbow — 2 – Прямое колено.
- msoConnectorCurve — 3 – Изогнутое колено.
- msoConnectorTypeMixed — -2 – Смешанные значения.
AddShape(Type, Left, Top, Width, Height) – Вставка графических объектов в Word, которые представляют указанную автофигуру.
Type – Определяет тип фигуры, значение константы MsoAutoShapeType.
AddPicture(FileName, LinkToFile, SaveWithDocument, Left, Top, Width, Height) — Добавляет изображения. Возвращает класс Shape, представляющий картинку и добавляет ее в коллекцию CanvasShapes. Обязательный только первый параметр.
FileName – Путь к файлу и его имя.
LinkToFile – True – привязать изображение к файлу, из которого он был создан. False – сделать изображение независимым от файла, по умолчанию.
SaveWithDocument – True — сохранить связанный рисунок с документом. Значение по умолчанию False. Если использовать значение False, то может возникнуть ошибка. Работа с графическими Word объектами.

AddLabel(Orientation, Left, Top, Width, Height) — Добавляет текстовую область.
Orientation – Задает ориентацию текста. Значение константы MsoTextOrientation:
- msoTextOrientationHorizontal — 1 — Горизонтальная.
- msoTextOrientationUpward — 2 – Направление вверх.
- msoTextOrientationDownward — 3 – Направление вниз.
- msoTextOrientationVerticalFarEast — 4 – Вертикальное направление для азиатских языков.
- msoTextOrientationVertical — 5 – Направление вниз.
- msoTextOrientationHorizontalRotatedFarEast — 6 — Горизонтальное направление для азиатских языков.
AddTextbox(Orientation, Left, Top, Width, Height) — Добавляет текстовое поле.
AddTextEffect(PresetTextEffect, Text, FontName, FontSize, FontBold, FontItalic, Left, Top) – Создание графического объекта WordArt в Word.
PresetTextEffect – Определяет эффект текста WordArt. Значение константы MsoPresetTextEffect.
Text — Текст в WordArt.
FontName — Название шрифта, используемого в WordArt.
FontSize — Размер шрифта в пунктах.
FontBold – Содержит логическое значение, определяющее, нужно ли сделать шрифт жирным (true) или нет (false).
FontItalic — Содержит логическое значение, определяющее, сделать шрифт курсивом (true) или нет (false).
Item(index) — Возвращает отдельный класс Shape в коллекции Shapes по его индексу.
Range(index) — Возвращает ShapeRange, представляющий графические объекты в Word внутри заданного диапазона. Данный метод позволяет выбрать несколько графических Word объектов для будущей их группировки или обработки.
Index — Указывает, какие графические объекты Word должны быть включены в указанный диапазон. Может быть целое число, указывающее порядковый номер фигуры в коллекции Shapes, строка, которая определяет имя фигуры, или массив, содержащий целые числа или строки. Например:
ActiveDocument.Shapes.Range(Array("Oval 5", "Rectangle 4")).Select
SelectAll() — Выбирает все графические объекты в Word в коллекции Shapes. Этот метод не выбирает классы InlineShape. Вы не можете использовать этот метод, чтобы выбрать более одного полотна.
AddPolyline(SafeArrayOfPoints) — Добавляет открытый или закрытый полигон. Возвращает Shape, который представляет многоугольник и добавляет его в коллекцию CanvasShapes.
SafeArrayOfPoints — Массив с парами координат, которые определяют вершины и контрольные точки кривой.
AddCurve(SafeArrayOfPoints) — Возвращает Shape, который представляет кривую Безье.
BuildFreeform(EditingType, X1, Y1) – Создание свободного графического объекта в Word, вернет класс FreeformBuilder. По сути, данный метод позволяет добавить только первый узел будущей фигуры, а уже далее нужно использовать функционал класса FreeformBuilder.
EditingType – Свойства узла. Значение константы MsoEditingType:
- msoEditingAuto — 0 – Подключение узла.
- msoEditingCorner — 1 — Угловой узел.
- msoEditingSmooth — 2 — Гладкий узел.
- msoEditingSymmetric — 3 — Симметричный узел.
X1 и Y1— Определяют положение узла в пунктах.
AddChart(Style, Type, Left, Top, Width, Height, Anchor, NewLayout) — Добавляет диаграмму в документе.
Style — Стиль диаграммы, целое значение
Type — Тип диаграммы, значение константы XlChartType.
Left – Положение диаграммы в пунктах от левого края.
Top — Положение диаграммы в пунктах от верхнего края.
Width и Height — Ширина и высота в пунктах.
Anchor – Диапазон, который будет связан с графическим объектом в Word.
NewLayout — Если значение true, то график будут вставлен с помощью новых динамические правил форматирования.
AddOLEControl(ClassType, Range) – Добавляет в документ элемент управления ActiveX (ранее известный как элемент управления OLE). Возвращает InlineShape, представляющий новый элемент управления ActiveX. Чтобы изменить свойства элемента управления ActiveX, можно использовать свойство Objectкласса OLEFormat для заданной фигуры.
ClassType — Данный параметр принимает строковое значение, которое содержит имя элемента управления ActiveX. Например:
- CheckBox — «Forms.CheckBox.1».
- ComboBox — «Forms.ComboBox.1».
- CommandButton — «Forms.CommandButton.1».
- Frame — «Forms.Frame.1».
- Image — «Forms.Image.1».
- Label — «Forms.Label.1».
- ListBox — «Forms.ListBox.1».
- MultiPage — «Forms.MultiPage.1».
- OptionButton — «Forms.OptionButton.1».
- ScrollBar — «Forms.ScrollBar.1».
- SpinButton — «Forms.SpinButton.1».
- TabStrip — «Forms.TabStrip.1».
- TextBox — «Forms.TextBox.1».
- ToggleButton — «Forms.ToggleButton.1».
Range — Диапазон, в котором нужно разместить элемент управления ActiveX. Если этот аргумент опущен, то ActiveX размещается автоматически.
![]()
Загрузить PDF
![]()
Загрузить PDF
Практически нет предела тому, что вы можете создать с помощью функции Фигуры в Microsoft Word. Эта функция обеспечивает разнообразие геометрических форм, которые полезны для создания графических объектов, в том числе линии, стрелки, баннеры, сигналы, формы уравнения, символы и многое другое. Кроме того, вы можете применить много эффектов к своим фигурам, например 3-D, теневые эффекты, градиентная заливка, прозрачность и так далее. Эта статья содержит инструкции по различным способам использования функции Фигуры в Microsoft Word.
-
1
Найдите в меню опцию «Фигуры». В строке меню нажмите на вкладку «Вставка» и выберете «Фигуры». В выпадающем меню вы увидите различные фигуры.
-
2
Добавьте фигуру в документ. Просто нажмите на любую форму, чтобы вставить ее в документ. Меню «Фигуры» автоматически закроется, а указатель мыши будет изменен на затемненный крестик. Чтобы вставить фигуру нажмите на документ и перетащите фигуру в любою место страницы. Выбранная фигура будет вставлена в документ.
Реклама


-
1
После добавления фигуры, измените ее размер. Выделите фигуру, кликнув на нее и перетаскивайте любой ее угол, тем самым регулируя размер фигуры. Вы можете установить любой размер.
-
2
Измените форму вставленной фигуры. Чтобы переключиться на другую фигуру, выделите объект, перейдите на вкладку «Формат» в строке меню и нажмите кнопку «Изменить фигуру», расположенную в меню «Вставка фигур» на панели форматирования. Нажмите «Изменить фигуру», чтобы открыть выпадающее меню, а затем выберете подходящую фигуру. Новая фигура будет выбрана.
-
3
Переместите фигуру на другое место в документе. Нажмите на фигуру, выделив ее и перетащите на любое место, внутри рабочей области документа.
Реклама


-
1
Выберите цвет заливки фигуры. Нажмите кнопку «Заливка фигуры», чтобы изменить цвет. Откроется цветовая палитра. Выберите цвет из палитры цветов или нажмите «Другие цвета заливки», чтобы создать собственный цвет. Откроется окно «Цвета».
- Нажмите и перетаскивайте крестик курсора право, для регулировки тона. Переместите ползунок с правой стороны диалогового окна вверх и вниз, чтобы отрегулировать уровень яркости. Нажмите «OK», чтобы закрыть окно «Цвета».
-
2
Выберите стиль фигуры. Убедитесь, что объект выбран и нажмите на вкладку «Формат» в строке меню. На панели инструментов «Формат» с левой стороны расположено окно «Стили фигур». Нажмите на стрелку вниз в меню «Стили фигур», чтобы открыть разные темы заливки фигуры.
- Выберите стиль из возможных вариантов.
Реклама


-
1
Установите стиль контура фигуры. Убедитесь, что объект выбран и нажмите на вкладку «Формат» в строке меню. Нажмите кнопку «Контур фигуры» в меню «Стили фигур» на панели инструментов форматирования. В выпадающем меню выберите опцию «Толщина линий». Откроется окно «Формат фигуры».
- Отрегулируйте такие настройки как ширина, составной тип, тип штриха и так далее, затем нажмите кнопку «Закрыть», чтобы применить изменения.
-
2
Установите толщину контура фигуры. Убедитесь, что объект выбран и нажмите на вкладку «Формат» в строке меню. Нажмите кнопку «Контур фигуры» в меню «Стили фигур» на панели инструментов форматирования. Измените толщину контура, выбрав опцию «Толщина». Откроется соответствующие подменю .
- Выберите толщину из предложенных вариантов или нажмите на «Дополнительные линии».
-
3
Установите цвет границы фигуры. Убедитесь, что объект выбран и нажмите на вкладку «Формат» в строке меню. Нажмите кнопку «Контур фигуры» в меню «Стили фигур» на панели инструментов форматирования.
- Выберите цвет контура фигуры. Нажмите кнопку «Контур фигуры», чтобы изменить цвет. Откроется цветовая палитра. Выберите цвет из палитры цветов или нажмите «Другие цвета контура», чтобы создать собственный цвет. Откроется окно «Цвета».
Реклама


-
1
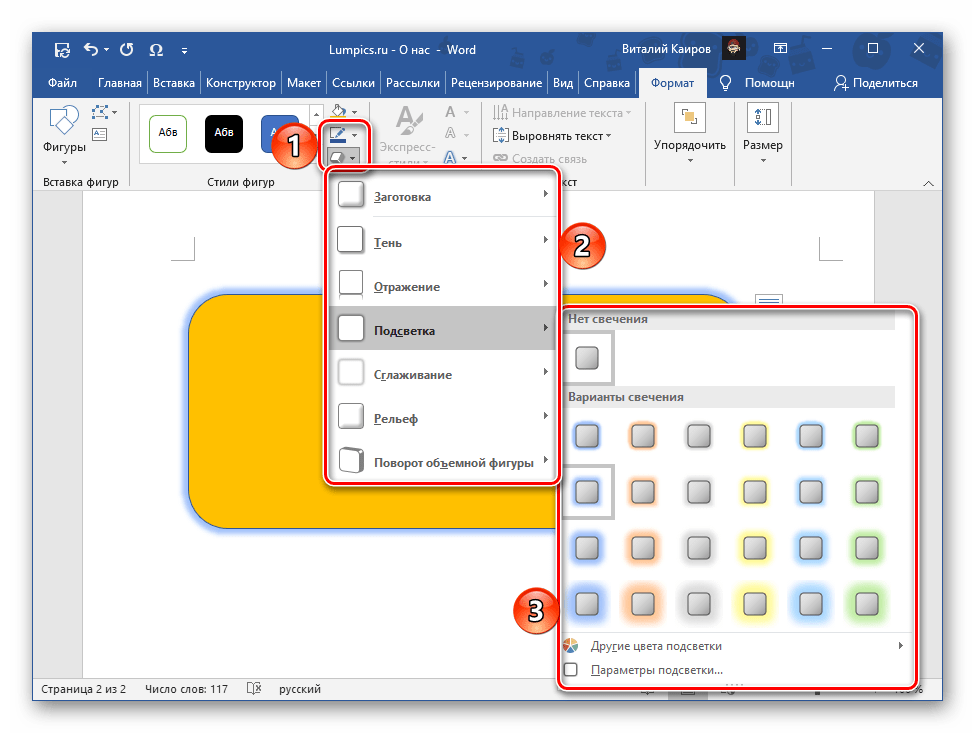
Добавьте эффекты к фигуре. Убедитесь, что объект выбран и нажмите на вкладку «Формат» в строке меню. Нажмите кнопку «Эффекты фигур» в меню «Стили фигур» на панели инструментов форматирования. Обратите внимание на различные шаблоны редактирования фигуры. Откройте подменю для каждой предустановленной категории эффекта путем наведения указателя мыши на название категории.
- Просмотрите варианты каждой категории и нажмите на эффект, чтобы применить его к фигуре. Измените выбранный эффект, нажав на другой вариант эффекта.

-
1
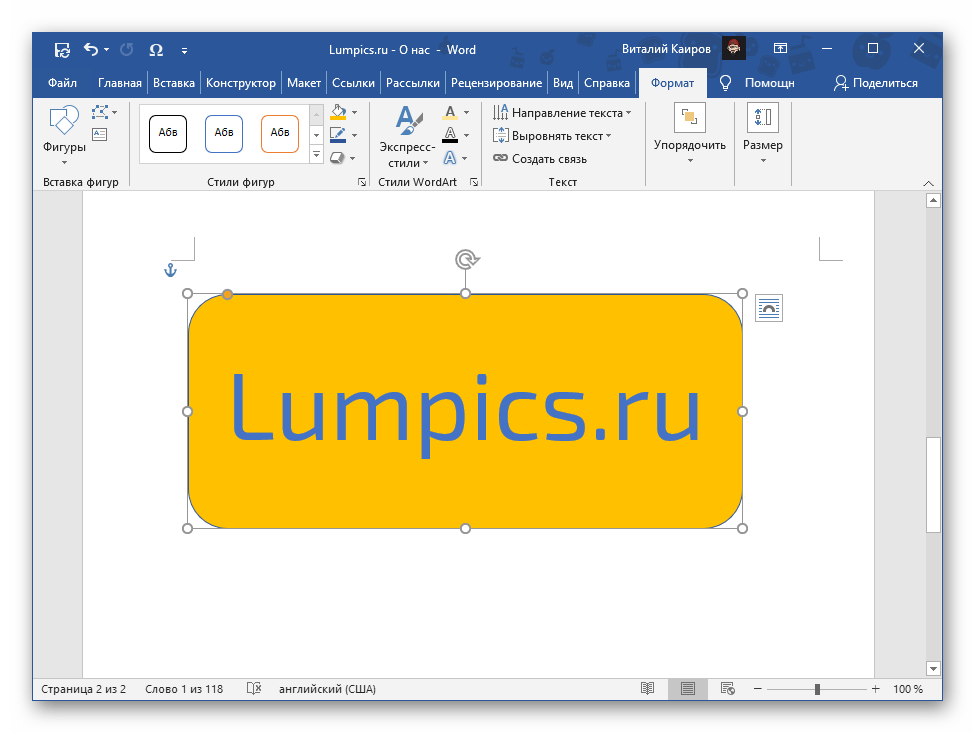
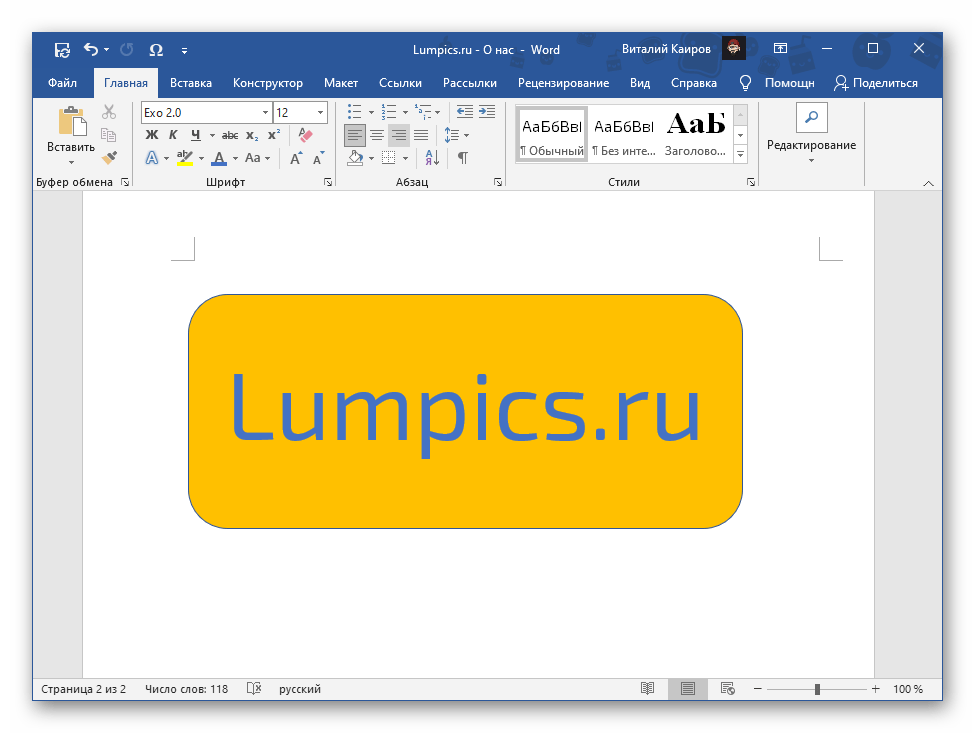
Добавьте текст к фигуре. Щелкните правой кнопкой мыши на фигуре, затем выберите из выпадающего меню «Добавить текст». По центру объекта появиться курсор. Введите любой текст и нажмите ввод. Чтобы изменить текст, выделите его и выберете различные варианты форматирования текста на вкладке «Главная».
- Выберите предварительно разработанный стиль в меню «Стили». Измените выравнивание, интервалы, отступы из меню «Абзац» и установите шрифт, цвет, размер или эффекты.
Реклама

Об этой статье
Эту страницу просматривали 11 375 раз.
Была ли эта статья полезной?

Microsoft Word makes it easy to add geometric shapes (and a whole lot more) to your document. You can also add text into these shapes, which is handy when you’re creating flowcharts, network diagrams, mind maps, and so on. This being Word, there are plenty of options for doing this, so let’s take a look.
First, you’ll need to insert a shape by going to Insert > Shapes. We’re going to use a nice rounded rectangle, which by default will be filled in with blue.

Right-click anywhere in your shape and click the “Add Text” command.
This places an insertion point in the shape where you can type your text. Once you’ve added whatever you want to write, the “Format” tab has tools you can use to give your text a little pop with things like text styles and shading.
You can also select the text and use the standard Font, Paragraph and Styles tools on the Home tab to format your text, just as if it were a normal part of the document. When you right click your text, you’ll find the usual quick options as well.
RELATED: How to Position Images and Other Objects in Microsoft Word
If you’d like a little more control over the placement and boundaries of your text, you can add a text box inside your shape instead. When you insert a new image or select an existing image, Word automatically switches you to the “Format” tab. You’ll see two ways here to insert a text box, both of which add a text box in the same way.
Select one of the options and move the cursor over your image. A yellow “+” mark will replace your pointer. Hold down the left mouse button and drag the “+” mark to create a text box. When the box looks about right, release the left click (don’t worry if the text box isn’t exactly the right size or location, you can change it afterward), and your text box will be created.
You can use the handles (the little squares) around the text box to resize it or select the whole text box to move it around within your shape. Add your text and format it in whatever way you want.
There are also text boxes with preset formatting that you can add by selecting your shape and then clicking Insert > Text Box. We’ve only scratched the surface of what you can do with text boxes here, so if you want to know more check out our guide to text boxes and all the things you can do with them.
RELATED: How to Create and Format a Text Box in Microsoft Word
READ NEXT
- › How to Link Text Boxes in Microsoft Word
- › How to Circle Text in Microsoft Word
- › How to Remove Borders in Microsoft Word
- › How to Get a Refund on the PlayStation Store
- › Windows 11 Has a New Photo Gallery in the File Explorer
- › The New Winamp Is Here, but It’s Not What You’d Expect
- › Android’s Nearby Share Has (Unofficially) Arrived on Mac
- › Save Hundreds on Elegoo’s New PHECDA Laser Engraver Through Kickstarter
How-To Geek is where you turn when you want experts to explain technology. Since we launched in 2006, our articles have been read billions of times. Want to know more?
Call them “doodles,” “sketchnotes,” or “visual notetaking.” Whatever the name, simple hand drawings have become more popular than ever. They’re as welcome in the classroom as they are in the boardroom.


Why? Maybe it’s because they’re quick to create. You don’t have to be an artist to draw stick figures. Yet they communicate everything from how viruses replicate to how a manufacturing supply chain works. They’re a good and unique way to enhance your Word documents.
Hand drawings also allow you to express your personality and stand out from your competition. And because you’re creating your own drawings, you don’t have to worry about using copyrighted materials.


Freeform Word drawings also help you better understand and assimilate the concepts you’re trying to convey. That’s because you’re forced to simplify the concepts and come up with visual metaphors for them.
You may be wondering «How do I draw on Microsoft Word?» While Word might not be the first drawing tool that comes to mind, there are drawing tools in Word that you can learn to use.
This article shows you, step-by-step, how to draw in Word so that you, too, can harness the power of simplified drawings in your projects. As you’ll see, you don’t have to be a professional artist or to use expensive tools and software because you can draw right within Word.
Let’s get started!
(Note: In the examples below, I’m using Microsoft Word for Mac version 16. If you’re using a different version, then the interface may be different.)
How to Draw in Word: Freehand With the Shapes Freeform Tool
There are several ways for you to draw by hand on your Word document. These include the Freeform and Scribble tools in the Shape tab. Both these two tools are very similar because they let you draw in Word using your mouse or trackpad.
1. Use the Freeform or Scribble Tool
You can draw objects and handwritten lines with either one. One difference is that the Freeform tool lets you draw perfectly straight lines, while the Scribble tool draws exactly what you draw.
To draw with Freeform, click on the Insert tab.


Click Shapes > Freeform.


To draw, click, hold, and drag the cursor on the page. Word stops drawing when you either bring the cursor back to your point of origin or double-click on the page. In this example, I’ll draw a check mark.


To draw perfectly straight lines with the Freeform tool, click on your starting point. Then, release the mouse, move the cursor to the end of the line, click there, and repeat until you finish your drawing. Double-click at your end-point. Using this technique, my check mark looks like this:


Notice that the lines are perfectly straight, even though my hands were unsteady. That’s because the Freeform tool draws straight lines between two consecutive points where you click on your mouse.
Don’t worry that the text runs straight through the drawing. We can fix this with text wrap because Word treats the drawing as an image.
2. Format the Text Wrapping Around Your Drawing
Click on the Shape Format tab. Then click Arrange > Wrap Text. Select one of the text wrapping options. In this case, let’s select Square.


Now the text wraps around the drawing.


Microsoft Word also lets you wrap text around an irregularly shaped drawing. Go to Shape Format > Arrange > Wrap Text > Edit Wrap Boundary.


Click and drag the boundary points to change the boundary.


By doing this, you’ve got more granular control over how text wraps around your drawing.


3. Refine Your Drawing
Refine the drawing you’ve made. Click on your drawing to select it. Under the Shape Format tab, click Edit Shape > Edit Points.


Click and drag any of the points to change the drawing as you wish.
.jpeg)
.jpeg)
.jpeg)
You can also use the Shape Format tab to edit other aspects of your drawing. Change its color, weight, and in the case of closed shapes, add a filling color.
To change the look of your drawing, from the Shape Format tab, expand the Theme Styles and Presets selection. Choose one of the styles you want to use.


You’ll have more choices by going to Shape Outline. From there, select a color.
To change the weight or thickness of your drawing, go to Shape Format > Shape Outline > Weight.


You can also apply special effects to your drawing. On the Shape Format tab, go to Shape Effects, then choose the effect you want to apply.
-A.jpeg)
-A.jpeg)
-A.jpeg)
Here’s the check mark now, after I added a shadow.


How to Draw in Word: Using the Scribble Tool
The Scribble tool is like the Freeform tool. The only difference I’ve seen is that the Scribble tool doesn’t draw straight lines between clicks. To draw, you’ve got to click, hold, and drag the mouse. If you release the mouse button, Word will stop drawing.
To draw using the Scribble tool, click Insert > Shapes > Scribble.


Click, hold, and drag the mouse to draw the shape. If you bring the cursor back to your point of origin, Word closes and fills the shape. In this case, let’s draw a cloud.


Now the drawing can be edited by using the tools in the Shape Format ribbon.
1. Change the Fill Color of Your Drawing
For example, to change the fill color, click on the drawing then on the Shape Fill button. Choose the color you wish to use.


2. Change the Outline Color of Your Drawing in Word
To change the shape’s outline color, click on the drawing, click Shape Outline, then choose the outline color or style you desire.


For this example, I selected No Outline.


3. Fill Your Drawing with a Picture
You could even fill the drawing with an image. Go to Shape Fill > Picture.


Find the image in your computer. Select the image file, then click Insert.


The resulting shape is pretty neat!


Follow the steps described earlier to change the text wrapping around your drawing, as well as its other attributes.
How to Draw With Microsoft Word Pen Tools
Either Freeform or Scribble are adequate tools for creating simple Word drawings that have only a single element, such as a single line or shape.
But what if you want to draw something slightly more complicated, such as a stick figure? It’s made up of a circle for the head and several lines for the arms, body, and legs.
1. Draw With the Microsoft Word Pen
In this case, it would be better to use Word’s Draw tools. To access them, click on the Draw tab.


As you can see, the Draw tab gives you some ink types:
- Pen
- Pencil
- Highlighter
Each ink type gives your drawing a different look. To select an ink, click the Draw button on the ribbon, and select either a Pen, Pencil, or Highlighter.
Click, hold, and drag to draw with your mouse. Notice that even when you release the mouse, Word stays in drawing mode. This means you can keep adding elements to your drawing. When you’re done, click the Draw button again.


To change the color and thickness of any tool, click on the drop-down menu, and make your selections. A total of 16 standard colors are available, and you can access many more by clicking on More Colors….
.jpeg)
.jpeg)
.jpeg)
Plus, for the pen ink, there are eight special effects:
- Rainbow
- Galaxy
- Lava
- Ocean
- Rose Gold
- Gold
- Silver
- Bronze


If your drawing has several parts, you’ll have to group them so that Word will treat them as one object. Click, press, and hold the Shift key as you click all the elements of your drawing. When you’re done, click Shape Format > Arrange > Group > Group.


Now you can treat the drawing as a single object. (Note: Once drawing elements are grouped, they can’t be ungrouped anymore.)
Click on the drawing, Shape Format. Then use the tools in the Shape Format tab. (Note that not all the features on the Shape Format ribbon can be applied to your drawing.) From here, we’ll change the text wrap setting of the drawing.
Go to the Shape Format tab. Click Wrap Text. then select a wrap setting.


I chose the Top and Bottom text wrap.


2. Erase Your Drawing
The Draw tab provides an Eraser tool so you can erase mistakes. First, format the tool by clicking on the drop-down arrow. You’ve got three choices:
- Stroke Eraser. Erases an entire stroke when you click on it.
- Small Eraser. Erases a small area when you click, hold, and drag your mouse.
- Medium Eraser. Erases a larger area when you click, hold, and drag your mouse.


If you selected the Stroke Eraser, click on any line to delete it. If you selected either the Small or Medium Eraser, click, hold, and drag your mouse over any areas you want to delete.
3. Draw With the Trackpad
Draw in Microsoft Word without a mouse by using the Draw with Trackpad tool.
First, choose the ink type you want to use. Then click the toggle to switch on Draw with Trackpad.


A window appears on top of your document. Use two fingers on your trackpad to move it anywhere on your document.
Pressing the Command key, move one finger on your trackpad to where you wish to draw. Pause, then draw with your finger. You don’t have to press down on the trackpad to draw.


How to Draw … Without Drawing!
So far, you’ve learned how to create your own images in Word by hand-drawing with either the mouse or the trackpad.
But what if you really can’t draw? Not even stick figures?
You can still “draw” by using the pre-made lines and shapes in Word. If you think about it, most objects can be broken down into shapes and lines. By putting these together, you can create your very own sketches — without drawing by hand.
Read on to see what I mean.
1. Draw With Lines in Microsoft Word
The simplest images are made up of lines. In this example, we’ll make a trellis, which is a grid like what you’d use to play Tic-Tac-Toe.
Go to Insert > Shapes > Line. This tool makes a simple straight line with a starting point and an endpoint.


Click on the page. That’s the starting point of your line. Drag your mouse to where you want the line to end, then click again.
Go to the Shape Format tab and use the buttons to edit the line. For this example, I changed the color and the weight of the line. I also added a shadow.


When you’re happy with how the line looks, copy and paste it as many times as needed to create your image. Click on the line, then go to Edit > Copy, then Edit > Paste. Or, use the shortcuts Command + C to copy and Command + V to paste.


Click, hold, and drag the lines into place. It may be helpful to display gridlines. To do so, click on the View tab, then check the box for Gridlines. This will help you to properly align the different elements of your drawing.


To change the angle of a line, click on the line, then go to Shape Format > Arrange > Rotate. Choose from one of the available rotation options or set your own. You can also click on one end of the line, hold, and drag it in place.


If you want the elements to line up precisely, select the lines, then go to Shape Format > Arrange > Align. Select an alignment option.


In this example, I’ll use Distribute Horizontally for the vertical lines, and Distribute Vertically for the horizontal lines.


These same steps apply to block arrows and other shapes, too.
2. Draw on Microsoft Word Using Shapes and Block Arrows
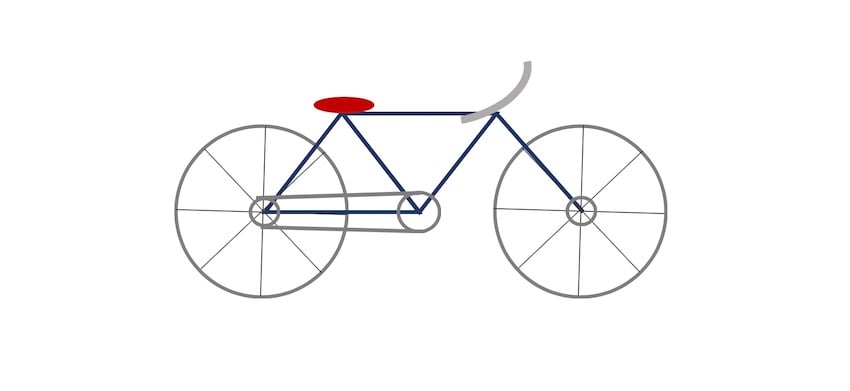
Now we’re ready to make more complicated pictures!
Let’s draw a bicycle by combining circles and triangles. Go to Insert > Shapes > Oval. Hold the Shift key as you click, hold, and drag your mouse to make a perfect circle. (But, if you want to draw an oval, then don’t use the Shift key.)


With the shape selected, go to Shape Format, and use the buttons on that tab to edit the shape you made.


To make the bicycle wheels, I’ll remove the Shape Fill and change the outline of the circle.


Next, copy and paste the circle. And then follow the same steps to add the triangles.
Use the triangle’s turning handle to change its orientation. Click on the turning handle, hold, and drag the mouse to the desired angle.


Add and edit more lines and shapes to make the image look just like a bicycle. The bike below is made up of circles, triangles, lines, an oval, and a half-circle (for the handlebar).
Remember, you can make your drawing as simple or as detailed as you like. It’s all up to you!
Find Professional Graphics for Your Microsoft Word Project
Now you know how to draw on a picture in Word. But perhaps you don’t have time to create your own Word drawings from scratch. And you still would rather not use stock photos.
What to do?
You can use premium graphic images from Envato Elements.


An Elements subscription brings thousands of creative tools at your fingertips. This includes print templates for Word, graphics, fonts, photos, and a lot more. And you get unlimited downloads for one flat monthly subscription.
Another great source of premium graphics is GraphicRiver. As with Elements, this marketplace gives you access to thousands of Word templates and other creative tools. These are also professionally designed for maximum impact. The difference is, at GraphicRiver, you pay for each use of every item.
Use each premium graphic on its own in your Word document. Or better yet, incorporate them with your own or other graphics to create something original.
Learn More About Working In Word
As you can see, Microsoft Word has many robust features. Some of them are little-known functionalities such as the various drawing tools in Word that I showed you in this article. It pays to learn how to use Microsoft Word so you can maximize its potential. Not only will you be able to realize the vision you’ve got for your Word documents, but you’ll also optimize your workflow.
If you aim to produce the most visually compelling materials using Word, then you may find these articles helpful:
You Can Draw in Microsoft Word
Even though Microsoft Word wasn’t built for graphic design, it’s got some tools to help you draw right inside your Word document.
You can make anything from simple line and stick drawings, to more detailed freehand drawings and line illustrations. Use the Freeform, Scribble, or Draw tools to draw by hand. Or combine lines and shapes to create original Word drawings without drawing from scratch.
You can also find hand-drawn graphics and Word templates in Envato Elements and GraphicRiver. If you want unlimited downloads of premium graphics and other design components, then Elements is the place for you. For one-off projects, GraphicRiver is the place to go to access top-quality templates for Microsoft Word and graphics on a pay-per-use basis.
You’ve just learned how to draw on Microsoft Word. Now, it you’re turn to create your best Word drawings.

Способ 1: Фигура
Наиболее простым и вместе с тем достаточным для большинства пользователей Ворд методом создания фигур является использование одноименного инструмента, входящего в группу «Иллюстрации».
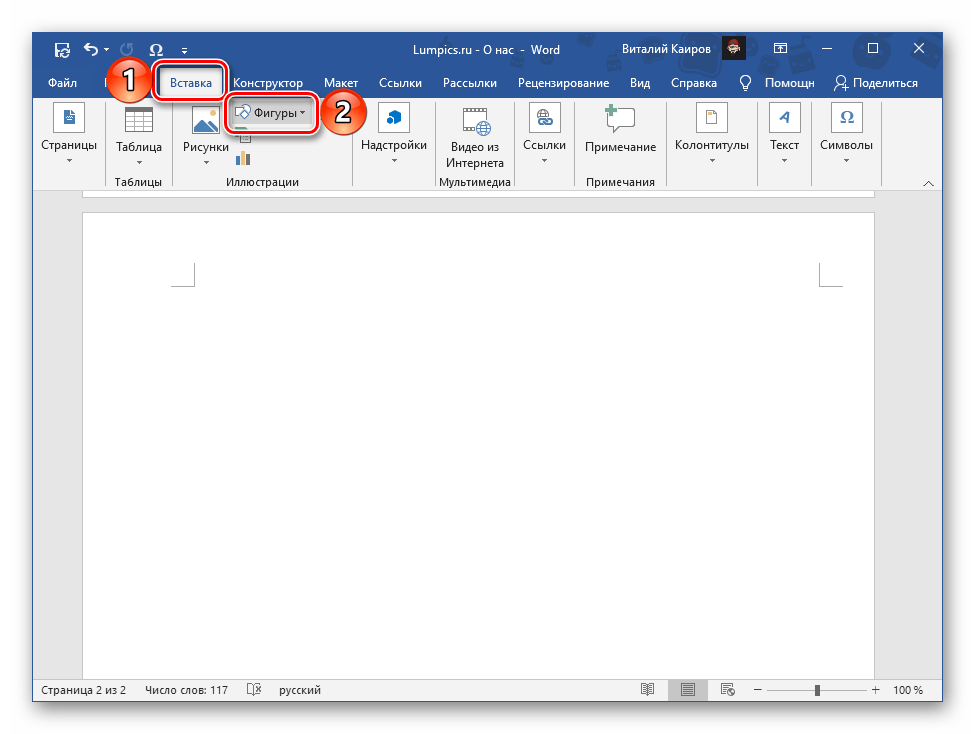
- Перейдите во вкладку «Вставка» и разверните меню кнопки «Фигуры».
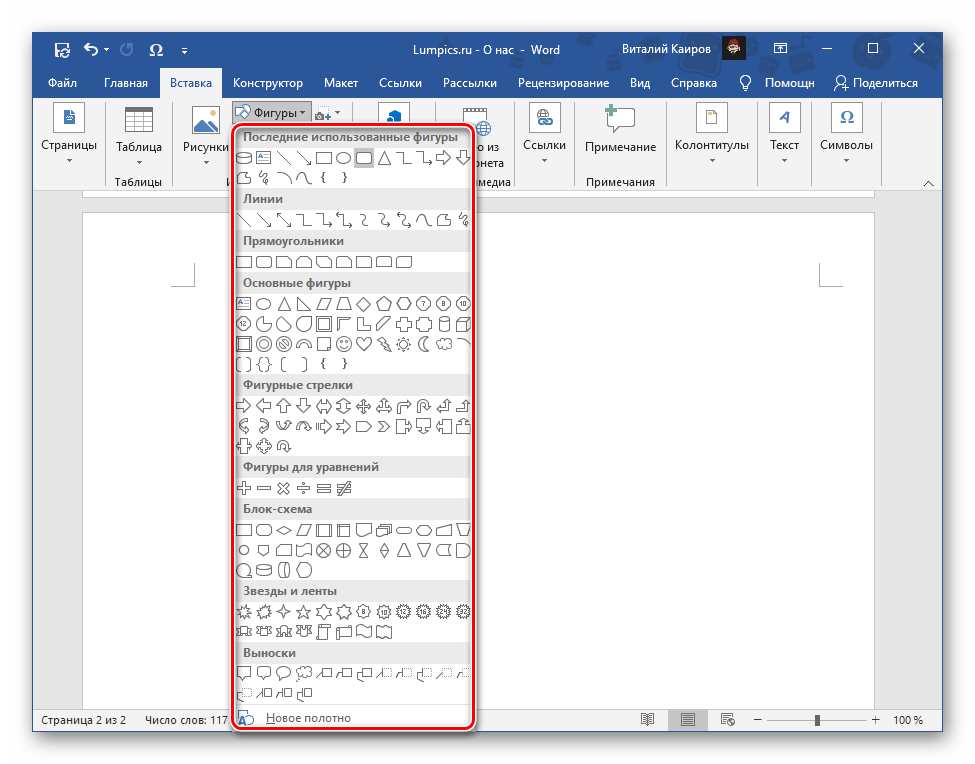
- Выберите подходящий объект из списка доступных.

Примечание: Если в показанном выше меню выбрать последний пункт — «Новое полотно», появится возможность создания пустой области, внутри которой затем можно будет нарисовать сразу несколько фигур, а также добавить другие объекты. Наглядный пример показан ниже.

- Нарисуйте его, зажав левую кнопку мышки (ЛКМ) в начальной точке и отпустив ее в конце.

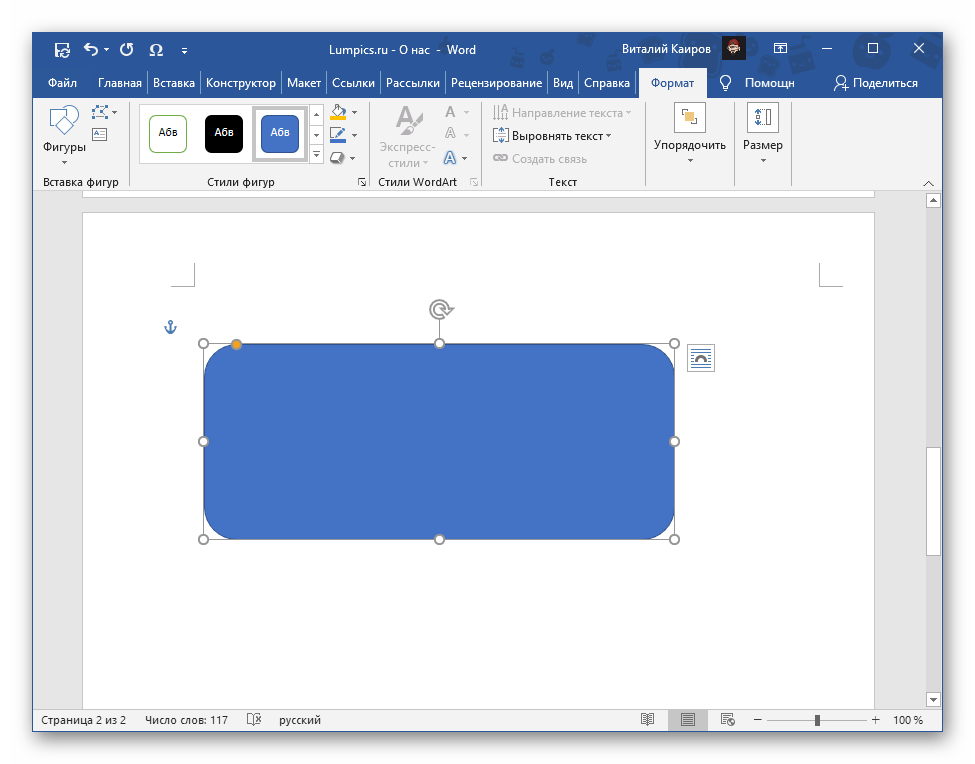
После того как фигура будет добавлена, отредактируйте ее в соответствии с собственными пожеланиями, если имеется такая необходимость.
Обратите внимание! Изменять фигуру можно только тогда, когда она выделена, а большинство инструментов для взаимодействия с ней находятся во вкладке «Формат».
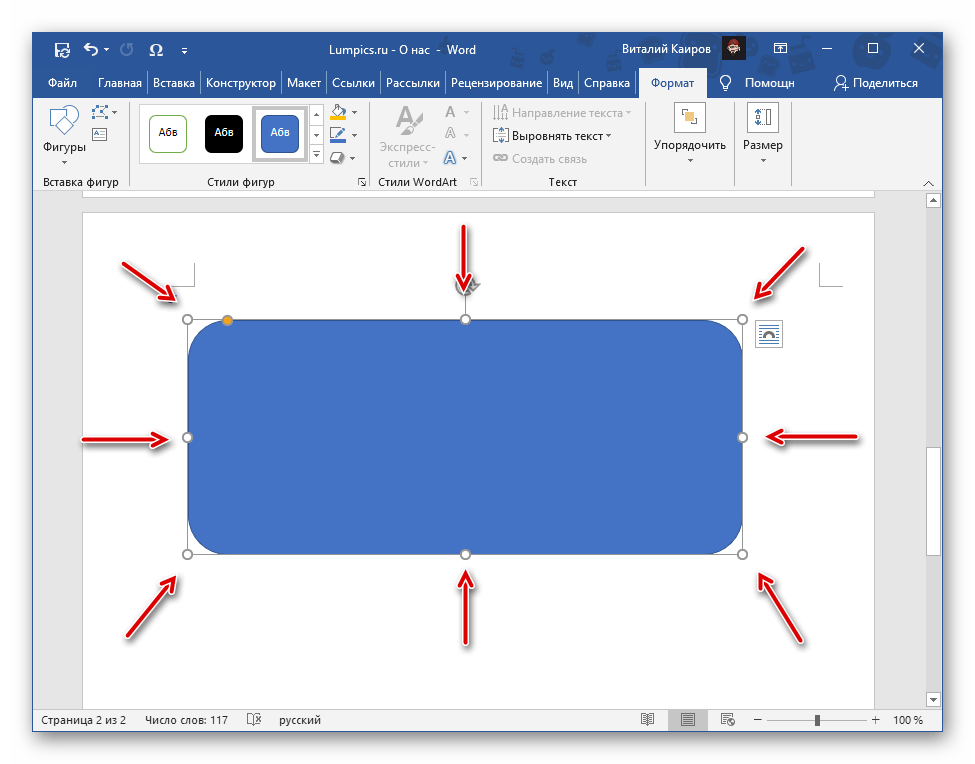
- Измените расположение, размер и пропорции, перемещая сам объект или находящиеся на углах и границах точки-маркеры соответственно.
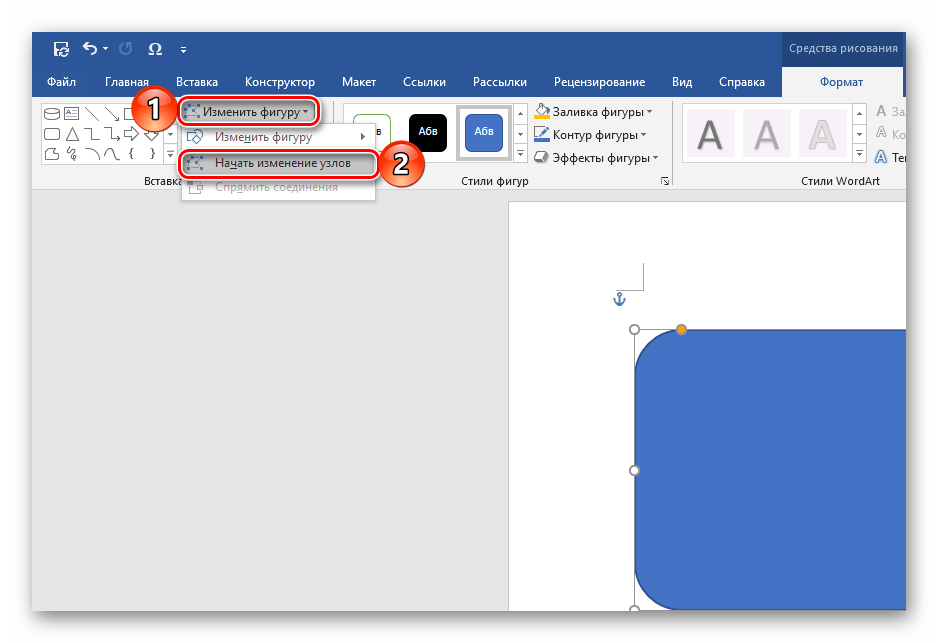
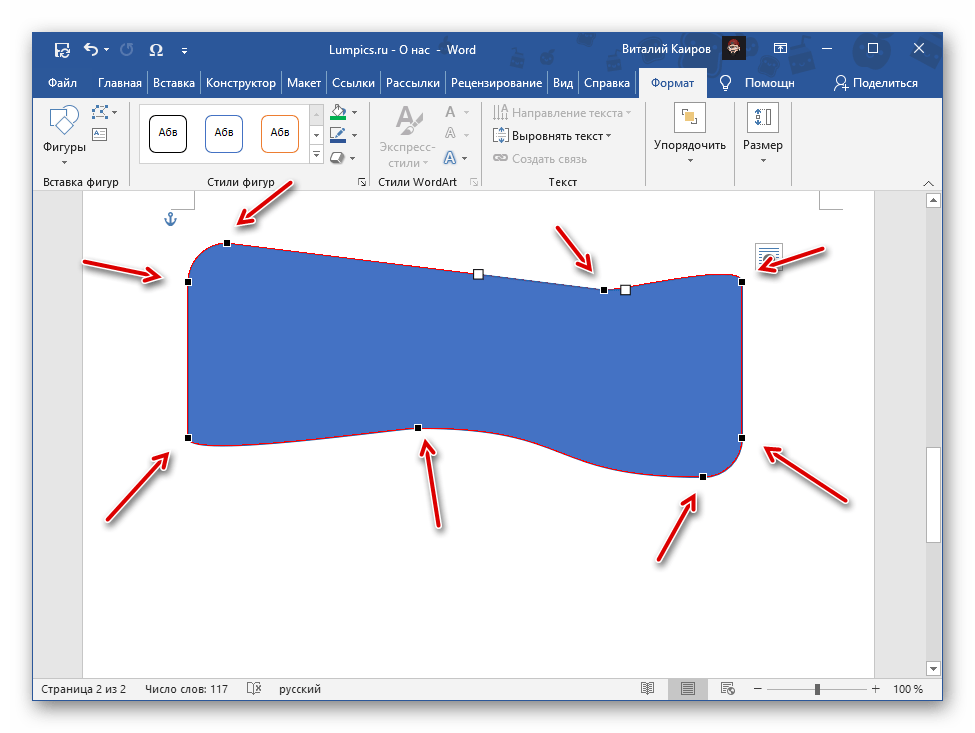
Если изначальная форма фигуры не соответствует вашим требованиям, а изменение размера и пропорций тоже не позволяет достичь желаемого результата, во вкладке «Формат» разверните меню пункта «Изменить фигуру» и нажмите там «Начать изменение фигуры».

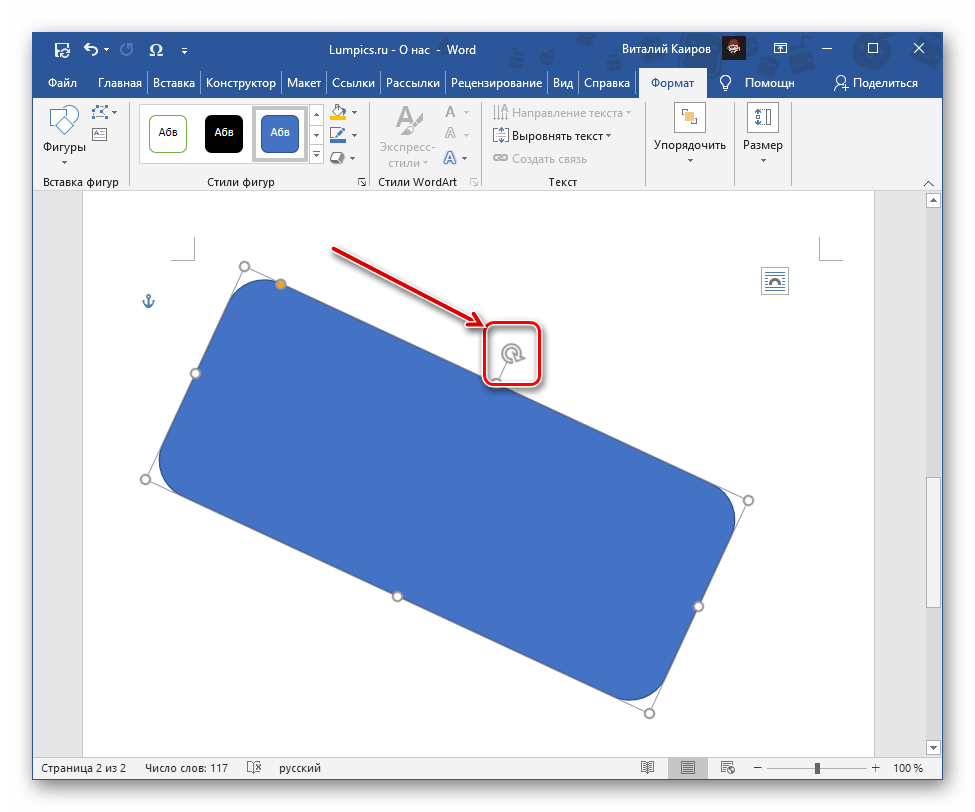
На границах объекта появятся дополнительные точки, с помощью которых можно более тонко подкорректировать его форму. - Выполните поворот объекта, используя расположенную вверху по центру круговую стрелку.
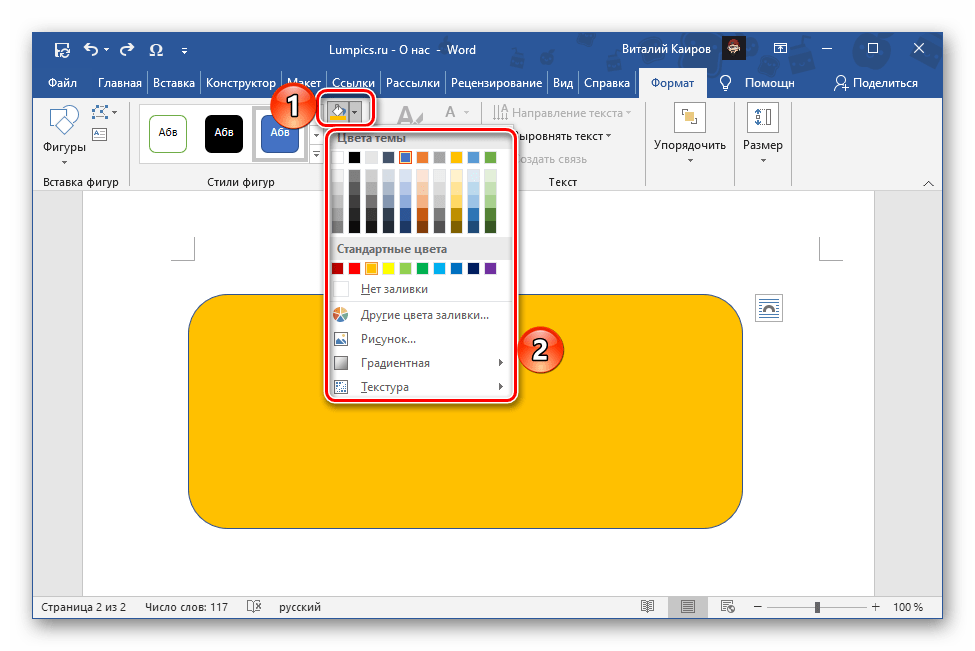
- В группе инструментов «Стили фигур» определите внешний вид, выбрав одно из доступных по умолчанию цветовых решений

или самостоятельно выполнив заливку, окрасив контур и применив эффекты.
Читайте также: Как сделать заливку фигур и других объектов в Word - По желанию добавьте текст.
Подробнее: Как вставить текст в фигуру в Ворде
Закончив с редактированием фигуры, просто кликните ЛКМ в свободной области документа. На любом этапе взаимодействия с объектом вы можете заменить его на любой другой, если это потребуется.
Читайте также Как сделать прозрачной фигуру в Word
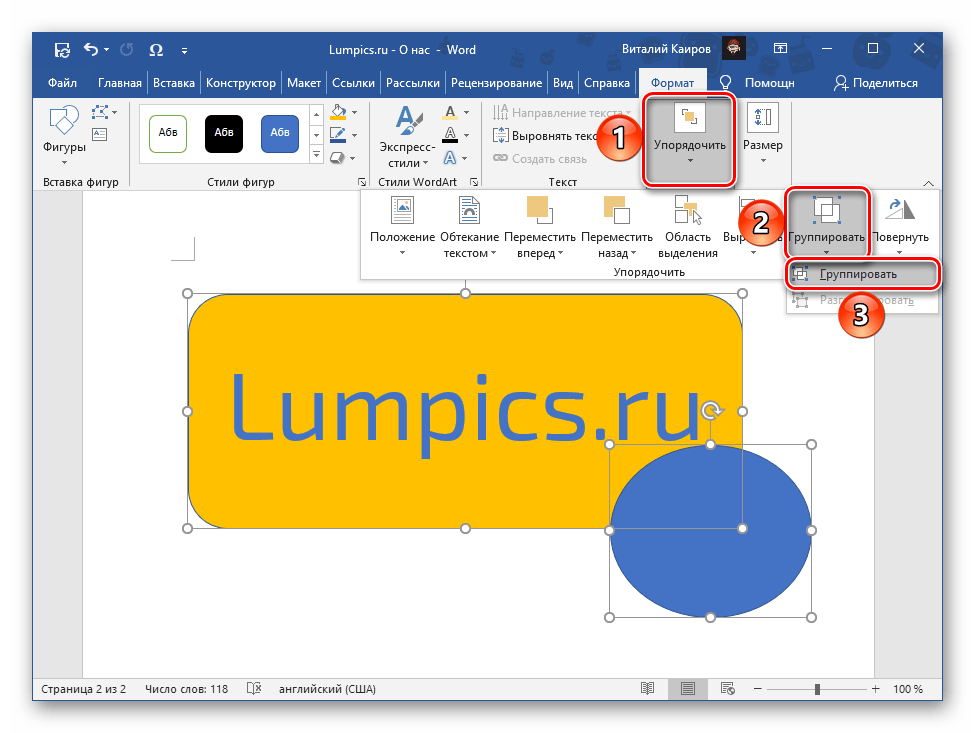
Количество создаваемых таких образом фигур, как и их внешний вид, ничем не ограничены. К тому же их можно группировать, создавая таким образом совершенно новые, не похожие на шаблонные объекты.
Подробнее: Как сгруппировать фигуры в Ворде
Способ 2: Изображение
Если у вас есть готовое изображение фигуры, которую требуется добавить в Ворд, следует воспользоваться теми же средствами вставки, что и в предыдущем способе, но другим инструментом – «Рисунок». Помимо локальных картинок, хранящихся на диске ПК, текстовый редактор от Майкрософт предоставляет возможность их быстрого поиска в интернете. Данная процедура, а также необходимое в большинстве случаев редактирование графического элемента нами ранее рассматривались в отдельных статьях, ссылки на которые даны ниже.
Подробнее:
Как вставить рисунок в Word
Как изменить рисунок в Word

Способ 3: Самостоятельное рисование
Помимо добавления шаблонных фигур и готовых изображений, Ворд также содержит в своем составе довольно внушительный набор инструментов для рисования. Конечно, до полнофункционального графического редактора ему далеко, но для решения базовых задач этого будет достаточно. Используя эти средства, можно создать собственную фигуру как по линиям, так и полностью вручную (пером), проработав ее до мельчайших деталей. Подробнее о том, как активировать данную возможность программы и использовать ее, можно узнать из представленных по ссылкам ниже инструкций.
Подробнее:
Как рисовать в Word
Как нарисовать линию в Word
Как нарисовать стрелку в Word
Как нарисовать круг в Word
Еще статьи по данной теме: