
I’ve recently discovered some very handy features in the Word programme which make rearranging and navigating to chapters a doddle without endless scrolling or cutting and pasting.
These functions are arranged under the Styles Ribbon
Setting up and formatting consistent chapter titles
In Word 365, under Home ribbon, select Styles, then select a style called Heading.
Right click this option. If you wish you can rename this to chapters so it makes sense to you.
Next, right-click Modify Style and you will see the settings for font size, point size, bold, line spacing on this menu. Change these to suit you. Once you apply these style settings to your chapter titles they will be consistent throughout your manuscript, giving a professional appearance.
You can choose to start the chapter on a new page with a page break before so that you do not have to add in return breaks or delete them.
Further options are available under a button called Format on this page.
Once you are happy with your settings save them and add, Add to Styles gallery and choose either
Only in this document or New documents based on this template, depending on whether you want these chapter headings to be available to word documents for other projects.
Creating consistent chapter titles
Once the formatting is set up for your chapters you can start to apply it to your manuscript.
Find your chapter headings, highlight them and click on the word heading in the styles button and it will apply the settings to the chapter headings you select. Work through your manuscript so that all your chapter headings will be consistent. If you click on a small arrow on the Styles ribbon, a small floating box appears on the document which has the same function.
Navigating through your novel, finding chapters, and moving chapters
Once all your chapters have been had the Styles button headings assigned to them, this creates an outline of your novel in word, accessed on the navigation pane.
Open the navigation pane, by pressing Control +F or View > Navigation Pane, or in search type, ‘navigation pane.’
In the navigation pane there are three headings. Headings, Pages or Results.
Click on Headings to see a list of your chapter titles. You can now easily manipulate your chapters.
Pages shows a graphic representation of how many pages are in each chapter. Results shows anything you are searching for.
Move to the start of a chapter instantly
In the navigation pane > Headings > Double click on the chapter title. The cursor will move you to the start of that chapter instantly.
Change the position of your chapter in your novel
In the navigation pane select > Chapter Title you want to move > Double click and drag the chapter title with your mouse to a different position on the navigation pane. The text will follow.

Jill Williamson is a chocolate loving, daydreaming, creator of kingdoms. She writes weird books for teens in lots of weird genres like, fantasy (Blood of Kings trilogy), science fiction (Replication), and dystopian (The Safe Lands trilogy). Find Jill on Facebook, Twitter, Pinterest, or on her author website.
This week I had to typeset Tinker (RoboTales, book one) for printing. I love creating new books. It’s always an exciting time. I opened a template I made a few years back and got to work . . . and couldn’t remember how to do it. Thankfully I had created a handy tutorial a few years back to help other authors, so I downloaded a fresh copy from my website, printed it out, and I was set!
This got me thinking that others might like this information too. So I decided to blog about it.
Now, I realize that few of you need to know how to typeset a novel at this very moment. And even if you do, there are easier ways than doing it in Microsoft Word. You can buy a template to paste your book into, which is a lot less work. But, if you like to have complete creative control and don’t want to purchase Adobe InDesign and learn how to use it, knowing how to typeset in Word might be of interest to you. If you have no need of typesetting today but think you might in the future, bookmark this post or click here to print out a version of these instructions to save for later.

1. Save a copy of the document so that your original will be untouched in case you need to start over. Save your new file with something that you’ll instantly recognize as the typeset document, for example Title_typeset.doc or Name_of_Book_final.doc.
2. I also have a file where I keep all my self-published typeset documents, so you might want to create one of those too.
NOTE: If there is any strange formatting in the manuscript—odd paragraphs, weird font changes, anything you may have changed but it keeps coming back—open the document in file in WordPad. Since this is a program with very little formatting options, it will rid the file of anything unusual without removing italics, indentions, etc. Save the document from WordPad, then open it in MS Word and continue.
3. Track Changes. Check to make sure track changes is off and that any lingering changes have been accepted. You may want to do a quick glance to see if any editor comments remain in the manuscript.
4. Font colors. “Select All” in the document (CTRL A) and remove highlighting and make all the text black.
5. Trim size. Change the page size to the trim size of your final book. Keep in mind that you can choose anything here. You are the designer. But be sure to choose one of the industry standard trim sizes. Most trade paperback books are 5.5 inches x 8.5 inches, so that’s what I’ve used in my example.
a. Click on “File,” “Page Setup”
b. Margins: Top .75, Bottom .75, Left (inside) .75, Right (outside) .5
c. Mirror Margins = yes
d. Paper Size = 5.5” x 8.5” (width x height)
e. Click “OK” and “Save” your document
6. Style. Adjust the style to make get rid of any special style formatting and chance everything to your normal Word style settings.
a. “Select All” (CTRL A)
b. Click “Normal” on the Styles toolbar or in the “Styles” dropdown menu.
7. Font. Change the font to whatever you want. Do keep in mind that you want something legible for the text. Most books are typeset in two fonts: one for the body and one for chapter titles. Don’t worry about your chapter headings for now. Simply make everything in the font you want to use for the body of the book.
NOTE: If you’re not sure which size font to choose or want to see how the chapter titles look, you can print out ONE page of your typeset novel to look at it. Use scissors to trim it to 5.5” X 8.5” and set it inside a book from your shelf to get an idea of how the final page will look. Be careful not to print your whole book.
a. “Select All” (CTRL A)
b. Click on the “Font” dropdown menu and select the font of your choice. If you’re not sure which font to use, some recommended fonts are: Garmond, Century, Century Schoolbook, or Times New Roman. I used Garmond for my books.
c. While all the text is still selected, click on “Font Size” in the “Font” dropdown menu and select your font size. If you want your font to be bigger or smaller, you can change this. I used size 10 for the Go Teen Writers book. But I used size 12 font for my Chokepoint novella to make the book a little longer and to make it match the book that Jeff typeset since I wanted them to look identical.
8. Front matter pages. You have to add pages to the front of the book for the copyright page and title pages. Here is what I recommend, but if you want more or less, it’s up to you. Do keep in mind that the first page of chapter one should start on an odd numbered page.
a. Hold down “CTRL” and the “Home” key to move your cursor to the very beginning of the document.
b. Click on “Page Layout,” “Breaks,” and select “Next Page” section break. This will allow you to restart your page numbering. (Any time you want to restart your page numbering throughout the book, you’ll need to insert a “Next Page” section break.)
c. Hold down “CTRL” and the “Home” key to move your cursor back to the very beginning of the document again.
d. Now click on “Insert,” “Page Break” as many times as you want, making sure that the section break page is on the page before chapter one starts. If you can’t see where the page breaks are, turn on the paragraph marks by clicking on ¶.
e. You should now have four or six blank pages before your first chapter/prologue. If you want to add a table of contents, you will need to add more pages. Below is an example from the Go Teen Writers book.

9. Formatting the body. If you haven’t already, select the paragraph mark in the “Home” toolbar (Show/Hide ¶) so that you can see all the behind-the-scenes formatting like paragraphs (where you hit enter), tabs, line breaks, extra spaces, and so on.
a. Place your cursor at the beginning of the first page of the manuscript (chapter one or prologue). Be sure you’re at the beginning of the first line even if it is blank.
b. Hold down “CTRL” and the “Shift” key and the “End” key to select all of the manuscript body text.
c. While the text is selected, double check your chosen body font and size.
d. On the “Home” toolbar, bring up the “Paragraph” menu. On the “Indents and Spacing” tab…
i. Justify selection
ii. Special Indent First Line = .3
iii. Line Spacing, Exactly 14 points
iv. Do not set a left or right indention or before after spacing—delete any settings that exist.
e. On the “Line and Page Breaks” tab …
i. Deselect all of the checked boxes except for “Suppress Line Numbers.” Leave that one checked.
f. Click OK
10. Find and Replace. You can use the “Find and Replace” function to seek out things that need changed in your document.
NOTE: While the “Find and Replace” box is open, click on “More” to bring up more options. You can use the “Special” button to show a list of things you can search for in the document. If for some reason the “Find and Replace” search isn’t bringing up things that you know exist, you might check here to make sure the “Match case” option is off.
a. Deselect your text and hold down “CTRL” and the “Home” key to place your cursor at the beginning of the document.
b. On the “Home” toolbar, click on “Replace.”
i. Tabs. Type ^t (shift 6, lowercase letter t) in the “Find” box. Leave the “Replace” box empty. Do not put anything in there, not even a space. Click on “Replace All” to remove the tabs throughout your document.
ii. Spaces. Delete the ^t from the “Find” box and type in two spaces. In the “Replace” box, type in one space. Click on “Replace All” to remove the double spaces in your document. Do this again and again until the window tells you it has made 0 replacements.
iii. Spaces and Paragraphs. Delete the two spaces in the “Find” box and type in ^p and a space. Type ^p with no space in the “Replace” box. Click “Replace All.” This will remove any extra spaces (false indents) that appear at the beginning of a new line. Click “Replace All” until the window tells you it has made 0 replacements.
iv. Manual Line Breaks. Delete the ^p space and type in ^l. Click “Find Next” to search for any line breaks in your document. (These happen when you hold down “Shift” and hit “Enter.”) These forced returns will keep the following paragraph from indenting. Replace these manually throughout your document by deleting the manual line break and hitting Enter to get a new paragraph. Watch the ¶ marks so you can see how things change. Check the following paragraph to make sure it is properly indented properly without any leading spaces. (Spaces are noted with a dot in the show ¶.) Delete any leading spaces.
v. Column Breaks. Do a search for any column breaks (^n) and remove them manually by clicking “Find Next” and making sure you don’t want them.
vi. Hyphens. Type two hyphens (–) into the “Find” box and type an em dash (—) into the “Replace” box. You can either paste a proper em dash in the “Replace” box by finding one in your document and copying it. Or you can select it from the “Special” list when you click on “More.” Click “Replace All.” Then do a search for spaces around your em dashes. In the “Find” box, replace the double hyphens with a proper em dash, then add a space before it. Put only an em dash in the “Replace box.” Replace all of them. Do the same for a space trailing the em dash. Do this until there are 0 replacements.
vii. Find and replace the misuse of en dashes (–) with em dashes (—). Check the leading and trailing spaces as well.
viii. Ellipses. Decide how you want to format them in your manuscript. You can either use the auto format ellipses (…) or you can use the period space period space period one (. . .). If you use the period space one, you’ll need to do a search for (. . .) once your manuscript is formatted to make sure that none of them ended up at the end of a line and got cut in half. These you will have to fix manually by rewording the sentence so that the ellipses falls together on the same line. If you want to use the auto format ellipses, this won’t be a problem. So, if you do choose the auto format ellipses, do a “Find” for any that might not be picking up the format. Type three periods into the “Find” box without any spaces between (…) and paste an auto formatted ellipses (…) into the “Replace” box. Replace them all. Then do a search for the auto ellipse with leading and trailing spaces and make them the way you want them. You will also want to do a “Find” for two periods (..) and period space period (. .). This should help you make all your ellipses consistent.
ix. Quotes and Double Quotes. Do a “Find and Replace” of all the quotes to turn the straight quotes into curly quotes. You’ll do this four times. One for “, one for ”, one for ‘, and one for ’. Paste the same thing into both boxes and click “Replace all.” Sometimes this will cause a quote to turn the wrong way when there is an em dash or ellipses there, but hopefully you or your proofreader will find those before you upload for printing.
x. Underlines and Bold. Search for underlining by clicking in “Find” box and type “CTRL” “U” at the same time. Then click “Find Next” to see where you’ve used underlining. If you used underlining for italicized thoughts, you’ll need to replace the underlining with italics. You can click in the “Replace” box and type “CTRL” “I” to do this faster, but I recommend taking your time to check each one before you replace so that you’re sure you want to italicize. Once you’re done, do a search for “CTRL” “B” for bold to see where you’ve bolded things in your document and remove any you don’t want.
11. Asterisks. Do a “Find” for a single asterisk. This is where you will format your scene breaks. Make sure you format them the way you want them to look in the print book. If you want to use a fun image or dots like ●instead of plain asterisk, replace them manually. I like to get one scene break formatted the way I want it, then copy it. Then I use the “Find” function to go from asterisk to asterisk and paste in my formatted scene breaks. If you want to insert an image, go to “Insert” “Picture” and find the image you want to use. Resize it, center it, then you can copy it and paste it in all the right places.
12. Page Breaks and Chapter Headings. Additional page breaks should only occur between chapters and maybe at the end for your acknowledgements and about the author pages.
a. Do a “Find” for manual page breaks (^m) and section breaks (^b) and remove any that don’t belong.
b. You can format your chapter headings anyway you want to. Do a “Find” for the word “chapter” or if you didn’t use the word chapter, you’ll have to search for each number “1,” “2,” “45,” etc. or manually scroll through the document to find them all. Make sure they’re all the same font, size, and start in the same place (count the ¶ marks to be sure). I like to format one and copy and paste it, then go in and change the number or chapter title. You can keep chapter headings plain or get fancy. Below are some examples of chapter headings I’ve done.

13. To add pages to the end of the book. One of the best things about typesetting your own book is that you are in control of what you put in the back. You can cross promote yourself however you want. And you should. Someone finished your book and loves it wants to see what else you’ve written. So put in a list of the other books you’ve written, create JPG ads for your other series and put a few in the back. Maybe even put an ad for your author website, inviting the reader to come connect with you online.
a. Press “CTRL” “End” to get to the end of your document.
b. Click “Insert,” “Page Break” to insert a page. Insert as many extra pages as you’d like and make sure you end on an even page number.
14. Headers and Footers. Go back to the very beginning of your document and double click on the page somewhere in the header or footer area. This will bring up the Header & Footer Tools menu.
Here’s how it works. Headers and Footers are connected unless you unconnect them. You can only unconnect them where you’ve placed a section break. So, if you want no page numbers in the beginning, lowercase Roman numerals for the table of contents, numbers for the book, then no page numbers at the end where the acknowledgements and ads are, you will need to insert three section breaks. If you want to change the chapter heading in each chapter, you will need a section break between each chapter.
This can get very complicated. Unless you’re publishing a nonfiction book, I recommend leaving your headers the same throughout the body of the book and even letting the page numbers go through the acknowledgements and ads in the back. But it’s up to you.
Here’s an image of the Header & Footer Tools menu.

I put a yellow box around the buttons that will take you from one section’s header or footer to the next. The button at the bottom, “Link to Previous” is the button that controls whether your headers and footers stay the same of change. If you want them the same, link your headers and footers. If you want them to change, unlink them. You link or unlink on the first page of each new section.
To make things easy, simply center your page numbers and headings and put the same heading on each page, for example: Chokepoint by Jill Williamson. If you’d like to have the title on the right-hand page or above the odd numbers and your author name on the left-hand side or above the even numbers, check the box in the Header & Footer Tools that says “Different Odd & Even Pages.” If you want to have no page number on the very first page, check the box that says “Different First Page.”
If you get stuck on page numbers, I have a video tutorial on the subject at this link: http://www.youtube.com/watch?feature=player_embedded&v=UOuihsC7SyY
And there are many others video tutorials out there too.
Insert a page number by double clicking in the footer area and selecting your choice from the “Page Number” menu. Choose whether you want your page numbers on the left, center, or right. Once the number appears, you can highlight it and change the font or size.

For the headers, simply double click in that area of the document, type what you want, and format it.
Here are some sample instructions for how it could be done. If you try it this way as a method of training, you will learn the basic concept. Then you can make changes however you’d like.
a. Header. Go to the very first page of your document and double click in the header. The header in section one will have nothing in it as these are your front matter pages. Click the show next button to look at the header in section two.
i. Deselect “Link To Previous.”
ii. Check the boxes in the Header & Footer Tools menu that say “Different First Page” and “Different Odd & Even Pages.”
iii. Deselect “Link to Previous” again as it may have reselected itself. If you accidentally leave this on, it will mess up your numbering.
iv. Click on “Show Next” in the Header & Footer Tools menu. This will take you to the even page header.
v. Deselect “Link To Previous.”
vi. Enter your author name, font Garamond size 10, centered, with one return after the name. Adding a return will give a little space between the name and the body of the page and is easier than adjusting the header and footer margins.
vii. Click on “Show Next” and do the same for the title of the book on the odd page header. Don’t forget to deselect “Link to Previous” before making any changes.
viii. Click on “Show Next” to see section three. The acknowledgements and author bio page has no header or footer. You will probably need to deselect “Link to Previous” to keep the headers from showing up.
b. Footer. Go back to the first page of your document and click in the footer. The footer in section one will have nothing in it as these are your front matter pages. Click the show next button to look at the footer in section two.
i. In section two, deselect “Link to Previous.” Click on the “Page Number” dropdown menu and select “Format Page Numbers,” which will bring up the Page Number Format box. Here you can click the button “Start at” and enter a “1” so that your first page will start at one. Click “OK.”

ii. Click on the “Page Number” dropdown menu and select “Bottom of Page,” and then select the page number that is centered. The number should appear in your footer. Highlight it and change the font to Garamond, size 10.
iii. Click on “Show Next,” deselect “Link to Previous,” and insert a page number for the even page footer. Format it as you did before.
iv. Click on “Show Next” and do the same for the odd page footer.
v. Click on “Show Next” to deselect the “Link to Previous” for the acknowledgements and author pages in the back. Delete any page numbers if they exist.
15. Embed your fonts. Once your document looks just how you want it to, you need to embed your fonts. This allows you to use fonts that the printer might not have. Embedding the fonts with your file saves that font information in the file so that it’s available to the computer that opens your file. If you don’t embed your fonts, the computer that opens your document to print it or read it will choose a substitution font, and that might mess up your formatting. Simply printing or saving to PDF will not embed fonts.
a. Click “File,” “Options.”
b. In the “Options” window, click “Save.”
c. Under “Preserve fidelity when sharing this document,” check the box “Embed fonts in the file.” Make sure that the “Do not embed common system fonts” box is also checked.
d. Click “OK.”
16. Save to PDF. Now you’re ready to save your document.
a. Click “Save as.” Enter the name for the file. And under the “Save as type” dropdown menu, select PDF.
b. Click the “Options” button. Ensure that the “Document structure tags for accessibility” box is checked. Click “OK.”
c. Click “Save.”
Congratulations! You have just formatted your manuscript for publication.
Any questions?
If you don’t use word, this might be no help!
Update: Now that Office 16 is here the collaboration features have been much improved — I wonder if that will be wonderful for co-authors or cause punch ups online?
There are a lot of different programs that you can use for writing a novel, including a pencil and paper, but there is a reasonable chance you are using Microsoft Word. For the sake of this little discussion, I am using Word 2013, but much of this also applied to earlier versions too.
There are a few reasons why I use Word. Firstly I have it already. Then I also use OneNote for planning and I can link the two of them together if I wish. Thirdly, I just sort of like it!
But out of the box, it is not necessarily perfectly set up for the budding or even budded writer. So, here are a few little tips: I am sure you could add many more.
Template
If you are writing a novel, then you should use a template that is right for the job. There are a couple of manuscript templates on microsofts website, but basically you should be setting up to use Times New Roman, 12pt, double space, indent first line and all headings at the same size as the normal text — extremely boring and easy to read, basically.
I have put up one in a ZIP file here if you are interested. It is from a friend and is similar to the one I use. (Mine has me all over it, so you aint getting that one. It also has an updateable table of contents at the front which you may or may not want to use, and the number of words on the cover page can be updated by right clicking and update field.
UPDATE: You might also find this Kindle-Friendly template useful! http://www.writeintoprint.com/p/layout-tips.html
Navigation
If you are going to write your whole book in one doc (which some don’t like doing but I do) then getting around it is pretty important.
For some reason I managed to miss that word comes with a navigation pane! Go to View and check Navigation pane. It is the most useful of tool bars and allows you to navigate round your book quickly and efficiently while also adding a useful search feature.
You can also use it to keep track of the number of words in a given section. Right click on any heading in the pane and choose «Select Heading and Content.» This will highlight that particular chapter, in my case, and after a couple of seconds, the number of words will be displayed in the bottom left bar of Word.
Quick Access Tool Bar
The change to the ribbon in Word was hard work for some. I found it odd to start with, though now I am used to it, I much prefer it to the old menu system. However, if there are some menu items you use regularly, then it can be a bit of a pain if they are spread out over the menus.
Right clicking anywhere on the ribbon allows you to show the quick access tool bar either below or above the ribbon. In my example above, I have it below.
You can add whatever you like to this little tool bar, but here are my choices:
- Save As
- Save
- Undo/Redo
- New Doc
- Open
- Spell check
- Print Preview
- Quick Print
- Comments
- Switch Windows
- Footnotes
- Page Break
Comments
I use comments a lot as well as using OneNote.
My most common use of comments is when I am taking a short break. I will often just add a comment reminding me what I am doing next.
«Battle starts here, need to set the scene,» for instance.
However, if you do use comments, you should make sure you remove them all before, for instance, saving as a PDF since they will appear in the document. Selecting a comment allows you to delete it, but you can also clean up your document of all extra rubbish by going to File > Info and Check for Issues. Make sure that you do this with a copy, for obvious reasons!
Dictionaries and Fantasy
If you are writing a fantasy, the chances are you will have names of places and people and other words that are not in your normal language.
One of the biggest problems I have is misspelling my own invented words! So I have started adding them to my dictionary when spell checking. It is not perfect, but gives me a running start!
And that is about it. Other than that I use Word 2013 just as it is. I have no trouble with the smooth cursor animation (actually I rather like it) and the display is nice and clean.
The only other thing I do enjoy is multiple monitors. This is an overhang from other work I do, but having my word doc dead ahead, then having OneNote open to the right and Photoshop or Illustrator with my current map on the left, makes my life very simple. The only thing I might add if I get a bigger office one day is a couple of white boards (not computer ones) and some pin boards so I can stick other inspiring bits round my room. But then, I am rather into immersing myself into my work!
Have fun, and if anyone tells you that you should not use word, ignore them. If you like it and have it, then go ahead. The most important thing is what you write, not what you write it on.
While there are a lot of great software options out there for writing your novels, I use Microsoft Word. Why? Because it’s simple – there’s no distracting features, just you and the page.
But sometimes it’s hard to figure out how you should format and manage your manuscript in Word, especially if you’re new to writing books and novels. I’m going to go through my process of setting up my documents, and how I use Word to manage big novels with large chapter structures.
Use the templates
Word makes setting up a manuscript easy with templates. There are both short story and book manuscript templates available for download and use in Word. You don’t have to do anything except search in the top box at the opening menu for manuscript, download them, put in your details and type. Too easy.
I use these all the time, but it is still helpful to know the standard settings for manuscripts or short stories to present to a publisher:
- Times New Roman or Courier font (I personally prefer Times)
- 12 point
- Double spaced
- 1 inch margins
- First line of each paragraph hanging (indented)
- Left alignment
- Your name/story title/page number in the top right hand corner
The number one tip I can give is to double check requirements for your manuscript with the publisher before submitting – they will include these requirements with their submission guidelines.
The reason for Times New Roman or Courier is their legibility. They’re both really easy fonts on the eye, rather than having an editor squinting over your manuscript in Papyrus. Using a template makes life easier – no more pressing tab every time you start a new paragraph.
If you need to set up your paragraphs in word itself (sometimes formatting can break or you want to change an old story), select your text, go to the paragraph pull out menu (tiny little button in the corner of the panel) and choose the appropriate settings.

Use headings for chapters
Under the home menu, you will see different style types up the top. Highlight your chapter headings, then style them as Headings from the menu, and they’ll appear in the headings navigation menu on the left hand side.
Using headings means that you can navigate quickly between chapters. This is particularly useful if you are writing non-fiction with multiple sub-sections, as you can use sub-headings to manage it in the navigation menu.
These are also extremely helpful if you will be self-publishing your book, as they are needed to format the document correctly for online export.

Save and label your files clearly
One final tip: I save all my files in this style of structure so I don’t send the wrong draft to publishers:
- Writing
- Novels
- Book title
- 1 DRAFT Book Name
- 2 DRAFT Book Name
- FINAL Book Name
- Book title
- Short Stories
- Year
- Short Story title
- 1 DRAFT Story Name
- FINAL Story Name
- Short Story title
- Year
- Novels
Now that you know how to format your manuscript correctly in Microsoft Word, you know your work will appear professional to editors, agents and publishers. If you have any questions, please feel free to ask in the comments section below, and I’ll do my best to answer them.
I spend an awful lot of time in Microsoft Word. It may not be the only word processing software out there, but there’s no denying that a lot of novels get written in it–and that a lot of people don’t know the useful things it can do.
So let’s talk about styles and how you, a novelist, can use them.
Styles are complicated and powerful, and while you don’t need to use many of them in a novel, they are good for:
- Making your Word file easy to navigate, so you can jump with one click from chapter to chapter
- Making it easy to create an ebook version of your file in Calibre
- Quickly and easily changing font styles throughout the document.
Let’s get to it!
First thing’s first: what are styles?

“Styles” takes up about half of the “Home” tab in Microsoft Word. Here’s what it looks like.
“Styles” are, well, font styles. Let’s say you have a simple report, and you have three different font styles: a large 1st-level header for the title of every section, a smaller 2nd-level header for subheadings, and a “normal” font for all of the text. You want your 1st-level heading to be 20pt Arial font, black, and with a 6pt of spacing after every header, and your 2nd-level header to be 16pt Arial, blue.
Let’s say your report is 100 pages long and includes 30 1st-level headers and 60 2nd-level headers. You write the whole document. You’re done. Then, one day before the report’s due, you have to change it. Both of your headers should be blue, the 1st-level header should be 18pt Times New Roman, and the 2nd-level should be 14pt. What do you do?
Well, if you manually formatted this document, you’d have to find all 90 of those headers and manually change them, one by one by one.
But if you had used styles, you wouldn’t have to do that.
Here’s what would have done: You would have gone to the “Heading 1” and “Heading 2” styles and made them look exactly the way you want it to. You would have set their size, color, spacing, borders–whatever.
Then you would have gone through the document. Every time you used a first- or second-level header, you’d select the text and click one of the buttons in the “styles” section–“Heading 1” or “Heading 2,” in this case. Then MAGIC HAPPENED.
Because the moment you do that, your text is automatically formatted according to the rules you assigned to that style. And if you ever need to change that style, you don’t change it in the document. You just edit the Heading 1 or Heading 2 style directly and every header in your document using that style is automatically updated.
How is this useful for novels?
You probably don’t use a lot of font styles in novels. 99% of my novels are one thing: 12pt Times New Roman font. There’s just one really important exception: chapters headings. At the start of every chapter, I have a big, bold heading: CHAPTER ONE. CHAPTER TWO. CHAPTER THREE.
And I create a style for those. This does two things. First, it makes it really easy to navigate your Word file. Just hit Control+F to bring up the Navigation Pane:

See that button? That’s called “Browse the headings in your document.” Click it.

And voila. Because I made every chapter heading a header, I can now see all of them–and I can click on them to navigate around the file.
Know what’s even better? If you want to create an e-book of your novel, Calibre will automatically split your book into chapters and create a table of contents. It does this by looking for Heading 1s and splitting the book at those points. (I covered this in a very old post called A Quick-and-Dirty Guide to Making Imperfect .EPUB Files.)
So if you write in Word, this is useful. Let’s talk about how to do it.
Step #1: Edit the “Heading 1” Style
First, let’s make the Heading 1 style look the way you want it to.
- Go to the “Home” tab. In the “Styles” section, find “Heading 1.”
- Right click on it.

- Click on “modify.”
- This is the “Modify Style” page. The easiest stuff to change is in the middle. Choose the font, size, and color.
- If you want to change anything else, click the “Format” button. You can customize a lot of things! But for the purposes of this example, we’re done. Hit “OK.”


“Heading 1” should now look exactly like you want it to.
Done? Good. Now do the same thing to the style called “Normal.” This is your “normal” text.
Step #2: Apply the style to all your chapter headings.
This one’s easy!
- Go through your entire document.
- When you encounter a chapter heading, select it. Be careful to only select the text you want to be a header. Don’t select extra lines or spaces!
- Click on “Heading 1.” Your chapter heading should automatically change.
Step #3: Make sure it looks right.
Remember above, when I told you how to use Control+F to bring up the Navigation Panel? Do that. View your headings. Does everything look OK?
It’s easy to make mistakes. I have, for example, accidentally made single blank spaces into headers–and then they show up in the heading viewer as big, empty spaces that mess up the flow of my “table of contents.”
So what do you do if that happens? Just turn it into normal text.
- Navigate to the thing that shouldn’t be a header. (You can do this by going into the Navigation Panel with Control+F, going to “Browse the headings in your document,” then clicking on the mistake.)
- Select the stuff that shouldn’t be a header.
- Click on the “Normal” style.
It will be converted from a Heading to normal font. And normal font doesn’t appear in the navigation panel, so it should vanish from your “Browse the headings in your document” list.
And that’s it!
That’s all you have to do. Now you can navigate your Word file with just a click of the mouse. And if you want to convert your Word file into an e-book, you’re all set–all you have to do is follow the steps in A Quick-and-Dirty Guide to Making Imperfect .EPUB Files.
It’s a simple trick, but it can be super useful!
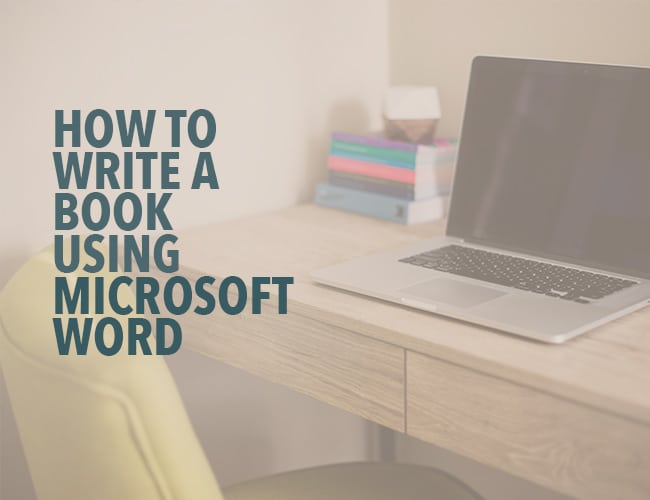
If you want to write a book, you’ll need book writing software that’s up to the task. Yes, you can invest in dedicated book writing programs. But you don’t have to: a great writing tool is likely already at your fingertips, if you know how to write a book using Microsoft Word.
There’s a lot of book writing software out there. Many of these programs claim to offer intuitive use, help with organization, and even say they’ll keep you from distraction. The options can be overwhelming.
There’s still one tried and true option if you’re not interested in all that (or can’t afford the fancier programs): Microsoft Word.
I write most of my books in Microsoft Word, not to mention short stories. Here’s the rundown of how to write a book using Microsoft Word, and why that might be your best choice.
The Benefits of Microsoft Word for Book Writing
You most likely already have it. And so does everybody else. Word is the standard, accepted across platforms, and is easy to access for non-writers (your beta readers). It’s been around forever, so most people know how to use it.
There are book formatting templates. A ton of them. They have them for short story format and for manuscript format. Personally, I don’t use those templates, but they’re a nice baseline for beginners, or even old hats that just want to hurry up and write without setting up their document first.
It’s simple and uncluttered. There are a ton of apps and programs out there that will allow you to keep your plot structure notes close at hand, to rearrange your chapters with the click of a button, and to keep detailed character profiles right in the program. That’s all a little too much for me. I prefer handwritten notes and nothing else blocking my screen while I’m typing and Word gives me that.
It is worth noting that if all that sounds appealing to you, you can do those things in Word as well, it just won’t be as fancy as other programs.
Hey writer: the first step to writing a book is coming up with a great idea. The second step is figuring out the structure of your book. If you have an idea but you need help with the structure, check out our new book The Write Structure. In it, we’ll teach you how to apply timeless story structure principles to write a great book. Get The Write Structure »
How to Navigate Your Book in Microsoft Word
When you have a 90,000-word manuscript, navigating becomes daunting. Luckily there are ways to do it in Word that make it easier if you know where to look.
Chapter Headings
Word doesn’t divide your book into chapters for you like some other programs. There will be no easy way to click and drag to rearrange chapters.
What I recommend is using headings. On Word’s Home page, there are already standard headings listed. Definitely mess with them and change their formatting to something simple.
No one needs giant blue words as their chapter headings. (You can set your simpler formatting as your default style as well, so you don’t have to change it every time.)
Make the title or number of each chapter a heading. Then you can easily bounce around to different chapters through the navigation pane (check the Navigation Pane box under the View menu).
Bookmarks
These basically work the same way as headings, but they’re for anywhere in your document. Have a specific scene you need to do more research on? You can bookmark it and jump back to it later.
Bookmark by going to the Insert menu and clicking Bookmark. Name your bookmark and voilà. You can delete them easily from the popup menu as well.
Find and Replace
CTRL+F brings up a simple search option to find words and phrases in your document. CTRL+H brings up the full gambit. From that dialogue box, you can search, replace certain words with others (i.e. Jennifer now becomes Julia all through the manuscript), and go to any page, section, heading, bookmark, etc. that you need to go to.
Microsoft Word is Great for Editing Your Book
Word has a ton of options for editing your story, including comments, tracking changes, and comparing documents. All of these are under the Review menu.
I use the comments feature to make notes to myself where I need to recheck facts or add description later. It’s easy to navigate through the comments with the search feature or the buttons under the Review menu. Don’t forget to remove them all before saving your document as a PDF or sending it off to an editor.
Tracking changes is awesome and a lot of editors (for short stories anyway) will use this feature to collaborate with you during the editing process. You can accept or reject changes or even revert back to the original.
Finally, make sure you have grammar and spellcheck on! Grammar check even allows you to check style issues (like how to use an ellipsis correctly) and passive voice. It’s invaluable.
Pro tip: To keep you on track while you’re writing, turn off some of the more fine-tuning features of grammar check. There’s nothing that will ruin your flow more than a bunch of underlining you feel like you need to take care of immediately. I recommend running the full check when you’re done (or at least done for the day).
Formatting Your Book in Microsoft Word
Make sure you’re familiar with standard manuscript format for novels and formatting short stories. Take a look at those links and follow their instructions. You don’t want to get rejected out of hand because you tried some weird formatting that’s hard to look at.
One of the biggest gripes I see from editors is writers using spaces to indent paragraphs. Don’t do this. It makes it super hard on them when they’re putting a book together. Instead, use the ruler in Word (under the View menu) or the paragraph settings (under the Home menu) to adjust your tabs. A half inch is standard.
Despite what most of us were taught in school, the standard is now one space after periods, not two. This is another sticking point with editors, so don’t do it. If you’re used to two, there’s a grammar check feature in Word you can turn on to highlight every time you use two spaces.
Finally, use the page break option to break for a new chapter, not enter or a million spaces. You can find the page break under the Insert menu.
Pro tip: When in doubt about your formatting, you can turn on the Show/Hide option under the Home menu (looks like a paragraph symbol) to see all your formatting symbols.
Now That You’ve Mastered Microsoft Word, Go Write Your Book
Don’t let choosing writing software stagnant your writing. Don’t overthink it. You don’t need to keep up with the Joneses with the latest writing technology that’s trotted out on tech forums and in writing chats.
The important thing about writing a book is actually writing it. No fancy book writing software is going to help you with that.
So get writing!
Ever used Word to write a book? Do you have any more tips for how to write a book using Word? Let me know in the comments!
PRACTICE
Take fifteen minutes to write. Just write. Don’t worry about page setup, formatting, or which program you’re going to use. Open up Word or get out a pen and paper if you’d like!
When you’re done, share your writing in the comments. Don’t forget to comment on your fellow writers’ work!

Sarah Gribble
Sarah Gribble is the author of dozens of short stories that explore uncomfortable situations, basic fears, and the general awe and fascination of the unknown. She just released Surviving Death, her first novel, and is currently working on her next book.
Follow her on Instagram or join her email list for free scares.
Anything I got wrong is my own fault, and none of theirs.

The dog went to the park, and learned how to play fetch would be corrected to «The dog went to the park, and learned how to play fetch. Here is a brief explanation as to why.

Write a question mark at the end of any sentence that asks a question interrogative sentence. Second and subsequent chapters: We have lots more free instructional articles in our Writing Academy.
Large in size is corrected to large. Please leave a comment if you have a question about fixing an issue in your Word document. If you find it easier to write with extra space between paragraphs then you can change the style of Normal or whatever style you are using for your chapter text to add the space for you automatically.

Now, when you type your text into Word using the Normal style and hit Enter to start a new paragraph, it will be indented automatically and no extra spaces or tabs should be used. Be sure to check out our Word Tips for Writers videos for even more tips on working with Word when writing your book.
An example of a well-formatted novel manuscript Further Reading.

All my advice is based upon: On the Format menu, click Document, and then click the Layout tab. This rule also covers numerals «twenty-one» through «ninety-nine». I would like to accepting the invitation. How to make your typesetter love you: You might also find this Kindle-Friendly template useful.
Then, when you hit the Enter key to start a new paragraph using that style, Word will automatically add extra spacing between the paragraphs.
Use the correct verb form after an auxiliary verb verbs that describe a person, number, mood, tense, etc. Back in the days of the typewriter, the norm was two spaces between sentences, and many of us learned to type following that rule.
That works out to. When there is an unexpected space before a punctuation mark and a missing space after it, this rule suggests removing the unexpected space and suggests inserting the missing space. He is driving real carefully would be corrected to He is driving really carefully. We are not taken them to the movies before.
Go to View and check Navigation pane. Check out the images below for an example of what a correctly-formatted manuscript looks like. Less You can change the default settings for new documents by making changes to the Normal template that new documents are based on.

Comma with Conjunction targets a redundant comma when a dependent clause with a coordinating conjunction follows the main clause. Create or open an item. I write fiction, and my experience is with U. To make changes to Normal.
The dog was seen by the man. If you need the word count for a specific block of text, highlight it to view that number. You can set your page size under the Page Setup window in Word.
It is corrected to I did not see anything. Inserting a Manual Line Break at the End of Each Line This mistake is also commonly done by people who learned to type on a manual typewriter.
Lines should be double spaced with no extra spaces between paragraphs. You can choose either option depending on which settings you want apply to your document. Standard Manuscript Novel Template For Microsoft Word By Mike, on January 28th, Hey folks, I’m putting up some templates for MS Word that make heavy use of styles and make it easy to put your manuscript into the standard manuscript format that most editors and agents request.

How to format a book for print in MS Word — Tutorial #3. If this is a novel, you don’t really need a table of contents, but that’s up to you. For the front pages, you’ll probably want to make sure there’s no indents anywhere, so everything is properly aligned.
and was featured in CNN for renting castles to use as writing retreats. There are a lot of different programs that you can use for writing a novel, including a pencil and paper, but there is a reasonable chance you are using Microsoft Word.
For the sake of this little discussion, I am using Wordbut much of this also applied to earlier versions too.
There are a few reasons why I. You’re at Scribophile, a writing community for serious writers. We have lots more free instructional articles in our Writing Academy. Never underline in novel manuscripts. Your title page should include: The name of the work.
Your approximate word count, to the nearest hundred. Standard Manuscript Novel Template For Microsoft Word By Mike, on January 28th, Hey folks, I’m putting up some templates for MS Word that make heavy use of styles and make it easy to put your manuscript into the standard manuscript format that most editors and agents request.
Aug 24, · How to Use Word to Easily Write Your Novel Rick Bettencourt How to use yWriter like I did to create your own novel — book writing Manuscript settings for Kindle (MS Word) Lesson #1.
Word settings for writing a novel
Rated 4/5
based on 18 review
You may be asking yourself why pre-formatting matters. There are actually some very good reasons.
- Revisions: An organized manuscript makes it easier for you to make revisions. It’s hard to see dialogue and such when your text is all crammed together with no rhyme or reason.
- Editing: Part of my job as an editor is to make suggestions for dialogue pacing, group speech with action so that it’s clear who the speaker is, arrange paragraphs so that they flow from one to the next. I can’t do that if it’s hard to make paragraph adjustments.
- Time: If you do your own formatting, this will save you time in the long run.
- Money: If you outsource your formatting, this will save your formatter time, and that’s going to ultimately save you money.
Before we start, let me say that if all this looks like WAY too much hassle for you, we offer pre-formatting at a reasonable rate and can usually get your manuscript back to you same business day or next business day. If you want to do it yourself, though, we’re here to help—keep reading. 🙂
The walk-through
So, okay—simply put, text in Microsoft Word is laid out in paragraphs. You can brute-force paragraphs into a certain layout by using your tab key or space bar, but the easier way is to use styles.
In your document, click on the Home tab at the upper left of the toolbar. You’ll see the style section to the right with different fonts in the rectangles and labels like Normal and Heading 1. You want to use a different style for each kind of paragraph that does a unique job.

The common styles you’ll use are for body text, chapter headings, scene breaks, and indented material (letters or messages read by your characters).
There are two ways to change a paragraph’s characteristics: in the body of the document or in the styles manager in the toolbar. If you change a paragraph in the body, the changes will apply to that paragraph only. If you change it in the toolbar style manager, the changes will apply to all paragraphs of that type in the document.
Let’s jump in and create styles for your manuscript! But first–SAVE A BACKUP COPY OF YOUR MANUSCRIPT, JUST IN CASE! Also, keep in mind that the following is just my recommendation for style choices. You can select different font sizes, alignments, and such as you wish.
BODY TEXT
- Put your cursor anywhere in a text paragraph within a chapter of your novel. In the toolbar style manager, find the Normal rectangle and right-click on it.
- Click on Modify.
- Choose the font and size you want for the paragraphs in the body of your manuscript.
- Click on Format in the lower-left corner and choose Paragraph.
- Make sure the Outline Level is Body Text. Under Indentation, click on Special, then First Line, and choose 0.5. This automatically indents the first line of all your paragraphs. You’ll never have to use a tab or a space again to indent your paragraphs! (Tabs and extra spaces can drive both you and your formatter crazy.)
- Click OK and OK.
CHAPTER HEADINGS
- Put your cursor on one of your chapter titles. In the toolbar style manager, find the Heading 1 rectangle. Put your cursor on Heading 1 and right-click on it.
- Click Modify.
- Choose the font and size you want for your chapter headings.
- Click on Format in the lower left corner and choose Paragraph.
- Make sure the Outline Level is Level 1. Under Indentation, click on Special, then choose (none).
- At the top of the dialogue box, click on Line and Page Breaks. Click the box for Page Break Before. This will start each chapter on a new page.
- At the top of the dialogue box, click back to Indents and Spacing.
- Under spacing, choose what you like for the amount of white space above and below your chapter titles.
- Click OK and OK.
SCENE BREAKS
- Put your cursor on one of your scene-break lines. In the toolbar style manager, find the Normal rectangle and click on it. (It’s probably already selected).
- Do NOT click Modify. This time, we’re going to create a new style.
- Click on the little drop-down menu button to the right of the word Styles on the tool bar. At the very bottom, click on the far-left square of the three squares to the left of Options (New Style).
- Make the name “SceneBreak” or whatever you want to call your scene breaks.
- Click on Format in the lower-left corner and choose Paragraph.
- Make sure the Alignment is Centered and Outline Level is Level 2.
- Under Indentation, click on Special, then choose (none).
- Under spacing, choose single spacing and then what you like for the amount of white space above and below your scene breaks (6, 9, or 12 all look fine).
- Click OK and OK.
INDENTED MATERIAL
- Put your cursor anywhere in a paragraph of quoted text within your novel. In the toolbar style manager, find the Normal rectangle and right-click on it.
- Do NOT click Modify. This time we’re going to create a new style.
- Click on the little drop-down menu button to the right of the word Styles on the tool bar. At the very bottom, click on the far-left square of the three squares to the left of Options (New Style).
- Make the name “QuotedMaterial” or whatever you want to call your quoted material.
- Choose the font you want for your quoted material. (Italicizing the same font you use in your text body is usually a good choice.)
- Click on Format in the lower-left corner and choose Paragraph.
- Make sure the Alignment is Left and Outline Level is Body Text.
- Under Indentation, click on Special, then choose what you want (either none or an indentation).
- Under spacing, choose single spacing if you prefer it and then what you like for the amount of white space above and below your indented material (6 is a good choice).
- Click OK and OK.
Congratulations! You’ve created your manuscript’s paragraph styles.
Now to pre-format your manuscript:
- If you’ve used the Tab key or the Space key to set off paragraphs, you can now remove those. You can do a Search and Replace for (two spaces) and replace with (one space) and repeat until you get zero results back. For tabs, you can do a search for (^t) and replace with nothing.
- Make sure each chapter title starts with the word “chapter.” (Add the word if it isn’t there. You can delete it after you’re finished–this is just to make it easy to find your sections when you start implementing your styles.)
- Make sure the scene breaks are consistent (all ***, for instance).
- If you have offset quoted material such as a letter, put the word “quotequote” at the beginning of each instance. (You’ll delete it later.)
- Highlight your entire manuscript (ctrl+A) and click on the Normal paragraph style rectangle in the toolbox. This should make all the paragraphs in your novel “Normal” style. Don’t worry! Changing the style in the toolbox retains formatting such as bold and italics.
- Do a search for the word “chapter.” Change your chapter headings to Chapter Heading paragraphs by putting your cursor on the chapter heading and clicking the Chapter Heading rectangle in the style toolbox. Once you’ve changed the chapter titles to Chapter Heading paragraphs, you can delete the word “chapter” if you like.
- Do a search for your scene breaks. Change your scene-break paragraphs from Normal to SceneBreak by clicking on the appropriate rectangle in the style toolbox.
- If you have quoted material, do a search for the word “quotequote.” Change the paragraph style to QuotedMaterial by clicking on that rectangle in the styles toolbox. You can then remove the extra text.
If you press Alt+V+D, your document map will appear on the left. Alternatively, you can press CTRL+F and then click on the first tab in that window. You should see your chapter titles (which you can click on to go to the various chapters) and your scene breaks. (Scene breaks are in the map at level 2 to make it easy for your formatter to add graphics.)
Your manuscript should now be ready for your formatter to easily add front and back matter as well as graphics.
PLEASE NOTE:
This is not to be confused with e-book formatting. This is merely to prepare your manuscript for the production process. Always go back over your document afterward to make sure everything is laid out as you’d expect.

When you write a book to send to an agent or editor, you are preparing a manuscript. And even if your ideas, characters, and plot twists are colorful and creative, your manuscript format should not be. Agents and editors almost always require submitted pages to be in a standard format free of images and color and anything flashy. Many agents and editors post the format they prefer (or demand) on a “Submissions” page at their website.
It’s normal, however, to prepare material before you know exactly where you’ll submit it. That’s why it’s smart to produce a generic document based on Chicago style (the style used by most US trade book publishers) that can be tweaked later if you receive more specific instructions. Using this conventional style and saving it in a flexible file format will position you to adjust your formatting for each submission without a lot of extra work.
The Chicago Manual of Style doesn’t specifically cover manuscript formats for novels, so these recommendations draw from CMOS 2.7–12, which lay out general best-practice manuscript formatting guidelines for design, production, and typesetting that apply to most types of books, including novels.
Whether agents or editors prefer to receive your manuscript as a mailed printout, in an emailed attachment, or through a submission website,* they will expect to receive it in a format similar to the one described here. These conventions have been around for a long time; in the absence of any contrary instructions, follow them to give your pages a professional look.
Document Setup for the Standard Manuscript
Microsoft Word is the document format usually required by agents and editors. Some will accept a PDF; as of this writing, most are not willing to work within a shared Google doc. Traditionally, manuscript pages look very different from typeset book pages. Bereft of color and images and nice typography, manuscripts are stripped-down and homely and a paper-saver’s nightmare in their double-spaced sprawl.
Compare these images of a manuscript page and a page from a published book.

A manuscript page in standard format.

A typical page from a typeset book.
The right-hand margin of the text in the page proof is fully justified rather than ragged, and the text is single-spaced rather than double. And unlike manuscript pages, typeset books vary in typeface and type size, margins, paragraphing, the position of page numbers and running heads or feet, the shape and size and color of the pages, the inclusion of images, and whatever other features a graphic designer might come up with.
The distinction between a manuscript and a typeset page is important, especially for self-publishers who may be tempted to skip the “manuscript” stage and aim for the “typeset book” appearance. But there are strong reasons to work in manuscript format, regardless of your end product. A plain document is ideal for the copyediting and graphic design stages of publishing, whether you submit it in Word or share it as a Google doc. And anyone using the templates at an online indie publishing platform will also benefit from starting with the stripped-down format.
Manuscript pages
- Use white, 8½ × 11–inch (standard US letter-size) paper with one-inch margins on all sides.
- Leave the right margin ragged, not justified.
- Put the author’s surname, a short title of the work, and a page number in the upper-right corner of every page except the title page. (Use the “header” feature to make this automatic.)
TIP
If you must print out your manuscript, print on one side only and don’t bind or staple the pages together.
Manuscript text
- Editors and agents who express a font preference most often specify 12-point Times New Roman, an eye-soothing serifed font that is readily available on devices and supports a wide range of special characters. Although the default fonts in MS Word (Calibri) and Google Docs (Arial) lack serifs, they are also well supported. Occasionally a writer finds a second font useful for distinguishing a chunk of content from the text proper—for instance, when setting off a text message or handwritten note—but at the manuscript stage, paragraph blocking or simple quotation marks nearly always suffice. A graphic designer will decide later how to handle unusual elements.†
- Put a single space between sentences.
- Double-space everything, even if you single-space while drafting. Editors value the extra white space on screen and on paper. Indent the first line of paragraphs, and don’t add extra space between paragraphs.
- Turn off the automatic hyphenation feature in Word. Yes, it can make that right margin ugly, but that’s OK. It will be worth it when odd hyphens don’t turn up in your printed novel. (It’s not likely, but it does occasionally happen—for instance, when optical character readers are used to digitize a hardcopy manuscript.)
TIP
Fonts aren’t always stable, even when you save in PDF form; if you use a nonstandard font and email your document to someone else, that person’s computer may have to supply a substitute font for it. This can mess up symbols and accented characters, which may turn into little boxes (□) or other garble. It’s best to use a standard font that any recipient is bound to have. If you must use a nonstandard font, take steps to embed it in the file.
Manuscript title page
The title page for a manuscript contains more information than will later appear on the title page of the published book. Here is an inclusive layout that can be tailored to more specific instructions.‡
- Put the author’s name, mailing address, email address, and phone number in the upper-left corner, single-spaced. If your word processor automatically formats the email address as a hyperlink, that’s fine. (NB: If you are an agent submitting to an editor, start with the author’s name, followed by your own name and contact information.)
- Put the date in a cover letter, not on the manuscript.
- Add the word count, either below the contact information or in the upper-right corner.
- Although the title page is page 1, it’s traditional to suppress the page number on the title page; use your word processor’s setting for a “different first page” or use the Section feature to create separate headers so there is no header on the title page.
- Center the book title about a third of the way down the page, in bold if you like.
- Use headline capitalization for the title and subtitle (CMOS 159–60 gives rules and examples), unless the publisher dictates all caps.
- If you have a subtitle, put a colon at the end of the title and start a new line for the subtitle. (A colon rarely appears on the title page of a published book, but in a manuscript it helps clarify that the subtitle is not part of the title.)
- Leave the rest of the title page blank.

A sample title page for a submitted manuscript. Remember, this is a basic model that can be varied according to an agent or editor’s preferences.
Manuscript chapter headings
- Insert either a page break or a blank line or two.
- Center the chapter title (or chapter number) and use headline capitalization.
- Don’t add a blank line below the heading. (Double-spacing adds enough space.) Begin the first line of the first paragraph flush left (no indent).
Researching Publisher Preferences
If you are targeting specific agents, editors, or producers for your work, visit their websites and look for their advice on submissions, which should override the guidelines offered here. Most will list the electronic formats they accept (MS Word, PDF, etc.). Some add detailed preferences (margins, type size, headers, etc.). Self-publishers who use an online publishing platform will find instructions for stripping your manuscript down to a basic format or a list of fees for paying a professional to do it for you.
The editors and agents who review your queries and submissions will know at once whether you bothered to check their guidelines; it’s worth a few minutes to do so.
TIP
Contests have strict submission rules that might clash with the standard format. For instance, they might require writers not to put any identifying information on the manuscript so the judges can read without bias. If you submit your novel to a contest, take care to make the needed adjustments.
* Submissions software can wreak havoc with the formatting described here. You paste your work into the box and it looks horrible; italics and paragraph indents may disappear. If you’re submitting only a few pages, it’s worth your while to read through and make adjustments, but don’t grieve excessively if the results are subpar. The agent or editor using the service is aware of its limitations and won’t hold it against you.
† If your book depends on a tricky visual concept, explain in a cover letter and/or submit a sample separately as artwork in a standard format. (Check submission guidelines, and never send original art with a submission.)
‡ When querying, if an agent or editor requests a specific number of pages instead of the entire manuscript, you may omit the title page and put contact information in your cover letter (email) or on the submission form.
Top image: “Formatting” by Amandine Vandesteene from the Noun Project, licensed under CC BY 3.0.
Fiction+ posts at Shop Talk reflect the opinions of its authors and not necessarily those of The Chicago Manual of Style or the University of Chicago Press.
~ ~ ~

 Carol Saller’s books include The Subversive Copy Editor and the young adult novel Eddie’s War. You can find Carol online at Twitter (@SubvCopyEd) and at Writer, Editor, Helper.
Sign up for Carol’s email updates.
Please see our commenting policy.