
Word for Microsoft 365 Word for Microsoft 365 for Mac Word 2021 Word 2021 for Mac Word 2019 Word 2019 for Mac Word 2016 Word 2016 for Mac Word 2013 Word 2010 Word for Mac 2011 More…Less
-
On the Design tab, select Watermark > Custom Watermark.
-
Choose Picture Watermark and select a picture.
-
Select or clear Washout.
-
Select OK.
To put a watermark on only one page, create a custom watermark and save it to the gallery, remove the current watermark, then put it back on one page from the gallery.
Add or change a background image or watermark
-
Go to Design or Layout, and select Watermark.
-
Select Picture > Select Picture, browse through your image files, and choose the image that you want to use
-
Select Insert.
-
If you want the background image to show with full color intensity, clear the Washout check box.
Remove a background image or watermark
-
Go to Design or Layout, and select Watermark.
-
Choose No watermark.
Want more? See See all our content about watermarks.
Need more help?
- Add a background image using the Insert Pictures dialogue box
- Add a background image by copying and pasting
- Add a background image by dragging and dropping
- Add a background image using Custom Watermark
Method 1: Add a Background Image Using the Insert Pictures dialogue box
Step 1: Open up a Word document.

Step 2: Launch the Insert Pictures dialogue box.
Now that we have a Word document opened, move your cursor to the top-left corner of your window and select the Insert tab.
Click on the Pictures button right below it.
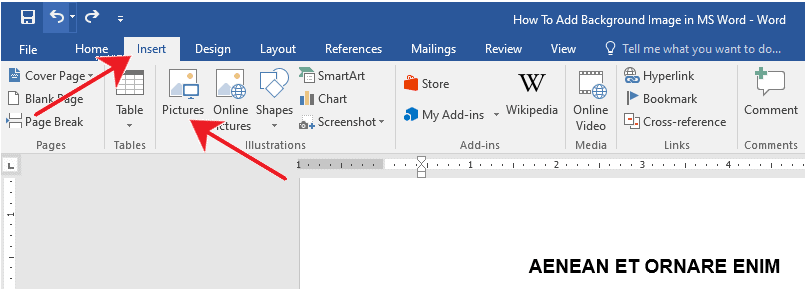
This will open the Insert Pictures dialogue box in the middle of your window.
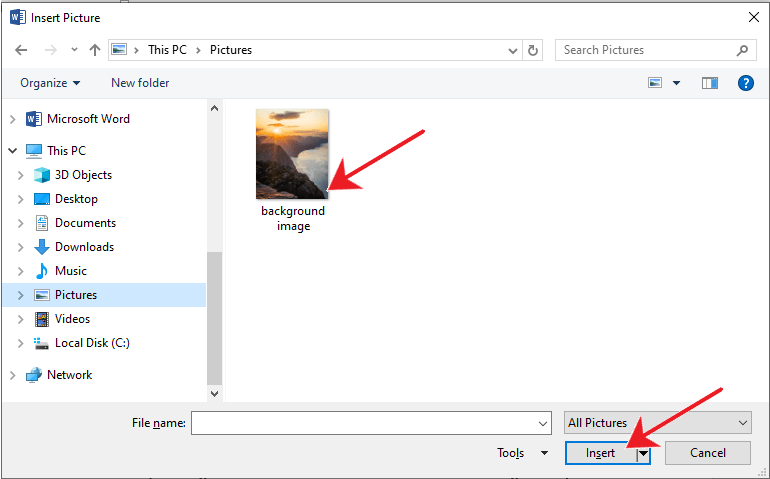
Step 3: Insert the image.
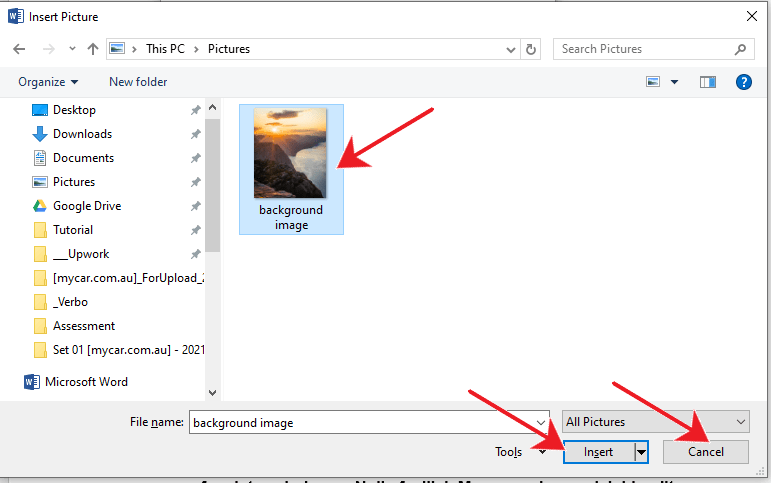
Locate the folder where you saved your image file. Select an image by double-clicking on the image file or by clicking on the Insert button.
For this example, we will be selecting the file background image in the Pictures folder.
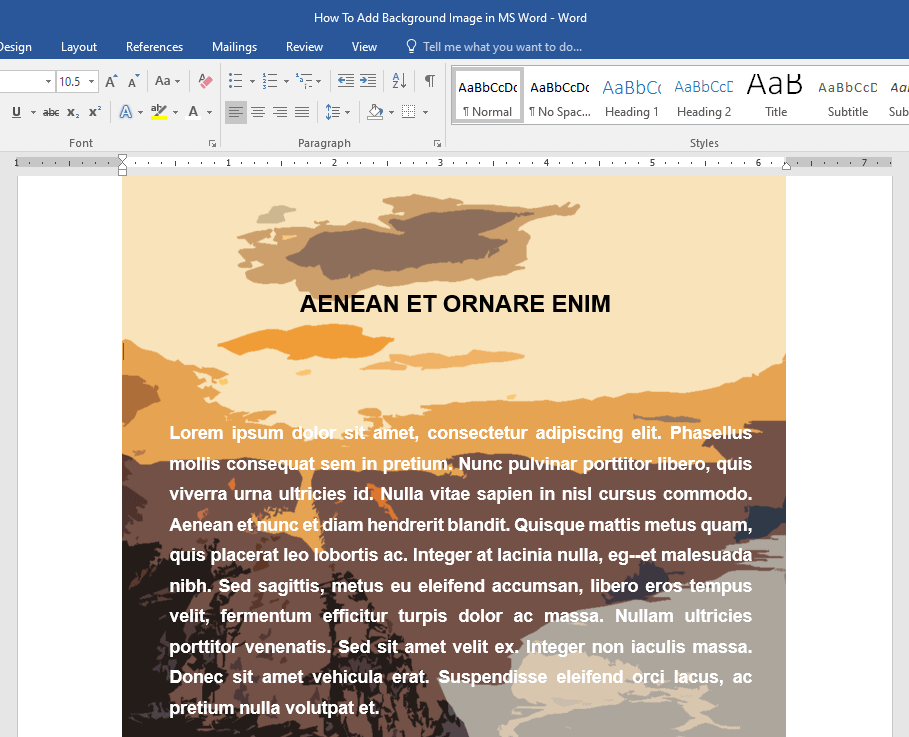
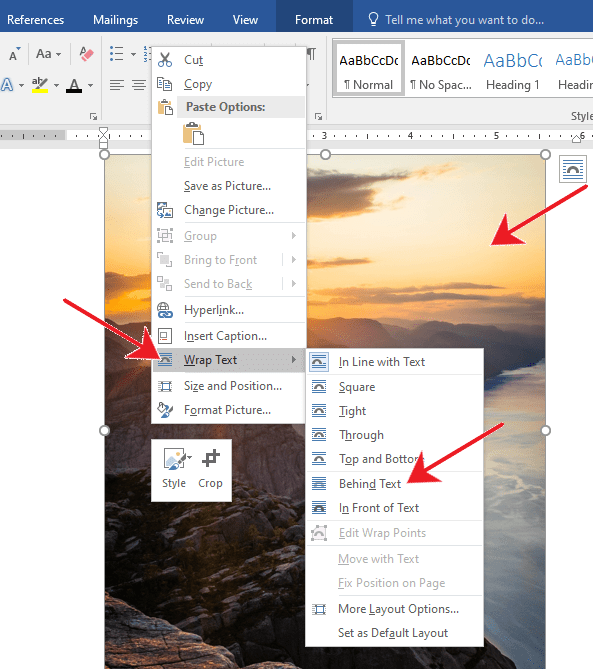
Step 4: Set the picture as the background image.
Once the image is inserted, you’ll notice that MS Word will place it where your cursor was before Step 3. This is the default behavior.
Now, right-click on the image and select the Wrap Text option from the Context Menu. Then, select Behind Text on the horizontal drop-down menu option.
Method 2: Add a Background Image by Copying and Pasting
Likewise, with text, you can copy and paste images across different documents or applications. This method allows you to easily insert pictures, be it from a folder, another document, or an application.
Step 1: Open up a Word document.

Step 2: Copy-paste the image.
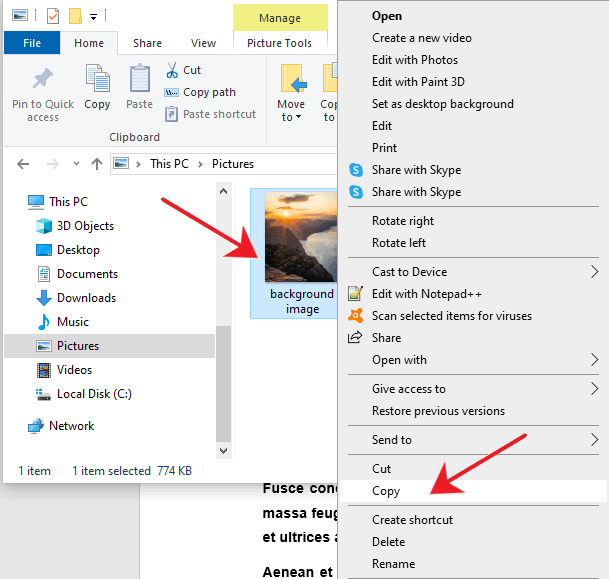
Once your document is opened, locate the image and right-click on it. Then, select Copy from the Context Menu. Alternatively, you may hit the CTRL + C keys on your keyboard to copy the image seamlessly.
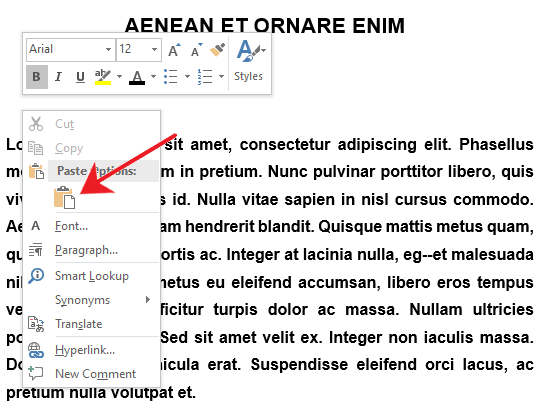
Now, go back to your document and paste the image. Do this by right-clicking on any part of your document then selecting Paste.
Alternatively, you can also press CTRL + V on your keyboard to paste.
Method 3: Add a Background Image by Dragging and Dropping
Step 1: Open up a Word file.

Step 2: Drag and drop the image.
With your Word document opened, locate the folder where you saved the image you want to use as the background image. Once located, simply click and hold the image, drag it onto your Word file then let go.
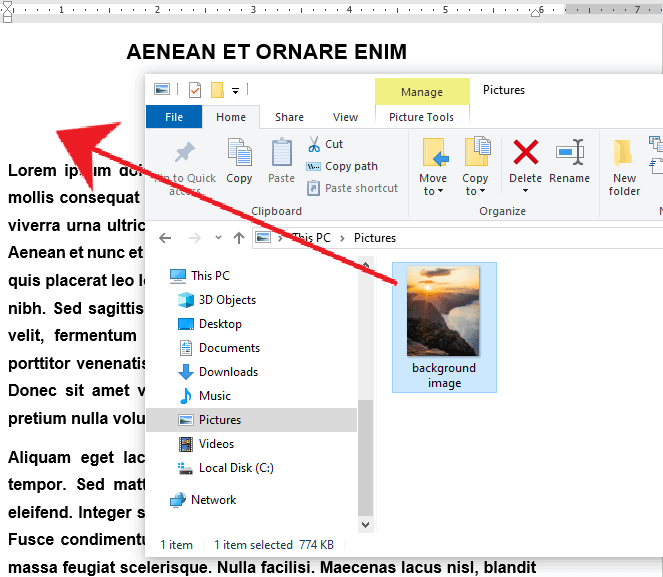
You can choose any part of your document to drop the image. This will slightly move the text around it, if you have any.
Method 4: Add a Background Image using Custom Watermark
Step 1. Open up an MS Word document.

Step 2. Go to the Design tab.
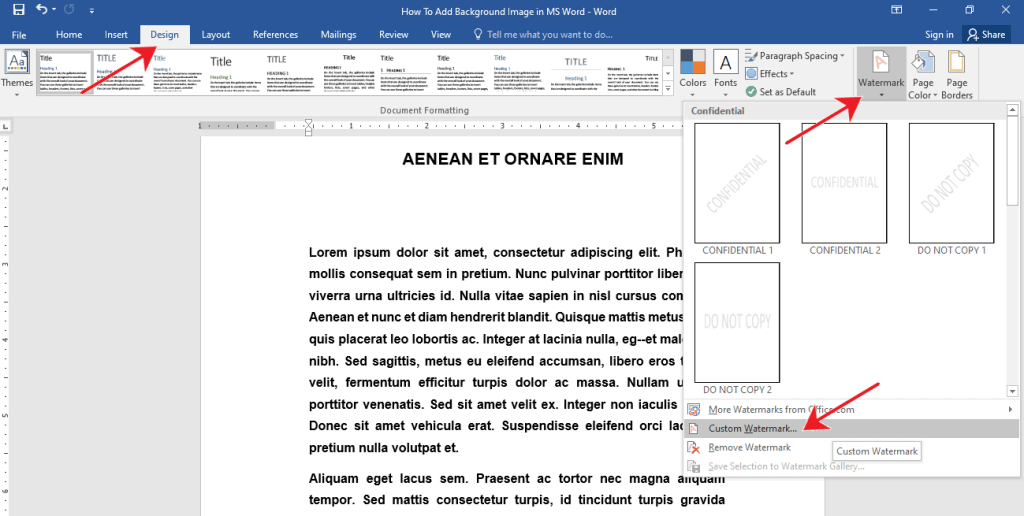
In the Ribbon, select the Design tab. Move your mouse to the upper leftmost part of the window and click the Watermark drop-down menu button. This will display a list of options to insert watermarks. Go all the way down the options and select Custom Watermark. This will launch the Printed Watermark dialogue box.
Step 3. Add the image.
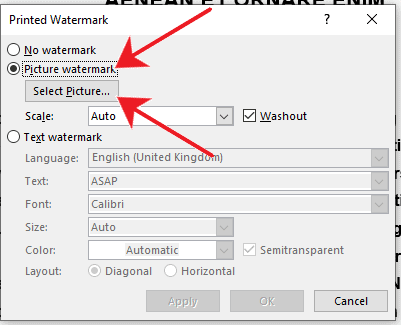
On the Printed Watermark dialogue box, select the Picture Watermark button among the options. Then, click the Select Picture button.
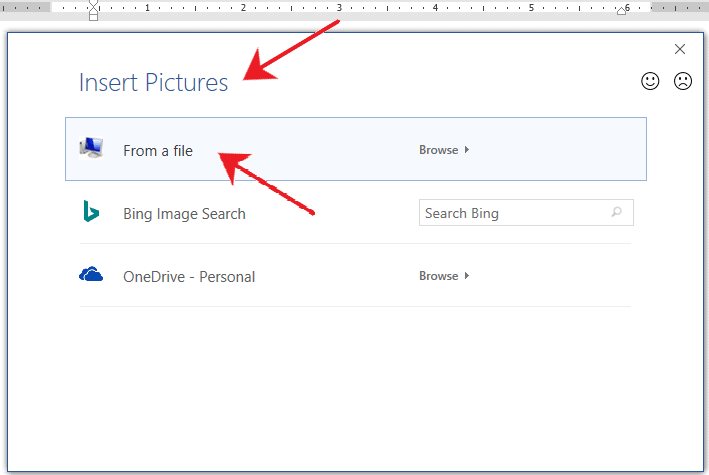
This launches the Insert Pictures menu in the middle of your window. Select From a File and locate your image.
Click the Insert button when done. Click the Cancel button to exit and revert any changes.
Click the Apply button if you want to see the changes while keeping the dialogue box open.
Click the OK button to proceed and exit the dialogue box.

Deleting a Background Image in MS Word
To delete the background image in your Word document, hover over the image until you see the cursor change to a four-point arrow. Then, click the image and press the Delete key on your keyboard.

Alternatively, you can use the Remove Background button found in the Format tab. Note that the Format tab will only show up after you’ve selected your background image.

Remember to use the keyboard shortcut CTRL + Z to revert any unwanted changes.
Customizing Your Background Image in MS Word
Here’s a brief rundown of some of the most useful functions in the Format tab.
Adjust Group
Remove Background
Use this when you want to delete your background image.
Corrections
Use this when you want to adjust the brightness, contrast, or sharpness of your background image.
Color
Use this when you want to change the color saturation and tone of your background image to match the theme of your document.
Artistic Effect
Use this when you want to add a painting-like effect on your background image.
Compress Pictures
Use this when you want to minimize the overall size of your document.
Change Picture
Use this when you want to change your background image.
Reset Picture
Use this when you want to revert all changes made on the background image.
Size Group
Crop
Use this when you want to crop unwanted areas of your background image.
Shape Height
Use this when you want to accurately set the height of your background image up to 2 decimal places.
Shape Width
Use this when you want to accurately set the width of your background image up to 2 decimal places.
Conclusion
We hope you’ve found this article helpful!
![]()
Download Article
Insert a watermark or change the background
![]()
Download Article
- Adding a Background Picture
- Changing the Background Color
- Adding a Stock Watermark
- Adding a Custom Image Watermark
- Adding a Custom Text Watermark
- Q&A
- Tips
- Warnings
|
|
|
|
|
|
|
Want to add a watermark to the background of your Word document? Or maybe you want to swap out the white background for an image or new color. All of this is easy to do using the Design tab! There are tons of options for preset and custom backgrounds, including some stock watermark text with options like «Confidential,» «Do Not Copy,» and «Draft.» This wikiHow will show you how to add watermarks and backgrounds in Microsoft Word on your Windows PC or Mac.
Things You Should Know
- To add a watermark background such as «Confidential» or «Do Not Copy,» click the Design tab and select Watermark.
- When adding a watermark background, you can select a stock background or use your own image.
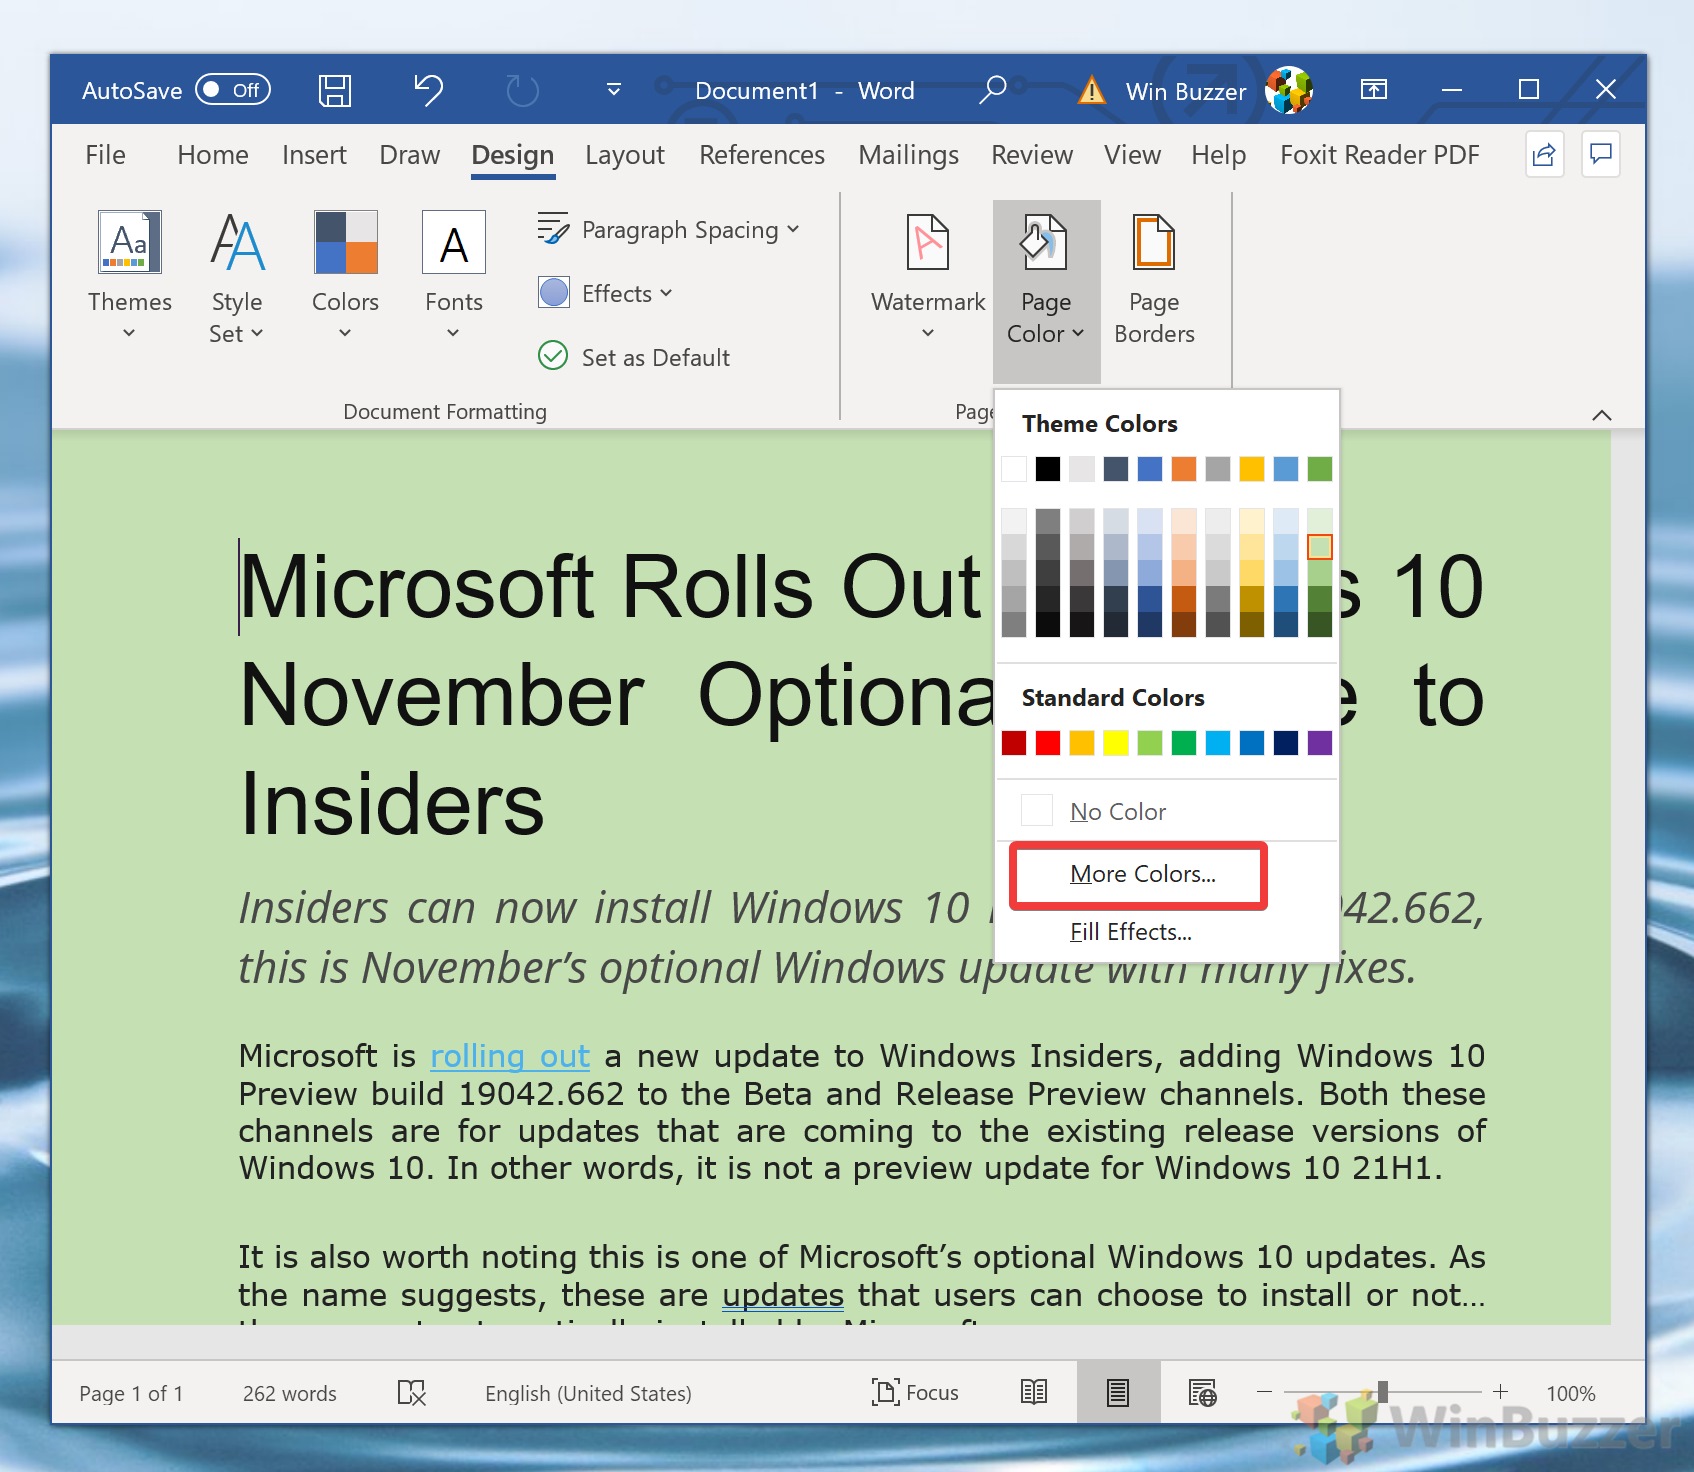
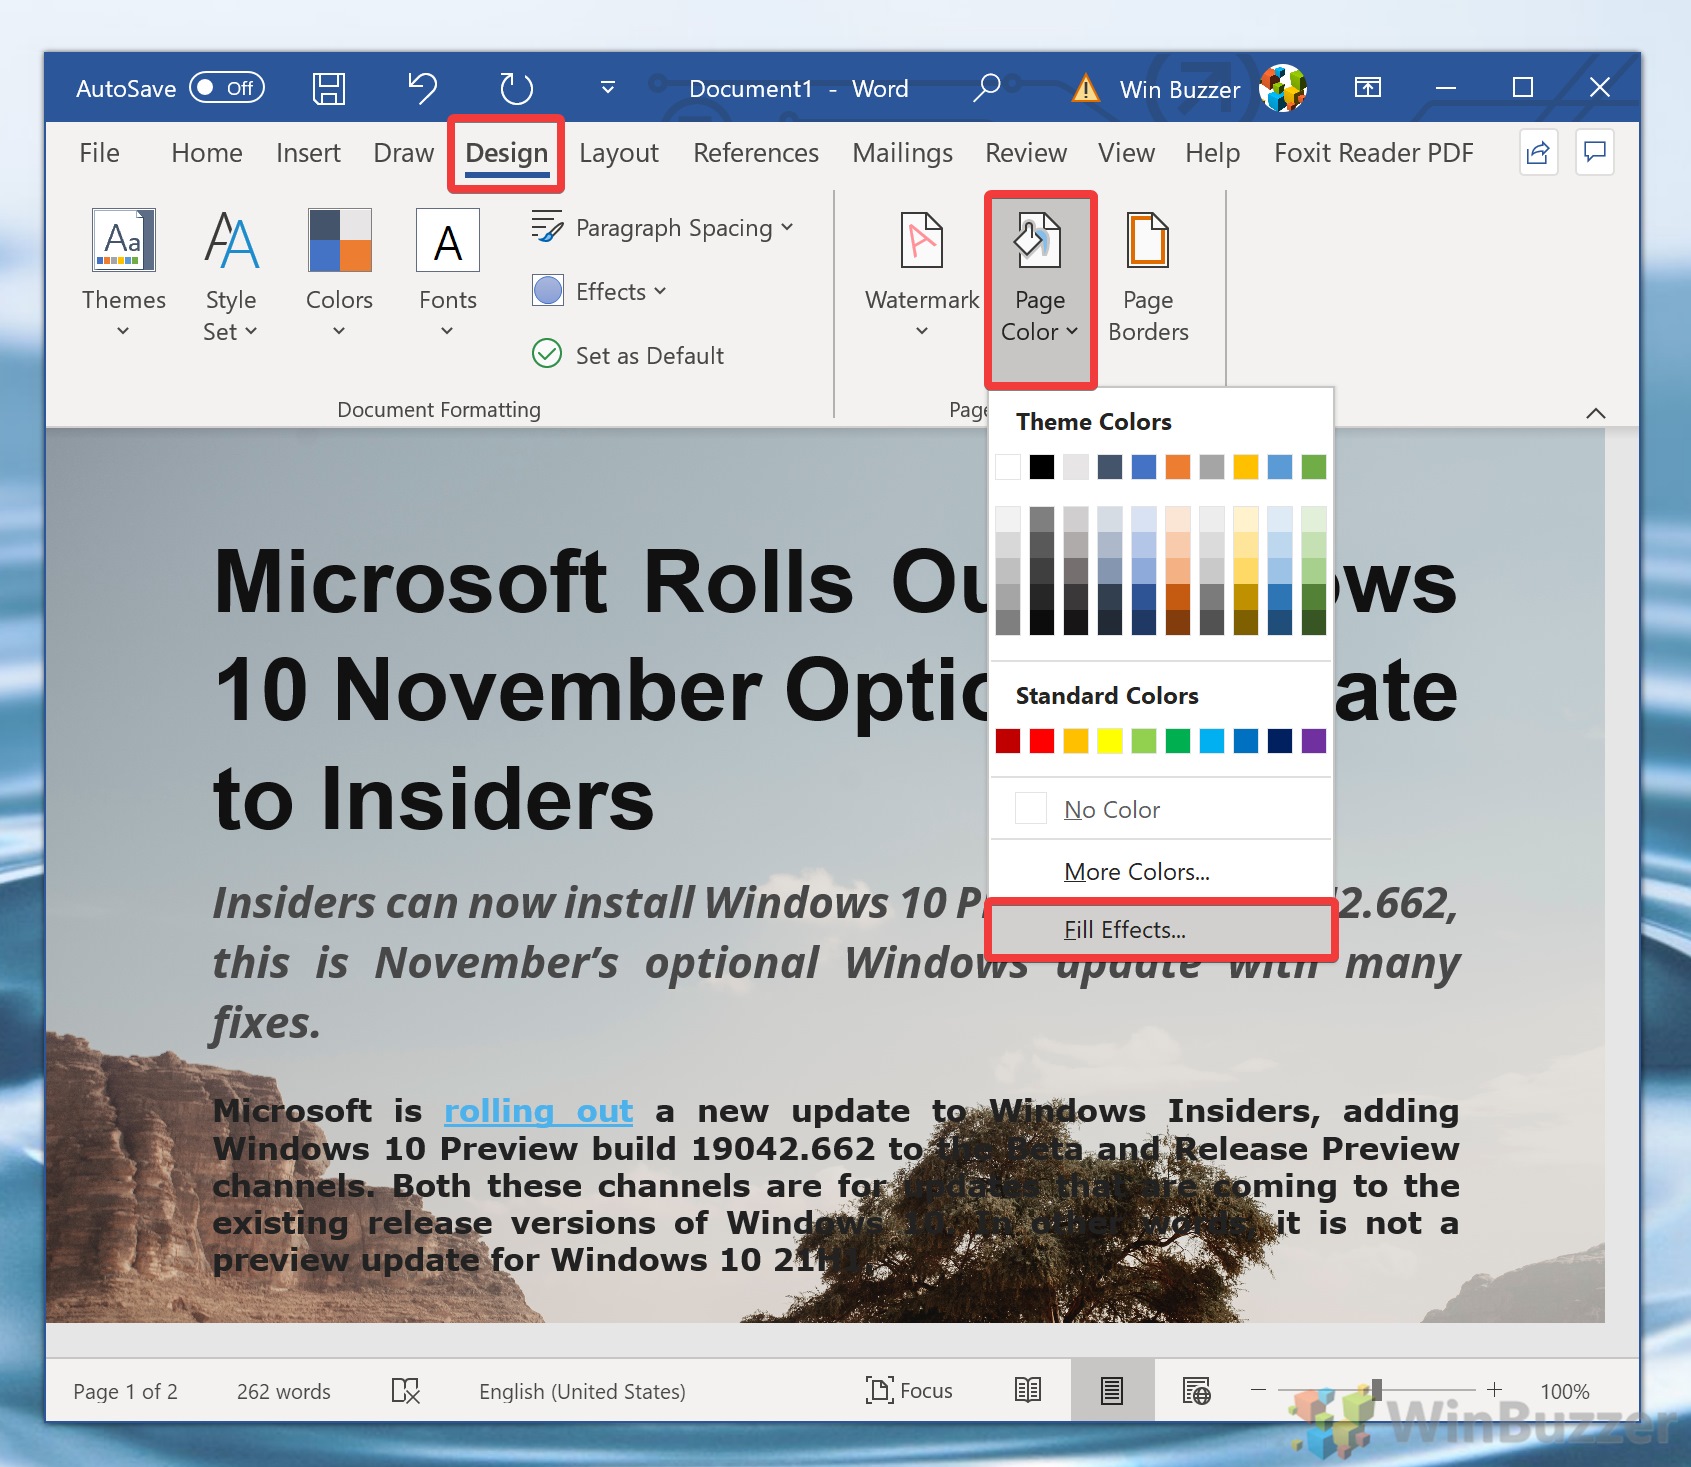
- To change the background color of a page, click the Design tab, select Page Color, and choose a color.
-

1
Click the Design tab. This tab is in the top-left side of the Word window.
- Use this method if you want to fill the background of your document with a custom image. This is different than a watermark, which would be more transparent on the page.
-
2
Click Page Color. It’s in the top-right side of the Word toolbar near the top of the window.
Advertisement
-
3
Click Fill Effects. It’s at the bottom of the drop-down menu here.
-
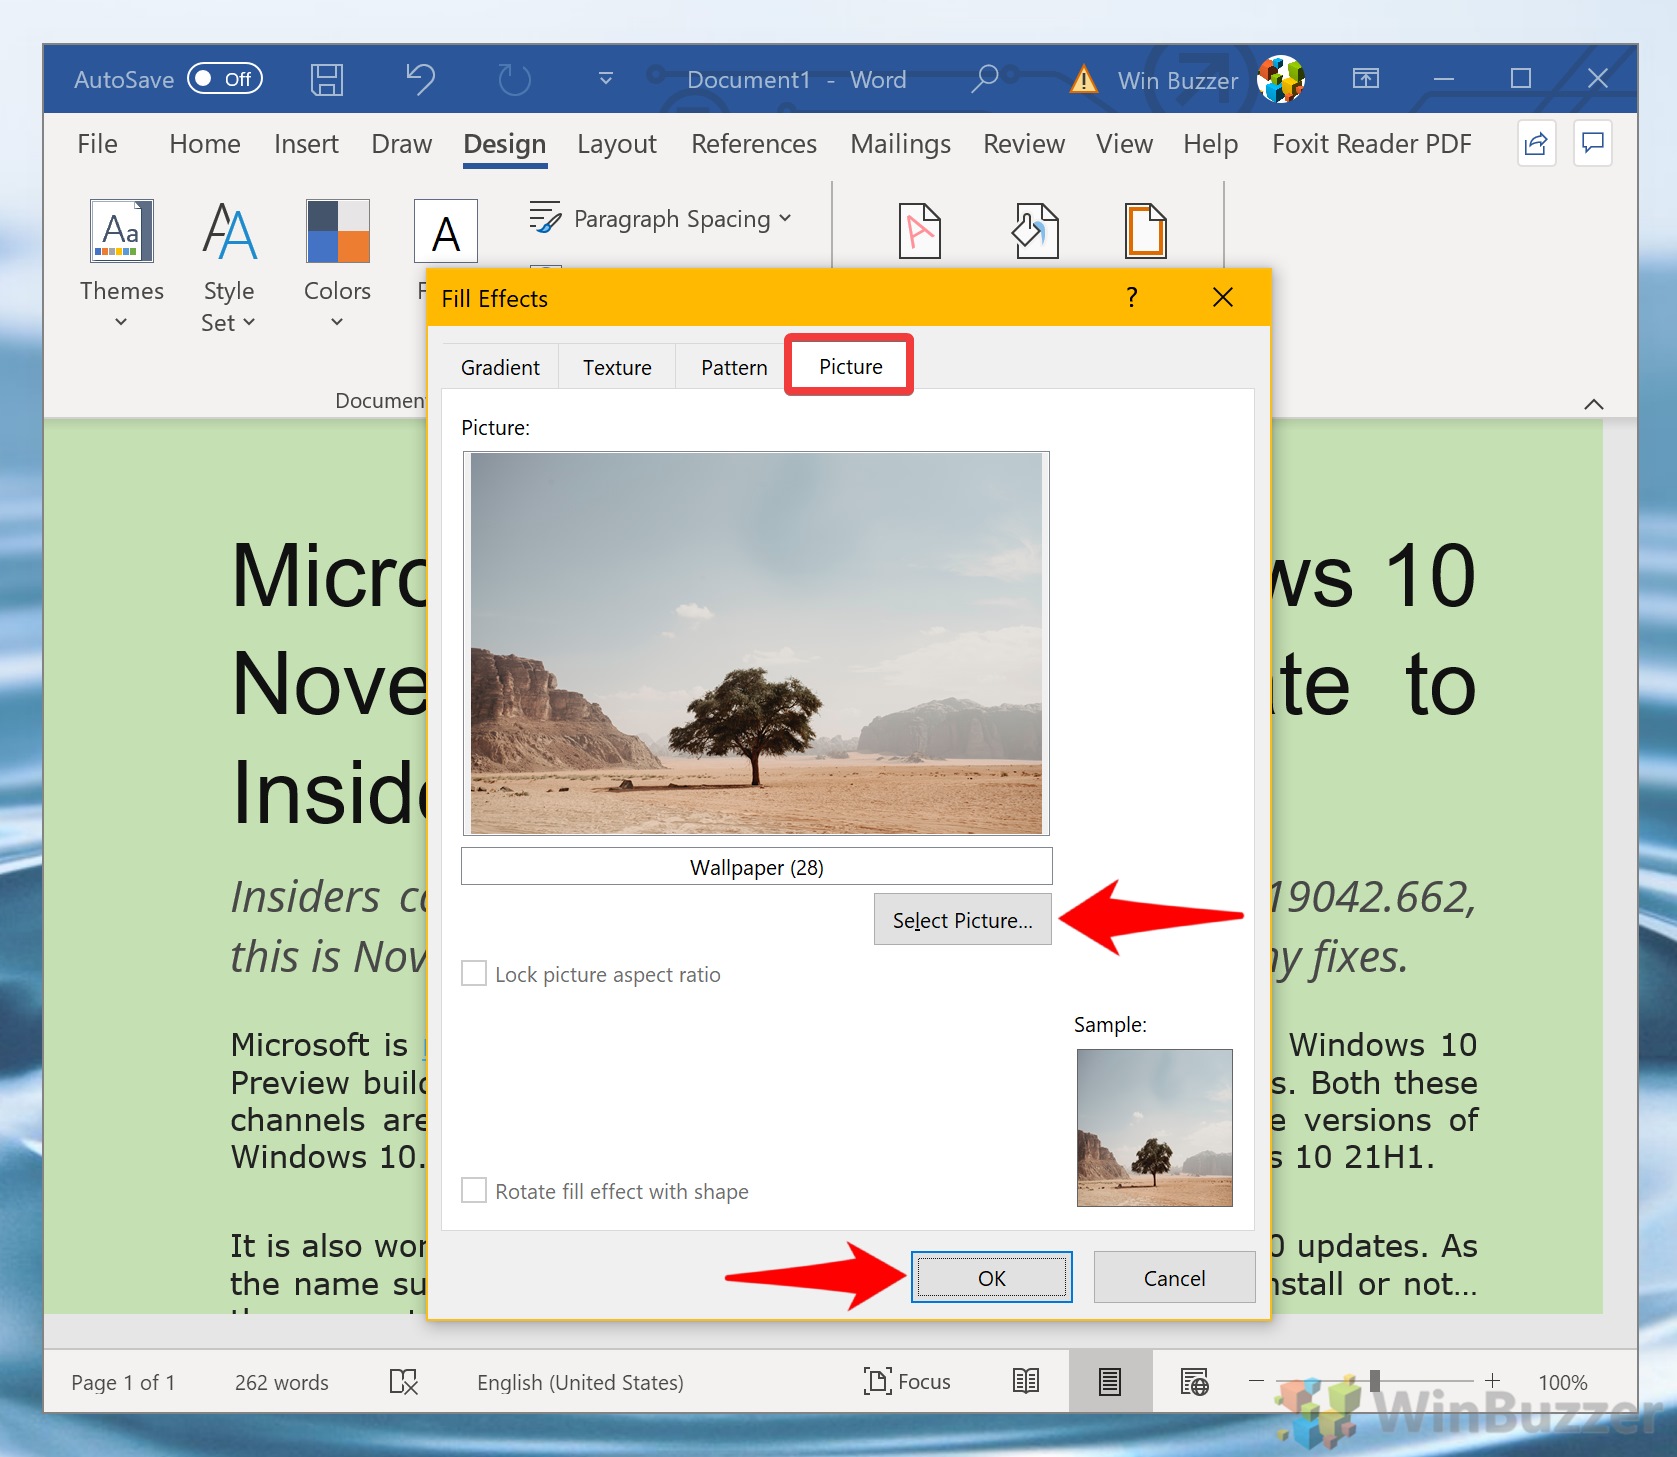
4
Click the Picture tab. You’ll see it at the top of the «Fill Effects» window.
-
5
Click Select Picture. It’s near the top of the window.
-
6
Click From a File. This option is at the top of the «Printed Watermark» window. Clicking it will open your computer’s default picture storage file (e.g., «Photos») for browsing.
- You can also choose Bing or OneDrive from this menu if you’d rather search for a photo or use one from Cloud storage, respectively.
-
7
Click a picture. Doing so will select it.
-
8
Click Insert.
-
9
Click OK. It’s at the bottom of the window; doing so will apply your selected picture to your document’s background.
- Unlike with an image watermark, this background picture won’t be transparent.
-
10
Add text to your document, like usual. Your text color will change to stay visible if the picture you chose is too dark or too light to adequately display text.


Advertisement
-
1
Click Design. This tab is in the top-left side of the Word window.[1]
- Use this method if you want to change the background of your Word document to a color other than the default white option.
-
2
Click Page Color. It’s in the top-right side of the Word toolbar near the top of the window.
-
3
Click a color. Doing so will apply it to your document’s background. If needed, your document’s default font color will change in order to stay visible. Now you’re ready to add text, create tables, and format your next paper.
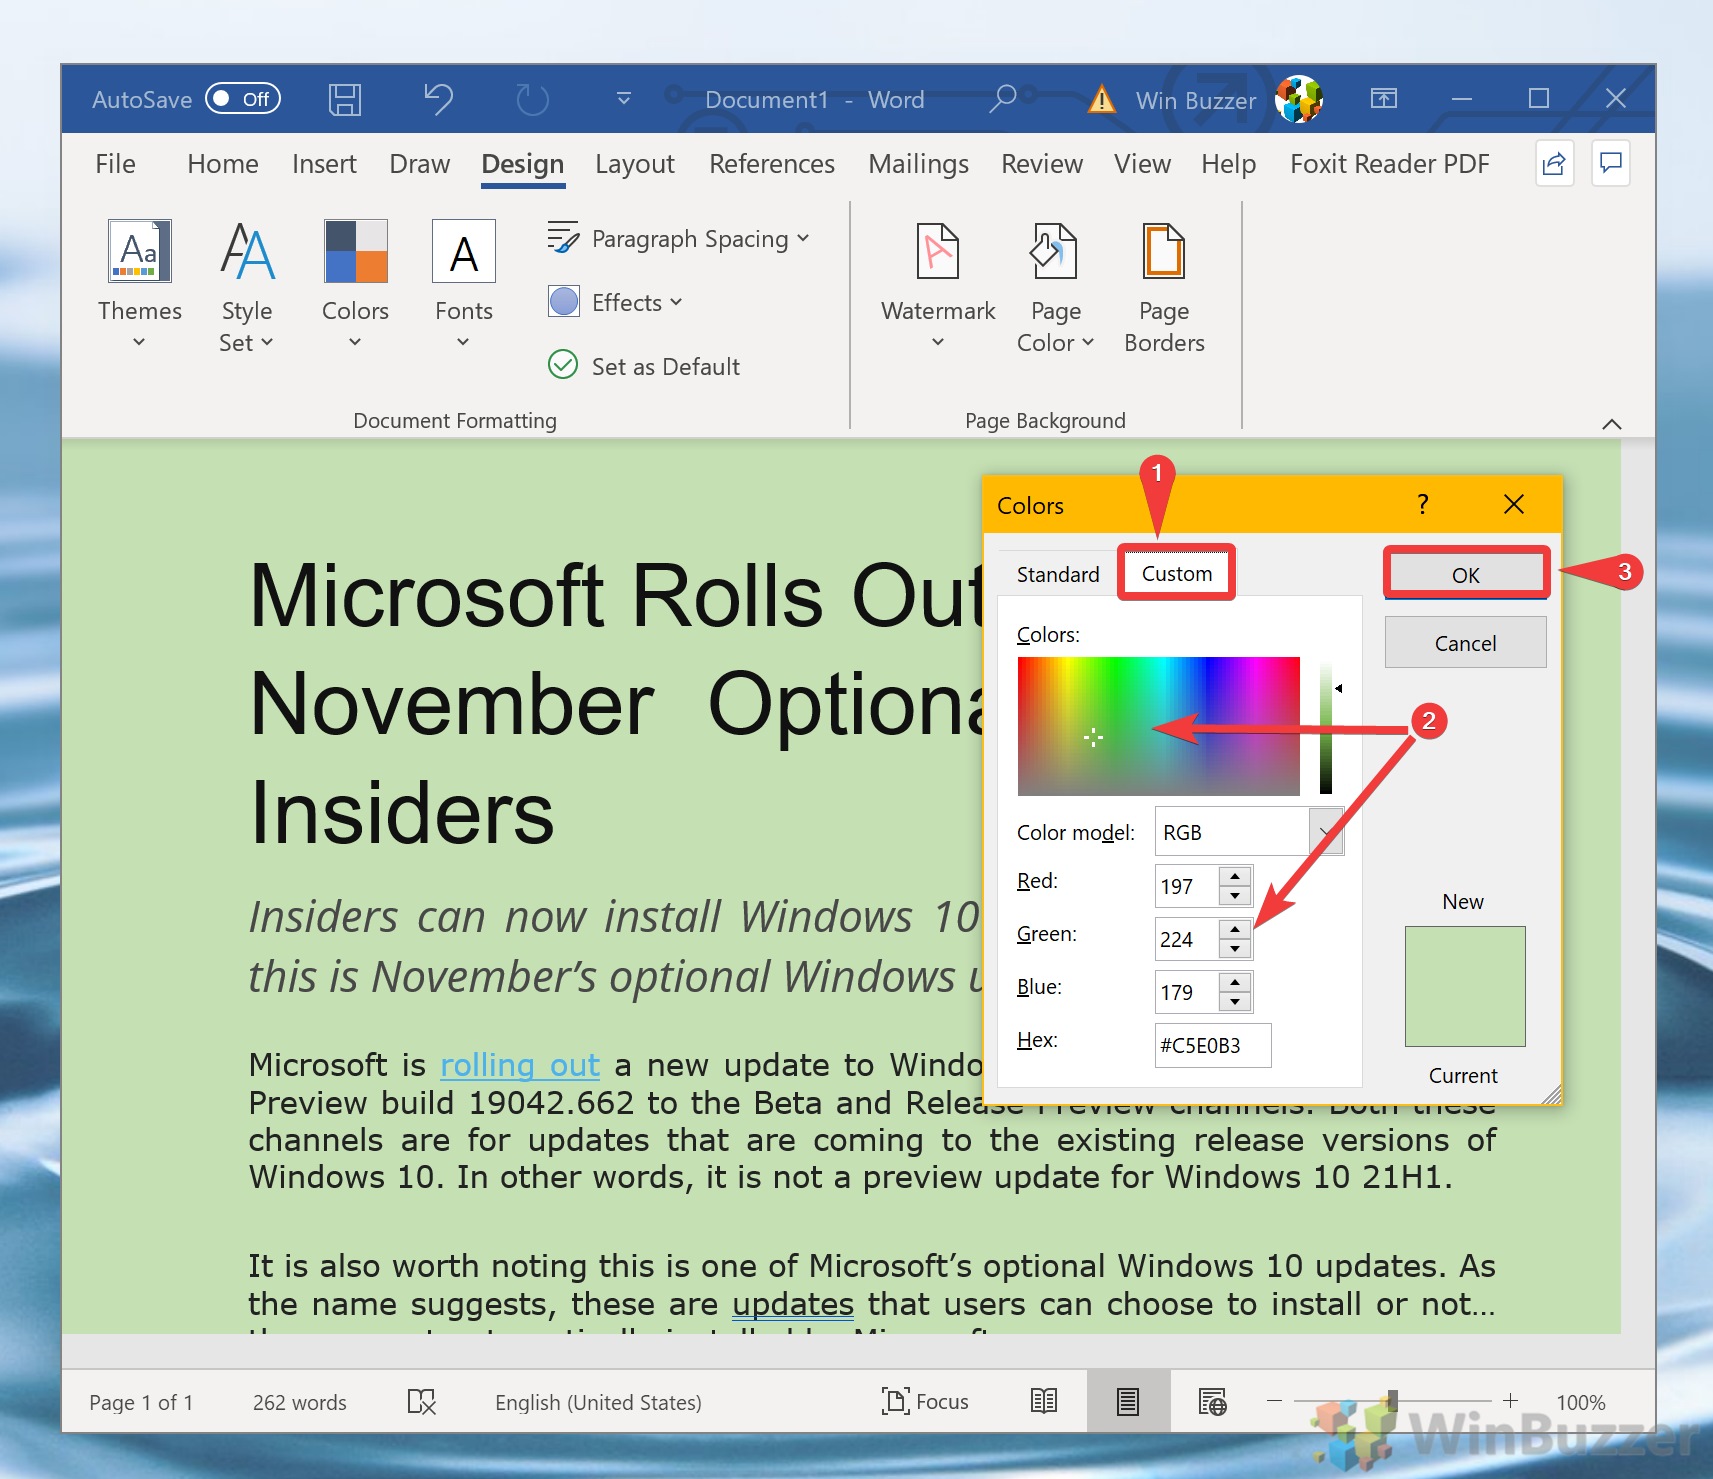
- If you want to create your own color, click More Colors below the color options here. You’ll be able to click and drag a slider around a color gradient to create a custom color.
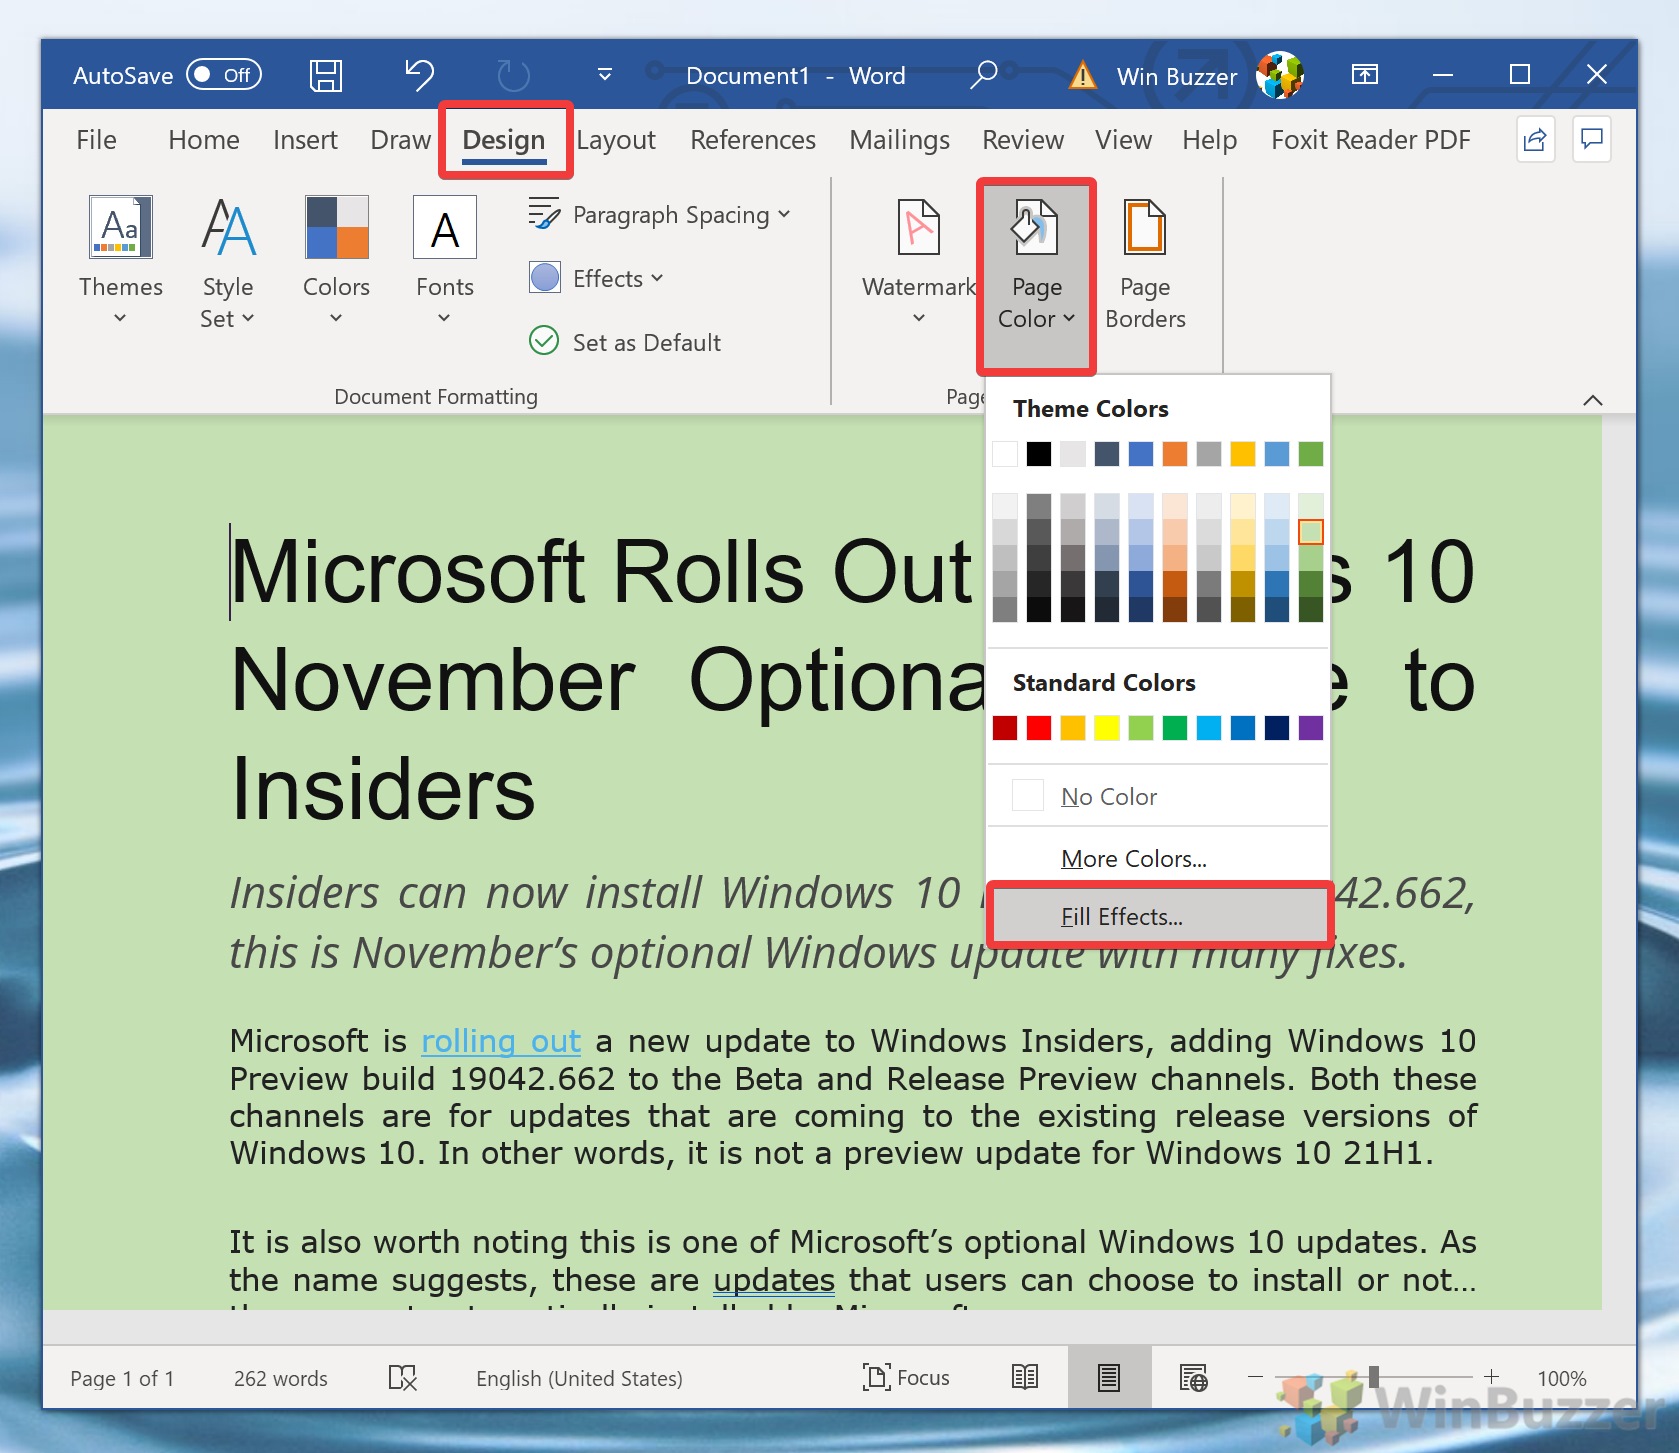
- You can also click Fill Effects to add pre-determined textures or patterns to your document’s background.


Advertisement
-
1
Click the Design tab. This tab is near the top-left of the Word window.
- A watermark is an image that’s superimposed on the background with transparency. Use this method if you want to choose a built-in watermark image that says «Confidential,» «Draft,» «Sample,» «Do Not Copy,» or similar behind the text and objects in your document.
-
2
Click Watermark. It’s in the top-right side of the Word toolbar, near the top of the window. You’ll see this option to the left of the «Page Color» and «Page Borders» options.
-
3
Click a watermark template. You can select any of the following templates to apply their text to your Word document’s background:
- «CONFIDENTIAL»
- «DO NOT COPY»
- «ASAP»
- «URGENT»
-
4
Add text to your document, like usual. The watermark will remain in the background of your document, meaning anything you type will remain on top of the watermark.
- You can remove a watermark by clicking Remove Watermark at the bottom of the watermark templates drop-down menu.
- Don’t forget to occasionally save your Word document to prevent losing any work!


Advertisement
-
1
Click Design. This tab is in the top-left side of the Word window.[2]
- A watermark is an image that will be superimposed on the background with transparency. Use this method if you have a specific image, such as a company logo or «Confidential» image that you want to appear behind the text and objects in your document.
-
2
Click Watermark. It’s in the top-right side of the Word toolbar near the top of the window. You’ll see this option to the left of the «Page Color» and «Page Borders» options.
-
3
Click Custom Watermark. This option is near the middle of the «Watermarks» drop-down menu. Clicking it will bring up the «Printed Watermark» window.
-
4
Click the circle next to «Picture watermark». It’s near the top of the «Printed Watermark» window.
-
5
Click Select Picture. You’ll see this button just below the «Picture watermark» section.
-
6
Click From a File. This option is at the top of the «Printed Watermark» window. Clicking it will open your computer’s default picture storage file (e.g., «Photos») for browsing.
- You can also choose Bing or OneDrive from this menu if you’d rather search for a photo or use one from Cloud storage, respectively.
-
7
Click a picture. Doing so will select it for your watermark.
-
8
Click Insert. It’s in the bottom-right corner of the window. This action will take you back to the «Printed Watermark» window.
-
9
Click OK. You’ll find this at the bottom of the window. Your selected picture will appear as your document’s background watermark.
- You can also resize your picture by clicking the «Auto» box and choosing a percentage (e.g., 200).
- Uncheck the «Washout» box to prevent your picture from appearing transparent.
-
10
Add text to your document, like usual. The watermark will remain in the background of your document, meaning anything you type will remain on top of your selected image. Your text color will also change to stay visible if the picture you chose is too dark or too light to adequately display text.
- Did you know you can cross out words in your Word document? It’s a great way to indicate a completed or canceled task.


Advertisement
-
1
Click the Design tab. This tab is in the top-left side of the Word window.
- This method will add your custom text to the background of your document. This is helpful if you want certain text to appear behind the main text and objects in your document, such as your company name or a legal notice.
-
2
Click Watermark. It’s in the top-right side of the Word toolbar near the top of the window. You’ll see this option to the left of the «Page Color» and «Page Borders» options.
-
3
Click Custom Watermark. This option is near the middle of the «Watermarks» drop-down menu. Clicking it will bring up the «Printed Watermark» window.
-
4
Click the circle next to «Text watermark». It’s in the middle-left side of the «Printed Watermark» window.
-
5
Type your watermark’s text into the «Text» box. This box is near the middle of the window; it should say «ASAP» by default. Your other customization options include the following:
- Font — The style of text that your watermark uses.
- Size — Your watermark’s size. «Auto», which automatically resizes your text, is the default setting.
- Color — The watermark’s color.
- Layout — You can click Diagonal or Horizontal here to determine how your watermark is oriented.
- You can also uncheck the «Semitransparent» box to display your watermark in a bold format.
-
6
Click OK. You’ll find this at the bottom of the window. Your custom text watermark will be applied to your document’s background.
-
7
Add text to your document, like usual. The watermark will remain in the background of your document, meaning anything you type will remain on top of your watermark text, even the page numbers.


Advertisement
Add New Question
-
Question
Can I put a different watermark on each page?

Teela Borrowdale
Community Answer
No. If you add a watermark to one page, it will appear on every page of the document.
-
Question
How can I add a watermark?
Open your Word document and click on the Design tab in the ribbon. Select the watermark option on the Page Background menu. If you want to add a picture, click on Custom Watermark.
-
Question
How do I write text onto a background that I have imported?
You would have to edit the photo itself using a picture editor, like Photoshop or Paint. After editing the photo, you can import the new version.
See more answers
Ask a Question
200 characters left
Include your email address to get a message when this question is answered.
Submit
Advertisement
-
You can find suitable images that are free to use by searching the Internet for images with a Creative Commons license. There are plenty of free stock image websites as well!
Thanks for submitting a tip for review!
Advertisement
-
Never use an image that is subject to copyright when you add a background to a document you plan on printing or distributing. Whenever possible, create your own images or upload photographs you have taken instead.
Advertisement
About This Article
Article SummaryX
1. Click the Design tab.
2. Click Page Color.
3. Click Fill Effects.
4. Click Picture.
5. Click Select Picture.
6. Click From a File.
7. Select the file and click Insert.
8. Click OK.
Did this summary help you?
Thanks to all authors for creating a page that has been read 1,133,880 times.
Is this article up to date?
Microsoft Word backgrounds are little-known features of to those who are new to the application. Even if you’re just starting out, you can learn how to insert background picture in MS Word.


Adding a Microsoft Word background image can serve a variety of uses. They can enhance the design of the material as well as add a layer of security.
This is only one of the many features of Word that lets you create awe-inspiring materials. It’s worthwhile to learn how to use Microsoft Word so you can take advantage of its many robust functionalities.
This article takes you step-by-step on how to add a background image in Word, as well as how to use watermarks and color backgrounds.
(Note: The instructions and screenshots in this tutorial are from Microsoft Word for Mac version 16.38. If you’re using a different version of Word, the steps and interface may be different from what you see here.)
Working With Background Text (Add a Text Watermark)
A watermark is a semi-transparent object that appears on every page. A text watermark is commonly used for either security or branding. For example, add a “CONFIDENTIAL” watermark as a constant reminder to people that the document shouldn’t be shared freely.
There are two ways to add a text watermark:
1. How to Add a Text Watermark from a Template
Go to Design > Watermark. The Insert Watermark dialog opens.
.jpg)
.jpg)
.jpg)
Click on the radio button for Text.


A few text templates are available for you to use. Click the drop-down menu to display the text templates.
Choose one of the pre-loaded text watermarks. You can change the formatting of the text watermark:
- font
- size
- transparency
- emphasis (bold or italics)
- font color
- orientation
Then, click OK.
The text watermark is now on every page of your document. It won’t be affected even if you change the text, formatting, and layout of your document.

2. How to Add a Custom Text Watermark
You can also create a custom text watermark if none of the pre-loaded watermarks fit your needs.
To create your custom text watermark, click Design > Watermark.
Click on the radio button for Text. Double-click inside the text input box. Type the text you wish to use as your watermark.


Set the font format settings for the text watermark, then click OK.


Your custom text watermark is now on every page of the document.
How to Add an Image Watermark
A watermark can also be an image, such as your company logo. Used this way, the watermark reinforces your visual branding. We’ll use the clean rain logo from Envato Elements.
To add an image watermark, go to Design > Watermark. Click the button for Picture.
.jpg)
.jpg)
.jpg)
Click Select Picture. Locate the picture you wish to use, then click Insert.
.jpg)
.jpg)
.jpg)
Select the Scale you want the picture to be displayed at. By default, the Washout button is selected. This makes the picture lighter. Click OK.


The image watermark has been added to the document.


If you want the picture to be displayed without transparency, un-check Washout, then click OK.
This creates an image background on all the pages of the document. You can’t insert a watermark on just one page, but there’s a way to get around that.
How to Add an Image Background to a Single Page
Sometimes you may want to add an image background to a single page — not on every page of the document. This is useful for designing a creative cover for your document and chapter dividers of a long document or manuscript.
To add an image background to only one page of your document, first insert the image. For this part of the tutorial we’ll use an image of a business person thinking from Envato Elements.
Go to Insert > Pictures > Picture from File ….


Locate the image you want to use as a background. Select the image file, then click Insert.
.jpeg)
.jpeg)
.jpeg)
With the image selected, go to Picture Format > Arrange > Wrap Text > Behind text. This allows the text on the page to show on top of the image.
.jpeg)
.jpeg)
.jpeg)
Click and drag the corners of the image to resize it and completely fill the page.


Now you’ve got an image background that’s on one page of the document only.
Work With Microsoft Word Background Color
Another way you can vary the background of your document is by adding a background color. Use this sparingly because colored backgrounds can make the text hard to read. Since the background color is applied to the entire document, it’s best to use it in short documents, such as a flier, business card, or a short brochure — materials that contain very little text.
Let’s get started:
How to Add a Background Page Color
From the Design tab, click on the Page Color button.


Choose the color you wish to use.


The background color is applied to all the pages in your document.


How to Add a Background Color to a Single Page
As with the watermark, Word doesn’t let you set a background color for an individual page.
If you want to add a background color to just one page of a multi-page document, you’ll have to use a work-around:
Click Insert > Shapes > rectangle.


Click and drag to create a rectangle that’s the same size as the page.
Click Shape Format > Shape Fill and select a color for the background.


To show text in front of the background color, from the Shape Fill tab, click Arrange > Wrap Text > Behind text.


Now, you’ve added background color to a single page in your document.


Find Great Images for Backgrounds
The successful use of images as background in your document depends mostly on the quality and relevance of the photo itself. You can find some of the best premium stock photos from Envato Elements. For a fixed monthly subscription, you get unlimited downloads of all the high-quality images you’ll ever need along with other design assets.


Aside from photos, Elements also gives you unlimited downloads of Microsoft Word templates, fonts, graphics, and other ingredients you need for a professional communication material.
For one-off projects look to Envato Market for Microsoft Word templates as well as stock photos and other creative elements. Download any item you need on a pay-per-use basis.
Learn More About How to Use Microsoft Word
Microsoft Word has all the features you need to create both printed and digital materials for various purposes. These articles describe what these features are and explain how to use them:
Common Microsoft Word Questions Answered (FAQs)
As you use Microsoft Word and explore its different functionalities, you’ll have questions. That’s why I’ve compiled some of the most commonly asked questions (FAQ) people ask about Word with links to tutorials and articles that address them:
1. Should I Use Microsoft Word or Google Docs?
Microsoft Word is the most widely used word processor in the world. But that may be quickly changing with the arrival of similar applications. Google Docs, for example, has many of the features most users need to create communication materials. And because it comes free with your Google account, it’s attractive to folks who are on a tight budget.
This article puts Microsoft Word head-to-head with Google Docs, so you can make the best choice:
2. How Can I Get a Different Header/Footer on Different Pages of My Document?
Adding different headers and footers throughout your document may seem confusing at first. This feature of Microsoft Word lets you create remarkable documents that are user-friendly and easy for readers to navigate. Follow this tutorial on how to work with headers, footers, and page numbers in your Word document:
3. Can Word Help Me Spell Check My Document?
In a word: Yes! Microsoft Word has a robust spell and grammar checker, so you can avoid those embarrassing typos and other mistakes. Here’s a step-by-step tutorial on how to work with Microsoft Word spelling and grammar checker — including how to troubleshoot common problems that may come up:
4. What Are Some Shortcuts I Can Use So I Don’t Need to Click on So Many Buttons?
Microsoft Word is designed to be as intuitive as possible. But if you use it often, whether for personal, educational, or business purposes, you’re going to want to make your workflow more efficient.
Try these keyboard shortcuts for many of the most frequently used features of Word. They cover everything from managing documents to working with text, graphics, and more. You’ll also find shortcuts for both Windows and MacOS.
5. What’s the Best Way to Reconcile Changes in Two Different Versions of the Same Document?
Microsoft Word has several features that make collaboration much easier and smoother. Those features include:
- tracking changes
- document comparison
- document merging
- even real-time co-authoring
As can be expected, these powerful functionalities can be intimidating to all but the most advanced users.
But no worries, we’ve got another tutorial to walk you through each of the steps for how to compare and merge two Microsoft Word documents. It also includes tips for troubleshooting common problems:
Create Professional and Effective Documents with Microsoft Word
Background images and text can be useful in your Word document, whether for creative design, branding, or document security. Follow the steps detailed in this article to add a background text or image in your document.
If you’ve got many creative projects, then Envato Elements is a better option. With a subscription to Elements you can download as many photos, fonts, templates for Word, video clips, and sound effects you need—all for one flat monthly fee.
Or choose relevant and high-quality images, Word print templates, and other design ingredients from the thousands of offerings at GraphicRiver. Download whatever you need and pay for each use of each item.
При работе в текстовом редакторе, возникает необходимость добавить или изменить фон текста в Ворде, выбрать другой цвет вместо белого фона документа, используемого по умолчанию. По мнению пользователя, потребовалось сделать другой подходящий цвет фона, для визуального изменения первоначального вида документа Microsoft Word.
Фон для документа Word изменит визуальное восприятие всего документа или отдельных блоков текста на странице документа. Необходимость для изменения цвета фона в Word возникает при создании электронных книг, брошюр или буклетов, в других случаях.
Содержание:
- Как в Ворде сделать фон страницы
- Как поменять фон Word на рисунок — 1 способ
- Изображение в качестве фона страницы Word — 2 способ
- Как изменить фон текста Word
- Добавление фона после текста — 1 способ
- Делаем фон за текстом — 2 способ
- Выводы статьи
В некоторых ситуациях, пользователю требуется выделить отдельный фрагмент в тексте документа, для привлечения внимания к определенному тестовому блоку, или к отдельным предложениям. Подобный вариант выделения или привлечения внимания пользователи часто встречают на веб-сайтах в интернете.
Давайте разберемся, как сделать фон в Word разными способами, какие настройки программы нужно использовать. В приложении имеется несколько вариантов для изменения фона в документе:
- заливка цветом всей страницы документа;
- использование в качестве фона рисунка;
- изменение цвета фона только под текстом.
Фон в Word может быть не только однотонным. Для оформления подходящего вида документа, можно сделать фон страницы со специальными эффектами в виде текстуры или узора, или добавить в качестве фонового изображения рисунок, загруженный с компьютера.
Изменения фона на странице выполняются в двух режимах, служащих для отображения документа в окне программы Word:
- Разметка страницы.
- Веб-документ.
В этом руководстве вы найдете инструкции о том, как изменить фон в Word 2019, 2016, 2013, 2010, 2007 несколькими способами: выполнить заливку фона на всю страницу, добавить рисунок (изображение) в качестве фона страницы, как поменять фон за текстом, не изменяя фон всей страницы.
Как в Ворде сделать фон страницы
Сначала мы разберемся, как сделать фон в Ворде цветным для страницы документа. При этом способе изменения фона, нет разницы есть ли сейчас на странице текст, или страница документа пока без текста. После применения изменения фона страницы, текст в документ можно добавить позднее.
Выполните следующие действия:
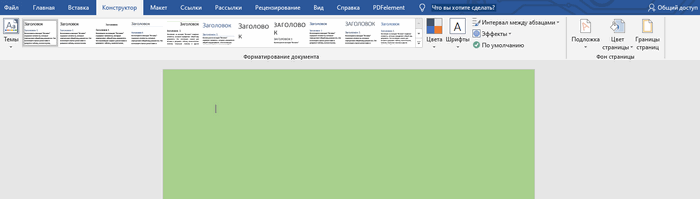
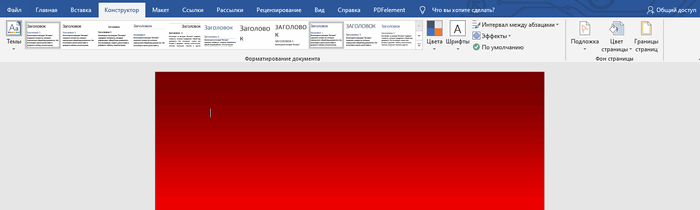
- Откройте документ Word, войдите во вкладку «Конструктор» (в Word 2019).
В Word 2016 и в Word 2013 откройте вкладку «Дизайн», а в Word 2010 и в Word 2007 зайдите во вкладку «Разметка страницы».
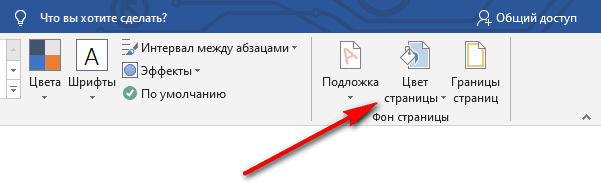
- В правом верхнем углу ленты нажмите на кнопку «Цвет страницы», находящуюся в группе «Фон страницы».
- Откроется окно «Цвета темы», в котором нужно выбрать подходящий цвет для заливки фона страницы.
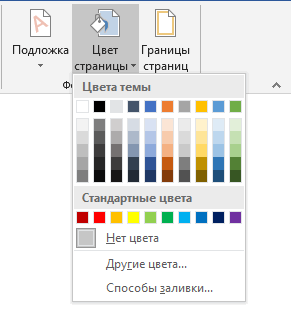
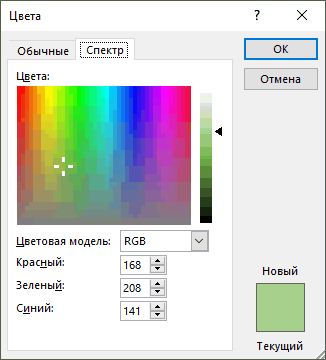
- Если, вам не подошли стандартные цвета, нажмите на «Другие цвета…», для выбора нужного варианта. В окне «Цвет», во вкладках «Обычные» или «Спектр» подберите необходимый цвет для заливки фона.
После выбора цвета фона, фон в документе поменяется с белого на другой цвет, выбранный пользователем.
Выбранный фон можно изменить для того, чтобы в документе была не однотонная заливка, а использовались и другие варианты заливки.
Выполните настройки способа заливки:
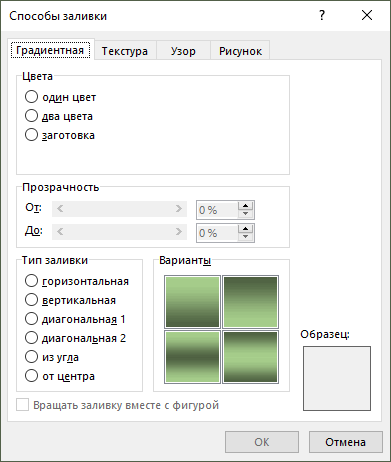
- Нажмите на кнопку «Цвет страницы».
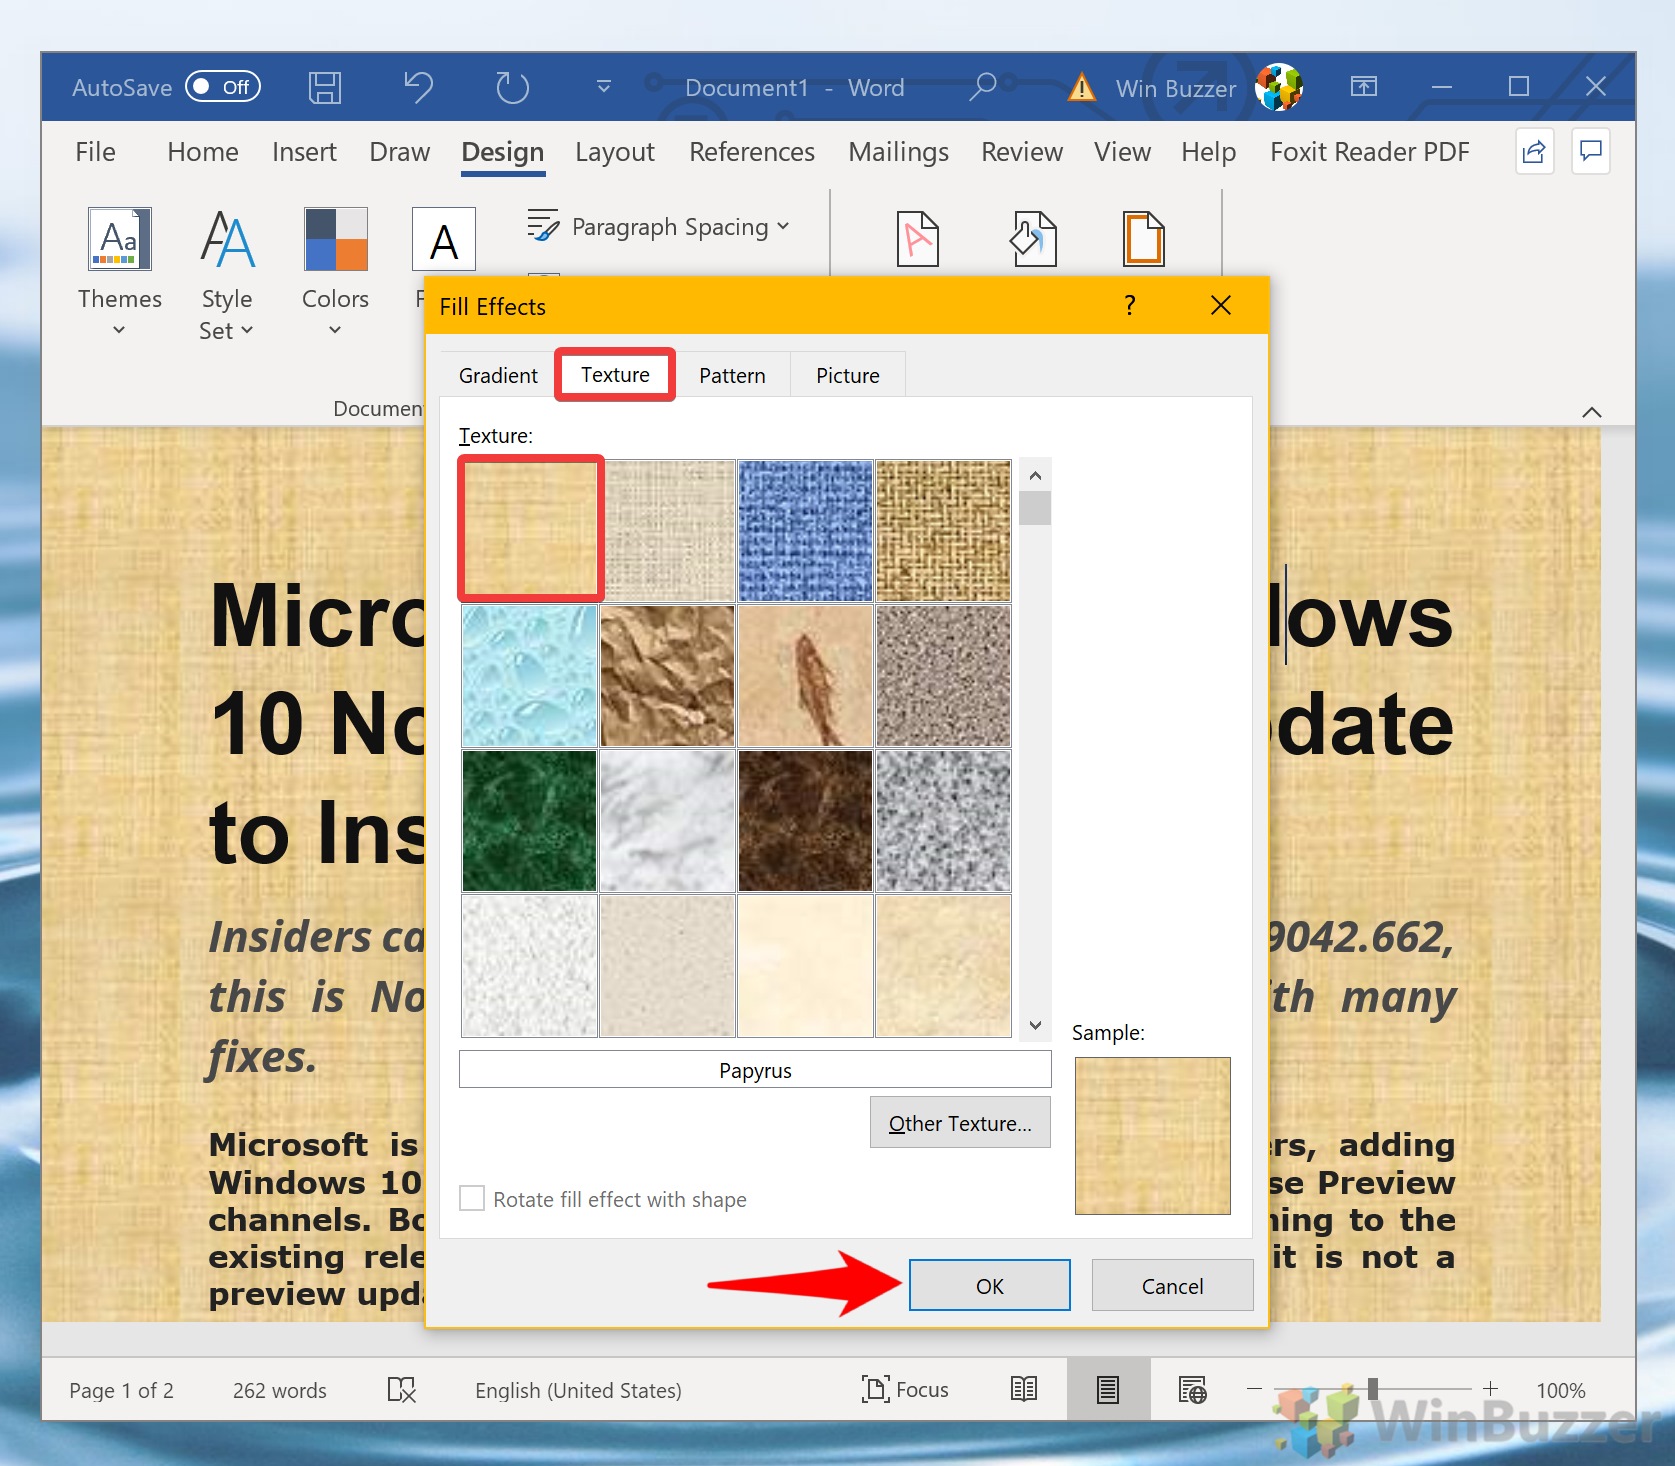
- В окне «Способы заливки» находятся вкладки «Градиентная», «Текстура» «Узор», «Рисунок». Выберите подходящий вариант и тип заливки.
Фон документа изменится, согласно выбранным параметрам.
Как поменять фон Word на рисунок — 1 способ
Сейчас мы сделаем фоновым изображением документа рисунок. Рисунок (изображение, фото, картинка) с компьютера будет использован в виде фона на странице документа Word.
Для этого, необходимо выполнить следующие шаги:
- Войдите в меню «Конструктор» (в Word 2019), в группе «Фон страницы» нажмите на кнопку «Цвет страницы».
В Word 2016 и в Word 2013 откройте меню «Дизайн», а в Word 2010 и в Word 2007 зайдите в меню «Разметка страницы».
- В окне «Цвета темы» нажмите на пункт «Способы заливки…».
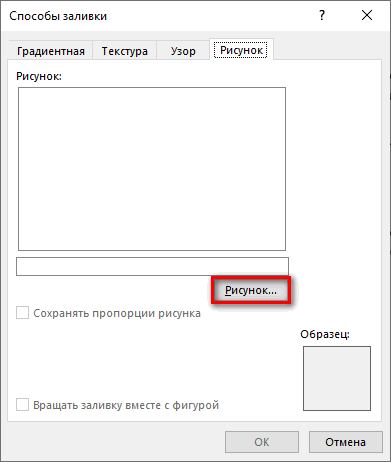
- В окне «Способы заливки» откройте вкладку «Рисунок».
- Нажмите на кнопку «Рисунок…».
- В открывшемся окне «Вставка изображений» нажмите на кнопку «Из файла», или загрузите картинку из интернета.
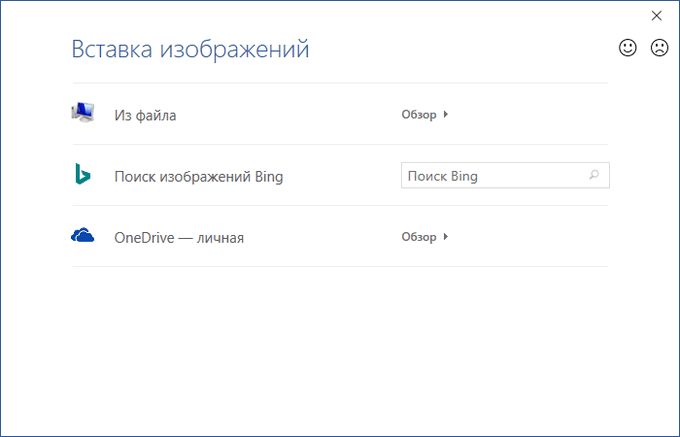
- В окне Проводника выберите подходящее изображение (файл графического формата, поддерживаемый Microsoft Office) со своего ПК.
- В окне с выбранным фоновым изображением нажмите на кнопку «ОК».
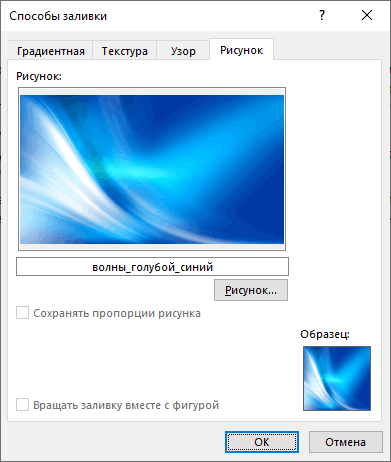
Изображение, добавленное с компьютера, станет фоновым рисунком на странице документа Word.

Изображение в качестве фона страницы Word — 2 способ
Существует еще один способ для добавления картинки в качестве фонового изображения на страницу документа Word.
- Откройте вкладку «Вставка» в группе «Иллюстрации».
- Нажмите на кнопку «Рисунки» («Рисунок»).
- В открывшемся окне выберите рисунок со своего ПК.
- Щелкните по картинке, по краям изображения появятся маркеры, с помощью которых можно растянуть рисунок до нужного размера.
- Во вкладке «Формат рисунка» найдите пункт «Обтекание текстом», в контекстном меню выберите опцию «За текстом».
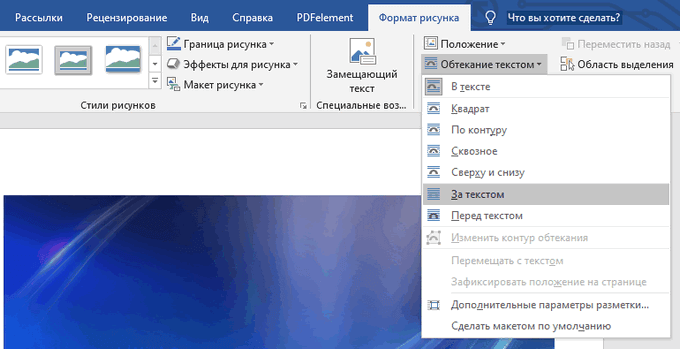
- Кликните по картинке, введите текст, который будет отображаться на изображении.
Для того, чтобы вводимый текст был хорошо виден на фоне картинки, измените цвет шрифта, чтобы он сочетался с цветом фонового рисунка.
Как изменить фон текста Word
Ранее в этой статье мы рассматривали способы добавления фона, занимающего весь размер страницы документа Ворд. В некоторых случаях, возникает необходимость для выделения фона за отдельными кусками текста, абзацами, предложениями или словами.
В этом случае, нам понадобится вставить фон в Word только за всем текстом документа или за определенным текстом в документе, не заливая фоном всю страницу. В Microsoft Word существует два способа выделения фоном текста: заливка фрагмента текста или всего текста, или выделение только текста, при котором межстрочные интервалы останутся с промежутком белого фона.
В обоих случаях фон появится только за выбранным текстом документа, заливки фона всей страницы не произойдет.
Добавление фона после текста — 1 способ
Сначала разберем способ при выделении фона за текстом, без заливки интервала между строками.
Для добавления фона выполните следующие действия:
- Выделите текст в документе Word.
- В программе MS Word откройте вкладку «Главная», в группе «Шрифт» нажмите на кнопку «Цвет выделения текста».
- Выберите нужный цвет.
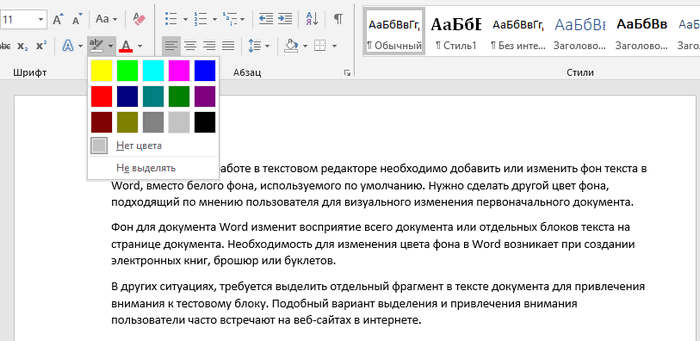
В результате, будут выделены строки с текстом, а место между строками останется с фоном по умолчанию.

Подобным способом можно выделять отдельные слова или предложения.

Делаем фон за текстом — 2 способ
При этом способе произойдет выделение определенного текста в виде блока прямоугольной формы. Подобным образом можно выделить весь текст на странице или только определенный фрагмент текста.
Проделайте следующее:
- Выделите нужный фрагмент текста.
- Во вкладке «Главная», в группе «Абзац» нажмите на кнопку «Заливка».
- В окне «Цвета темы» выберите нужный цвет. Помимо стандартных цветов, здесь имеется возможность для выбора других цветов, которые можно использовать в качестве фона в документе.
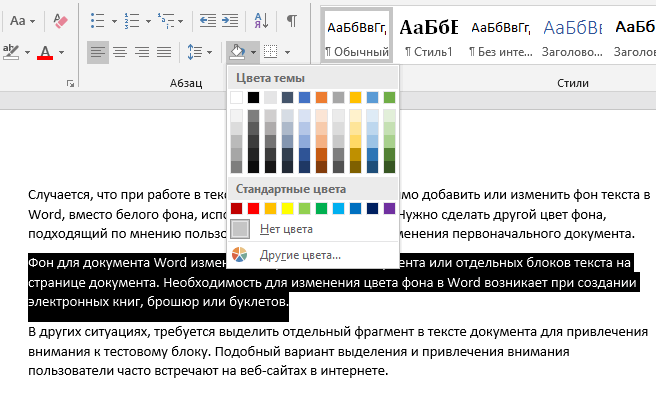
Получаем результат с выделенным прямоугольным фоном, который находится за текстом.

Выводы статьи
В случае необходимости, пользователь может заменить фон в документе Word. Существует несколько способов для изменения фона: заливка фонового изображения на всю страницу документа, использование в качестве фона рисунка (картинки, изображения, фотографии), выделение фона за всем текстом, или только за определенным фрагментом текста в документе.
Похожие публикации:
- Как сделать скриншот в Word
- Как перевернуть текст в Word — 5 способов
- Как поставить длинное тире в Ворде — 6 способов
- Как убрать режим ограниченной функциональности Word 2019, 2016, 2013, 2010, 2007
- Как включить линейку в Word
Add a background image to any page in a Word document instead of a solid color or pattern. Using a picture as the background for Word page isn’t as straight forward because the official or approved method doesn’t work very well. We’ll show you other Word features that work better (or at all).
Most of the time a page background image is distracting to the main document text or you can use the Watermark feature. But there are times in more creative work where you want the page fully or partly backgrounded.
The advantage of a background image in a Word document is that, once setup and locked ‘behind text’, the image won’t conflict with any text, shape or images you put in the document.
Firstly we’ll show you the Microsoft approved method for putting an image in the page background and why it’s not very useful.
Then we’ll show you the way that actually works 😊
The Approved Method
For a long time, Microsoft Word has the ability to put in a picture as the background to a page. It’s mostly used for a small repeating pattern image like this:

To make a page background over an entire page like this:

As we’ll see, this method is quite limited and there’s better, more flexible ways to insert a page background.
In Word 2013 and later to Word 365 go to the Design tab. In Word 2010 and Word 2007 to Page Layout tab.
Then Page Color | Fill Effects | Picture, select an image and click OK.

We’ll use an example image that, as well as being a shameless plug, shows an image plus text. This better shows the proportions and problems in setting a background image. Of course, in a real world use you’d probably want a faded, less obtrusive background image than the one we’ve used here.
The problem with this method is apparent when you see the image on the page – using one page view:

The image isn’t resized at all. What you see on the Word page is the top left corner of the image. If the image is too small for the page, the image is repeated. There’s no provision to resize or reposition the page background image within Word. Unless the picture is exactly the same size as the page, it’ll probably look wrong.
Note that the ‘sample’ in the Insert Picture dialog above bears no relation to what happens in the document,
The solution is to forget about Word’s Page Background feature and use another method that gives you more control.
What Works – Insert Picture … to Back
In short: Insert a picture into a Word document and send it to the back of the document layers.
Layers in Word documents
Yes, Word documents have layers. They aren’t as complex or powerful as layers in image programs like Photoshop but Word has layers all the same.
Think of layers as like a series of clear plastic sheets on top of each other. Each sheet contains images or text that you can adjust without changing things on other sheets. When the sheets are put on top of each other you see the finished document.
With an image on the ‘back’ sheet and text on another sheet combined you get a document with an image plus text overlaid.
Layers don’t feature a lot in Word. There’s a page background layer. Images and shapes can be layered so one image overlays another.
Flexible Page Background
To make a flexible Word page background, insert an image into a document then ‘Send to Back’ so it’s a back layer for text and other document content to show in front.
Insert | Picture and select the image you want to use. You can do this at any time while making the document but, at first, it’s easier to set the image background before anything else.
The image is inserted into the document as usual.

Above you can see the image formatting fly out for Word 365, 2021 back to Word 2013 with ‘Behind Text’ selected. In Word 2010 and Word 2007 go to the Picture tab or choose ‘Size and Positioning’ from the right-click menu – then the Text Wrapping tab.

The options on the above dialog haven’t changed much for many versions of Word.
Text Wrapping | Behind Text
Now position the image on the page. Usually you’ll want to put it top left to start, but the image and your needs might change that.

Change the Horizontal position to Left relative to Page and Vertical positions Top relative to the page. You may want to make the positions relative to margin instead.
Uncheck the ‘Move document with text’ option to stop Word trying to ‘help’ you.
Check the ‘Lock Anchor’ box.
Resize image to fit page
The image should now look like this, tucked up into the document corner.

Drag the bottom right image size handle down and right until the image covers the entire page.

Now the image fills the page with the resizing handles around the edge. The image might jump around a bit but you should be able to move it to cover the page.
Then just start typing! Because the image is set to ‘Behind Text’ anything else you do is placed ‘above’ it in Word simple layer stack.

In fact the term ‘Behind Text’ isn’t completely correct because you can put anything on top of the background image. That includes another image or shape as in this extreme example.

Watermarks with text on PowerPoint Handouts
Align Page vs Align Margin in Word
Print selected pages or sections of a Word document in any order
How to Force a Page Break through Styles Setting in Word
Two unusual Page Break options in Word
Suppose you are on your PC and working for your office. Out of the blue, you needed to set a background image instantly on the document that you were preparing on Microsoft Word. Now, will you download and install any word or photo editor just for this?
No way! It is pretty easy to use an image on the document background on Word. Yet, I will not let you stay on pins and needles.
So, in the latter portion of my article, I will list down all the feasible methods to apply an image at the back of your Word file. As a power Office user, I practically researched the matters a lot and heavily dealt with them for different purposes.
Keep reading till the end. Please, do not skip anything.
Let’s get started.
Also, check out our separate post on how to make only one page landscape in Word.
Why should you Set a Background Image in MS Word?
I think you all know a single image can speak louder than a thousand words. Not only to persuade readers more easily and laconically, but there are also diverse aspects and benefits of using an image on your Microsoft Word document as well.
No, guys. I am not talking about using an image anywhere inside your writing that is capable of describing your content or enhancing the implicit meaning. Instead, I want to focus merely on using an image in the background of your document.
It would be boring for the readers to digest your content written on a bare white background with the same black text. But, if you just add an image in the background, the document will obtain a distinct dimension. As a plus, if you think of using a few special features and colors, you will be able to create a profound impression on the person who will consume it. Moreover, having an appealing look at the document will enhance your morale as well.
For a myriad of purposes, a person needs to set images in the background.
Check out the easiest way to enable equation editor in Microsoft Word.
Here are the steps to set a background image in MS word:
- If your documents are to be used as marketing materials such as brochures, flyers, tripods, and so forth, the background image plays not only a crucial role here, rather it is inextricably related to your reach to your target audience and ultimately the revenue.
- Using choosy and enticing background images, you can create demanding templates that can, of course, pave the way for you to make money out of it.
- An embellished and precisely adorned background will enrich the visual appeal of your document over others. That will, in turn, keep your audience concentrated on your content.
- One most important thing is if you preserve your document or intellectual property from plagiarism or being copied, simply insert a watermark at the background of your document and stay safe. It is the traditional way to take digital thieves out of the market.
- A well-arranged document coupled with the fluidity of language helps you make your document professional. Not only in professions, but youngsters can also utilize this approach in their academics as well.
Hence, it is evident that slightly working on the representation of your document will lead to widespread acceptability over others. So, without wasting time, let’s dive into the process of how to do it.
Check out the Microsoft Refund policy to get absolutely full refunds to your products.
I discussed the purposes of setting a background image on your word document. Now, I am going to list down all the steps that you need to follow throughout the process. And, worth mentioning, I will consider the Microsoft Word document as the word file here.
However, you can set your background simply in 3 ways- you can just fill the background with a solid color, you can add a watermark, you can add a complete image as your document’s background. I would like to explain the procedures separately. So, stay tuned, and make sure you have a plain white MS Word document before you.
Here are the ways of setting backgrounds, along with their steps to make it happen:
1. Setting the Background with a Solid Color
When you do not need to do more except insert a solid color guided by Microsoft Word, follow the steps below to get the job done.
Here are the steps to set the background with a solid color:
This is the easiest and most precise way to apply solid colors as the background of your document.
Quickly check out our epic guide on how to enable word wrap in notepad.
2. Setting the Background with a Watermark
For safety purposes, a watermark has been used for a long time, and still, it is the most suitable and accessible way for mass users. But, you can use a text or even an image as your document watermark. I will delineate both the procedures.
Text Watermark
Have some time to spare? Quickly check out our epic guide on why can’t I copy paste in Microsoft Word.
Image Watermark
But before that, go through our epic guide on do Microsoft points still work.
3. Setting the Background with an Image
If you want to set your background with an image, the process is as simple as the previous ones. The first couple of steps is exactly the same.
Here are the steps to set the document background with an image:
Quickly check out our epic guide on Lock and Unlock Cells in Excel
Conclusion
There you have it. The approaches I demonstrated are the simplest words possible ever. Already many users reported to me about their satisfaction and definite outcome after following my methods.
This time, I focused on simply setting the background with images, colors, and watermarks. In another article, I will definitely cover how to edit them and insert special features into the background images.
Was this article helpful? If you find your job done successfully, please share this article with others to let them get help.
Comment in the box below if you have anything to ask. I will try to get back to you shortly.
Last Update: Jan 03, 2023
This is a question our experts keep getting from time to time. Now, we have got the complete detailed explanation and answer for everyone, who is interested!
Asked by: Kameron Wyman
Score: 4.7/5
(49 votes)
Add or change a background image or watermark
- Go to Design or Layout, and select Watermark.
- Select Picture > Select Picture, browse through your image files, and choose the image that you want to use.
- Select Insert.
- If you want the background image to show with full color intensity, clear the Washout check box.
How do you make a full page background on word?
Go to the ‘Design’ tab and click the ‘Page Color’ drop-down in the ‘Page Background’ set of tools. A pop-up menu will open with colors to set as the background. At the very bottom of this pop-up is an option ‘Fill Effects’. Click it.
How do I set a default background in Word?
Word 2016: How to Set Background
- Select the “Design” tab.
- In the “Page Background” area, select “Page Color“.
- Choose a desired color.
How do I change the background color on a Word document?
Change the background color
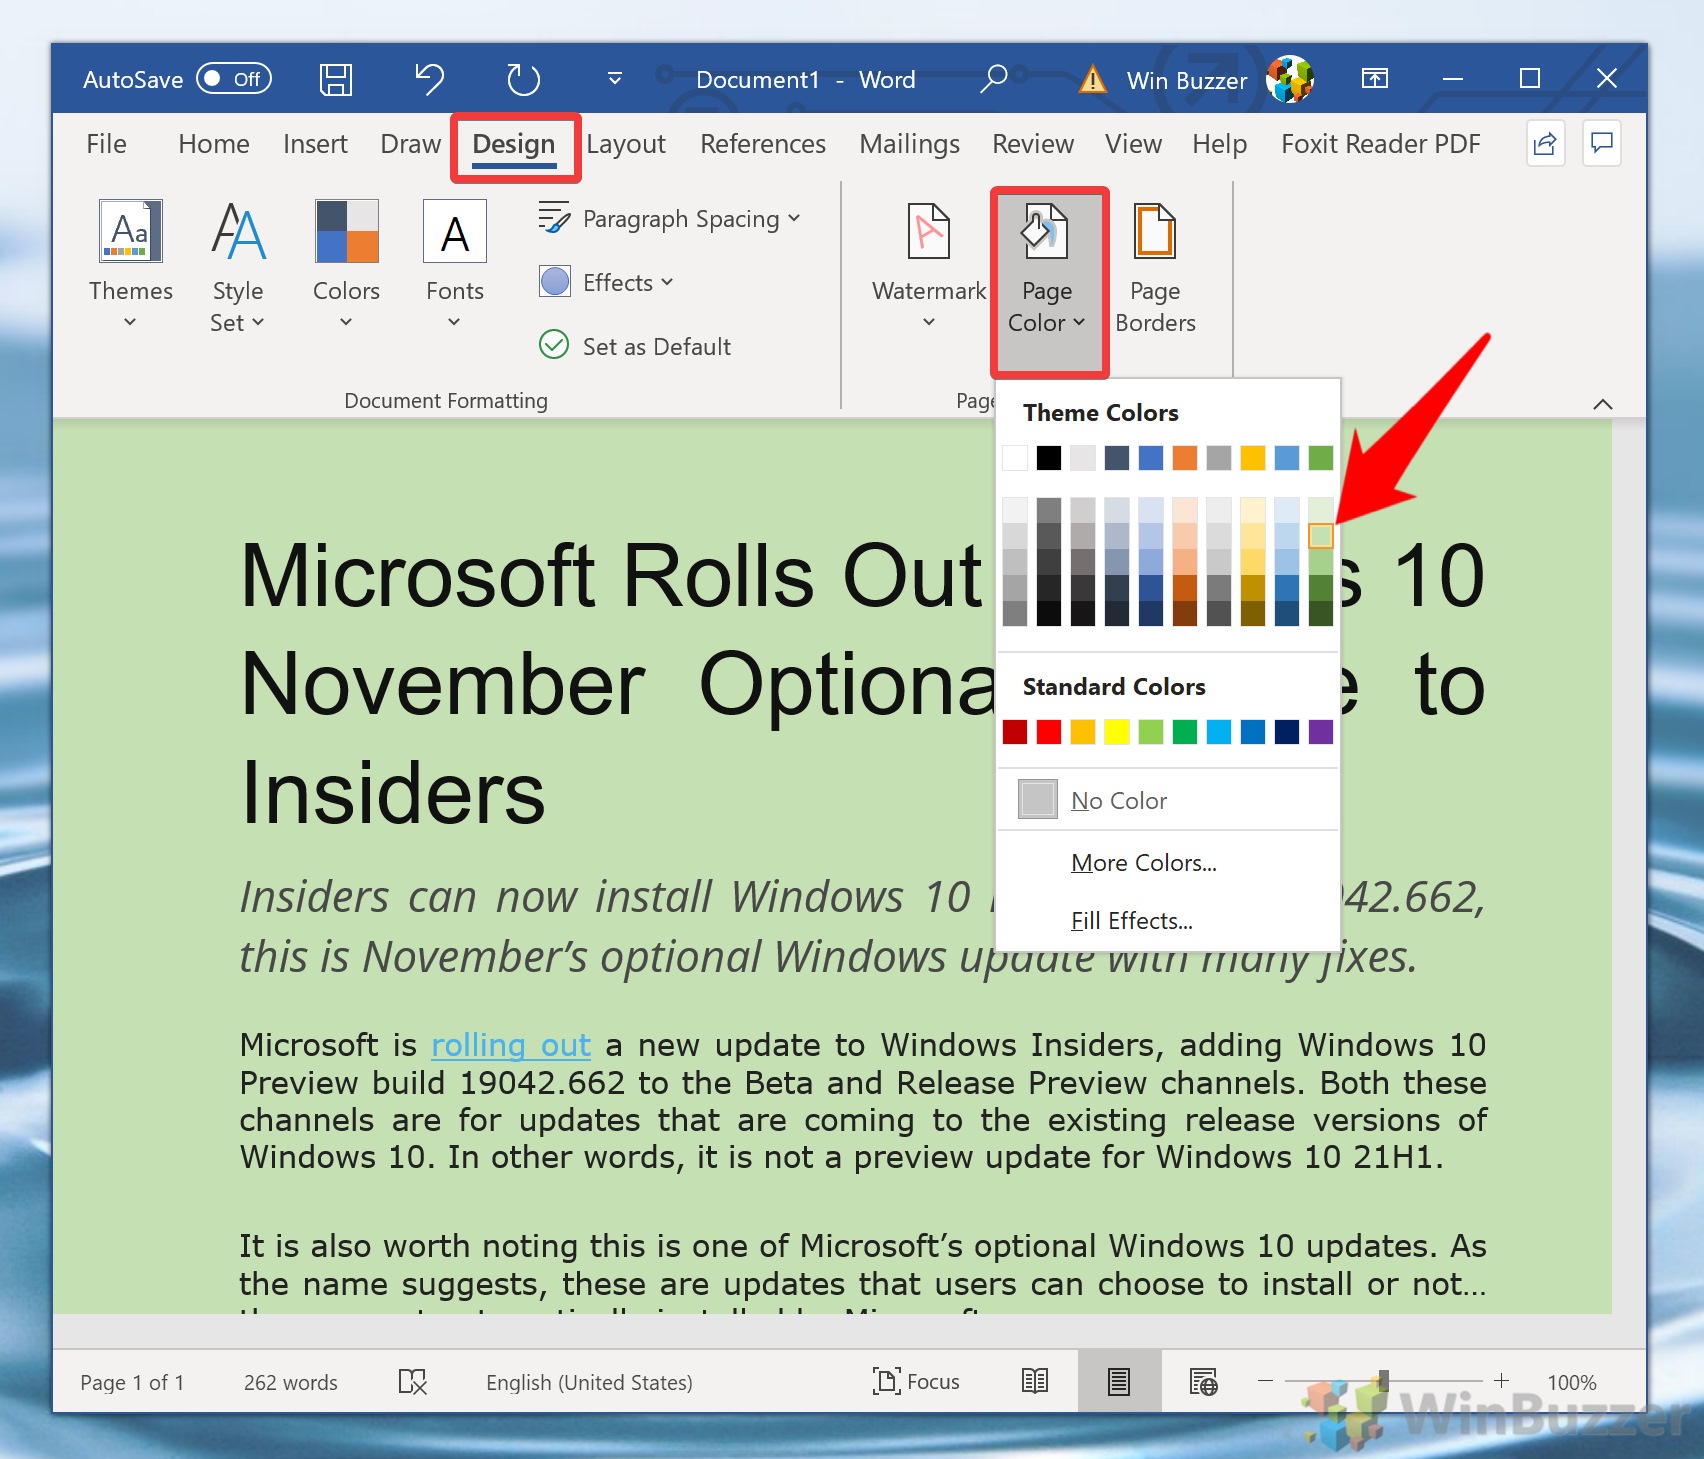
- Go to Design > Page Color.
- Choose the color you want. If you don’t see the color you want, select More Colors and then pick a color from any of the options in the Color box. Tips: To pick a color from a file, select the picture image, click the gear icon, and select New from File.
How do I change the background color of one page in Word?
To do this, go to the Page Layout ribbon tab and choose Page Color.
…
Add a background colour to Word on just one single page
- Go to Insert.
- Choose Shapes.
- Choose a square to insert. Extend it to the full page and give it its colour properties as you wish.
39 related questions found
How do you put a picture as a background on Microsoft Word 2007?
You’ll use the same Page Color option on the Page Layout tab (in the Page Background group) to add a picture, as follows.
- Click the Page Color option and choose Fill Effects.
- Click the Picture tab.
- Click Select Picture.
- Locate the picture you want to insert and click Insert.
- Click OK.
How do I change the background of a picture in Word 2007?
Open your word document and choose Page Layout on the Ribbon, then select page color to select the background color you want. The nice thing about Word 2007 is you just need to hover the mouse over each color to see a preview of how it will look in the document. Select the background color you want and you are done.
How do I set a PDF as a background in Word?
Open the PDF from your Word document, open the Edit PDF tool and then under More, choose Background=>Add. You can specify an existing PDF file that you can position wherever you want on the page, at whatever magnification you want, and on whatever range of pages you want.
Can I set a PDF as a background?
Only PDF, JPEG, and BMP files can be used as background images. Adjust the appearance and position of the background, as needed. … Click Add Files, choose Add Files or Add Open Files, and then select the files.
How can I turn a PDF into a JPEG?
How to convert PDF to JPG using Acrobat:
- Open the PDF in Acrobat.
- Click the Export PDF tool in the right pane.
- Choose Image as your export format, and then choose JPEG.
- Click Export. The Save As dialog box is displayed.
- Select a location where you want to save the file, and then click Save.
How do I embed a PDF into a Word document?
How To Insert PDF Into Word—From Microsoft Word
- Open the Word document you want to insert a PDF into.
- Click Insert > Object… > From File…
- Choose the PDF file from the pop-up window and press Insert.
- Ta-da! Your PDF should now be on the page.
How do you remove the background of a picture in Word 2010?
Word 2010: Remove the background from an image
- Insert the image into your Word 2010 document (Insert tab > Picture).
- Once it’s in, select it to open the Picture Tools toolbar > Format tab.
- Click the Remove Background button (at the far left on the Picture Tools > Format tab).
How do you remove the background of a picture in Word?
Remove the background of a picture
- Select the picture that you want to remove the background from.
- Select Picture Format > Remove Background, or Format > Remove Background. …
- The default background area will be colored magenta to mark it for removal, while the foreground will retain its natural coloring.
How do you put a picture in the background of just one page?
Apply/insert background image to only one page in Word
- Scroll to the specified page you will add background image in, and click View > One Page to show the whole page in the screen.
- Click Insert > Shapes > Rectangle as below screenshot shown, and then draw a rectangle covering the whole page.
How do I make a picture fill the whole page in Word?
How to Fill the Page With a Picture on Microsoft Word
- Open Microsoft Word. …
- Click the «Page Layout» tab. …
- Click the «Fill Effects» option.
- Click the «Picture» tab. …
- Browse to the picture you wish to use to fill the page and double-click it.
How do you remove the background of a picture in Word 2013?
To remove the background from an image:
- Select the desired image, then click the Format tab.
- Click the Remove Background command. …
- Word will try to guess which part of the image to remove and mark the background with a magenta fill. …
- Drag the selection handles until all of the foreground is inside the box.
How do you remove the background of a picture in paint?
Select the original picture in the Layers tab, and then select the Magic Wand tool from the toolbar on the left pane. Select and mark the background in your image that you need to turn transparent. Click the Delete key on your keyboard.
How do I make the background of an image transparent?
You can create a transparent area in most pictures. Select the picture that you want to create transparent areas in. Click Picture Tools > Recolor > Set Transparent Color. In the picture, click the color you want to make transparent.
How do I edit a picture in Word 2010?
How to Edit an Image in a Word 2010 Document
- Click to select the image. The image grows handles.
- Hold down the Shift key.
- Use the mouse to drag one of the image’s four corner handles inward or outward to make the image proportionally smaller or larger.
- Release the Shift key.
How do I type into a PDF document?
Add new text to a PDF.
- Open your file in the Acrobat PDF Editor.
- Select Fill & Sign on the right side of the screen.
- Choose the Add Text tool, which looks like an upper-case “A” next to a lower-case “b.”
- Click anywhere in the PDF where you’d like to add text and start typing.
How do you attach a File to a PDF?
Add an attachment
- Choose Tools > Edit PDF > More > Attach File.
- In the Add Files dialog box, select the file you want to attach, and click Open. …
- To make the attachment viewable in Acrobat 5.0 or earlier, do one of the following: …
- Save the PDF.
How do I merge a PDF with a Word document?
The simplest method is to use File > New Document, and choose the option to Combine Files into a Single PDF. A file-list box will open. Drag in the files that you want to combine into a single PDF. You can add PDF files, or any combination of text, images, Word, Excel, or PowerPoint documents into the list.
How do I convert PDF to JPG on Windows?
Click the «View > Tools > Export PDF > Open» in the top menu bar. Then, select «Image» from the «Convert To» dropdown menu, choose the «JPEG» option, and select the quality for your output file. Step 3. When you have specified the conversion options, click «Export to JPEG» to start converting your PDF file to JPG.

Contents
- 1 How to Add a Background Color
- 2 How to Add a Word Background Image
- 3 How to Add a Backrgound Image Texture in Word
The default white background color for Microsoft Word documents provides the best level of contrast for most people. Unfortunately, it also has the tendency to blind you if you’re doing some late-night text editing. In such situations, knowing how to change background color in Word or insert a custom image can be very useful.
If you work in marketing or are creating a brochure, a Word background image can do a lot of the heavy lifting visually. Though they can risk looking tacky, a well thought out, subtle background image texture can bring a document to the next level.
That said, you should bear in mind that when you add a color or background for a Word document it will apply globally. That is, every page will have the same color or design. As a result, you may want to check that it doesn’t clash with the position or colors of any of your text before you proceed. Let’s get started:
It’s very simple to add a page background to Word, but there are also some additional customization options you should’ve aware of.
- Change the Word background via the “Page Color” button
In Microsoft Word, switch to the “Design” tab and look to the right-hand side of the ribbon. Click the “Page Color” button, then click on one of the preset swatches for a quick and easy fix.

- Try out more Word background colorsWith the “Page Color” menu open, click the “More colors…” button to access additional options.

- Set a custom page background color
Switch to the “Custom” tab to set the precise color of your choice. Click in the gradient window to select a rough color, then refine it by adjusting the Red, Green, and Blue values.
Once you’re happy, press “OK”.

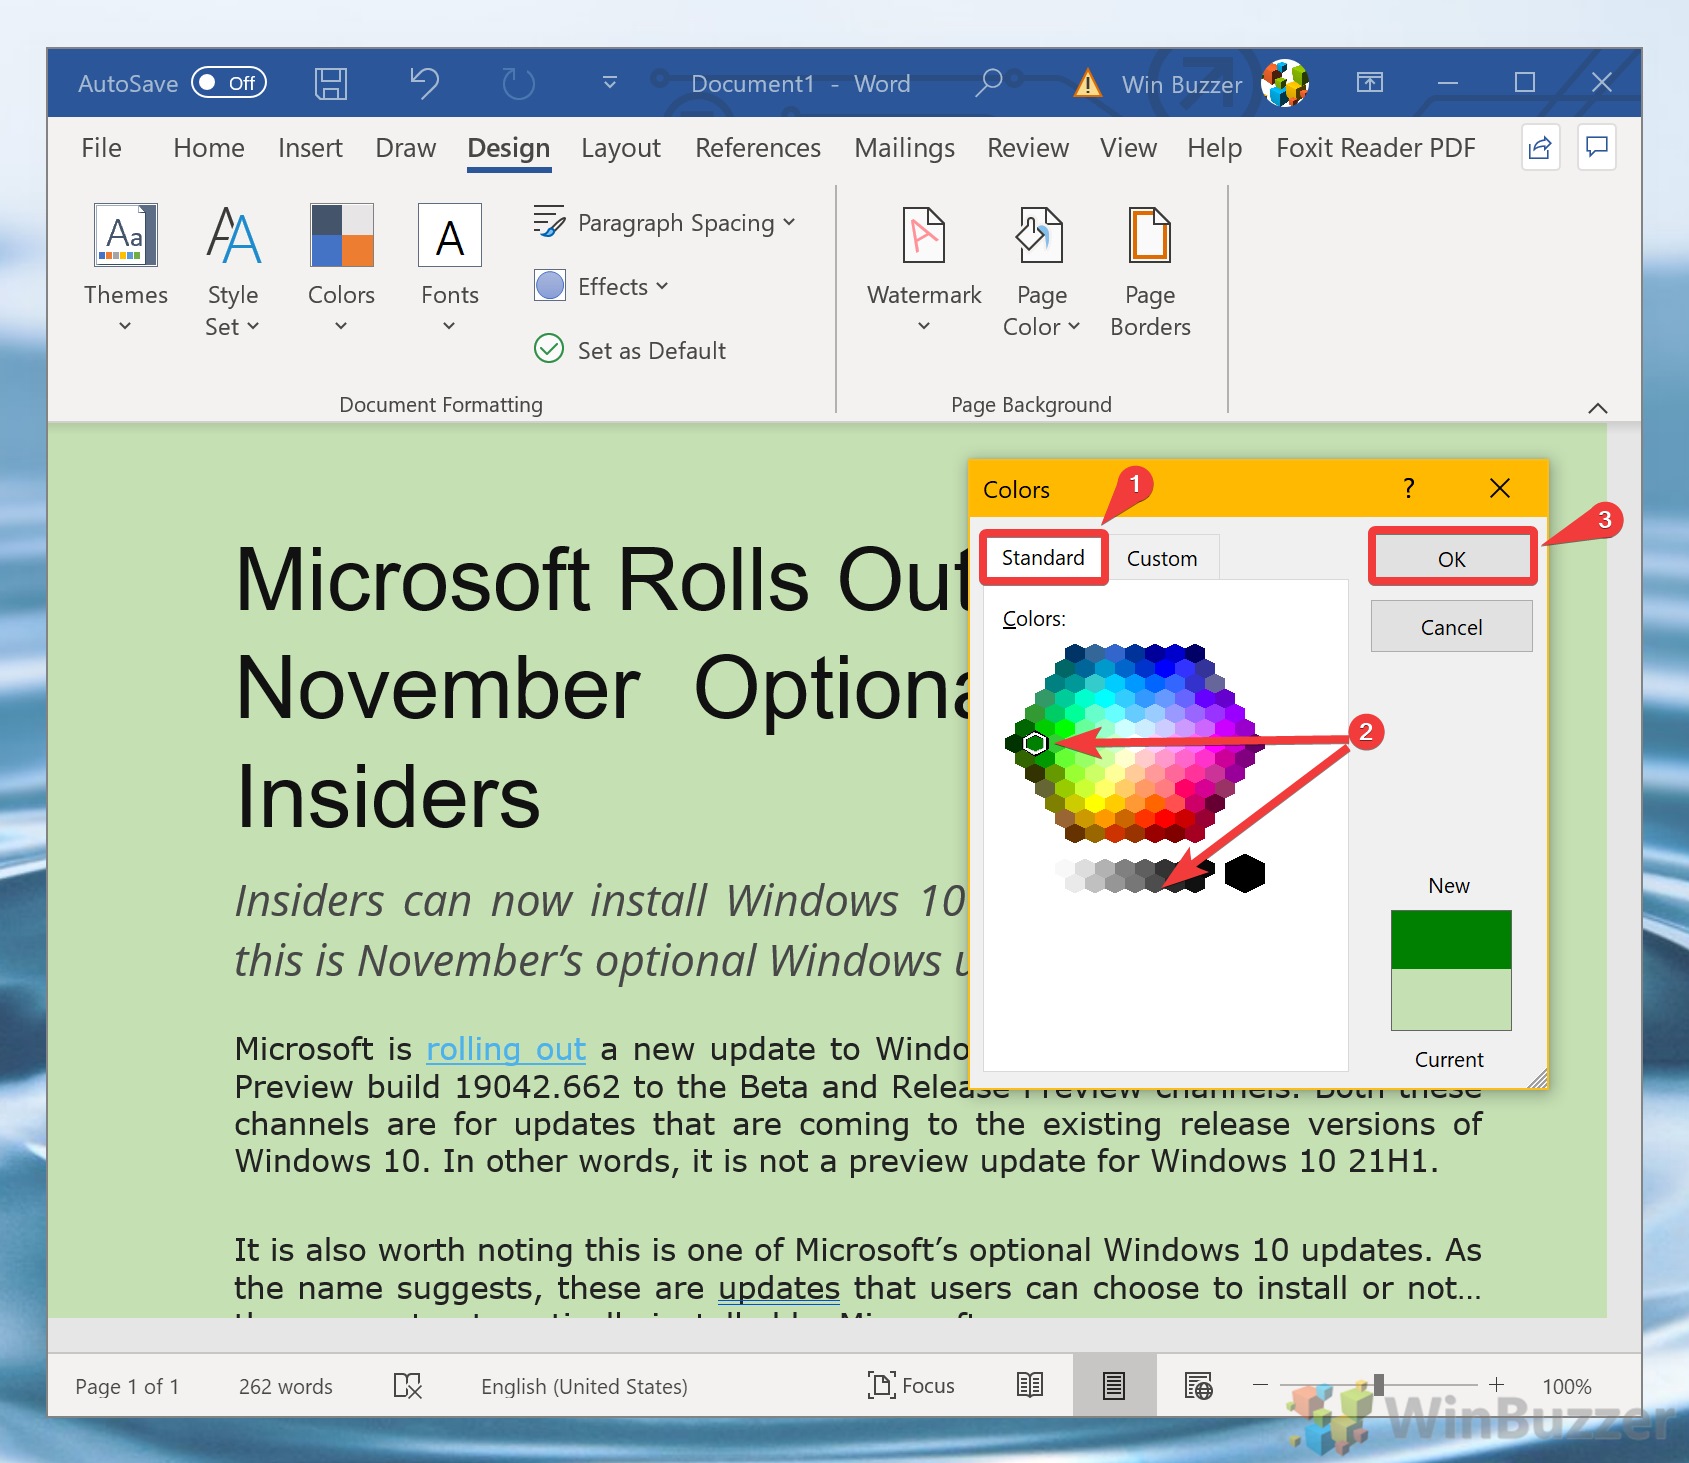
- Choose from one of the standard selections
Alternatively, you can choose from a larger set of colors or shades in the “Standard” tab. Click the one you like and press “OK”.

How to Add a Word Background Image
- Open the ‘Fill Effects…’ menu
In the “Design” tab again, find the “Page Color” button, click it, and then press “Fill Effects…”.

- Select your Word document background image
In the Fill Effects window, click on the “Picture” tab. Press “Select Picture…” to open File Explorer, and choose an image that makes a fitting Microsoft Word background. Once you’re ready, press “OK”. Your document will update to reflect the new look.

How to Add a Backrgound Image Texture in Word
If an image is too busy for you, you can set a more subtle background image texture to suit your preferences. Once again, this is found in the Fill Effects menu.
- Open ‘Fill Effects…’
In the “Design” tab of your ribbon, click on “Page Color”, then press “Fill Effects…” in the fly-out menu.

-
Choose your Word textureWord will give you a selection of background texture images to choose from, though most of them aren’t particularly subtle. If you’d like to use a custom one, you can instead press the “Other Texture…” button and import one from a file, Bing, or your OneDrive. Once you’re done, press “OK” to apply the changes to your Word document.

If you enjoyed customizing your Microsoft Word, you may want to try our Windows 10 screensaver tutorial. If you don’t own Word, or need to open a .doc file on the go, read our alternatives guide.