
Is there a way of extracting all lines that are using a particular font (size, is it bolded, font name, etc) in word via C#?
In addition, is there a way to find out what is the font for some text that is in the document?
My hunch is that there are functions in the Microsoft.Office.Interop.Word namespace that can do this, but I cannot seem to find them.
Edit: I am using word 2010.
asked Jan 1, 2012 at 23:50
![]()
soandossoandos
4,95813 gold badges62 silver badges94 bronze badges
7
You can loop through the document using the Find object from Word Interop. You can set the Find.Font.Name property for a Selection or Range from your document. Note that the Font interface has several Name* properties for various encodings.
EDIT
Here’s the equivalent VBA code:
Dim selectionRange As Range
Set selectionRange = Application.ActiveDocument.Range

With selectionRange.Find
    .ClearFormatting
    .Format = True
    .Font.NameBi = "Narkisim" //for doc without bidirectional script, use Name
    Do While .Execute
        MsgBox selectionRange.Text
    Loop
End With
The object model from Word Interop is the same, see the link above.
Don’t go asking me for C# code now… this is SO, we don’t do silver platters. And if you’re ever going to do serious work with the Office Interop API, you will need to be able to read VBA code.
answered Jan 2, 2012 at 12:48
![]()
sq33Gsq33G
3,3021 gold badge25 silver badges37 bronze badges
3
- Remove From My Forums
-
Question
-
Is it possible to select all the the text that matches a certain font? I cannot seem to find the function in the Microsoft.Office.Interop.Word namespace.
In addition, it is possible to see what type of font some text in the document is formatted with (say, the first line)?
Answers
-
Hi soando
So you don’t really need to select all instances formatted with a particular font. All you need to do is
extract all text that’s formatted with it?In that case, using the Word API I’d work with the Range.Find method. Something like (to give you start with the syntax):
string foundText;
object oTrue = true;
object oFalse = false;
object missing = System.Type.Missing;
object findStop = Word.WdFindWrap.wdFindStop;
Word.Range rng = DocObject.Content;
rng.Find.Font.Name = «Arial»;
rnf.Find.Font.Size = 12;
bool found = false;
do
{
found = rng.Find.Execute(ref missing, ref missing, ref missing, ref missing, ref missing, ref missing, ref missing, ref findStop, ref oTrue, ref missing, ref missing, ref missing, ref missing, ref missing, ref missing);
//if successful, Range is now the found segment:
if (found)
{
Word.Range rngFound = rngFound.Range;
foundText = rng.Text;
//Now do something with the text, then…
//Reset the search range to start after the found font, otherwise it will loop
rng.Start = rngFound.End;
rng.End = DocObject.Content.End;
}
} while found
Cindy Meister, VSTO/Word MVP
-
Edited by
Monday, January 2, 2012 2:15 PM
-
Marked as answer by
soandos3
Monday, January 2, 2012 3:45 PM
-
Edited by
I have converted a PDF document to word format. The PDF is an issue of a magazine. I need all of the text that is a certain font, and either 9.5 or 10 point. Those are the contents of the articles, which I want to do text mining on (word frequencies only). The tons of other stuff that would be extremely tedious to remove a different way.
Right clicking on an area of text and selecting «Select text with similar formatting» does not work. (This is what I was planning to do). It only selects the current paragraph. I tried to ‘select all’ and then set all paragraph formatting to be the same, but this had no effect.
asked Nov 29, 2016 at 1:22
![]()
In a copy of your document (in case you want to keep all the text), you could delete all the text that isn’t the specific font and size by doing 3 find and replaces (the first two will highlight the text you want to keep, the third will delete the remaining plain text).
(NB: ensure the Find what and Replace with textboxes are empty and don’t accidentally include a space in Replace with)
- Find all text of the font that is 9.5 point, and replace with highlighting (it will keep the text but highlight it in the last highlighter colour you used — you may want to highlight a word at the start so you have a colour selected).

- Do the same find and replace, but this time replace 10 point font with highlight.

Steps 1 and 2 above will mean that any text which is NOT 9.5 or 10 point in the font style you are looking for won’t be highlighted.
- Do a find and replace, where the find is simply Not Highlight (to get Not Highlight as the Format option, you have to select it from the Format button at bottom left of screenshot twice).

This will delete all the non-highlighted text, leaving you with just the text you want to keep.
![]()
answered Nov 29, 2016 at 3:05
![]()
TanyaTanya
1,6601 gold badge9 silver badges5 bronze badges
 Please Note:
This article is written for users of the following Microsoft Word versions: 97, 2000, 2002, and 2003. If you are using a later version (Word 2007 or later), this tip may not work for you. For a version of this tip written specifically for later versions of Word, click here: Finding Text Not Using a Particular Font.
![]()
Written by Allen Wyatt (last updated July 5, 2022)
This tip applies to Word 97, 2000, 2002, and 2003
Hilary notes that most of the documents their company uses are standardized on a Times Roman font. However, once in a while someone will edit a document and apply a different font to some of the text it contains. She’d like to easily find those «formatting anomalies.» Hilary wonders if there is a way to search a document for text that is not using a particular font.
There are a couple of ways that you can go about finding what you need and, potentially, fixing the problem. First, you could use Find and Replace in this manner:
- Press Ctrl+F. Word displays the Find tab of the Find and Replace dialog box.
- Click the More button, if it is available.
- Make sure the Find What box is empty.
- Click Format and then choose Font. Word displays the Find Font dialog box. (See Figure 1.)
- Use the controls in the dialog box to specify that you want to find the Times Roman font you are using. (Just choose the font. You don’t have to specify any other settings unless you want to.)
- Click on OK. The font specifications you are looking for appear just below the Find What box.
- Click the Highlight All Items check box.
- Click Find All.
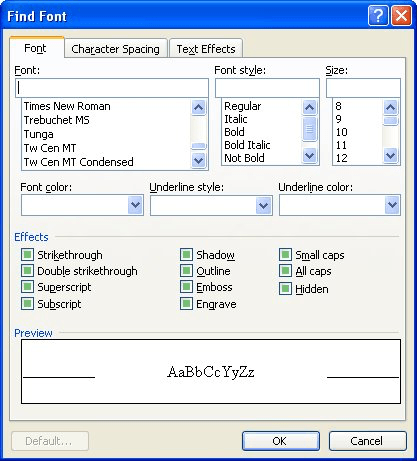
Figure 1. The Find Font dialog box.
At this point, the dialog box closes and Word dutifully highlights all instances of Times Roman in your document. You can easily scroll through the document to see what isn’t highlighted—these are the «anomalies» you are seeking.
You could also use Find and Replace to apply some stand-out formatting to text that isn’t in Times Roman font. Just figure out some formatting that you are not using in the document, such as double underlines or red text. Select the whole document (Ctrl+A) and apply that formatting to the whole document. Then use Find and Replace to find all instances to Times Roman (see the steps above) and replace it with Times Roman without the stand-out formatting you previously applied. What you end up with is only the text that is not Times Roman formatted with the stand-out formatting.
If you prefer, you can use a macro to modify the font used in the document. The following is a short little macro that looks at the font used for each word in your document:
Sub FixFormatAnomalies()
    Dim aWord

    For Each aWord In ActiveDocument.Words
        If aWord.Font.Name <> "Times Roman" Then
            aWord.Font.Name = "Times Roman"
        End If
    Next aWord
End Sub
If the font used for a word doesn’t match what you want, then the routine changes the font. The only thing you’ll need to do to make the macro work in your case is to change the desired font name on two lines. (You’ll want to use the font name exactly as it appears in the list of fonts usable by Word. Pay particular attention to capitalization.)
Another approach is to simply check each character in the document and highlight the character if it doesn’t use your desired font. The following macro highlights the offending characters in yellow:
Sub HighlightOtherFonts()
    Dim iCounter As Integer
    Dim sFontName As String
    Dim sPrompt As String
    Dim sTitle As String
    Dim sDefault As String
    Dim c As Range

    ' Gets the name of the font as typed by the user
    sPrompt = "Type the name of the font that is OK to "
    sPrompt = sPrompt & "have in the document."
    sTitle = "Acceptable Font Name"
    sDefault = ActiveDocument.Styles(wdStyleNormal).Font.Name
    sFontName = InputBox(sPrompt, sTitle, sDefault)

    ' Verifies that the name of the font is valid
    For Each sFont In Application.FontNames
        If UCase(sFontName) = UCase(sFont) Then
            ' Changes the user-typed name of the font to
            ' the version recognized by the application
            ' Example: 'times new roman' (user-typed) is
            ' changed to 'Times New Roman' (application version)
            sFontName = sFont
            Exit For
        Else
            ' Terminates the loop if the name of the font is invalid
            iCounter = iCounter + 1
            If iCounter = FontNames.Count Then
                sPrompt = "The font name as typed does not match "
                sPrompt = sPrompt & "any fonts available to the "
                sPrompt = sPrompt & "application."
                sTitle = "Font Name Not Found"
                MsgBox sPrompt, vbOKOnly, sTitle
                Exit Sub
            End If
        End If
    Next sFont

    ' Checks each character in the document, highlighting
    ' if the character's font doesn't match the OK font
    For Each c In ActiveDocument.Characters
        If c.Font.Name <> sFontName Then
            ' Highlight the selected range of text in yellow
            c.FormattedText.HighlightColorIndex = wdYellow
        End If
    Next c
End Sub
One of the nice features of this macro is that it prompts you for the font that you find acceptable. It then checks to make sure that what you enter matches one of the fonts available in the system. Because the macro checks each character in the document individually, you may need to be patient while it is running. The longer the document, the longer the macro takes to complete its work.
If you simply want to find the next occurrence of a font change, then the following very short macro is quite handy:
Sub FindDifferentFont()
  Selection.SelectCurrentFont
  Selection.Collapse wdCollapseEnd
End sub
The SelectCurrentFont method extends the current selection until there is a change in either the font (typeface) or the font size. So if you start at the beginning of the document and run the macro (perhaps you could assign it to a shortcut key), then the insertion point is moved to where the current font ends and a new font begins.
If you would like to know how to use the macros described on this page (or on any other page on the WordTips sites), I’ve prepared a special page that includes helpful information. Click here to open that special page in a new browser tab.
WordTips is your source for cost-effective Microsoft Word training.
(Microsoft Word is the most popular word processing software in the world.)
This tip (11069) applies to Microsoft Word 97, 2000, 2002, and 2003. You can find a version of this tip for the ribbon interface of Word (Word 2007 and later) here: Finding Text Not Using a Particular Font.
Author Bio
With more than 50 non-fiction books and numerous magazine articles to his credit, Allen Wyatt is an internationally recognized author. He is president of Sharon Parq Associates, a computer and publishing services company. Learn more about Allen…
MORE FROM ALLEN
Using Different Shapes in WordArt
You can apply different shapes in WordArt to create different effects.
Discover More
Quickly Inserting a New Worksheet
Want a quick way to insert a worksheet? There’s nothing faster than using the handy shortcut.
Discover More
Table Borders Won’t Print
Print a table and you may be surprised if it has no borders. That could be because you actually have the borders turned …
Discover More
MS-Word is a word processing application used for editing and creating documents or files. There are many features and tools provided in it, and it makes your work or task easier.
Selecting the Text
Selecting the text is a very common and frequently used operation. It is used many times and in many ways. For example, If you need to delete text (Specific or whole paragraph) then you need it to select first. Similarly, In many operations Selection of the text is the basic operation or minimum requirement first. So, In this article, we will see how to select the text in different ways:
- Single-word: For selecting a single word in MS-Word quickly double-click that word with mouse.
- Line of text: For selecting a line of text, place your cursor at the start of the line and then press “Shift + down arrow”.
- Paragraph: For selecting a whole paragraph, place your cursor at the start of the paragraph and then press “Ctrl + Shift + down arrow”.
Now, we will see the above-mentioned ways step-by-step with instructions and images:
Method 1: For Selecting a Single Word
Steps to follow:
Step 1: First open MS-Word on your PC.
Step 2: Now, Open the document or create a new one in which you want to perform this operation.

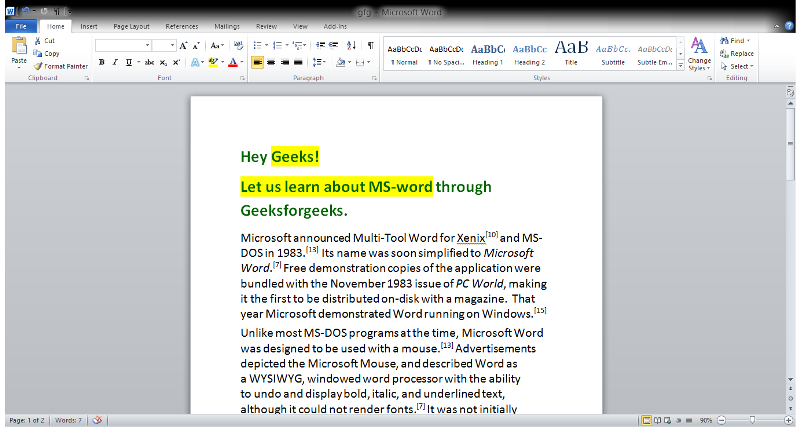
Step 3: Now, for selecting a single word, move the cursor to that word. (Here we will select the word “Geeksforgeeks”)
Step 4: Now, quickly double-click that word with the mouse.
Step 5: That word is selected successfully. (the selected word is highlighted in the below image.)

Method 2: For Selecting a Line of text
Steps to follow:
Step 1: First open MS-Word on your PC.
Step 2: Now, Open the document or create a new one in which you want to perform this operation.
Step 3: Now, for a selecting a line of text, move cursor to the start of line of you choice. (Here we will select the line “Let us learn about MS-word through Geeksforgeeks.”)
Step 4: Now, Press “Shift + down arrow” from the keyboard.
Step 5: That line is selected successfully. (the selected line is highlighted in the below image.)

Method 3: For Selecting a Paragraph
Steps to follow:
Step 1: First open MS-Word at your PC.
Step 2: Now, Open the document or create a new one in which you want to perform this operation.
Step 3: Now, for a selecting a paragraph, move cursor to the start of paragraph of you choice. (Here we will select the paragraph starting from “Microsoft announced Multi-Tool Word…….. ” to “…………demonstrated Word running on Windows.”)
Step 4: Now, Press “Ctrl + Shift + down arrow” from the keyboard.
Step 5: So, paragraph is selected successfully. (the selected paragraph is highlighted in the below image.)

There are also Some other ways for Selecting the text and these are discussed below:
Method 4: Selecting specific text
We can also select a specific word, line of text, or one or more paragraphs by just dragging the cursor with help of mouse. For this operation we will first place our cursor in front of the first letter of the word, sentence, or paragraphs which we want to select and then just click and hold while dragging your cursor to select the text you want, and it is done.
Now, let us see this operation step by step:
Steps to Follow:
Step 1: First open MS-Word at your PC.
Step 2: Now, Open the document or create a new one in which you want to perform this operation.
Step 3: Now, for a selecting a desired text, move cursor to the start of text which you want to choose. (Here we will select the text starting from “Geeks! Let us learn about MS-Word”)
Step 4: Now, just click and hold while dragging your cursor to select the text you want and drag it to cover the text you want to select.
Step 5: So, the desired text is selected successfully. (the selected text is highlighted in the below image.)
Method 5: Selecting all text
For Selecting all the text, we can simply select it by using the Key “Ctrl + A”. Just press this key and all the text is selected.
Let us also see this with help of images and instructions:
Steps to follow:
Step 1: First open MS-Word on your PC.
Step 2: Now, Open the document or create a new one in which you want to perform this operation.
Step 3: Now, to select whole text, first click anywhere in the document.
Step 4: Now, Just Press “Ctrl + A” and it is done.
Step 5: So, All the text is selected successfully.

So, This is all about Selecting Text in different ways.
OF ALL THE FEATURES offered by word processing programs, you may be most familiar with formatting text and paragraphs — commonly changing fonts, bolding, italicizing, and underlining. In its essence, formatting involves selecting text and then applying a format command using menus or buttons.
In this article, I’ll show you the basics of formatting as well as shortcuts for simple ways to select and format desired sections of text. The information here will provide a foundation for understanding how to use and create Styles, which will be covered in a future article.
First, let’s talk about selecting text. Just as there’s more than one way to peel an orange, there’s more than one way to select and format text and paragraphs in Word. Most often, writers unfamiliar with shortcuts will select text by placing their cursor at the beginning of the section they want to select and then clicking and dragging to select words, paragraphs, and so on. While this certainly works, it is by far the slowest — and most frustrating — method, because it can be difficult to be precise. Plus, if you have a large area to select, it means waiting for Word to scroll down the page as your selection increases.
Selecting Text
Here are a few easy and efficient ways to select text:
- To quickly select all of the text in your document (to change font, for example), use the keyboard command: ⌘-A (Mac) or CTRL-A (PC). Done.
- Use Shift-click to quickly select a precise section of text: place your cursor at the beginning of the selection, then hold the shift key and click your cursor at the end of the selection.
- Double-click on a word to instantly select the entire word. Double-click and drag to select text word by word.
- Triple-click to select an entire paragraph.
Formatting Text
Once you have your text selected, there are a number of ways to format the text —
- Selecting icons on the Home tab ribbon
- Right-clicking the selected text (Windows only)
- Using commands on the Format menu at the top of the the screen
Let’s look at these methods one at a time.
Using the font formatting section on the Home Tab ribbon.
This is the easiest and most common way to change font and/or font styles. Simply,
- Select the desired word or section of text.
- Select the desired effects from the font format section of the ribbon.
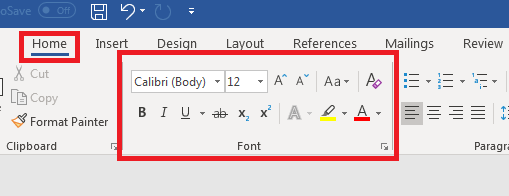
Mac Font Formatting ribbon section on Home Tab
Windows Font Formatting Ribbon on the Home Tab is nearly identical to that of the Mac.
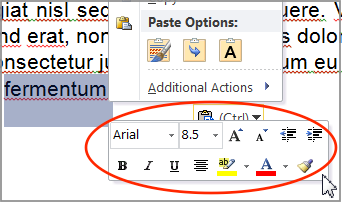
Right-clicking the selected text (Windows version only)
In the Windows versions of Word, when you right-click on the selected text (and just by hovering over the selected text), you will see a small pop-up menu which offers many of the options normally located on the Font formatting section of the ribbon.
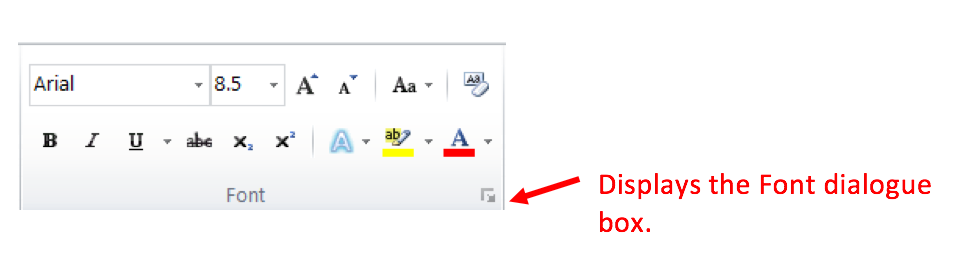
Using the Font Format dialogue box to make multiple changes at once
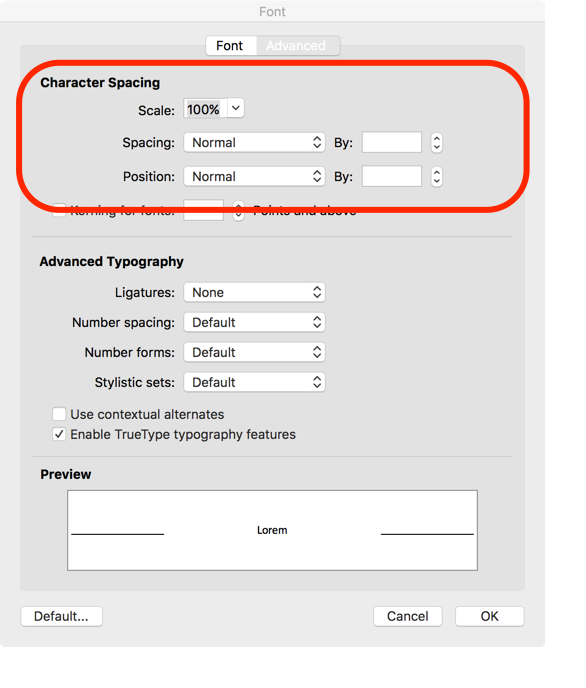
If you have a number of changes you want to make at once, such as changing font, selecting Format > Font (⌘-D in the Mac and CTRL-D on the PC) opens the Font dialogue box. On this box, there are two tabs — Font, and Advanced.
The Font tab allows you to change font, style, size, and color, as well as apply strikethrough, double strikethrough, superscript, subscript, small caps, all caps, and hidden (though I have no idea why a writer would want to hide text). It provides a preview of your selected options and allows you to define your selections as the default font and style for all future new documents.

The advanced tab allows you to nuance your text in a number of ways. Most writers will probably only need to use the top 3 features from time to time: Scale (to scale text horizontally), Spacing (to adjust space between letters), and Position (raise and lower the text in relationship to the baseline).
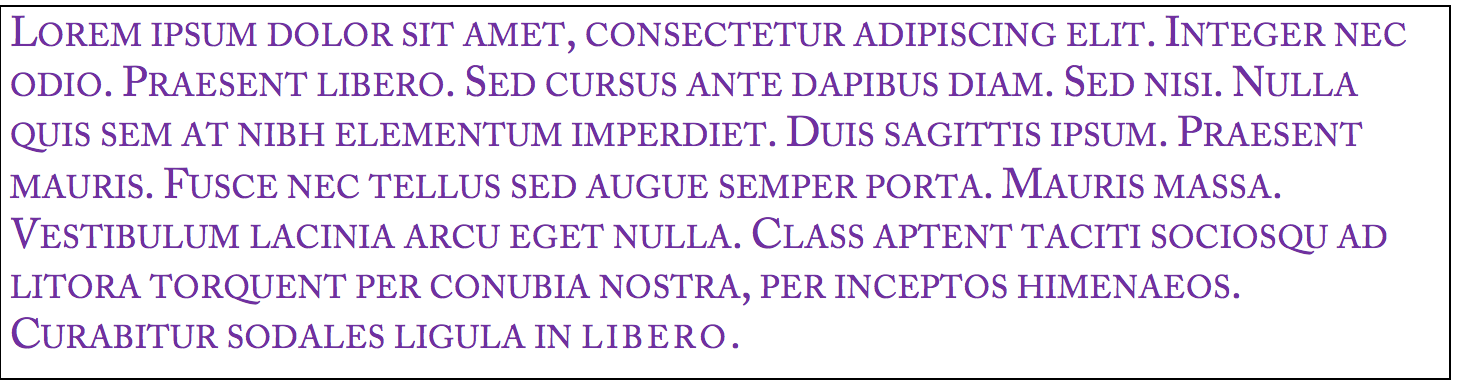
Try this:
- Triple-click to select a paragraph of text.
- Select Format > Font. (⌘-D Mac or CTRL-D PC).
- In the Font dialogue box,
- Pull down the font menu and select Adobe Caslon Pro.
- Select a color from the Font Color menu.
- Click the checkbox next to Small Caps.
- Click OK. Your text will be formatted as in the example below.

So that’s my down-and-dirty overview of how to format text in Microsoft Word. I’ve also provided two short YouTube videos below that demonstrate the basics of selecting and formatting text.
In the next installment of this series, I’ll cover Paragraph Formatting.
I’m curious — did you learn anything new today?
Formatting Text in Word 2011 for Mac
Formatting Text in Word 2013 for Windows
–


No word processor would be complete without a way to format text, and Microsoft Word has a full set of tools that let you stylize text in your document files. Instead of having only standard fonts, you can change text to represent styles such as sub-titles, titles, section headers and other non-standard content.
Text Editing Functions
All basic text editing functions are found in the «Home» ribbon tab.
(Word text editing controls)
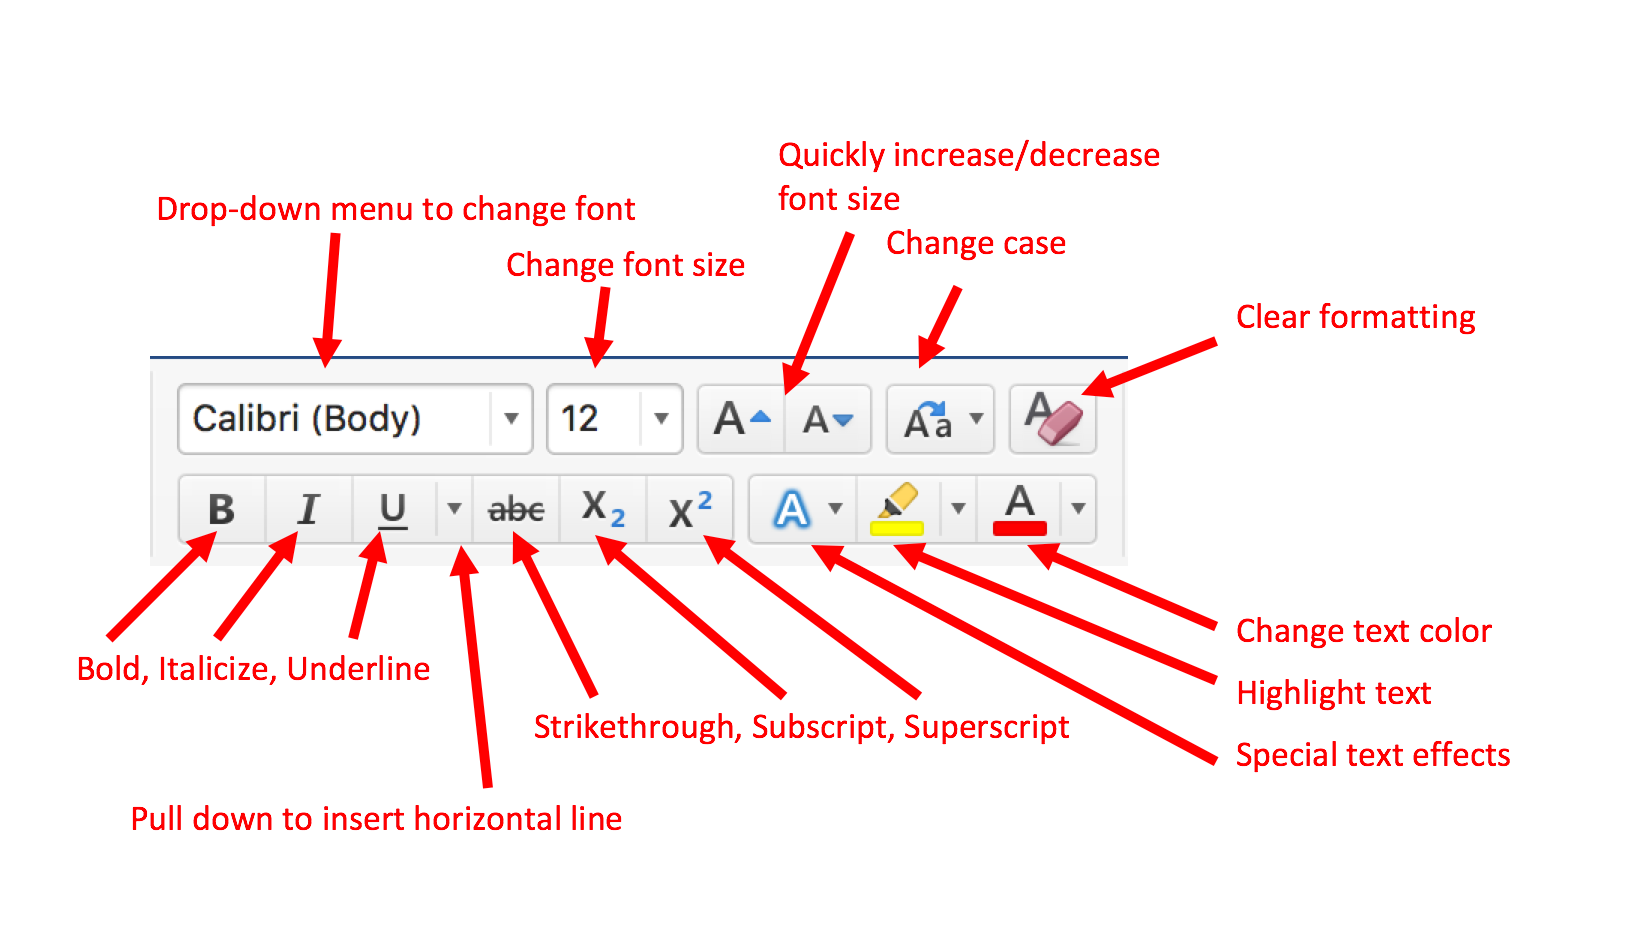
Notice that Word offers several stylizing features in the «Font» category in the «Home» tab. As you type content into a document, you’ll use these features and controls heavily.
The top row of font styles is the font type and the size of the characters. By default, Word opens a blank document using Calibri as the font for the body of a document. The default size is 11, but you can change this style with a simple click of the dropdown control. Alternatively, you can highlight text in your document, and then hover your mouse over the text and a list of standard font style choices will display.
When it comes to fonts in a Word document, only the fonts installed on your computer will show in the dropdown control. This is different from having fonts display in a web browser where developers pull fonts from a cloud location, so if content is meant for a website, you’ll need a way to implement the font using code or the browser will be unable to display the same font that you’ve used in your Word document.
You aren’t limited to one font size and style. If you have no content highlighted in the document, then the font changes will only take effect on new content typed into Word. If you have any content highlighted when you make these changes, Word will change the font and size of the highlighted content.

(Font style changes)
In the image above, the first line of text is the default font and size. The second line of text is a much larger size with a different style. This shows you that you can have several different font styles in a document without any restrictions. The dropdown control in the «Home» ribbon tab will show you all fonts available on your computer. Some third-party programs have their own fonts installed when you add the software to your computer. These fonts will then show in the Word font dropdown control.
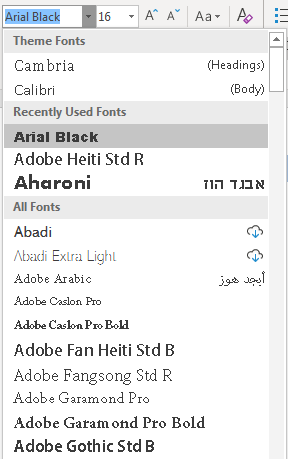
(Word dropdown font control with selection options)
Adobe Reader was installed on the computer in the image above, so several Adobe fonts are available in the Word dropdown. Not every application prefaces font names with the brand, so after you install some programs, you might just notice new fonts available. You can also download fonts from the Internet or purchase them from designers to add more fonts to your computer and Word availability.
Basic Font Styles
There are three basic font styles common with every text editing program: bold, underline and italics. Word offers other styles, but these three are the most common with standard content. All three buttons are under the font dropdown control.

(Bold, Italics and Underline controls)
The first «B» button sets any text to a bold style. The second «I» button sets text to italics, and then the «U» button sets an underline style. You can highlight any text and click one of these buttons to change to the style that you want. You can also click multiple buttons and have all three styles applied to text.
When you click one of these buttons and start typing, the style takes effect until you want to go back to the original style. Click the button again to stop the style from being applied to future text. Should you change your mind and want to remove a style, highlight the text and click the button to remove the style.
Alternatively, you can use the Ctrl+B keyboard shortcut for bold. Ctrl+I will apply italics style to selected text, and Ctrl+U will underline selected content.
Subscript and Superscript
Word supports subscript and superscript styles. These styles are used mainly for either math equations or referencing content within your documentation. The two controls are to the right of the font styles explained in the previous section (bold, italics and underline).

(Subscript and superscript controls)
The two font styles can be applied the same way as the others. Highlight the text that you want to stylize and click the button. You can remove the style by clicking the button again with the text highlighted.
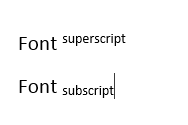
(Example subscript and superscript styles)
In the image above, notice that the superscript text is slightly above the «Font» text, and then the subscript text is slightly below. These two styles help you create math equations in a document or reference text similar to an academic paper references sources.
Adding a Hyperlink
When you create web pages, it’s not uncommon to add a link to another page on a website. You can do the same with Microsoft Word, except clicking a link will open the user’s browser and bring them to the linked web page.
To add a hyperlink, you can right click the text that should have a hyperlink applied and a context menu will display.
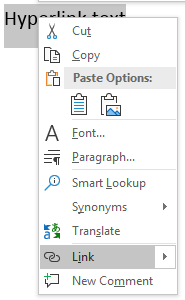
(Font style context menu)
In the image above, notice that the «Link» selection is highlighted. Click this link option and a window opens asking for the link location.
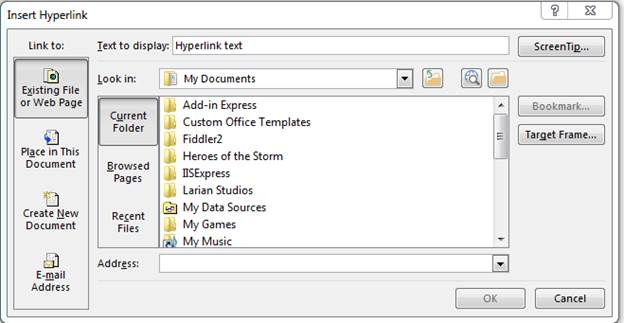
(Hyperlink configuration window)
The «Address» input text box is where you type the URL. You can also copy and paste a URL from your browser. Notice that the window also displays local directories from your computer. You aren’t limited to just URLs on the Internet. You can also link to files on your local computer or on a network drive. If this document is sent to another user, remember that any links to external documents on your computer won’t be accessible to a third party.
Highlighting and Font Color
Microsoft Word has a highlighter function that imitates when you run a physical highlighter over text on a sheet of paper. You have your choice of several different colors and using a highlighter will make specific sentences and words stand out.

(Highlighter and font color controls)
The first button is the highlighter control. Click the arrow icon next to this button and a list of color options appear. After you choose a color, click the highlighter button. Your cursor changes its icon and displays a highlighter icon indicating that any actions that you take will highlight text rather than prompt you to start typing.
Text highlighted with the tool will display a different background than the one in the document.
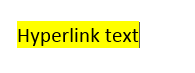
(Highlighted text)
The image above shows what text looks like when the highlighter tool has been used.
The default font color is black. Whenever you create a blank Word document, font color is black until you change it. Just like any other text in your document, you can change parts of it to be a different color. Any text selected can have its color changed using the font color tool.
Just like the highlighter tool, click the arrow to the right of the button and several color options are displayed. These color choices aren’t the only ones available. Click the «More Colors» option and another window opens where you can choose a custom color based on a more granular color palette.
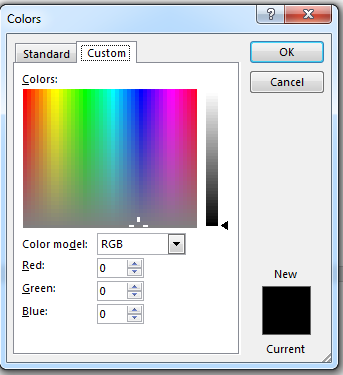
(Custom color choices)
The above image shows the color palette range. Just click somewhere on the palette and the color code will be automatically filled. Click «OK» when you choose your color, and any text highlighted will have its color changed. If you change the color with no text selected, the new color will take effect as you type your text.
These text changes are common when you create long documents. Even with small documents and notes, you’ll use these text edits to customize the way it displays on your screen or when you print it to hardcopy. Text editing tools are one of the most common features available in Word.
Selecting Text
Now that we’ve gone over the more exciting features of what word 2019 can do to enhance your text, let’s buckle down and get to the actual basics of how to enter and edit text.
The first step in editing text that appears on the screen in Word is to learn how to select it for editing. You can always click within a document to move the cursor to change text, or use Backspace and Delete to remove text. However, this can be time consuming. What if you want to remove a whole chunk of text? Or what if you want to move one paragraph to another location? Well, by selecting text, you can delete or move entire paragraphs or pages. You can also format your document. You can change the font size, color, style, or any number of other things. Being able to select text in Word is mandatory, even for the absolute beginner.
Whenever you select text in Word, the text appears highlighted, as shown below.

Selecting text is easy and done in three easy steps.
- Move the cursor to the beginning of the text that you want to select.
- Click and hold in the left button on your mouse.
- Drag it over the text you want to select. It will highlight the selected text, as shown above. Simply release the mouse button when you are finished selecting text.
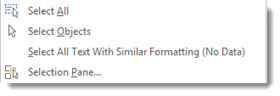
If you want to select the entire document, simply click on the Home tab and click Select on the far right in the Editing group.

Click the downward arrow beside Select and choose Select All.
This will highlight all your text for formatting. Also note that you can select objects or text with similar formatting as your selected text when clicking on ‘Select.’
Cutting Text
Once you’ve selected text, there are several things that you can do with it. Naturally, you can select text to format it. Perhaps you want to change the font type or size. We’ll cover how to do that later.
However, you can also cut selected text from a document as a way to either delete it from one location, then paste it elsewhere in the same or different document.
If you’d like to remove text from one location in the document to paste into another location, use the Cut command.
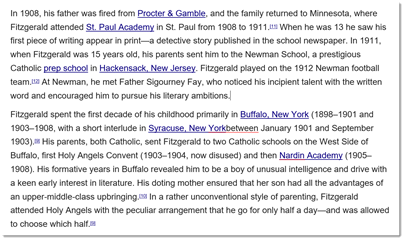
For example, below is an excerpt of the biography of F. Scott Fitzgerald.
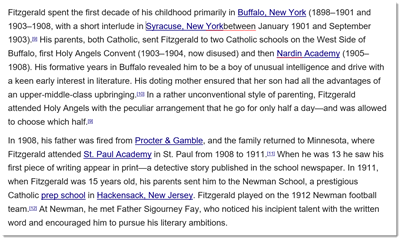
Let’s say we want to reverse the two paragraphs. In other words, we want the second paragraph to be the first paragraph.
We will use the Cut feature in Word to accomplish this.
1. Select the text or object to be cut and copied. We’ve selected the second paragraph.
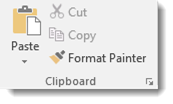
2. Click the Cut icon  in the Clipboard group under the Home tab. As you can see below, the paragraph is now cut from the document.

3. Now, click on the area in the document where you want to «paste» the text that you just cut. Using our example, it’s before the first paragraph. Once you see the cursor, go to the Ribbon. Under the Home tab, click Paste in the Clipboard group.
Delete and Cut should not be used interchangeably. When you cut an object, it is copied to the Clipboard. When you delete an object, it is simply removed from the document and the only way to restore it is by clicking the Undo Typing button. To delete text, select the text, then click Delete on your keyboard.
Copying Text
Once you select text, you can also copy it. Copying text means you copy the text you’ve selected, then you can paste it somewhere else in the document – or in another document. When you copy text, the text you’ve copied remains in the document.
There are three ways to copy text and objects to the clipboard.
1. Select the text or object to be copied and click the copy icon  in the Clipboard group under the Home tab.
2. Select the text or object to be copied, position the mouse pointer over it and right click. Then select Copy from the menu.
3. Select text or object to be copied and hit CTRL + C.
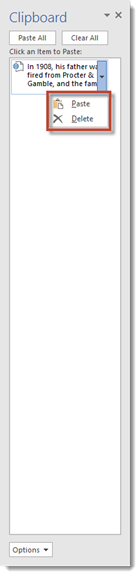
The Clipboard
Whenever you copy anything in Word, it is automatically sent to the Clipboard. The Clipboard does just as its name implies. It holds the text that you copy and paste for you to use. The Clipboard and its associated tools can be found on the Home tab at the far left end of the ribbon. The Clipboard group looks like this:
Click the arrow at the bottom of the Clipboard group to see its contents.
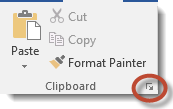
The clipboard will open as a long window to the left of your document. It can only hold 24 objects. When a 25th object is added, the first copied item is removed. To empty the Clipboard, click the Clear All button at the top of the Clipboard menu.

You can remove individual items from the clipboard by moving the mouse pointer over the item, then clicking the arrow button that appears to the right of the object. In the dropdown menu, select Delete.
Paste
The Paste command allows you to copy an object from one location in the document to another, or from another Office Program into Word. You can use the Cut or Copy feature to move an item to the clipboard, then use Paste to place it elsewhere into a document. We’ve already covered Paste briefly earlier in this course.
There are three ways to Paste text or an object into a document:
1. Move the cursor to the point in your document where you want to place the item and click the Paste icon. It looks like this:

2. Move the mouse pointer to the place you wish to insert the item and click the right mouse button. Select one of the paste options from the dropdown menu. We’ll discuss the options in just a minute.
3. Move the cursor to the point in your document where you wish to place the item and press CTRL + V.
Ordinarily, Word pastes the most recently copied item. To paste an object that was copied earlier, position the cursor at the point in your document you wish to paste the item, then open the clipboard and click the item you wish to paste. You can also move the mouse pointer over the item to be pasted, and click the arrow that appears to the right of that item. Then select a paste option.
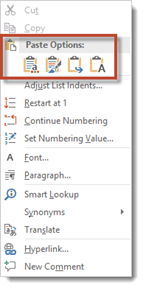
Paste Options is what you see when you right click your mouse to paste into a document. See below.
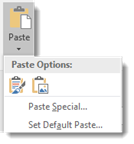
You also see Paste Options when you click the downward arrow below Paste on the Ribbon.

Paste Options allows you to specify the method of pasting that you want to use. This will be important if you want to keep or remove formatting for the selected text.
Let’s explain what we mean. This course is typed using Calibri font. Let’s say for example, that we want to paste a paragraph of this lesson into another lesson with a different font size, or into another document with a different font. Word gives us the option of preserving formatting, making the formatting match the area of the document where we paste our text, or pasting text only and not any images that we cut or copied.
Again, Paste Options only appears when you right click your mouse to paste – unless you select your Paste option from the Ribbon. Once you’ve copied or cut selected text, then right click, you’ll see this:
These are your paste options:
 Paste using original formatting of pasted text.
 Merge formatting. Paste using the formatting of the majority of the text in the document.
 Allows you paste text only. Any graphics or images will not be pasted, only text.
 Paste using the formatting of the destination text, or the text where you paste into.
 Paste a Picture.
Inserting Text
You can insert text anywhere in a document simply by moving the cursor to the desired location and typing.
Word automatically moves all text to the right of the cursor over as you type. However, if you’d rather replace the text as you type, Word gives you two options:
- Select the text you’d like to replace and start typing. This deletes the highlighted text and positions the cursor in its place.
- Use Overtype Mode. To turn on overtype mode, click on the File tab, then select Options.
You will then see this dialogue box.
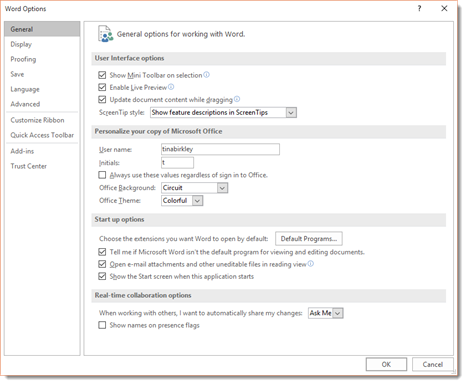
Click on Advanced in the left column.
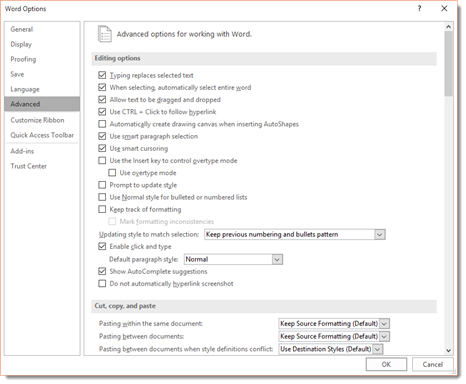
Put a Checkmark beside «Use the Insert key to control overtype mode» or the «Use overtype mode» box.

If you select the «Use the Insert key to control overtype mode» box, you can toggle overtype mode on or off by pressing the Insert key.
If you select only «Use overtype mode» you must manually turn it off by deselecting it.
AutoCorrect
AutoCorrect automatically corrects some errors you make. For example, by default, Microsoft Word will start the first letter of every new paragraph with a capital letter. It also may recognize certain words and make corrections for you without ever having to use Spell. However, you can customize AutoCorrect to find and correct certain errors — or to leave certain «errors» alone.
To customize AutoCorrect, click on the File tab, then click Options on the left.
Click Proofing in the column on the left.
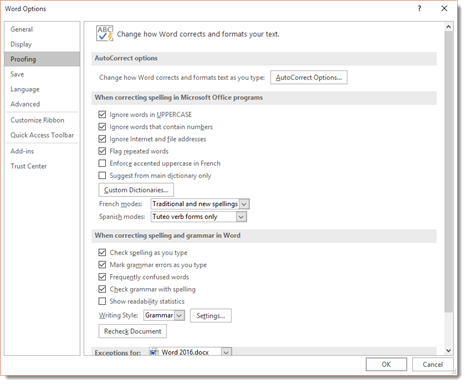
Next, click the AutoCorrect Options button. The screen you will see will look like the one below.
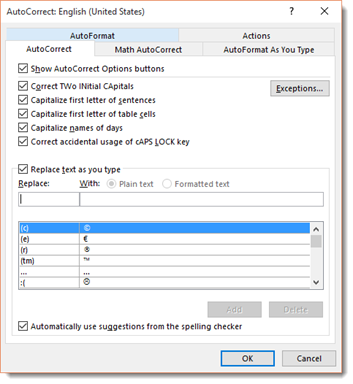
Click on the AutoCorrect options button, and you can specify words or even math that you want Word to correct as you type.
As you can see, by default, Word will automatically turn: (into a smiley face emoticon: J. It will also create a trademark symbol ™. These are default corrections that Word makes for you. You can add your own too.
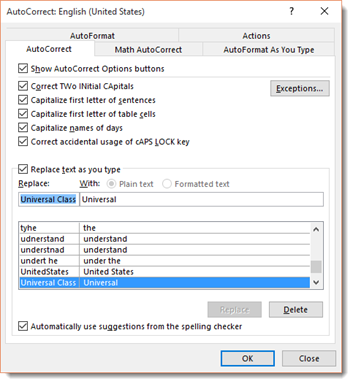
To add your own, type in what word or symbols you will enter in that you want Word to automatically correct. We’re going to type «Universal Class» and have it replaced by «Universal.» We’re doing this to have uniformity in our documents. Click the Add button when you’re finished.
Now, let’s click the Math AutoCorrect tab in the dialogue box.
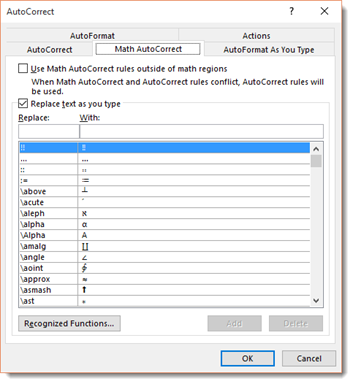
We’ll talk about mathematics later in this course. However, you can set AutoCorrect for mathematics just as you would with text.
Undo and Redo
But let’s say you accidently delete something or deleted it and then decided that you want it back. You grit your teeth and start to grumble, trying to remember the exact wording. It’s a lost cause, right? Wrong. The makers of Word anticipated this problem and supplied an easy solution. The Undo button!
The Undo button is on the Quick Access Toolbar. It looks like this:  . You can click the downward arrow beside the Undo button to determine how many steps backward you want to take with your undo.
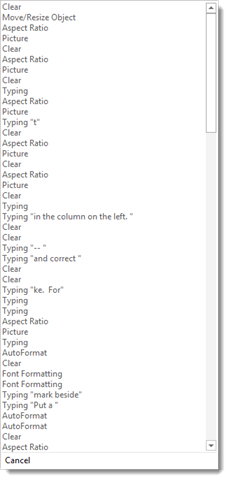
If you scroll down the list above to the bottom to AutoFormat, everything above AutoFormat will be undone too. You can undo up to 100 actions.
The Redo button is to the right of the Undo button. It looks like this:  . The redo button allows you redo an action that you just undid or to repeat the last action. If Word cannot redo the last action, the button will be faded.
Hyphenation
Word can hyphenate words at the end of lines for you, or you can choose to do it yourself. By default, hyphenation is turned off, which means Word won’t hyphenate words that are at the end of a line. Instead, it will just move the word to the next line.
To use the hyphenation feature in Word, click on the Layout tab, then go to the Page Setup group on the ribbon. You’ll see Hyphenation, as shown below.
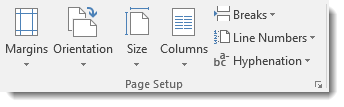
If you click the downward arrow beside Hyphenation, you’ll see that None is selected. This means no hyphenation (default.)
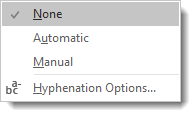
If you want Word to hyphenate words for you, select Automatic. This means that Word will hyphenate words that appear at the end of a line rather than moving it down to the next line to keep your text within the margins. Word will use its settings to decide how to hyphenate words. Just keep in mind, it does NOT mean Word will hyphenate words such as ‘how-to.’ It won’t.
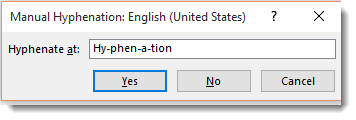
You can also select Manual. This box will pop up and ask you to specify how you want words hyphenated. Word will search your text for words that can be hyphenated and ask you how you wanted hyphenated. See the snapshot below:
You can also set options to tell Word the maximum amount of space to allow between the word and the right margin. This is called the Hyphenation Zone. To set the amount of space yourself, go to Hyphenation, click the downward arrow, then click on Hyphenation Options.
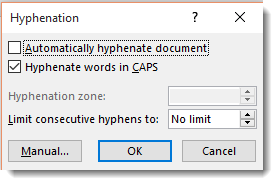
In this window, you can also select to automatically hyphenate the entire document, hyphenate words that are in CAPS, and manually set hyphens as we just learned to do.

wael on May 31, 2011 at 4:29 pm
i have a book in searchable pdf format which i can copy a text from it and easy past in anther txt files like word format but when i tried to past the copied text from the book and pat in the word 2010 the past option beginning every time in new line not complete first the line incomplete i mean how to make the word page as only one paragraph to make past continuing whatever the line