
Excel for Microsoft 365 Word for Microsoft 365 Access for Microsoft 365 Project Online Desktop Client Publisher for Microsoft 365 Word for the web OneNote for the web PowerPoint for the web Excel 2021 Word 2021 Access 2021 Project Professional 2021 Project Standard 2021 Publisher 2021 OneNote 2021 Excel 2019 Word 2019 Access 2019 Project Professional 2019 Project Standard 2019 Publisher 2019 Excel 2016 Word 2016 Access 2016 OneNote 2016 Project Professional 2016 Project Standard 2016 Publisher 2016 Office 2016 for Mac Excel 2013 Word 2013 Access 2013 OneNote 2013 Project Professional 2013 Project Standard 2013 Publisher 2013 Project Online Excel 2010 Word 2010 Access 2010 OneNote 2010 Project 2010 Project Standard 2010 Publisher 2010 Office 2010 Excel Starter 2010 More…Less
You can use the Office programs to save or convert your files to PDFs so that you can share them or print them using commercial printers. And you won’t need any other software or add-ins.
Use PDF format when you want a file that:
-
Looks the same on most computers.
-
Has a smaller file size.
-
Complies with an industry format.
Examples include resumes, legal documents, newsletters, files that are intended to be read (not edited) and printed, and files that are intended for professional printing.
Important: Many programs, including Microsoft Word, have the ability to open and edit PDF files. Simply sharing something as a PDF is not sufficient to guarantee the recipient can’t edit the file.
To see step-by-step instructions, select an Office program from the drop-down list.
-
Open the table or report you want to publish as a PDF.
-
On the External Data tab, in the Export group, select PDF or XPS.

-
In the File Name field, type or select a name for the document.
-
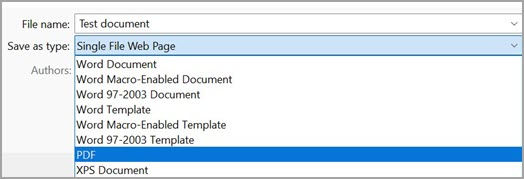
In the Save as type list, select PDF (*.pdf) .
-
If the document requires high print quality, select Standard (publishing online and printing) .
-
If file size is more important than print quality, select Minimum size (publishing online).
-
-
Select Options to set the page to be printed, to choose whether markup should be printed, and to select output options. Select OK .
-
Select Publish.

Note: You can’t save Power View sheets as PDF files.
-
Select the File tab.
-
Select Save As .
To see the Save As dialog box in Excel 2013 or Excel 2016, you have to choose a location and folder. -
In the File Name box, enter a name for the file, if you haven’t already.
-
In the Save as type list, select PDF (*.pdf) .
-
If you want the file to open in the selected format after saving, select the Open file after publishing check box .
-
If the document requires high print quality, select Standard (publishing online and printing) .
-
If file size is more important than print quality, select Minimum size (publishing online) .
-
-
Select Options to set the page to be printed, to choose whether markup should be printed, and to select output options. For more information on the Options dialog box in Excel, see More about PDF options . Select OK when finished.
-
Select Save .
-
Select the File tab.
-
Select Export .
-
Under Export Current , select what part of the notebook you want to save as PDF.
-
Under Select Format , select PDF (*.pdf) , and then select Export .
-
In the Save As dialog box, in the File Name field, enter a name for the notebook.
-
Select Save .
-
Select the File tab.
-
Select Save As .
To see the Save As dialog box in PowerPoint 2013 or PowerPoint 2016 , you have to choose a location and folder. -
In the File Name box, enter a name for the file, if you haven’t already.
-
In the Save as type list, select PDF (*.pdf) .
-
If you want the file to open in the selected format after saving, select the Open file after publishing check box.
-
If the document requires high print quality, select Standard (publishing online and printing) .
-
If the file size is more important than print quality, select Minimum size (publishing online) .
-
-
Select Options to set the page to be printed, to choose whether markup should be printed, and to select output options. Select OK when finished.
-
Select Save .
-
On the File tab, choose Save As .
To see the Save As dialog box in Project 2013 or Project 2016, you have to choose a location and folder. -
In the File Name box, enter a name for the file, if you haven’t already.
-
In the Save as type list, select PDF Files (*.pdf) or XPS Files (*.xps) , and then choose Save .
-
In the Document Export Options dialog box, select a Publish Range , whether to Include Non-printing Information , and ISO 19500-1 compliance (PDF only).
Formatting tips
Project doesn’t support every PDF or XPS formatting feature, but you can still use some print options to change the look of the final doc.
Choose File > Print , and then change any of these options:
-
Dates
-
Orientation
-
Paper Size
-
Page Setup
In the Page Setup dialog box, you can change options on these tabs:
-
Margins
-
Legend
-
View
-
Select the File tab.
-
Select Save As .
To see the Save As dialog box in Publisher 2013 or Publisher 2016, you have to choose a location and folder. -
In the File Name box, enter a name for the file, if you haven’t already.
-
In the Save as type list, select PDF (*.pdf) .
-
If you want to change how the document is optimized, select Change . (Select Options in Publisher 2013 or Publisher 2016.)
-
Make any changes you want to the picture resolution and non-printing information.
-
Select Print Options to make changes to the printing options for the document.
-
Select OK when finished.
-
-
If you want the file to open in the selected format after saving, select the Open file after publishing check box.
-
Select Save .
-
Select the File tab.
-
Select Save As .
To see the Save As dialog box in Visio 2013 or Visio 2016, you have to choose a location and folder. -
In the File Name box, enter a name for the file, if you haven’t already.
-
In the Save as type list, select PDF (*.pdf) .
-
If you want the file to open in the selected format after saving, select the Automatically view file after saving check box.
-
If the document requires high print quality, select Standard (publishing online and printing) .
-
If file size is more important than print quality, select Minimum size (publishing online) .
-
-
Select Options to set the page to be printed, to choose whether markup should be printed, and to select output options. Select OK .
-
Select Save .
-
If the file was previously saved, select File > Save a Copy.
If the file is unsaved, select File > Save As. -
Select Browse to choose the location on your computer where you want to save the file.
-
In the drop-down list, select PDF.
-
Select Save.
Select More Options > Options to customize your PDF.
-
To make a PDF file from only some of the pages in your document, choose an option under Page range.
-
To include tracked changes in the PDF, under Publish what, select Document showing markup. Otherwise, make sure Document is selected.
-
To create a set of bookmarks in the PDF file, select Create bookmarks using. Then, choose Headings or, if you added bookmarks to your document, Word Bookmarks.
-
If you want to include document properties in the PDF, make sure Document properties is selected.
-
To make the document easier for screen-reading software to read, select Document structure tags for accessibility.
-
ISO 19005-1 compliant (PDF/A) This option outputs the PDF document as version 1.7 PDF, which is an archiving standard. PDF/A helps to insure that a document will look the same when it’s opened later on a different computer.
-
Bitmap text when fonts may not be embedded If fonts can’t be embedded into the document, the PDF uses bitmap images of the text so that the PDF looks the same as the original document. If this option isn’t selected and the file uses a font that can’t be embedded, then the PDF reader might substitute another font.
-
Encrypt the document with a password To restrict access so only people with the password can open the PDF, select this option. When you select OK, Word opens the Encrypt PDF Document box, where you can type and re-enter a password.
Open and copy content from a PDF with Word
You can copy any content you want from a PDF by opening it in Word.
Go to File > Open and browse to the PDF file. Word opens the PDF content in a new file. You can copy any content you want from it, including images and diagrams.
To save your file as a PDF in Office for Mac, follow these easy steps:
-
Select File.
-
Choose Save As.
-
Select File Format at the bottom of the window.
-
Choose PDF from the list of available file formats.
-
Give your file a name, if it doesn’t already have one, then select Export.
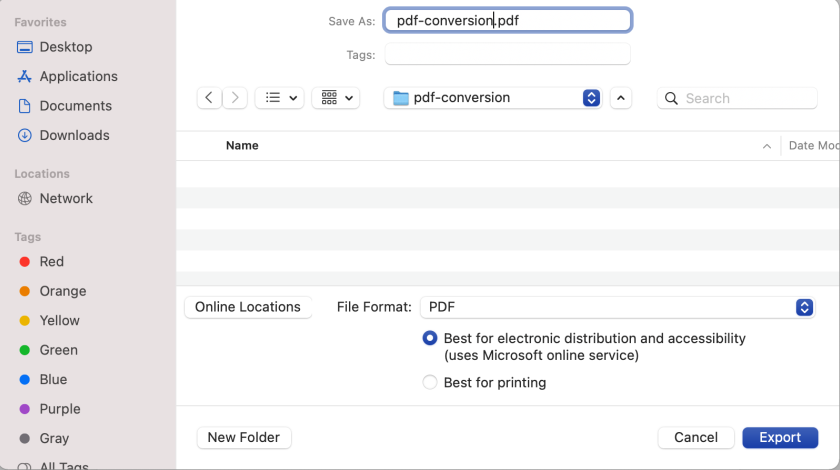
Note: When using Best for printing, the hyperlinks may not convert correctly. This is a known issue in Word for Mac.
Important:
-
When using Online Service , only font that Microsoft has the legal rights to can be used. If the documentation contains custom font, it will be substituted and may cause problems. This can be avoided by embedding the fonts into the document.
-
Learn more about embedding fonts by visiting:
-
Benefits of embedding custom fonts
-
Some of your fonts can’t be saved with the presentation
You can use Word, PowerPoint, and OneNote for the Web to convert your doc into a PDF.
-
Select File > Print > Print (in PowerPoint you will select one of three formats).
-
In the dropdown menu under Printer , select Save as PDF and then select Save.
-
Then in the Explorer menu that opens you can name the PDF and choose where to save it and then select Save.
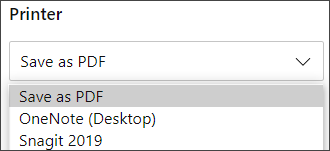
This will generate a basic PDF that preserves the layout and format of your original document.
If you need more control over the options for your PDF, such as adding bookmarks, use the desktop app to convert your doc to a PDF. Select Open in Desktop App in the toolbar of PowerPoint and OneNote to start using the desktop app, and in Word select the Editing dropdown first and then select Open in Desktop App .

If you don’t own the desktop app, you can try or buy Microsoft 365.
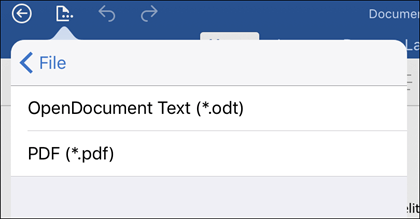
To export your Word document or Excel workbook to PDF format on iOS tap the File button at the top left, choose Export and then PDF.
Portable Document Format (PDF) preserves document formatting and enables file sharing. When the PDF format file is viewed online or printed, it retains the format that you intended. The PDF format is also useful for documents that will be reproduced using commercial printing methods. PDF is accepted as a valid format by many agencies and organizations, and viewers are available on a wider variety of platforms than XPS.
XML Paper Specification (XPS) is an electronic file format that preserves document formatting and enables file sharing. The XPS format ensures that when the file is viewed online or printed, it retains exactly the format that you intended, and that data in the file cannot be easily changed.
Important: Most modern web browsers can open and display a PDF file. If you have an older operating system, however, you may need a PDF reader installed on your device such as the Acrobat Reader, available from Adobe Systems.
See also
-
Edit or make changes to a PDF file
-
Create accessible PDFs
Need more help?


You use Microsoft Word for your various word-processing needs. It’s simple and easy-to-use, and it simply gets the job done in most cases. But what if someone else requests a file in a different format, such as PDF? What if you need the info in your Word doc to appear in plain text, without any font or paragraph styles?
Microsoft Word 2016 for Windows has a basic feature that lets you save documents in several different, but common, file formats. Here’s how to use it.
See on Microsoft Store (opens in new tab)
How to save a Microsoft Word doc as a PDF
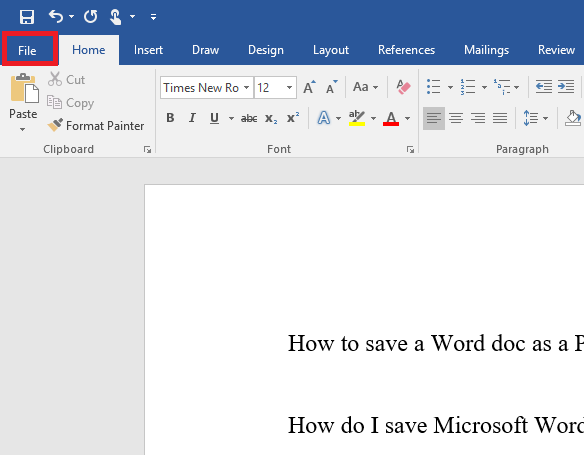
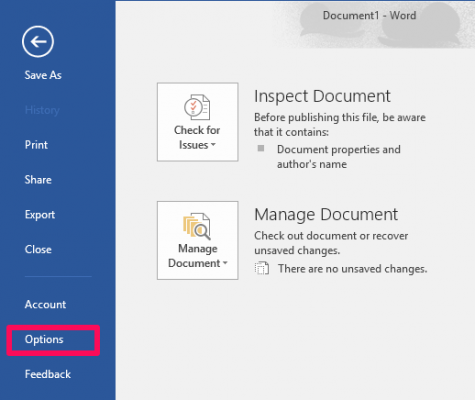
- Click the File tab in the top-left corner of your Word screen.
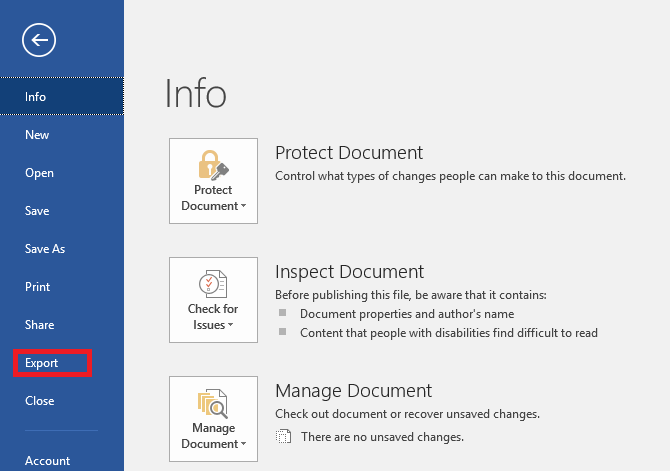
- Click Export in the blue vertical menu that runs along the left side of your screen.
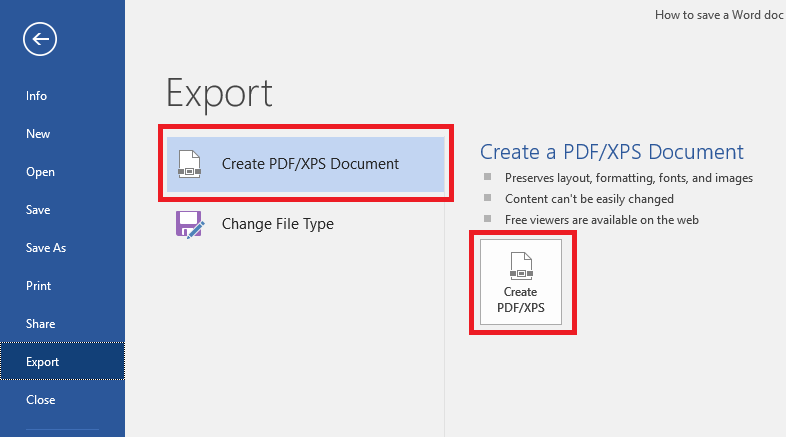
- With the Create XPS/PDF Document option selected, click the corresponding box on the right side of your screen. (It looks like a document icon wearing a seatbelt.)
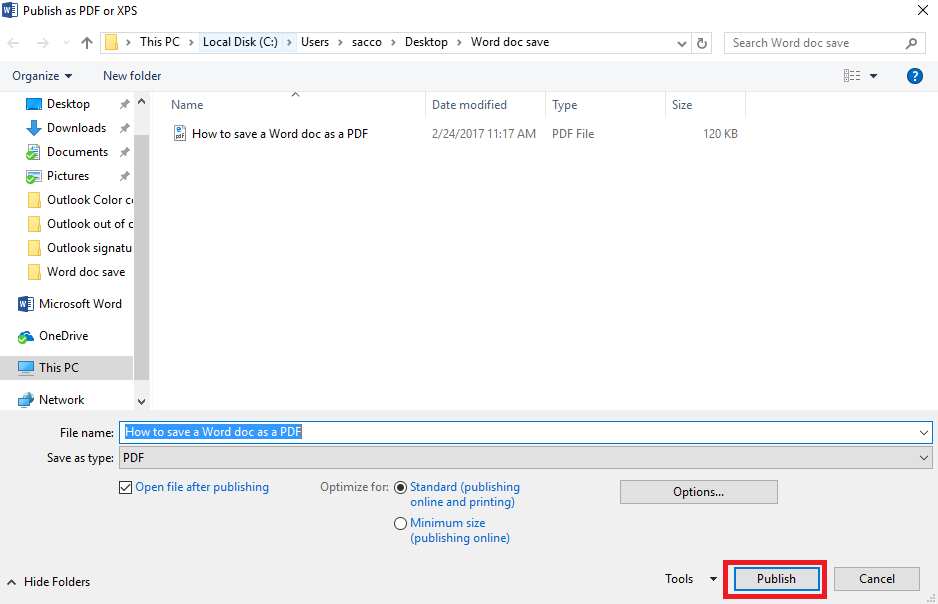
- A new box labeled Publish as PDF or XPS appears, and you should use it to navigate to the location on your PC where you want to save the new PDF.
- Click Publish to create and save your PDF.
- You may see a How do you want to open this file? pop-up box. By default, Windows will use the Edge browser but you can choose from other compatible browser apps installed on your PC, as well.
- If you want to continue using the same app to open PDFs in the future, check the Always use this app to open .pdf files option.
If the file format you want isn’t available in Microsoft’s default option, you can also dig a bit deeper for additional file format options.
How to save a Microsoft Word doc in different file formats
- Follow Steps No. 1 and No. 2 above.
- Highlight the Change File Type option on the left side of the screen.
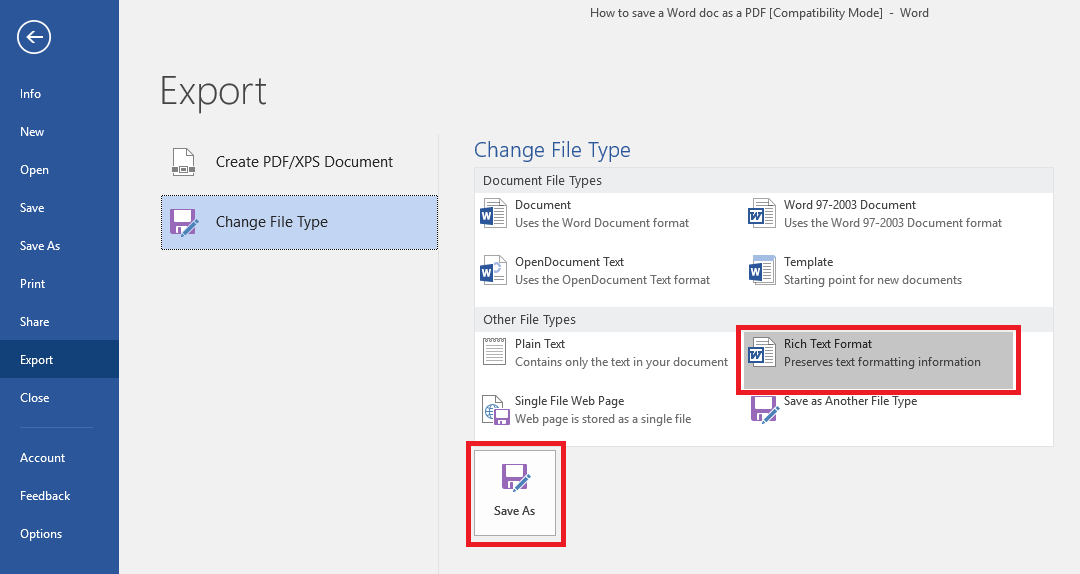
- You’ll see a number of different present options for new file formats, including OpenDocument Text, Word 97-2003 Document, Plain Text and Rich Text Format.
- If you want to use one of the default options, choose and click it accordingly and then hit the Save As box at the bottom of the screen.
- Next, navigate to the location on your PC where you want to save the new file and click Save.

- If you want to save your Word doc in a format that’s not available in Word’s preset defaults, complete Steps No. 1 and No. 2 above, and then choose Save as Another File Type
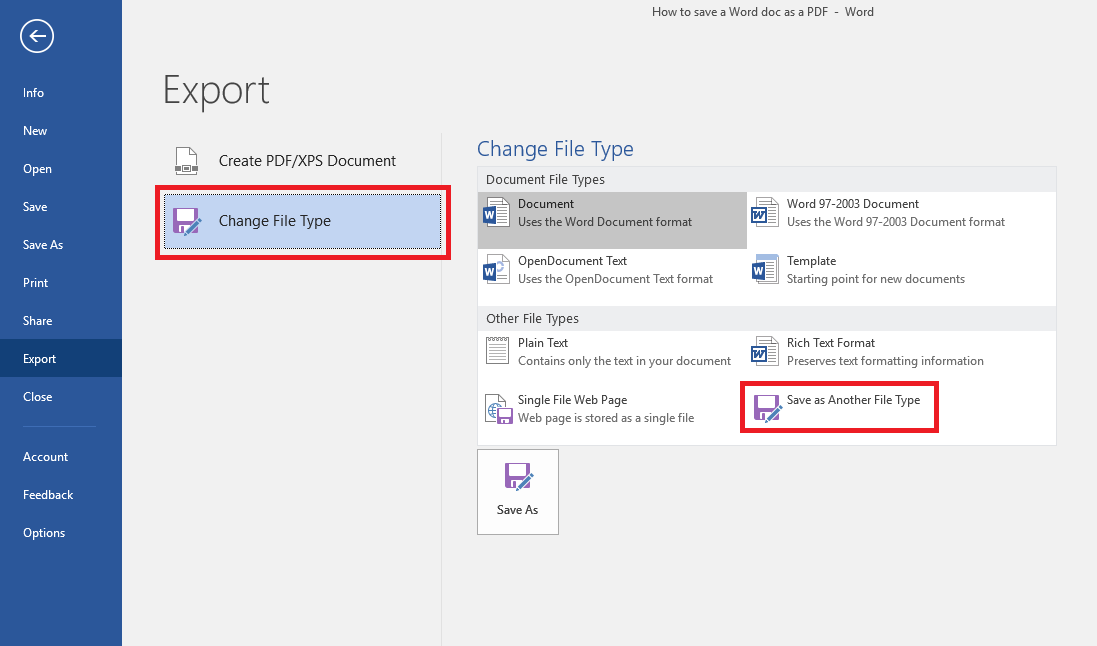
- Click the Save As box at the bottom of the screen.
- In the next box, navigate to the location on your PC where you want to save the new file.
- Open the drop-down menu next to Save as type to see a few additional options, such as Word XML Document, Strict Open XML document, and Web Page, Filtered.
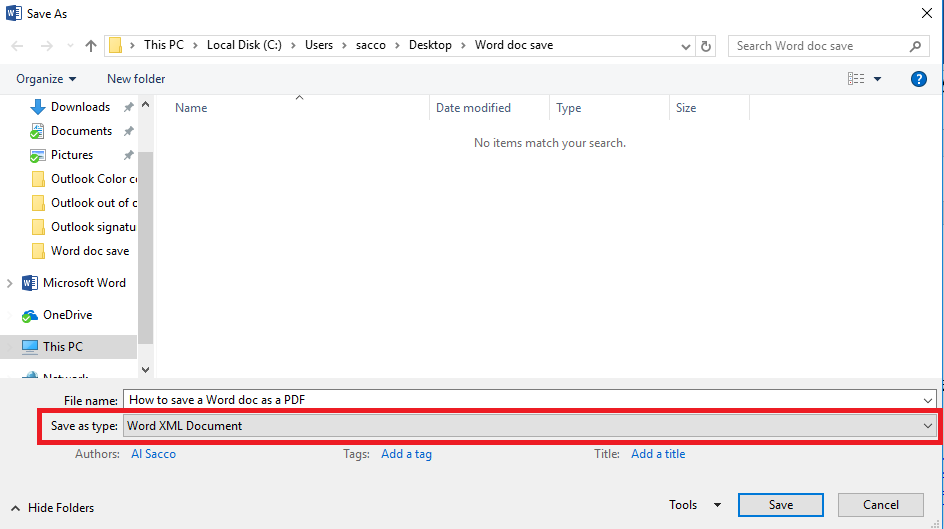
- Choose the format you want and click Save.
Word 2016 for Windows lets you easily convert your documents into more than a dozen different formats, using the process detailed here.
For more Word help and how-to articles, read:
- 13 easy-to-remember Microsoft Word keyboard shortcuts
- How to skip the Start screen in Microsoft Word 2016 for Windows
- How to change font defaults in Microsoft Word 2016 for Windows
- How to master Zoom settings in Word 2016 for Windows
All the latest news, reviews, and guides for Windows and Xbox diehards.
Al Sacco is content director of Future PLC’s Mobile Technology Vertical, which includes AndroidCentral.com, iMore.com and WindowsCentral.com. He is a veteran reporter, writer, reviewer and editor who has professionally covered and evaluated IT and mobile technology, and countless associated gadgets and accessories, for more than a decade. You can keep up with Al on Twitter and Instagram.
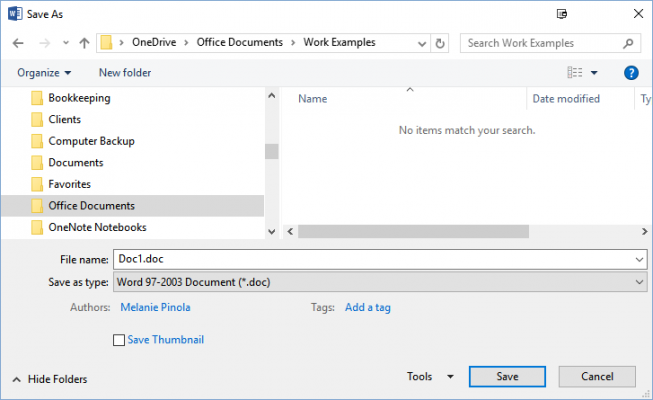
By default, Word saves all documents in the newest format (*.docx), but you can change the default format to
.doc or anything else.
To do this, follow the next steps:
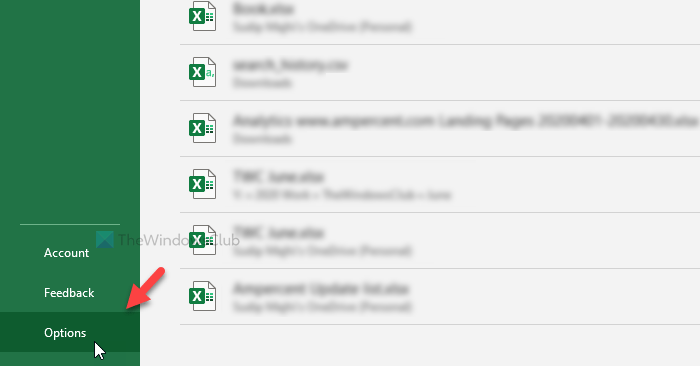
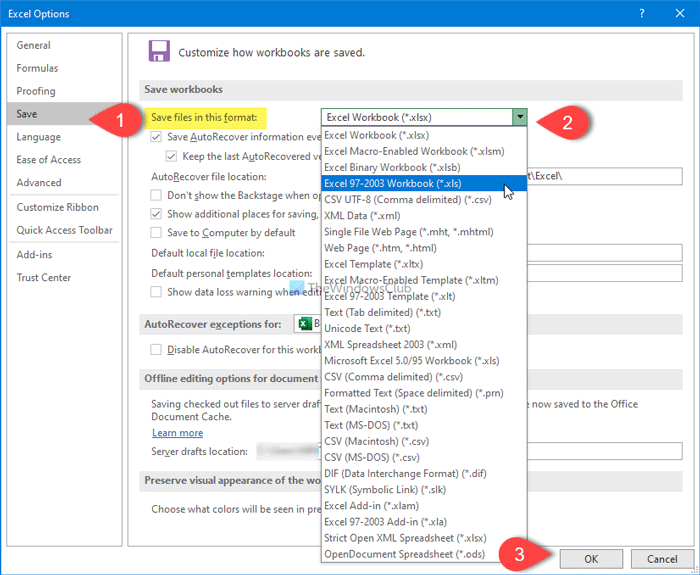
1. On the File tab, click the Options button:

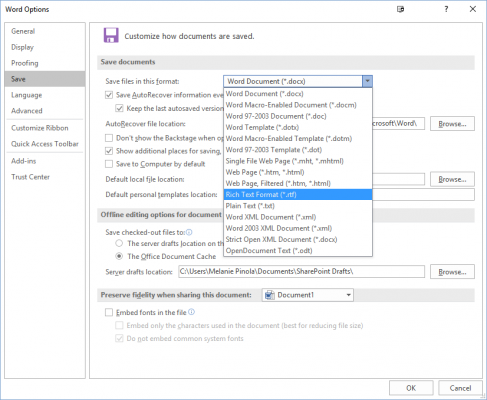
2. In the Word Options dialog box, on the Save tab, choose
the format you prefer in the list Save files in this format:

3. Click OK.
See also this tip in French:
Comment enregistrer des documents au format .doc.
Please, disable AdBlock and reload the page to continue
Today, 30% of our visitors use Ad-Block to block ads.We understand your pain with ads, but without ads, we won’t be able to provide you with free content soon. If you need our content for work or study, please support our efforts and disable AdBlock for our site. As you will see, we have a lot of helpful information to share.
Download PC Repair Tool to quickly find & fix Windows errors automatically
If you do not want to save files in the default format, you can change the default file format for saves in Word, Excel, and PowerPoint. It is possible to opt for a different format even though those apps offer options to do the same while saving a file. This tutorial lets you change the default file extension for saves so that you do not need to change the format manually while saving a file every time.
By default, Microsoft Word saves all files in .docx format, Excel saves files in .xlsx format, and PowerPoint saves files in .pptx format. However, let’s assume that you want to send some Excel spreadsheets to someone who has an old version of Excel. In this case, you must save the file in .xls format instead of .xlsx.
Note: We have included screenshots of Excel. However, if you want to make the change in Word or PowerPoint, you must follow the same steps. The list of file extensions will be different as per the app.
How to change the default File Format for Saves in Office
To change the default file format for saves in Excel, follow these steps-
- Open Excel on your computer.
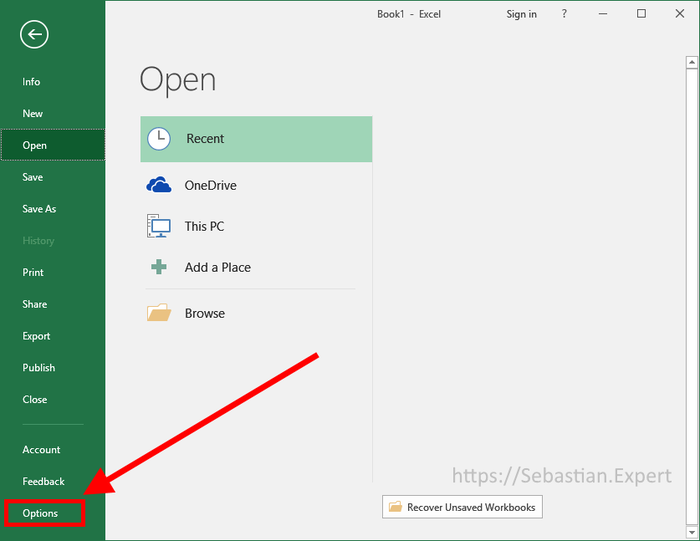
- Click the File option from the top menu bar.
- Click on the Options button.
- Switch to the Save tab.
- Expand Save files in this format drop-down menu.
- Choose a format.
- Click the OK button.
Let’s delve into the steps to know more about them.
To get started, you need to open Excel on your computer. If you have already opened a spreadsheet, click on the File option from the top menu bar. Following that, you need to click the Options button. In case you didn’t open a spreadsheet, you can find the Options button right on your screen after opening Excel on your computer.
By default, you should land on the General tab. You need to switch from the General tab to the Save tab.
Here you can find a drop-down list called Save files in this format. You need to expand this list and choose a file format as per your requirement.
At last, click the OK button to save the change.
That’s all! Now your files will be saved in the preset format automatically.

When he is not writing about Microsoft Windows or Office, Sudip likes to work with Photoshop. He has managed the front end and back end of many websites over the years. He is currently pursuing his Bachelor’s degree.
If you often share Microsoft Office files with people using an older version of Word, Excel, or Powerpoint, you might want to change the default file format for saving, so you don’t have to constantly change it at save time. Here’s how to customize how these files are saved.
All versions of Office from 2007 and above use the same default file formats, so you don’t have to worry about compatibility if you and your team are working in, say, Word 2007, 2010, 2013, or 2016. However, if anyone’s stuck in Word 2003 or earlier, you can streamline your workflow by automatically saving files in the older format for Word 97-2003. You can also set Word to automatically save files in other formats, such as plain text, PDF, or rich text format. Likewise, you can change Excel’s default file format to CSV or XML, and PowerPoint to OpenDocument Presentation or Strict Open XML Presentation.
In this example, we’re using Word, but the steps are the same for Excel and PowerPoint 2016 as well.
1. Create a new document or open an existing one.
2. Click the File tab on the ribbon.
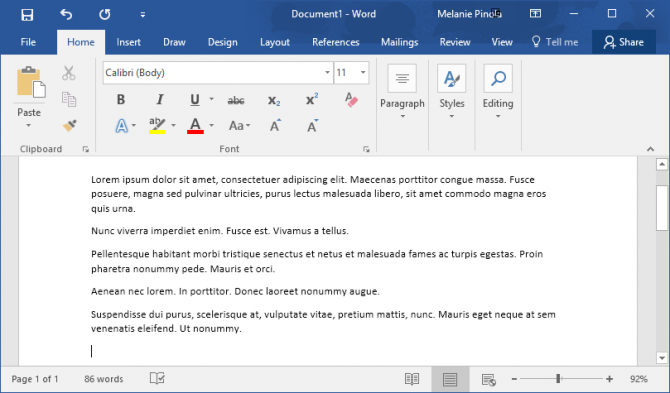
3. Click Options in the left menu.
4. Click Save in the Options window.

5. Select the default file format in the drop-down box next to «Save files in this format.»
6. Click OK.
Going forward, any new files you save in the program will use that file extension. If you want to change it back to the default, just head to the setting again.
- How to Change Your Office 2016 Theme
- How to Upgrade to Office 2016
- How to Mail Merge in Office 2016
Get instant access to breaking news, the hottest reviews, great deals and helpful tips.
In Office 2007, Microsoft introduced new extensions: xlsx, docx, ppts etc. which are no longer binaries but based on Office Open XML. Since then, they are also the default format for saving files.
However, if you still need to save new files in a format such as Excel 97-2003 and would like to have it as default — you can change it easily.
-
Click File tab.

-
Click Options.

-
Navigate to Save panel.
In the panel on the right find Save files in this format. Click to drop down to choose the format.
From now whenever you hit the Ctrl + S shortcut, or click the save button, the file format you just selected will be set.

Excel save options — Click to enlarge
Word Save Options — Click to enlarge
PowerPoint Save Options — Click to enlarge


![]()
Download Article
An easy-to-use guide to turn your Word documents into viewable PDFs
![]()
Download Article
Do you want to convert your Word document into an easy-to-send PDF file? PDFs are compatible with all platforms, so turning your Word document into a PDF ensures that more people can open the file. It’s incredibly easy to convert a Word document to PDF—we’ll show you how to do it on any PC or Mac!
-
1
Open the Microsoft Word document. Double-click the Word document to open it in Microsoft Word.
- If you haven’t yet created the document, open Word, then click Blank document and create the document as needed before proceeding.
-
2
Click File. It’s in the top-left corner of the Word window. Doing so opens a pop-out window.
Advertisement
-
3
Click Export. This option is in the left-hand column of options. You should see several new options appear in the middle of the window.
-
4
Click Create PDF/XPS Document. It’s in the upper-left corner of the window.
-
5
Click Create PDF/XPS. This option is in the middle of the window. Doing so prompts a pop-up window.
-
6
Select a save location. On the left side of the window, click the folder in which you want to store the PDF version of your Word file.
- Since the PDF is a different file type than the Word document, you can store the PDF in the same file location as the Word file.
- You can also enter a new file name in the «File name» text box if you like.
-
7
Click Publish. It’s in the bottom-right corner of the window. This will create a PDF copy of your Word document in your specified location.


Advertisement
-
1
Open the Microsoft Word document. Double-click the Word document to open it in Microsoft Word.
- If you haven’t yet created the document, open Word, then click Blank Document and create the document as needed before proceeding.
-
2
Click File. It’s in the upper-left corner of your Mac’s screen. A drop-down menu will appear.
-
3
Click Save As…. This option is in the drop-down menu. Doing so opens a new window.
-
4
Enter a file name. Type whatever you want to name the PDF into the «Name» text box at the top of the window.
-
5
Select a save location. On the left side of the window, click the folder in which you want to save your PDF.
-
6
Click the «File Format» text box. It’s at the bottom of the window. A drop-down menu will appear.
-
7
Click PDF. This option is in the «Export» section of the drop-down menu.
- You may have to scroll down in the drop-down menu to see this option.
-
8
Click Export. It’s a blue button in the bottom-right corner of the window. Doing so saves your PDF in the specified file location.


Advertisement
-
1
-
2
Click Choose file. It’s in the middle of the SmallPDF page. Doing so will open either a File Explorer (Windows) or a Finder (Mac) window.
-
3
Select your Word document. Go to your Word document’s location, then click the Word document to select it.
-
4
Click Open. It’s in the bottom-right corner of the window. Doing so will upload the Word document to SmallPDF.
- On a Mac, you may click Choose here instead.
-
5
Click Download File. This option is in the lower-left side of the SmallPDF page. Your PDF will download onto your computer, though you may have to select a storage location and/or confirm the download depending on your browser’s settings.
- It may take a few seconds for this option to appear if your Word document is large or your Internet connection is slow.


Advertisement
-
1
Open Google Drive. Go to https://drive.google.com/ in your computer’s web browser. This will open your Google Drive page if you’re logged in.
- If you aren’t logged in, click Go to Google Drive, then enter your email address and password when prompted.
-
2
Click + New. It’s in the top-left side of the Google Drive window. A drop-down menu will appear.
-
3
Click File upload. It’s in the drop-down menu. Doing this will open either a File Explorer (Windows) or a Finder (Mac) window.
-
4
Select your Word document. Go to your Word document’s location, then click the Word document to select it.
-
5
Click Open. It’s in the bottom-right corner of the window. Your Word document will upload to Google Drive.
- On a Mac, you may click Choose here instead.
-
6
Open the Word document. Once the Word file finishes uploading to Google Drive, double-click it in Google Drive to open it in your browser.
-
7
Click File. It’s in the upper-left side of the window. Doing so prompts a drop-down menu.
- On a Mac, make sure you’re clicking File in your browser window and not in the menu bar at the top of the screen.
-
8
Select Download as. This option is in the middle of the drop-down menu. Selecting it prompts a pop-out menu.
-
9
Click PDF document. It’s in the pop-out menu. A PDF version of the Word document will immediately download onto your computer.
- Depending on your browser’s settings, you may have to confirm the download and/or select a save location before the file will actually download.


Advertisement
Add New Question
-
Question
Why doesn’t Microsoft Word give me the option to «Save as PDF» in the file menu?

A special type of software (technically called add-in) has the ability to convert Microsoft Word documents to PDF. However, Word 2007 does not include this add-in by default. To convert to PDF with Microsoft Word 2007, you have to download the add-in from Microsoft’s website.
-
Question
I need to convert a PDF file to a Microsoft Word document. Is there a way to do this?
Open up your PDF document and select «Save as —> Word Document.» You’ll need to clean it up afterwards (remove paragraph signs, reformat, etc.).
-
Question
How do I fix the glitches and formatting errors that show up in the new PDF file?
The latest versions (after MS Office 2007) allow you to save the document as a pdf, thus avoiding formatting errors. Go to Files->Save As and select «.pdf format» from Save As Type. Click to save.
See more answers
Ask a Question
200 characters left
Include your email address to get a message when this question is answered.
Submit
Advertisement
-
To open your PDF in your computer’s default PDF reader, simply double-click it; if you have more than one PDF reader, you may be prompted to select one after double-clicking the PDF.
-
You can also use the «Save as» menu to convert your Word document to a PDF on a Windows computer.
Advertisement
-
When converting sensitive documents (e.g., credit card statements), avoid using SmallPDF. While their site is secure, it’s best to keep such documents offline as much as possible.
Advertisement
About This Article
Article SummaryX
1. Go to https://smallpdf.com/word-to-pdf in your web browser.
2. Click Choose file.
3. Double-click the Word file you want to convert.
4. Click Download File when the PDF is available.
Did this summary help you?
Thanks to all authors for creating a page that has been read 4,795,631 times.
Is this article up to date?

Вариант 1: Microsoft Word 2007 и новее
Ввиду того, что в Ворде, начиная с версии 2007 года, основным форматом является DOCX, задача сохранения документов в нем не стоит как таковая – это происходит по умолчанию при выборе соответствующего пункта меню. Текстовый файл, созданный в этой и последующих версиях приложения, будет совместим с каждой из них, но не с 2003, в которой использовался DOC. Если же вам требуется сделать так, чтобы созданный в «свежих» редакциях документ можно было открыть в самой «старой», выполните следующее:
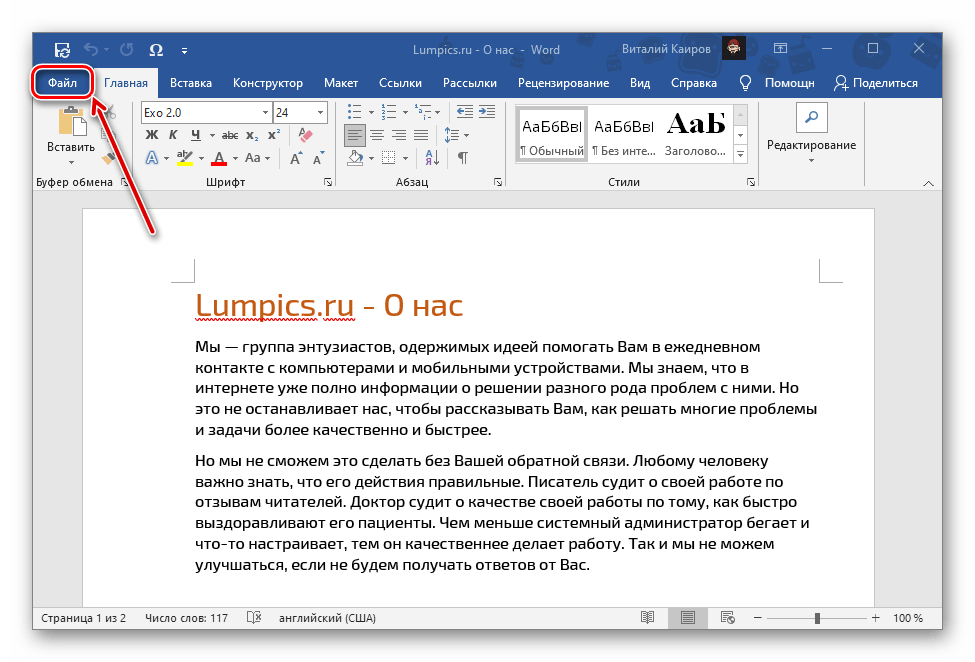
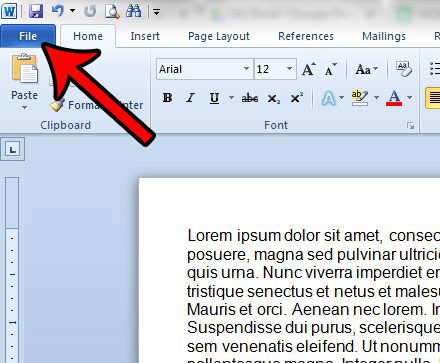
- Откройте меню «Файл» (Word 2010 и более новый) текстового редактора или нажмите на кнопку с логотипом «Microsoft Office» (2007).
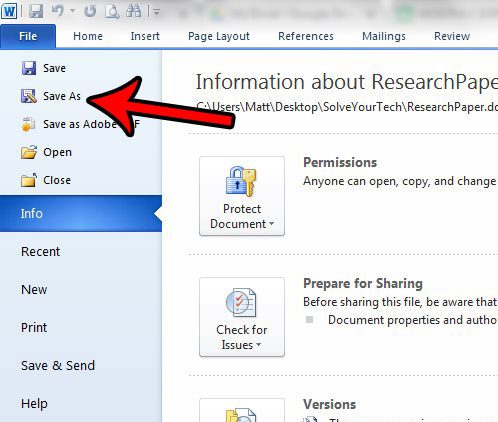
- На боковой панели выберите пункт «Сохранить как», затем нажмите «Обзор».

Примечание: Вместо выполнения двух предыдущих шагов можно воспользоваться клавишей F12.
Читайте также: Горячие клавиши для удобной работы в Word
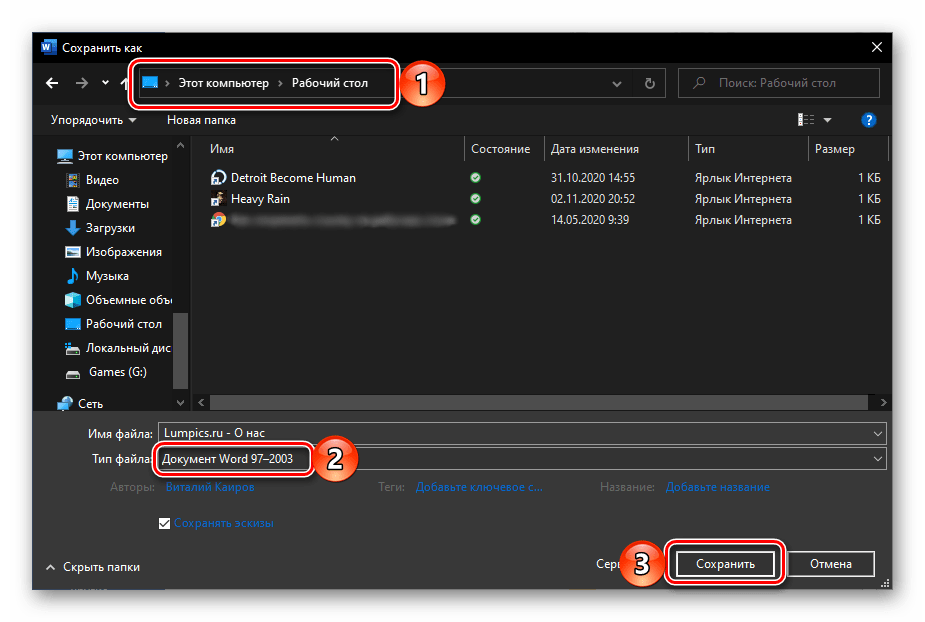
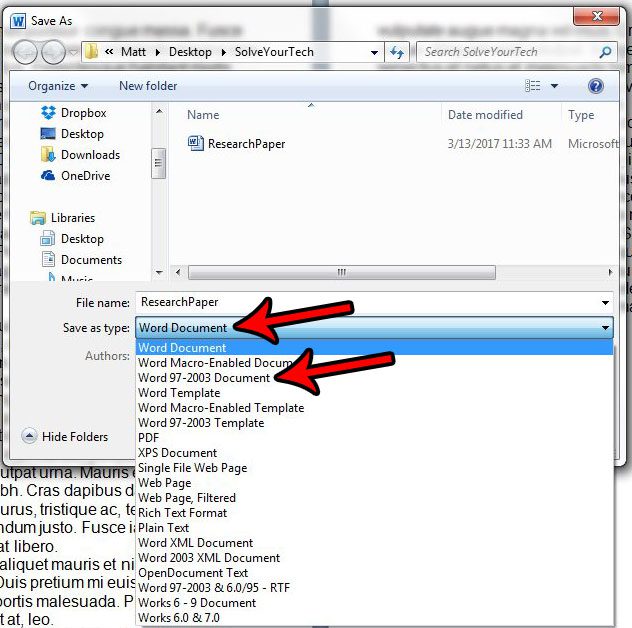
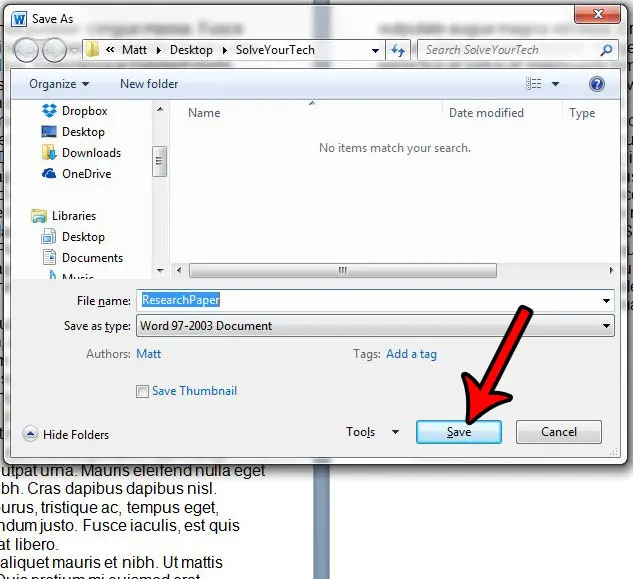
- Укажите путь к папке, в которую вы хотите поместить документ. По желанию измените его имя. Разверните меню «Тип файла» и выберите пункт «Документ Word 97 — 2003». Для подтверждения нажмите на кнопку «Сохранить».

Примечание: В Microsoft Word 2007 возможность выбора типа экспортируемого файла доступна еще на предыдущем шаге, при выборе пункта меню «Сохранить как».

Теперь файл, созданный в любой из актуальных версий текстового редактора Майкрософт, можно будет открыть в Ворде 2003 и даже, как можно было заметить при выполнении последнего пункта инструкции, Ворде 97, так как он имеет формат DOC.
Вариант 2: Microsoft Word 2003
Вполне возможно, что под вопросом из заголовка статьи подразумевается ситуация, когда в Ворде 2003 требуется сохранить документ в стандартном для 2007 и более свежих редакций формате – DOCX. Последний, как мы уже обозначили выше, изначально этой устаревшей версией программы не поддерживается. Решением в данном случае является установка специального пакета совместимости, который помимо открытия, импорта и экспорта файлов в актуальном расширении, наделяет рядом дополнительных возможностей все приложения-компоненты Майкрософт Офис. Узнать о том, как его скачать, установить и использовать, можно в представленной по ссылке ниже статье. Само же сохранение осуществляется по рассмотренному выше алгоритму, с поправкой на различия в интерфейсе, по сути, все что потребуется от вас – это выбрать тип файла.
Подробнее: Как добавить поддержку формат DOCX в Word 2003
Еще статьи по данной теме:
Помогла ли Вам статья?
Microsoft introduced a new default file type with Office 2007 that changed the standard Word document type from .doc to .docx. It added some new features to the document and improved the types of edits that you could make. Unfortunately, it also made it much harder to collaborate on documents with people that were still using earlier versions of Word.
While they did release a compatibility pack that addressed this issue, not everyone was able to download it or was even aware that it existed. But one way to ensure that users of the older versions of Word will still be able to read your documents is by learning how to save as .doc instead of .docx by default in Word 2010. This is a change that you can apply to the program that will automatically save your documents in the .doc format.
While this is less of a concern now than it was during the initial transition period, you might be interested in reducing any possible complications that might arise when you have a varied audience that is trying to read your work. So continue reading below to see how to change the default file type in Word 2010.
How to Change the Default File Save Type in Word 2010
- Open Word.
- Click the File tab.
- Select Options.
- Choose the Save tab.
- Click Save files in this format, then select Word 97-2003 Document (*.doc).
- Click OK.
Our guide continues below with additional information on saving as doc instead of docx in Word 2010, including pictures of these steps.
How to Save as .doc By Default in Word 2010 (guide with Pictures)
Like many of the other interesting settings that exist in Office 2010, this one is found on the Options menu that you can access from the File tab. And you are not only limited to .doc or .docx as the default file type, either. You can also choose to save to any of the other compatible Word 2010 file types as well, such as .txt or .html. But continue reading to learn how to start using .doc as your default file type in Word 2010.
Step 1: Launch Microsoft Word 2010.
Step 2: Click the File tab at the top-left corner of the window.

Step 3: Click the Options item at the bottom of the column on the left side of the window.

Step 4: Click Save in the column on the left side of the Word Options window.

Step 5: Click the drop-down menu to the right of Save files in this format, then choose Word 97-2003 Document (*.doc).

Step 6: Click the OK button at the bottom of the window to apply your changes.
The changes in the section above will affect all of the future new documents that you create in Word 2010. This is the best option if you create a lot of documents and need to have all of them in the .doc file format. But what if this is an isolated incident, and you would prefer to only save one file with the .doc file type, or even change docx to doc?
How to Convert from .docx to .doc in Word 2010
This section assumes that you already have an existing .docx file that you would like to save to the .doc file type, or that you have a new document and you would like to only save this document to .doc instead of .docx.
Step 1: Open the document in Word 2010.
Step 2: Click the File tab at the top-left corner of the window.
Step 3: Click Save As in the left column.
Step 4: Click the dropdown menu to the right of Save as type, then click the Word 97-2003 Document option.
Step 5: Click the Save button.
If you were working with an original file in the .docx file type, then this is going to create a new copy of the file with the .doc file type. It will not overwrite or replace the original file.
What Other File Format Can I Pick if I Don’t Want to Save Doc Files or Docx Files?
Microsoft Word 2010 will let you create files in a variety of different formats. These include:
- Word Document
- Word Macro-Enabled Document
- Word 97-2003 Document
- Word Template
- Word Macro-Enabled Template
- Word 97-2003 Template
- XPS Document
- Single File Web Page
- Web Page
- Web page, Filtered
- Rich Text Format
- Plain Text
- Word XML Document
- Word 2003 XML Document
- OpenDocument Text
- Word 97-2003 & 6.0/95 – RTF
- Works 6 – 9 Document
- Works 6.0 & 7.0
As you can see, this is much more than just Word documents. While this is a fairly old Microsoft Word application at this point, you have a lot of file options for your word processing documents besides just the DOCX format.
Note that if you select any of the options other than the ones with an MS Word file extension then you may encounter compatibility options after you create the converted document. However, you will typically get a warning Word window if you pick a save option that won’t work with everything that you have added to the document.
More Information on How to Save as Doc Instead of Docx in Word 2010
The steps in this article were performed in the Word 2010 version of Microsoft Office. However, these same steps will also work in most other versions of Microsoft Word.
When you change the default save type it won’t affect any existing files. They will retain their current file type unless you manually choose to change it.
Google Apps has its own word processing application called Google Docs. The Google Apps programs offer a strong alternative to Microsoft’s offerings. They can also convert uploaded Microsoft Word files to the Google Docs format, and you can download a Google Docs file as a .docx file type.
Is there a type of document that you create a lot in Word, and you are looking for a way to make the process a little quicker? Learn how to create a document template in Word 2010 and save yourself the hassle of constantly re-applying settings and formatting options every time you create one of these types of documents.
See also
- How to insert a check mark in Microsoft Word
- How to do small caps in Microsoft Word
- How to center text in Microsoft Word
- How to merge cells in Microsoft Word tables
- How to insert a square root symbol in Microsoft Word

Matthew Burleigh has been writing tech tutorials since 2008. His writing has appeared on dozens of different websites and been read over 50 million times.
After receiving his Bachelor’s and Master’s degrees in Computer Science he spent several years working in IT management for small businesses. However, he now works full time writing content online and creating websites.
His main writing topics include iPhones, Microsoft Office, Google Apps, Android, and Photoshop, but he has also written about many other tech topics as well.
Read his full bio here.
MS Word 2013 Saves Documents in DOC Instead of DOCX
-
Thread starterviveknayyar007
-
Start dateOct 29, 2013
-
-
Tags -
Default
File Format
Microsoft Word
Office
tutorial
-
Even after knowing the above benefits of saving the file in DOCX format, some users might still want to save their MS Word files with the legacy extension (i.e. DOC) to allow the older versions of the program (MS Word 2003 or earlier) to support the files created in the post 2003 versions of MS Word. This situate is very rare these days though.
To save the files in legacy format, the files must be saved in the compatibility mode. In order to do so, while saving the files, the option ‘Word 97-2003 Document (*.doc)’ must be selected from the ‘Save as type’ drop-down list in the ‘Save As’ box.
The above discussed method can be followed if the MS Word 2013 works perfectly well and saves the files in DOCX by default. However there might be instances when the default configuration of the application has been manually or automatically modified. As a result, sometimes MS Word 2013 might start saving the files with the legacy file extension, i.e. DOC by default.
If you face such issues with your MS Word 2013, you can easily rectify the problem by modifying the configuration of the application back to its default settings.
Below is the process using which you can configure your instance of MS Word 2013 to start saving the files in DOCX format by default:
- ■Log on to the computer using the account on which MS Word 2013 configuration is to be made.
■Once logged on, open any existing Word document or create a new one.
■On the opened interface, go to the FILE tab.
■From the displayed list, click Options.

■On the opened Word Options box, click to select Save option from the left pane.
■From the right pane, under the Save documents section, choose Word Document (*.docx) option from the Save files in this format drop-down list.

■Once done, click OK to save the changes.
■Restart MS Word 2013 to allow the changes to take effect.

- Status
- Not open for further replies.
- Status
- Not open for further replies.
| Thread starter | Similar threads | Forum | Replies | Date |
|---|---|---|---|---|
|
J
|
Solved! Save state of PC. | Apps General Discussion | 10 | Jul 26, 2022 |
|
O
|
Solved! How can I save images without losing any quality at all? | Apps General Discussion | 1 | Oct 5, 2019 |
|
W
|
Solved! How do I send a voicemail that I saved | Apps General Discussion | 1 | Jan 27, 2019 |
|
K
|
Solved! Is there a program to clean & organize 1,000’s of saved photos? | Apps General Discussion | 2 | Jan 18, 2019 |
|
J
|
need help saving unfinished video in wondershare slideshow builder deluxe | Apps General Discussion | 2 | Dec 10, 2018 |
|
|
Microsoft Guts Edge, Adds Chromium to Save Failing Browser | Apps General Discussion | 8 | Dec 6, 2018 |
|
K
|
Extensions for auto saving documents in .html | Apps General Discussion | 4 | Aug 16, 2017 |
|
L
|
I downloaded SpyHunter a few days ago and now I cannot print anything. My computer makes me save documents that I want to prin | Apps General Discussion | 1 | Sep 27, 2016 |
|
|
Microsoft Word 2013 (v15) Save Glitches On Older Documents | Apps General Discussion | 1 | Feb 5, 2016 |
|
A
|
Why can’t I transfer from onedrive to a new folder in my computer. I have documents I want to save and since HP is no longer s | Apps General Discussion | 2 | Sep 24, 2015 |
|
|
Game saves problem to my internet cafe. | Apps General Discussion | 2 | Jan 4, 2015 |
|
Y
|
Word 2011 for Mac. Can’t save changes, I have to always ‘save as’ a different file. | Apps General Discussion | 1 | Nov 17, 2014 |
|
M
|
How can I restore an excel document to an earlier date as it looks like the file was saved in error with a lot of the informat | Apps General Discussion | 3 | Apr 11, 2014 |
|
|
Why Does MS Visio 2013 Ask for Additional Information While Saving Your Files? | Apps General Discussion | 0 | Dec 12, 2013 |
|
|
Save anything as PDF for FREE — Guide for total beginner | Apps General Discussion | 0 | Oct 12, 2013 |
|
M
|
Save AND Open downloaded files with Firefox 23.0.1 | Apps General Discussion | 4 | Sep 15, 2013 |
|
T
|
Office 2010 Can’t Open Or Save Documents in My Documents Folder | Apps General Discussion | 12 | Jul 11, 2013 |
|
G
|
Saving styles for the other documents on MS Word 2010 | Apps General Discussion | 1 | Jan 31, 2013 |
|
|
Microsoft Word 2010 | Question about saving documents prompt | Apps General Discussion | 2 | Sep 10, 2012 |
|
D
|
Starting word 2000. a previously saved document starts instead of a ba | Apps General Discussion | 3 | May 13, 2009 |


- Advertising
- Cookies Policies
- Privacy
- Term & Conditions
- Topics