
Basic word processing operations include editing and saving files, using the clipboard, recognizing user interface features, spell check, and printing files.
Objectives and Skills[edit | edit source]
Objectives and skills for basic word processing concepts include:[1]
- Create a new document: enter text; delete; save; save as
- Use basic edit features: cut; copy; paste
- Identify features: tool bar; icons; cursor
- Use dictionary; spell check
- Operate print; print preview
Multimedia[edit | edit source]
- YouTube: Word 2010: Environment
- YouTube: Word 2010: Creating Documents
- YouTube: Word 2010: Text Basics
- YouTube: Word 2010: Saving
- YouTube: Word 2010: Page Layout
- YouTube: Word 2010: Spelling and Grammar
- YouTube: Word 2010: Printing
Activities[edit | edit source]
These activities may be completed using any word processing application (Microsoft Word, LibreOffice Writer, Google Document, Apple Pages, etc.):
- Start your word processing application. It should automatically open with a new, blank document.
- Enter two paragraphs of text in your new document. You can write about the user interface features you see (toolbar, icons, menus, status bar, scroll bars, etc.) and where they are located.
- Save your document.
- Copy the first paragraph and paste it at the end of the document, creating a third paragraph.
- Delete the duplicate third paragraph.
- Use Spell Check to verify and correct spelling for your document.
- Use Print Preview to see the page layout for your document.
- Print your document.
- Use Save As to save your document with a new name.
See Also[edit | edit source]
- Computer Skills/Intermediate/Word Processing
- Computer Skills/Advanced/Word Processing
- Computer Skills/Proficient/Word Processing
References[edit | edit source]
- ↑ University of New South Wales: Computer Skills Assessment Framework

COMPUTER SKILLS & APPLICATIONS MODULE 5: WORD PROCESSING BASICS & BUSINESS CORRESPONDENCE Paragraph Formats, Operational Keys, Business Letters, Personal Business Letters, Memos and Tables 1

FORMATTING A WORD DOCUMENT Apply formatting and editing features and operational keys appropriately. 2

Word Processing software is a type of application software that is used for creating text documents Such as: Advantages of Using • Letters MS Word • Easy to read text • Memos • Can be edited • Can be sent/shared digitally • Reports • Tools like spell checker / grammar checker, etc. 3 • Any others you can think of?
 • Standard Paper Size: 8 ½")
Typing / Copier / Printer Paper (Standard Size) • Standard Paper Size: 8 ½ x 11 inches • There are 66 lines per page. • Six lines equals one vertical inch. 4

Page Orientation : the direction in which you can print on a page • Portrait : height is greater than the width • Landscape : width is greater than the height Portrait Landscape 11” x 8 ½” x 11” Most Word Processing documents are printed in portrait orientation. 5

Know Your Screen TOP RIBBON – where you will see the name of your file once you save FILE TABS– Where you find tool bars (Commands) to format your document CURSOR– Where you will begin typing or insert image on your page SCROLL BAR– You may have this bar on the right and bottom of your document – allows you to move up and down or left to right to view the page 6

Document Margins Margin – the blank space at the top, bottom, left, and right of a document where you cannot type Header: allows you to type above the top margin at the top of each page of a document Footer : allows you to type below the bottom margin at the bottom of each page of a document 7

How to Format Document Margins Click on the Margins drop down menu on the LAYOUT Tab Then choose the Margins tab and make necessary changes to the Top, Bottom, Left, & Right margins. Default should be 1” for each. Some documents will call for a 2” top margin. 8

Text Alignment – the way multiple lines of text line up along the left, right, or both margins Tool Bar Alignment Buttons Left Align • Left align – text is lined up along the left margin, leaving a jagged right margin • Right align – text is lined up along the right margin, leaving a jagged left margin • Center align – text is centered between both margins, resulting in jagged left and right margins • Justified – text is aligned along the left and right margins, with no jagged edges Right Center Align Left align – text is lined up along the left margin Center align – text is centered on the page Justify Right align – text is lined up along the right margin Justified – text is lined up along both margins 9

Horizontal Centering When text is centered between the left and right margin • Commonly used when formatting: • Invitations • Announcements • Title pages Lets Hoop It Up! Participate in our Hoops For Heart Campaign to help raise money for the American Heart Association February 27 -March 3, 2017 See your PE teacher for more details. 10

How to Horizontally Center Click on the Center Alignment button on the HOME Tab Shortcut Commands you can select all (Ctrl A) and use (Ctrl E) to center. Or you may open up your Paragraph Dialog box and select the alignment of Center 11

Vertical Centering When text is centered between the top and bottom margin Lets Hoop It Up! Commonly used when formatting: • Invitations • Announcements • Title pages Participate in our Hoops For Heart Campaign to help raise money for the American Heart Association February 27 -March 3, 2017 See your PE teacher for more details 12

How to Vertically Center You should open up your Page Setup Dialog box and select the Layout Tab Then Select the drop down menu for the Page: Vertical Alignment Choose — Center 13

What is Line Spacing? Line spacing – the spacing between lines of text in a document Single Space (SS) – Strike Enter 1 time; leaves no blank lines between lines of text in a document Double Space (DS) – Strike Enter 2 times; leaves 1 blank line between lines of text in a document Triple Space (TS) – Strike Enter 3 times; leaves 2 blank lines between lines of text in a document Quadruple Space (QS) – Strike Enter 4 times; leaves 3 blank lines between lines of text in a document Word wrap – the automatic wrapping of text from the end of one line to the beginning of the next line without having to press the Enter key 14

Spell Check and Thesaurus Spell Check: Check Spelling, Grammar, & Clarity • Word autocorrects a lot of mistakes for you, and if it’s not autocorrected, you’ll see colored underlines appear under words to check for spelling, grammar, and clarity. • To check each item that Word finds, right-click the underlined text and learn more about the issue. Accept the change that Word suggests, or ignore it. 15
")
Thesaurus: Using thesaurus, you can look up synonyms (different words with the same meaning) and antonyms (words with the opposite meaning). 16
 the cursor Escape")
Operational Keys Backspace – deletes text to the left of (behind) the cursor Escape (Esc) – allows you to exit unwanted menus and dialog boxes Insert – allows text to be inserted within a line of text Tab – used to indent; moves the cursor 5 spaces on a line Caps Lock – Locks the alphabetic keys in uppercase Control (Ctrl) – used with other keys to execute (carry out) out commands Home – moves the cursor to the beginning of a line Page Up – moves one screen above the current cursor position Num Lock – locks the numbers of the numeric keypad Shift – Used to capitalize alphabetic keys and type symbol keys Alternate (Alt) – used with other keys to access commands on the menu bar Delete – deletes text directly in front of (to the right of) the cursor Enter – used to move the cursor down to the next line End – moves the cursor to the end of a line Page Down – moves one screen below the current cursor position Arrow keys – move the cursor in the direction of the arrow, one character at a time 17

Operational Keys to Save Time! • Control and Page Up – quickly moves you to the first page of a multi-page document • Control and Home – quickly takes you to the first line of a document • Control and End – quickly takes you to the last line of a document • Control and Page Down – moves you to the next page of a multi-page document 18

Function Keys • Allow you to quickly access frequently used functions • Examples: • F 1 – allows you to access the Help feature • F 5 – Plays a Power. Point (full screen) • F 7 – allows you to access the Spell Check feature Visit http: //www. computerhope. com/issues/ch 000306. htm for more information on Function Keys 19

PARAGRAPH FORMATS Implement paragraph formats. 20

Paragraph Formats: Block Style Left Margin all lines of text are aligned with the left margin the first line of a paragraph is not indented commonly used when formatting letters and memos Example: In a block style paragraph, all lines are aligned against the left margin. Do not tab/indent any lines. You should use a double space between paragraphs when using a block style paragraph formatting. 21

Paragraph Formats: Indented Style Left Margin the first line of a paragraph is indented use the Tab key to indent paragraphs commonly used when formatting reports Example: Indented paragraphs use a tab to indent the first line of the paragraph. All other lines are aligned to the left margin. 22

Paragraph Formats: Hanging Indent Style a temporary left margin that indents all lines except the first line of text the first line is flush with the left margin; each additional line is indented Left Margin commonly used when citing bibliography sources EXAMPLE: Coolkid, One. (2006). Cool Kids and How They Demonstrate Character University. Retrieved January 2, 2006 from the World Wide Web: http: //www. coolcharacterkids. org 23

LETTERS Personal-Business Letters vs. Business Letters 24

Types of Letters Personal-Business Letters: A personal-business letter is a letter that is sent from an individual using their home address to a person or business/organization. Business Letters: • A business letter is sent from a business or organization to an individual or to another business or organization. • Business letters are usually keyed on letterhead. The letterhead can consist of the business’ name, address, phone/fax/email, and logo 25

Major Parts of a Letter 1. Return Address-the address of the person writing the letter. Letterhead if the letter is from a business. 2. Dateline-Complete and current date (spell out the month) Example: June 20, 2018 Letter Address/Inside Address-the address of the person receiving the letter. 2. Salutation-the greeting of the letter. 1. Example: Dear Sir or Madam: Body-the message of the letter. (the paragraphs / Block Style) 4. Complimentary Close-the ending of the letter. 3. Example: Sincerely yours, Keyed Name-the authors typed name. 6. Handwritten Signature-the author signs the letter after it has been printed. 5. Sign between your Complimentary Close and Typed Name (in the QS) 1. Typist Initials-initials of the typist. (lowercase / no spaces or punctuation between) 26

Formatting a Letter Margins: TM-2 inches BM-1 inch RM-1 inch LM-1 inch Block Style is one method of formatting a letter. In this style of letter writing all parts of the letter are keyed at the left margin. • Paragraphs should not be indented in this style of letter. • Use a standard font style and font size Times New Roman/Arial and 12 point font. • Single Space (SS) within paragraphs • Double Space (DS) between paragraphs. 27

Parts of a Personal-Business Letter Return address Letter address Date Salutation Body Complimentary Close Enclosure notation Copy Notation Writer key a DS after the last line of the letter. 28

Punctuation Styles Open Punctuation • There is not a colon or comma in the salutation and there is not a comma in the complimentary closing. Mixed Punctuation • A colon : is in the salutation and a comma , is in the close. OPEN Punctuation Example: Dear Ms. Smith Sincerely yours MIXED Punctuation Example: Dear Ms. Smith: Sincerely yours, 29

Business Letter with Open Punctuation Letterhead: The business letter uses letterhead instead of a return address, which consists of the business’ name, address, phone/fax/email, and logo. Open Punctuation: The colon is not keyed in the salutation and the comma is not keyed in the complimentary close. 30

Special Letter Parts • Typist initials are used when someone other than the author types the letter. Typed a DS below the writer’s name, in lowercase letters, with no space or punctuation. • Enclosure notation is used when additional items are included in the envelope with the letter. • Attachment notation is used when additional items are clipped, stapled, etc… to the letter. • Copy notation is used when a copy of the letter is sent to someone in addition to the addressee/letter address. 31

Remember… • A personal business letter is correspondence sent from an individual using their home address to a person or organization. • A business letter is correspondence sent from a business to another business or to an individual. Because letterhead stationery is used, the return address is not keyed. • The top margin is usually 2“, side and bottom margins are typically 1″. • Block format is one style of writing for personal-business and business letters in which all parts of the letter begin at the left margin. • Typist initials are the initials of the typist and are used when someone other than the writer prepares the letter. Lowercase letters are used, with no space, and with no punctuation, appearing a double space below the signature. • Enclosure/Attachment and Copy notations appear a double space (DS) below the typist initials. 32

MEMORANDUMS Memos 33
 are forms of written communication used by individuals")
What is a Memorandum? Memorandums (memos) are forms of written communication used by individuals within the same business or organization to communicate with each other. It is best to use word processing software (MS WORD) to create a memorandum. Remember, unlike a letter, that you do NOT have a salutation or complementary close in a memorandum. The customary standard margins are used: 2” top margin, 1” side margins, and a least a 1” bottom margin. *In today’s office place we may use an email to replace the use of a memo. 34

Memo Headings begin at the left margin. Remember to follow each heading with a colon (: ) and type in ALL Caps or Initial Cap, Double Space between headings/entries Typist Initials Used is someone other than the author types the Memo. First & Last name initials, lowercase Parts of a Memo Entry An entry is the information that follows the memo heading. Pressing the TAB once or twice aligns each entry. Body Message of the Memo. Paragraph form, single space within the paragraph and double space between paragraphs. Attachment Notation A special notation at the end of a memo or letter that indicates that an item(s) is physically attached to 35 the letter or memo.

TABLES Apply Correct Table Formats 36

What is a Table? A table is a grid of rows and columns used to display and organize information. 37

Creating a Tables are created by defining the number of rows and columns that will be needed to enter information. • Rows show the horizontal arrangement of data. • Columns show the vertical arrangement of data. • Cells are the boxes that are formed as the row and column intersect. • Gridlines are the vertical and horizontal lines in the table. Columns Cell Rows Gridlines 38

Formatting a Table Center the secondary title in initial caps and bold. Center and bold column headings. EAST MIDDLE SCHOOL DS Center the main title in all capital letters and bold. Career and Technical Education Left align or center text entries. Teacher DS Key the $ symbol in the first entry to show currency. Subject Right align number entries. Remaining Budget James Massey Career Decisions Carrie Shore Business Technology 834. 90 Mandy Johnson Keyboarding 547. 24 Source: EMS Faculty Handbook SS or DS between table entries (body). $900. 32 Left align the source note under the table, which identifies the source of the information in the 39 table.

Parts of a Table Secondary Main Title TOP 10 BROADWAY GROSSES Column Headings Week Ending September 12, 2003 Production Gross This Week Gross Last Week $572, 885 $671, 363 Cabaret 466, 670 515, 787 Fosse 566, 644 605, 993 Les Miserables 375, 318 436, 915 Miss Saigon 395, 522 434, 641 Ragtime 420, 902 539, 159 The Lion King 880, 717 875, 772 Totals $3, 678, 658 $4, 079, 630 Body Annie Get Your Gun Source Key the $ symbol in the first entry to show currency for the number entries. Source: Online Productions 40 Key the $ symbol with total entries to show currency.

Inserting Tables If the table is the only object on the page: • Center the table vertically, leaving equal top and bottom margins. • Center the table horizontally, leaving equal left and right margins. • For best results use automatic vertical and horizontal centering features in your word processing software (see slide 20 for details ). Equal left and right margins Equal top and bottom margins 41

Inserting Tables If the table is inserted between text: Double space above and below the table. DS DS 42

Table Notes to Remember üCenter the main title in all capital letters and bold. üDouble space after the main title. üCenter secondary titles in initial caps, and bold. üDouble space after the secondary title. üCenter align and bold column headings. üSingle or Double space is appropriate between entries. üText entries may be aligned on the left or centered. üNumerical entries are usually right aligned. üThe source note should be left aligned under the table. 43
Learning Objectives
- Understand how to access and use word-processing tools
Word-Processing Essentials
Most writing you do for college will need to be typed, and often submitted electronically. Mastering the basics of word-processing tools will make this process much more comfortable to do.
The most popular word-processing program is Microsoft Word, part of the Microsoft Office Suite. Most college computer labs have this program available, and you can sometimes purchase it for a reduced rate through your college bookstore or campus technology center.
Free Alternatives to Word
Word is the most common word processor, but it’s expensive, especially if it didn’t come with your computer. Some classes will explicitly require you to use Microsoft Word for your classwork. Otherwise, you’re free to use whatever program you wish. Google’s Google Docs and Apple’s Pages, are two other widely-used examples. Here are some free options to explore as an alternative to Word:
- Google Drive. Connected to a Gmail / Google personal account, this flexible tool lets you access your saved files from any internet-connected device. You can also download files to work on offline, and they will automatically sync when you go online again.
- Office Online. You’ll need to register with an account, but can then access your saved files from any internet-connected device.
- OpenOffice. This is software you download on your computer, so you don’t have to be online to use it.
- LibreOffice. Similar to OpenOffice, you download this software directly to your computer.
Using Microsoft Word
When you first open Microsoft Word, you’ll be given the option to choose from various templates. Some of these may be useful for your classes, particularly newsletters, brochures, and resumes, but you will most frequently be working in a simple Word Document. Once inside the document, familiarize yourself with the various tools to help you format your paper.
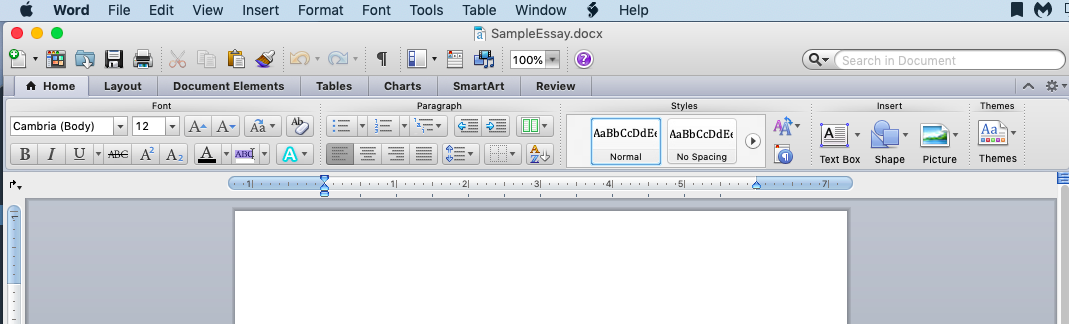
Figure 1. Take some time to investigate the various tools and options inside of Microsoft Word and use these to your advantage when you write.
- Visit the “Format tab” or the “Layout” tab in the toolbar if you need to adjust the sizing of your font or margins
- Use the home tab of the toolbar to adjust the font, font size, and address basic formatting needs, such as adding a numbered list, bullet points, columns, or images.
- Use the tools tab to check for spelling and grammar issues, track changes during editing, or check the word count (although you can also highlight text and see a tally of the word count in the bar at the bottom of the document).
Watch it: Getting to Know Word
Let’s start by reviewing the program as a whole, and what it’s capable of.
You can view the transcript for “Word: Getting Started” here (opens in new window).
Visit each of the links below to review important features and uses of Microsoft Word:
Basic Skills
- Creating and Opening Documents
- Saving and Sharing: The ever-important “Save” feature is going to be your new best friend in college.
- Text Basics: Cutting, copying, pasting, and deleting are all reviewed here. “Find and replace” is a tool that will be particularly handy for revising documents.
- Formatting Text: Making your document look attractive is one of the most fun parts of using a word processor. This video demonstrates quick ways to change your text’s appearance.
- Page Layout: Your professor may have specific instructions for how she wants you to format the documents you write for her class. If that’s the case, review how to change layout and formatting settings here.
- Printing
Intermediate Skills
- Line and Paragraph Spacing: Having trouble getting things to line up the way you want them to on the page? This video shows how to simplify the appearance of your text with a couple of clicks.
- Spell Check and Grammar Check: Probably everyone’s favorite tool since the invention of computers is automatic spell check. Grammar check is also quite useful. Though neither tool is perfect, both will provide you a good leg up in the proofreading process.
- Headers, Footers, and Page Numbers: Your instructor will often ask you to include page numbers on your document, along with some specific formatting procedures. MLA and APA document formats, for instance, both rely upon the use of Headers. See how to insert these easily here.
- Track Changes: Some built-in tools allow you to add comments on a draft, which is useful for doing peer review, or making notes to yourself as you build a project. Your instructor might also add notes to your essay document when he grades it, so it’s useful to know how to turn on Track Changes so you don’t miss his input.
- Word Count: Many writing assignments you have in college will ask for a particular word count range (such as a 500–750 word essay assignment). It’s useful to know how to easily locate the word count in a document you’ve created.
Try It
Advanced Skills
- Hanging Indents: MLA and APA bibliography pages use a special type of indent, called a “hanging indent.” Where a normal paragraph indents the first line but not any others, a hanging indent paragraph DOESN’T indent the first line, but DOES indent all the others. Luckily, it’s very easy to have your word processor do the hard work of this type of formatting for you, as this video demonstrates.
- Bibliography Pages: Speaking of bibliographies (or Works Cited pages, or References pages), did you know that many word processors have ways to help you create those quickly?
- Alphabetizing Bibliographies (and other lists): One more bibliography tip…if you create your citation list as you use sources, you’ll need to put these in alphabetical order at the end. An easy way to do that is to use the Sort feature in your word processor. This video demonstrates that in Word 2016.
- Inserting Pictures: Many college projects will require you to include visuals in your essays. The following video addresses how to add an image and then how to get the text around it to behave properly afterward.
- Change Default Settings: If the first thing you do each time you open a new document, is to change your font size or style, as well as readjust your margins, then you probably will save time by changing the default settings so it starts just the way you like it. (This video is for Word 2013)
Using Google Docs
Working in Google Docs is similar to working in Microsoft Word. The only requirement is that you need a Google login to save and share your documents, and most college and university email addresses come synced with a Google log-in. You can access Google Docs from inside your Google Drive, going directly to the website, or by clicking on the Drive button in the upper-right hand corner of your Google account.
Inside of the Google Drive, you can create Google Docs, Google Sheets (like an Excel document), Google Slides (similar to Microsoft PowerPoint), and more. One advantage of Google Docs is that they are made to be collaborative, so it’s very easy to share materials with classmates and your instructor. Note that some LMSs will require you to download your Google Doc as a PDF or Word document before you upload it; the video below explains how to do that (.37).
Once inside of a Google Doc, you’ll see that it is very similar to Microsoft Word. If there are features you don’t see but would like to include in your document, it may be worth searching for “add-ons” (or searching YouTube for tutorials) to enhance your document.
Watch It
This video shows the basics of getting started with Google Docs and how to share them.
You will need to know how to create hanging indents for your Works Cited or References pages in Google Docs. You can easily do this by choosing Format > Align & Indent > Indentation Options > Hanging Indent. Here is a quick tutorial to help with hanging indents.
You can view the transcript for “How to Create, Edit, and Share Files With Google Documents-Overview” here (opens in new window).
Contribute!
Did you have an idea for improving this content? We’d love your input.
Improve this pageLearn More
We all use computers for typing and sending emails, sending applications for jobs, as well as for writing and creating different files and documents. If the same process is done manually, this will take a lot of time.
Today with the help of Word Processing, we can draft a mail, edit, send or take a printout in very little time.
Word processing is the most popular computer application that enables users to create, store and display on a screen. Word processing is an example of Application software.
Let us learn more in detail about Word Processing.
What is Word Processing?
Word Processing needs a software which is called ‘Word Processor’. Some of the main Word Processors are Word, Notepad, Wordpad, etc.
A Word Processor is a software used to type text, edit text, and format and decorate the text. Word processing has enabled grammar correction and computerised spell testing features, which helps eliminate errors.
How to open the word?
Here is a list of instructions used to open the word:
- Drag the mouse pointer to the start button.
- Click on the left button of the mouse.
- The start menu will appear on the screen.
- Search and click on the “All programs” option.
- Search and click on the Microsoft Office.
- Select and click on the Microsoft Word 2007 option.
How to Open and Save the Document?
Any text material created through a word processor is a word file or word document.
After opening the Microsoft Word 2007 file, users can type the required text with the help of a keyboard. Once typing the text, the user can recheck and correct spellings or edits, if needed.
After completing typing the text, the same file can be saved into the computer permanently by saving either in a disk or a folder.
Here is a list of instructions used for saving a file:
- Go to the File menu, select and click on the “Save as” option.
- Give a specific name to the file.
- Choose the location or folder where you want to save the file.
- If you want to save the file in a separate folder, create a new folder.
- Click on the mouse’s right button at the empty place where other files and folders are placed; a box will appear with different options.
- Click on the new option, then click on the folder.
- A new folder will be created at the end, and a line will blink.
- Name the folder and press the enter key.
- Now your new folder is created.
- Now left-click the mouse to open the folder.
- Save the file or a document into this folder.
- Now click on the Save button.
- The file has been saved successfully in a new folder, for further reference of users.
How to Close a File?
Once opening the file it is necessary to close a document file after working on it. By doing this, the data will remain safe.
To close the file:
- Go to the File menu.
- Select and click on the “Exit” option.
- A dialogue box will appear on the screen with the options ‘Yes’ or ‘No.’
- Click on the ‘Yes’ option. The file will get closed.
How to Close a Word Program?
The procedure to close a word program is called to quit or exit. When the user no longer needs to work on word processing, it is necessary to close the word file.
To close the Word program :
- Click on the close button (X) present on the upper right side of the word screen.
- The Word program will get closed.
Another option to close the Word program is:
- Go to the File menu
- Select and click on the “Exit” option given at the end. Word file will close by clicking on it.
Frequently Asked Questions on Word Processing
Q1
What are the keyboard shortcuts to cut, copy and paste?
The keyboard shortcuts to cut, copy and paste are:
Cut – (CTRL + X)
Copy – (CTRL+ C)
Paste – (CTRL + V)
Here CTRL refers to the control key. Both the keys (CTRL + X) should be pressed together in these keyboard shortcuts.
Q2
What is word processing?
Word processing refers to typing any text, editing and formatting.
Q3
What is a word document?
A text written through a word processor is called a word file or word document.
Q4
What is the office button?
There is a button on the top left side of the word screen used to create a new file, to open an already saved file, save, print, close, etc.
Q5
How to open an already created file?
Click on the office button.
Open and select the required file to open the word program.
Stay tuned to BYJU’S for more information on NIOS, syllabus, notes, along with its important questions and solutions.
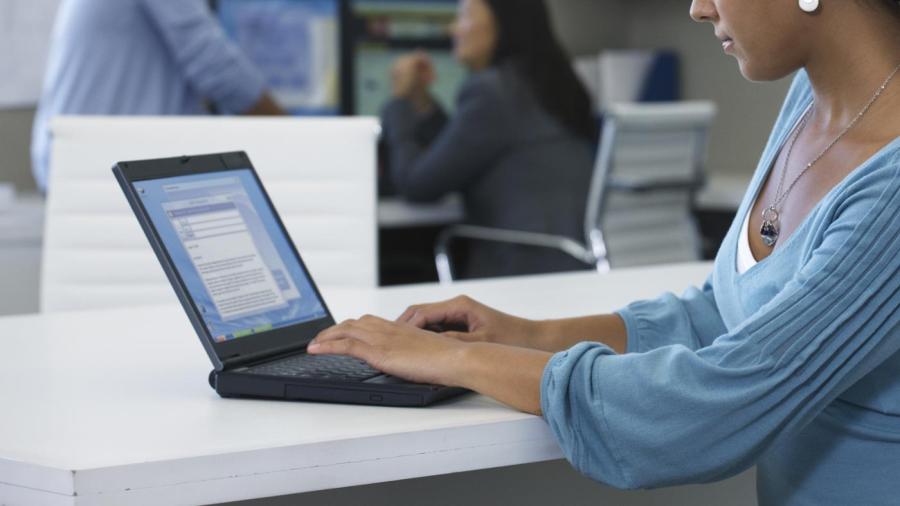
i typing #3 image by Adam Borkowski from Fotolia.com
Basic computer and word processing skills are required for almost every job. Most people should be able to achieve basic computer skills with a little practice. Displaying decent typing skills while efficiently navigating the operating system will help demonstrate computer skills. Another requirement for most jobs is a general knowledge of how to use Microsoft Office. Visit a local bookstore or Amazon.com and purchase a couple of computer books to review basic computing and word processing.
Step 1
Study the computer basics, such as how to plug all the cables into the back of a computer, what to do if the computer crashes, and how to add and remove programs. There are a lot of things that can go wrong while using a computer. Download a couple of free programs and install them to learn more about how the computer works. The VLC video player at VideoLan.org is a great choice. Right-click different options on the desktop and start menu to see what’s available.
Step 2
Improve typing skills. This is the most important basic computer skill because it makes everything else so much easier, especially word processing. Visit Staples or Amazon.com and purchase a typing program such as Mavis Beacon. The software will feature a series of lessons that can be completed over a period of several months. The key is to never miss a lesson. Always practice typing every day, even if you don’t feel like it, until you are able to demonstrate a speed of 40 words per minute or faster.
Step 3
Learn to use Mozilla Firefox and Internet Explorer. Familiarity with these popular Web browsers will be very helpful in demonstrating basic computer skills. First go through all the options in the menu bar and learn what they are used for. Learn how to install plugins such as Adobe Flash or Sun Java. Study the different tool bars, and practice adding and removing favorites and bookmarks.
Step 4
Review browser and software email programs. For browsers, Yahoo Mail and Gmail are popular choices. Mozilla Thunderbird and Microsoft Outlook are software programs used to send emails. Learn to write emails that sound professional without a lot of emotion. Write a clear subject line, and proofread the email before sending it. Learning how to write email using a professional voice can be helpful in demonstrating word processing skills.
Step 5
Purchase the latest version of Microsoft Office from Staples or an on-line computer store. Also buy a couple of computer books explaining how to use the programs. Demonstrating a knowledge of word processing with Microsoft Word will be very helpful during a review of basic computer skills. Develop a basic knowledge of all the programs in the Office suite, and pay special attention to Microsoft Word, Excel, and PowerPoint.
References
Writer Bio
Cari Haus has authored or co-authored a score of books on topics ranging from business and health to parenting, faith, and life. After earning a B.B.A. from Andrews University in 1982, Haus became a C.P.A. in 1985. Lately she has been writing business articles for the newsletter Real Estate Advisor.
Unit 9. Basic word processing skills
Click play on the following audio player to listen along as you read this section.
– the use of a program (software application) running on a computer that allows users to create, edit, format, and store documents.
Create a Document
 Steps to create a new word processing document (Word, Office 365):
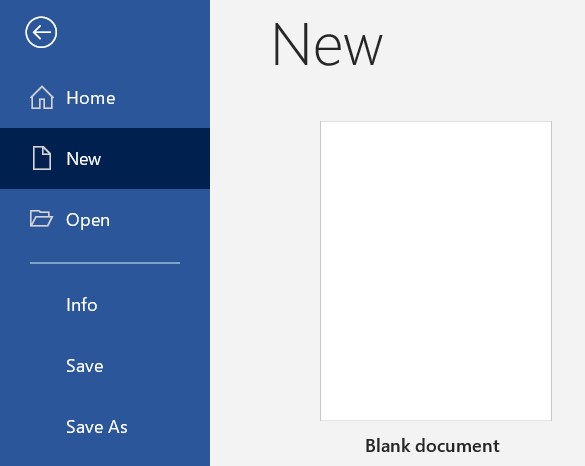
- Start Microsoft Word.
- Click the File tab.
- Click the New tab.
- Click Blank document. (A new blank document appears.)
- Type your text. The text you type will be inserted into the document.
Edit a Document
– making revisions to a document, focusing on correcting errors, improving the accuracy of language, rearranging, making words and sentences clearer and more effective, etc.
Editing in word processing may include the following tasks:
- Adding text (terms, phrases, paragraphs, etc.)
- Deleting a part of a text
- Copying text
- Moving text
- Pasting text
- Checking for grammar and spelling
- Formatting text
Select Text
Before editing text, you’ll need to select it. This is also sometimes called “highlighting text.”
- Click File Explorer icon.

- Go to the location where stores your file or folder (hard drive, USB, etc.).
- Open the document you wish to edit.
- Move the I-beam pointer
 to where you wish to select text.
- To select a word: double-click the word.
- To select an entire line of text: move the I-beam to the left of the line until it turns into a right-pointing arrow
 , then click.
 - To select a paragraph: triple-click the paragraph.
- To select any amount of text: click and drag the I-beam over the text to highlight it.
- To select an entire document: move the I-beam to the left of any text until it turns into a right-pointing arrow , then triple-click. Or click the Home tab, under Editing, click Select, and then click Select All.
Delete (or remove) text
Method 1
- Select the text you wish to delete.
- Press the Delete key (on the keyboard).
Method 2

- Move the I-beam pointer to the text you want to delete. Click to set the insertion point there (a blinking vertical line).
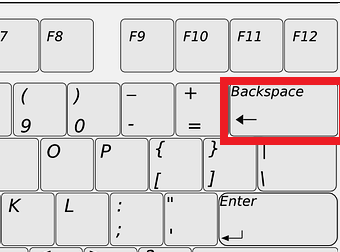
- To delete text to the left of the insertion point, press the Backspace key on the keyboard. (On a Mac keyboard, press the Delete key.)

- To delete text to the right of the insertion point, press the Delete key on the keyboard. (On a Mac keyboard, press the fn key plus the Delete key.)
Copy and Paste
Copy vs. cut
- – duplicates the selected item (text, symbol, table, image, etc.).
- – removes the selected item from its original position.
Copy and paste vs. cut and paste
- Copy and paste – duplicates the selected item. The selected item can be found in both original and the new, pasted location(s).
- Cut and paste – duplicates the selected item then deletes the original. The selected data can be found only at the new, pasted location (the item has moved from one location to another).
Steps to copy / cut and paste
Method 1
- Open the document you wish to edit.
- Select the item you wish to Copy or Cut.
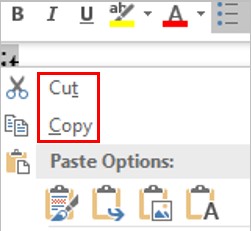
- Right-click the highlighted item and click Copy or Cut. You can also use your keyboard:
- Copy: Cntr + c (On a Mac, it is Cmd + c)
- Cut: Cntr + x (On a Mac, it is Cmd + x)
- Position the insertion point where you wish to insert the item.
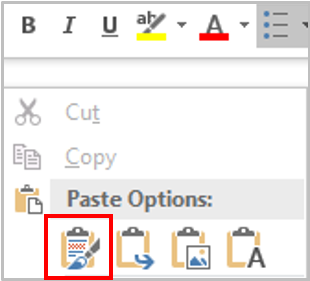
- Right-click and click the Paste
 icon. You can also use your keyboard by pressing Cntr + v (On a Mac, it is Cmd + v).
Method 2
- Open the document you wish to edit.
- Select the item you wish to copy or cut.
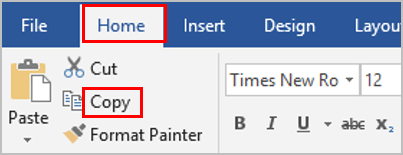
- Click the Home tab at the top (on the ribbon). Click the Copy button.

- Position the insertion point where you wish to insert the item.
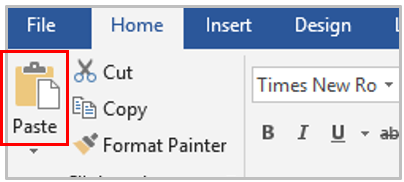
- Under the Home tab at the top, click the Paste button.

Review a Document
Check Spelling and Grammar
Method 1
- Open the document you wish to edit.
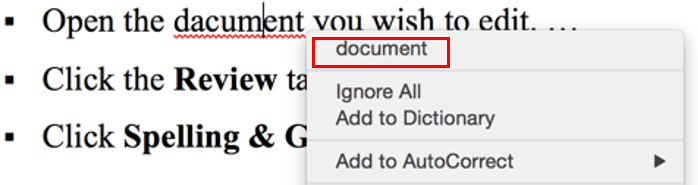
- Right-click a word that is underlined with a wavy line (that indicates a misspelled word).

- Select the correct spelling from the suggestion list to correct the spelling error. For each error, Word will offer one or more suggestions.
Method 2
- Open the document you wish to edit.
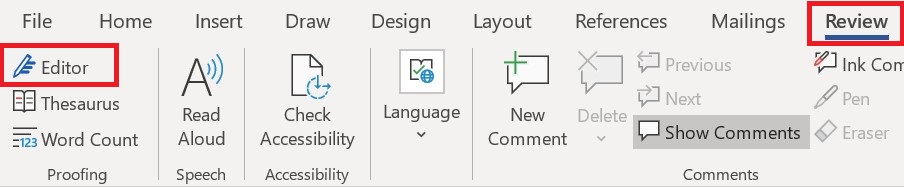
- Click the Review tab.
- Click the Editor button (it may also say, “Spelling and Grammar”). If the program finds spelling errors, the Spelling & Grammar pane will appear.

- Click one of the options from the suggestion list to change the spelling error. The program will move to the next misspelled word.
Find Synonyms
Method 1
- Open the document you wish to edit.
- Right-click a word for which you wish to find a synonym for.
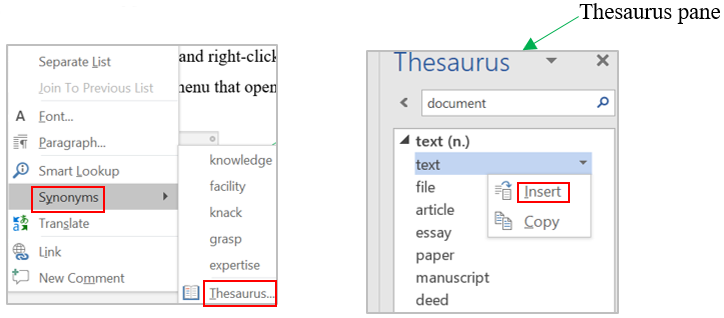
- Click the Synonyms command from the pop-out menu.
- Find a desired word in the list and click it to replace the original word.
- If none of the synonyms are desired, click the Thesaurus command to open the full thesaurus. (The Thesaurus pane will appear.)
- Find a desired word in the Thesaurus pane list and right-click it and then click Insert.
- Close the Thesaurus pane.

Method 2
- Open the document you wish to edit.
- Select a word for which you wish to use the thesaurus.
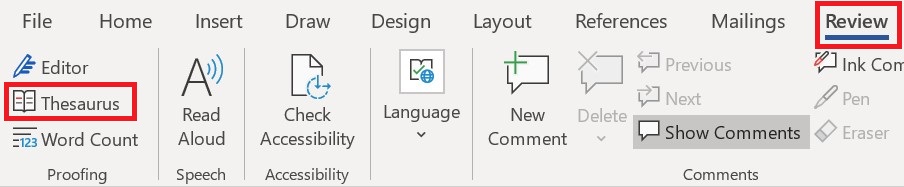
- Click the Review tab.
- Click the Thesaurus button.
- Find a desired word in the “Thesaurus” pane and right-click it and then click Insert.
- Close the Thesaurus pane.
Keyboarding Applications
State Standard 3: Students will
create and edit a variety of documents; i.e., reports, letters, memos, emails,
labels and envelopes from unarranged, edited, and script copy using word
processing software.
Objective1:
Students will demonstrate basic word processing formatting
skills.
Utilize file
functions: open, close, save, save as, page setup, and print.- Utilize
formatting functions: variable top, bottom, left, and right margins; font sizes
and styles; line spacing, word wrap, bullets and outline features;
justification; spell check; thesaurus.
Create tables.- Utilize report
functions: page numbering; page number suppress; widow/orphan protection;
enumerated items; bibliography (references); works cited; title pages; table of
contents.
Day 1 – Text Alignment
- Text Alignment Document
Day 2 – Copy, Move and
Paste
- Holidays Document
- Copy, Move and Paste
instructions
Day 3 – Fun with Fonts
- Fun with Fonts Document
Day 4 – Margins and Line
Spacing
- Falling Asleep Document
- Margins and Line Spacing
instructions
Day 5 – Insert/Overtype,
Formatting Marks, and Word Wrap
- Word Wrap Document
- Insert/Overtype,
Formatting Marks, and Word Wrap instructions
Day 6 – Spelling and
Grammar check
- Spelling and Grammar Check
instructions
Day 7 – Punctuation and
Thesaurus
- Thesaurus Document
- Punctuation and Thesaurus
instructions
Day 8 – Headers and
Footers
- Headers and Footers
instructions
Day 9 – Bullets and
Numbering
- Bullets and Numbering
instructions
Day 10 – Change Case
- Change Case Document
Day 11 – Format Paragraphs
- Declaration Document
- Format Paragraphs
instructions
Day 12 – Setting Tabs
- Setting Tabs instructions
Day 13 – Outline Format
- Outline Format
instructions
Day 14 – Page Breaks,
Widow/Orphan Control
- Fun Poetry document
- Page Breaks, Widow/Orphan
Control instructions
Day 15 – Vertical Alignment
and Page Numbering
- Fun Poetry document (saved
from day 14) - Vertical Alignment and
Page Numbering instructions
Day 16 – Creating Tables
in MS Word
- Creating Tables in MS Word
instructions
Day 17 – Formatting Tables
- Formatting Tables
instructions
Day 18 – Word Processing
Review Activities 1-3
- Confessions Document
- Hanna Zen Document
- Activity 1-3 instructions
Day 19 – Word Processing
Review Activities 4-6
- Newsletter Document
- Activity 4-6 instructions
Day 20 – Word Processing
Practice Test 1
- Enormously Gorgeous
Document - Word Processing Practice
Test 1 instructions
Day 21 – Word Processing
Practice Test 2
- Walk Away document
- Word Processing Practice
Test 2 instructions
Day 22 – Word Processing Production
Test
- Getting a New Puppy
document - Word Processing Production
Test instructions
Day 23 – Word Processing
Jeopardy
- Word Processing Jeopardy
PowerPoint
Day 24 – Word Processing
Multiple Choice Test
- UTIPS Quiz – Basic Word
Processing
Day 25 – Advanced Word
Processing – Ergonomics Day 1
- Healthy Computing document
- Advanced Word Processing –
Ergonomics Day 1 instructions
Day 26 — Advanced Word
Processing – Ergonomics Day 2
- Healthy Computing document
(saved from Day 25) - Advanced Word Processing –
Ergonomics Day 2 instructions
Day 27 – Advanced Word
Processing – History of Keyboarding Day 1
- History of Keyboarding
document - Advanced Word Processing –
History of Keyboarding Day 1 instructions
Day 28 – Advanced Word
Processing – History of Keyboarding Day 2
- History of Keyboarding
document (saved from Day 27) - Advanced Word Processing –
History of Keyboarding Day 2 instructions
May 6, 2019
This article breaks down how to list computer skills in a resume using real resume examples. For other professional skills, check out this article on how to include 50+ examples of skills on a resume.
In today’s information and technology age, it’s no surprise that job seekers with strong computer skills land far more jobs than those who don’t. From laptops to POS systems and from RFID scanners to mobile phones, almost every job today requires you to work hand-and-hand with technology.
To make sure you have the computer skills on your resume that hiring managers are looking for, this guide will walk you through how to add the right computer skills, plus 50+ computer skill examples.
This resume writing article will cover:
-
- What Are Computer Skills? And Why Are Computer Skills Important?
-
- Types of Computer Skills
-
- Levels of Computer Skill Proficiency
-
- Where and How to Incorporate Computer Skills On Your Resume
-
- Top 50+ Computer Skills Hiring Managers Look for On Resumes
- The Fastest Ways to Acquire New Computer Skills
What Are Computer Skills? Why Are Computer Skills Important?
Computer skills are the ability to utilize computers and technology efficiently.
With the rise of technology, the computer skills you have can set you apart when applying for a new job. When you think about it, there are seldom positions that remain free from technology. Even trades that traditionally didn’t require computers, like farming, landscaping, and handymen, now use technology for marketing, accounting, and reservations.
Every professional position requires the use of certain technology, ranging from hardware to computer applications. Likewise, every professional has a unique set of computer skills with varying levels of proficiency. Finding the perfect fit between what’s needed and what someone has is the sole mission of a hiring managers when looking for a new employee. If the hiring manager is able to find someone that has all of the computer skills necessary, they won’t need to spend so much time and money on training, which means they will get a quicker return on their hiring investment.
But how can hiring managers tell if you have the computer skills needed for their role?
First and foremost, hiring managers will look at your resume. Typically, hiring managers spend no more than 6 seconds reviewing a resume and during that time they are looking to see if the computer skills needed jump out.
As a job seeker, it is your responsibility to know what computer skills are necessary for each role. It is also your responsibility to put those computer skills on your resume in a way that stands out.
Types of Computer Skills (Resume Examples)
Computer skills can be broken down into categories and levels of proficiency. Before we discuss how to incorporate computer skills on your resume, let’s discover the basic computer skills categories and assess your level of proficiency.
Skill Categories
Computer skills can be broken down into 13 main categories.
Typing – The process of writing or inputting text, typically using a keyboard
Mouse – Navigating a two-dimensional surface with a pointer, using a standalone mouse, touchpad, or touchscreen
Internet – Using the internet to browse and research
Email – Using text to correspond with other users through the internet using an email application or browser
Hardware – The physical elements of technology, including keyboards, cases, cables, screens, and touchpads
Operating Systems – The critical, low-level software that supports all other applications
Word Processing – Using a text editing application, such as Notepad or Word, to write and modify text
Presentations – Creating engaging, visual presentations using applications like Prezi and PowerPoint
Graphics – Creating and manipulating visual elements
Multimedia – Using sound, images, and video to create multi-faceted elements
Spreadsheets – Using applications, such as Excel, to input, edit, calculate, and manipulate numbers and data
Databases – Storing numbers and data in a central location
Programming – Using programming languages to write, edit, and manipulate software applications
Levels of Proficiency
There are many assessments used in the job market to assess a candidate’s level of computer skill proficiency. One of the most widely used is the International Competitions and Assessments for Schools, also knows as ICAS. The ICAS Digital Technologies assessment assesses skills and knowledge in the above technology categories and then grades your level of proficiency using a letter rating between A and H.
The rating system most hiring managers are familiar with though is simply rating your computer skills as either fundamental, basic, intermediate, or advanced. We will go through each of these categories and will give examples of your expected knowledge for each.
Fundamental Computer Skills
Fundamental computer skills include typing and using a mouse. Possessing fundamental computer skills mean you have no to little computer experience or training. At a fundamental level of computer proficiency, you should be able to:
-
- Identify the basic components of a computer (keyboard, mouse, screen, etc.)
-
- Understand menu bars
-
- Create, save and delete documents
-
- Operate the print function
- Recognize icons (sound, internet, video, etc.)
Basic Computer Skills
One level up from fundamental proficiency is basic computer skills. Possessing basic computer skills requires a small amount of computer experience, including a basic understanding of email, word processing, graphics, and spreadsheets. At a basic level of computer proficiency, you should be able to:
-
- Write, modify, and edit text using a word processing application
-
- Create and format simple spreadsheets
- Create basic presentations
-
- Know how to forward and cc emails
- Understand how to search, assess search results, and download information from the internet
Intermediate Computer Skills
Intermediate computer skills build upon the basic level of proficiency. Intermediate computer skills require a moderate amount of previous computer experience, including a moderate understanding of operating systems, word processing, graphics, spreadsheets, and databases. At an intermediate level of computer proficiency, you should be able to:
-
- Understand operating systems
-
- Understand how to use flash drives and memory cards
-
- Know how to insert hyperlinks and tables on word processing applications
-
- Understand how to insert links and videos into presentations
-
- Know how to use CD, DVD, and mp3 players
-
- Modify your signature, recognize and sort spam, and recognize file formats when using email
- Conduct complex sorting, applying filters, and using different views on spreadsheets and databases
Advanced Computer Skills
The final level of proficiency is advanced computer skills. At this stage, you will be able to use word processing, email, the internet, and spreadsheets to their fullest capacity. You will also start to understand basic software development and programming principles. At an advanced level of computer proficiency, you should be able to:
-
- Understand computer hardware and software components
-
- Execute complex operations, formatting, and tables in word processing applications
-
- Integrate multimedia elements into presentations
-
- Create distribution lists and complete advanced file transfers using email
-
- Create ‘if’ statements, create complex graphs/charts, and use complex functions like macros and VLOOKUP in spreadsheets
- Have a fundamental understanding of programming principles and concepts
Where and How To Include Computer Skills On Your Resume
Your computer skills must be incorporated throughout your entire resume, rather than being stuck in one area. When hiring managers review a resume, they scan over each section, from top to bottom, which is why it is important to include your computer skills in these 3 main areas: The professional summary, the key skills, and the experience sections.
If writing your resume from scratch, we suggest using this free and easy-to-use resume builder. When using a resume template, all sections and formatting is done for you, all you need to do is fill in rich, engaging content.
Professional Summary Section
At the top of your resume, below the header and contact information, comes a professional summary section. This section could be titled ‘Professional Summary’ or ‘Summary’ but avoid calling it an ‘Objective’. An objective statement is an old-school resume writing approach and is seldom used in today’s job market.
Your professional summary section will be 1-3 sentences in length. This should include your title, years of experience, and the top skills that set you apart.
If using the resume builder, the ‘True Red’, ‘Doppio’, and ‘Large; resume templates have professional summary sections that are sure to stand out.
Professional summary resume example:

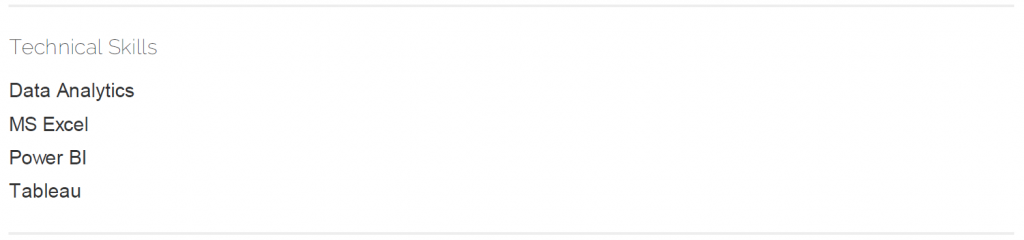
Summary of Skills Section
Following your professional summary comes a ‘summary of skills’ section. Alternative titles for this section could be ‘technical skills’, ‘key skills’, or ‘core competencies’.
Your skills section should be written in list form. Depending on the amount of skills you want to include, you can either list them out separately or arrange them into categories. A good rule of thumb is 10 skills or less should be separate, while more than 10 skills should be categorized.
Summary of skills resume example:
Experience Section
After your summary of skills comes an experience section. Alternative titles for this section include ‘professional experience’, ‘work experience’, and ‘relevant experience’.
The experience section should be written listing your most recent employer first. For each professional position, include the company name, your title, the dates of employment, and 3-5 bullet points detailing your daily responsibilities.
When writing your responsibilities, sprinkle as many computer skills in as you can. This will validate the computer skills you have listed in your skills section by explaining how and where you used each of them.
Experience section resume example:

What Computer Skills Should You Include on Your Resume?
There are three easy-to-follow steps to figure out what computer skills you should include on your resume. The computer skills you include depend on both your background and the types of positions you are applying to.
Step #1: Create a master list of your computer skills
Go through each category and create a master list of each and every computer skill you have in your toolbox. When creating your master list, write every skill, no matter how obvious it may seem. Although some computer skills might seem obvious given your profession, many hiring managers still want to see these skills listed.
The important thing is to never write a computer skill that you aren’t comfortable with. If you include it, hiring managers will expect you can deliver. If you are ever worried about a hiring manager over or underestimating your level of proficiency, add ‘fundamental’, ‘basic’, ‘intermediate’, or ‘advanced’ in parentheses next to the skill listed.
Job post example (with highlighted skills):
Step #2: Figure out the computer skills required for the job
When applying for a new position, you must first identify the computer skills needed. To figure this out, go through each job description and highlight each thing that relates to a technology, software, or application.
Then create a list with the computer skills described, making sure to write each skill using the same wording that is used in the job description.
| Data Analytics | SAS (advanced) | SQL |
| Excel | Business Intelligence | Power BI |
| MS Office | Word | Excel |
| PowerPoint | Outlook |
Step #3: Match your master list with the computer skills required for each position
The computer skills you include on your resume should be the items that overlap between your master list and the list of computer skills needed.
A general rule of thumb is to never include skills that aren’t relevant to the job you are applying for. For example, if you are applying for a landscaping position, there is no need to include that you know computer programming.
50+ Computer Skills Hiring Managers Want In Resumes
To make sure your resume has the computer skills hiring managers look for, go through this list to check out the top computer skills needed for each type of category and position.
Basic Computer Skills
| Typing | Word Processing | Electronic File Management |
| Emailing | Internet Research | Presentations |
| Graphic Editing | Spreadsheets | MS Word |
| MS Outlook | MS PowerPoint | MS Excel |
Hardware
| Cabling | Servers | Screen Repair |
| Hardware Troubleshooting | Networking | A/V Setup |
Software
| Software Development | Full-Stack Development | Web Development |
| Java | JavaScript | HTML |
| CSS | .NET | Agile Development |
| Python | COBOL | C++ |
Graphic Design & Word Processing
| Graphic Manipulation | Document Formatting | Adobe Photoshop |
| Adobe Illustrator | Adobe InDesign | CorelDRAW |
| Microsoft Publisher | AutoCAD | Art Design |
Spreadsheets & Databases
| MS Excel | Data Analytics | MATLAB |
| SAP BI | Excel Macros | VLOOKUP |
| Statistics | Relational Databases | Pivot Tables |
IT Support
| Client Server Management | Troubleshooting | Tech Diagnostics |
| Network Support | Systems Administration | Password Resets |
Marketing
| Digital Marketing | Social Media Marketing | Pay-Per-Click Advertising |
| Graphic Design | UI/UX Design | MailChimp |
| Google Analytics | Facebook Ads | WordPress |
How To Learn New Computer Skills
Are you worried about not having the computer skills needed for a position? If so, there are plenty of tools to help you get up to speed quickly.
The first option is to enroll in a course at a local school or library. For beginners, many public libraries teach basic computer skills, so ask your neighborhood branch when the next lesson is. If you are more advanced, consider enrolling in a technology certification course at a local community college. They are cheaper and require less time than a full-out degree program.
The second option is to use an online platform. There are so many free and cheap computer skills courses available, ranging from YouTube videos to eLearning platforms like Lynda, Udemy, and Skillshare. But of course, you will need to have mastered fundamental computer proficiency, like internet browsing and typing, before you can get there.
More Skill-Related Articles For Resume Writing:
- How to List Skills on a Resume (50+ Resume Skill Examples)
- How To List Hard Skills On A Resume (50+ Hard Skill Examples)
Word processing skills refer to the know-how of using word processing software to create professional word documents. These skills are necessary to create letters, emails, organizations’ reports and other documents.
Word processing skills help an individual create and organize word documents that are attractive and readable. Skills include aligning text in the document and using various fonts to create a presentable document. It is also important to learn how to set the correct line spacing and margins to produce presentable word documents. In addition, the use of the thesaurus tool built into many word processing software helps create professional documents.
Popular word processing software, including Microsoft Word for Windows and Pages for Mac, have built in spelling and grammar check capability that should be used to create documents free of spelling and grammar errors.
Another word processing skill one should master is the use of headers and footers. This skill includes important details that need to appear in the document such as dates and page numbers. Creating and formatting tables is an important skill, especially when dealing with research data. In addition, one needs to know how to set tabs appropriately. Learning to use page breaks appropriately is very useful, especially when creating large documents.
MORE FROM REFERENCE.COM