
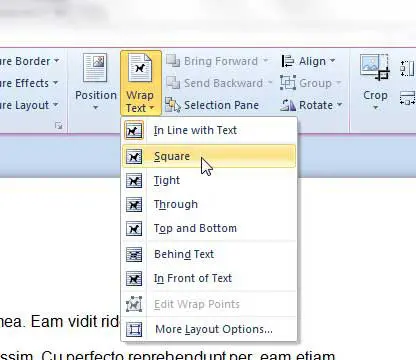
Wrap text around a picture in Word

-
Select the picture.
-
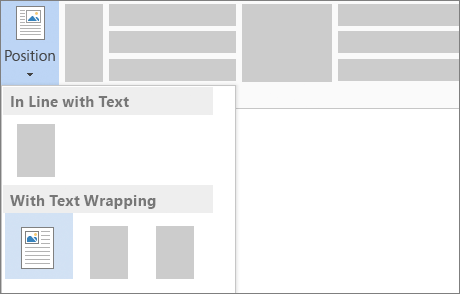
Select Layout Options.

-
Select the layout you want.
Tip:
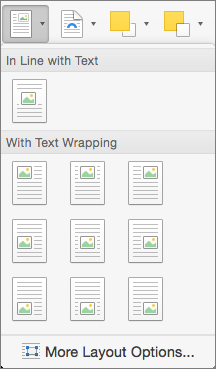
In Line with Text puts the picture in a paragraph, just as if it were text. The picture will change position as text is added or removed. The other choices let you move the picture around on the page, with text flowing around it.

For more info on text wrap options and wrap points, see Text wrapping options.
You can add a picture in the top left corner of a document and have the text flow around it.

-
Select a picture.
-
Go to Picture Format or Format > Position, and under Format with Text Wrapping, select Top Left.
Tip: You can drag the image around the document and align it any way you like. Make custom changes to word wrapping by selecting Format > Wrap Text > More Layout Options.
You can add a picture in the center of a document and have the text flow around it.
-
Select a picture.
-
Go to Picture Format or Format > Wrap Text > Square.
-
Select Position > More Layout Options.
-
On the Position tab, select Alignment, and change the drop-down field to Centered.
-
Next to relative to, choose Page, and select OK.
Note: You can drag the image around the document and align it any way you like. Make custom changes to word wrapping by clicking Format > Wrap Text > More Layout Options.

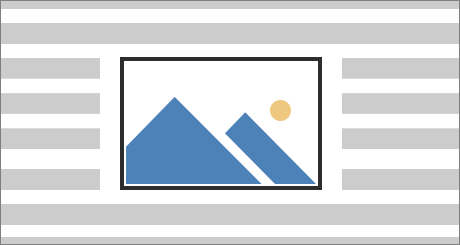
You can add an image in your document and make the text flow around it in a way that follows the shape of the image.
Tip: For best results, use a picture with a transparent, white, or solid colored background.

-
Select a picture and drag it to the middle of the page, or wherever you want it.
-
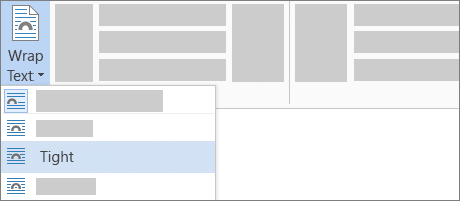
Go to Picture Format or Format > Wrap Text > Tight.
-
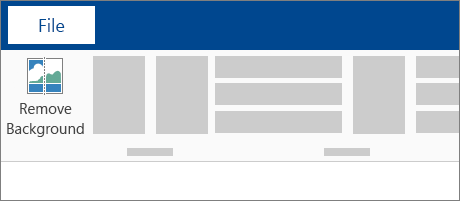
On the Format tab, select Remove Background.
Note: You cannot remove the background from vector images.
-
Select anywhere outside the image to see how the text has wrapped around the image.
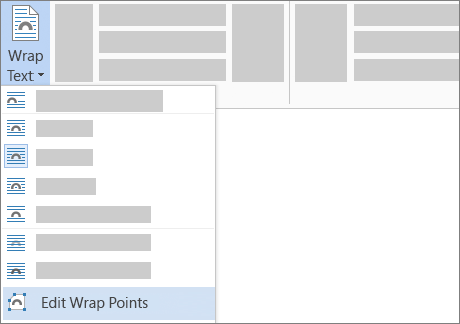
Fine-tune text wrapping
If there’s too much space between the text and your image, you can set the wrap points manually.
-
Select the picture, and go to Picture Format or Format and select Wrap Text > Edit Wrap Points.
-
Drag the black wrap points closer or farther away from your picture until you’re happy with its appearance. Drag the red line to create additional wrap points.
For more info on text wrap options and wrap points, see Text wrapping options.
Pictures inserted in line are tied to the place within the text where they were inserted and are treated like any text character—»in line with text.» They automatically move with the surrounding text.
-
Select a picture.
-
Go to Picture Format or Format and select Wrap Text > In Line with Text.
You can make sure that your picture stays in place as text is added or deleted.
-
Select a picture.
-
Go to Picture Format or Format and select Wrap Text > Fix Position on Page.
Configure text wrapping around a picture or drawing object
-
Select the picture or object.
-
Go to Picture Format or Shape Format and select Arrange > Wrap Text.
If the window is wide enough, Word displays Wrap Text directly on the Picture Format tab.
-
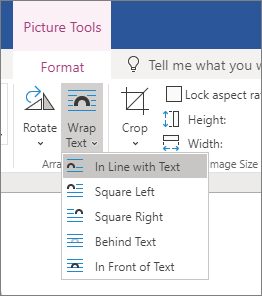
Choose the wrapping options that you want to apply.
For example, In Line with Text, Top and Bottom, and Behind Text.

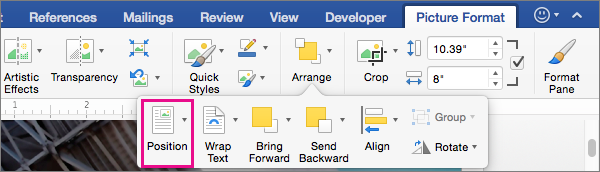
Change the position of a picture or drawing object relative to the text
-
Select the picture or drawing object.
-
Go to Picture Format or Shape Format and select Arrange > Position.
If the window is wide enough, Word displays Position directly on the Picture Format tab.
-
On the Position menu, choose the type of positioning that you want, or select More Layout Options to choose advanced layout options.
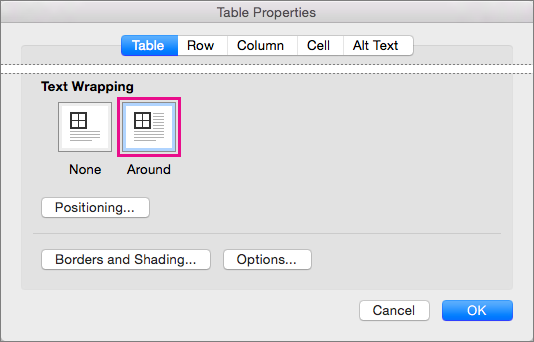
Configure text wrapping around a table
-
Control + Click the table, and then select Table Properties.
If you don’t see Table Properties on the shortcut menu, Control + Click in a different part of the table.
-
In Table Properties, under Text Wrapping, select Around.
-
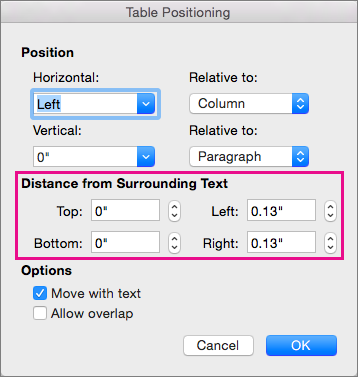
To change the distance of the table from surrounding text, select Positioning, and then in Table Positioning, set measurements under Distance from Surrounding Text.
Wrap text around a picture or drawing object
-
Select the picture or object.
-
Select Format and then under Arrange, select Wrap Text.
-
Choose the wrapping option that you want to apply.
Tip: To change a picture or drawing object’s position on the page relative to the text, select the picture or object, select Format > Position, and then select the position that you want.
Wrap text around a table
-
Click the table.
-
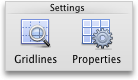
Click the Table Layout tab, and then under Settings, click Properties.
-
Under Text Wrapping, click Around.
-
To set the horizontal and vertical position of the table, the distance from surrounding text, and other options, under Text Wrapping, click Positioning, and then choose the options that you want.
Tip: When you use the Draw tool to create a table (located on the Tables tab, under Draw Borders), you can automatically apply text wrapping by holding down OPTION while you draw the table.
There are a limited group of text wrapping options for images with Word for the Web.
-
Insert and select a picture.
-
Go to Picture Tools > Format > Wrap Text.
-
Choose a layout.
If you inserted a picture into your document while using Word for the web, you can cut and paste it to move it within a document, and you can apply paragraph formatting, like vertical spacing and centering, to it. However, you cannot move a picture that was inserted while using the desktop version of Word if the picture has text wrapping or a fixed position on the page.
If you find that you cannot make changes to a picture, and you have the desktop version of Word, select Open in Word to open your document in Word and make changes to its layout.
When you are done, press Ctrl+S to save your document to its original location. You can then open the document again in Word for the web, and continue editing. Word for the web will retain the layout settings that you applied in the desktop version of Word.
Need more help?
Wrap text around a picture in Word
-
Select the picture.
-
Select Layout Options.
-
Select the layout you want.
Tip:
In Line with Text puts the picture in a paragraph, just as if it were text. The picture will change position as text is added or removed. The other choices let you move the picture around on the page, with text flowing around it.
For more info on text wrap options and wrap points, see Text wrapping options.
You can add a picture in the top left corner of a document and have the text flow around it.
-
Select a picture.
-
Go to Picture Format or Format > Position, and under Format with Text Wrapping, select Top Left.
Tip: You can drag the image around the document and align it any way you like. Make custom changes to word wrapping by selecting Format > Wrap Text > More Layout Options.
You can add a picture in the center of a document and have the text flow around it.
-
Select a picture.
-
Go to Picture Format or Format > Wrap Text > Square.
-
Select Position > More Layout Options.
-
On the Position tab, select Alignment, and change the drop-down field to Centered.
-
Next to relative to, choose Page, and select OK.
Note: You can drag the image around the document and align it any way you like. Make custom changes to word wrapping by clicking Format > Wrap Text > More Layout Options.
You can add an image in your document and make the text flow around it in a way that follows the shape of the image.
Tip: For best results, use a picture with a transparent, white, or solid colored background.
-
Select a picture and drag it to the middle of the page, or wherever you want it.
-
Go to Picture Format or Format > Wrap Text > Tight.
-
On the Format tab, select Remove Background.
Note: You cannot remove the background from vector images.
-
Select anywhere outside the image to see how the text has wrapped around the image.
Fine-tune text wrapping
If there’s too much space between the text and your image, you can set the wrap points manually.
-
Select the picture, and go to Picture Format or Format and select Wrap Text > Edit Wrap Points.
-
Drag the black wrap points closer or farther away from your picture until you’re happy with its appearance. Drag the red line to create additional wrap points.
For more info on text wrap options and wrap points, see Text wrapping options.
Pictures inserted in line are tied to the place within the text where they were inserted and are treated like any text character—»in line with text.» They automatically move with the surrounding text.
-
Select a picture.
-
Go to Picture Format or Format and select Wrap Text > In Line with Text.
You can make sure that your picture stays in place as text is added or deleted.
-
Select a picture.
-
Go to Picture Format or Format and select Wrap Text > Fix Position on Page.
Configure text wrapping around a picture or drawing object
-
Select the picture or object.
-
Go to Picture Format or Shape Format and select Arrange > Wrap Text.
If the window is wide enough, Word displays Wrap Text directly on the Picture Format tab.
-
Choose the wrapping options that you want to apply.
For example, In Line with Text, Top and Bottom, and Behind Text.
Change the position of a picture or drawing object relative to the text
-
Select the picture or drawing object.
-
Go to Picture Format or Shape Format and select Arrange > Position.
If the window is wide enough, Word displays Position directly on the Picture Format tab.
-
On the Position menu, choose the type of positioning that you want, or select More Layout Options to choose advanced layout options.
Configure text wrapping around a table
-
Control + Click the table, and then select Table Properties.
If you don’t see Table Properties on the shortcut menu, Control + Click in a different part of the table.
-
In Table Properties, under Text Wrapping, select Around.
-
To change the distance of the table from surrounding text, select Positioning, and then in Table Positioning, set measurements under Distance from Surrounding Text.
Wrap text around a picture or drawing object
-
Select the picture or object.
-
Select Format and then under Arrange, select Wrap Text.
-
Choose the wrapping option that you want to apply.
Tip: To change a picture or drawing object’s position on the page relative to the text, select the picture or object, select Format > Position, and then select the position that you want.
Wrap text around a table
-
Click the table.
-
Click the Table Layout tab, and then under Settings, click Properties.
-
Under Text Wrapping, click Around.
-
To set the horizontal and vertical position of the table, the distance from surrounding text, and other options, under Text Wrapping, click Positioning, and then choose the options that you want.
Tip: When you use the Draw tool to create a table (located on the Tables tab, under Draw Borders), you can automatically apply text wrapping by holding down OPTION while you draw the table.
There are a limited group of text wrapping options for images with Word for the Web.
-
Insert and select a picture.
-
Go to Picture Tools > Format > Wrap Text.
-
Choose a layout.
If you inserted a picture into your document while using Word for the web, you can cut and paste it to move it within a document, and you can apply paragraph formatting, like vertical spacing and centering, to it. However, you cannot move a picture that was inserted while using the desktop version of Word if the picture has text wrapping or a fixed position on the page.
If you find that you cannot make changes to a picture, and you have the desktop version of Word, select Open in Word to open your document in Word and make changes to its layout.
When you are done, press Ctrl+S to save your document to its original location. You can then open the document again in Word for the web, and continue editing. Word for the web will retain the layout settings that you applied in the desktop version of Word.
Need more help?
Многим пользователям во время редактирования документа может потребоваться оформить обтекание текстом изображения или другого объекта в Ворде. Благодаря этому, вы сможете по своему усмотрению изменить стиль оформления иллюстрированного документа Word.
Обтекание текстом — это результат взаимодействия текста на странице с внедренным объектом: изображением, таблицей, надписью или другим элементом. Вы можете выполнить в Word обтекание картинки текстом, разместив текст перед, за, после или вокруг изображения.
Содержание:
- Как сделать обтекание картинки текстом в Word — 1 способ
- Как сделать обтекание текстом в Ворде — 2 способ
- Как сделать обтекание картинки текстом в Ворде — 3 способ
- Как задать параметры для обтекания
- Как изменить контур обтекания текста
- Обтекание текстом таблицы в Ворде
- Выводы статьи
Часто необходимо расположить изображение в определенном месте, чтобы текст обтекал его в заданном порядке. В программе Word обтекание текстом объекта в любой момент можно изменить, добавить или убрать.
В этом руководстве вы найдете инструкции о том, как сделать обтекание картинки текстом в разных версиях программы Microsoft Word: Word для Microsoft 365, Word 2021, Word 2019, Word 2016, Word 2013, Word 2010, Word 2007. В указанных версиях Word обтекание рисунка текстом выполняется одинаково.
Как сделать обтекание картинки текстом в Word — 1 способ
По умолчанию, вставленный объект воспринимается программой как новый символ текста. После добавления нового текста в документ, рисунок будет перемещаться вместе с остальным текстом, потому что объект привязан к абзацу.
Вы можете вручную перенести изображение в нужное место на странице документа с помощью зажатой клавиши мыши.
Пройдите шаги:
- Вставьте нужное изображение в текст документа или используйте ранее вставленный рисунок.
- Щелкните левой кнопкой мыши по картинке.
- Подведите курсор мыши к одному из углов объекта, чтобы изменить масштаб изображения до необходимого размера.

- Кликните по изображению левой кнопкой мыши, в правом верхнем углу около рисунка появится значок «Параметры разметки».
- Нажмите на значок, чтобы выбрать подходящий вариант в опции «Обтекание текстом».

- Выберите нужный макет, нажимая на соответствующие значки, чтобы выполнить обтекание изображения текстом.
По умолчанию, вставленный объект имеет параметр «В тексте». Это значит, что этот элемент находится внутри абзаца, как будто это текст. Если добавить или удалить часть текста, положение изображения изменится.
В параметрах разметки имеются две настройки для перемещения или фиксации положения объекта на странице:
- Перемещать с текстом — после добавления или удаления текста, изображение перемещается по странице.
- Зафиксировать положение на странице — рисунок останется на своем месте, несмотря на перемещение текста в документе, после его добавления или удаления.
Как сделать обтекание текстом в Ворде — 2 способ
Вы можете воспользоваться похожим способом, используя при редактировании меню правой кнопки мыши.
Выполните следующие действия:
- Щелкните правой кнопкой мыши по изображению.
- В контекстном меню нажмите на пункт «Обтекание текстом».

- В открытом подменю выберите обтекание рисунка текстом, которое вам подходит.

Вам доступны следующие варианты выбора макета:
- В тексте — объект вставлен как новый абзац, текст располагается выше и ниже картинки.
- Квадрат (Вокруг рамки — название макета в некоторых предыдущих версиях MS Word) — текст размещается вокруг прямоугольной квадратной области на одинаковом расстоянии.
- По контуру — текст располагается вокруг контура объекта, размер и вид которого можно изменить разными способами.
- Сквозное — текст находится вокруг рисунка и внутри.
- Сверху и снизу — текст находится только выше и ниже объекта, соприкасаясь с ним.
- За текстом — текст страницы располагается за изображением, но он отображается на фоне объекта как водяной знак.
- Перед текстом — картинка закрывает часть текста, который находится за элементом.
В контекстном меню имеется параметр «Сделать макетом по умолчанию». Это значит, что вы можете задать выбранный способ обтекания текстом для всех последующих вставок объектов на страницы документов Word.
- После завершения редактирования сохраните файл Word на компьютере.
Как сделать обтекание картинки текстом в Ворде — 3 способ
Переходим к следующему способу изменения положения текста около изображения.
Проделайте следующие действия:
- Откройте документ Word.
- Наведите указатель мыши на место, куда вы хотите вставить изображение.
- В меню откройте вкладку «Вставка».
- Щелкните по значку «Рисунки», затем в выпадающем меню нажмите на «Это устройство…» или «Изображения в Интернете…».
- Добавьте изображение в текст документа.
- В меню откроется вкладка «Формат рисунка» (Формат).
- Кликните по значку «Положение», расположенному в группе «Упорядочить».

- Выберите подходящий вариант размещения объекта из предложенных, чтобы сделать обтекание картинки текстом в Ворде по заданным параметрам в опции «Обтекание текстом».

Как задать параметры для обтекания
Вы можете дополнительно отрегулировать параметры обтекания текстом объекта на странице документа Word.
Пройдите несколько шагов:
- При выборе способа обтекания, в контекстном меню имеется пункт «Дополнительные параметры разметки…», на который нужно нажать.
- В окне «Макет», во вкладке «Обтекание текстом» задайте необходимую опцию для каждой группе параметров.

В группе «Обтекание» укажите подходящий метод реализации.
В группе «Текст» выберите размещение текста:
- вокруг — текст расположен с любой стороны;
- слева — текст находится только слева;
- справа — текст располагается только справа;
- по большей стороне — текст размещен только с большей стороны.
В группе «Расстояние до текста» с помощью регуляторов «сверху», «снизу», «слева» и «справа» задаем расстояние от изображения до ближайшего текста.
В зависимости от выбранного способа обтекания, разнятся доступные настройки параметров в группах «Текст» и «Расстояние до текста».
- Для применения настроек нажмите на кнопку «ОК».
Во вкладке «Положение» настраивается позиция изображения или другого объекта в различных положениях.
Во вкладке «Размер» устанавливается высота, ширина, поворот и масштаб рисунка.
Как изменить контур обтекания текста
В обычном случае контур обтекания и само изображение совпадают по размеру и по форме. Вы можете придать контуру иную форму по своему смотрению.
Сделайте следующее:
- В окне открытого документа выделите изображение.
- Перейдите во вкладку «Формат рисунка» (Формат).
- В группе «Упорядочить» нажмите на кнопку «Обтекание текстом».
- В выпадающем меню выберите один из параметров обтекания, кроме исходного варианта — «В тексте».
- Щелкните по пункту «Изменить контур обтекания».

- Наведите курсор мыши на край выделенной красным рамки или на одну из угловых узловых точек.
- При зажатой левой кнопке мыши растащите контур обтекания до нужной формы.

- Сохраните изменения в документе Microsoft Word.
Обтекание текстом таблицы в Ворде
В некоторых случаях, нужно сделать обтекание текстом вокруг таблицы, созданной в документе Word.
Вам понадобится выполнить следующее:
- Щелкните правой кнопкой мыши по таблице.
- В открывшемся контекстном меню нажмите на пункт «Свойства таблицы…».

- В окне «Свойства таблицы», во вкладке «Таблица», в группе «Обтекание» нажмите на параметр «вокруг».
- Подтвердите изменения нажав на кнопку «ОК».

- Перетяните таблицу в нужное место документа, текст будет размещаться вокруг таблицы.

Выводы статьи
Во время работы в текстовом редакторе пользователю может понадобиться изменить разметку документа, в частности, сделать обтекание рисунка текстом в Ворде. Это необходимо для изменения внешнего вида страницы после вставки туда объекта. Вы можете выбрать положение изображения на странице документа и способ обтекания текстом по своему усмотрению, используя настройки приложения.
Похожие публикации:
- Как вставить видео в Word — 3 способа
- Как вставить PDF в документ Word — 6 способов
- PDF24 Creator — инструменты для работы с PDF файлами
- Как сделать список литературы в Word
- Озвучивание текста в Ворде — «Прочесть вслух» или «Проговорить»
I prefer to include images in Microsoft Word documents. They often help illustrate technical examples. The problem for me was I could never quite get the pictures and text to work nicely. Either the surrounding text was too close to the online picture or there was too much spacing. In this tutorial, I’ll show you how to wrap text around an image in Word without using a table. (Includes video tutorial.)
For this word wrap tutorial, I’m taking advantage of Creative Commons images and the RAND function. However, you can use your own text, images, or even an irregular shape.
Create the Practice Doc Without Image
In this tutorial, I’m using Microsoft 365. And if you’re interested in older MS Word versions, I’ve created a PDF document with the steps. Let’s create a practice document.
- Open a blank Microsoft Word document.
- At the top of the page, type
=rand(2,5). - Press Enter.

- This Word function creates 2 paragraphs of 5 sentences of random text.

How to Insert the Picture in Word
You can use any image, but I’m going to use an online image because they come with attached captions. Unfortunately, captions can present issues.
- Place your cursor at the end of paragraph 1.
- From the ribbon, click Insert.
- From the Illustrations group, click Pictures.
- From the menu, select Online Pictures…

- From the Online Pictures pane click Cats. Or, you can choose another category.
- Click the first cat picture. A checkmark will appear in the top right corner.
- Click the Insert tab. It will show with (1) to indicate image count.
Your image will appear between the two sample paragraphs.

Resize the Image & Caption
Most likely, your image is not the size you want, so we’ll resize it. What is not immediately apparent is that the caption has its own sizing controls. Thus, we’re dealing with 2 objects – the picture object and the caption object. If we don’t click the right set, we may end up resizing one object. You can test this by clicking around.
- Click the image. You want to have one set of sizing handles and one rotation control. The red arrow below points to the rotation handle.

- From the top menu, click Picture Format.
- In the Size group, click the downward-pointing arrow in the lower right corner.

- This opens the Layout dialog with 3 Tabs: Position, Text Wrapping and Size. Click the Size tab.

- In the Height section, change the Absolute size to 2.5″.
- Press Tab. The width value will change.
- Keep the Lock aspect ratio box checked.
- Press OK.
You should now have a small image and a caption with the Layout Options control to the right. The image also maintained its aspect ratio.

Adjust Word Wrap with Layouts
At this stage, we’d like to have the text wrap to the right of the image. To do that, we need to change our wrapping option.
- Click the Layout Options control, which is on the right-hand side outside of the sizing box.
- Click the Square option. It’s the first item under With Text Wrapping.

- Click the X to close the Layout Options panel.
We now have wrapped text to the right of the kitten image. However, this wrapping style looks too crowded for me.

Add Space With Picture Styles
For my taste, there isn’t enough room between the image and text. And you can’t highlight the paragraph and indent. This is where picture styles play a role. Fortunately, Microsoft has a number of layout styles that can enhance the image and white space.
- Click your image. The sizing box should show around it and the caption.
- Click Picture Format from the top menu.
- The Picture Styles group appears.
- Click the More button (small arrow) to the right scrollbar to expand.

- Hover over the style icon to determine which one works best for you.
If you played around with the different picture formats, you’d have noticed that the effects differed quite a bit. And while some styles didn’t really increase the space between the image and text, the image effect and coloring made it seem like it did.
There are other places where you can wrap text in Word, such as making custom address labels with an image. While address labels don’t have as many options, the layout concept is similar. And you could probably shrink down this adorable kitten picture to use.
- Wrap Text Video Tutorial
Hand-picked Tutorials
- How to Create Letterhead in Word
- How to Compress a Word Document
- How to Add a Watermark in Word
- How to Reduce Image File Size
- How to Check Word Readability
Lesson 18: Pictures and Text Wrapping
/en/word2013/headers-footers-and-page-numbers/content/
Introduction
Adding pictures to your document can be a great way to illustrate important information or add decorative accents to existing text. Used in moderation, pictures can improve the overall appearance of your document.
Optional: Download our practice document.
To insert a picture from a file:
If you have a specific image in mind, you can insert a picture from a file. In our example, we’ll insert a picture saved locally on our computer.
- Place the insertion point where you want the image to appear.
 Placing the insertion point
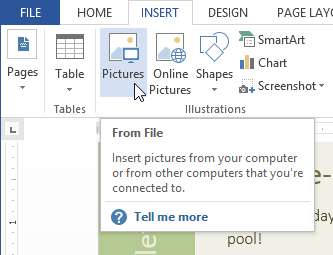
 - Select the Insert tab on the Ribbon, then click the Pictures command.
 Clicking the Pictures command
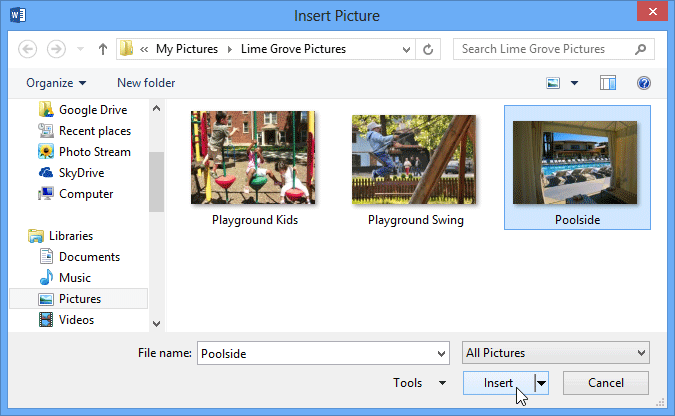
 - The Insert Picture dialog box will appear. Select the desired image file, then click Insert.
 Selecting a picture to insert
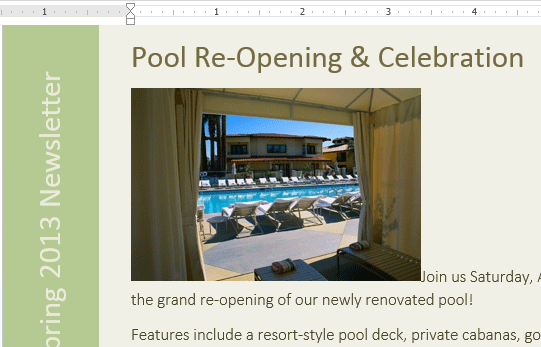
 - The image will appear in the document.
 The inserted image
To resize an image, click and drag one of the corner sizing handles  . The image will change size while keeping the same proportions. If you want to stretch it horizontally or vertically, you can use the side sizing handles
  .
.
 Resizing an image
Inserting online pictures
If you don’t have the picture you want on your computer, you can find a picture online to add to your document. Word offers two options for finding online pictures:
- OneDrive: You can insert an image stored on your OneDrive (previously called SkyDrive). You can also link other online accounts with your Microsoft account, such as Facebook or Flickr.
 Office.com Clip Art results
 - Bing Image Search: You can use this option to search the Internet for images. By default, Bing only shows images that are licensed under Creative Commons, which means you can use them for your own projects. However, you should go to the image’s website to see if there are any restrictions on how it can be used.
Bing Image search results

Previously, you also had the option to insert clip art images from Office.com, but this service has been discontinued. Instead, you can use Bing Image Search to find images for your document.
To insert an online picture:
- Place the insertion point where you want the image to appear.
 Placing the insertion point
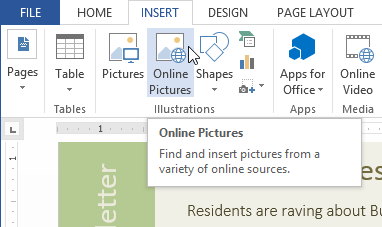
 - Select the Insert tab, then click the Online Pictures command.
 Clicking the Online Pictures command
 - The Insert Pictures dialog box will appear.
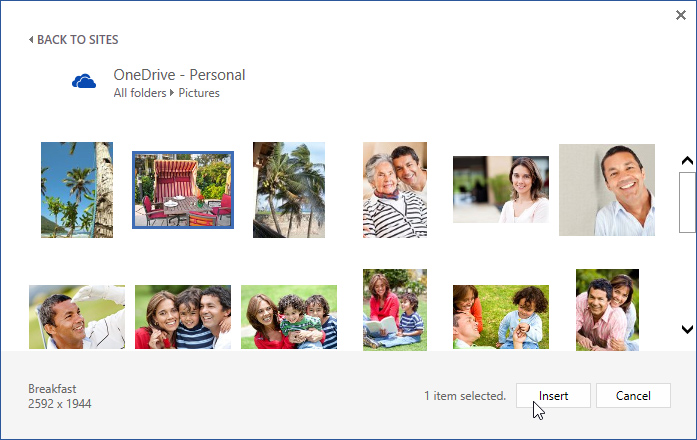
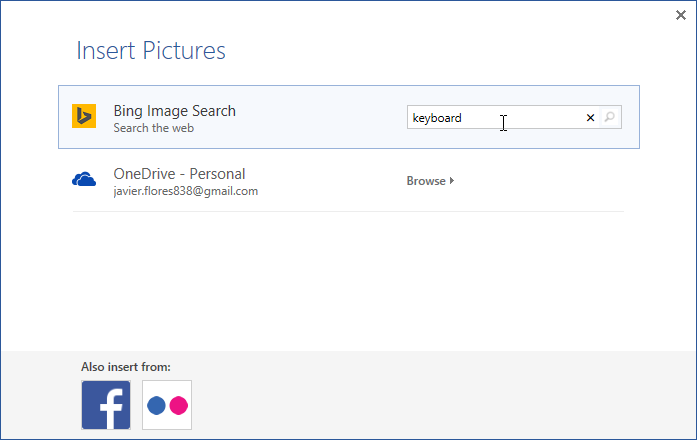
- Choose Bing Image Search or your OneDrive. In our example, we’ll use Bing Image Search.
Typing a search term
- Press the Enter key. Your search results will appear in the dialog box.
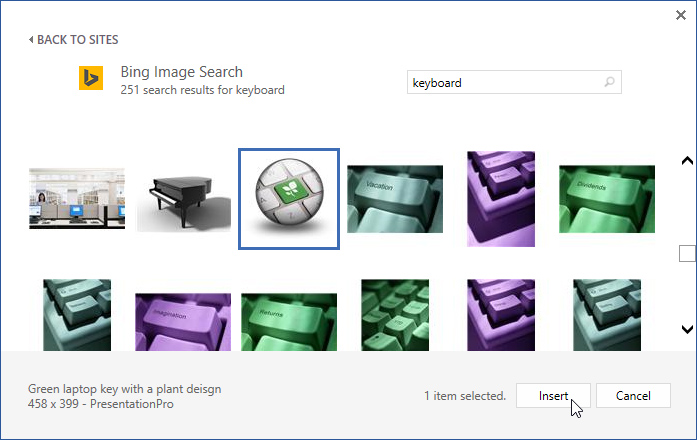
- Select the desired image, then click Insert.
Inserting a search result
- The image will appear in the document.
 The inserted clip art
When adding images, videos, or music to your own projects, it’s important to make sure you have the legal right to use them. Most things you buy or download online are protected by copyright, which means you may not be allowed to use them. For more information, visit our Copyright and Fair Use lesson.
Changing text wrapping settings
When you insert an image, you may notice that it’s difficult to move it exactly where you want. This is because by default the image is in line with the text. If you want to move the image freely, you’ll usually need to choose a different text wrapping setting. The text wrapping for an image is set to In Line with Text. You’ll need to change the text-wrapping setting if you want to move the image freely or if you want the text to wrap around the image in a more natural way.
To wrap text around an image:
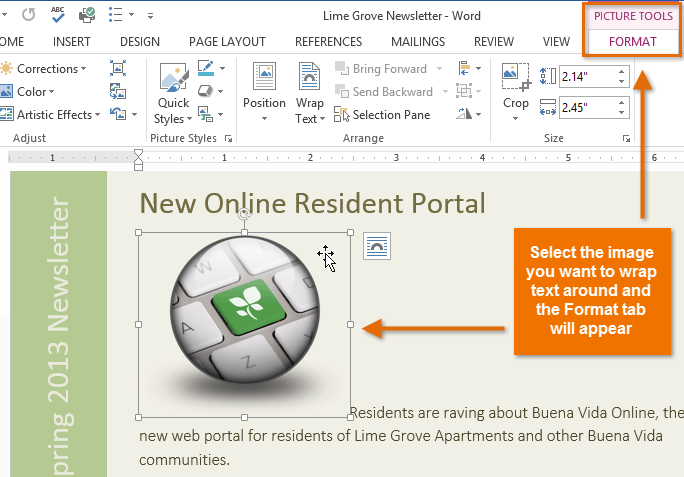
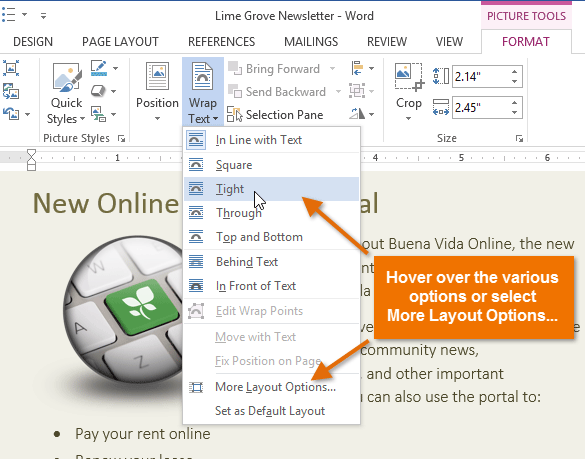
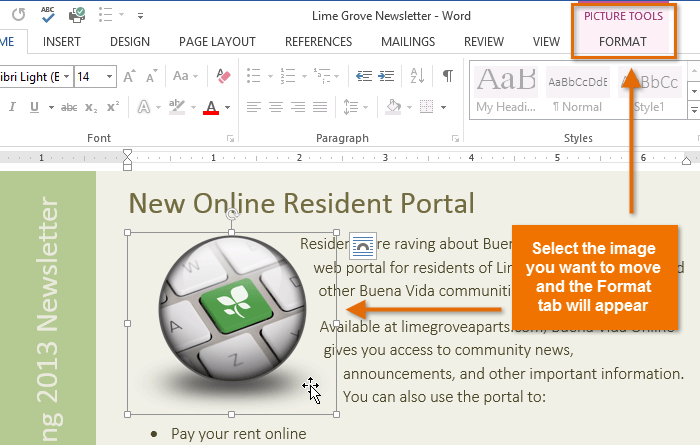
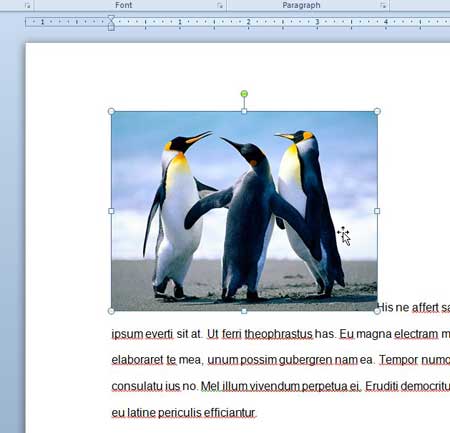
- Select the image you want to wrap text around. The Format tab will appear on the right side of the Ribbon.
 Selecting an image
 - On the Format tab, click the Wrap Text command in the Arrange group. A drop-down menu will appear.
- Hover the mouse over the various text-wrapping options. A live preview of the text wrapping will appear in the document. When you’ve found the text-wrapping option you want to use, click it. Alternatively, you can select More Layout Options… to fine tune the layout.
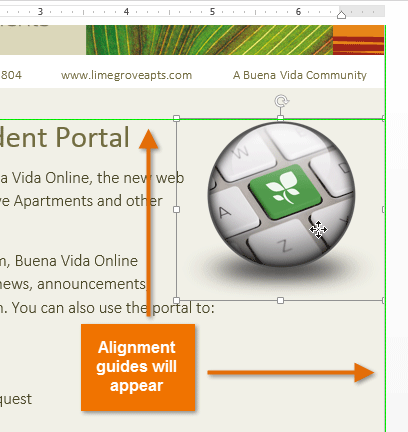
 Selecting a text wrapping setting
 - The text will wrap around the image. You can now move the image if you want. Just click, hold, and drag it to the desired location. As you move it, alignment guides will appear to help you align the image on the page.
 Alignment guides
Alternatively, you can access text-wrapping options by selecting the image and clicking the Layout Options button that appears.
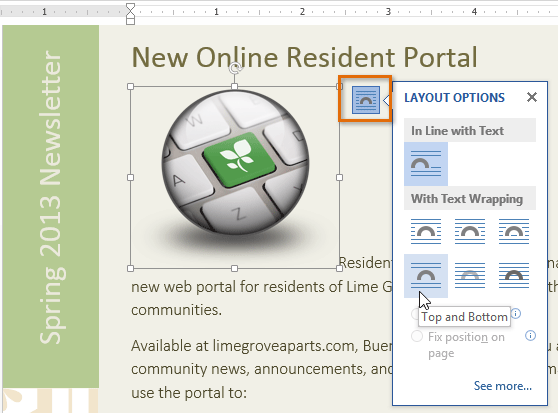 The Layout Options menu
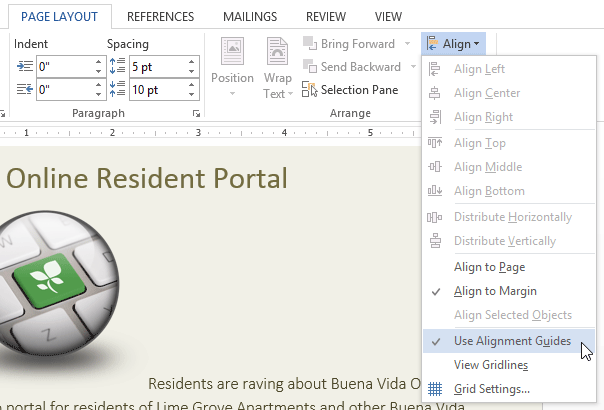
If the alignment guides do not appear, select the Page Layout tab, then click the Align command. Select Use Alignment Guides from the drop-down menu that appears.
 Turning on the alignment guides
To use a predefined text wrapping setting:
Predefined text wrapping allows you to move the image to a specific location on the page.
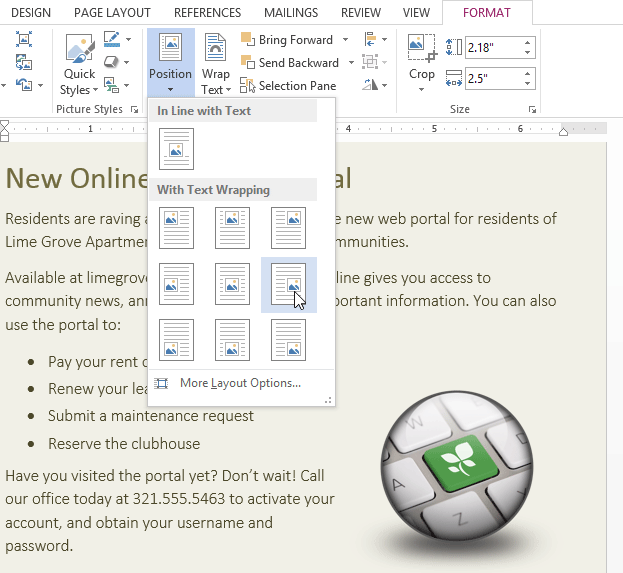
- Select the image you want to move. The Format tab will appear on the right side of the Ribbon.
 Selecting an image
 - On the Format tab, click the Position command in the Arrange group.
- A drop-down menu of predefined image positions will appear. Select the desired image position. The image will adjust in the document, and the text will wrap around it.
 Selecting a text wrapping setting
Challenge!
- Create a new Word document. If you want, you can use our practice document.
- Insert a picture from a file into the document.
- Resize the picture.
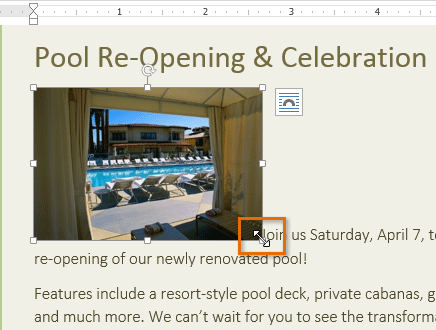
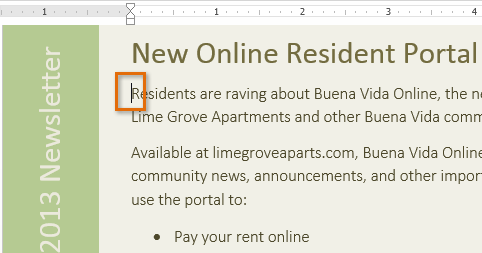
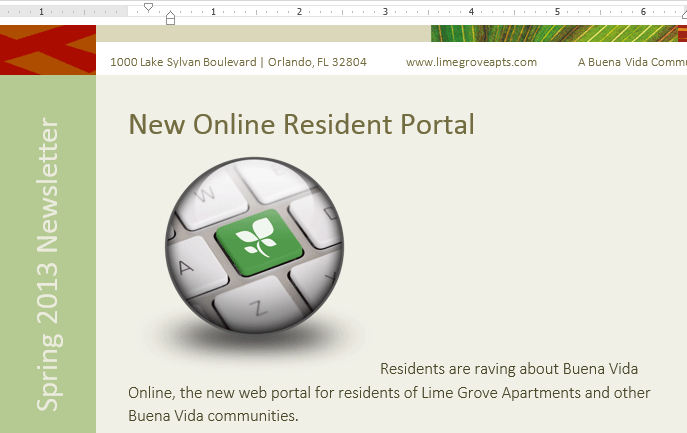
- Find a picture with Bing Image Search and insert it into your document. If you are using the example, search for computer and insert it in the New Online Resident Portal section.
- Change the text-wrapping setting of one of the images. If you’re using the example, change the text-wrapping setting of the computer to Through.
- Try moving an image to a new location.
/en/word2013/formatting-pictures/content/

- Using a Text Wrapping Style
- Inserting a Text Box
- Inserting a WordArt
Method 1: Place Text Over Image Using Text Wrapping Style
If you have a long chunk of text and you just want to put a background image or a watermark on a document, then this method is best for you.
Step 1: Open up a Word document.

Step 2: Set the image as background.
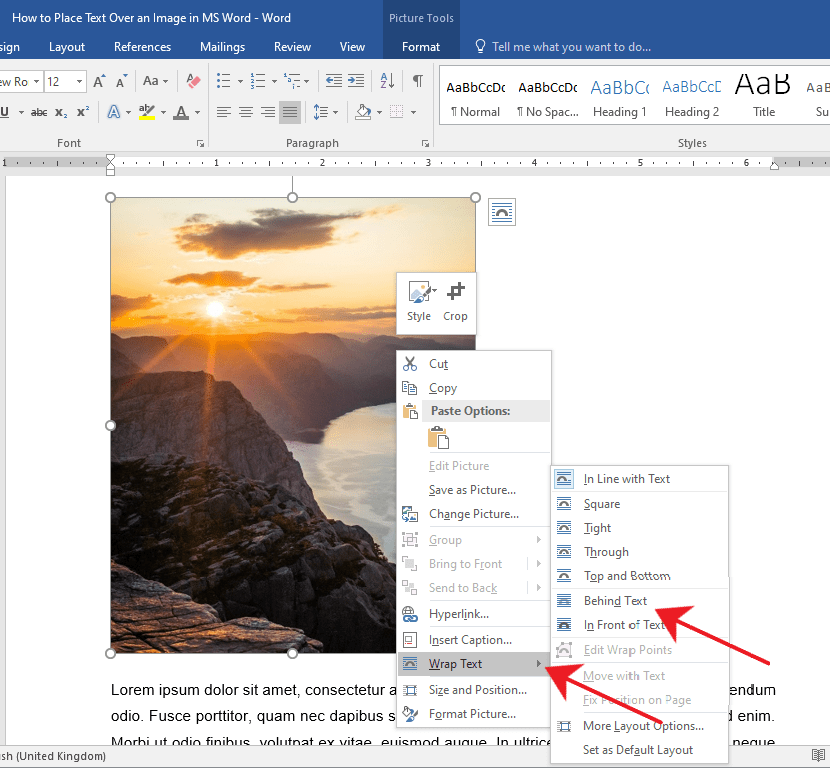
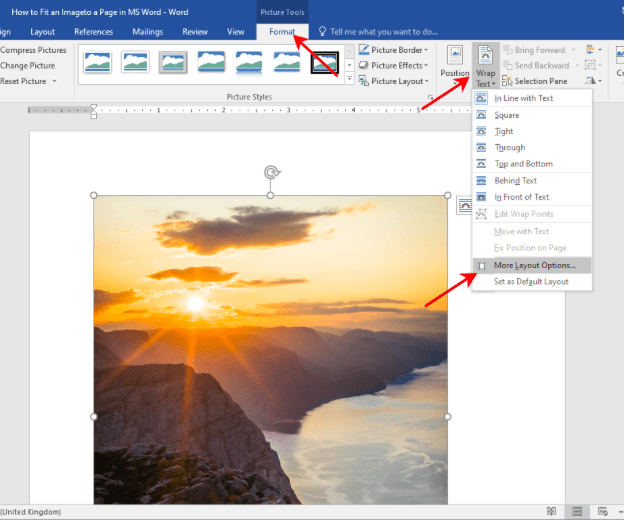
Right-click on the image and select the Wrap Text option.
This will display a horizontal drop-down menu on the right. Once you see the drop-down menu, select Behind Text.
You’ll notice the images and text will rearrange automatically as you hover over the text wrapping options.
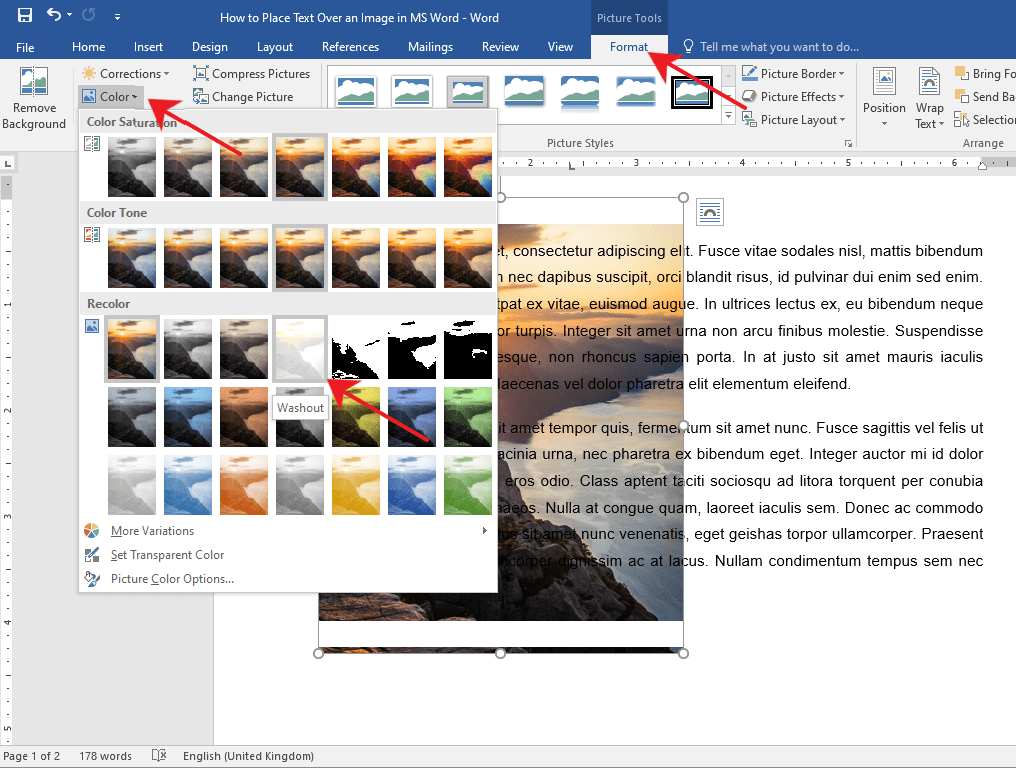
If after you’ve inserted a background image and the text becomes unreadable, you can change the image’s opacity or color.
Simply double-click on the image to activate the Format tab in the Ribbon.
After that, click on the Color drop-down menu and select Washout under the Recolor group.
You can also get creative and explore other options to suit your needs.
Method 2: Place Text Over Image Using a Text Box
Step 1: Open up a Word document.
Step 2: Insert a text box.
Go to the Insert tab on the Ribbon.
Now, navigate to the right side of the Ribbon and click on the Text Box drop-down menu.
Then, select a text box style of your preference. For this example, we’ll use the Simple Text Box.
Step 3: Type in the text.
Type in the text that you want to put on top of your image.

Step 4: Set the text wrapping style of the text box.
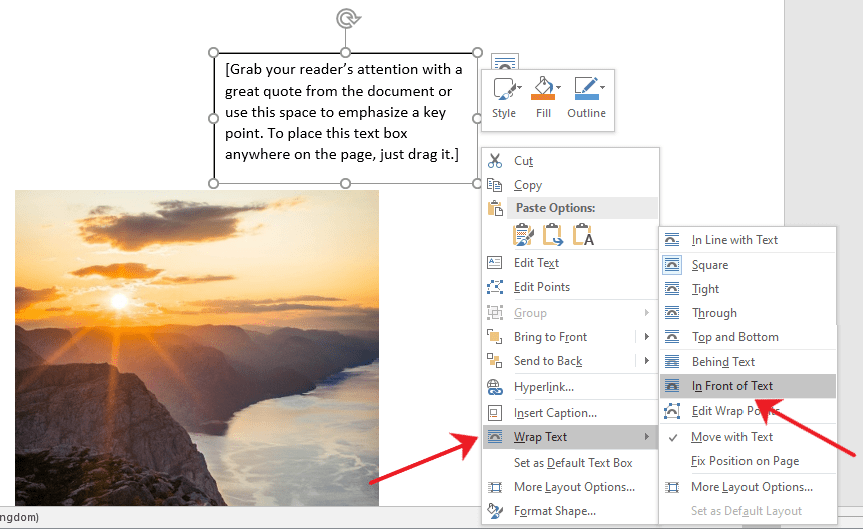
Select the text box and click the Layout button found at the upper right-hand corner of the text box.
Then, select the In Front of Text option.
Step 5: Place the text box over the image.
Click and drag the text box to place it over your image. You’ll notice that your text box has a background color by default and is covering a part of the image.

You can change your text box’s background and border color by accessing the Format tab.
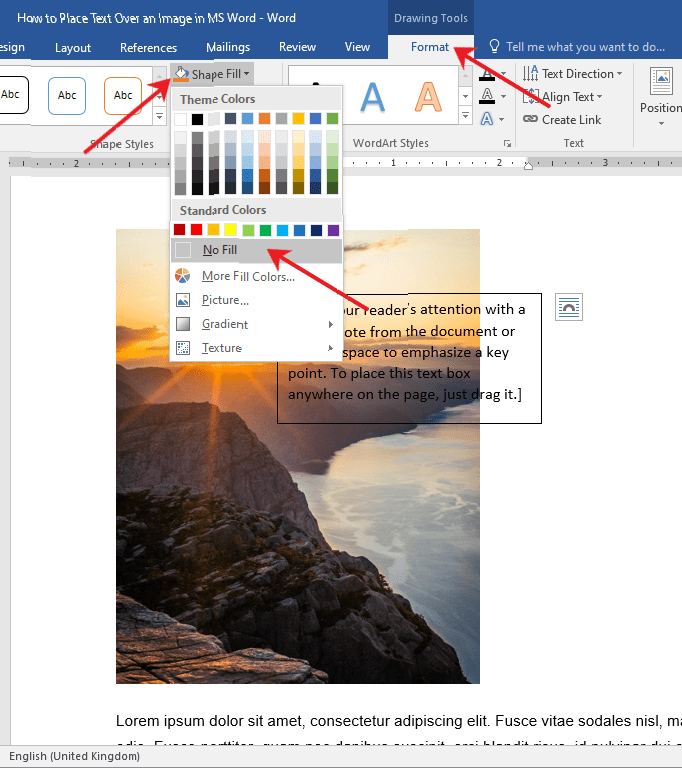
This way, only the text will be visible on top of your image. Now, Double-click the text box and go to the Format tab.
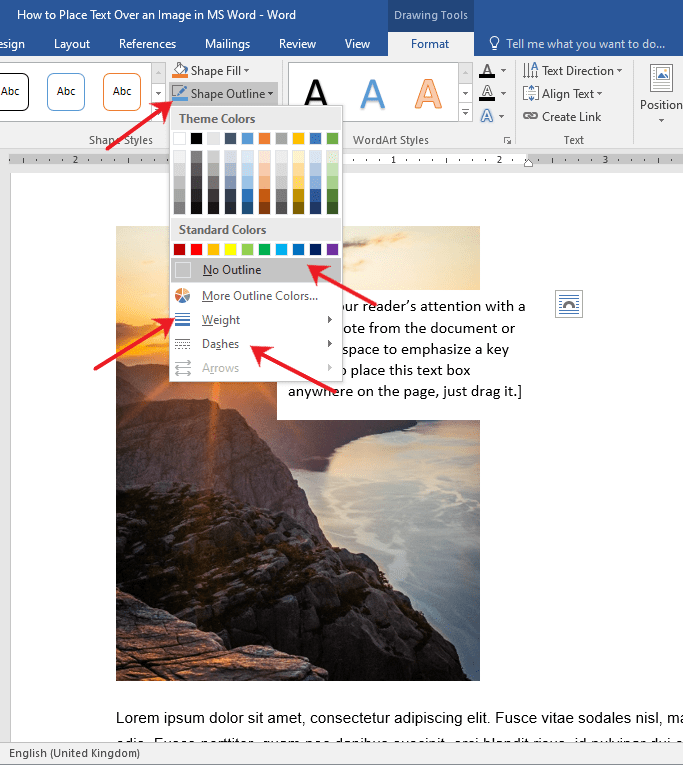
From there, click on the Shape Fill drop-down menu and choose No Fill.
To change the border color, select the Shape Outline drop-down menu and choose No Outline.
You can also change the border’s weight and design by exploring the Dashes and Weight options.
Method 3: Place Text Over Image Using Word Art
If you find yourself needing to put a title, a name, or a couple of words over an image, then this method has got you covered.
Step 1: Open up a Word file.

Step 2: Insert the WordArt
Click the Insert tab on the Ribbon.
Now, click the WordArt button found at the right side of your screen.
It’s the slanted letter A icon under the Text group. After that, choose a WordArt that suits the style of your document.
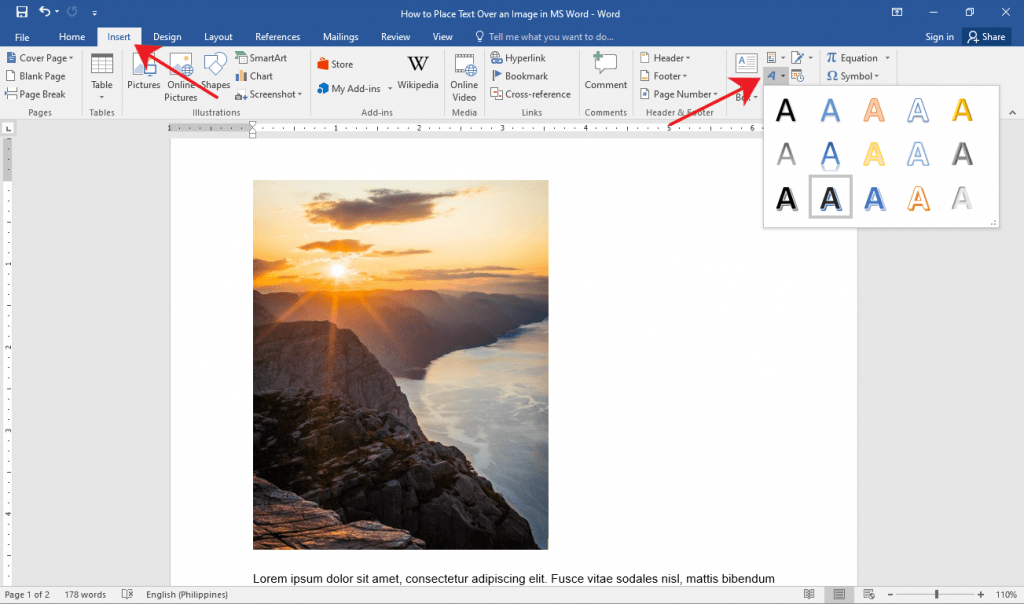
Step 3: Place the WordArt over the image.
Click on the WordArt and type in the text you want.
From there, select and drag the WordArt to easily move it around to the perfect location on your document.
You can also resize the WordArt like any other text box by grabbing either one of its corners.

Tip: If you’re using a pen or touch-enabled computer, you can directly write text over an image using the Draw option.
Editing and Deleting Text Over an Image
If you used Method 1, simply select the erroneous text and edit or delete it just as you would with any other text.
For Methods 2 and 3, click on the inside of the text box or the WordArt and start editing.
If you want to delete the entire text box or WordArt, click on any of the borders of the text box or WordArt and hit the Delete button on your keyboard.
Conclusion
That’s the rest of it. We hope you’ve found this article helpful!
It can be helpful to know how to wrap text around a picture in a Microsoft Word document if you dislike the way the document looks by default.
A picture that’s inserted into a document can often seem to break up the flow of the content, which might disrupt the reader.
You can wrap text in Word documents by selecting the image, clicking Picture Format, then Text Wrap, then choosing one of the options.
How to Wrap Text Around a Microsoft Word Image
- Open the document.
- Click the picture.
- Select the Picture Format tab.
- Click the Wrap Text button and choose an option.
Our guide continues below with more information about wrapping text in Microsoft Word, including pictures of these steps.
Text wrapping in Word 2010 is a feature that may not initially seem like something that is very important, but the effect that it can have on your document’s overall appearance can be surprising.
Images can be a helpful inclusion in many types of documents that you create in Word 2010.
But the images will simply be inserted into your chosen location in the document and may not be formatted in the most visually appealing way.
One way that you can solve this issue and make your document more visually appealing is to wrap your text around the picture.
There are several different styles of text wrapping that you can choose from, so continue below to learn how to use the text-wrapping options in Word 2010.
Related: You can read our guide about removing section breaks in Word if you have some breaks that you are having trouble removing from your document.
How To Use Text Wrapping in Word 2010 (Guide with Pictures)
This tutorial will assume that you already have a document with a picture inside of it and that you want to be able to wrap your text around that picture to both save space and make the document more visually appealing.
If you have not already inserted the picture, you can click Insert at the top of the window, click Picture, then select your picture.
Note that applying text wrapping in Word 2010 can change the layout of some other elements in the document, and affect the overall length of the document.
Once you have completed these steps, it is a good idea to proofread the rest of the document to ensure that nothing has been displaced or negatively impacted.
Step 1: Open your document in Word 2010.
Step 2: Locate the image in the document, then click it once to select it.
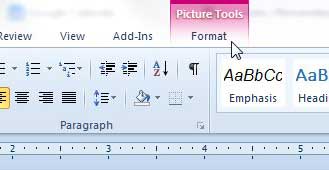
Step 3: Click the Format tab under Picture Tools at the top of the window.
Step 4: Click the Wrap Text button in the Arrange section of the window, then click the style of text wrapping that you want to use.
My preferred method is the Square option, but if you hover over a choice, you can see a preview in your document of how the wrapped text will look.
Once you have found the text-wrapping option that works best for this picture, you can continue applying text-wrapping to the rest of the images in your document.
Now that you know how to wrap text in Word, you can use this technique any time you want to make your images flow better with the rest of the content in the document.
If your picture is taking up the entire width of the document, then there will not be any room for the text to wrap around the image. You can click the image, then drag one of the anchors on the corner to make the image smaller and create space for text to wrap around the image.
Summary – How to use text wrapping in Word 2010
- Select the picture.
- Click the Format tab under Picture Tools.
- Click the Wrap Text button.
- Select the style of text wrapping that you want to use for this picture.
Would you like to add some words to your picture? Learn how to add text to an image in Word 2010 so that you do not need to use an image editing program.

Matthew Burleigh has been writing tech tutorials since 2008. His writing has appeared on dozens of different websites and been read over 50 million times.
After receiving his Bachelor’s and Master’s degrees in Computer Science he spent several years working in IT management for small businesses. However, he now works full time writing content online and creating websites.
His main writing topics include iPhones, Microsoft Office, Google Apps, Android, and Photoshop, but he has also written about many other tech topics as well.
Read his full bio here.

Adding an image to a Word document is as simple as dragging and dropping—or clicking Insert > Picture—and then moving it to the right place. But what if you want to put your image in a specific place in the document and have the text flow around it in different ways? Well, here how that works.
What Does the Default Text Wrapping Look Like?
When you insert an object like a picture or shape into a Word document, Word treats that insertion differently depending on what you insert. For reference, we’re talking here about the illustration objects Word lets you insert—pictures, shapes, icons, SmartArt, and so on. We’re not talking about all the other things on the Insert tab of the Ribbon, like tables, headers, embedded spreadsheets, and the like.

When you insert most of those illustration types—pictures, icons, SmartArt, charts, and screenshots—that object is placed in line with your text by default. For all practical purposes, Word treats that object like just another character of text. If you add more words to the document, the object moves around just like the rest of the text. You can select the object and drag it to another place in your document, but by default, it will always move around with the rest of the text.
There are two illustration types—3D models and shapes—that don’t work that way. When you insert those illustration types, they are placed in front of text by default, actually obscuring the text behind them. You can move them around however you like without affecting your text.
How to Change the Text Wrapping?
No matter what type of illustration you’re working with, you’re not stuck with the default wrapping.
When you select an illustration object (or right after you first insert it), you’ll see a little button floating out to its right. Click that to pop up a quick Layout Options menu with a few text wrapping choices (which we’ll discuss in the next section). Just click an option to change the wrapping style.
That’s okay for quick changes, but you can get a complete set of wrapping options by selecting the object, switching over to the “Layout” tab on the Ribbon, and then clicking the “Wrap Text” button.
The same “Wrap Text” button is also available on the “Format” tab.
Both open the same menu, which contains all the same basic text wrapping options that the smaller fly-out menu does, but also provides access to more layout options for fine tuning your text wrapping (which we’ll also discuss a bit later) and for setting a default layout based on however you have the selected image set up.
What are the Text Wrapping Options?
So, now that you’ve seen how to access the text wrapping options let’s talk about how they work. You can group these options into three main types:
- Square, Tight, and Through: These three options are all variations on the same thing. Text wraps around all four sides of your object.
- Top and Bottom: This option keeps the text above and below the object, but not to its sides
- Behind Text and In Front Of Text: These two options don’t affect the text at all. The image either appears behind text or in front of it.
Let’s take a closer look at these.
Square, Tight and Through
These options all wrap the text around the four sides of your object. They are all slightly different, although it won’t be obvious if you’re using a square image like we are here.
The “Square” setting wraps the text around the square (or rectangular) boundary of the object (even if the object itself isn’t square, it does have a square boundary), leaving a consistent gap between the text and the image.
The “Tight” setting tries to wrap the text as closely as possible around the object itself, using the contours of the image rather than the boundary if the object isn’t square. It’s easier to show this with a shape than our square geek picture.
The “Through” setting allows the text to flow into the white space of the object if you’ve got a transparent background. Here, you can see that the text wraps much more tightly and follows the contours of our square object because it’s allowed to wrap through our transparent background.
In practice, the Tight and Through settings work similarly. If we were to apply either of those settings to the objects in the two preceding images, you’d get pretty much the same result. So, you’ll have to play with the options a bit to see what works for you.
Top and Bottom
This setting keeps the text above and below the object so that the object never interrupts text within a line. You can drag the object around however you like, always knowing that it will remain on its own line.
Behind Text and In Front of Text
These two options don’t change the flow of the text around the image, but instead, put the image on a different layer than the text. The “Behind text” setting moves the image behind the text, which is useful for a custom background or a watermark. The “In front of text” setting lets the image show on top of the text, which you can use for overlays.
Editing Your Wrap Points
Once you’ve chosen your wrapping option, you can customize how the text flows around the object by using the “Edit Wrap Points” option on that full “Wrap Text” dropdown menu.
This command adds a new red border to your object that you can move around to control how the text flows around it.
Grab one of the black corner handles on the image and move it to where you want the new boundary to be, and the text will immediately flow around the new boundary.
This lets you create some cool effects if your object has a transparent background and you’ve chosen the “Through” wrapping because you can move the black corner handles inside the object, which allows the text to flow through the transparent parts of your image.
Also, the number of wrap points changes depending on the object’s shape. In that square image we used above, we only got four wrap points. This circle shape, on the other hand, gives us quite a few more to play with.
Fine Tune Your Wrapping
Once you’ve chosen your wrapping, you can fine-tune even further by clicking selecting the “More layout options” options on the “Wrap Text” dropdown menu.
On the “Text Wrapping” tab of the Layout window that opens, you can use the “Wrap text” and “Distance from text” sections to get your wrapping the way you want it.
The “Wrap text” options let you choose which sides to wrap the text around. The default is to wrap both sides, but you can also choose a single side, which will leave the other side blank. Here’s an example with “Left only” selected.
The “Distance from text” options let you choose the amount of white space between the text and image. Use this if you want a bigger (or smaller) border area around your image.
Keeping Your Object in Place
When you place an object into a paragraph of text, Word automatically anchors the object and paragraph together. You can always see which paragraph your object is associated with by selecting the object and looking for the little anchor symbol.
(If you can’t see the anchor, then go to File > Options > Display and make sure “Object anchors” is switched on.)
While the object is anchored to a paragraph, Word will move the object along with the paragraph. This means that if you add a new block of text above your paragraph, the whole paragraph—including the object—moves down the page. If you select a whole paragraph by triple-clicking it, the object is also selected.
You can change this behavior in the “Wrap Text” dropdown by changing from the “Move With Text” setting to the “Fix Position On Page” setting.
This keeps the object in the same place on the page. The anchor will move with the paragraph that the object is associated with, but the object itself will stay in the same place on the page no matter what other text or images you add.
Changing Your Default Wrapping
Once you’ve adjusted your wrapping the way you want it for an object, you can also make those wrapping settings the default for when you insert future objects. Just select the object with the settings you want to use as the default, and then click the “Set As Default Layout” command on the “Wrap Text” dropdown menu.
From that point on, any object you insert will use the same settings.
READ NEXT
- › How to Cut, Copy, and Paste in Microsoft Word
- › How to Make Vertical Tear-Off Pages in Microsoft Word
- › How to Remove the Background from a Picture in Microsoft Word
- › How to Wrap Text Around an Image in Microsoft PowerPoint
- › How to Wrap Text Around a Table in Microsoft Word
- › How to Create Custom Cover Pages in Microsoft Word
- › How to Place Text Over a Graphic in Microsoft Word
- › How to Get a Refund on the PlayStation Store
There are two commands you can use to wrap text around images in Microsoft Word. Use Wrap Text to choose the way in which text will wrap around the object. Use Position to choose the position of the object on the page, and the text will automatically wrap around the image.
This feature works the same in all modern versions of Microsoft Word: 2010, 2013, and 2016.
To wrap text around an image using the Wrap Text command:
- Select the image by clicking on it and then, on the Picture Tools Format tab in the Arrange group, click Wrap Text.
- Hover over the Wrap Text options and then click on one of them to select it.


To position text around an image using the Position command:
- Select the image by clicking on it and then on the Picture Tools Format tab, in the Arrange group, click Position.
- Hover over the Position options and then click on one of them to select it.

