
When you work in Microsoft Word, you’ll have to rearrange pages. It’s not always clear how to do that, so use these tips to make it a lot easier!

Can you move pages in Word? Depending on the type of document you’re creating in Microsoft Word, you may find yourself in this situation. It is especially likely for lengthy documents—moving a page on Word can make or break the document in the right circumstances.
Unlike PowerPoint, you cannot rearrange the slides in Word. That’s because Word is a word processor, so it’s one long scrolling document. PowerPoint, on the other hand, is an application that has slides as its own elements.
But there are ways to rearrange and move Microsoft Word pages. You can rearrange them online or offline using three easy methods.
How to Interchange Pages in Word With the Navigation Pane
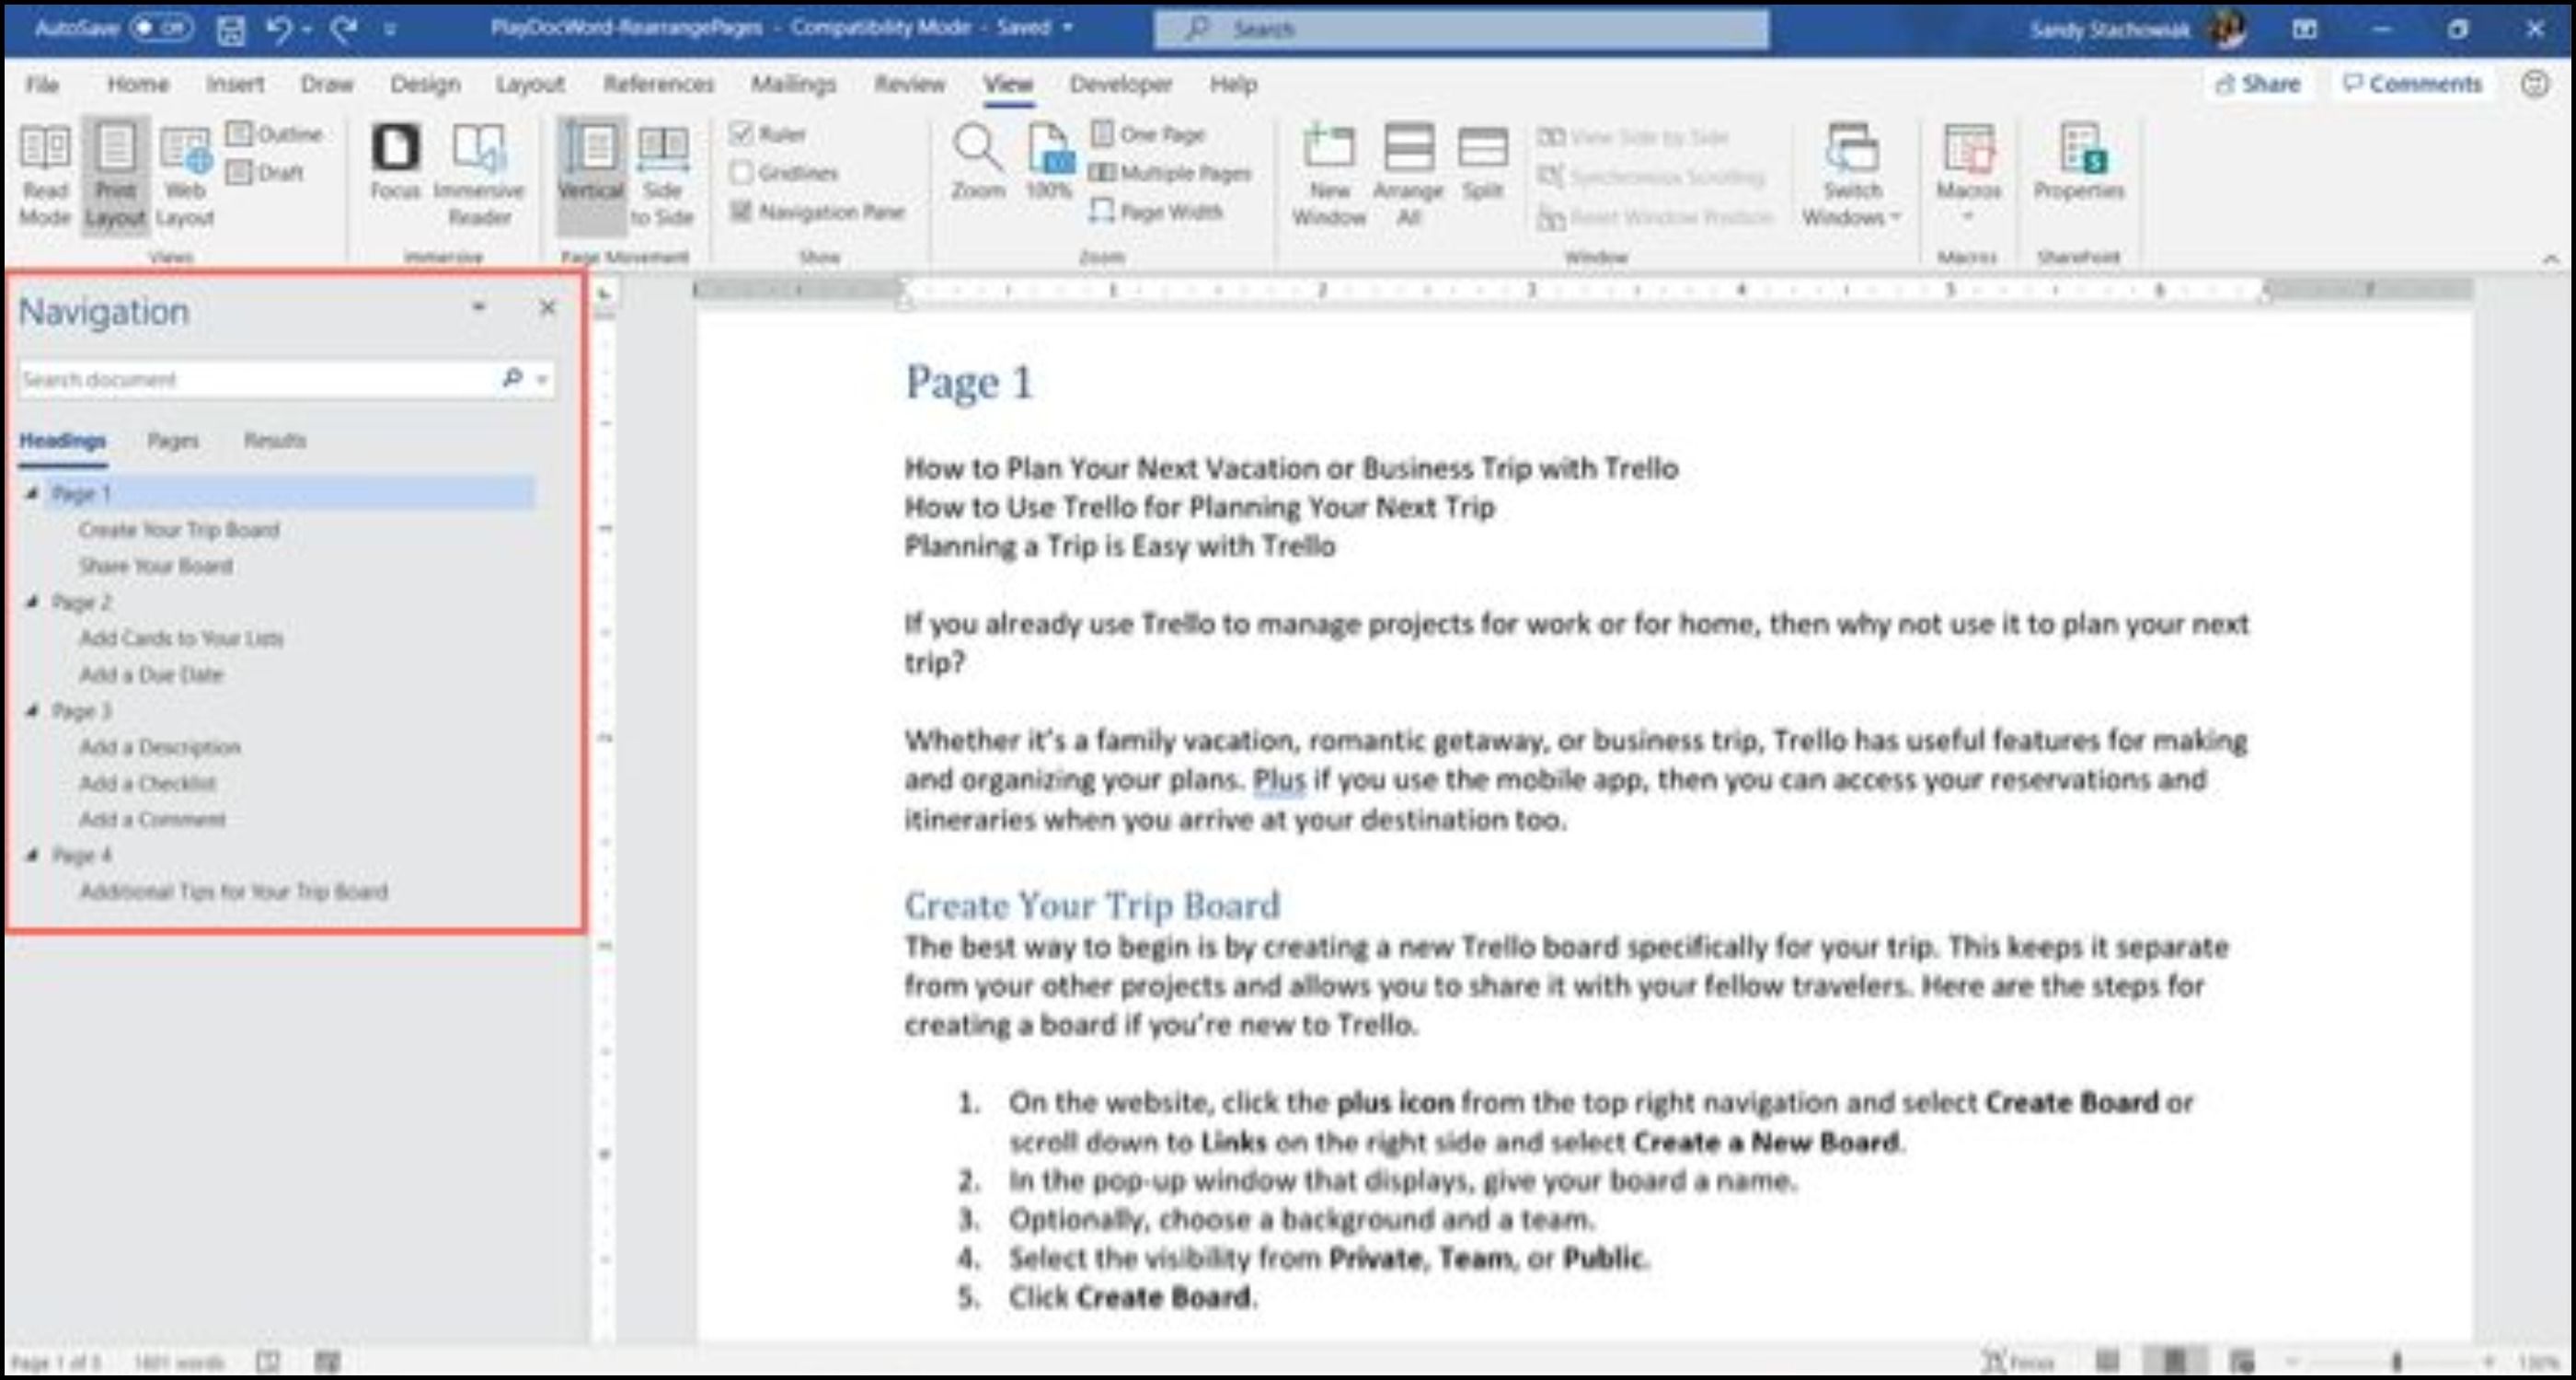
The Navigation Pane in Word is a handy tool for jumping to certain spots in your document without having to scroll or search.
For this reason, the Navigation Pane method is the way to go if you use headings in your document. And it’s most helpful if you have a heading at the top of each page.
- Click the View tab and check the box for Navigation Pane.
- When the tool opens on the left side of your document, click Headings in the pane.
- Select the heading for the page you want to move and drag it to its new location in the Headings list.
As you drag the heading, you’ll see a dark line appear. When the line is in a spot where you want to move the heading (page), release.

You’ll then see the heading and its contents in the new position; your document will reflect this change as well.
Tips to Switch Pages in Word With the Navigation Pane Method
Here are a couple of tips to help you reorder pages. Word offers more than a few formatting options.
Formatting Text With Headings
If you want to use this method to rearrange Word pages but don’t currently have your text formatted with headings:
- Click the Home tab.
- Select your text, and choose a heading in the Styles section of the ribbon in Microsoft Word.
- Reorder pages, removing the headings if you like.
Order of Headings in the Pane
Remember that all headings in the Navigation Pane are listed in descending order. So the order will be Heading 1 at the top, then Heading 2, Heading 3, and so on. To move an entire page, or section, use the highest-level heading for that section.
How to Move Pages in a Word Document With Keyboard Cut and Paste
Using the Navigation Pane isn’t practical for your type of document? You may be wondering: how do I rearrange pages in Word without it?
There are many options in Word. Rearrange pages by cutting and pasting, if you have to. If you prefer to maneuver this way with your keyboard, here’s how to arrange pages in Microsoft Word in that style.
- Place your cursor at the very beginning of the text on the page you want to move.
- Hold your Shift key and press the Page Down (Pg Dn) key. This will grab a screen’s worth of text.
- If you need to select more, continue holding Shift and press Page Down again. You can do this until you have it all.
- Press Control (Ctrl) + X to cut the text you selected.
- Move your cursor to the spot where you want the page moved to and press Control (Ctrl) + V to move the page. Word does all the rest.
How to Change Order of Pages in Word With Mouse Cut and Paste
Maybe you’re a pro with your mouse and would rather use it than the keyboard while moving pages in Word. You’ll do the same thing to cut and paste the text, but a little differently.
How to Switch Page Order in Word With Your Mouse
- Place your cursor at the beginning of the text on the page you want to move.
- Hold the left mouse button while you drag through all of the text on the page, then release.
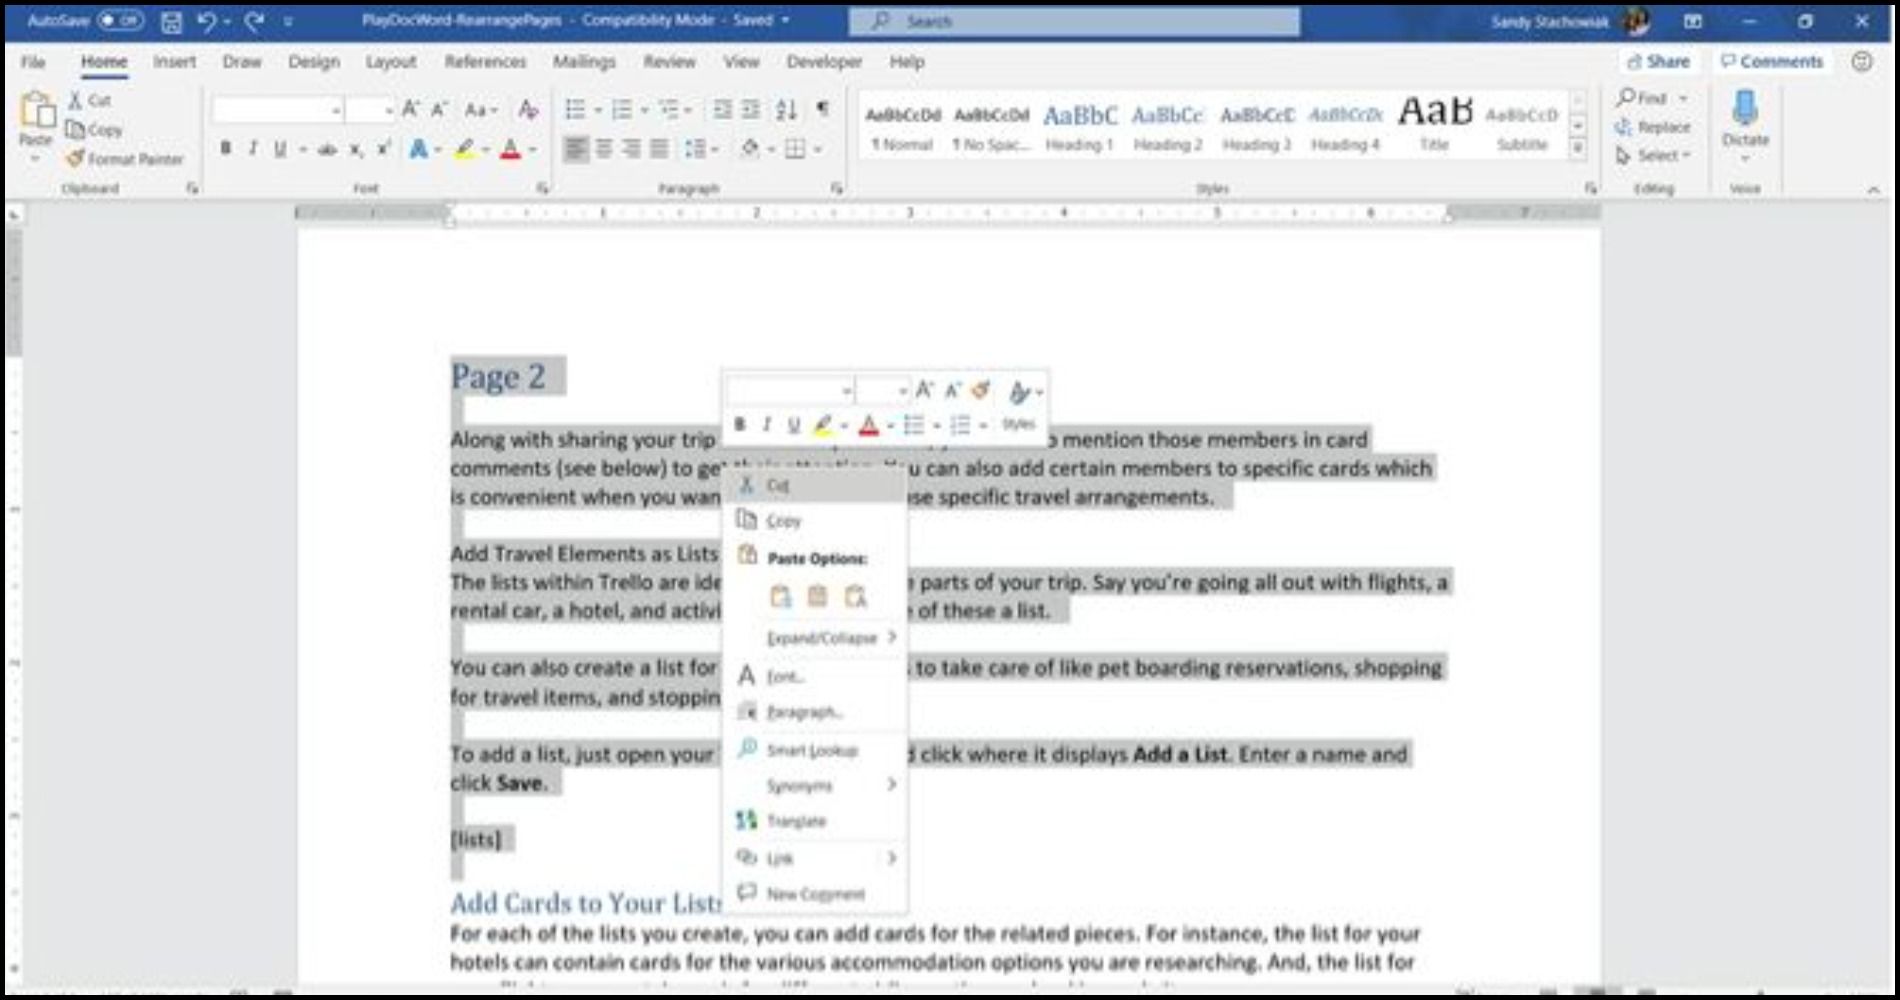
- Right-click and choose Cut, or click Cut on the Home tab under Clipboard.
- Move your cursor to the spot where you want the page moved to, right-click, and pick Paste from the shortcut menu or click Paste on the Home tab under Clipboard.
 How to Move Pages Around in Word With the Cut and Paste Methods
 How to Move Pages Around in Word With the Cut and Paste Methods
You may be wondering how to shift pages in Word most effectively via these means. Regardless if you use your keyboard or mouse, here are a few tips to help you move a page in Word using this method.
Reorder Pages in Word Using the Quick Access Toolbar
If you would like to swap pages in Word with custom settings like the Cut and Paste commands in the Quick Access Toolbar, here’s what you need to do:
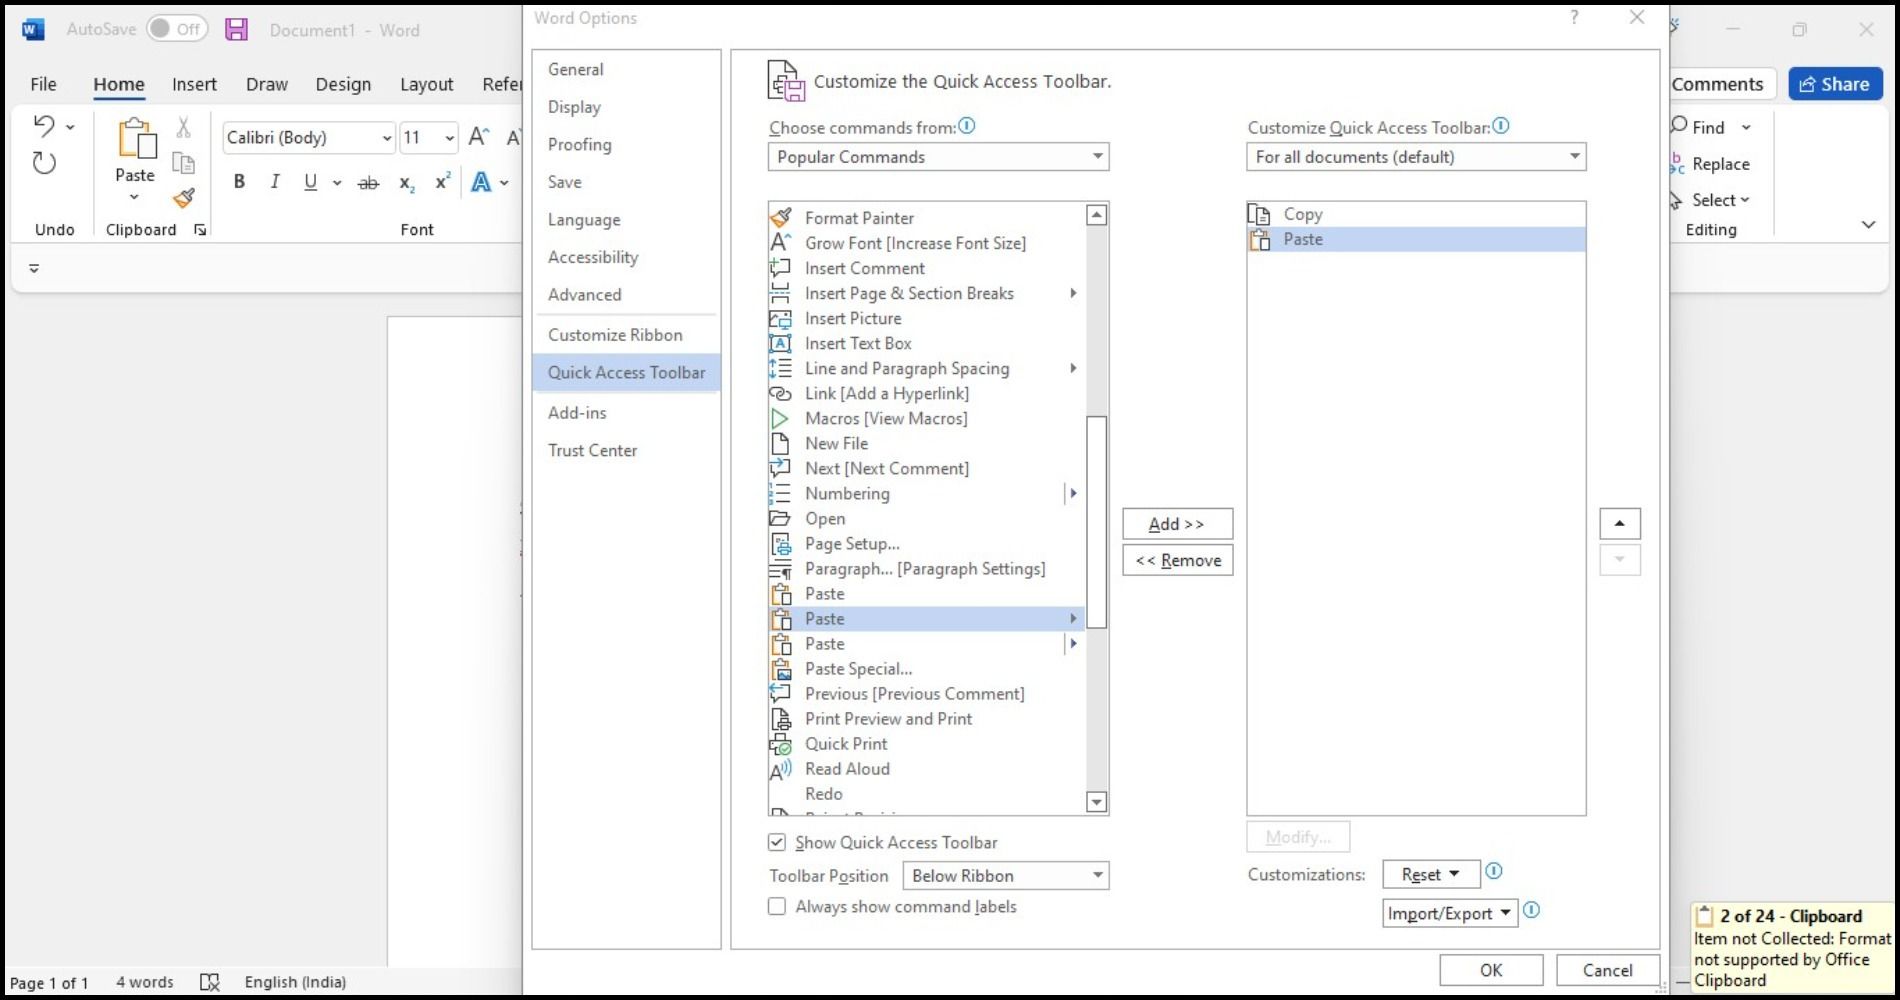
- To get started, open up the Quick Access Toolbar by right-clicking anywhere on the ribbon at the top of the document.
- Enable Show Quick Access Toolbar.
- Click on the dropdown Menu and scroll down and select More Commands.
- A new window will pop up where you can select specific commands that you wish to add to the Quick Access Toolbar.
- Find Cut and Paste in the list of options and tap the Add button to include them to the toolbar. Check Always show command labels at the bottom of the list.
- Hit OK to save your changes and close out the window. The icons will now appear in the toolbar.
Here’s how to cut-and-paste text using the Quick Access Toolbar on Word:
1. Select the text you want to remove.
2. Click the Cut icon in the Quick Access Toolbar.
3. Move your cursor to the desired area in the document and click Paste.
Remember Undo Move
If you make a mistake during the cut-and-paste process, remember that you can undo what you just did. Click the Undo Move button in your Quick Access Toolbar. This will undo your last change, but you can click the arrow next to the button to go back through your history changes.
Copy Instead of Cut
If cutting text from your document makes you nervous, you can use a copy, paste, delete method instead of reorganizing pages in Word. Follow the same steps for using your keyboard or mouse to select the text, but, rather than choosing Cut, choose Copy.
Then, once you paste that selected text into the spot where you want it, you can go back and delete it where you copied it from originally. This will take longer than a simple cut and paste. However, this method of how to change pages in Word might feel safer for you.
Ever end up with weird formatting when you paste something from the web into your Word document? We recommend some helpful ways to strip formatting while using copy and paste functions, for both Windows and Mac users.
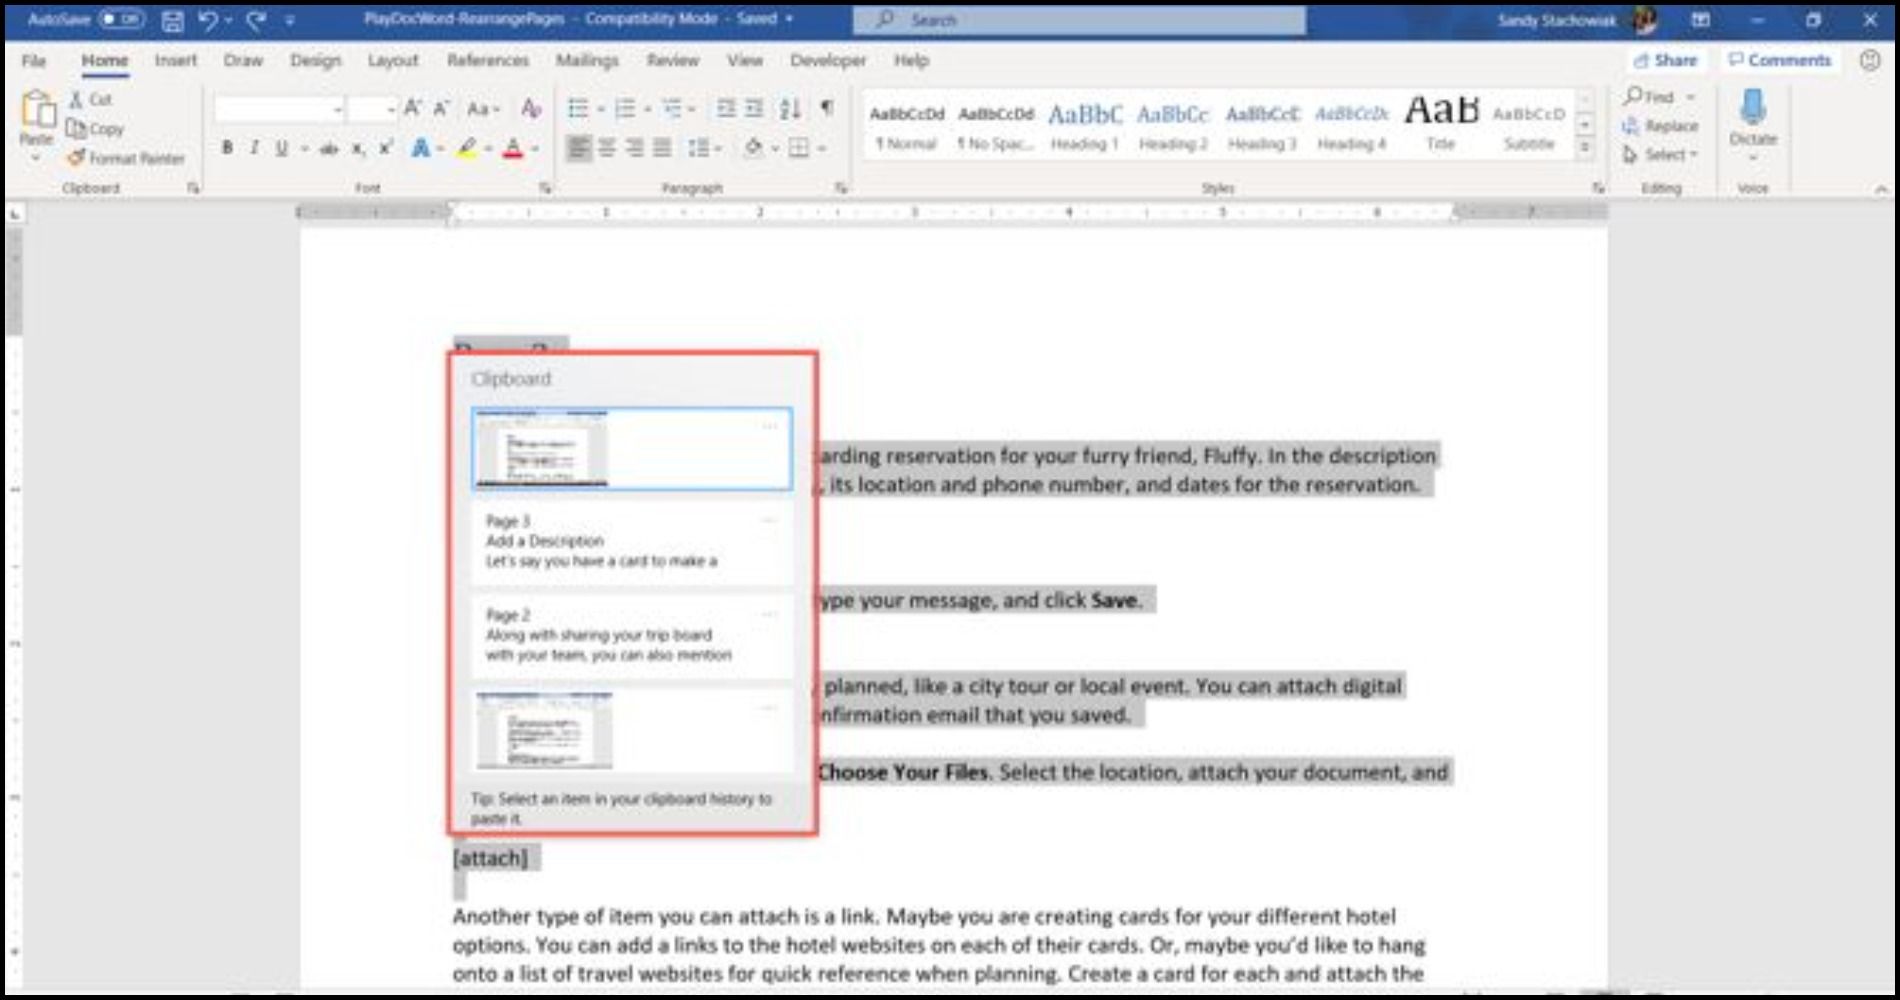
How to Swap Pages in Word Using Your Clipboard History
Another cool way how to arrange pages in Word is via the Clipboard History tool on Windows. The Clipboard is a feature that allows you to copy and paste information from one place to another.
- Move your cursor to the spot in your Word document where you want the page you just cut (or copied) in Word.
- Move pages using the keyboard shortcut Windows key + V to open your clipboard history. Alternatively, on the Home tab, you can click the Clipboard section to open up the pop-up window on the left.
- Then, click an item in the history window to paste it and move pages around in Word.
With the release of Windows 11, there are many new features to explore! You can use the improved Clipboard Manager in Windows 11 to copy and paste symbols, GIFs, and emojis for a truly personalized experience.
Carefully Handle Your Word Pages
You should be able to arrange Word pages using one of these methods. Every user of Microsoft Word will be able to move a page differently.
These tips can help you reorganize the pages of your brochure, your manuscript, or even just your homework. We’ve only discussed a few approaches to rearranging Word pages; each one has its advantages. Thankfully, there’s a way to change the page order in Word, no matter what type of project you’re working on.
Word offers a number of valuable capabilities that allow you to arrange manuscripts into segments, pages, and even a complete overview of the document’s layout. However, reordering pages in Word is a problematic tool to identify and utilize.
Although Word autonomously inserts pages as you write, the application really perceives chunks of text rather than pages. In Word, you may rearrange pages by clipping and pasting big text blocks and allowing the application to repaginate the pages as you cut and paste. This post will go through how to change order of Pages in Word in great detail.
Methods of Changing Order of Pages in Word
This may be executed in a number of approaches. You may utilize Word’s navigation panel to reorganize parts by headers, or you can employ the tried-and-true cut-and-paste method. Following is a breakdown of every approach.
Method 1: Use the Navigation Pane to Reorder Pages in Word
The built-in navigation window in Word is one of the easiest methods to view and reorganize all pages. To do so, head to the View tab and click the option beside Navigation Pane.
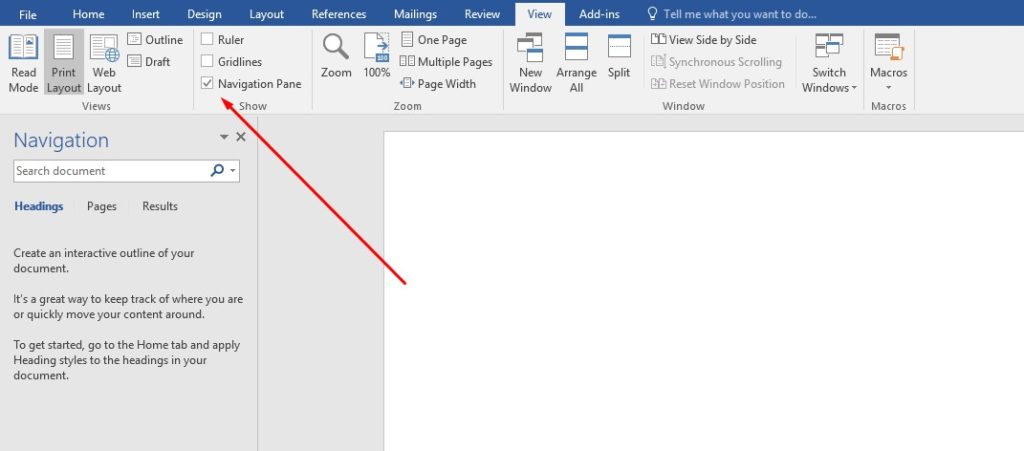
Your content will now be sorted in a sequence of Headers on the left sidebar of the screen.

It is a wonderful approach to move portions around if your text is well-formatted and every page or segment you wish to move begins with a Header. Simply press and hold the heading you wish to move in the navigation window, then glide it down or up. Lift the cursor and drag the portion to the desired location.

If you decide to move the top-level headers, it will often shift everything, along with its own sub-headings. Only if you possess a file with a single header in each section will this function. If you utilize a bunch of sub-headers or numerical headings, you may end up cluttering up a great deal of the document’s initial arrangement.
Method 2: Quickly Reorganize Pages in Word by Utilizing Page Breaks
Let us examine some more complex techniques to organize pages in Word now that we have covered the very standard approach virtually everybody knows about and utilizes. Among the most efficient ways to manage this is to employ Page Breaks. The conclusion of a page is forced to appear at a specific place in the document by using page breaks. The succeeding page will always begin on a new page, with proper space.
To accomplish this, move the pointer to the opening of the part you wish to resume on a fresh page. Choose Page Break from the tab from the Insert menu.
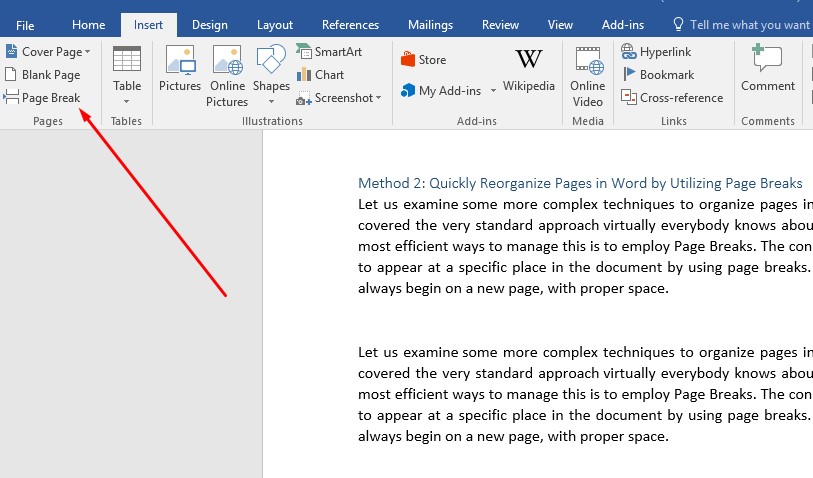
The following content will be moved all the way below to a fresh page.

Choose the Home button and then the Paragraph symbol to view where page breaks have been put within a file. All formatting elements, such as Page Break and Section Break, will be shown.
You may now copy paste pages or headings using any of the rearrangement methods stated in the preceding two sections, and you will not damage any of your initial formattings. All of the existing arrangement, as well as your copy and pasting, is preserved owing to the Page Break.
Method 3: Reorganize the Pages Employing the Outline View in Word
Now here’s a clever way to reorganize pages more neatly by utilizing headers. This approach also functions on a Mac, as previously stated. If you wish to reorganize the pages, you’ll need to ensure your content has headings such as H1, etc.
Switch the display to Outline from the View panel.
It takes you to the Outlining option and changes everything to outline mode. By using headers and sub-headers, you’ll be able to view an outline of the complete page. Place your cursor on the Plus icon in the heading to the left. The symbol on your mouse will transform to a Move arrow. Drag the mouse down or up the Outline anywhere you want that portion to move by clicking and holding the mouse. Whenever you release the cursor, a line will emerge where the portion will go.
Release the mouse button to place that portion in its new spot. It appears a little differently on a Mac; however, the concept is identical.
This is similar to utilizing the Navigation pane, only the organization is better, and moving parts and subsections about is much simpler. When you’re through rearranging your work, just pick Close Outline View from the toolbar.
Related post:
- How to Right Align Part of a Line in Word
- How Many Words are 15 Pages?
- How to Double Space in Word on iPad
Conclusion
Knowing change order of pages in Word without creating a complete mess of your manuscript is a valuable skill to have. To retain page layout and numbering, utilize Word’s structuring tools like Page Breaks or Section Breaks. Once you’ve got all of that in position, you may use almost any of the methods discussed in this post. But remember to double-check each time you reorganize a page to make sure everything is staying in the right place.
Writing an effective business document can sometimes feel like a wrestling match, especially when it comes to moving pages around in Microsoft Word 2010. While Word automatically adds pages as you type, the program really does not see pages, it sees blocks of text. Reordering pages in Word can be done by cutting and pasting the large text blocks of your document and letting the program repaginate the pages as you cut and paste. In Word 2010, there is a new feature called the Navigation Pane which comes closer to dropping and dragging pages, but this only works well if you have added headings to your document.
Use the Navigation Pane
-
Click the “View” tab in the Show group and then click the “Navigation Pane” check box. The Navigation Pane pops up on the left side of your screen.
-
Click the “Browse the Headings” tab in the Navigation pane. It looks like one long page. Your document is broken down into headings in the Navigation pane. If you have not assigned Heading Styles to your document, you will only see the document and subheadings.
-
Click the heading of the section you want to move and drag it to a new location in the pane. A black line appears as you are moving through the headings in your document. When you release your mouse, the heading and the information in it drops below the black line to reorder your pages.
Keyboard Cutting and Pasting
-
Open Word and your document with the pages you want to reorder. Scroll to the target page you want to move. Place your cursor at the beginning of the text you wish moved.
-
Press the “Shift-Page Down” keys on your keyboard simultaneously. This selects one screen of information. If you did not get all the text you wanted, continue to hold the Shift key and press the “Down Arrow» key on your keyboard to continue selecting lines.
-
Press “Ctrl-X” to cut your selection and the rest of the document automatically repaginates. Move your cursor to the area where you want the new page to appear and press “Ctrl-V” to paste the cut information. Word automatically moves text and graphics to the right and down to make space for the cut information.
Mouse Cutting and Pasting
-
Open Word and the document to reorder. Scroll to the page you want to move. Hold down the left mouse button and drag down to the right to select a whole page. Release the mouse and the page is highlighted.
-
Click the Home tab and then click “Cut” from the Clipboard group. Your document adjusts to the removal of the information.
-
Scroll to the location in your document for the cut text and click to move your insertion point where you want to place the cut information. Click the Home tab and then “Paste” in the Clipboard group to place the cut information back in your document.

There might be a time when you wanted to rearrange pages in Word document. Even though it depends primarily on your work purpose, it’s likely that you want to move your pages in any given Word document, especially for long documents.
Sadly, it isn’t possible to find a way to reorder your word document. This is because Microsoft Word is an application used to process words, but not the document. As a result, you would only see an ongoing document. You shouldn’t try to compare Word with PowerPoint, where you can easily rearrange slides. But you need not worry, we will show three effortless to move, change order of pages or rearrange pages in Word document.
Rearrange Pages in Word Using Navigation Pane
Microsoft Word comes with a pretty handy tool called Navigation Pane. It helps you navigate throughout the document you are working on. If you maintain a heading on each page, Navigation Pane is an easy method to change the order of pages in a Word document.
Note that this method is only applicable if your document contains headings on the top of each page. In order to rearrange pages using Navigation Pane in word, follow these steps:
- Click on the View tab located on top of the Ribbon bar.
- Click on the Navigation Pane located in the “Show” section under the View tab.
- When the Navigation Pane appears, click the Headings option.
- Now choose the heading of the page you want to move and wait until you see a dark line.
- Move or drag the dark line to the position you want, and your page will be moved accordingly.
Once the heading is moved, its contents will also move along with the heading letting you rearrange pages in word. Although here are some of the things you might need to remember.

If you don’t have any text with headings format, you should add some headings to your document. You can do that by choosing a text, then going to the Home tab and selecting a heading from the options.
The Heading will be listed in the order they were placed in the text, from top to bottom —Heading 1, Heading 2, Heading 3 etc. in ascending order.
Move Pages in Word using Keyboard Cut and Paste Option

If your document doesn’t have the option use Navigation Pane option, then the copy and paste might be a better option to check out. Copying and pasting the text can be done using your mouse. You can also use your keyboard, if you prefer that way. Here’s how to use copy and paste to move pages in a Word document.
- Head over to the top of the page you want to move. Now, place your cursor at the beginning of the text you would like to move.
- Hold down the Shift Key on your keyboard and press the PgDn (Page Down) key on the keyboard. This will select the text to the end of the page. You can also select additional text by holding down the Shift Key and pressing the Page Down (PgDn) key again.
- Press Control (Ctrl )+ X on your keyboard to cut the selected text.
- Now move your cursor to the place where you want to move the text. Then press Control (Ctrl) + V to paste the text that you cut in Step 3.
This will cut and move the text to rearrange pages in word document.
Change or Re-order Pages in Word Using Mouse Cut and Paste Option
If you don’t like using a keyboard to cut and paste option, then you can also use your mouse to move Pages around in a Word document. Here’s how you can do it.
- Head over to the top of the page you want to move. Now, place your cursor at the beginning of the text you would like to move.
- Click and hold down the left button on your mouse and drag over the text you want to cut. This will highlight the text you want to move.
- Right-click the selected text and click on Cut.
- Move the cursor to the place where you want to move the text. Right-click and select the Paste option on the shortcut menu.
If you cut and move the text, you might misplace the text. If you do it by accident, then you can always Undo the any step by pressing the Ctrl + Z on keyboard. Instead, you can also use the Undo option in the Quick Access toolbar.

It is always better to use the Copy option over Cut option. This will maintain the previous text if you don’t want to lose your text that you want to move. Once pasted, you can delete the original text later.
We hope that you understood how to rearrange text in Word using the above methods. The above procedure vary in their effectiveness. It is better to choose your preferred way. So it’s better which method you choose to rearrange pages in Word. These methods work with every version of the Microsoft Office, but if you still face any problem, you can comment down your questions below.
29.08.2019 Word Задать вопросНаписать пост
В режиме редактирования документа часто можно забыть, где расположены нужные функции для изменения структуры написанного текста или всего файла в целом. Так как опций в Word очень много, можно практически бесконечно искать нужный раздел в меню. Одна из таких функций – возможность поменять одну страницу местами с другой, которая не имеет отдельного выделенного инструмента.
Как поменять страницы в Ворде?
Использование копирования
Проще всего поменять местами страницы и изменить порядок следования в Ворде, скопировав содержимое первой и вставить его в конце второй. Выделение можно выполнить с помощью мышки, зажав правую клавишу на ней и провести вверх по тексту снизу вверх или наоборот. Второй способ – установить курсор в самом низу листа, зажать клавишу Shift и построчно выделять символы выше или сразу кликнуть на самый первый символ нужного выделения.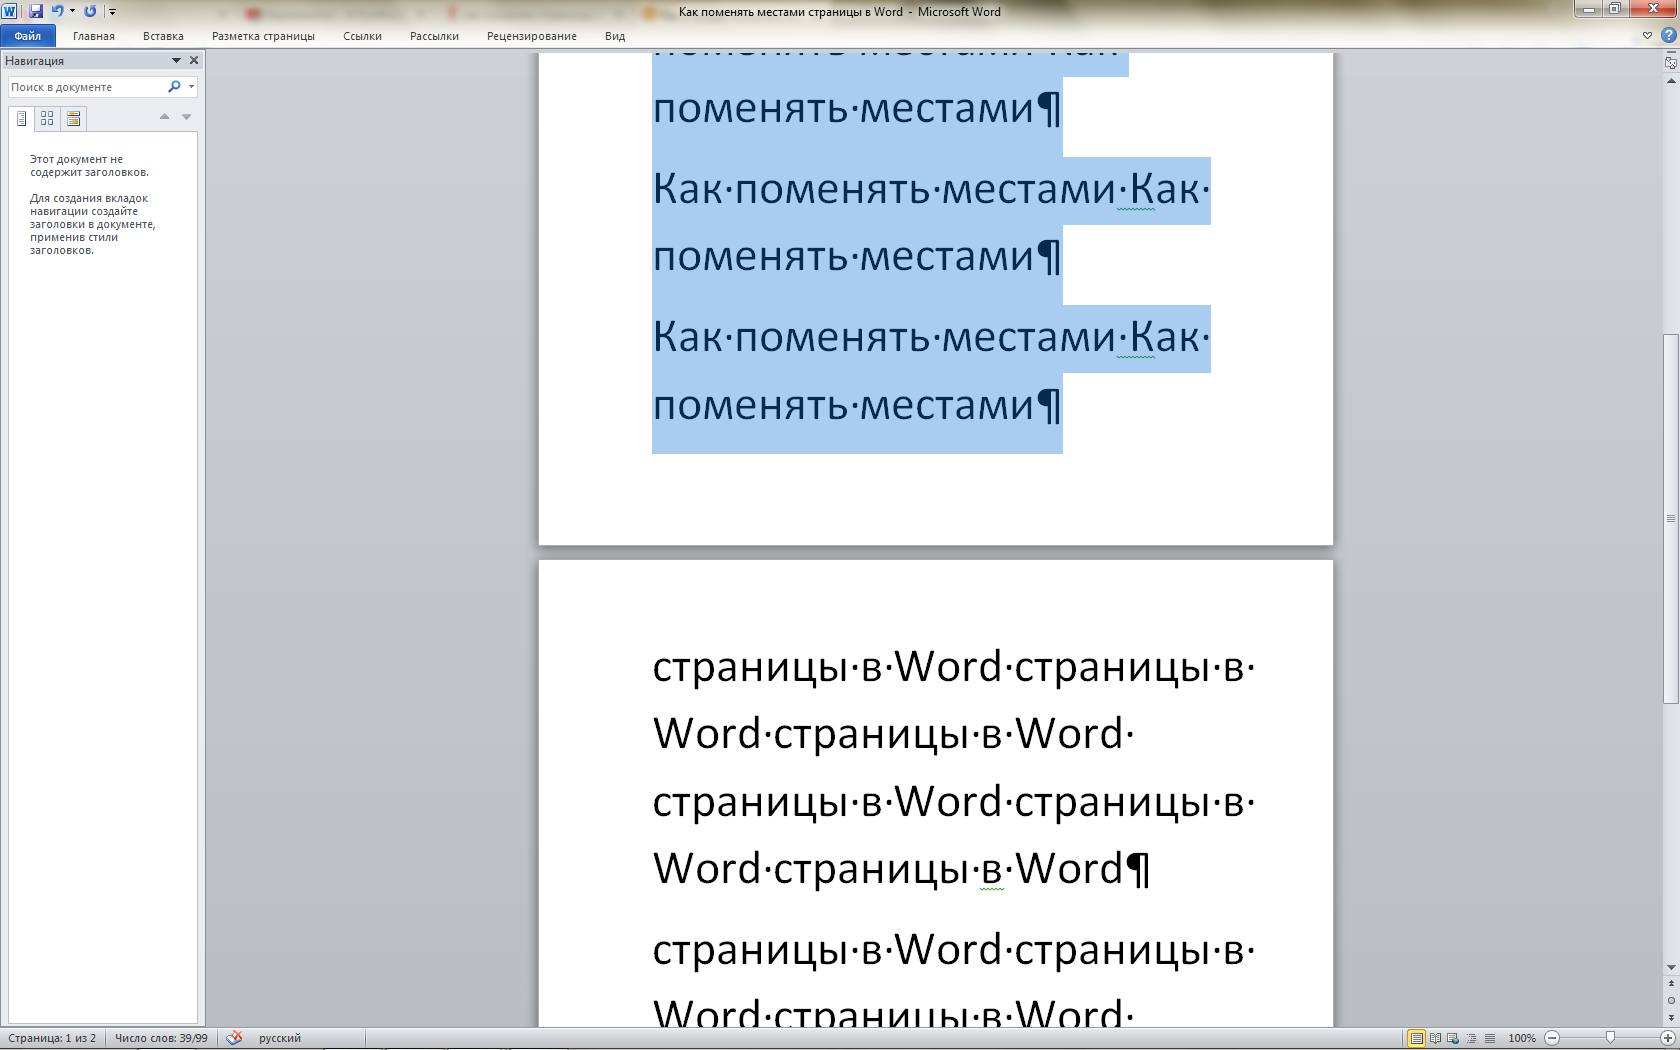
Далее нажимаем Ctrl + X (вырезать выделение, скопировав его) и ставим курсор под содержимое второй страницы, которое нужно поставить выше.
Когда курсор установлен в это положение, нажимаем комбинацию клавиш Ctrl + V и вырезанный текст появится ниже, в месте, где раньше был второй лист.
Разрыв страницы
С помощью такой функции как «Разрыв страницы», которая находится в меню «Разметка страницы» можно «забронировать» третью страницу под копирование в нее первой, притом не потеряв содержимое второй. Операции по удалению и вставке текста будут похожи на предыдущий метод. Чтобы поменять листы местами выполняем тоже самое, но немного видоизменив действия.
Чтобы начать работу найдите на верхней панели окна Word вкладку разметки. Далее, следует установить курсор под содержимым второго листа.
Теперь в ранее выбранной закладке нажмите на пункт «Разрыв» и в выпавшем списке вариантов редактирования кнопку «Страница», та, что выделена красным прямоугольником.
Таким образом, в документе появится следующее обозначение использованной функции:
Далее, уже привычной операцией Ctrl + X вырезаем выделение на первом листе, на экране останется следующая картинка.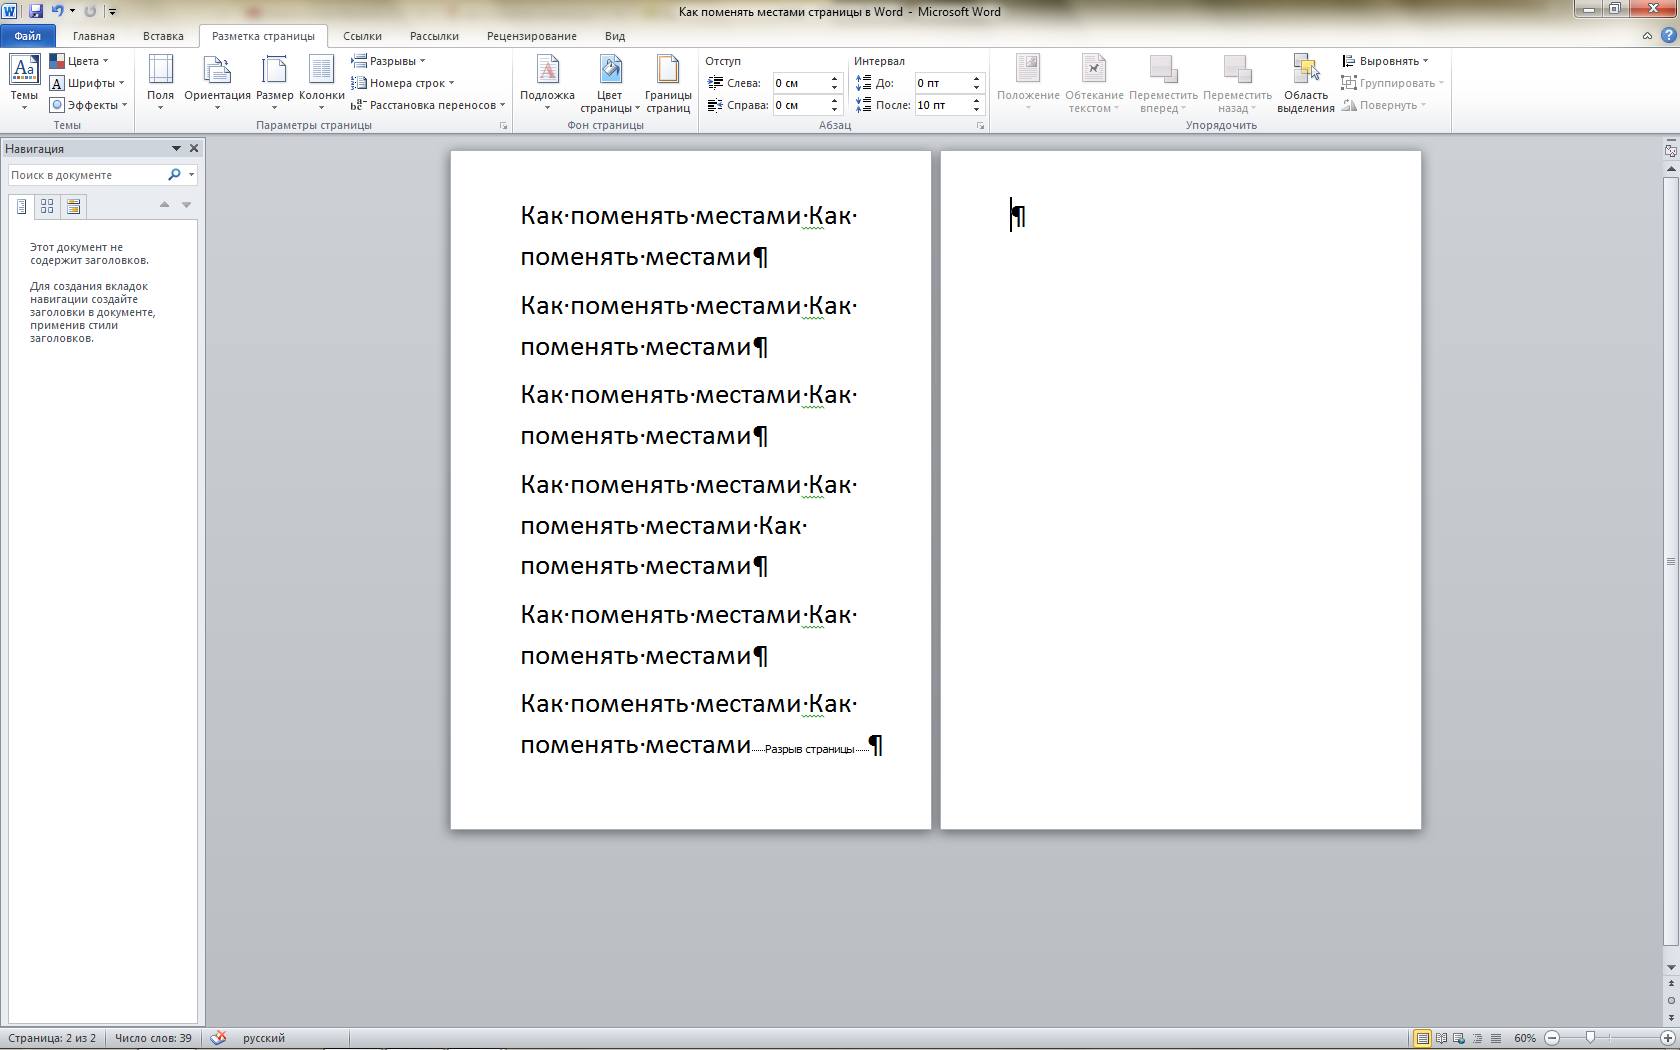
Затем вставляем текст, там, где мигает курсор и работа завершена.
В обоих вариантах, часто может получиться так, что останется пустая строка в конце, либо в начале нового листа после того, как страницы переставлены. В этом случае воспользуйтесь кнопками на клавиатуре «Delete» или «Backspace», чуть левее первой.
Reader Interactions