
Remove the page number from the first page
-
Go to Insert > Header or Footer > Edit Header or Edit Footer.
-
Select Different First Page.
Note:
Different first page can be applied to the first page of any section in your document, not just the very first page. -
In the header or footer area, you should see a label on the first page that says First Page Header. Select the page number and press Delete.
-
Select Close Header and Footer or press Esc to exit.
Tip: If you want your second page to start at 1 rather than 2, go to Insert > Page Number > Format Page Numbers, and set Start at under Page Numbering to 0, rather than 1.
Start page numbering on Page 3 — double-sided printing
If the first page of your document is a cover page, the second page is a table of contents, and you want the third page to show “Page 1”, see Start page numbering on Page 3 — double-sided printing.
Choose the scenario that most closely matches what you want to do:
You don’t want a page number to appear on your title page, but you want the second page to show «Page 2.»
-
Go to Insert > Header or Footer > Edit Header or Edit Footer.
-
Select Different First Page.

Note:
Different first page can be applied to the first page of any section in your document, not just the very first page. -
In the header or footer area, you should see a label on the first page that says First Page Header. Select the page number to highlight it and press Delete.
-
Select Close Header and Footer or press Esc to exit.

Start page numbering on Page 3 — double-sided printing
If the first page of your document is a cover page, the second page is a table of contents, and you want the third page to show “Page 1”, see Start page numbering on Page 3 — double-sided printing.
Remove the page number from the first page
-
Go to Insert > Header & Footer.
-
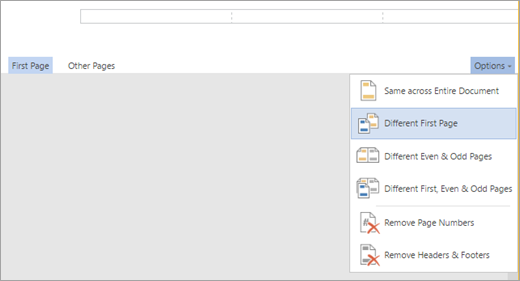
SelectOptions on the right side, and then select Different First Page.
-
Select Options again, and then select Remove Page Numbers.
-
To see your page numbers and confirm deletion of the number from the first page, go to View > Reading View.
-
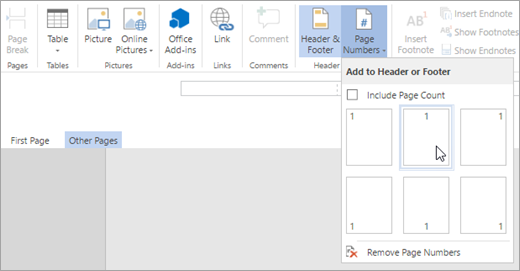
If all page numbers are deleted, go to Insert > Header & Footer and select Other Pages on the left side,. Go to Insert > Page Number and choose a number placement.

Contents
- 1 How to Add Page Numbers in Word
- 2 How to Format Page Numbers in Word
- 3 How to Start Page Numbers over in Word (Restart Numbering)
- 4 How to Skip the First Page Number in Word
- 5 How to Change Types of Page Numbering in Word
- 6 How to Leave the Header and Footer or Design Bar
- 7 Extra: How to Add Line Numbers in Word
- 8 Extra: How to Add a Page Border in Microsoft Word
Microsoft Word page numbering
Page numbers in Word are a valuable tool to help you order pages after printing or quickly reference information for other readers. Today, we’re going to show you how to add page numbers in Word, format them, and skip the first page number if necessary.
Inserting page numbers in Word is easy, modifying them not so much
Though inserting page numbers in Word in the base form is quite easy, it gets more complex once you start to modify them to suit your exact needs. Microsoft Word has a variety of styles, placement, and formatting choices that can make things feel a little overwhelming.
Not to worry, though – we’ll be breaking down all the major options so you can quickly get your page numbering in Word looking exactly how you want. Let’s get started:
If you’re wondering how to insert page numbers in Word, the first place you might think to look is the “Page Number” tool. Thankfully, you’d be right. This makes the entire process very simple:
- Open the “Insert” tab of the ribbon and press “Page Number > Bottom of Page > Plan Number 2”
Naturally, you can choose a different style for the page number if you like, such as the accent bar. You can also choose to have the number at the top of the page if you wish.


How to Format Page Numbers in Word
After inserting page numbers in Word, you may want to format them to match the styling of the rest of your document. You can quickly change aspects such as font, text color, size, center/right/left justification, and more. Here’s how:
- Double-click your page number and adjust the formatting options in the fly-out
You should already be familiar with the options here – they’re the same as they are for any other text. Once you’ve finished modifying the number, you can double-click anywhere that’s not in the footer to return to your document.


How to Start Page Numbers over in Word (Restart Numbering)
If you want your page numbers restart at a certain point, you need to make use of Word’s section breaks feature. This is a useful tool in many situations, so it’s worth familiarizing yourself with:
- Place your cursor at the start of the page you want to restart page numbers on and insert a “Next Page” break
To do so, open the “Layout” tab of your ribbon, click on “Breaks” below it, then press “Next Page” under the “Section Breaks” heading.

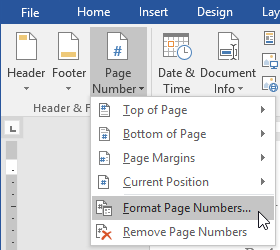
- Double-click the page number, then press “Page Number > Format Page Numbers…” in the ribbon
To clarify, you should double-click the page number of the page you’re planning to restart the page numbers on.

- Tick “Start at” under the page numbering heading select “1”, and press “OK”


How to Skip the First Page Number in Word
In many cases when adding page numbers in Word, you’ll want to skip the first page number. This happens most commonly when you have a cover page or title page. Here’s how to make page numbers start on page 2:
- Double-click the first page number and tick “Different First Page” in the ribbon
The “Different First Page” option can be found in the “Header & Footer” section of the ribbon, which should automatically appear once you double-click your page number.

- Delete the first page number
Due to the “Different First Page” option, deleting the first page number now won’t remove page numbers from the rest of your document.


How to Change Types of Page Numbering in Word
As well as the style, position and starting position of page numbers, you can change the type of page number. For example, whether the numbers take the form of numbers, letters, or Roman numerals, and whether they use dots or dashes:
- Double-click your number and press “Page Number > Format Page Numbers…” in the ribbon
- Press the dropdown arrow next to “Number format”, choose an option, and press “OK”
The changes will automatically apply to all of the page numbers in your Word document.


How to Leave the Header and Footer or Design Bar
If you find yourself stuck in the Header and Footer or design bar with no way to edit the rest of your document, you can use the following trick:
Press the “Esc” button on your keyboard
This will instantly exit the header and footer bar and bring you back to your normal document view.

As well as page numbers, you can add individual line numbers to your document so that you can reference part of it even more easily. Just follow our linked tutorial to do so.

While you’re at it, you can add a page border to your Word document to ensure a clear margin for annotations once it has been printed. You can read our dedicated guide here to learn how to do so.

![]()
Download Article
Easily add page numbers to the header or footer in your Microsoft Word document
![]()
Download Article
- Inserting (PC & Mac)
- Formatting (PC & Mac)
- Inserting (Mobile)
- Video
- Expert Q&A
- Tips
|
|
|
|
|
Adding page numbers in Microsoft Word is easy! Whether you’re writing a 10-page essay or a thesis paper, there are a variety of ways to customize the page numbers. Use the Insert tab to quickly add page numbers. From there, you can change the formatting and numbering options. This wikiHow guide will show you how to add page numbers to your Microsoft Word document on Windows and macOS, as well as in the Word mobile app on your Android, iPhone, or iPad.
Things You Should Know
- On desktop or mobile, go to the Insert tab, then select «Page Number» to add page numbers.
- Double-click the page number to make changes to the font, color, or style.
- Double-click the header or footer, then go to Page Number > Format Page Numbers for additional options.
-
1
Click Insert. This is in the tab menu bar at the top of Word. Alternatively, double-click the top or bottom of the page to open the Header or Footer editing menu.
- Don’t forget to save your work as you go!
-
2
Click Page Number. This opens a pop-up menu for choosing where to place the page numbers.[1]
- In the Insert menu, Page Number is near the center.
- In the Header & Footer design tab, Page Number is on the left.
Advertisement
-
3
Choose a page number position. This can be in the header or footer, and located left, center, or right.
- You can also toggle the option to include the page count in the page numbering (e.g. 1 of 3).
- Selecting a page number position will open the “Header & Footer” tab.


Advertisement
-
1
Double-click a page number. This will select it and show a pop-up menu with options for changing the font, color, and style. This change will edit every page number automatically.
- You could even cross out the page numbers if that’s your style.
-
2
Start numbering on the second page. If you want the first page to have no numbering, and start at 1 on the second page, follow these steps:
- Double-click the header or footer to open the Header & Footer design tab.
- Check the “Different First Page” checkbox.
- Click Page Number then Format Page Numbers.
- Select “Start at” and change it to 0.
-
3
Restart page numbers by using page breaks. If you want to start a new numbering later in the document, you’ll need to use a page break.
- Place your cursor at the beginning of the page you want to restart the numbering on.
- Go to the Layout tab, then click Breaks.
- Select Next Page in the Breaks options menu.
- Double-click the header or footer in the second section. This will open the Header & Footer design tab.
- Click Page Number then Format Page Numbers.
- Select the radio button labeled «Start At,» then select «1» to restart the page count at 1.
-
4
Use «Format Page Numbers» for additional changes. This can be located by going to Insert > Page Number > Format Page Numbers. You can change:
- The number format. You can change this to Roman numerals, letters, or another style.
- The chapter number.
- The starting number.
-
5
Click Close Header and Footer. This will return you to editing the body of the document. Alternatively, press Esc to close the header and footer editor.


Advertisement
-
1
Open your Word document on your Android, iPhone, or iPad. It’s easy to use Word on your phone or tablet to insert page numbers into your document.
-
2
Tap the more button. While in Edit mode in the Word mobile app, tap the more button (three horizontal dots).
-
3
Tap Home. Then, select Insert to switch to the Insert menu.
-
4
Choose Page Numbers. Then, select the placement location for the numbers.
-
5
Format the page number. After selecting the placement, double-click the page number. Then, tap the text edit button (the icon with the letter A and a pen). You can change the font, size, color, and more!
-
6
Go to Headers and Footers. This is in the Insert menu. You can set a different first page, change how odd and even pages look, or remove the page numbers entirely.
- When working in Online mode, any changes made in the app will appear on your desktop version of Word.


Advertisement
Add New Question
-
Question
In the insert box, the page number icon is grayed out and not available for use. How do I activate it?

Kyle Smith is a wikiHow Technology Writer, learning and sharing information about the latest technology. He has presented his research at multiple engineering conferences and is the writer and editor of hundreds of online electronics repair guides. Kyle received a BS in Industrial Engineering from Cal Poly, San Luis Obispo.
wikiHow Technology Writer
Expert Answer
The page numbering feature isn’t available in certain layouts. Go to View and select Print Layout. If this doesn’t resolve the issue, try restarting and/or updating Microsoft Word.

Ask a Question
200 characters left
Include your email address to get a message when this question is answered.
Submit
Advertisement
Video
-
If you plan on creating a complex header or footer (like your name, or a title), try and add the page numbers first. They will be much easier to work with.
-
Looking for money-saving deals on Microsoft Office products? Check out our coupon site for tons of coupons and promo codes on your next subscription.
Thanks for submitting a tip for review!
Advertisement
About This Article
Article SummaryX
1. Click Insert.
2. Click Page Number.
3. Select a position.
4. Choose a style.
Did this summary help you?
Thanks to all authors for creating a page that has been read 423,920 times.
Is this article up to date?
Lesson 17: Page Numbers
/en/word/headers-and-footers/content/
Introduction
Page numbers can be used to automatically number each page in your document. They come in a wide range of number formats and can be customized to suit your needs. Page numbers are usually placed in the header, footer, or side margin. When you need to number some pages differently, Word allows you to restart page numbering.
Optional: Download our practice document.
Watch the video below to learn more about page numbers in Word.
To add page numbers:
Word can automatically label each page with a page number and place it in a header, footer, or side margin. If you have an existing header or footer, it will be removed and replaced with the page number.
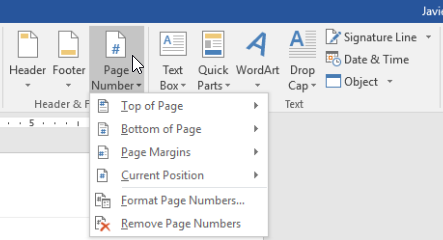
- On the Insert tab, click the Page Number command.
- Open the Top of Page, Bottom of Page, or Page Margins menu, depending on where you want the page number to be positioned, then select the desired style of header.
- Page numbering will appear.
- Press the Esc key to lock the header and footer.
- If you need to make any changes to your page numbers, simply double-click the header or footer to unlock it.
If you’ve created a page number in the side margin, it’s still considered part of the header or footer. You won’t be able to select the page number unless the header or footer is selected.
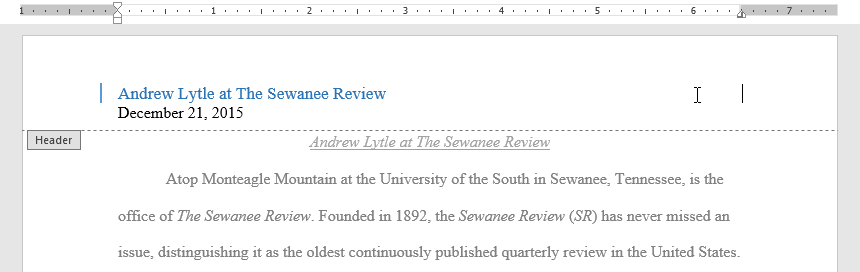
To add page numbers to an existing header or footer:
If you already have a header or footer and you want to add a page number to it, Word has an option to automatically insert the page number into the existing header or footer. In our example, we’ll add page numbering to our document’s header.
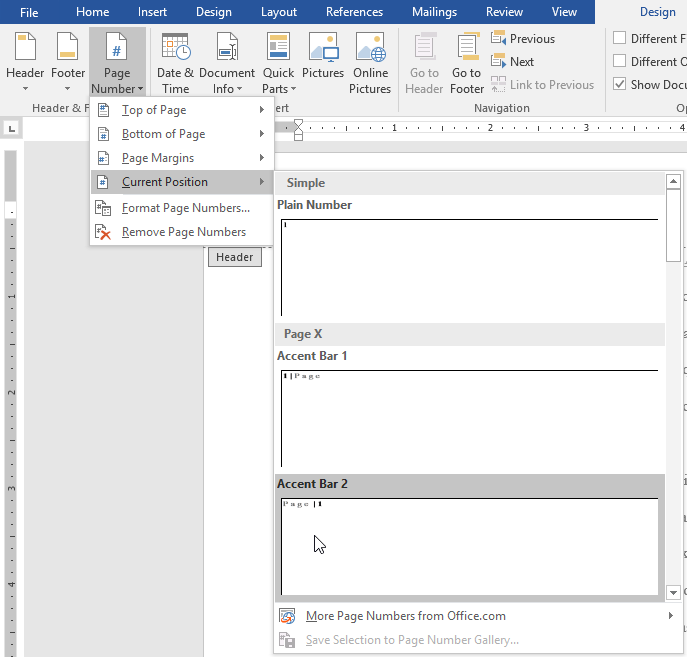
- Double-click anywhere on the header or footer to unlock it.

- On the Design tab, click the Page Number command. In the menu that appears, hover the mouse over Current Position and select the desired page numbering style.
- Page numbering will appear.
- When you’re finished, press the Esc key.
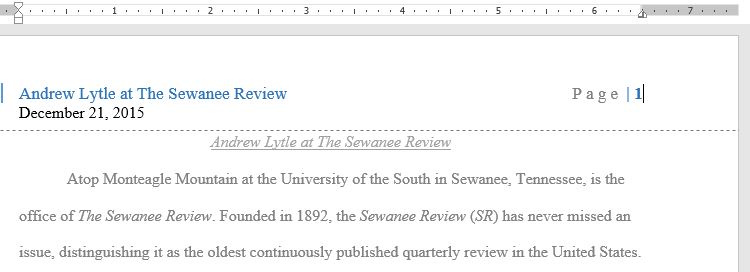
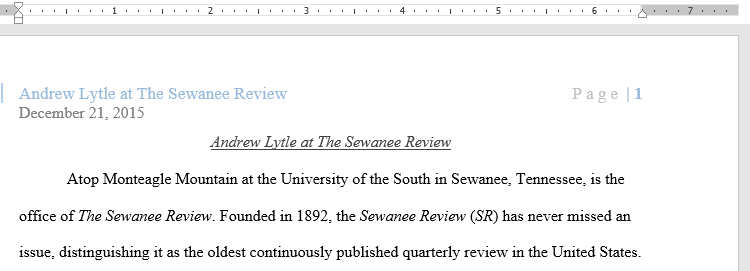
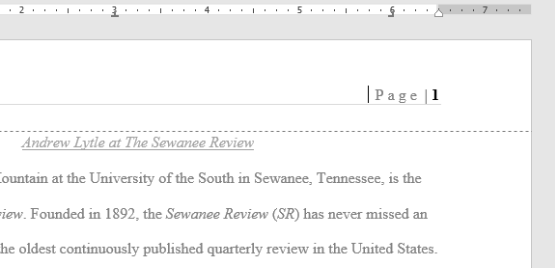
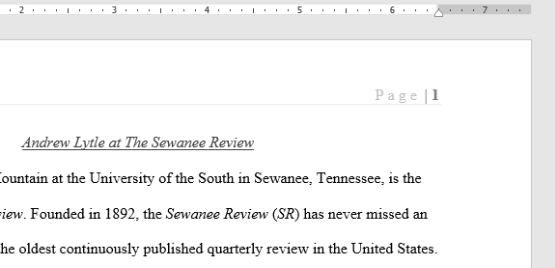
To hide the page number on the first page:
In some documents, you may not want the first page to show the page number. You can hide the first page number without affecting the rest of the pages.
- Double-click the header or footer to unlock it.
- From the Design tab, place a checkmark next to Different First Page. The header and footer will disappear from the first page. If you want, you can type something new in the header or footer, and it will only affect the first page.
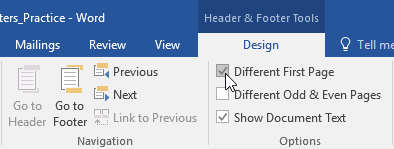
If you’re unable to select Different First Page, it may be because an object within the header or footer is selected. Click an empty area within the header or footer to make sure nothing is selected.
To restart page numbering:
Word allows you to restart page numbering on any page of your document. You can do this by inserting a section break and selecting the number you want to restart the numbering with. In our example, we’ll restart the page numbering for our document’s Works Cited section.
- Place the insertion point at the top of the page you want to restart page numbering for. If there is text on the page, place the insertion point at the beginning of the text.
- Select the Layout tab, then click the Breaks command. Select Next Page from the drop-down menu that appears.
- A section break will be added to the document.
- Double-click the header or footer containing the page number you want to restart.
- Click the Page Number command. In the menu that appears, select Format Page Numbers.
- A dialog box will appear. Click the Start at: button. By default, it will start at 1. If you want, you can change the number. When you’re done, click OK.
- The page numbering will restart.


To learn more about adding section breaks to your document, review our lesson on Breaks.
Challenge!
- Open our practice document.
- On page 1, insert the Accent Bar 4 page number at the Bottom of Page.
- In the Design Options, choose Different First Page. The page number should now be hidden on the first page.
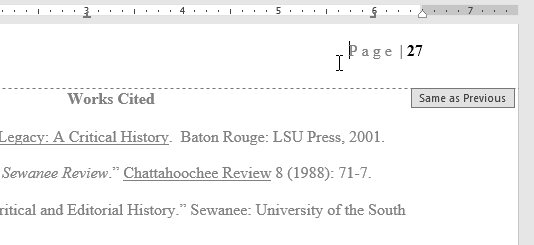
- Scroll to page 27 of the document.
- Place your cursor at the beginning of the title Works Cited and insert a Continuous Section break.
- In the footer of page 27, restart the page numbering at 1.
- When you’re finished, the bottom of page 27 should look like this:


/en/word/pictures-and-text-wrapping/content/
In this guide, you’ll learn everything you need to know about adding page numbers in Word.
When adding page numbers into your Word document, several methods are available.
However, this guide focuses only on the best approaches that give the most ease and flexibility.
I’ll show you all the secrets.
Let’s dive right in.
Introduction.
Page numbering in Word is very easy. In fact, I know a shortcut with which you can insert page numbers in under five seconds (will be discussed soon).
At the same time, numbering pages in Word can be very complicated, depending on what document you are working on.
- Are you starting the page numbering from page one, page two or page three?
- Do you want the page numbers to be Roman numerals, alphabets or ordinary numbers?
- Where do you want to insert the page numbers? – Is it in the footer? In the Header? Or in the side margin?
All these factors count when it comes to inserting page numbers into Word.
So, in order to not confuse you, I’ll begin from the basics with examples and screenshots on every step.
Without wasting much time, let’s get started.
The quickest way to add page numbers in Word – Shortcut
This is so far the quickest way you can use to number your pages in Word.
NOTE: With this method, I assume that you just want your pages to be numbered starting from the first page to the last page.
Below are the steps you can use to perform quick page numbering in Word:
- Identify where on the page you want to insert the page numbers. Whether in the footer (bottom of page) or in the header (top of page). In this example, we’ll insert the page numbers in the footer section.

- Now, go to any page of your choice. It could be page one or page 10, it doesn’t really matter.
- Double-click on the page’s Footer area to make it editable. Alternatively, right-click in the Footer area, then click on Edit Footer. The same thing applies if you are inserting the page number into the header section.
- Whilst in the Footer editing mode, press Shift+Alt+P on your keyboard.
- Now press the Escape (Esc) key to exit the Header & Footer.
After performing the above simple steps, Word will insert page numbers on all the pages in the document.
Below is a very short video illustration of the steps outlined above:
Option 2: Using the insert page numbers button
This is yet another way you can insert page numbers into your Word document.
It involved using the Page Number commands in the Insert tab, or Header & Footer tab when active.
Following the steps below, you can also add page numbers into your Word document.
- Go to the Insert tab, in the ‘Header & Footer’ group, click on ‘Page Number’ to display the page numbering options.

You can also find the ‘Page Number’ command in the Header & Footer tab. However, the Header & Footer tab shows only when you are editing headers or footers. So you can double click either in the Footer or Header section to make it editable.
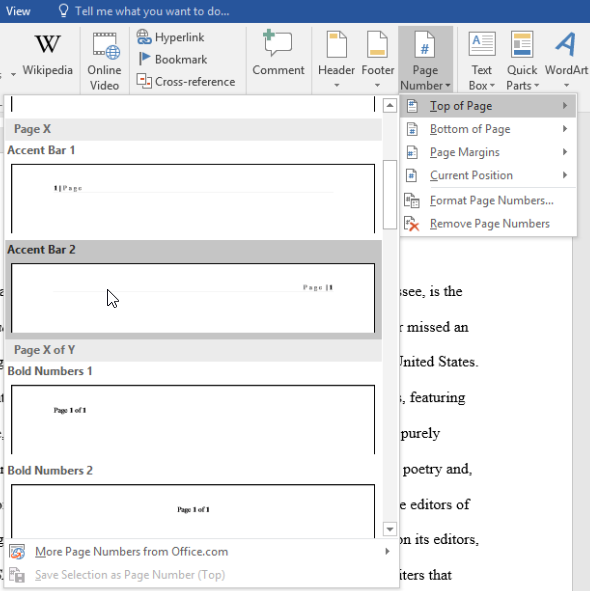
- From the ‘Page Number’ drop-down menu, choose your page numbering style to automatically insert the page numbers into your document.

Use the ‘Top of Page’ option if you want to insert page numbers on top of the pages. Or use ‘Bottom of Page’ option to add page numbers to the bottom of the pages.
This is how you can add page numbers to your word document.
The two approaches explained above are the basis for learning how to insert complex page numbers in Word.
Now let’s look at more advanced ways you can insert or tweak page numbers to suit your needs.
Numbering your pages with Roman numerals or alphabets
Word gives you the flexibility of choosing the page numbering style that works well for you.
You are not only limited to using the standard ordinary numbers when numbering your pages in Word. You can number pages with Roman numerals. You can also use alphabets.
Therefore, without further ado, below are the steps you can follow to change your page numbers to Roman numerals or other numbering styles.
- First, insert the page numbers.
To insert roman numerals as page numbers, you first have to insert the page numbers with the default ordinary numbers, and then format it to display the roman numerals.
In case you forget, to insert page numbers, go to the Insert tab, under the Header & Footer group, click Page Number and then specify the location and style you want for your page numbers.
- After successfully adding the page numbers, go to Page Number > Format Page Numbers in the Insert tab.

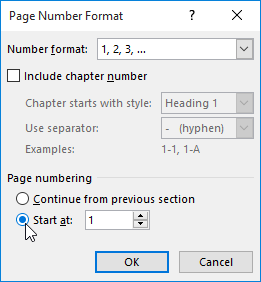
- From the ‘Page Number Format’ dialog, click the ‘Number format’ options and select the numbering style you want. You can select alphabets or roman numerals.

- Click on the OK button.
This few steps will change your page numbers to roman numerals.
NOTE: You can also include different page numbers in the same document. For instance, you can use Roman numerals for the introduction pages, and start page 1 on the main part of the content. This technique is discussed later in this article.
Removing page number from the first page
Perhaps you want to remove the first-page numbering since it serves as your cover page.
Or for any other reason, you can remove the page number from the first page of your Word document using the following editing steps:
- Double-click the Footer/Header section to activate the ‘Header & Footer’ tab. Alternatively, right-click the footer area and Click on Edit Footer.
- From the ‘Header & Footer’tab, select ‘Different First Page’.

As soon as you check the ‘Different First Page’ checkbox, the page number on the first page disappears.
NOTE: Even though there’s no page number on the first page anymore, it is still counted. This means that the second page will still display page number 2 instead of page number 1. To start numbering page 1 on the second page, keep reading below.
Numbering pages starting on page 2
After removing the page number on the first page, you realized that the second page still has page number 2 instead of 1.
This is because the first page is still counted, it’s just that the page number is not visible.
There are two ways you can number pages in Word starting on page 2:
- Start the page numbering at 0 (zero). This way, the first page will be page 0 (which is hidden anyway), and the second page will be numbered page 1.
- Use Section Breaks to separate the first page from the rest of the pages. This way, you can delete the page number on the first page and it will not affect the other page numbers on the rest of the pages.
In this section, I’ll show you how to number pages in Word starting at 0 (zero) instead of 1 (one).
- First, insert the page numbers into your document. If you don’t know how to insert page numbers, refer to the previous sections. If you already have your pages numbered, move to the next step.
- In the Insert tab, go to Page Number > Format Page Numbers.
- The ‘Page Number Format’ dialog appears. Under the page numbering section, type 0 (zero) in the Start at box.

- Click OK.
At this point, the page numbering will start with 0 (zero) on the first page which is not visible. Then the second page will be numbered N1, and so on.
TIP: Not every page needs to be on page 1. Therefore, just like starting to number at zero, you can also start your numbering at any number (except negatives) depending on the layout of your content.
As mentioned already, the second method to perform this task involve using section breaks to separate the first page from the rest of the pages. I’ll cover this approach in the next sections where you’ll learn how to insert page number in Word starting from a specific page.
Insert page number in word from specific page
Yes, it is possible to start page numbering from any page in your word document.
In the previous section, we already talked about how you can start numbering your pages from page two using the ‘Different First Page’ option.
With the ‘Different First Page’ method, you can only start numbering your pages on page 2. You cannot really insert the page numbers on other specific pages like page 3, page 4 or page 5.
To skirt this limitation, you need to use what is called Page Breaks to break your pages into sections. This way, each section can have independent headers and footers, which means that they can also be numbered independently.
To understand how this works, let’s demonstrate how to start page numbers on page 3.
Starting page numbers on page 3 or any other page
NOTE: The following steps will show you how to start numbering your pages from page 3. However, you can apply the same idea to add page numbers from any specific page you want, like page 5.
The diagram below illustrates the goal of this section:

In the diagram above, the first section (first and second pages), is the introduction – with no page numbers. And the second section (starting from the third page), is the main content – which contains page numbers, starting with number 1.
If you follow the steps below carefully, you will achieve awesome results.
Without further ado, let’s dive right into the action:
- Identify the page from where you want to start the numbering. In this example, it’s page 3.
- Place the insertion pointer at the start of the third page (main content page).

- Go to the Page Layout tab, in the page setup group, click on Breaks and then select Next Page from the extended list of commands.

At this point, the section break is inserted. It separates the document’s first two pages from the rest of the pages. Thus, starting from page 3 is a new section.
- Confirm the section break
After inserting the section break, Word doesn’t actually make the effects visible. Everything happens in the backend.
So, to be sure that the section break is really inserted, Press Ctrl+Shift+8 on PC or ⌘+8 on Mac. This will make all the paragraph marks visible including section breaks.

If you see the section break line just before the third page, it means that inserting the section break was successful. It tells Word that the next page (page 3) begins a different section which may have different header/footer.
- Unlink the header/footer for the second section from that of the previous.
To unlink these two sections:
Double-click to activate the Footer section on page three. This displays the Header & Footer tab, in the Navigation group, click on Link to Previous to deselect that command. Do the same for the Header.

When the “Link to Previous” item is selected for any given header or footer, it means that the header or footer is the same as that for the previous section. If you want to fix page numbers on specific pages, you don’t want that setting active.
Now follow the rest of the steps to insert the page numbers on page 3.
- Go to the Insert tab, in the ‘Header & Footer’ group, click on ‘Page Number’ to display the page numbering options.
- From the ‘Page Number’ drop-down menu, choose your page numbering style you want.
Use the ‘Top of Page’ option if you want to insert page numbers on top of the pages. Or use ‘Bottom of Page’ option to add page numbers to the bottom of the pages.
After adding the page numbers, you’ll notice that each section has its pages numbered separately. Section one, which has only two pages will be numbered from page 1 to 2. Then section two, which begins with page three will also be numbered starting from 1.
You can change the numbering styles of the introduction pages to say roman numerals.
We’ll talk about how to do that in the last section below.
How to insert different page numbers in word
You can use different page numbering styles within the same document.
Perhaps you want to use Roman numerals for numbering the introduction and then start over with page number 1 for the main content.
For instance, consider a document with two separate sections, as shown below:

Section 1 is the introduction which uses Roman numerals to number the pages. Section 2 contains the main content – which uses the standard ordinary numbers to number the pages, starting with page number 1.
This is entirely possible if you following the steps below very carefully.
- Open your document. If you haven’t written the content yet, you can finish writing it before you make the settings.
- Using the steps in the preceding section, insert a page break to separate the first section from the second.
- After dividing the document into sections, insert page numbers using the steps I showed you from the beginning.
- Change the page numbers in section one to Roman numerals. This is already covered in the previous sections.
- Format the page numbering in the new section too.
You can use the techniques discussed on this page to solve many page numbering problems in Word.
This is enough information to help you fix page numbers in Word.
Now it’s your turn to take action.
If you have any questions, suggestions or corrections, let me know in the comments section.