
Insert a header or footer

-
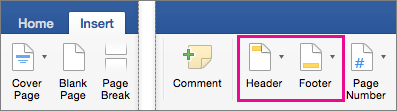
Go to Insert > Header or Footer.
-
Choose the header style you want to use.
Tip: Some built-in header and footer designs include page numbers.
-
Add or change text for the header or footer. For more info on things you can do with headers, see Edit your existing headers and footers. To edit a header or footer that’s been already created, double-click on it.
-
To eliminate a header—like deleting it on the title page—select it and then check the Different First Page box.
-
Select Close Header and Footer or press Esc to exit.
To delete, select Insert > Header (or Footer) > Remove Header (or Remove Footer).
Add a standard or customized header or footer
-
Go to Insert > Header or Footer.

-
Choose from a list of standard headers or footers, go to the list of Header or Footer options, and select the header or footer that you want.
Or, create your own header or footer by selecting Edit Header or Edit Footer.
-
When you’re done, select Close Header and Footer or press Esc.
Important:
Office for Mac 2011 is no longer supported. Upgrade to Microsoft 365 to work anywhere from any device and continue to receive support.
Upgrade now
-
On the Layout tab, under View, click Page Layout.
-
On the Layout tab, under Page Setup, click Header & Footer.
-
Choose from a list of standard headers or footers by going to the Header or Footer pop-up menu, and clicking the header or footer that you want.
Or, create your own header or footer by clicking Customize Header or Customize Footer and following the instructions.
Note: When you customize your header or footer, you can add images, page numbers, date, time, sheet name, file name and path, and more.
-
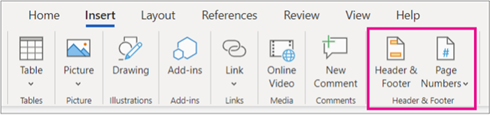
Go to Insert > Header & Footer.
-
Add or header or footer text.
-
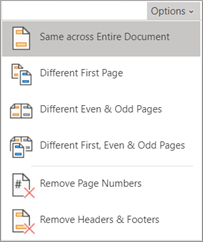
Use the Options menu for additional customization.
-
To exit, select Close Header and Footer or press Esc.
-
To delete, select Insert > Header (or Footer) > Remove Header (or Remove Footer).
For more on headers and footers, see Headers and footers in Word.
Need more help?
If you need to put each Heading 1 at the beginning of a new page, you
can customize the existing Heading 1 style or create a new
Heading style to put page breaks before the heading. Microsoft Word
automatically inserts page breaks for such style.

See also
how to start a new part of a document on an odd page.
To add the page breaks into the existing style Heading 1,
do the following:
1. To open the Modify Style dialog, do one of
the following:
- On the Home tab, in the Styles group, right-click on the
Heading 1 style and choose Modify… in the popup menu:
- On the Home tab, in the Styles group, click the dialog box launcher:

On the Styles pane, right-click on the Heading 1 style
and choose Modify… in the popup menu:


2. In the Modify Style dialog box, click the
Format button and then choose Paragraph…:

3. In the Paragraph dialog box, on the
Line and Page Breaks tab, select the Page break before option:

4. Click OK twice.
After saving the style, all paragraphs with the style Heading 1 in
the current document will start from a new page.
To create a new style that will start from on a new page, do the following:
1. On the Home tab, in the Styles group, click the dialog box launcher:

2. On the Styles pane, click the New Style button:

3. In the Create New Style from Formatting
dialog box:
- Type the name of the new style or leave the proposed,
- Choose any other settings you prefer,
- Click the Format button and then choose Paragraph…:

4. In the Paragraph dialog box, on the
Line and Page Breaks tab:
- Select the Page break before option:
- Choose any other settings you like.
5. Click OK twice.
After saving the new style, simply apply this style for each heading that you want
to start from a new page.
See also this tip in French:
Comment mettre Titre 1 sur la nouvelle page.
Things You Should Know
- Adding a header in Microsoft Word will add text to the top of your pages.
- When adding a header, you can choose between pre-made templates or blank.
- In Header settings, you can toggle «Different First Page» and «Header Position».
-
1
Open Microsoft Word. It’s a blue app with a white «W» on it.
- You can also open an existing document by double-clicking it.
-
2
Click Blank Document. This will open a new document in Word.
Advertisement
-
3
Click the Insert tab. You’ll see it near the top of the Word window, directly to the right of the Home tab.
-
4
Click Header. It’s in the «Header & Footer» section that’s on the right side of the row of options near the top of the screen. You’ll see a list of header options in a drop-down menu.
- These options will vary depending on your Office subscription type and version of Word.
-
5
Click a header option. In most cases, you’ll just click the Blank option, since it will apply to the majority of Word documents necessitating a header. Selecting an option will add it to your document.
-
6
Type in your header’s text. This is the text that will appear at the top of every page.
-
7
Click Close Header and Footer. Doing so will apply it to your document; you’ll see your header text at the top of each page.


Advertisement
-
1
Double-click your header text. Doing so will open the Header options menu in the bar near the top of the Word window.
-
2
Review the header’s basic settings. There are a couple of aspects of the header that you can edit in the «Options» and «Position» sections:
- Different First Page — Check this box to customize your document’s first page’s header. It will appear different than the header on the rest of the pages.
- Header Position — Change the number in the «Header from Top» box to raise or lower the header’s position on the page.
-
3
Click and drag your cursor across the header text. This will select it, which will allow you to modify it as needed.
- If you’re using the «Different First Page» option, you’ll need to do this on a page other than the first for your changes to apply across your document (first page aside).
-
4
Click the Home tab. Doing so will allow you to edit the header by using options in the following sections:
- Font — Edit your text’s font, size, color, and general formatting (e.g., bolding or underlining).
- Paragraph — Change your header’s orientation (e.g., centered).
-
5
Double-click the «Header» tab. It’s below your header’s text; doing so will save your changes and close the header section.


Advertisement
Add New Question
-
Question
How do I make the header show up in the document?

To make a header appear, double-click (left mouse key) the highest part of the «page» and a new box will appear, with a dotted line indicating the «header» boundaries. You can then select the font/sizing/etc. for the header. When you’ve finished writing your header, double-click (left mouse key again) to return to the normal page, and leave the header at the top. Note that the header will fade out slightly and will seem to have a greyish tint. Your header will appear at the top of every page.
-
Question
How can I have page numbers inserted sequentially?
Once you add page numbers in the header options, they will automatically be inserted sequentially.
-
Question
How do I add another header in Microsoft Word if I already have one?
Go to the «Design» tab in the menu across the top. You’ll see an option to «Link to Previous.» That is where you turn headers on and off.
Ask a Question
200 characters left
Include your email address to get a message when this question is answered.
Submit
Advertisement
Video
Thanks for submitting a tip for review!
About This Article
Article SummaryX
1. Open a new or existing document in Microsoft Word.
2. Click Insert.
3. Click Header.
4. Click a header template.
5. Enter your preferred text.
6. Click Close Header and Footer.
Did this summary help you?
Thanks to all authors for creating a page that has been read 300,979 times.
Is this article up to date?
Posted on: 03/17/2017
If you want your Heading 1 paragraphs to start at the top of the next page, you can accomplish this with a page break, but a better option would be to use Word’s paragraph feature to do this.
- Right-click your Heading 1 style and select Modify.
- Now click on Format then Paragraph.
- In the Paragraph box, select the line and page breaks tab.
- Check Page Break Before and click OK twice.
The Page Break Before setting, when chosen, forces the paragraph to always start at the top of the next page.
YouTube Video on Page Breaks before for Heading 1

Chris Menard
Chris Menard is a Microsoft Certified Trainer (MCT) and is employed full-time as a Trainer for BakerHostetler, one of the nation’s largest law firms. Menard has a YouTube channel with over 900 technology videos covering Excel, Word, Zoom, Teams, Outlook, Gmail, Google Calendar, and other resources that over 15 million viewers have appreciated. Menard also does public speaking at conferences for CPAs and Administrative Professionals. Connect with Chris on LinkedIn at chrismenardtraining.com/linked or on YouTube at chrismenardtraining.com/youtube
Categories
-
Blog
»
Microsoft
»
Microsoft Word
»
Intermediate
Don’t want to add a Header to the whole document? Learn how to add one only on the first page.


Microsoft Word offers ample customizations to users to users which is one of the prime reasons behind its popularity. For instance, adding a ‘Header’ only to the first page of a document.
Headers are located at the top of a document and are used to include information such as page numbers or titles. By default, the header content remains the same for the entire document, unless set otherwise.
Many a time, you may require to insert a header only on the first page of a document. Say, if you plan to add the title to the first page or the writer’s name. In the next couple of steps, we will see how to do just that.
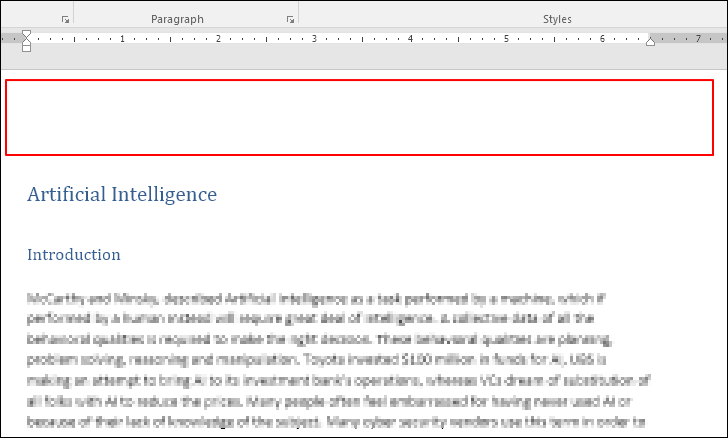
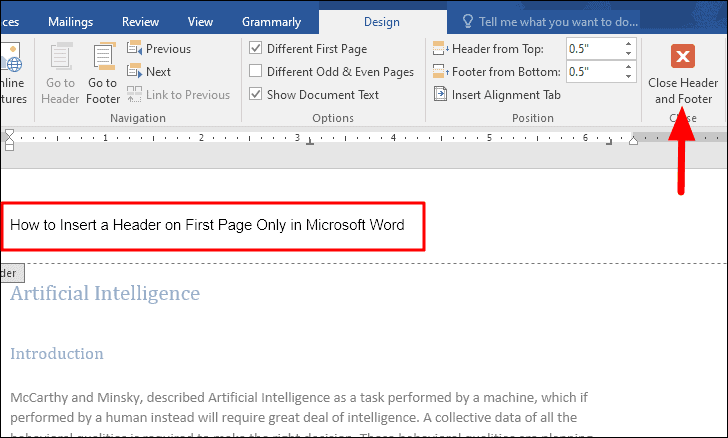
To add a header only to the first page in Word, double-click on the header portion at the top of the first page of the document.
A ‘Design’ tab will now appear where you have all the options and customizations for ‘Header and Footer’. Next, tick the checkbox for ‘Different First Page’ under the ‘Options’ section.
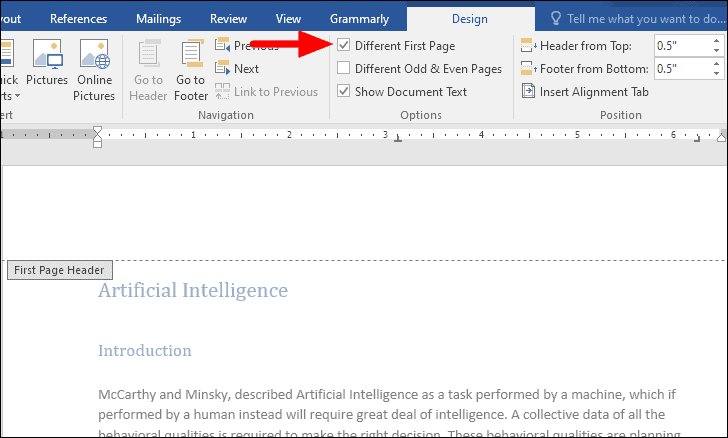
You can now enter the desired content in the ‘Header’ and it will only appear on the first page of the document. Once you are done, click on ‘Close Header and Footer’ at the extreme right of the ‘Design’ tab. You can now resume work on the remaining document.
Now that you know how to insert a ‘Header’ only on the first page, it will help you customize and enhance the readability of your document.