
When you work in Microsoft Word, you’ll have to rearrange pages. It’s not always clear how to do that, so use these tips to make it a lot easier!

Can you move pages in Word? Depending on the type of document you’re creating in Microsoft Word, you may find yourself in this situation. It is especially likely for lengthy documents—moving a page on Word can make or break the document in the right circumstances.
Unlike PowerPoint, you cannot rearrange the slides in Word. That’s because Word is a word processor, so it’s one long scrolling document. PowerPoint, on the other hand, is an application that has slides as its own elements.
But there are ways to rearrange and move Microsoft Word pages. You can rearrange them online or offline using three easy methods.
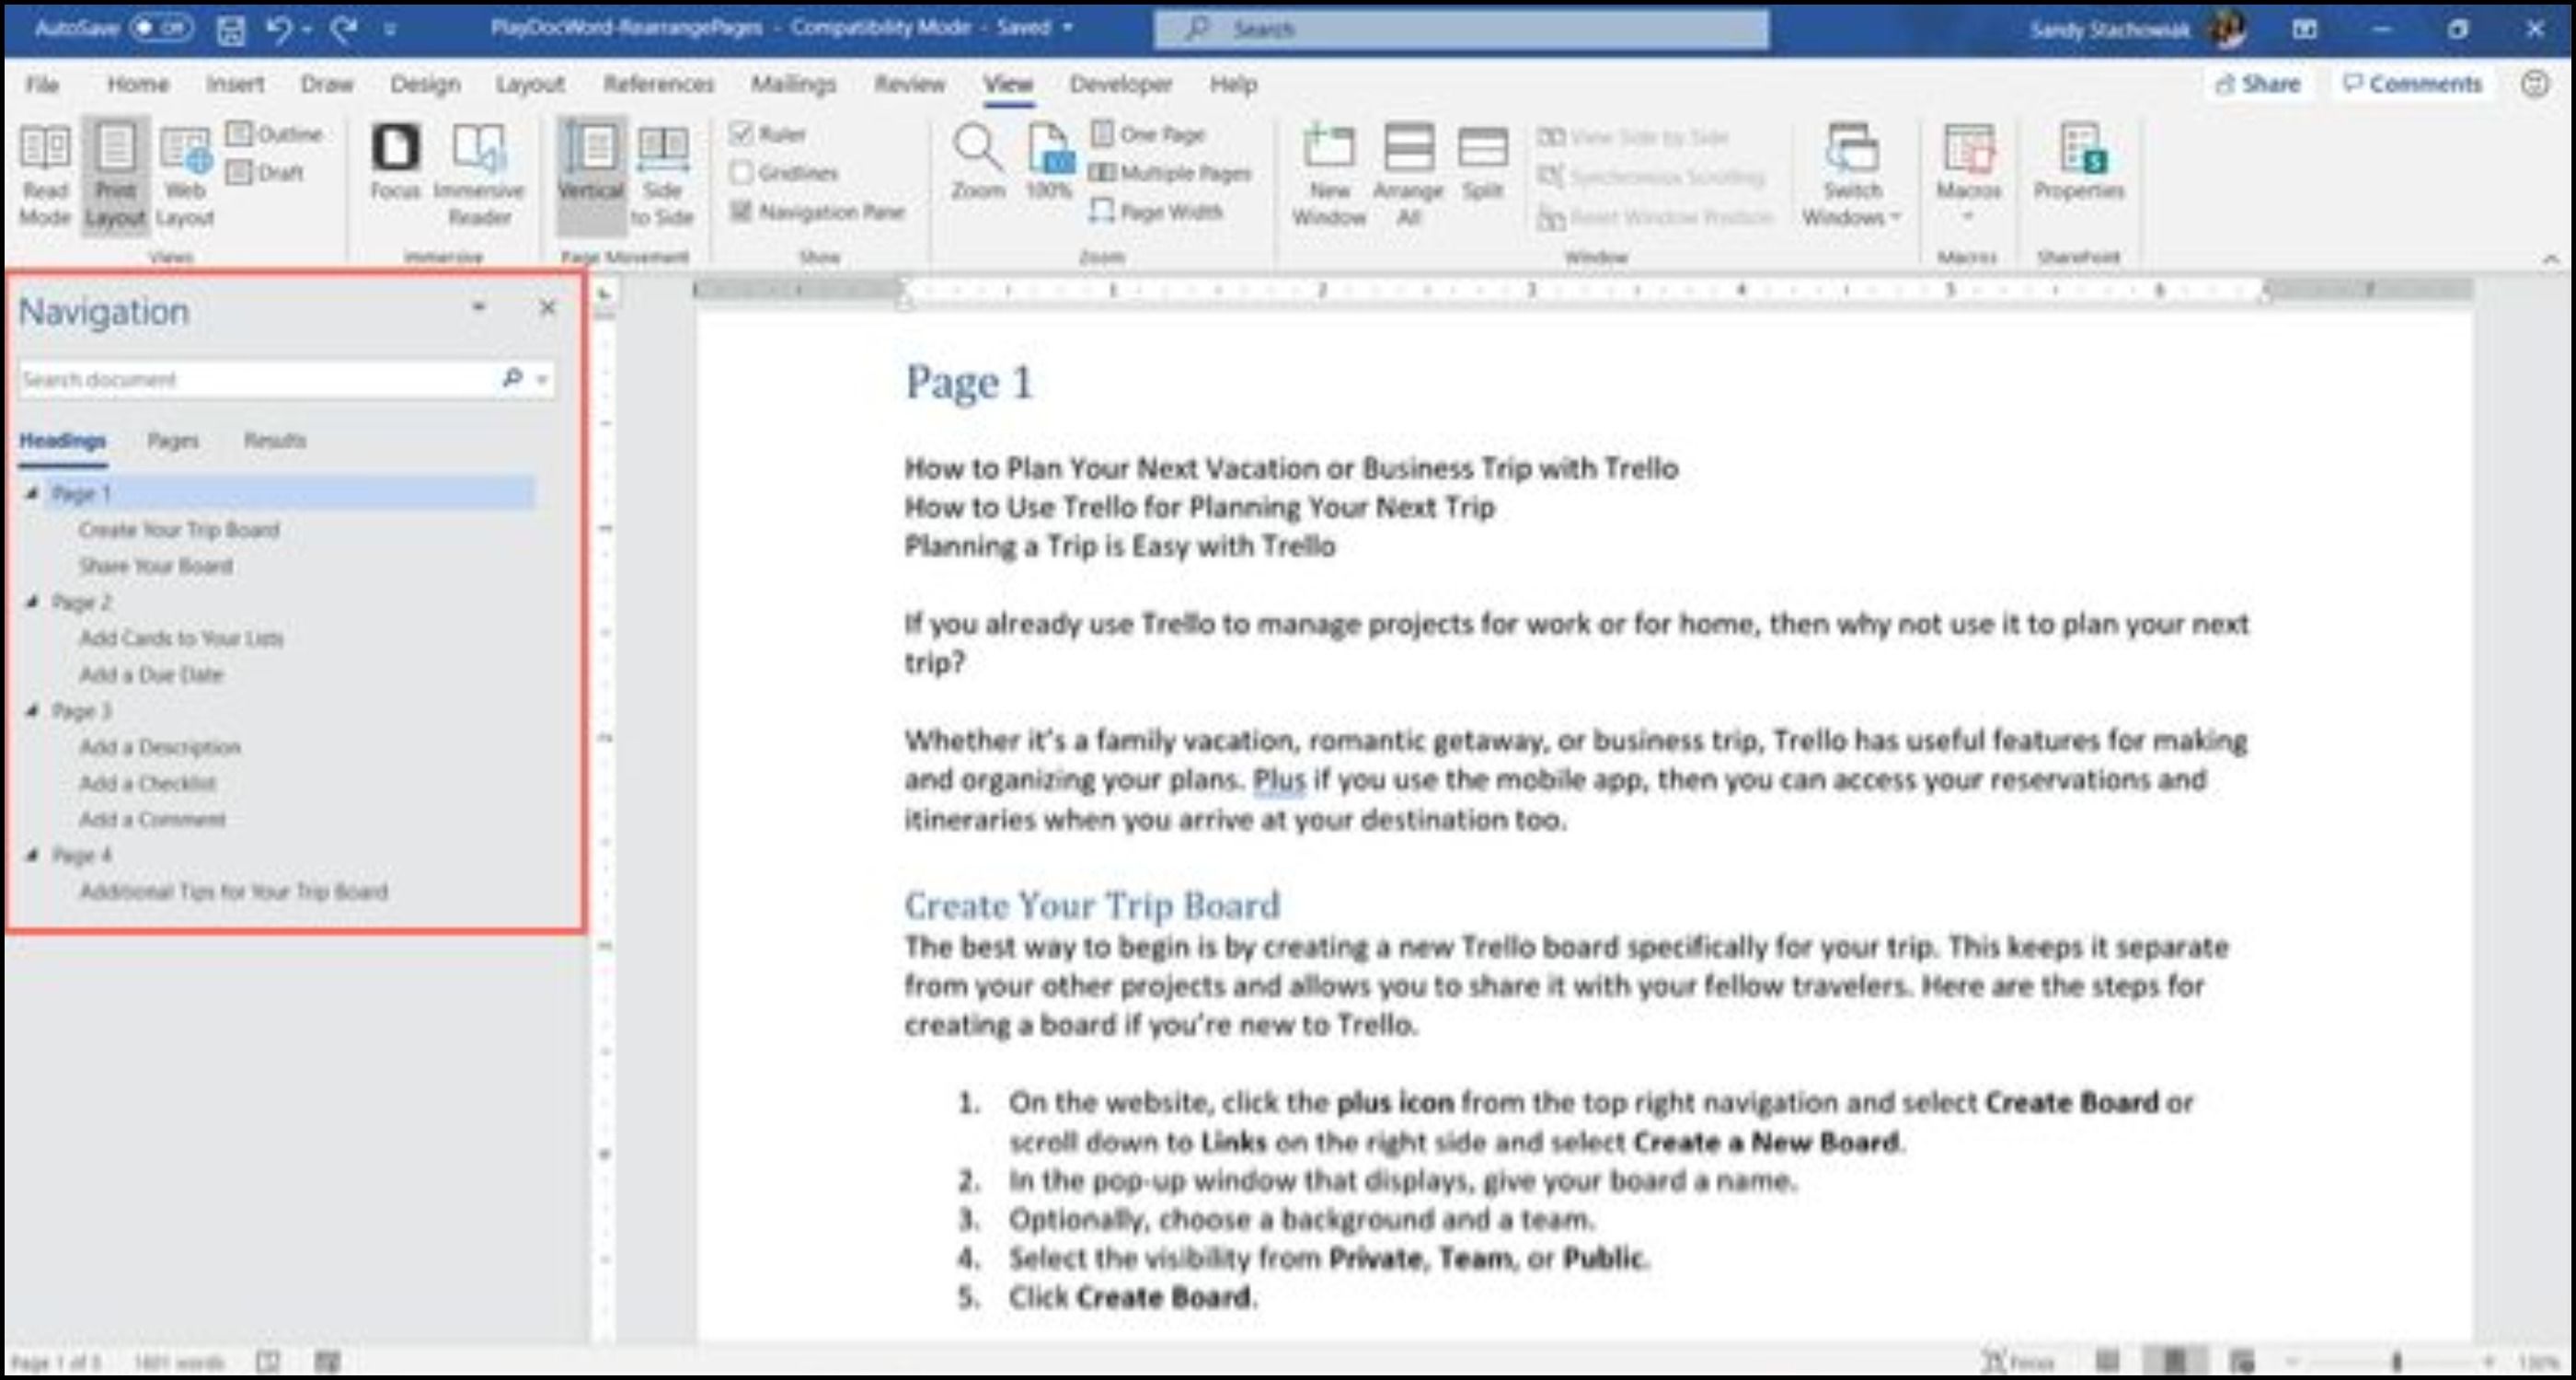
How to Interchange Pages in Word With the Navigation Pane
The Navigation Pane in Word is a handy tool for jumping to certain spots in your document without having to scroll or search.
For this reason, the Navigation Pane method is the way to go if you use headings in your document. And it’s most helpful if you have a heading at the top of each page.
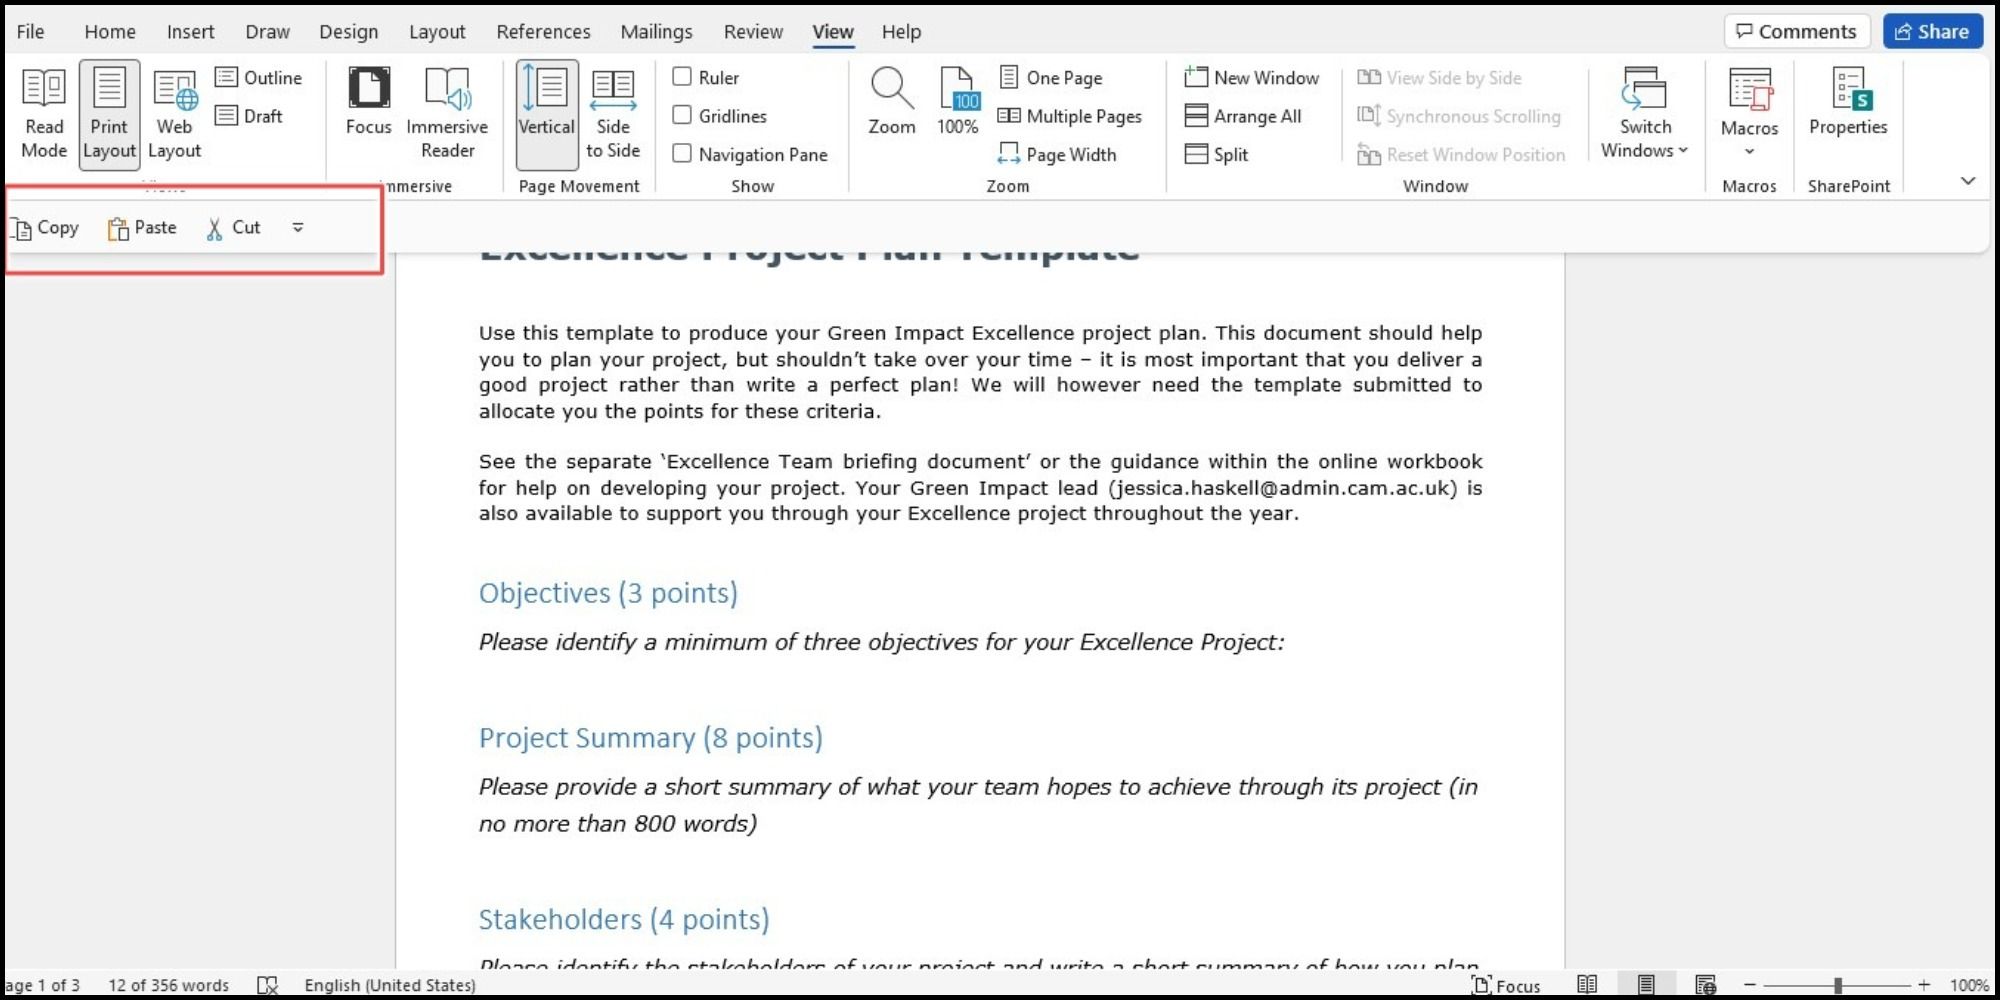
- Click the View tab and check the box for Navigation Pane.
- When the tool opens on the left side of your document, click Headings in the pane.
- Select the heading for the page you want to move and drag it to its new location in the Headings list.
As you drag the heading, you’ll see a dark line appear. When the line is in a spot where you want to move the heading (page), release.

You’ll then see the heading and its contents in the new position; your document will reflect this change as well.
Tips to Switch Pages in Word With the Navigation Pane Method
Here are a couple of tips to help you reorder pages. Word offers more than a few formatting options.
Formatting Text With Headings
If you want to use this method to rearrange Word pages but don’t currently have your text formatted with headings:
- Click the Home tab.
- Select your text, and choose a heading in the Styles section of the ribbon in Microsoft Word.
- Reorder pages, removing the headings if you like.
Order of Headings in the Pane
Remember that all headings in the Navigation Pane are listed in descending order. So the order will be Heading 1 at the top, then Heading 2, Heading 3, and so on. To move an entire page, or section, use the highest-level heading for that section.
How to Move Pages in a Word Document With Keyboard Cut and Paste
Using the Navigation Pane isn’t practical for your type of document? You may be wondering: how do I rearrange pages in Word without it?
There are many options in Word. Rearrange pages by cutting and pasting, if you have to. If you prefer to maneuver this way with your keyboard, here’s how to arrange pages in Microsoft Word in that style.
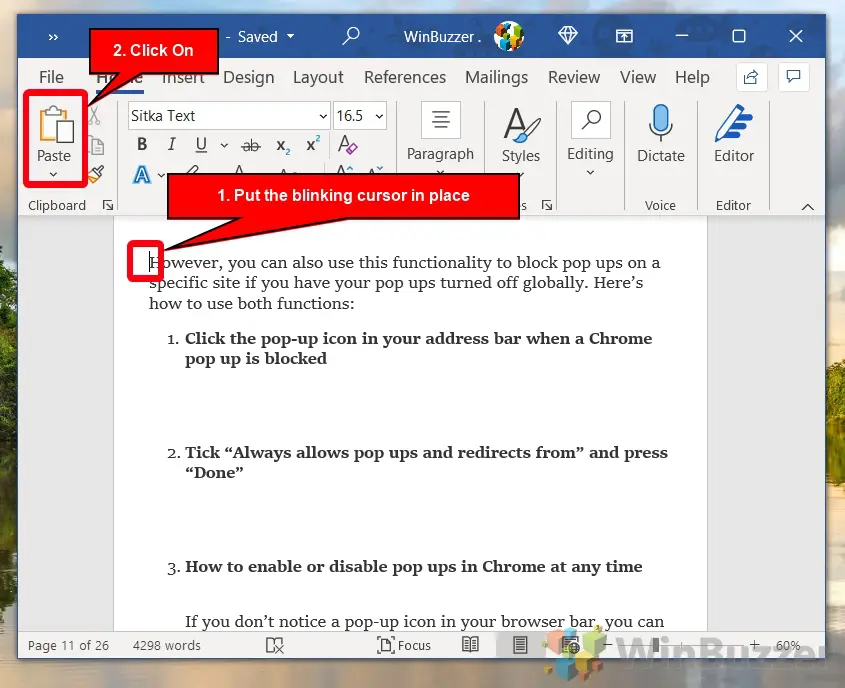
- Place your cursor at the very beginning of the text on the page you want to move.
- Hold your Shift key and press the Page Down (Pg Dn) key. This will grab a screen’s worth of text.
- If you need to select more, continue holding Shift and press Page Down again. You can do this until you have it all.
- Press Control (Ctrl) + X to cut the text you selected.
- Move your cursor to the spot where you want the page moved to and press Control (Ctrl) + V to move the page. Word does all the rest.
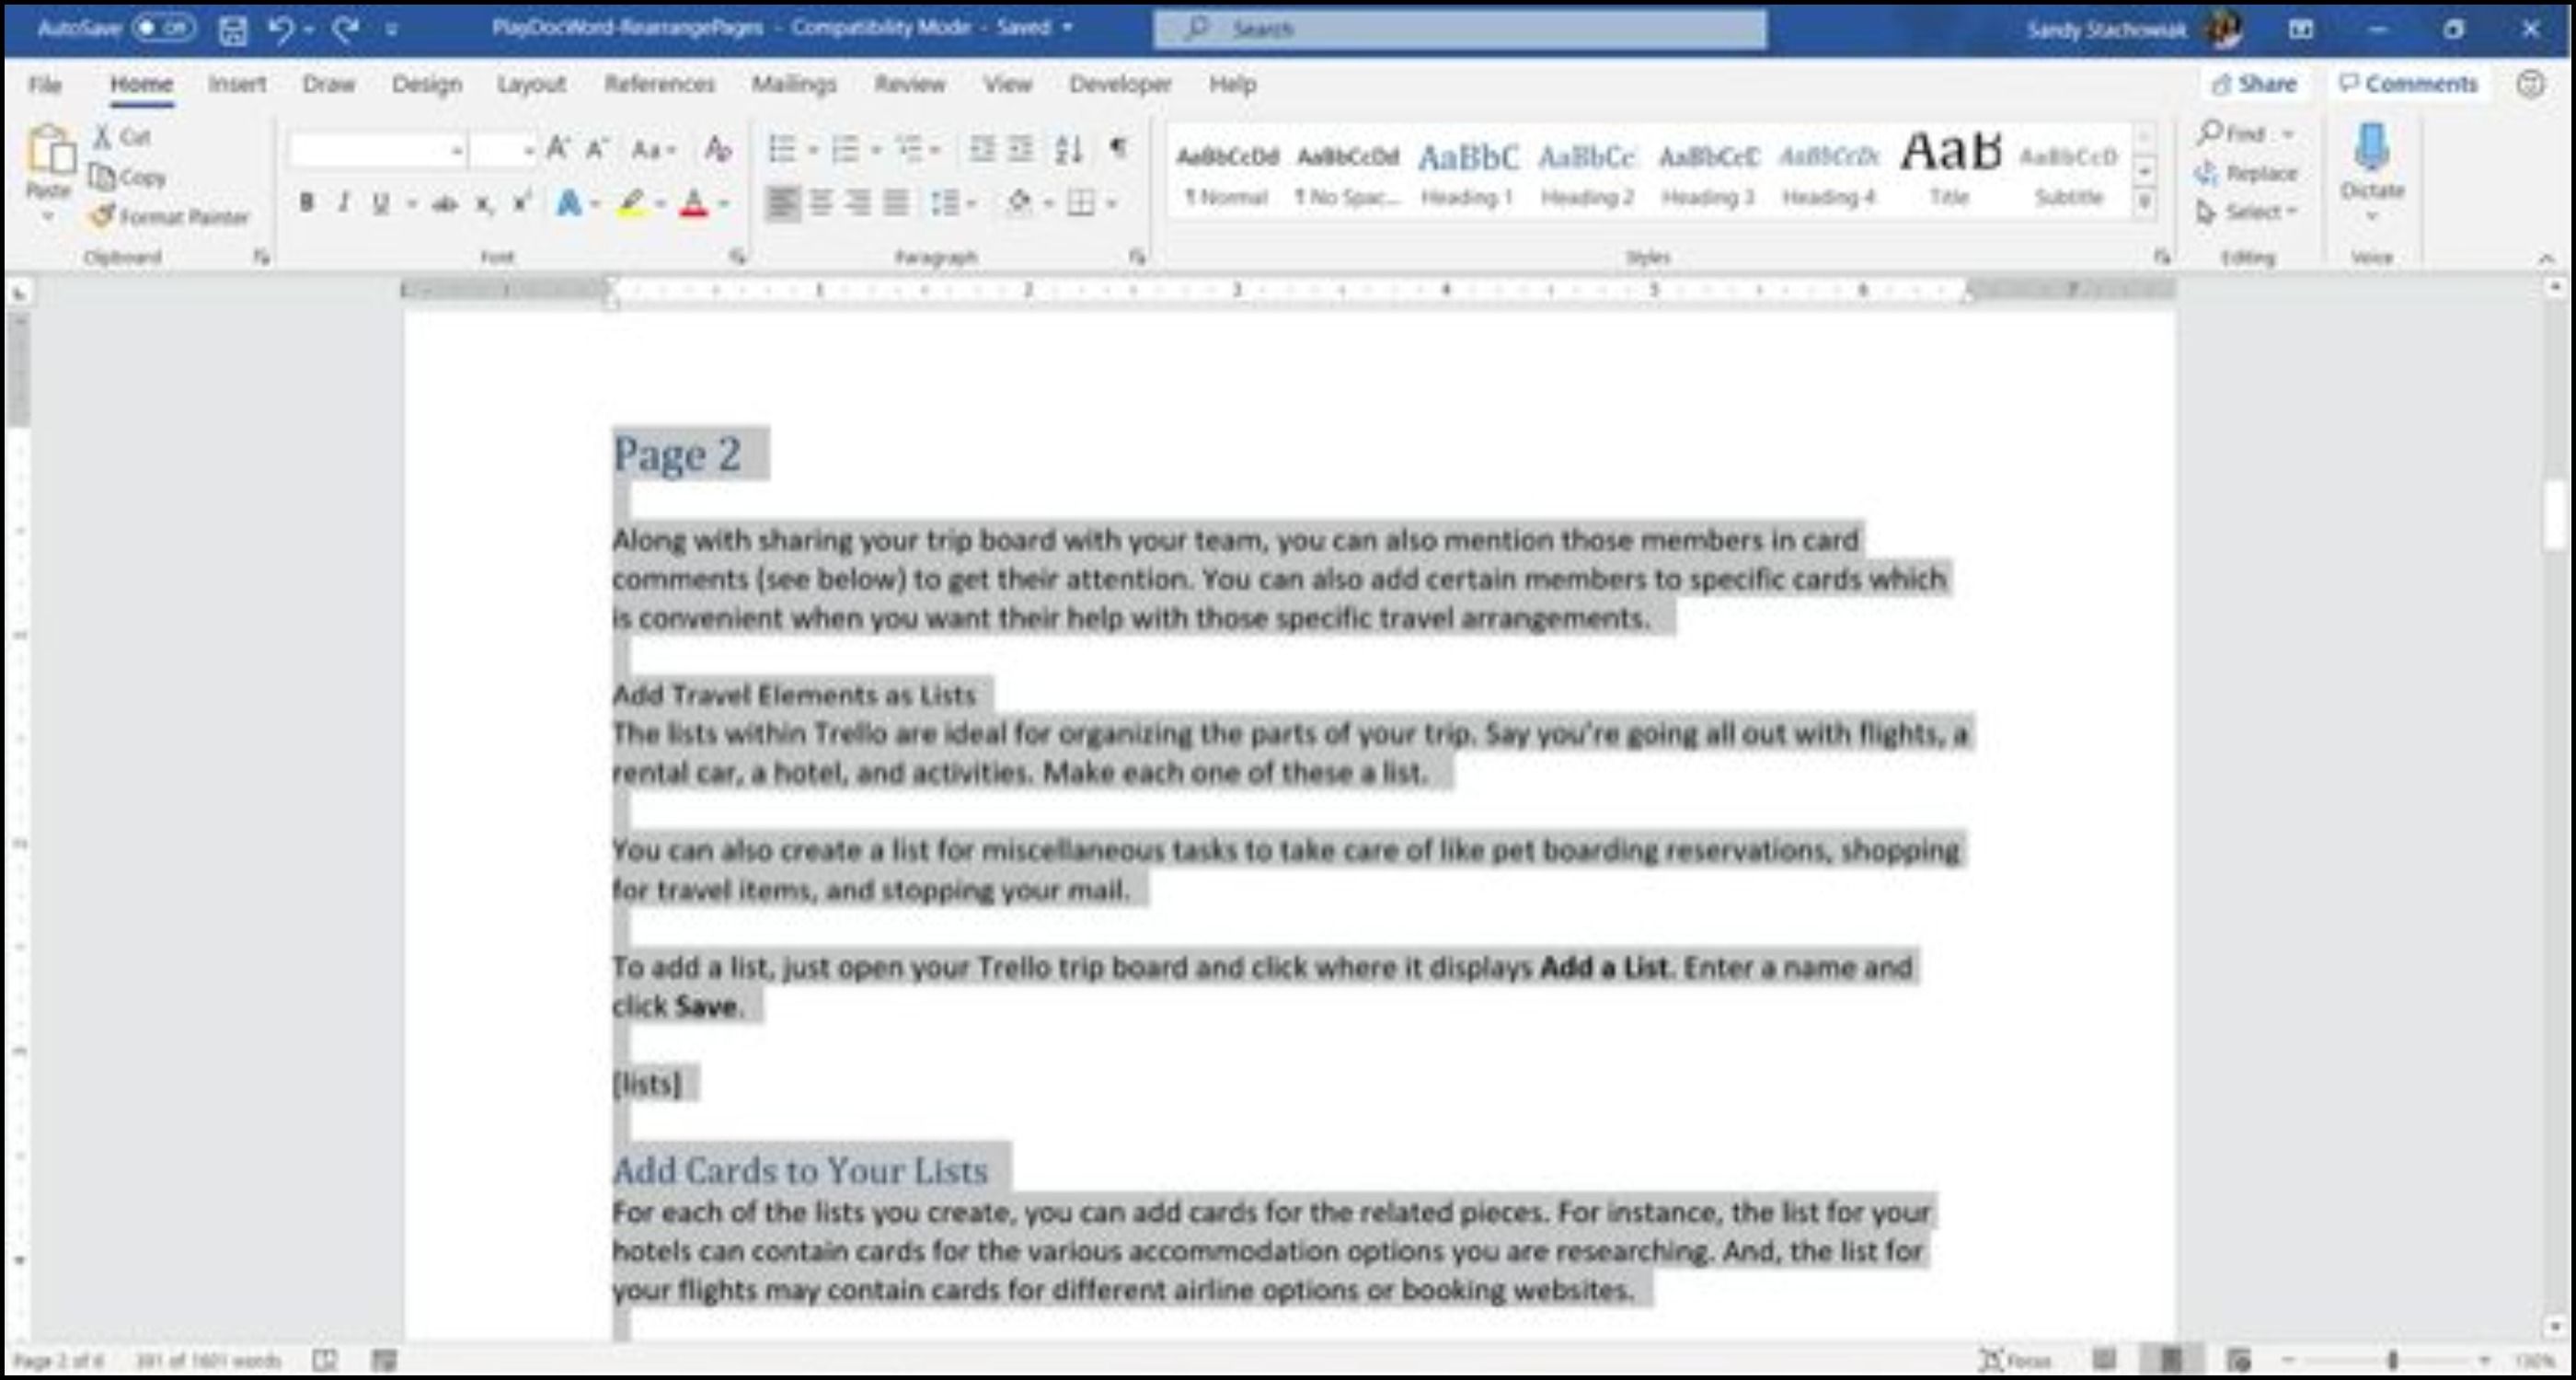
How to Change Order of Pages in Word With Mouse Cut and Paste
Maybe you’re a pro with your mouse and would rather use it than the keyboard while moving pages in Word. You’ll do the same thing to cut and paste the text, but a little differently.
How to Switch Page Order in Word With Your Mouse
- Place your cursor at the beginning of the text on the page you want to move.
- Hold the left mouse button while you drag through all of the text on the page, then release.
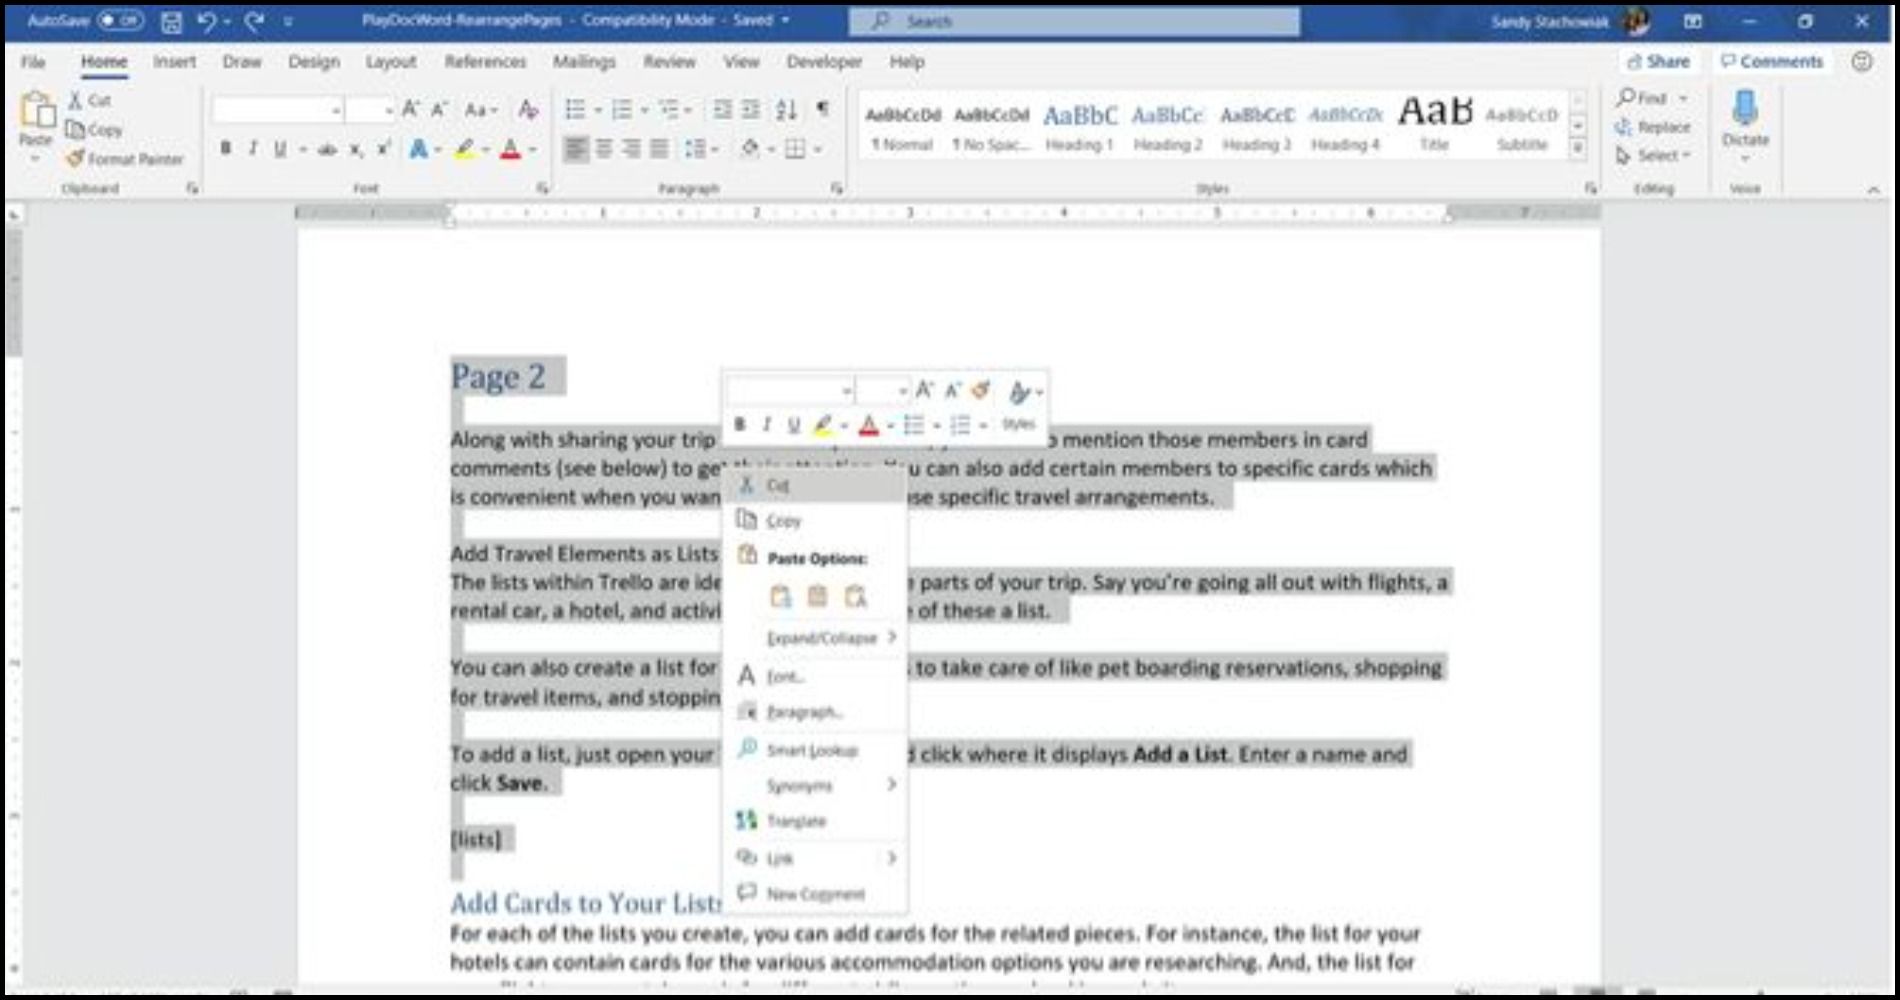
- Right-click and choose Cut, or click Cut on the Home tab under Clipboard.
- Move your cursor to the spot where you want the page moved to, right-click, and pick Paste from the shortcut menu or click Paste on the Home tab under Clipboard.
 How to Move Pages Around in Word With the Cut and Paste Methods
 How to Move Pages Around in Word With the Cut and Paste Methods
You may be wondering how to shift pages in Word most effectively via these means. Regardless if you use your keyboard or mouse, here are a few tips to help you move a page in Word using this method.
Reorder Pages in Word Using the Quick Access Toolbar
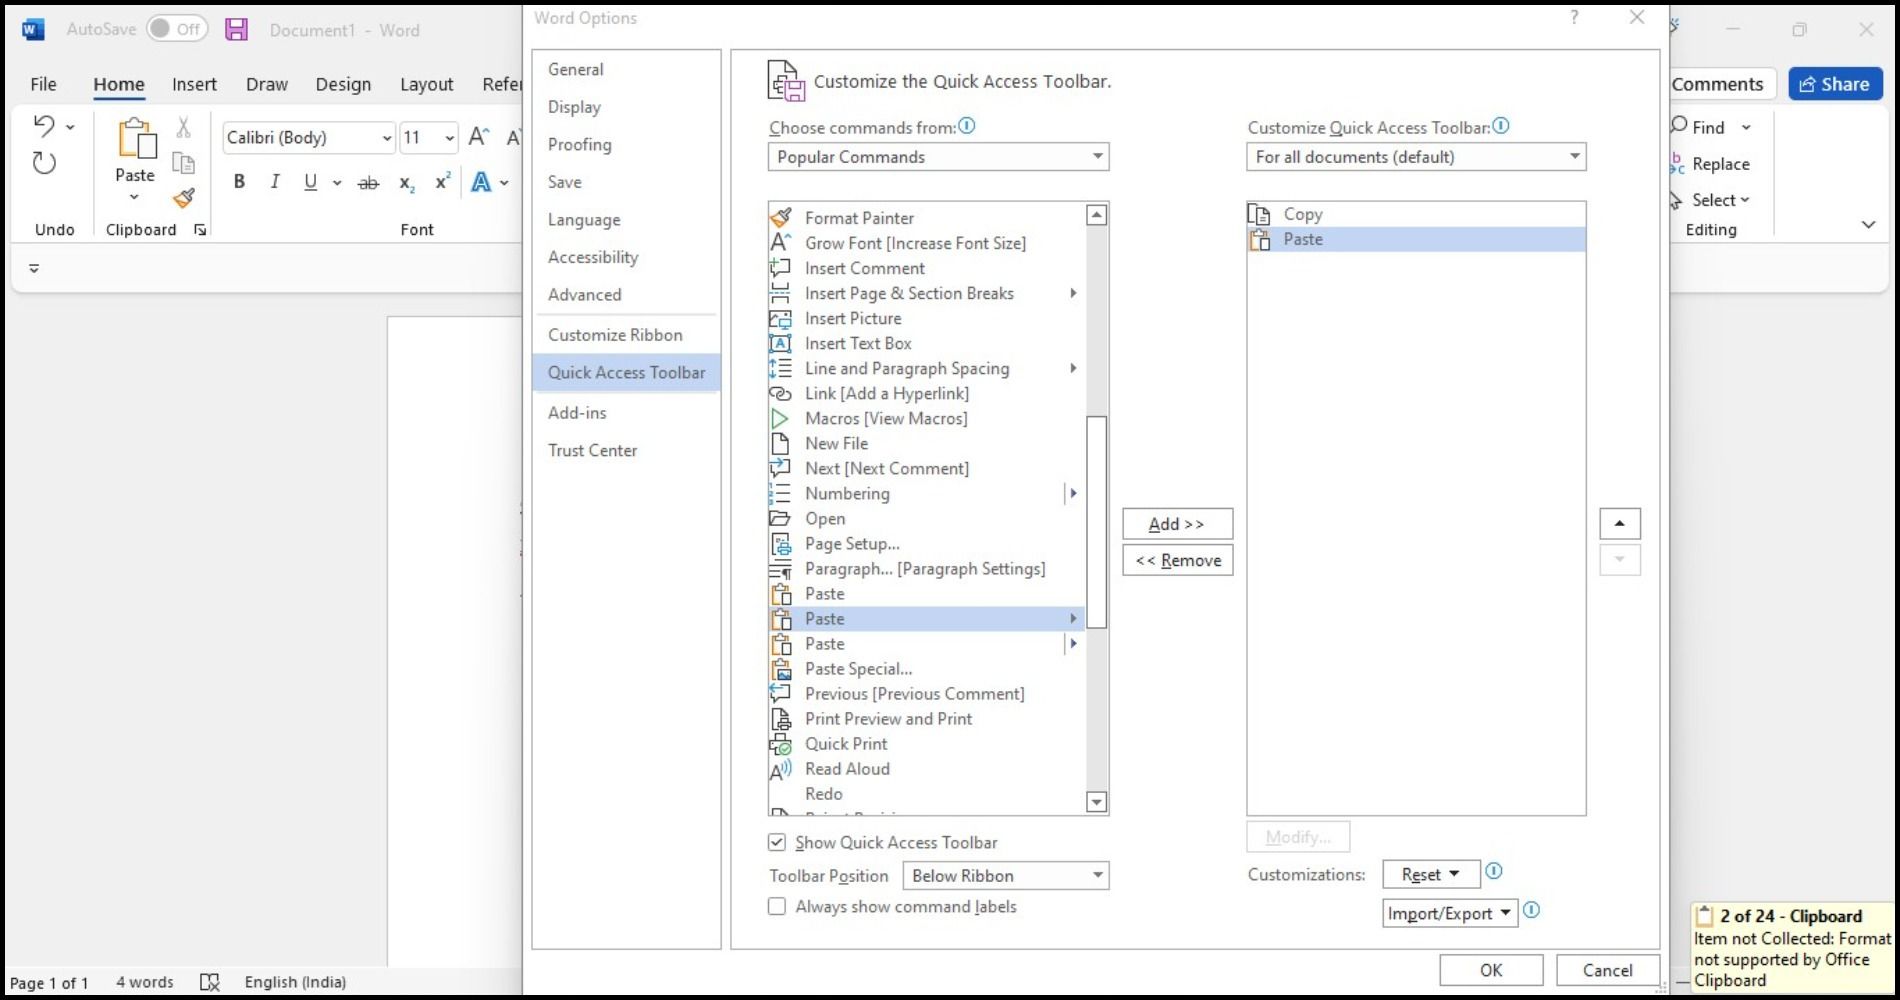
If you would like to swap pages in Word with custom settings like the Cut and Paste commands in the Quick Access Toolbar, here’s what you need to do:
- To get started, open up the Quick Access Toolbar by right-clicking anywhere on the ribbon at the top of the document.
- Enable Show Quick Access Toolbar.
- Click on the dropdown Menu and scroll down and select More Commands.
- A new window will pop up where you can select specific commands that you wish to add to the Quick Access Toolbar.
- Find Cut and Paste in the list of options and tap the Add button to include them to the toolbar. Check Always show command labels at the bottom of the list.
- Hit OK to save your changes and close out the window. The icons will now appear in the toolbar.
Here’s how to cut-and-paste text using the Quick Access Toolbar on Word:
1. Select the text you want to remove.
2. Click the Cut icon in the Quick Access Toolbar.
3. Move your cursor to the desired area in the document and click Paste.
Remember Undo Move
If you make a mistake during the cut-and-paste process, remember that you can undo what you just did. Click the Undo Move button in your Quick Access Toolbar. This will undo your last change, but you can click the arrow next to the button to go back through your history changes.
Copy Instead of Cut
If cutting text from your document makes you nervous, you can use a copy, paste, delete method instead of reorganizing pages in Word. Follow the same steps for using your keyboard or mouse to select the text, but, rather than choosing Cut, choose Copy.
Then, once you paste that selected text into the spot where you want it, you can go back and delete it where you copied it from originally. This will take longer than a simple cut and paste. However, this method of how to change pages in Word might feel safer for you.
Ever end up with weird formatting when you paste something from the web into your Word document? We recommend some helpful ways to strip formatting while using copy and paste functions, for both Windows and Mac users.
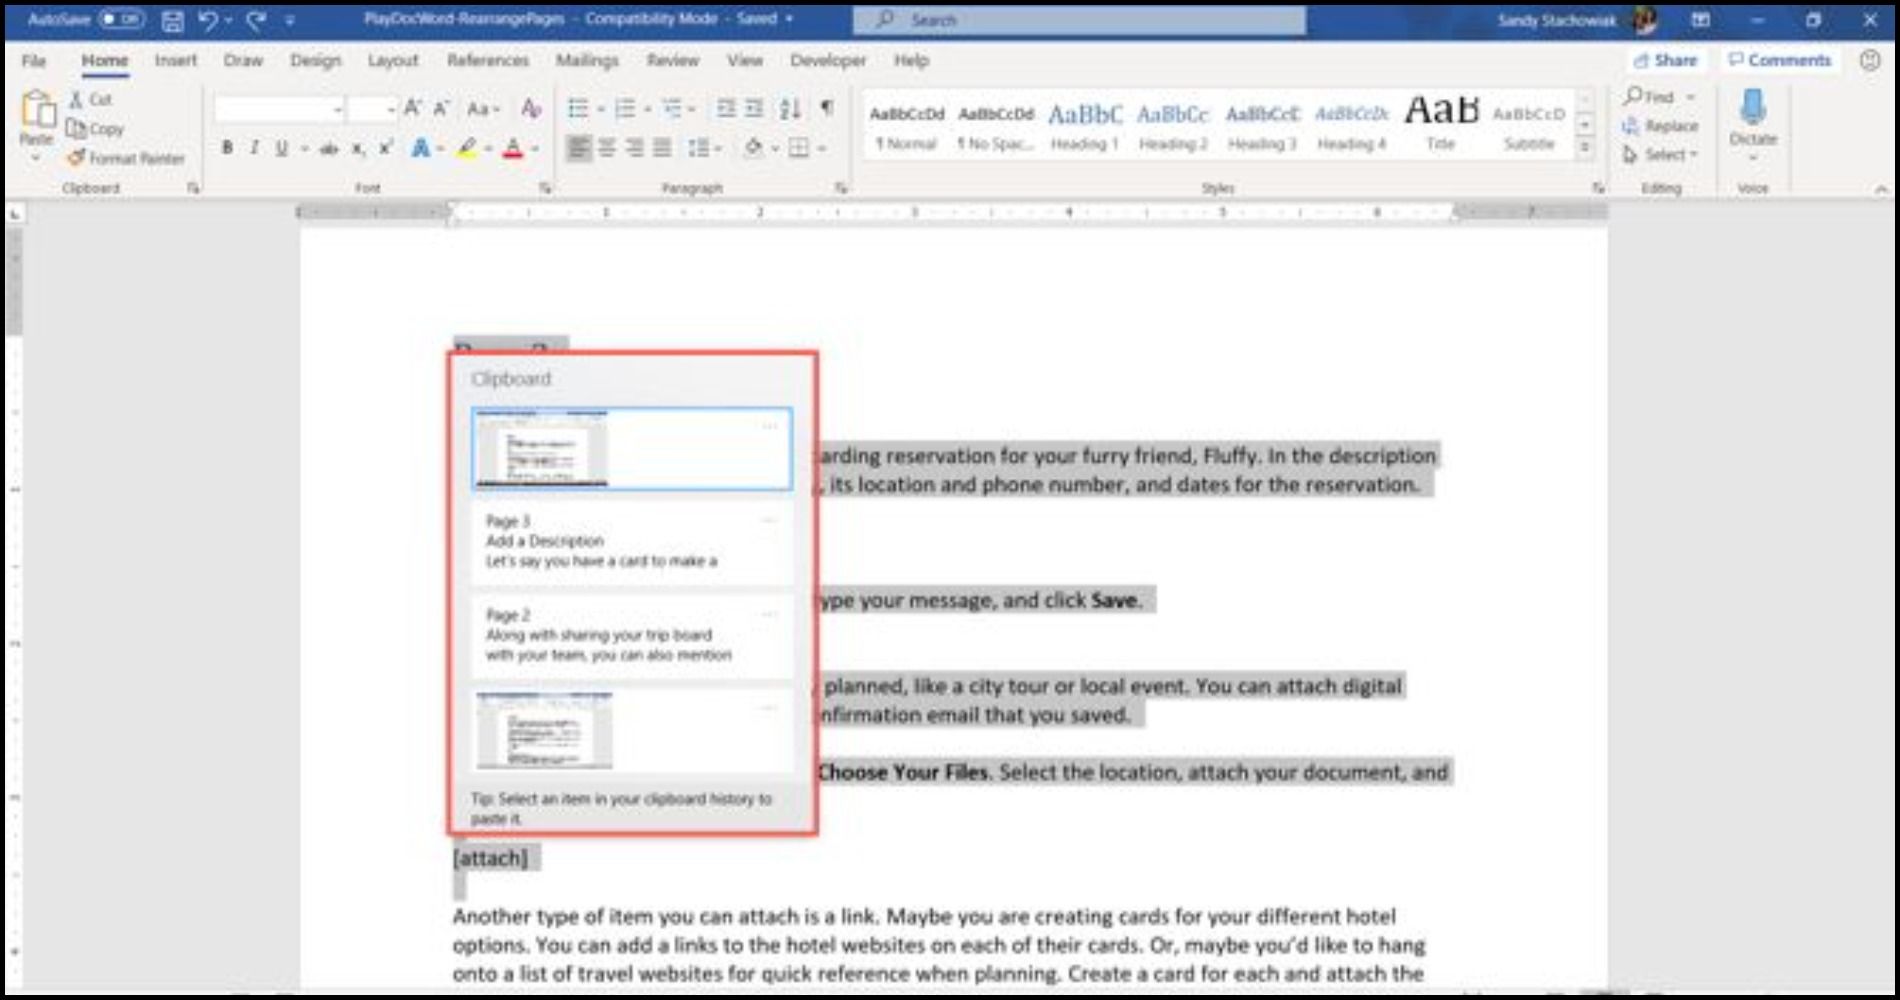
How to Swap Pages in Word Using Your Clipboard History
Another cool way how to arrange pages in Word is via the Clipboard History tool on Windows. The Clipboard is a feature that allows you to copy and paste information from one place to another.
- Move your cursor to the spot in your Word document where you want the page you just cut (or copied) in Word.
- Move pages using the keyboard shortcut Windows key + V to open your clipboard history. Alternatively, on the Home tab, you can click the Clipboard section to open up the pop-up window on the left.
- Then, click an item in the history window to paste it and move pages around in Word.
With the release of Windows 11, there are many new features to explore! You can use the improved Clipboard Manager in Windows 11 to copy and paste symbols, GIFs, and emojis for a truly personalized experience.
Carefully Handle Your Word Pages
You should be able to arrange Word pages using one of these methods. Every user of Microsoft Word will be able to move a page differently.
These tips can help you reorganize the pages of your brochure, your manuscript, or even just your homework. We’ve only discussed a few approaches to rearranging Word pages; each one has its advantages. Thankfully, there’s a way to change the page order in Word, no matter what type of project you’re working on.
You can do this until you have it all. Press Control (Ctrl) + X to cut the text you selected. Move your cursor to the spot where you want the page moved to and press Control (Ctrl) + V to move the page. Word does all the rest.
Contents
- 1 Can I rearrange the pages in Word?
- 2 How do I move a page number down in Word?
- 3 How do you move to the top of a Word document?
- 4 How do I change the page order in Word 2013?
- 5 How do I move a page in Word Mac?
- 6 How do I rearrange pages in Pages?
- 7 How do you put page numbers outside the border in Word?
- 8 How do I change page numbers and margins in Word?
- 9 How do you go back to the top of a page in a Word document with a hyperlink?
- 10 How do you scroll a page in Word?
- 11 How do I change my page from vertical to moving?
- 12 How do I change the first page in Word?
- 13 Can you move pages around in pages?
- 14 How do you move pages around in Word 2007?
- 15 How do you move text in pages?
- 16 How do you make a 0.2 hanging indent?
- 17 How do I fix the layout of a Word document?
- 18 How do I drag margins in Word?
- 19 How do I change the top and bottom margins in Word?
- 20 How do you move to the top of a Word document on a Mac?
Can I rearrange the pages in Word?
Word doesn’t offer an easy, built-in option to easily rearrange pages if you don’t use headings. The only way to do it is to cut and paste the text and manually rearrange it instead.Using your mouse or trackpad, drag your cursor down to select the text you want to move.
How do I move a page number down in Word?
Move one page’s order/number down in Word
- Enable the Navigation Pane by checking the Navigation Pane option on the View tab.
- In the Navigation Pane, please click the Pages tab, and then click the specified page you will move to end.
- Now the cursor jumps to the beginning of the specified page.
How do you move to the top of a Word document?
Go to beginning of a document: [Ctrl]+[Home] Go to the bottom of a screen: [Ctrl]+[Page Down] Go to the top of a screen: [Ctrl]+[Page Up] Go to a specified location (page, bookmark, section): [Ctrl]+G or [F5]
How do I change the page order in Word 2013?
Step 1: Open your document in Word 2013.
- Step 2: Click before the first character of the first word on the page that you want to move.
- Step 3: Use the scroll bar on the right side of the window to adjust the page view so that the bottom of the page is visible.
How do I move a page in Word Mac?
Click and hold the mouse and slide it up or down the outline wherever you’d like that section to go. You’ll see a line appear where the section will go once you release the mouse. Release the mouse to drop that entire section in the new location. On a Mac, it looks a bit different, but it’s the same principle.
How do I rearrange pages in Pages?
Rearrange pages or sections
Click View in the toolbar, choose Show Page Thumbnails, select the page or section thumbnail, then drag it to where you want it in the page hierarchy.
How do you put page numbers outside the border in Word?
Double-click at the top or bottom of your doc or go Insert>Header or Insert>Footer. Then insert your page number at “the current location”. If you have to, you can play with the Header/Footer position and move the numbering outside your borders.
How do I change page numbers and margins in Word?
Change default margins
- Select Layout > Margins > Custom Margins.
- Set your margins.
- Select Set As Default.
- Confirm your selection.
How do you go back to the top of a page in a Word document with a hyperlink?
Scroll to the bottom of the page or to the spot where you want to insert the hyperlink. Type in a short phrase, such as “Back to Top,” indicating that you will jump to the top of the page by clicking on the text.
How do you scroll a page in Word?
To move page by page, you can hold down the Ctrl key and press Page Up or Page Down. You can also use View>Navigation Pane and click on the page icons to move a page at a time.
How do I change my page from vertical to moving?
For instance, if you’re viewing pages one and two and scroll down, you’ll then see pages two and three. To return to a one-page view in Word, select the View tab and in the Page Movement section of the ribbon, click Vertical.
How do I change the first page in Word?
Start page numbering later in your document
- Go to Insert > Header or Footer > Edit Header or Edit Footer.
- Select Different First Page.
- In the header or footer area, you should see a label on the first page that says First Page Header.
- Select Close Header and Footer or press Esc to exit.
Can you move pages around in pages?
Move a section or page: In the sidebar, select the section (in a word-processing document) or page (in a page layout document) you want to move, then drag it to where you want it in the document. You can move multiple pages at a time, but only one section at a time.
How do you move pages around in Word 2007?
Go to the page to move and click at the very top of the page. Hold down the “Shift” key and arrow down to the bottom of the page. You can also press the “PageDown” key, which selects one screen at a time. Release the key at the end of the page you need to move.
How do you move text in pages?
To drag and drop text
- Select the text you want to move . click here to view image.
- Move the cursor over the selected text.
- Click and hold your mouse button over the selected text, and drag it to its new location, releasing the mouse button when the cursor is where you want the text .
How do you make a 0.2 hanging indent?
Create a hanging indent
- Select the text where you want to add a hanging indent.
- Go to Home > Paragraph dialog launcher. > Indents and Spacing.
- Under Special, select Hanging. You can adjust the depth of the indent using the By field.
- Select OK.
How do I fix the layout of a Word document?
Change the default layout
- Open the template or a document based on the template whose default settings you want to change.
- On the Format menu, click Document, and then click the Layout tab.
- Make any changes that you want, and then click Default.
How do I drag margins in Word?
Hold your mouse over the line separating the white and gray area. You’ll see the pointer turn to a double arrow and will likely see a tooltip letting you know you’re point at the margin. Now, just click and drag that line left or right to adjust that margin.
How do I change the top and bottom margins in Word?
Set Margins for a Section of Your Document
- Select the section in the document where you want a different margin size.
- Select Layout > Margins > Custom Margins.
- Type new values for the Top, Bottom, Right, and Left margins.
- From the Apply to list, select This Section.
- Select OK when you’re done.
How do you move to the top of a Word document on a Mac?
To the top of the next page: Command + Page Down or Command + Fn + Down arrow. To the top of the previous page: Command + Page Up or Command + Fn + Up arrow. To the beginning of the document: Command + Home or Command + Fn + Left arrow. To the end of the document: Command + End or Command + Fn + Right arrow.
Typing up a document in Microsoft Word can prove to be nothing short of a power struggle, especially when there’s document formatting and layout to take into account. Various aspects of formatting a document and perfecting its layout can be significantly difficult, one of the worst ones being moving around pages existing pages in a document. Word simply creates new pages as needed when you’re typing up a document, but it’s when you want to move around pages that already exist that things get a bit tricky. Why? Well, Word does not have a native option or feature that allows users to freely and easily move pages around in a Word document, at least not under normal circumstances.
That’s not to say that it is impossible to move pages around in a Word document, however – it is certainly possible, and not too difficult either. In addition, one way or another, it is possible to move entire pages around in all versions of Word. There are two different ways a Word user can move existing pages in a Word document – they can either move pages using headings (if they’re using Word 2010 or later) or by moving every single word on the pages they want to move to a new location in the document (the pages will automatically be moved when you move their content). Without further ado, here’s how you can move existing pages in a Word document:
Method 1: Using the Navigation Pane (Word 2010 or later)
First and foremost, you can move pages in a Word document using the Navigation Pane feature to move entire headings and all the content that comes under them. This method can only be used on Word 2010 or an ever newer version of the word processor, and only works if you have added headings to the document. To move pages in a Word document using this method, you need to:
- Open the Word document you want to rearrange pages in.
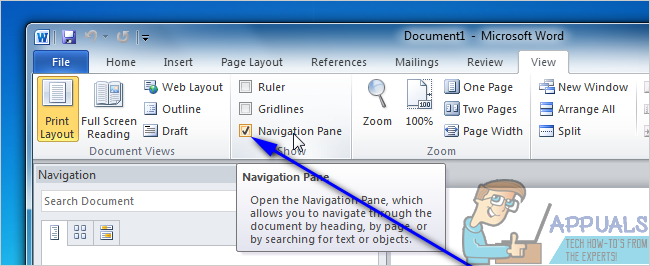
- Navigate to the View tab in Word’s toolbar.
- In the Show section, check the checkbox located directly beside the Navigation Pane option to enable the Navigation Pane.

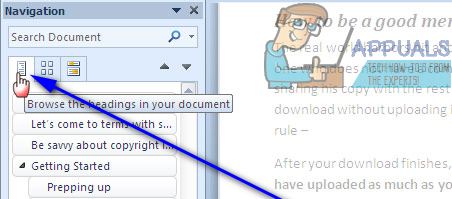
- Navigate to the Browse the headings in your document tab in the Navigation Pane. The Word document will not look like one very long page, and it will be broken down into different sections by headings.

- Click on the heading of the section of text you want to move to a new location in the Word document, and with the click still held, drag the heading to the new location you want it in. Everything under the heading will be moved to the new location with the heading, and Word will automatically reformat and move the document’s pages as required.
Method 2: Move the contents of the target page to a new location
You move pages in any Word document on any version of Microsoft Word by simply cutting the contents of the target page(s) from their current location and pasting them to whatever location in the document you you to move them to. In order to do so, simply:
- Open the Word document you want to rearrange pages in.
- Right-click and drag your mouse pointer over everything on the page(s) you want to move to highlight and select the contents.
- Press Ctrl + X to Cut the selection of text. The page(s) the text was on will be eliminated once it has been Cut.
- Place your mouse pointer in the location within the Word document you want the pages moved to.
- Press Ctrl + V to Paste the contents of the target page(s). The contents will be moved to the new location and Word will automatically create space to accommodate the text that you have pasted, successfully moving the target page(s) from their previous location to the new location you have chosen.

Kevin Arrows
Kevin Arrows is a highly experienced and knowledgeable technology specialist with over a decade of industry experience. He holds a Microsoft Certified Technology Specialist (MCTS) certification and has a deep passion for staying up-to-date on the latest tech developments. Kevin has written extensively on a wide range of tech-related topics, showcasing his expertise and knowledge in areas such as software development, cybersecurity, and cloud computing. His contributions to the tech field have been widely recognized and respected by his peers, and he is highly regarded for his ability to explain complex technical concepts in a clear and concise manner.
Back to top button

on
June 23, 2022, 5:30 AM PDT
How to quickly rearrange pages in Microsoft Word
Moving entire pages takes a bit of effort because Microsoft Word doesn’t recognize them. It’s a bit awkward unless you know these three techniques for rearranging pages in Word.
We may be compensated by vendors who appear on this page through methods such as affiliate links or sponsored partnerships. This may influence how and where their products appear on our site, but vendors cannot pay to influence the content of our reviews. For more info, visit our Terms of Use page.

Rearranging content in a Microsoft Word document is easy most of the time. You can quickly select sentences, paragraphs, graphics and so on and then cut and paste or move the selection up or down using Shift + Alt + Up/Down. These are only a few of the many ways Word helps you move content.
The one element Word doesn’t support autonomously is the page. There’s no quick-click selection for selecting and moving a page. In this tutorial, I’ll show you three easy ways to rearrange Word pages.
SEE: Windows, Linux, and Mac commands everyone needs to know (free PDF) (TechRepublic)
I’m using Microsoft 365 on a Windows 10 64-bit system, but you can use earlier versions. Word for the web supports these methods. The Navigation Pane is available in Word 365 through Word 2007. The Clipboard history is available in Word 365 through Word 2013. For your convenience, you can download the demonstration .docs and .doc files. Only the first method will work in the older .doc format.
How to move a page using Windows’ cut and paste feature
It’s easy to jump right to Windows’ classic cut and paste feature when moving data, but doing so can be a bit awkward when moving pages. Because cut and paste is a standard, let’s use it to move a page in Word:
- Enable Word’s Show/Hide feature by pressing Show/Hide in the Paragraph group on the Home tab. Doing so displays hard page breaks, making it easier to locate and move pages.
- Position the cursor at the beginning of the current page by pressing Ctrl + Home.
- Select the entire page. There are two ways to do so:
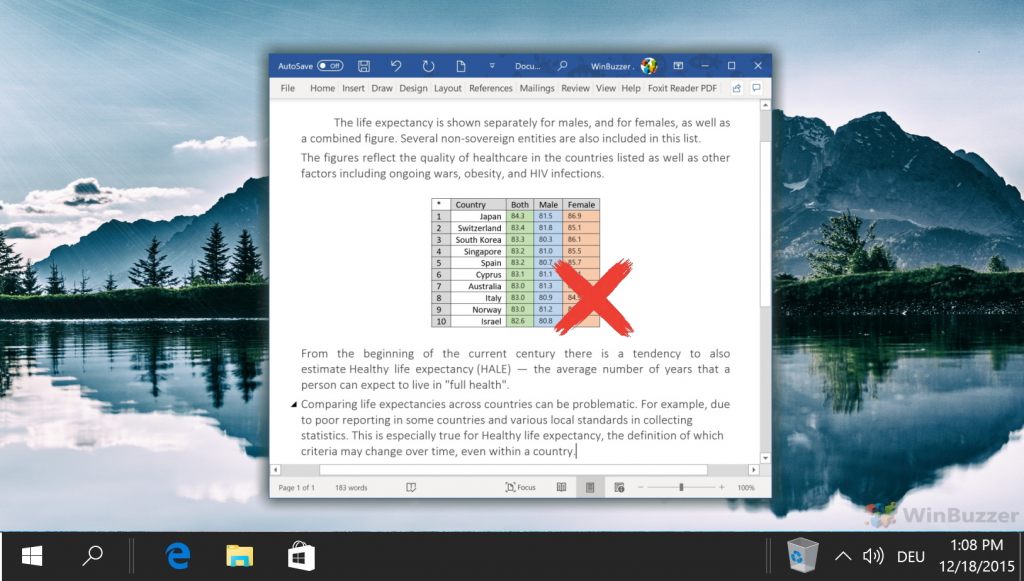
- If you prefer a mouse selection, hold down the left mouse key and drag to the end of the page. This method is quick if you can see the entire page on screen. Be sure to include the hard page break at the bottom of the page if there is one (Figure A). If you leave it, you’ll leave an empty page.
- Hold down the Shift key while pressing PgDn (Page Down) key. Doing so will highlight a screen at a time. Press PgDn until the selection reaches the end of the page.
- Press Ctrl + X to cut the page and copy it to the Clipboard. Click Ctrl + C if you don’t want to delete the content.
- Position the cursor where you want to copy the content to and press Ctrl + V. If you want to paste the content without the original formatting, click Paste in the Clipboard group on the Home tab and choose Keep Text Values Only from the dropdown.
Figure A

If you’re only moving one or two pages, cut and paste is adequate. If you have a lot of rearranging to do, consider using Word’s Navigation pane
If you change your mind or make a mistake, press Ctrl + Z to undo the move.
How to move a page using the Navigation Pane in Word
Word’s Navigation Pane displays your document by Headings and Pages. For the former to work, you must use World’s built-in heading styles.
To open Word’s Navigation Pane, click the View tab and check Navigation Pane in the Show menu. Then, click Pages.
Figure B

As you can see in Figure B, Word displays a thumbnail for each page in the document. If the page you want to move begins with a built-in heading style, this is the quickest way to move an entire page. To demonstrate, do the following:
- Open the Navigation Pane, which defaults to displaying headers.
- In the Navigation Pane, click the heading that begins the page you want to move. In this case, that’s the first heading, Video. Notice that the page font color is red — that’ll matter in a minute.
- Drag the Video header to the end of the list. Doing so will display a bold, guiding line (Figure C).
- Drop the header into position.
Figure C

If you’re working with the demonstration Word document, you can see that the red page is now at the end of the document. The first page is green with the Themes heading. If the page you want to move doesn’t have a built-in heading at the beginning of the page, you can still use the Navigation Pane:
- Select the first few words or lines at the top of the page.
- Click a heading style in the Styles group on the Home tab. It’s only temporary.
Now, the page will show up in the Headings section in the Navigation Pane. After moving the page, remove the temporary heading style.
There’s one small catch to using the Navigation pane: The first heading shows in the Navigation Pane. If there’s a higher-level heading elsewhere on the same page, the move begins with that higher-level heading, not the first heading on the page. This is something to watch out for because there’s no way for you to know that the heading in the Navigation Pane isn’t the highest-level heading on the page.
Sometimes you might want to move multiple pages. For instance, you might want to swap the position of two or move pages. You could do that with cut and paste or the Navigation Pane, but there’s an easier way.
How to move pages using Windows’ extended Clipboard in Word
At this point, you’ve learned two easy ways to move one page at a time in a Word document. Now let’s focus on a method that lets you move multiple pages quickly — the extended Clipboard, also known as the Clipboard history. To use this feature to swap two pages or several pages, do the following:
- Using the cut and paste method above, cut the first page to the Clipboard.
- Repeat this process to cut the next page to the Clipboard.
- Position your cursor where you want the first cut page to be.
- Press the Windows key + V to open the Clipboard history (Figure D). Or click the Clipboard group’s dialog launcher.
- In the history pane, click the page you want to insert at the cursor position.
- Position your cursor where you want to insert the second page that you cut.
- In the history pane, click the page you want to insert at the cursor position.
Figure D

Repeat the steps above to move as many pages as you like. Using the Clipboard history, you can move many pages at the same time. To learn more about the Clipboard history, read How to get more out of your Clipboards in Microsoft Office.
Your version of Word might limit you to the first method. However, if you have a recent version, the Clipboard history is probably the quickest method and eliminates the problem of moving a section of a page when the heading at the beginning of the page isn’t the highest-level heading on the page.
Also See
-
Best project management software 2022
(TechRepublic) -
Windows 11 cheat sheet: Everything you need to know
(TechRepublic) -
Software usage policy
(TechRepublic Premium) -
Best software for businesses and end users
(TechRepublic on Flipboard)
-
Microsoft
-
Software
Contents
- 1 How to Rearrange Pages in Word via the Navigation Pane
- 2 How to Move Pages in Word by Copy and Paste
- 3 Extra: How to Delete a Page in Word
- 4 Extra: How to Make One Page Landscape in Word
When you pen a small document, it’s quite easy to put everything in a logical order. You start at the beginning and finish at the end. Once a document gets longer, however, it gets unwieldy. You start to realize that perhaps you would be better off introducing a certain concept sooner, or switching two chapters or your novel around. In these cases, it’s very useful to know how to rearrange pages in Word.
How to reorder pages in Word
There are a few ways to move pages in Word, but the most effective involve the use of the Word navigation pane or some simple copy and pasting. It’s these two methods that we’ll be covering today.
Before we start, we do recommend that you perform these changes on a separate version of your document. If you save your document out as “documentname-rearranged”, you can look at both versions and see which flows the best. With that said, let’s get started:
How to Rearrange Pages in Word via the Navigation Pane
The navigation pane is an incredibly useful tool for large documents – particularly if you have split your document into separate parts with the relevant headings. Technically, the method we’ll show below won’t show you how to move pages in Word. Instead, you’ll be reordering those ever-important headings and all of the text in their section. Many times, this is faster and more useful than moving individual pages.
Here’s how you can do so:
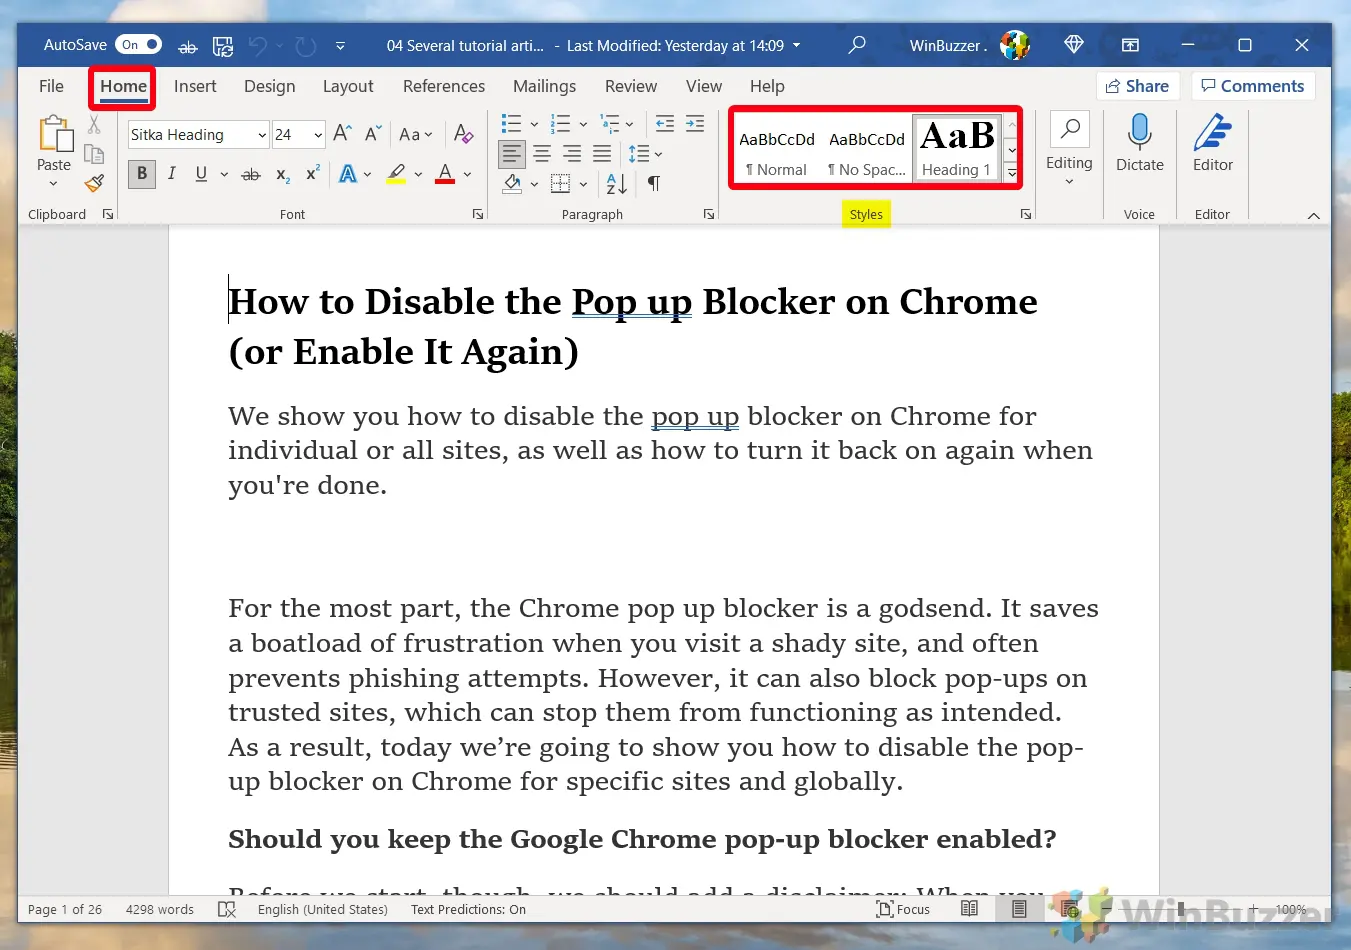
- Add headings to your document
If you haven’t already, split your document into sections by adding Heading 1 to your main title, Heading 2 to their sub-sections, and Heading 3 for sections within that. You can do so by opening the “Home” tab in your ribbon and clicking on the preset heading options in the styles section.

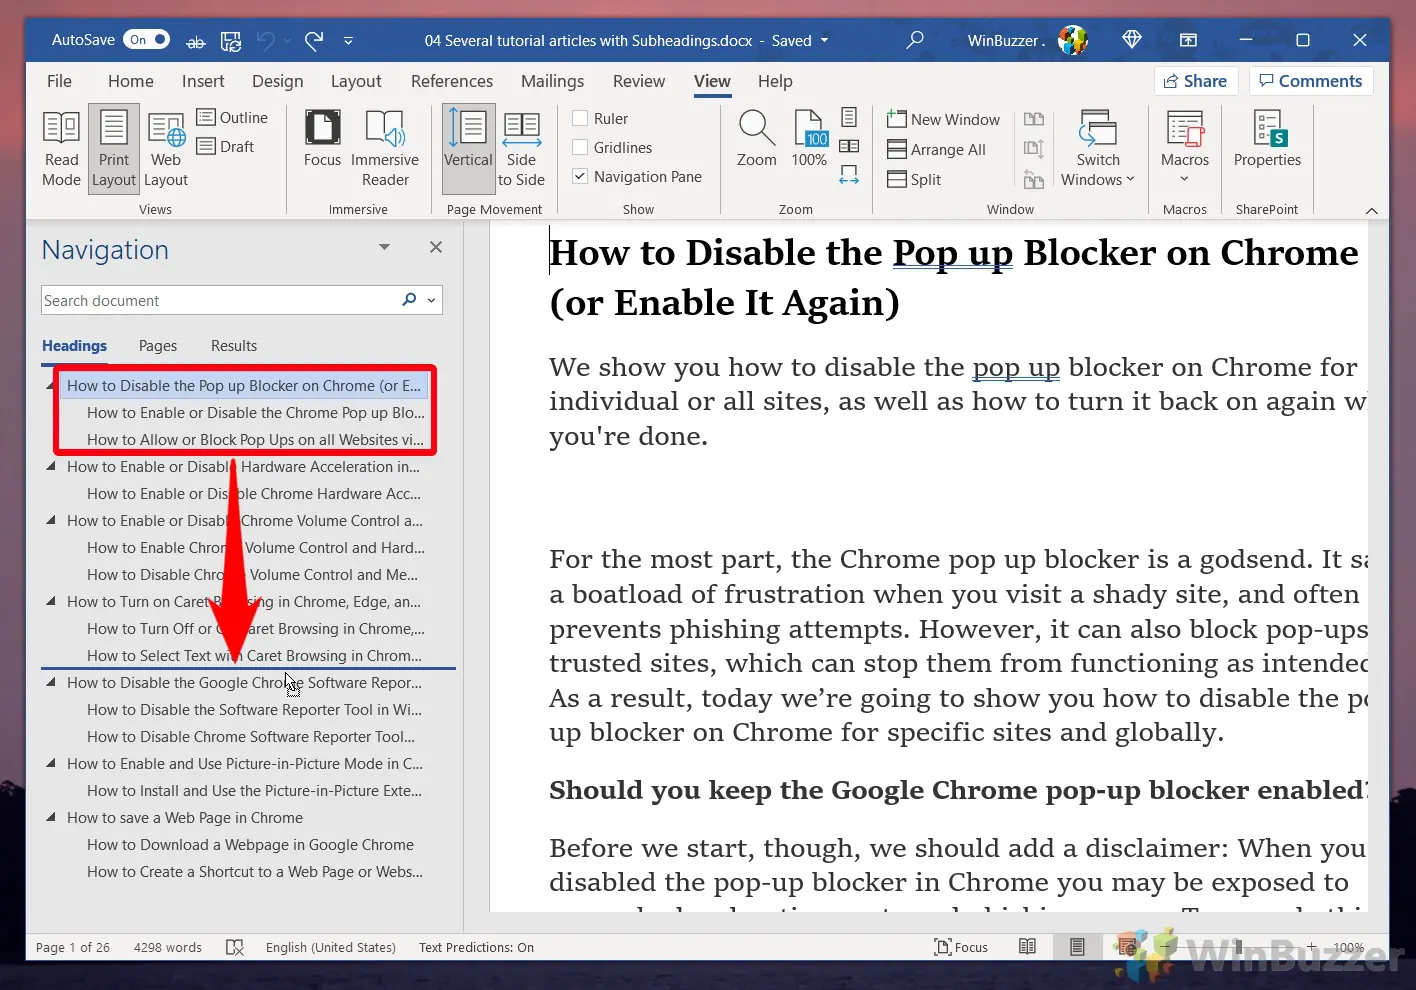
- Open the headings section of the Word navigation pane
Open the “View” tab in your ribbon and tick the “Navigation Pane” option in the “Show” section. When it opens on the left, make sure you’re in the “Headings” tab.

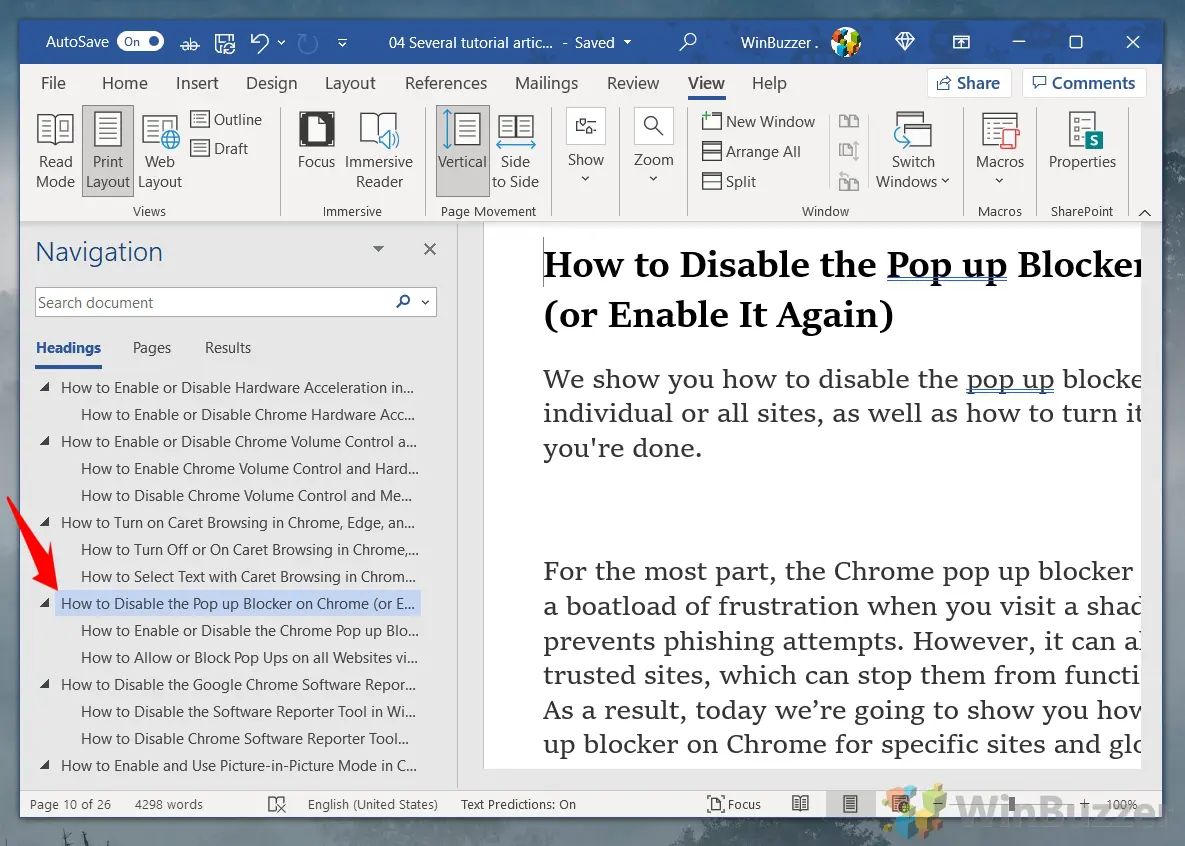
- Click and drag your heading to rearrange pages in Word
You can click and drag on any heading in the navigation pane to move it before or after another heading in your document. Once you let go of your mouse button, the heading all of its content will be moved to that section of your document.

- Click on your heading in the Word navigation pane to view the changes
It should now comfortably sit in the place you released your mouse button. You can now make further adjustments to content and order as required.


How to Move Pages in Word by Copy and Paste
We’ve shown you how to reorder pages in Word based on their headings, but what if you want to swap two specific pages within a section? Here’s how to copy a whole page in Word and paste it elsewhere:
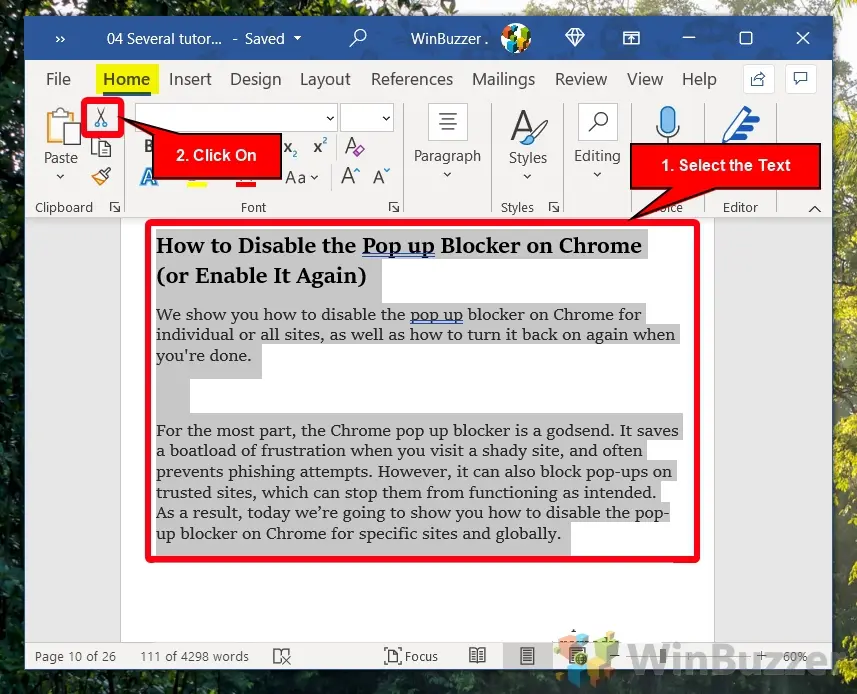
- Select your text and use the cut tool
Set your cursor at the very start of the page you want to move and hold Shift on your keyboard. Then, click at the bottom of the page to select all of the text. Alternatively, you can just click and drag.
With your text selected, click open the “Home” tab of your ribbon and press the scissors icon in the top left or press Ctrl + X on your keyboard. This will cut your text causing it to temporarily disappear. Don’t worry, we’ll return it again, but make sure you don’t copy anything else until you finish the next step.

- Put your cursor at the start of your target page and paste your contents
The paste button is next to the scissor icon in the home tab, and should look like a clipboard. You can alternatively press Ctrl + V.

Now you know how to rearrange pages in Word and move them using the copy and paste tools. However, what if you decide there’s a page you don’t want in there at all? You can follow our guide on how to delete a page in Word to safely remove it without affecting your other content.
Extra: How to Make One Page Landscape in Word
If instead, you’re wondering how to rotate a page, you can follow our guide on how to make one page landscape in Word.