
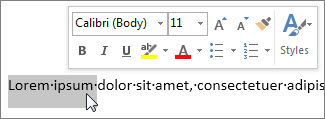
Select the text or cells with text you want to change. To select all text in a Word document, press Ctrl + A. On the Home tab, click the font size in the Font Size box.
Contents
- 1 How do I increase the height of my font?
- 2 How do I stretch font height in Word?
- 3 How do you change the width and height of a text box in Word?
- 4 How do you change height in Word?
- 5 How do I change the Font size in Windows 10?
- 6 How do I stretch text to fill a text box?
- 7 What is font stretch?
- 8 How do you add 6 spaces in Word?
- 9 Can you change the size of the text box?
- 10 How do I increase the height of a textbox in Windows form?
- 11 How do I center text vertically in Word?
- 12 Why can’t I adjust cell height in Word?
- 13 When we increase the font size the Row height is automatically adjusted?
- 14 How do I make the text on my screen bigger?
- 15 What is the shortcut for increasing font size?
- 16 How do I make my computer screen bigger using the keyboard?
- 17 How do I automatically expand a text box in Word?
- 18 Can I use font-stretch?
- 19 Why font-stretch is not working?
- 20 What is font size adjust?
How do I increase the height of my font?
Changing the Height of a Font
- Select the text you want to affect.
- Enlarge the font size to 15 points. (12 times 1.25 is 15.)
- Display the Character Spacing tab of the Font dialog box. (See Figure 1.)
- Using the Scale control, specify a scaling of 80%. (100 divided by 1.25 is 80.)
How do I stretch font height in Word?
You can scale text by stretching it or by compressing it.
- Select the text that you want to stretch or compress.
- On the Home tab, click the Font Dialog Box Launcher, and then click the Advanced tab. Note: If you’re using Word 2007 the tab is called Character Spacing.
- In the Scale box, enter the percentage that you want.
How do you change the width and height of a text box in Word?
To resize a shape, text box, or WordArt, under Drawing Tools, on the Format tab, in the Size group, enter the measurements that you want into the Height and Width boxes.
How do you change height in Word?
To fit the table to the text, click [AutoFit] > select “AutoFit Window.” To keep Word from automatically adjusting your column size, click [AutoFit] > select “Fixed Column Width.” To adjust the row height, click the up and down arrows within the “Height” field.
How do I change the Font size in Windows 10?
To change your display in Windows 10, select Start > Settings > Ease of Access > Display.To make only the text on your screen larger, adjust the slider under Make text bigger. To make everything larger, including images and apps, choose an option from the drop-down menu under Make everything bigger.
How do I stretch text to fill a text box?
Click anywhere in the text. On the Text Box Tools Format tab, in the Text group, click Text Fit, and do one of the following: To reduce the point size of text until there is no text in overflow, click Shrink Text On Overflow. To shrink or expand text to fit in the text box when you resize the box, click Best Fit.
What is font stretch?
Definition and Usage. The font-stretch property allows you to make text narrower (condensed) or wider (expanded). Note: Some fonts provide additional faces; condensed faces and expanded faces. For these fonts, you can use the font-stretch property to select a normal, condensed, or expanded font face.
How do you add 6 spaces in Word?
Select the paragraphs you want to change. Go to Home > Line and Paragraph Spacing. Choose the number of line spaces you want or select Line Spacing Options, and then select the options you want under Spacing.
Can you change the size of the text box?
Resize a text box
Select the text box. Select one of the handles and drag until the text box is the size you want.
How do I increase the height of a textbox in Windows form?
There are two ways to do this : Set the textbox’s “multiline” property to true, in this case you don’t want to do it so; Set a bigger font size to the textbox.
- Set the textboxes to multiline.
- Change the height.
- Change the font size. (so it fit into the big textboxes)
- Set the textboxes back to non-multiline.
How do I center text vertically in Word?
1 Select the text you want to center between the top and bottom margins. 2 On the Page Layout tab, click the Page Setup Dialog Box Launcher. 3 Select the Layout tab. 4 In the Vertical alignment box, click Center 5 In the Apply to box, click Selected text, and then click OK.
Why can’t I adjust cell height in Word?
From the Table menu, select “Table Properties.” Click on the Table tab, then the Options button. Uncheck “Automatically resize to fit contents.” Click “OK.” Now click on the “Row” tab in Table Properties. Make sure that “Specify Height” is checked and the size in the middle box is the height you want your rows to be.
When we increase the font size the Row height is automatically adjusted?
yes, it is true that when you increase the font size,the row height is automatically adjusted.
How do I make the text on my screen bigger?
Make text bigger on your screen
- To go to the Ease of Access settings on your computer, press the Windows key+U.
- Under Make text bigger on the Display tab, drag the slider to the right to increase the size of the sample text.
- Once you’re happy with the text size, select Apply. Windows scales up the size of all text.
What is the shortcut for increasing font size?
Keyboard shortcut
Hold down the Ctrl and press the + to increase the font size or – to decrease the font size. Pressing either of these keys while continuing to hold down the control key continues to increase or decrease the font until it reaches its maximum.
How do I make my computer screen bigger using the keyboard?
You can use your keyboard to zoom in or out. This method works in many applications and web browsers. Click anywhere on the Windows desktop or open the webpage you want to view. Press and hold the CTRL key, and then press either the + (Plus sign) or – (Minus sign) to make objects on the screen larger or smaller.
How do I automatically expand a text box in Word?
Follow these general steps.
- Place the text box in your document.
- Adjust the width of your text box to reflect what you need.
- Right-click the text box and choose Format Text Box from the resulting Context menu.
- Make sure the Text Box tab is displayed.
- Make sure the Resize AutoShape to Fit Text check box is selected.
Can I use font-stretch?
You can use font-stretch to select a condensed or expanded face from such fonts. If the font you are using does not offer condensed or expanded faces, this property has no effect.
Why font-stretch is not working?
According to this, here is why : In order to use font-stretch and see a result of some kind, the font being used has to have a face that matches the value given. In other words, font-stretch will not work on just any font, but only on fonts that are designed with different faces matching the defined sizes.
What is font size adjust?
The font-size-adjust CSS property sets the size of lower-case letters relative to the current font size (which defines the size of upper-case letters).

How do I increase the height of text in Word?
To change the font size of selected text in desktop Excel, PowerPoint, or Word:
- Select the text or cells with text you want to change. To select all text in a Word document, press Ctrl + A.
- On the Home tab, click the font size in the Font Size box. You can also type in any size you want, within the following limits:
How do I extend letters in Word?
Expand or condense the space evenly between all the selected characters
- Select the text that you want to change.
- On the Home tab, click the Font Dialog Box Launcher, and then click the Advanced tab. …
- In the Spacing box, click Expanded or Condensed, and then specify how much space you want in the By box.
Why does Microsoft Word cut off the top of letters?
The line spacing of your text may be set to an exact height. When you set the line spacing to Exactly and select a measurement that is equal to or less than the height of the font, underscore characters may not be displayed and characters that have an ascender, descender, or an umlaut may be cut off.
How do I italicize text in Word?
Click the Format button, then select Font. Select Italic from the Font Style list in the Find Font dialog box, then click OK. ‘Format: Font: Italic‘ is added immediately below the Find what text box.
How do I make text taller?
You could follow these general steps:
- Select the text you want to affect.
- Enlarge the font size to 15 points. (12 times 1.
How do I get rid of double spacing between words in Word?
Remove double line spacing
- Select the paragraph you want to change, or press Ctrl+A to select all text.
- Go to Home > Line and Paragraph Spacing.
- Select the line spacing you want. …
- For more exact spacing, select Line Spacing Options, and make changes under Spacing.
When I print some words are missing?
A PDF form that is garbled or missing text after printing could be due to a system font inconsistency. … With the Print window, open select Advanced. When the next window opens click the check box for Print As Image. Now click OK and continue to print like normal.
How do I print a Word document without cutting it off?
There may be times when you need a way to make your document take up fewer printed pages. One of the easiest ways to do this is by using smaller margins. Just go to the Page Layout tab, click Margins, then select Narrow (you can also select Custom Margins for even smaller margins).
Is there a way to make text italic in word?
‘Format: Font: Italic’ is added immediately below the Find what text box. Click Replace All. You’re only limited by your imagination — you can use the same procedure for changing any font formatting for a particular text string, such as making it bold or small caps etc.
Why do I not italicize my citation in word?
Our editorial guide instructs authors to italicize ‘ et al ‘ in a citation, but many forget to do so. Or they copy a section from another document and paste it as unformatted text (as we want them to do), thus losing the italic formatting for that string of text.
How do you resize block letters in Microsoft Word?
Simply click on the «Page Layout» tab (or find it in the «File» menu) and find the «Orientation» option. Select «Landscape» and click «OK» to return to your document. Now you can continue resizing the word to make it as large as you like. Reversing the Block Letters
How do you resize A Word document in word?
Simply click on the «Page Layout» tab (or find it in the «File» menu) and find the «Orientation» option. Select «Landscape» and click «OK» to return to your document. Now you can continue resizing the word to make it as large as you like.
Excel for Microsoft 365 Word for Microsoft 365 PowerPoint for Microsoft 365 Excel 2021 Word 2021 PowerPoint 2021 Excel 2019 Word 2019 PowerPoint 2019 Excel 2016 Word 2016 PowerPoint 2016 Excel 2013 Word 2013 PowerPoint 2013 Excel 2010 Word 2010 PowerPoint 2010 More…Less
You can change the font size for all text or just selected text in desktop Excel, PowerPoint, or Word.
Change the default font size for all text
The way you change the default font size varies by app. Select your app below, and then follow the steps.
-
Click File > Options.
-
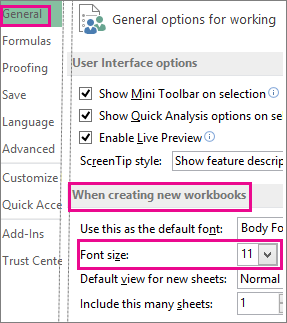
In the dialog box, click General.
-
Under When creating new workbooks, in the Font Size box, enter the font size you want.

Or, you can type in any size you want, between 1 and 409, in multiples of .5, such as 10.5 or 105.5. You can also choose a different default font style.
Note: To begin using the new default font size or font, you must restart Excel. The new default font and font size are used only in new workbooks created after you restart Excel; any existing workbooks are not affected. To use the new default font and size in existing workbooks, move worksheets from an existing workbook to a new workbook.
To change the font size for all slides, change it on the slide master. Every PowerPoint presentation contains a slide master with related slide layouts.
Note: If you want to change the theme, you should do that before changing the font, as a different theme may use different fonts.
-
On the View tab, click Slide Master.
In Slide Master View, the slide master is at the top of the thumbnail pane with the related layouts beneath it.
-
Click the slide master to change the font on all slides, or click any of the layouts to change the font size on just that layout.
-
On the slide master or layout, select the level of placeholder text for which you want to change the font size.
-
On the Home tab, click the font size you want in the Font Size box.
You can also type in any size you want in multiples of .1, such as 10.3 or 105.7.
The bullet automatically increases or decreases in size to match the font size changes.


-
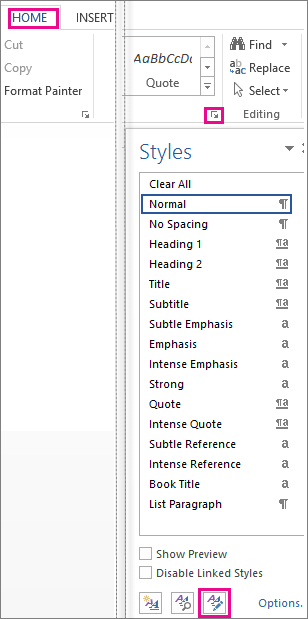
Open a new blank document.
-
On the Home tab, in the Styles group, click the dialog box launcher
..Or press Ctrl+Alt+Shift+S.
-
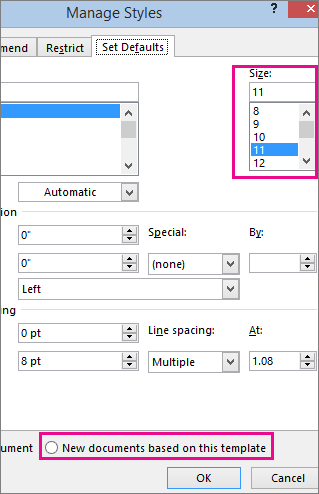
Click the Manage Styles button (third from left at the bottom).
-
Click the Set Defaults tab and pick the size you want in the Size box.
You can also type in any size you want, between 1 and 1638, in multiples of .5, such as 10.5 or 105.5.
-
Click the New documents based on this template option.
-
Close and reopen Word. If you’re prompted to save the Normal template, say Yes.
Tip: You can also change the default font or font color on the Set Defaults tab.
 ..
..
When you set a default font, every new document you open will use the font settings you selected and set as the default. The default font applies to new documents that are based on the active template, usually Normal.dotm. You can create different templates to use different default font settings.
Change the size of selected text
To change the font size of selected text in desktop Excel, PowerPoint, or Word:
-
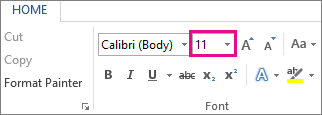
Select the text or cells with text you want to change. To select all text in a Word document, press Ctrl + A.
-
On the Home tab, click the font size in the Font Size box.
You can also type in any size you want, within the following limits:
-
Excel: between 1 and 409, between 1 and 409, in multiples of .5 (such as 10.5 or 105.5)
-
PowerPoint: between 1 and 3600, in multiples of .1 (such as 10.3 or 105.7)
-
Word: between 1 and 1638, in multiples of .5 (such as 10.5 or 105.5)
-
Tips:
-
When you select text, a mini toolbar appears near your cursor. You can also change the text size in this toolbar.
-
You can also click the Increase Font Size or Decrease Font Size (Grow Font and Shrink Font in some earlier versions of Office programs) icons until the size you want is displayed in the Font Size box.
See Also
Change or set the default font in Word
Change the fonts in a footer on a slide
Change a theme (Excel and Word)
Format text in cells (Excel)
Need more help?
 Please Note:
This article is written for users of the following Microsoft Word versions: 97, 2000, 2002, and 2003. If you are using a later version (Word 2007 or later), this tip may not work for you. For a version of this tip written specifically for later versions of Word, click here: Changing the Height of a Font.
![]()
Written by Allen Wyatt (last updated February 10, 2021)
This tip applies to Word 97, 2000, 2002, and 2003
Word makes it easy to change the horizontal scale of a font, by using the Scale control on the Character Spacing tab of the Font dialog box. Using the control changes only the horizontal scale; the vertical height of the font remains exactly the same.
It is interesting to note that Word does not provide any corresponding method to change the vertical scale of a font without affecting the width. There is a way around this disparity, however: You can play with the font size and adjust the horizontal scale negatively.
For instance, let’s say that you have a text selection that is formatted using 12-point type. Now suppose that you want your font to be 25 percent taller, but not to have the width changed. You could follow these general steps:
- Select the text you want to affect.
- Enlarge the font size to 15 points. (12 times 1.25 is 15.)
- Display the Character Spacing tab of the Font dialog box. (See Figure 1.)
- Using the Scale control, specify a scaling of 80%. (100 divided by 1.25 is 80.)
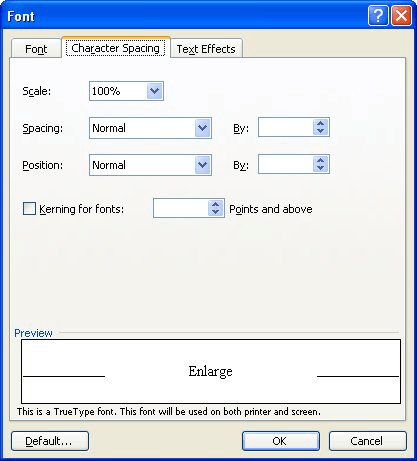
Figure 1. The Character Spacing tab of the Font dialog box.
That’s it. You now have a font that is the same width as its base font, but is the desired height. Depending on the font, you may need to play with the sizing just a bit to get the desired effect, but this approach should work in all instances. Just remember that whatever you multiply the height by, you need to divide the width by (always starting at 100%).
WordTips is your source for cost-effective Microsoft Word training.
(Microsoft Word is the most popular word processing software in the world.)
This tip (1646) applies to Microsoft Word 97, 2000, 2002, and 2003. You can find a version of this tip for the ribbon interface of Word (Word 2007 and later) here: Changing the Height of a Font.
Author Bio
With more than 50 non-fiction books and numerous magazine articles to his credit, Allen Wyatt is an internationally recognized author. He is president of Sharon Parq Associates, a computer and publishing services company. Learn more about Allen…
MORE FROM ALLEN
Sorting Data on Protected Worksheets
Protect a worksheet and you limit exactly what can be done with the data in the worksheet. One of the things that could …
Discover More
Slowing Down Mouse Selection
Ever tried to select a range of cells using the mouse, only to have the cells scroll by so quickly you can’t make the …
Discover More
Setting Default Attributes for Lines and Arrows
Don’t like the way that Excel formats lines and arrows? You can easily make your own formatting changes, and then use …
Discover More
![]()
Download Article
An easy-to-follow guide on changing the direction of text in Microsoft Word
![]()
Download Article
- Rotating Text
- Making Text Vertical
- Mirroring Text
- Changing Paper Orientation
|
|
|
Do you want to type vertically in word? You can create vertical text by creating a textbox and adjusting its settings to set the position. You can change the text’s direction, rotate it, and mirror it. You could also change the document’s orientation from portrait to landscape mode. This wikiHow will show you how to write vertically in word on your Windows or Mac computer.
Things You Should Know
- Create a textbox with your text. Click «Shape Format» → «Text Direction» → «Rotate all text 90°».
- To make text vertical, drag the right-center circle of your textbox towards the left.
- To mirror text, right-click the textbox, then «Format Shape». Click «Effects», then input «180» into the X or Y Rotation field.
-
1
-
2
Create a textbox. To do this, click the Insert tab in the top toolbar, then click the Text Box icon in the Text section. You can select Simple Text Box from the presets.
Advertisement
-
3
Insert your text. Input the text you want to edit. You can copy and paste from another program into Microsoft Word.
- Make sure the textbox is still selected.
-
4
Click Shape Format. You can find this at the top toolbar, next to Help. Alternatively, double-click the edge of the textbox to be quickly redirected.
-
5
Click Text Direction. This will be in the Text section.
- A drop-down menu will open.
-
6
Select Rotate all text 90°. You can also select Rotate all text 270° if you want the top of the words to face the left side.
- Your text will be rotated.
- You can continue to edit your text in the textbox. The words will type in the direction set.


Advertisement
-
1
Open a project in Microsoft Word. This looks like a W on top of a blue square. Microsoft Word is available to install for Windows and Mac.
- You must have a subscription to use Office 365.
-
2
Create a textbox. To do this, click the Insert tab in the top toolbar, then click the Text Box icon in the Text section. You can select Simple Text Box from the presets.
-
3
Insert your text. Input the text you want to edit. You can copy and paste from another program into Microsoft Word.
- Make sure the textbox is still selected.
-
4
Click and drag the center circle on the right towards the left. With the textbox selected, you’ll see four circles at each point of the text box and one circle between each corner. Use the middle circle on the left side.
- As you drag the text box towards the left, it will become smaller. The text inside will adjust to fit the size of the box in vertical format.
- Make sure not to drag past the point of the left line. This could result in the words returning to their normal positions.
-
5
Remove the textbox lines (optional). If you want to remove the lines around the text, double-click the textbox to return to the Shape Format tab.
- Click Shape Outline, then select No Outline from the drop-down menu.
- The textbox lines will be hidden. Be sure to save your document if you need to return to it later.


Advertisement
-
1
Open a project in Microsoft Word. This looks like a W on top of a blue square. Microsoft Word is available to install for Windows and Mac.
- You must have a subscription to use Office 365.
-
2
Create a text box. To do this, click the Insert tab in the top toolbar, then click the Text Box icon in the Text section. You can select Simple Text Box from the presets.
-
3
Insert your text. Input the text you want to edit. You can copy and paste from another program into Microsoft Word.
- Make sure the textbox is still selected.
-
4
Right-click the textbox. A drop-down menu will open.
-
5
Click Format Shape…. This will be at the very bottom of the menu.
- A panel will open on the right side.
- If you don’t see this option, make sure the textbox is selected, not the text.
-
6
Click the «Effects» icon. This looks like a pentagon, next to the paint bucket icon.
-
7
Enter 180 in the X or Y field. If you want your text to be mirrored left-right, enter 180 into the X Rotation field. If you want your text to be mirrored up-down, enter 180 into the Y Rotation field.
- The changes will take effect immediately.
-
8
Remove the textbox lines (optional). If you want to remove the lines around the text, double-click the textbox to return to the Shape Format tab.
- Click Shape Outline, then select No Outline from the drop-down menu.
- The textbox lines will be hidden. You can print your document if needed.


Advertisement
-
1
Open a project in Microsoft Word. This looks like a W on top of a blue square. Microsoft Word is available to install for Windows and Mac.
- You must have a subscription to use Office 365.
- Use this method if you want to change your paper orientation from portrait to landscape.
-
2
Click Layout. This will be in the top toolbar, between Design and References.
-
3
Click Orientation. You can find this at the top, next to Margins.
- A drop-down menu will open.
-
4
Click Landscape. Your Microsoft Word document will change to landscape orientation.
- If you change back to portrait mode after inputting text, the text will follow the portrait mode orientation. It will not save in its landscape position.


Advertisement
Ask a Question
200 characters left
Include your email address to get a message when this question is answered.
Submit
Advertisement
Thanks for submitting a tip for review!
About This Article
Article SummaryX
1. Click Insert.
2. Click Text.
3. Click Text Box.
4. Click Draw Text Box.
5. Click and drag a text box.
6. Type text into the box.
7. Hover the mouse over the box outline.
8. Click the rotation icon and drag in any direction.
Did this summary help you?
Thanks to all authors for creating a page that has been read 1,279,441 times.
Is this article up to date?
Содержание
- Изменение размера шрифта на нестандартные значения
- Пошаговое изменение размера шрифта
- Вопросы и ответы

Те, кто хотя бы пару раз в своей жизни пользовался текстовым процессором MS Word, наверняка знают о том, где в этой программе можно изменить размер шрифта. Это небольшое окошко во вкладке «Главная», расположенное в группе инструментов «Шрифт». В выпадающем списке этого окошка представлен перечень стандартных значений от меньшего к большему — выбирайте любой.
Проблема в том, что далеко не все пользователи знают, как увеличить шрифт в Ворде больше 72 единиц, указанных по умолчанию, или как сделать его меньше стандартных 8, или же как можно задать любое произвольное значение. На самом деле сделать это довольно просто, о чем мы и расскажем ниже.
Изменение размера шрифта на нестандартные значения
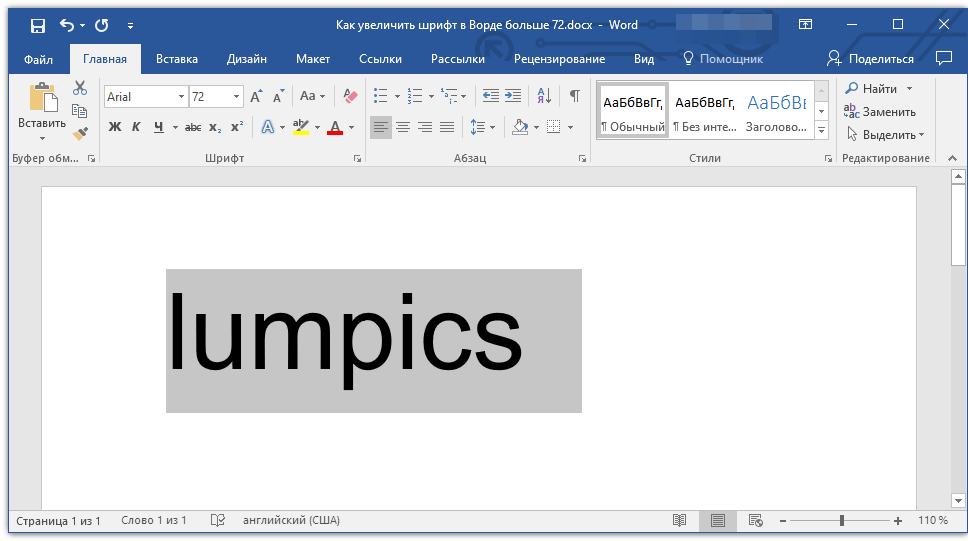
1. Выделите текст, размер которого вы хотите сделать больше стандартных 72 единиц, с помощью мышки.
Примечание: Если вы только планируете ввести текст, просто кликните в том месте, где он должен находиться.
2. На панели быстрого доступа во вкладке «Главная» в группе инструментов «Шрифт», в окошке, расположенном рядом с названием шрифта, где указано его числовое значение, кликните мышкой.

3. Выделите заданное значение и удалите его, нажав «BackSpace» или «Delete».
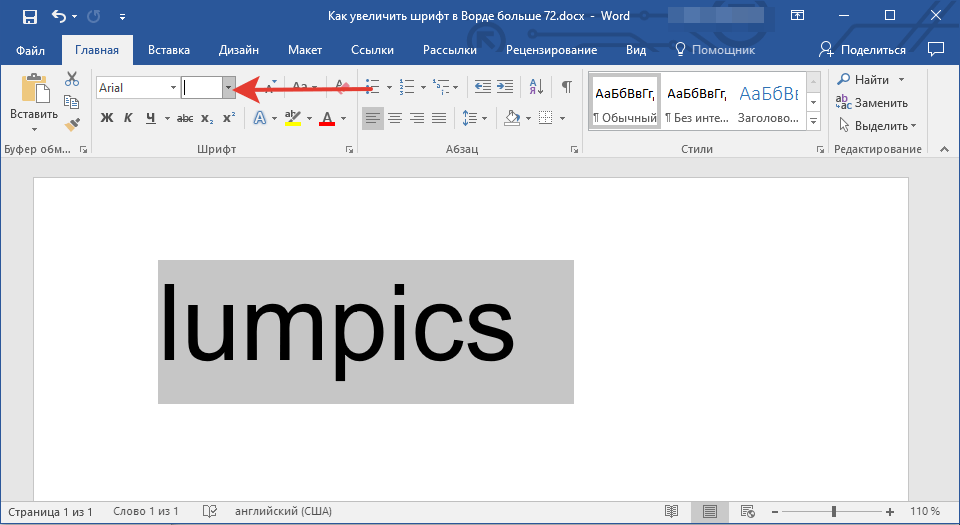
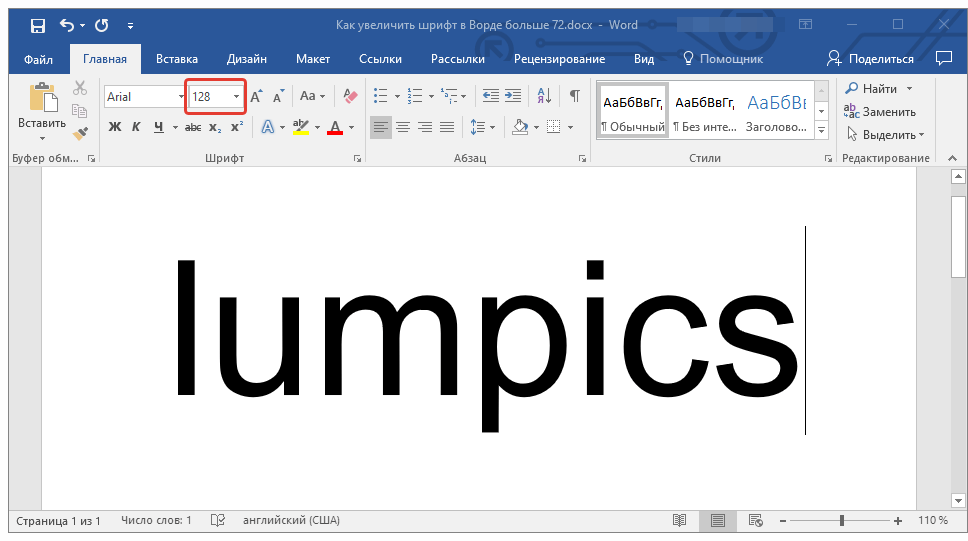
4. Введите необходимое значение размера шрифта и нажмите «ENTER», не забывая о том, что текст все же должен как-то уместиться на странице.
Урок: Как изменить формат страницы в Word
5. Размер шрифта будет изменен согласно заданным вами значениям.
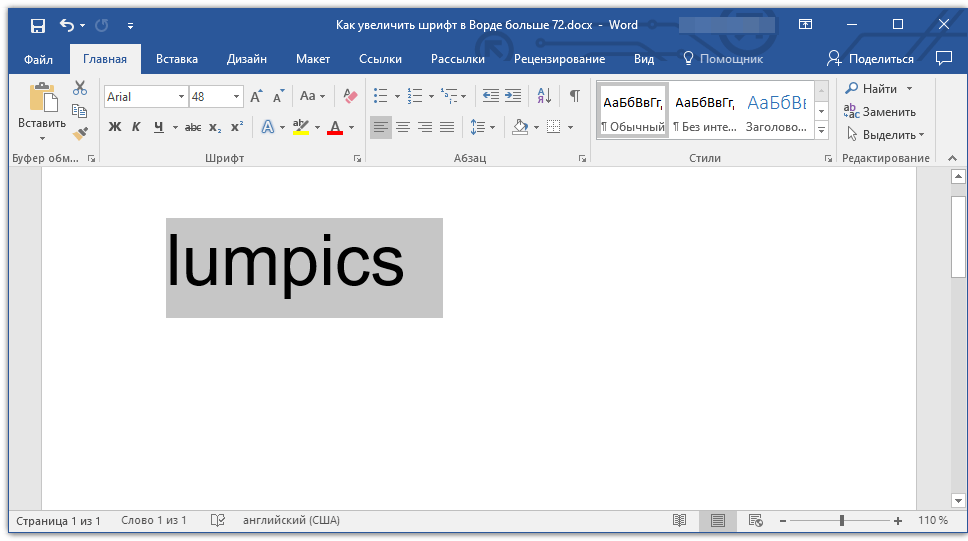
Точно таким же образом вы можете изменить размер шрифта и в меньшую сторону, то есть, меньше стандартных 8. Кроме того, аналогично можно задавать и произвольные значения, отличные от стандартных шагов.

Пошаговое изменение размера шрифта
Далеко не всегда можно понять сразу, какой именно размер шрифта нужен. Если и вы этого не знаете, можете попробовать изменять размер шрифта по шагам.
1. Выделите фрагмент текста, размер которого требуется изменить.
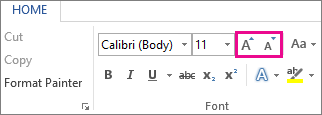
2. В группе инструментов «Шрифт» (вкладка «Главная») нажмите кнопку с большой буквой А (справа от окна с размером) для увеличения размера или кнопку с меньшей буквой А для его уменьшения.

3. Размер шрифта будет изменяться с каждым нажатием на кнопку.
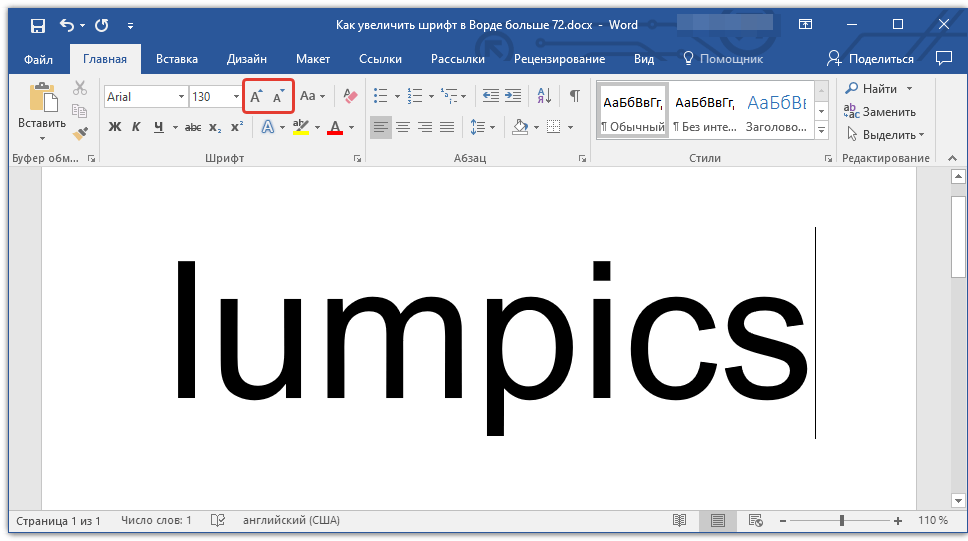
Примечание: Использование кнопок для пошагового изменения размера шрифта позволяет увеличивать или уменьшать шрифт только по стандартным значениям (шагам), но не по порядку. И все же, таким образом можно сделать размер больше стандартных 72 или меньше 8 единиц.
Узнать больше о том, что еще можно делать со шрифтами в Ворде и как их изменять, вы можете узнать из нашей статьи.
Урок: Как в Word изменить шрифт
Как видите, увеличить или уменьшить шрифт в Ворде свыше или ниже стандартных значений довольно просто. Желаем вам успехов в дальнейшем освоении всех тонкостей этой программы.
Еще статьи по данной теме:
Помогла ли Вам статья?
Changing the Height of a Font
- Select the text you want to affect.
- Enlarge the font size to 15 points. (12 times 1.25 is 15.)
- Display the Advanced tab of the Font dialog box. …
- Using the Scale control, specify a scaling of 80%.
Subsequently, What are some tall thin fonts?
tall and thin fonts
- Neumatic Compressedby Arkitype. Style: Semi Bold. …
- Pen And Inkby Mini Press. Style: Regular. …
- Tall Talesby Comicraft. Style: Regular. …
- Jazz Ageby Studio K. Style: Jazz Age. …
- Porcelainby Up Up Creative. Style: Regular. …
- Neumatic Gothic Roundby Arkitype. …
- Goodbye Anjingby Allouse Studio. …
- Kutilangby Allouse Studio.
Accordingly What is the highest font size?
Word supports font sizes from 1 point to 1638 points, which means you can use fonts that are 1/72 of an inch all the way up to 22-3/4 inches.
Beside above, How do I make text bigger than 72 in Word? Make the font size larger than 72 points
- Select the text that you want to change.
- Click the Format tab under Text Box Tools, type a point size in the Font Size list. . For example, type 592.
- Press ENTER.
What is the thinnest font?
Top 21 Best Modern and Contemporary Thin and Extra Light Fonts
- Rajdhani – Light 200.
- Raleway – Extra Light 200 and Thin 100.
- Roboto – Thin 100.
- Titillium Web – Extra Light 200.
- Yanone Kaffeesatz – Extra Light 200.
- Yantramanav – Thin 100.
- Wire One – Regular 400.
- Work Sans – Thin 100 and Extra Light 200.
also What is a tall skinny font in Word? A condensed font is a narrow version of a standard typeface in a type family. It typically has “condensed,” “compressed,” or “narrow” in its name, e.g. Arial Condensed. … Some fonts that are not part of a family are also described as condensed when they are much taller than they are wide.
What is the biggest font style in Google Docs?
Google Docs supports font sizes up to 400 pt. You can change the font size for an existing block by selecting it and then entering a new value in the Font size field.
What font is 1inch tall?
1 inch is roughly equal to 72 points
FONT HAVE 3 ELEMENTS: X-HEIGHT – height of the lowercase “x” character.
What is the largest font available in Word?
thanks for your help! The maximum font-size available in Microsoft Word 2010 from the dropdown list is 72; however the font size can be set up to 1638 by typing the size manually for the font.
What font size is 2 inches tall?
What font size is 2 inches tall? Your font size should be 144 pt. to print a letter that’s approximately 2” tall.
What is the smallest readable font size?
A minimum text size of 2.5mm (x-height 1.2mm) or 7 point is the smallest size that most people (and regulators) are likely to consider readable.
How do I adjust my font?
Change text & display settings
- Open your device’s Settings app.
- Tap Accessibility Text and display.
- Tap Font size.
- Use the slider to choose your font size.
What is the minimum and maximum font size in Word?
In Word, fonts can be sized from 1 point to 1,638 points. Point sizes smaller than 6 are generally too small for a human to read. A 1-inch-high letter is roughly 72 points.
What font is thinner than Arial?
For sans-serifs similar to Arial / Helvetica, but narrower, have a look at: Myriad Pro, Open Sans, Segoe UI, Tahoma, Frutiger, Bell Gothic, Lato, Antique Olive, and Adobe’s new font Source Sans Pro.
What is kinfolk font?
Kinfolk is a classic style serif typeface that has been modernised with its unique curves and cut-ins making it one of the most memorable caps fonts on the market. This versatile font can be used for word-mark logos, mastheads, pull quotes & monograms showing both feminine and masculine qualities.
How can I find out what font was used?
The most graceful way to identify a font in the wild is with the free WhatTheFont Mobile app. Just launch the app and then snap a photo of the text wherever it appears—on paper, signage, walls, a book, and so on. The app prompts you to crop the photo to the text and then identify each character.
What font is smaller than Arial?
For sans-serifs similar to Arial / Helvetica, but narrower, have a look at: Myriad Pro, Open Sans, Segoe UI, Tahoma, Frutiger, Bell Gothic, Lato, Antique Olive, and Adobe’s new font Source Sans Pro.
What font is best for resume?
Arial is the font most commonly recommended by our experts. Times New Roman was the go-to font for so long that some of our experts now say it appears dated, but it’s still a safe choice in terms of readability.
…
What Are the Best Resume Fonts?
- Arial.
- Cambria.
- Calibri.
- Garamond.
- Georgia.
- Helvetica.
- Times New Roman.
- Veranda.
What font is monospaced?
The only monospaced TrueType fonts shipped by Microsoft are Courier New, which shipped with Windows 3.1, and Lucida Sans Typewriter, which was included in the TrueType Font Pack.
What is the biggest font type on word?
The steps in this article were performed in Microsoft Word 2013. The result of completing these steps is that text in your document can use a bigger font size than the 72 that is available from the dropdown menu. You are able to use larger font size up to a max of 1638 pt.
Which APA font is the biggest?
Times New RomanThe preferred font is Times New Roman, 12 point. For any text in figures, authors should use a sans serif typeface, because the clean and simple lines enhance the figure’s visual presentation. The preferred font is either Arial, Futura, or Helvetica, and font size may range from 8 to 14 points.
Is Arial or Helvetica bigger?
The differences between Helvetica and Arial are much more noticeable in larger sizes, while they look fairly similar in smaller text.
Is 11 or 12 point font standard?
The standard font for a college paper is 12 font. Format papers in standard academic format (using Microsoft. So with proper spacing and margins, type sizes of 11 or 10 point can be quite comfortable to read.
How tall is a 12 point font?
The default font in Microsoft Word 2010 is Calibri. Font sizes are measured in points; 1 point (abbreviated pt) is equal to 1/72 of an inch. The point size refers to the height of a character. Thus, a 12-pt font is 1/6 inch in height.
Is Arial 11 or Times New Roman 12 bigger?
Surprisingly, Arial 11 point is overall just slightly larger than Times New Roman 12 point—unless the text is set in all caps. However, Arial’s x-height, which is to say the height of lowercase letters such as x, n, o, is almost 16% higher than that of Times New Roman!
There are a large number of tools and settings in Microsoft Word 2010 that allow you to modify the appearance of your document. However, there is not an option to display your text vertically. There are options to achieve this affect, but they will require you to use a text box.
Text boxes in Microsoft Word 2010 are controlled separately from text in the main body of the document, and you can manipulate the appearance of a text box to display your text vertically. There are two different possible ways to display your text vertically, and you will have the option to achieve your desired result in the last step of our guide below.
Display Text Vertically in Word 2010 With a Text Box
The steps in this article will show you how to create a text box, add text to the text box, then format the text in that text box so that it is displayed vertically. If you would like to modify the appearance of your text box, then you can do so without affecting the rest of the document. For example, you can remove the border from a text box if you want to make it blend in with the rest of the document.
Step 1: Open your document in Word 2010.
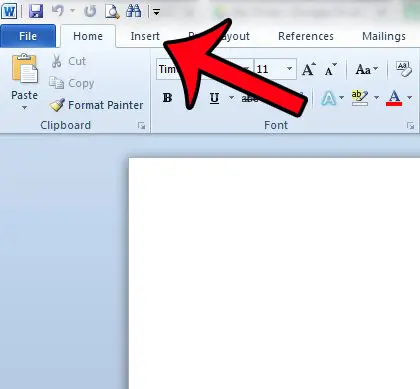
Step 2: Click the Insert tab at the top of the window.
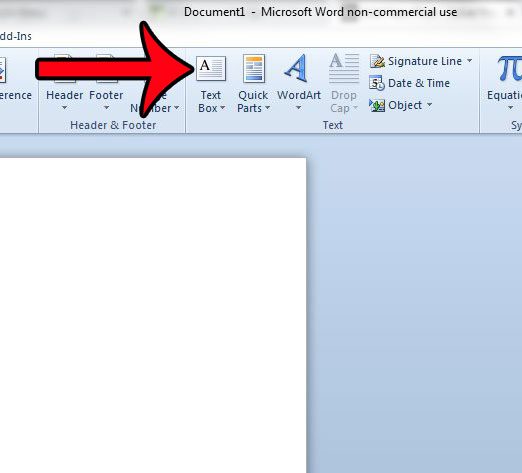
Step 3: Click the Text Box button in the Text section of the Office ribbon.
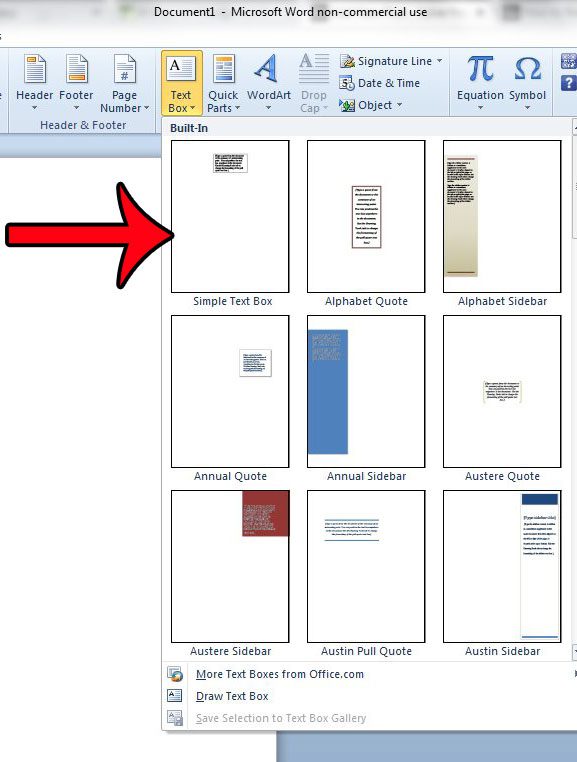
Step 4: Select the type of text box that you wish to create. If you are just looking for the basic option, then click the Simple Text Box option.
Step 5: Click inside the text box and delete the default text, then add the text that you wish to display vertically.
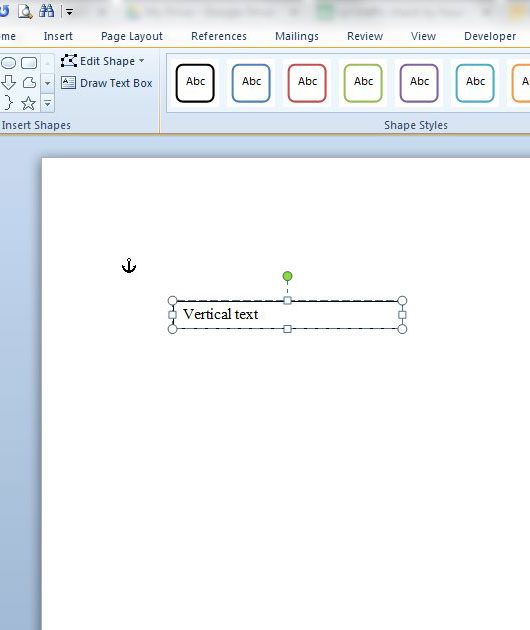
Step 6: Position or adjust the text box as needed. You can move the box by clicking and dragging on any of the borders, you can expand it by clicking any of the handles and dragging them in or out, and you can rotate it by clicking the green circle above the text box.
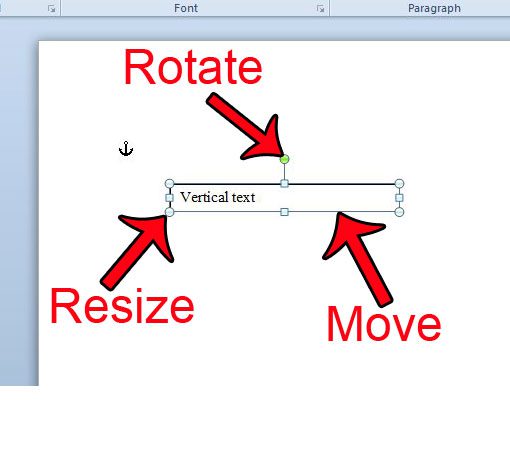
The next step that you take will depend on whether you want the text oriented properly, but displayed with one letter per line, or if you want the entirety of the text to be rotated.
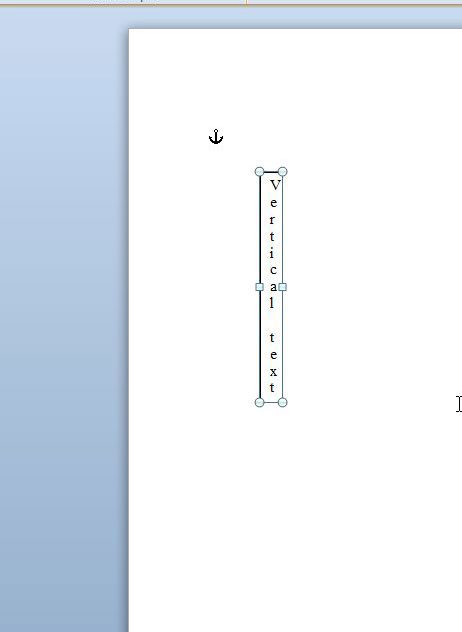
One Letter Per Line
There is not an actual option to do this, so we will need to get a little creative. The method for achieving this goal is to simply adjust the size and shape of the text box to make it a tall, thin rectangle. The text box will naturally force each letter onto it’s own line. You can form the text box to the needed shape by dragging the handle on the right side of the text box inward until it is wide enough for just a single letter. Word will extend the height of the text box to accommodate your text.
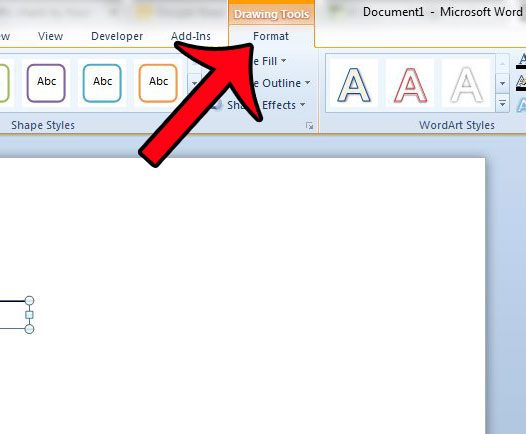
All Text Rotated in Text Box
If you wish for your text to be rotated, then you have the option of rotating it either 90 degrees or 270 degrees. You can do this by:
1. Click the Format tab under Drawing Tools at the top of the window. if you do not see it, then you will need to click somewhere inside the text box to make it active.
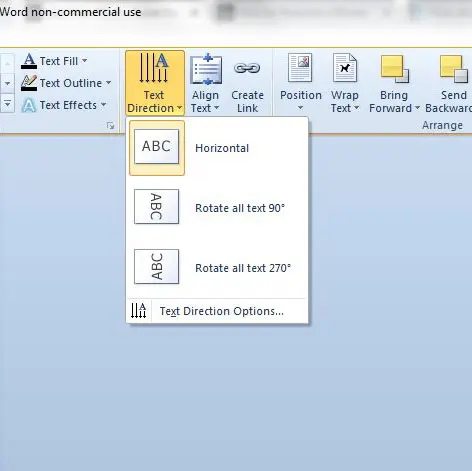
2. Click the Text Direction button in the Text section of the Office ribbon, then click the Rotate All Text 90 degrees or the Rotate All Text 270 degrees option. Note that this will only affect the text in the text box. The text in your main document will not rotate.
Would you like to create vertical text in Microsoft Excel, too? This article will show you how to rotate text within a cell in an Excel worksheet.

Matthew Burleigh has been writing tech tutorials since 2008. His writing has appeared on dozens of different websites and been read over 50 million times.
After receiving his Bachelor’s and Master’s degrees in Computer Science he spent several years working in IT management for small businesses. However, he now works full time writing content online and creating websites.
His main writing topics include iPhones, Microsoft Office, Google Apps, Android, and Photoshop, but he has also written about many other tech topics as well.
Read his full bio here.
Some people may have difficult time reading text because of various reasons. You can make the text on your word document appear larger when you are reading.In this blog post, you will look at making text look larger or smaller in Microsoft Word to enhance the reading experience.
Sometimes we need to Zoom in or out for a clear view of the text. All you need to do is the following steps:
- Go to the Status Bar to find the Zoom Bar with a slider to zoom in and zoom out as in the below picture.
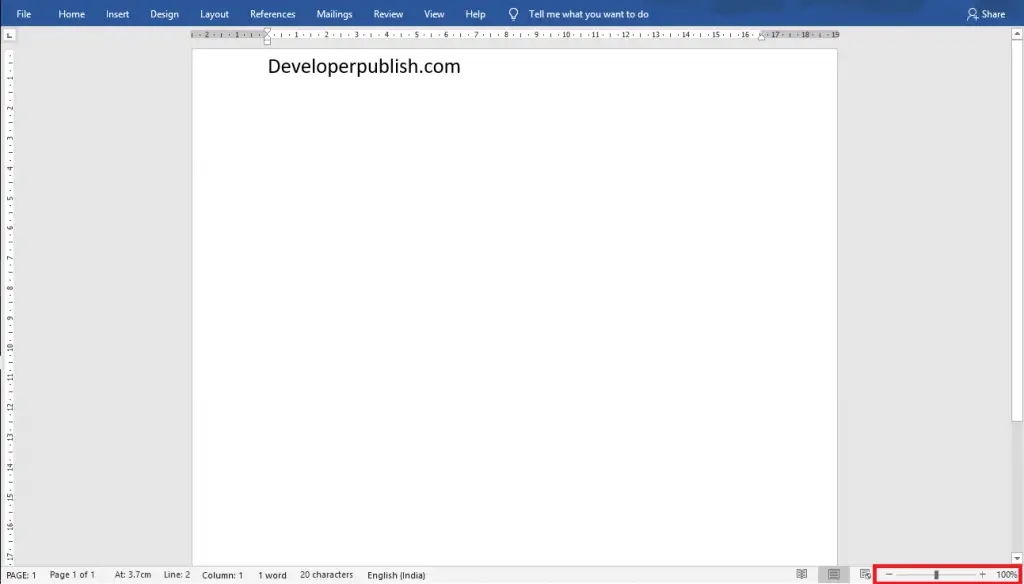
- Slide to the left to zoom out and slide to the right to zoom in.
You can also use the + (plus) and – (minus) button to Zoom in and zoom out.
Making text look larger or smaller using the Zoom dialogue box
- Go to the View tab and click on the Zoom button in the zoom group.

- The Zoom Dialogue Box will appear on the screen as in the below image.
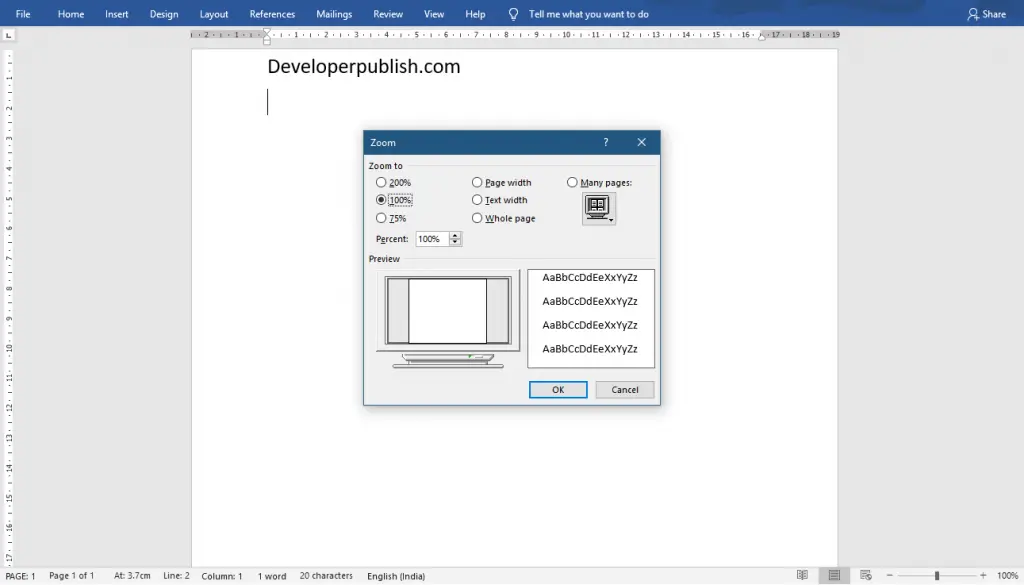
- Enter the value you want to zoom in or out your page in the Percentage number box.
- You can do it for page width or text width by selecting the options.
- Click the Ok button to apply the changes.