
Microsoft Office for Mac is a suite of applications that includes Word for creating text documents and Excel for making spreadsheets. If you don’t want to use the default font in Office each time you create a new document, you can designate the font of your choice by changing the preferences settings. You have to quit Excel and Word and restart the applications before the new default font settings will take effect for future documents that you create.
Word
-
Launch Microsoft Word and open a new blank document.
-
Click “Font” on the Format menu and then click the “Font” tab.
-
Click the Font pull-down menu and select the name of the font you want to set as the new default.
-
Click “Default” and «OK.»
-
Quit Word and then relaunch the application. New documents that you create will use the font you selected.
Excel
-
Launch Microsoft Excel on your Mac and open a new blank document.
-
Click the “Excel” menu and then click “Preferences.”
-
Select the «General» preferences in the Authoring section. Click the “Standard Font” drop-down menu and click the name of the font you want to set for the default. Click «OK.»
-
Quit Excel and then relaunch the application. New spreadsheets that you create will now use the default font you selected.
В Microsoft Word для Mac включены десятки шрифтов, но есть только один шрифт по умолчанию. Это шрифт, который автоматически выбирается для вас при создании нового документа. В последних версиях Word для Mac этот шрифт называется Calibri.

Теперь нет ничего плохого в Калибри; это действительно очень хороший шрифт. Но это может быть не для всех. Если вы предпочитаете использовать другой шрифт по умолчанию для своих документов, вы можете настроить Word для изменения шрифта по умолчанию на любой другой установленный шрифт, который вы выберете. Вот как это сделать!
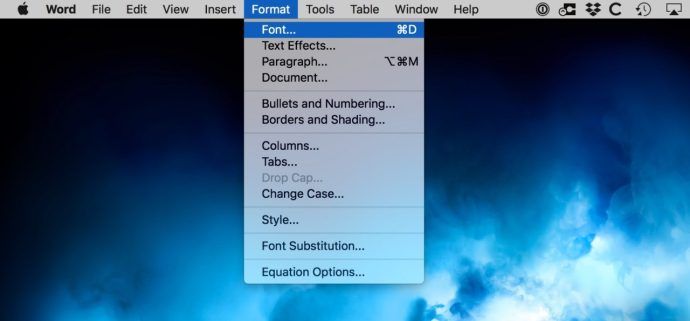
Чтобы начать с изменения шрифта по умолчанию в Microsoft Word для Mac, сначала запустите приложение, а затем выберите « Формат»> «Шрифт» в строке меню в верхней части экрана. В качестве альтернативы вы можете использовать сочетание клавиш Command-D .

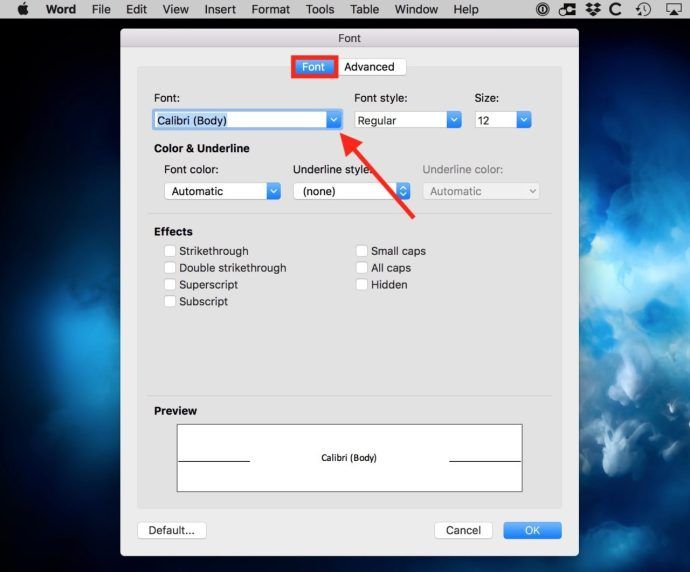
Появится новое окно «Шрифт». Убедитесь, что вы находитесь на вкладке « Шрифт » и найдите раскрывающееся меню «Шрифт» рядом с левой верхней частью окна.

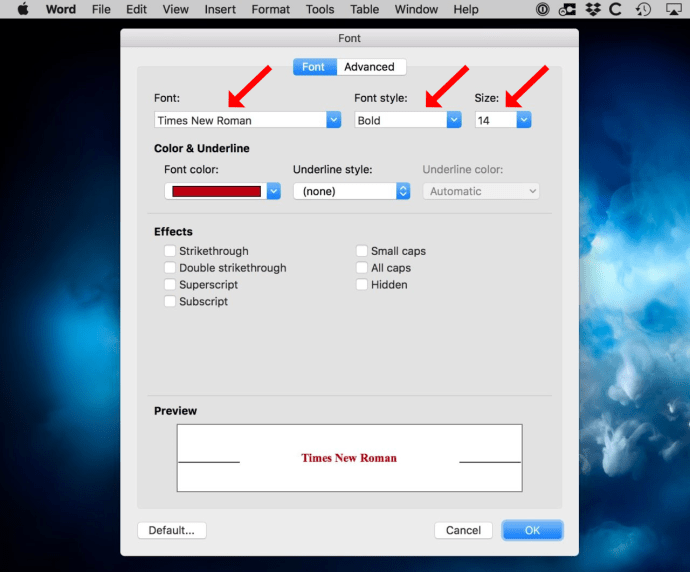
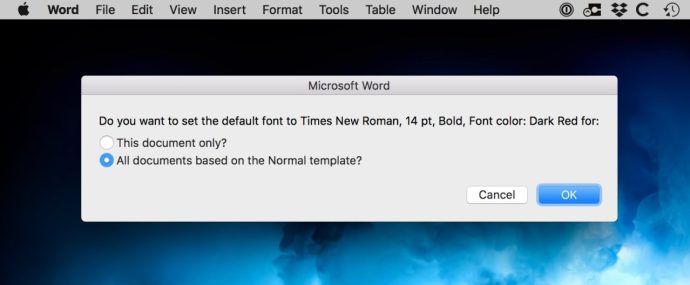
Если вы никогда не меняли шрифт в прошлом, вы увидите, что Calibri выбран в качестве шрифта по умолчанию. Чтобы изменить его, просто нажмите на раскрывающуюся запись, чтобы открыть меню, и выберите новый шрифт по умолчанию, например Times New Roman или, если вы хотите троллить своих коллег, Comic Sans. Помимо изменения самого шрифта по умолчанию, вы также можете настроить стиль и размер шрифта по умолчанию. Например, на скриншоте ниже я выбрал Times New Roman, выделенный жирным шрифтом темно-красного цвета, размером 14 пунктов.

Но ждать! Изменение этих параметров только изменяет их в текущем документе. Чтобы сохранить его в качестве нового шрифта по умолчанию, нажмите кнопку « По умолчанию» в левом нижнем углу окна.

Word попросит вас подтвердить, хотите ли вы повлиять только на ваш текущий документ или на все документы, которые вы создаете . Если вы хотите, чтобы настройки, примененные вами на последнем шаге, были вашими по умолчанию, убедитесь, что переключатель рядом с Все документы, основанные на шаблоне «Нормальный», включен, затем нажмите кнопку « ОК» .

Теперь все новые документы, которые вы создаете, будут начинаться с выбора шрифта, который вы сделали ранее.

Конечно, это не изменит существующие файлы, а также не повлияет на любые документы Word, которые вы создаете, которые начинаются с шаблонов, так как у них есть свои собственные настроенные шрифты и стили. Это здорово, особенно, если вы хотите убежать от Калибри! Просто, пожалуйста, не используйте Comic Sans, хорошо? Я пошутил.
![]()
Download Article
![]()
Download Article
Do you want to switch things up in Word by changing the default Times New Roman or Calibri font to something else? There’s an easy way to adjust settings so you can set a new default font. This wikiHow article will show you how to set the default font in Word Office 365 (for all versions since Word 2013) on Windows and macOS.
-

1
Open Word. On your Windows PC, open up the Microsoft Word application.
-
2
Open up a document. You can use any document you want, but if you want to start a new document, click on File > New > Blank Document in the top left corner of the window.[1]
Advertisement
-
3
Click on Home. This is located in the left corner of the top Windows menu bar.
-
4
Click on the Font Dialogue Box Launcher. This is the small square icon with an arrow inside. It is located in the bottom right corner of the “Font” section above the document.[2]
-
5
Select your font. In the pop-up window, you’ll see a drop down menu labeled “Font” in the top left corner. Simply scroll until you find the font that you want to set as the default. Click on it.
- You can see a preview of your font in the “Preview” section near the bottom of this pop-up window. This will show you exactly what your font looks like as you make changes.
-
6
Set your Font style and Size. There are two drop down menus to the left of “Font.” Scroll through each to set your desired default font style and size.
-
7
Set other font preferences (optional). If you also want to change features such as «Font color,» «Underline style,» or «Effects,» simply adjust these settings within the same pop-up window.
- You can also click on Advanced near the top of this pop-up window to change more settings such as “Character Spacing” and “Advanced Typography.”
-
8
Click on Default…. This is located in the bottom left corner of the pop-up window.
-
9
Click on This document only or All documents based on the Normal template. The former will only change the default font for this particular document, while the latter will change the default font for all future Word documents.
-
10
Click on OK. This is located in the bottom right corner of the pop-up window. You have now successfully changed the default font in Word.
- If you’ve tried this method and the font you chose still does not appear as the default font, look towards the next method for troubleshooting.


Advertisement
-
1
Open the Start menu. This is located on the left or center of your PC’s taskbar. This button is the Windows logo, which looks like four squares.[3]
-
2
Type Normal.dotm into the search bar. The search bar is located in the bottom left corner of the Search menu. If your office template directory is not indexed and you are unable to find «Normal.dotm» through search, Right click start menu and select «Run» option. Then type «%Appdata%/Microsoft/Templates» in run dialogue box and click «OK». This will open office’s templates directory and you will find Normal.dotm in this directory.
-
3
Right-click the Normal.dotm. Now click on Properties at the bottom of this drop down menu.
-
4
Navigate to General. If it isn’t already displayed, click on this button near the top of the pop-up window to view the general information.
-
5
Uncheck Read-only (if necessary). If you see that the checkbox next to “Read-only” is selected, simply click on it to uncheck it. You should now be able to change default settings on Word.
- If you are unable to uncheck this box, look towards the last step of this method.
-
6
Click on the Security tab. This is located at the top of the pop-up window.
-
7
Click on your name. You should see your name located underneath “Group or user names.” Now look and see if there’s a checkmark in the “Allow” section of the “Write” permission.
- If there isn’t, look to the last step.
-
8
Click on OK. This is located at the bottom of the Normal Properties pop-up window.
-
9
Contact your company (if necessary). If you weren’t able to uncheck the “Read-only” box, or did not see the “Write” permission allowed, this means that your company will not allow you to change the default font. We recommend that you contact your company’s technology or computer services to try and resolve this issue.


Advertisement
-
1
Open Word. On your Mac, open up the Microsoft Word application.
-
2
Open up a document. You can use any document you want, but if you want to start a new document, click on File > New Document in the top left Apple menu bar.
-
3
Click on Format > Font. These are located in your top Apple menu bar.[4]
-
4
Click on the “Font” drop down menu. This is located in the top left corner of the “Font” pop-up window. Simply click on the arrow.
-
5
Select your font. In the drop down menu that appears below “Font,” you’ll see all of the fonts available to you. Simply scroll until you find the font that you want to set as the default. Click on it.
- You can see a preview of your font in the “Preview” section near the bottom of this pop-up window. This will show you exactly what your font looks like as you make changes.
-
6
Set your Font style and Size. There are two drop down menus to the left of “Font.” Click on each to set your desired default font style and size.
-
7
Set other font preferences (optional). If you also want to change features such as «Font color,» «Underline style,» or «Effects,» simply adjust these settings within the same pop-up window.
- You can also click on Advanced near the top of this pop-up window to change more settings such as “Character Spacing” and “Advanced Typography.”
-
8
Click on Default…. This is located in the bottom left corner of the pop-up window.
-
9
Click on This document only or All documents. The former will only change the default font for this particular document, while the latter will change the default font for all future Word documents.
-
10
Click on OK. This is located in the bottom right corner of the pop-up window. You have now successfully changed the default font in Word.
- If you’ve tried this method and the font you chose still does not appear as the default font, look towards the next method for troubleshooting.


Advertisement
-
1
Open Finder. If the default font you chose isn’t remaining as the default, use these steps to check your permissions. The Finder application is blue and white with a smiley face inside.
- Some companies have permission settings that don’t allow default font changes, which is why you may want to check and see if this is the case for you.
-
2
Type Normal.dotm into the search bar. Click on the magnifying glass in the top left corner to open the search bar. Press Enter on your keyboard after typing it in.
-
3
Click on the Normal.dotm file. If you don’t see this file in your search results, you may need to click on This Mac near the top left corner of the window.
-
4
Click on File > Get Info. These are located in the top Apple menu bar.
-
5
Navigate to General. If it isn’t already displayed, click on this button near the top of the pop-up window to view the general information.
-
6
Uncheck Locked (if necessary). If you see that the checkbox next to “Locked” is selected, simply click on it to uncheck it. You should now be able to change default settings on Word.
- If you are unable to uncheck this box, look towards the last step of this method.
-
7
Click on Sharing & Permissions. This is located at the bottom of the pop-up window. Now look and see if the “Read & Write” privilege appears next to your name. If it doesn’t, look to the next step.
-
8
Contact your company (if necessary). If you weren’t able to uncheck the “Locked” box, or did not see “Read & Write” next to your name, this means that your company does not allow you to change the default font. We recommend that you contact your company’s technology or computer services to try and resolve this issue.


Advertisement
Ask a Question
200 characters left
Include your email address to get a message when this question is answered.
Submit
Advertisement
References
About This Article
Article SummaryX
1. Open a document in Word.
2. Click on Home > Font Dialogue Box Launcher.
3. Select your font.
4. Change font style.
5. Click on Default.
6. Click on This document only or All documents.
7. Click on OK.
Did this summary help you?
Thanks to all authors for creating a page that has been read 2,643 times.
Is this article up to date?
Содержание
- — Как мне сбросить шрифт по умолчанию на моем Mac?
- — Почему мой шрифт в Word Mac постоянно меняется?
- — Какой шрифт используется по умолчанию на Mac?
- — Как изменить шрифт по умолчанию в Safari?
- — Как сбросить Microsoft Word для Mac 2020?
- — Как изменить шрифт по умолчанию для Word?
- — Как исправить форматирование в Word для Mac?
- — Какой шрифт использует Apple 2019?
- — Как изменить шрифт на моем Macbook Pro Safari?
- — Как мне изменить шрифт в моем браузере?
Как изменить шрифт по умолчанию для Pages на Mac
- Щелкните Страницы в строке меню.
- Выберите «Настройки». …
- Откроется вкладка «Общие». …
- Появится другое меню с параметрами для имени и размера шрифта. …
- Теперь вы должны увидеть предпочитаемый шрифт по умолчанию, указанный под флажком (сейчас).
Почему мой шрифт в Word Mac постоянно меняется?
Прежде всего, вам нужно проверить, чтобы убедиться, что что у всех пользователей отключено динамическое обновление стилей. Эта функция Word вызывает изменения в определении стиля, когда кто-то применяет явное изменение форматирования к чему-либо в документе. … Word отображает диалоговое окно «Стиль». В списке стилей выберите название стиля.
Какой шрифт используется по умолчанию на Mac?
Системные шрифты
Основной системный шрифт в OS X El Capitan и более поздних версиях: Сан-Франциско. OS X Yosemite использовала Helvetica Neue, а предыдущие версии в основном использовали Lucida Grande. Для этикеток и другого мелкого текста обычно использовалась 10 pt Lucida Grande.
Как изменить шрифт по умолчанию в Safari?
Сафари
- В меню Safari выберите Настройки ….
- Щелкните Внешний вид. Чтобы изменить шрифт на «Стандартный шрифт:» или «Шрифт с фиксированной шириной:», нажмите соответствующую кнопку «Выбрать …». Чтобы изменить кодировку по умолчанию, используйте раскрывающееся меню рядом с полем «Кодировка по умолчанию:».
Как сбросить Microsoft Word для Mac 2020?
Выполните следующие действия, чтобы сбросить их:
- Закройте все программы.
- В меню «Перейти» выберите «Главная»> «Библиотека». …
- Откройте папку «Настройки» и перетащите com. …
- Теперь откройте папку Microsoft (в настройках) и перетащите com. …
- Запустите Word. …
- Закройте все программы.
- В меню «Перейти» выберите «Главная»> «Библиотека».
Как изменить шрифт по умолчанию для Word?
Чтобы постоянно использовать любимый шрифт в Word, установите его по умолчанию.
- Перейдите в Формат> Шрифт> Шрифт. Вы также можете нажать и удерживать. + D, чтобы открыть диалоговое окно «Шрифт».
- Выберите шрифт и размер, которые хотите использовать.
- Выберите По умолчанию, а затем выберите Да.
- Выберите ОК.
Как исправить форматирование в Word для Mac?
Вы можете исправить форматирование, скопировав форматирование из одного абзаца в другой.
- Выберите абзац с нужным форматированием. …
- Выберите «Формат»> «Копировать стиль» (в меню «Формат» в верхней части экрана, а не на панели инструментов «Страницы»).
- Выделите текст в абзацах, которые нужно исправить, затем выберите «Формат»> «Вставить стиль».
Какой шрифт использует Apple 2019?
Нью-Йорк (шрифт 2019)
| Категория | Засечки |
|---|---|
| Дата выпуска | 2018 (Apple Books) 2019 (использование разработчика) |
| Вариации | Нью-Йорк Маленький Нью-Йорк Средний Нью-Йорк Большой Нью-Йорк Очень большой |
| Также известный как | SF Serif Serif UI |
| Веб-сайт | https://developer.apple.com/fonts/ |
Как изменить шрифт на моем Macbook Pro Safari?
Изменение размера шрифта или уровня масштабирования веб-страниц в Safari
- Чтобы увеличить размер шрифта, нажмите Option-Command-плюс (+)
- Чтобы уменьшить размер шрифта, нажмите Option-Command-минус (-)
Как мне изменить шрифт в моем браузере?
Как изменить шрифт в браузере Google Chrome
- Откройте Google Chrome. …
- Щелкните три вертикальные точки (кнопка меню) справа от строки URL. …
- Выберите «Настройки».
- Прокрутите вниз и выберите «Настроить шрифты». Это будет под заголовком «Внешний вид».
- Отсюда вы можете изменить размер шрифта с помощью двух ползунков.
Интересные материалы:
Как узнать, является ли изображение векторным?
Как узнать, является ли мой DNS TLS?
Как узнать, является ли мой контроллер домена основным или дополнительным?
Как узнать, является ли мой сервер виртуальной машиной Hyper-V?
Как узнать, является ли мой USB корневым концентратором?
Как узнать, является ли мой вентилятор приточным или вытяжным?
Как узнать, является ли мой Xbox 360 Jasper?
Как узнать, является ли пластик АБС-пластиком?
Как узнать, является ли сковорода индукционной?
Как узнать, является ли значение NaN?
В Microsoft Word для Mac включены десятки шрифтов, но по умолчанию используется только один шрифт. Этот шрифт выбирается автоматически при создании нового документа. В последних версиях Word для Mac этот шрифт Калибры , что соответствует MS Windows.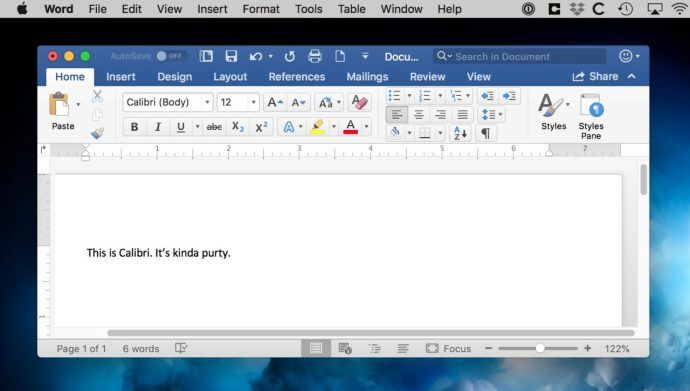
Теперь с Calibri все в порядке; это действительно прекрасный шрифт, но он может быть не для всех. Если вы предпочитаете использовать для документов другой шрифт по умолчанию, вы можете настроить Word для Mac, чтобы изменить его на любой другой установленный шрифт по вашему выбору. Вот как это сделать!

- Запустите Word для Mac и выберите Формат> Шрифт в строке меню вверху. В качестве альтернативы вы можете использовать сочетание клавиш Command-D.
- Появится новое окно шрифтов. Убедитесь, что вы на Шрифт и найдите раскрывающееся меню Шрифт рядом с верхней левой частью окна.
- Щелкните раскрывающийся список, чтобы открыть меню и выбрать новый шрифт по умолчанию, например Times New Roman. Вы также можете настроить стиль и размер шрифта по умолчанию.
- Чтобы сохранить настройки нового шрифта по умолчанию, нажмите кнопку «По умолчанию» в нижнем левом углу окна.
- Word попросит вас подтвердить, хотите ли вы, чтобы параметр применялся к текущему документу или ко всем документам, которые вы создаете. Установите переключатель рядом с Все документы на основе шаблона Обычный, затем нажмите ОК, чтобы сохранить новый шрифт по умолчанию.
- Подтвердите изменения, выйдя из документа и открыв новый — введите что-нибудь в новом файле, чтобы убедиться, что ваш новый шрифт по умолчанию работает.


Теперь все новые документы, которые вы создаете, будут начинаться с выбора шрифта, который вы сделали ранее. Конечно, это не изменит существующие файлы , а также не повлияет на созданные вами документы Word для Mac, созданные на основе шаблонов. .