
Word for Microsoft 365 Word for Microsoft 365 for Mac Word for the web Word 2021 Word 2021 for Mac Word 2019 Word 2019 for Mac Word 2016 Word 2016 for Mac Word 2013 Word 2010 Word for Mac 2011 More…Less
You can control the vertical space between the lines of text in your document by setting the line spacing. Or, you can change the vertical space between paragraphs in your document by setting the spacing before or spacing after paragraphs. You can also choose to keep lines of text together or keep paragraphs together on a page.
Change the line spacing in an entire document
-
Go to Design > Paragraph Spacing.
-
Choose an option. To single space your document, select No Paragraph Space.
To return to the original settings later, go to Design > Paragraph Spacing and choose the option under Style Set. This may be Default or the name of style you’re currently using.
Change the line spacing in a portion of the document
-
Select one or more paragraphs to update. Press Ctrl + A to select all.
-
Go to Home > Line and Paragraph Spacing

-
Select Line Spacing Options and choose an option in the Line spacing box.
-
Adjust the Before and After settings to change spacing between paragraphs.
-
Select OK.

For more info, see Adjust indents and spacing.
Change the line spacing in an entire document
-
Go to Design > Paragraph Spacing.
-
Choose the option you want. If you want to single space your document, choose No Paragraph Space.

This overrides the settings of the style you’re currently using. If you decide later to return to the original settings, go to Design > Paragraph Spacing and choose the option under Style Set. The option might be Default, as shown above, or it will show the name of style you’re currently using.
Change the line spacing in a portion of the document
-
Select the paragraphs you want to change.
-
Go to Home > Line and Paragraph Spacing.
-
Choose the number of line spaces you want or select Line Spacing Options, and then select the options you want under Spacing.
-
To change the spacing before or after each of the paragraphs in the text you selected, click the arrow next to Before or After and enter the amount of space that you want.
-
Select OK.

-
Select the paragraph whose lines you want to keep together.
-
Go to Format > Paragraph >Line and Page Breaks.
-
Select Keep lines together.
-
Select the first of the two paragraphs that you want to keep together.
Tip: If you want to keep more than two paragraphs together, select all but the last paragraph.
-
Go to Format > Paragraph.
-
Go to Line and Page Breaks.
-
Select Keep with next.
-
Select OK.
-
Select the paragraphs you want to change, or press Ctrl+A to select everything.
-
Go to Home > Line Spacing.
-
Choose the number of line spaces you want, or select Line Spacing Options and then select the options you want in the Paragraph dialog box under Spacing:
Tip: If you want to change the spacing before or after the selected paragraphs, select the arrows in the Before or After boxes, or type a number directly.
Need more help?
I’m trying to get a document on a single page.
There is too much whitespace between the lines.
I attempt to reduce it with:
[Select all text] -> Format -> Paragraph -> Indents & Spacing -> Line Spacing: Multiple -> At: 0.7
However this has no effect. Is this a bug? Is there any way to fix it? It seems inconceivable that there might be no solution.
- microsoft-word
- line-spacing
asked Feb 23, 2017 at 13:51
![]()
P iP i
1811 gold badge2 silver badges6 bronze badges
2
-
There is a function in word, which can reduce the number of pages. However it is not included in the ribbons. So you can go to «options», «change ribbons» and search for «reduce pages». (Sorry, I don’t know the correct english names, as I have a localized version.)
Feb 23, 2017 at 14:01
-
Decreasing line spacing below 1 means that lines overlap and part of the letters won’t be visible. You may try to decrease spacing above / below paragraphs and margins. and if that doesn’t help, then play around at character level: spacing, font size, font type.
Feb 23, 2017 at 14:16
Lesson 9: Line and Paragraph Spacing
/en/word/indents-and-tabs/content/
Introduction
As you design your document and make formatting decisions, you will need to consider line and paragraph spacing. You can increase spacing to improve readability and reduce it to fit more text on the page.
Optional: Download our practice document.
Watch the video below to learn how to adjust line and paragraph spacing in your document.
Line spacing
Line spacing is the space between each line in a paragraph. Word allows you to customize the line spacing to be single spaced (one line high), double spaced (two lines high), or any other amount you want. The default spacing in Word is 1.08 lines, which is slightly larger than single spaced.
In the images below, you can compare different types of line spacing. From left to right, these images show default line spacing, single spacing, and double spacing.

Line spacing is also known as leading (pronounced to rhyme with wedding).
To format line spacing:
- Select the text you want to format.

- On the Home tab, click the Line and Paragraph Spacing command, then select the desired line spacing.

- The line spacing will change in the document.


Adjusting line spacing
Your line spacing options aren’t limited to the ones in the Line and Paragraph Spacing menu. To adjust spacing with more precision, select Line Spacing Options from the menu to access the Paragraph dialog box. You’ll then have a few additional options you can use to customize spacing.
- Exactly: When you choose this option, the line spacing is measured in points, just like font size. For example, if you’re using 12-point text, you could use 15-point spacing.
- At least: Like the the Exactly option, this lets you choose how many points of spacing you want. However, if you have different sizes of text on the same line, the spacing will expand to fit the larger text.
- Multiple: This option lets you type the number of lines of spacing you want. For example, choosing Multiple and changing the spacing to 1.2 will make the text slightly more spread out than single-spaced text. If you want the lines to be closer together, you can choose a smaller value, like 0.9.


Paragraph spacing
Just as you can format spacing between lines in your document, you can adjust spacing before and after paragraphs. This is useful for separating paragraphs, headings, and subheadings.
To format paragraph spacing:
In our example, we’ll increase the space before each paragraph to separate them a bit more. This will make it a little easier to read.
- Select the paragraph or paragraphs you want to format.

- On the Home tab, click the Line and Paragraph Spacing command. Click Add Space Before Paragraph or Remove Space After Paragraph from the drop-down menu. In our example, we’ll select Add Space Before Paragraph.

- The paragraph spacing will change in the document.


From the drop-down menu, you can also select Line Spacing Options to open the Paragraph dialog box. From here, you can control how much space there is before and after the paragraph.

You can use Word’s convenient Set as Default feature to save all of the formatting changes you’ve made and automatically apply them to new documents. To learn how to do this, read our article on Changing Your Default Settings in Word.
Challenge!
- Open our practice document.
- Select the the date and the address block. This starts with April 13, 2016, and ends with Trenton, NJ 08601.
- Change the spacing before the paragraph to 12 pt and the spacing after the paragraph to 30 pt.
- Select the body of the letter. This starts with I am exceedingly and ends with your consideration.
- Change the line spacing to 1.15.
- When you’re finished, your page should look like this:


/en/word/lists/content/

There are several ways to adjust line spacing in Microsoft Word. Today’s tutorial explains the basic method using the ribbon and a more advanced method using the Paragraph dialog box.
See the Quick Tip at the bottom of this tutorial to learn how to single-space an entire document from the Paragraph dialog box.
This tutorial is available as a YouTube video showing all the steps in real time.
Watch more than 150 other document software tutorials on my YouTube channel.
The images below are from Word for Microsoft 365.The steps are the same in Word 2021, Word 2019, and Word 2016, and similar for Word 2013 and Word 2010. However, your interface may look slightly different in those older versions of the software.
Basic Method: Adjust Line Spacing from the Ribbon
- Select the Home tab in the ribbon.

- (Optional Step) Select the Show/Hide button in the Paragraph group to show paragraph break symbols and other formatting that may affect line spacing.

- Select the text with the line spacing that needs to be changed.

- Select the Line and Paragraph Spacing button in the Paragraph group.

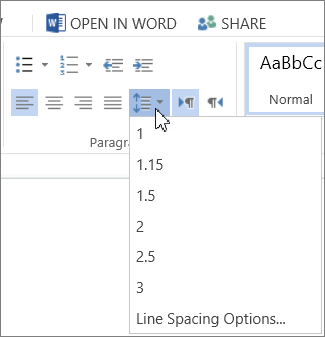
- Select an option from the drop-down menu:
A. Numbers 1.0 through 3.0 add space between lines.
B. Add Space Before Paragraph adds space before paragraphs but not before the lines within them.
C. Remove Space After Paragraph removes space after paragraphs but not after the lines within them.
These three options are based on your current font size with 1.0 being the equivalent of single-spacing.

Your changes will be applied immediately.

Note that you can apply the individual line spacing (the numbers 1.0 through 3.0) and the paragraph spacing to the same text to further customize your results.
- (Optional Step) Select the Show/Hide button again to hide paragraph symbols and other formatting (see figure 2).
Now, let’s move on to an advanced method offering additional spacing options.
Advanced Method: Adjust Line Spacing from the Paragraph Dialog Box
- Select the Home tab in the ribbon (see figure 1).
- (Optional Step) Select the Show/Hide button in the Paragraph group to show paragraph break symbols and other formatting that may affect line spacing (see figure 2).
- Select the text with the line spacing that needs to be changed (see figure 3).
Pro Tip: PC users can press Ctrl + A to select the entire document if all the line spacing needs to be changed. However, this includes items you may not want to alter, including headings, tables, table titles, figure captions, tables of contents, footnotes, endnotes, and reference lists.
- Select the dialog box launcher in the Paragraph group.

- Make changes in the Spacing section of the Paragraph dialog box:
A. The Before and After boxes represent the spaces before and after paragraphs measured in points with one point being 1/72 of an inch tall. Use the increment arrows to choose a whole number or enter a number with a decimal (e.g., 2.75) directly into the box.
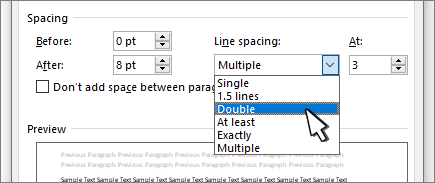
B. The Line spacing drop-down menu offers six options:
1. Single—Creates single-spacing based on your current font size.
2. 1.5 Lines—Creates a space and a half as large as your current font size.
3. Double—Creates double-spacing based on your current font size.
4. At Least—Determines the minimum amount of space between lines based on the number of points entered in the At box.
5. Exactly—Creates space between lines based on the number of points entered in the At box.
6. Multiple—Creates spacing multiplied by the number entered in the At box. For example, if you enter four in the At box, your spacing will be four times as large as your current single-spacing.
C. Don’t add space between paragraphs of the same style—For many users, this will remove spaces between all paragraphs because general documents commonly have only one paragraph style.

Note that the Preview box updates as you make adjustments in the Spacing section.
- Select the OK button to close the Paragraph dialog box.

- (Optional Step) Select the Show/Hide button again to hide paragraph symbols and other formatting (see figure 2).
Quick Tip: Single-Space an Entire Document from the Paragraph Dialog Box
- Select the Home tab in the ribbon (see figure 1).
- Select the entire document. (PC users can press Ctrl + A.)
- Select the dialog box launcher in the Paragraph group (see figure 7).
- Enter 0 in the Before box in the Paragraph dialog box (see figure 8).
- Enter 0 in the After box in the Paragraph dialog box (see figure 8).
- Select Single in the Line spacing drop-down menu (see figure 8).
- Select the OK button (see figure 9).
Related Resources
How to Adjust Letter Spacing in Microsoft Word (PC & Mac)
How to Adjust the Space between Words in Microsoft Word
How to Adjust Page Margins in Microsoft Word
Updated June 25, 2022
Change the line spacing in a portion of the document
- Select one or more paragraphs to update.
- Go to Home > Line and Paragraph Spacing.
- Select Line Spacing Options and choose an option in the Line spacing box.
- Adjust the Before and After settings to change spacing between paragraphs.
- Select OK.
Contents
- 1 How do you do 1.5 line spacing in Word?
- 2 How do I change line spacing to 1.0 in Word?
- 3 How do I change the spacing between lines in Word 2010?
- 4 What is 1.5 spacing word?
- 5 How do I change line spacing in Word 2016?
- 6 How do you change line spacing in Word 2007?
- 7 Is 1.0 single spacing?
- 8 What is a line spacing in Word?
- 9 How do you change line spacing in docs?
- 10 Which line spacing is invalid?
- 11 How do I change the spacing between lines in Word 2013?
- 12 How do I make the space between paragraphs smaller in Word?
- 13 How do I change the spacing in Word for Mac?
- 14 How do I change the line spacing in Word 2008?
- 15 How do I change the line spacing in Word 2003?
- 16 What is line spacing in MS Word 2007?
- 17 Why is line spacing not working in Word?
- 18 How do I change line spacing to 1.2 in Word?
- 19 What is the shortcut key for 1.5 line spacing?
- 20 Why is my Line spacing off in docs?
How do you do 1.5 line spacing in Word?
To format line spacing:
- Click Format on the menu bar.
- Select Paragraph. The Paragraph dialog box appears.
- Click the Indents and Spacing tab.
- In the line spacing drop-down menu, you can select single, 1.5, or double spacing. The default is single spacing.
- Click OK.
How do I change line spacing to 1.0 in Word?
Choose 1.0
- Select the paragraphs you want to change.
- Go to Home > Line and Paragraph Spacing .
- Choose 1.0.
How do I change the spacing between lines in Word 2010?
To format line spacing:
- Select the text you want to format.
- Click the Line and Paragraph Spacing command in the Paragraph group on the Home tab.
- Select the desired spacing option from the drop-down menu.
- From the drop-down menu, you can also select Line Spacing Options to open the Paragraph dialog box.
What is 1.5 spacing word?
Press Ctrl+1 for single-spacing, Ctrl+5 for 1.5 spacing, or Ctrl+2 for double-spacing. Click to view larger image.
How do I change line spacing in Word 2016?
Go to Home > Line and Paragraph Spacing. Select Line Spacing Options, and then choose the options you want under Spacing. To change the spacing before or after the selected paragraphs, select the arrow next to Before or After and enter the amount of space that you want. Select Set as Default.
How do you change line spacing in Word 2007?
Select the text you want to format. Click the Line spacing command in the Paragraph group on the Home tab. Select a spacing option.
The Paragraph dialog box appears.
- Use the Line spacing drop-down menu to select a spacing option.
- Modify the before and after points to adjust line spacing as needed.
- Click OK.
Is 1.0 single spacing?
Line spacing is the distance between lines. In earlier versions of Word, the default line spacing distance is “1.0,” or single-spacing, which stacks lines closely together with minimal space between. The amount of that space varies depending on the font used.
What is a line spacing in Word?
Line spacing is the distance between lines of text.To change the line spacing, select the lines you want to change. Then go to the Home tab and find the line spacing button in the Paragraph section.
How do you change line spacing in docs?
Change line & paragraph spacing
- On your computer, open a document in Google Docs.
- Select the lines you want to change.
- Click Format. Line & paragraph spacing.
- Select a line spacing option: To change your paragraph spacing, click Single, 1.15, 1.5, or Double.
Which line spacing is invalid?
The correct answer is Triple. Line spacing feature in MS word or any other word processing tool gives us the flexibility to adjust the space between two lines of text. To set the line spacing, we need to select the lines of text and go to the spacing option on the ribbon.
How do I change the spacing between lines in Word 2013?
To format line spacing:
- Select the text you want to format. Selecting text to format.
- On the Home tab, click the Line and Paragraph Spacing command. A drop-down menu will appear.
- Move the mouse over the various options.
- The line spacing will change in the document.
How do I make the space between paragraphs smaller in Word?
Change spacing between paragraphs
- Click anywhere in the paragraph you want to change.
- Go to Layout, and under Spacing, click the up or down arrows to adjust the distance before or after the paragraph. You can also type a number directly.
How do I change the spacing in Word for Mac?
Change the line spacing in Word for Mac
- Click Design > Paragraph Spacing.
- Click the option you want. If you want to single space your document, choose No Paragraph Space.
How do I change the line spacing in Word 2008?
Word 2011 and 2008
- Select the document text for which you want to change the line spacing.
- From the Format menu, select Paragraph…. The Paragraph dialog box will open.
- Select the Indents and Spacing tab.
- Click OK to apply your changes.
How do I change the line spacing in Word 2003?
Adjusting Line Spacing
- Place the insertion point in the desired paragraph.
- From the Format menu, select Paragraph… The Paragraph dialog box appears.
- Select the Indents and Spacing tab.
- In the Spacing section, from the Line spacing pull-down list, select the desired spacing option.
- Click OK.
What is line spacing in MS Word 2007?
By Dan Gookin. Word 2007 enables you to change the line spacing within your paragraphs using the Line Spacing command. Changing the line spacing inserts extra space between all lines of text in a paragraph. Word adds the space, or extra blank lines, below each line of text in the paragraph.
Why is line spacing not working in Word?
A couple of things to check: For the style in question, look at the paragraph formatting and make sure that “Don’t add space between paragraphs of the same style” is not checked. At Tools | Options | Compatibility, make sure that “Don’t use HTML paragraph auto spacing” is checked.
How do I change line spacing to 1.2 in Word?
Change the line spacing in a portion of the document
- Select one or more paragraphs to update.
- Go to Home > Line and Paragraph Spacing.
- Select Line Spacing Options and choose an option in the Line spacing box.
- Adjust the Before and After settings to change spacing between paragraphs.
- Select OK.
What is the shortcut key for 1.5 line spacing?
Ctrl+5
Pressing Ctrl+5 changes to 1.5 line spacing.
Why is my Line spacing off in docs?
You will need to change that on the computer/desktop app (not the mobile app). When you’re on a computer, drag your cursor through the problem lines or press Ctrl + A to select your entire document. Then go to the line-spacing tool in the action bar and select Add/remove space before paragraph.
Microsoft 365, Microsoft Office for Mac, Microsoft Word, Office 2000, Office 2003, Office 2007, Office 2010, Office 2013, Office 2016, Office 2019, Office 2021 / Office LTSC, Office 365 /
1 October 2021
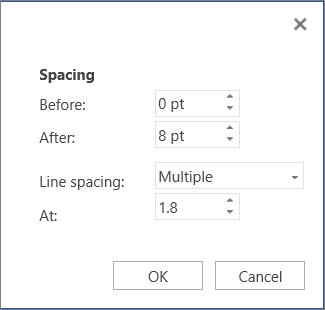
There’s a simple Microsoft Word trick that lets you shrink the vertical space between lines. Specifically reducing to below single line spacing.
To set less than 1 line space go to Paragraph | Line Spacing and choose ‘Multiple’ – yes ‘Multiple’. Sounds screwy but it works.
Set the Multiple line spacing value to less than one eg 0.7
Try out various line spacing fractions until you get what you need.
There’s a catch. Reduce the line spacing too much and the letters will be cut off. Here’s an example with 0.5 line spacing.

We usually settle for something in the 0.7 to 0.8 range to get the lines close together without clipping.
Six Word tricks to reduce space between lines
Law & Order title card in PowerPoint and Word
Sentence spacing in Word
Kerning fonts and why it matters in Word and Powerpoint
Во время набора текста или при оформлении документа наряду с размером и типом шрифта важную роль играет межстрочный интервал в Ворде. От этого зависит удобочитаемость текста, междустрочный интервал относится к параметрам форматирования в Microsoft Word.
Расстояние между двумя строками, известное как междустрочный интервал в Ворде, влияет на визуальное восприятие текстовой информации. Например, если расстояние слишком маленькое, то такой текст будет затруднительно читать, а при большем интервале текст выглядит рассеянным, что также не способствует комфортному чтению.
Содержание:
- Как сделать межстрочный интервал в Ворде — 1 способ
- Как сделать междустрочный интервал в Word — 2 способ
- Как настроить междустрочный интервал в документе Microsoft Word — 3 способ
- Как изменить межстрочный интервал в Word — 4 способ
- Выводы статьи
- Как изменить межстрочный интервал в Word (видео)
Междустрочный интервал определяет расстояние между строками в тексте документа Word. Интервал между строк текста впрямую зависит от размера используемого шрифта. Расстояние учитывается между базовыми линиями каждой строки, проходящими строго по центру букв (с учетом верхних и нижних их элементов).
Во многих случаях при наборе текста используется одинарный междустрочный интервал, который равен размеру шрифта текста. Часто используется и полуторный междустрочный интервал, который применяется при оформлении рефератов, курсовых и дипломов.
Наряду с другими вариантами, для увеличения пространства между стоками текста применяют двойной интервал. Благодаря этому удваивается пространство между строками документа, потому что вы добавляете полную строку пробела между каждой строкой текста.

Какой межстрочный интервал выбрать зависит от решаемых задач и предъявляемых требований к оформлению документа Word.
В этом руководстве вы найдете инструкции о том, как сделать междустрочный интервал в Ворде, и как настроить межстрочный интервал, используя пользовательские параметры.
Как сделать межстрочный интервал в Ворде — 1 способ
Вы можете быстро увеличить межстрочный интервал Word с помощью встроенных параметров текстового редактора. Этот способ можно применить в версиях программы MS Word 2021, MS Word 2019, MS Word 2016, MS Word 2013.
Пройдите последовательные шаги:
- Откройте документ Word.
- Войдите во вкладку «Конструктор» («Дизайн»).
- В группе «Форматирование документа» найдите и щелкните по кнопке «Интервал между абзацами».

- В выпадающем меню предлагаются следующие варианты:
- По умолчанию — междустрочный интервал «1,08».
- Отсутствует — междустрочный интервал «1».
- Сжатый — междустрочный интервал «1».
- Узкий — междустрочный интервал «1,15».
- Неплотный — междустрочный интервал «1,15».
- Свободный — междустрочный интервал «1,5».
- Двойной — междустрочный интервал «2».

Перемещая курсор мыши между этими пунктами, вы можете визуально наблюдать за изменениями интервалов между строками текста.
- Выберите один из подходящих вариантов. При выборе любого из предложенных параметров изменения применяются ко всему документу Word.

Вы можете создать свой собственный стиль междустрочного интервала. Для этого выберите пункт «Пользовательский интервал между абзацами…».
В окне «Управление стилями», после открытия вкладки «По умолчанию» настраивается изменение междустрочного интервала. Укажите подходящие значения в группе «Интервал». В параметрах стилей, помимо интервала между строками абзаца, имеется возможность изменить интервал до или после абзаца.

Как сделать междустрочный интервал в Word — 2 способ
В случае необходимости, вы можете задать пользовательский размер междустрочного интервала в документе Word.
Чтобы изменить междустрочный интервал Word, выполните следующие действия:
- В окне открытого документа Word выделите нужные абзацы. Если вам необходимо применить изменения ко всему тексту, нажмите на клавиши «Ctrl» + «A» для его выделения.
- Щелкните правой кнопкой мыши по выделенному фрагменту.
- В контекстном меню выберите пункт «Абзац».

- В окне «Абзац» на вкладке «Отступы и интервалы» находятся параметры междустрочного интервала. В группе «Интервал» в графе «междустрочный:» выберите нужный интервал:
- Множитель — самостоятельная установка межстрочного интервала. Если вы не вносили изменений, в настройках отображается значение по умолчанию.
В версиях Word 2021-2013 по умолчанию используется интервал в 1,08 строки, что немного больше, чем при одинарном интервале. В версиях Word 2010-2007 по умолчанию используется значение «1,15».
- Одинарный — размер интервала равен размеру текущего шрифта текста абзаца.
- 1,5 строки — интервал равен полуторному размеру шрифта текста абзаца.
- Двойной — интервал равен двойному размеру шрифта текста абзаца.
- Минимум — интервал не меньше заданного в пунктах настроек размера.
- Точно — интервал точно соответствует заданному в пунктах размеру.

- Нажмите на кнопку «ОК», чтобы изменения вступили в силу.
Интервалы «Одинарный», «1,5 строки» и «Двойной» зависят от высоты текущего шрифта. Если вы увеличите размер шрифта, то соответственно пропорционально увеличится и размер интервала между строками абзаца.
В интервалах «Минимум» и «Точно» устанавливается точное значение междустрочного интервала в «пунктах» (типографских пунктах). В случае увеличения или уменьшения высоты шрифта, межстрочный интервал не изменяется.

Как настроить междустрочный интервал в документе Microsoft Word — 3 способ
Ознакомьтесь с другим способом установить интервал между строками абзаца самостоятельно, выбрав подходящий вариант.
Проделайте следующее:
- В открытом документе Word переходим во вкладку «Главная».
- Выделяем нужные абзацы.
- В группе «Абзац» щелкаем по кнопке «Интервал» («Междустрочный интервал»).

- В открывшемся меню выбираем необходимый межстрочный интервал абзаца:
- 1,0;
- 1,15;
- 1,5;
- 2,0;
- 2,5;
- 3,0;
Здесь есть возможности для добавления интервала перед и после абзаца или можно выбрать другие варианты междустрочных интервалов. Затем вы можете применить выбранные настройки к текущему документу или к новым документам, использующим текущий шаблону.
Как изменить межстрочный интервал в Word — 4 способ
Существует простой способ для изменения интервалов между строк при редактировании документа MS Word. Этим методом вы можете задать одинарный (междустрочный интервал 1), полуторный (межстрочный интервал 1,5), и двойной (межстрочный интервал 2).
Чтобы изменить межстрочный интервал в тексте, выполните действия:
- В открытом окне текстового редактора Word установите указатель мыши в нужный абзац текста.
- Используйте следующие сочетания клавиш клавиатуры, чтобы задать необходимые параметры:
- «Ctrl» + «1» — одинарный интервал;
- «Ctrl» + «5» — полуторный интервал;
- «Ctrl» + «2» — двойной интервал.
Выводы статьи
Высота и тип шрифта, а также междустрочный интервал играют важную роль для визуального восприятия текста в документе Word. Интервал можно изменить, увеличивая или уменьшая расстояние между строками текста. В случае необходимости, пользователь может применить готовые параметры междустрочных интервалов в Word или самостоятельно настроить межстрочный интервал абзаца во время оформления документа.
Как изменить межстрочный интервал в Word (видео)
Похожие публикации:
- Режим чтения Word: как включить или как убрать
- Как объединить документы Ворд в один файл
- Как сделать обтекание текстом в Word — 3 способа
- Как сохранить картинки из Word
- Как убрать красные подчеркивания в Word — 3 способа
Asked by: Francesca Schmitt
Score: 4.7/5
(28 votes)
Single-space part of a document
- Select the paragraphs you want to change.
- Go to Home > Line and Paragraph Spacing .
- Choose 1.0.
How do I set single line spacing in Word 2016?
Setting the line spacing
- Click the Home tab.
- In the Paragraph group, click the Line Spacing command button. A menu appears.
- Choose a new line spacing value. The line spacing is set for the current paragraph or all selected paragraphs. Word adds the extra space below each line of text.
Is 1.5 single spacing in Word?
In the Paragraph dialog box, select one of the options from the dropdown menu under “Line spacing.” You can select single-, 1.5-, or double-spacing, or you can select “Multiple” and set your own custom line spacing. To apply your selected line spacing, select “OK.”
What is 1.5 spacing Word?
The lines in all Word documents are single-spaced by default, which is appropriate for letters and most documents. But you can easily change your document line spacing to double or 1.5 lines to allow extra space between every line. This is useful when you want to make notes on a printed document.
What is the shortcut key for 1.5 line spacing?
Pressing Ctrl+5 changes to 1.5 line spacing.
24 related questions found
What is single line spacing in Word 2010?
Word sets line spacing at 1.15 as its standard, or default. Supposedly, that extra . 15 lines of text makes text more readable than using single spacing, or 1.0. In double spacing, or the line spacing value 2.0, one line of text appears with one blank line below it.
What is the default line spacing?
The default line spacing in Word is 1.15. By default, paragraphs are followed by a blank line and headings have a space above them. , and then choose Line Spacing Options.
What is a line spacing in Word?
Line spacing is the distance between lines of text. Loose line spacing can make text much more readable, while tight line spacing can fit more text in a space. To change the line spacing, select the lines you want to change. Then go to the Home tab and find the line spacing button in the Paragraph section.
What are the 4 alignment options?
There are four main alignments: left, right, center, and justified.
What are the types of line spacing?
Generally, you can choose between four types of line spacing in Word: single spacing; 1.5 times spacing; double spacing or a custom amount, in which the numbers refer to the size of the space, relative to the size of a line.
How do I remove space between lines in Word?
Click or tap anywhere in the paragraph you want to change, or press Ctrl+A to select all text. Click Home > Line Spacing. Select the line spacing you want. If you want more exact spacing, select Line Spacing Options.
How do I change 1.5 line spacing in Word?
To format line spacing:
- Click Format on the menu bar.
- Select Paragraph. The Paragraph dialog box appears.
- Click the Indents and Spacing tab.
- In the line spacing drop-down menu, you can select single, 1.5, or double spacing. The default is single spacing.
- Click OK.
What is the difference between line spacing and paragraph spacing?
Line spacing determines the amount of vertical space between lines of text in a paragraph. … Paragraph spacing determines the amount of space above or below a paragraph.
How do I change the spacing between lines in Word 2013?
To format line spacing:
- Select the text you want to format. Selecting text to format.
- On the Home tab, click the Line and Paragraph Spacing command. A drop-down menu will appear.
- Move the mouse over the various options. …
- The line spacing will change in the document.
Why is line spacing not working in Word?
Under the “Indents and Spacing” tab, deselect “Don’t add space to paragraphs of the same style”. … If this does not work, check the options within the “Lines ans Page Break” tab in the “Paragraph” window, and deselect unnecessary options.
How do I adjust line spacing in Word 2010?
Click the Line and Paragraph Spacing command in the Paragraph group on the Home tab. Select the desired spacing option from the drop-down menu. From the drop-down menu, you can also select Line Spacing Options to open the Paragraph dialog box. From here, you can adjust the line spacing with even more precision.
How do you change to single space in Microsoft Word 2010?
How to type (create,Change TO) single spacing word 2010? Select the double spaced text, then in the “Paragraph” section click on the “Line & Paragraph Spacing” button drop down arrow and choose 1.0 spacing. Also “Ctrl key + 1 will also change the spacing from double to single.
How do I set line spacing?
Change the line spacing in a portion of the document
- Select one or more paragraphs to update. …
- Go to Home > Line and Paragraph Spacing.
- Select Line Spacing Options and choose an option in the Line spacing box.
- Adjust the Before and After settings to change spacing between paragraphs.
- Select OK.
What is a 1 inch margin in CM?
Note: Be careful, 1 cm = 0.3937 inch and 1 inch = 2.54 cm. By default, Word uses 1-inch margins and 2.5 cm.
How do I remove the space between lines in Word 2007?
Select the text you want to format. Click the Line spacing command in the Paragraph group on the Home tab.
…
The Paragraph dialog box appears.
- Use the Line spacing drop-down menu to select a spacing option.
- Modify the before and after points to adjust line spacing as needed.
- Click OK.
Why is my spacing off in Word?
Select the text that you want to change. On the Home tab, click the Font Dialog Box Launcher, and then click the Advanced tab. Note: If you’re using Word 2007 the tab is called Character Spacing. In the Spacing box, click Expanded or Condensed, and then specify how much space you want in the By box.
How do you remove space between lines in Word 2016?
Set your cursor to the location of the paragraph spacing. Click on the Line and Paragraph Spacing icon in the Home Ribbon. Select «Remove Extra Space» to remove the extra space. This has to be done in each document unless you adjust your default settings.
How much is single line spacing?
Line spacing is the space between each line in a paragraph. Word allows you to customize the line spacing to be single spaced (one line high), double spaced (two lines high), or any other amount you want. The default spacing in Word is 1.08 lines, which is slightly larger than single spaced.
What is double line spacing?
In text formatting, a double space means sentences contain a full blank line (the equivalent of the full height of a line of text) between the rows of words. … For example, when a teacher wants an essay double spaced, you’ll need to adjust your spacing settings, so the text in the essay is double spaced.
Is line spacing 2.0 the same as double spacing?
A 2.0 value will mean double spacing. Remember that the double spacing will take place from whatever part in the text your cursor is positioned.
In Microsoft Word, line spacing defines the space above and below lines and between letters. If the distance between the lines is too small, the text becomes difficult to read. On the other hand, if you space your lines too far apart, you run the risk of wasting space. Along with the font size, line spacing is the most important way of controlling the amount of space that your text takes up. You can change the line spacing in Word with just a few clicks. Thanks to this option, you can quickly turn two pages into one or improve the flow of your document.
Contents
- Quick guide: How to change line spacing in Word
- Making precise adjustments to the spacing in Word
Word has a handy feature that allows you to change the line spacing. To do this, select the text you want to adjust and go to the Line and paragraph spacing button on the “Home” tab. In Word, line spacing is measured in multiples of 1. You can click to set the line spacing to the default value of 1.0, or you can enlarge it to 3.0.

Making precise adjustments to the spacing in Word
The default options that Word provides under the “Line and paragraph spacing” button are adequate for most situations. Sometimes, however, you’ll need to make more precise adjustments. To do this, click “Line Spacing Options…” A new box will appear. Along with indentation settings (the horizontal alignment of the text), you can also make fine adjustments to the line spacing: To do this, select the “Exactly” option from the drop-down menu. Now use the font size (pt) as the unit of measurement. This allows you to specify the spacing very precisely in relation to the font size.

Note
The changes you make always apply to selected paragraphs. Therefore, start by selecting the paragraph for which you want to change the line spacing. If no paragraph is selected, Word automatically selects the paragraph on which your cursor is placed.
Word also has a special feature for changing the spacing between paragraphs. To improve the appearance and clarity of the text, the line spacing after the last line of a paragraph should be larger than the spacing within the paragraph. This keeps the paragraph together from a purely visual standpoint. In Word, you can insert the spacing either before or after the paragraph—or both.
Once again, you can do this under “Line and paragraph spacing” in Word on the “Home” tab, where you have the option of inserting (and removing) additional spacing or using the “Line spacing options…” Then enter a font size to set the distance between paragraphs.
If you switch to the second tab in the options dialog box (“Line and Page Breaks”), you have additional pagination options:
- Widow/orphan control: This function prevents a single line of a paragraph from appearing at the top or bottom of a page.
- Keep with next: If you select this option, Word treats this paragraph and the next one as a single unit.
- Keep lines together: This function ensures that the paragraph is not split between two pages and always appears as a complete unit on the next page.
- Page break before: This function inserts a page break before the paragraph, meaning the paragraph is always at the top of the page.

Tip
If you’ve configured settings for a paragraph and want to apply them to other paragraphs, you can use the Format Painter on the “Home” tab.

How to recover unsaved Word documents
If either Word or your PC crashes while working on a Word document, don’t panic! Recovering unsaved Word documents is easy to do; even damaged or deleted files are not always lost. Microsoft has numerous tools built into its popular text program which allow you to retrieve the edited or in-progress file. And if these tools don’t work, Windows and special repair and recovery tools offer plenty of…
How to recover unsaved Word documents

How to create a table of contents in Word
Microsoft Word makes it easy to create smart text documents with its diverse template styles. This includes pre-formatted table of contents templates. With our illustrated, step-by-step guide, we’ll show you how to find the templates and how to customize the design.
How to create a table of contents in Word

Activate and adjust hyphenation in Word
Hyphenation in Word is a handy tool that is often used to create a more legible document. This feature avoids excessive line breaks and large spaces that sometimes occur in Word documents. We’ll show you how to activate and customize automatic hyphenation in Word.
Activate and adjust hyphenation in Word
How to create a bibliography in Word
Anyone writing a paper for college or school will need to use citations—and they shouldn’t forget the bibliography either. In principle, creating a bibliography in Microsoft Word is not too difficult. If you make a database with all your references, you’ll only need a few clicks to generate references and a bibliography.
How to create a bibliography in Word

Install fonts in Windows 10
Finding and installing new fonts is easy! Learn where to find new fonts, what to look for, and how to add new fonts in Windows 10. Use the option to install fonts in the system to add fonts to applications like PowerPoint or Word to enhance the design of your texts and presentations.
Install fonts in Windows 10
Line Spacing refers to the amount of space between any two lines in the Word Document. The default size of Line Spacing is 1.08 in MS Word. However, we can add custom line spaces to different lines, paragraphs in our Word Document according to our requirements and ensure quite good readability of our content to others.
In MS Word there are multiple ways to adjust Line Spacing which are as follows:
Method 1: Using the Line Spacing button
One way of setting the Line Spacing is using directly the Line and Paragraph Spacing feature in MS Word, which comes under the Home menu.
There are multiple Line Spaces like: 1.0, 1.15, 1.5, 2.0, 2.5, 3.0, etc.
Steps to Apply:
Step 1: Select the text/line/Paragraph you want to change the spacing.

Step 2: Now, select the Line and Paragraph Spacing tab from the Paragraph menu under the Home tab and select the line spacing of your choice.
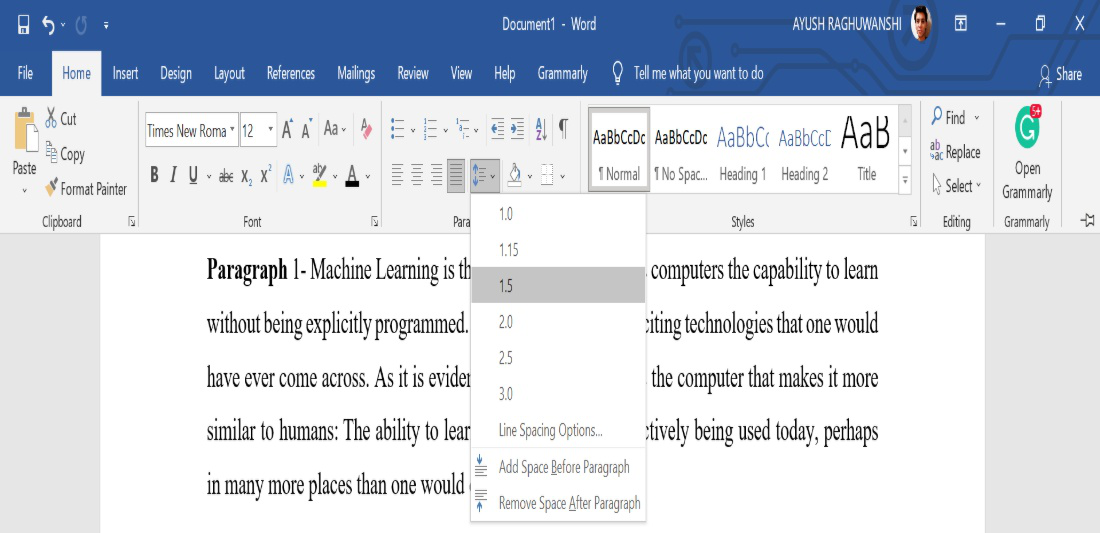
Perform the same steps for different line spacing:
- Select the text/line/Paragraph you want to change the spacing.

- Now, select the Line and Paragraph Spacing tab from the Paragraph menu under the Home tab and select the line spacing of your choice.
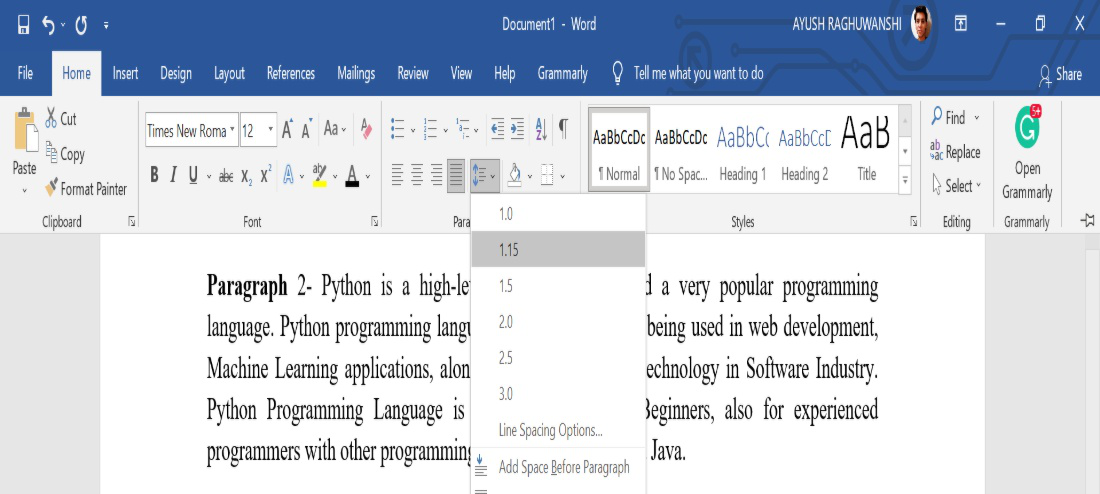
- Select the text/line/Paragraph you want to change the spacing.

- Now, select the Line and Paragraph Spacing tab from the Paragraph menu under the Home tab and select the line spacing of your choice.

Results:
Final Result of the Complete Word Document.

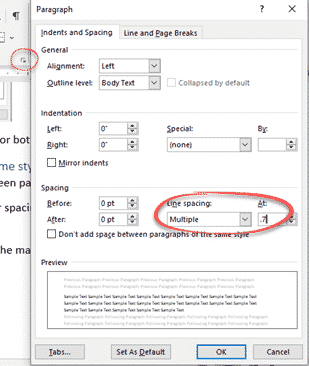
Method 2: Using Paragraph Dialog Box
Another way of setting the Line Spaces is using the Paragraph dialog box feature in MS Word. The Paragraph dialog box provides a wide variety of features along with Line Spacing that we can use in our Word Document to modify beautifully and accurately.
There are multiple Line Spaces in the Paragraph dialog box like- Single, 1.5 lines, Double, At least, Exactly, Multiple, etc,
Steps to Apply:
Step 1: Select the text/line/Paragraph you want to change the spacing.

Step 2: Now, select the Show/Hide Paragraph tab from the Paragraph menu under the Home tab.

Step 3: Now, Select the dialog box launcher-Paragraph Setting from the Paragraph menu under the Home tab.
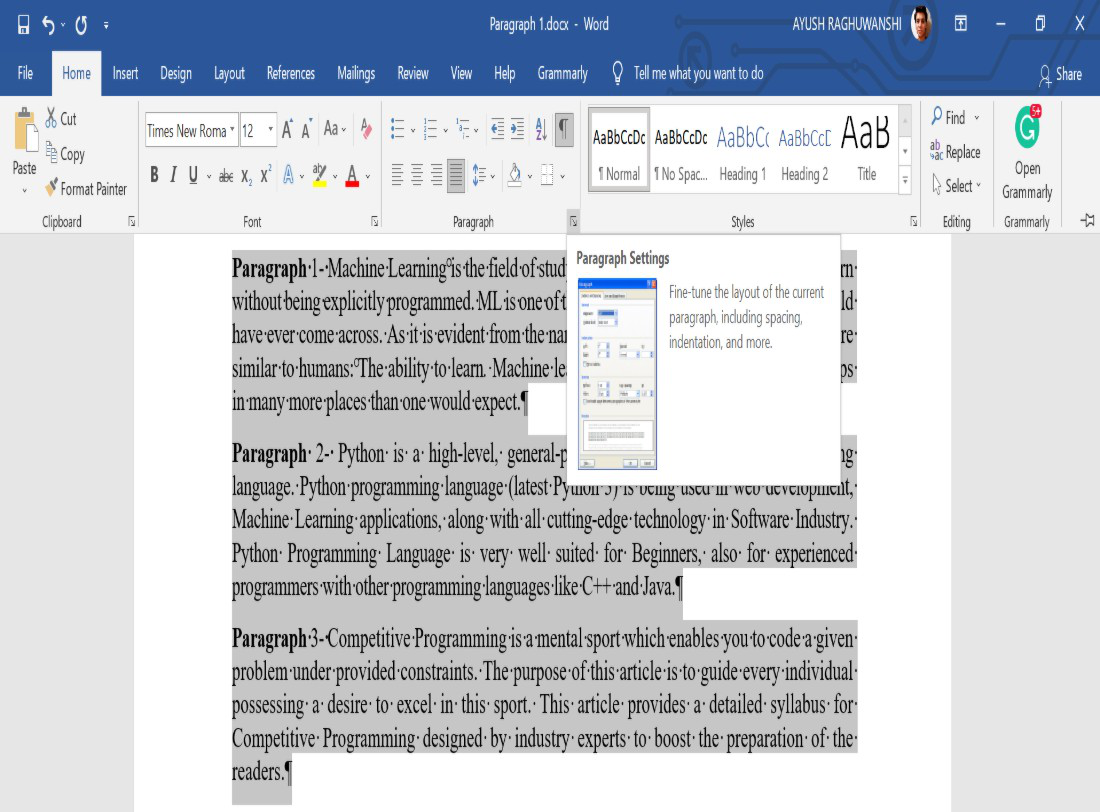
Step 4: Then select the Line Spacing from the dialog box under the Indents and Spacing tab- Single, 1.5 lines, Double, At least, Exactly, Multiple, etc, and then press the OK button.

Result:
As the whole Document was selected initially, so the Complete Word Document’s line spacing is changed to 1.5 lines.
