
Word for Microsoft 365 Word 2021 Word 2019 Word 2016 Word 2013 Word 2010 Word 2007 More…Less
You can often improve the look of your document by keeping certain words and paragraphs together on the page or across page breaks. Also, you can use hyphenation to improve overall readability.
Word automatically breaks the text at a space or a hyphen at the end of a line. To keep two words or a hyphenated word together on one line, you can use a nonbreaking space or nonbreaking hyphen instead of a regular space or hyphen.
-
Click where you want to insert the nonbreaking space.
-
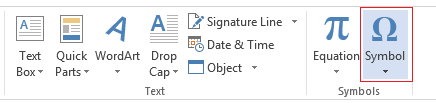
On the Insert tab, in the Symbols group, click Symbol.

-
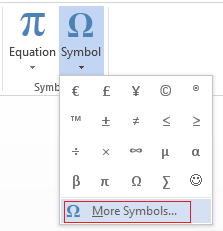
In the box that opens, click More Symbols.
-
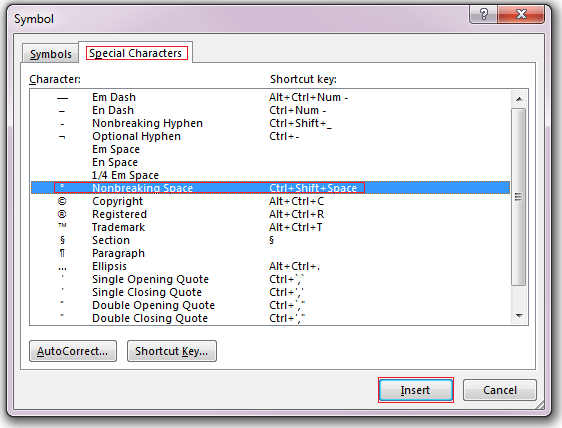
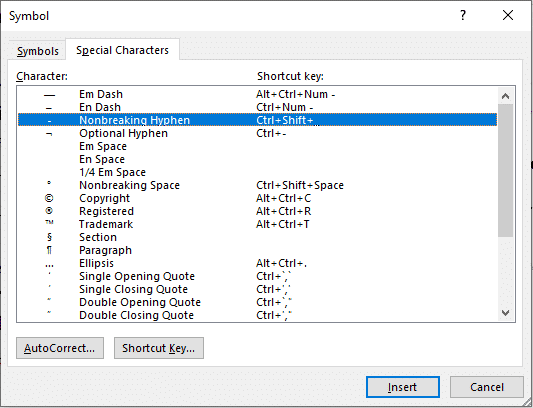
In the Symbol dialog box, on the Special Characters tab, click the Nonbreaking Space row to highlight it, and then click Insert.
-
Click Close.
Tip: You can also use the keyboard shortcut. Click where you want to insert the nonbreaking space, and press Ctrl+Shift+Spacebar.
Sometimes you want a hyphenated word to stay together on one line, without it breaking across lines.
-
Click where you want to insert the nonbreaking hyphen.
-
On the Insert tab, in the Symbols group, click Symbol.
-
In the box that opens, click More Symbols.
-
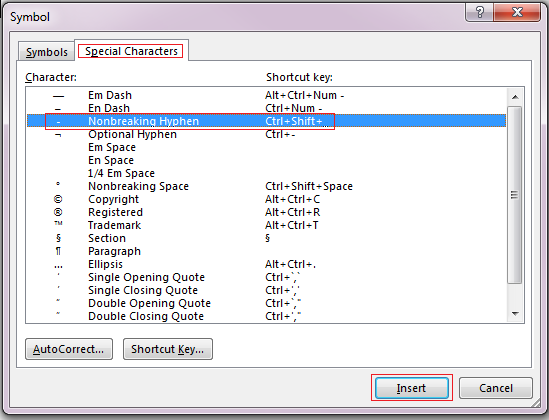
In the Symbol dialog box, on the Special Characters tab, click the Nonbreaking Hyphen row to highlight it, and then click Insert.
-
Click Close.
Tip: You can also use the keyboard shortcut. Click where you want to insert the nonbreaking hyphen, and press Ctrl+Shift+Minus Sign.
Word automatically breaks paragraphs at the end of a page, so a paragraph that started on one page continues on to the next page. To keep the whole paragraph on the same page, follow these steps.
-
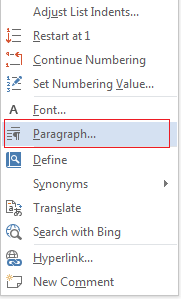
Right-click the paragraph that you want to keep together. In the box that opens, select Paragraph.
-
In the Paragraph dialog box, click the Line and Page Breaks tab.
-
In the Pagination section, select the Keep lines together check box, and click OK.
If two consecutive paragraphs or a subhead and a paragraph are closely related, you might want to keep them on the same page.
-
Right-click the paragraph or subhead that you want to keep with the content that follows it. In the box that opens, select Paragraph.
-
In the Paragraph dialog box, click the Line and Page Breaks tab.
-
In the Pagination section, select the Keep with next check box, and click OK.
Tip: It’s best not to add additional line breaks between your paragraphs because Word interprets each line break as a beginning of a new paragraph, and page breaks might not occur properly. If you want spaces between paragraphs, use the Paragraph Spacing controls. For more information, see Change spacing between paragraphs.
If a paragraph has a page break in the middle so that only the last line appears at the top of the following page, this lonely line is called a “widow.” If, on the other hand, a paragraph has a page break in the middle so that only the first line appears at the bottom of a page while the rest of the paragraph appears on the next page, this lonely line is called an “orphan.”
If you want to avoid widow and orphan lines in your document, follow these steps.
-
Right-click the paragraph in which you want to avoid widows and orphans. In the box that opens, select Paragraph.
-
Click the Line and page breaks tab.
-
In the Pagination section, select the Widow/Orphan control check box.
-
Click OK.
If a word is too long to fit at the end of a line, Microsoft Office Word 2007 moves the word to the beginning of the next line instead of hyphenating it. However, you can use the Hyphenation feature to automatically or manually hyphenate the text, insert optional or nonbreaking hyphens, and set the maximum amount of space allowed between a word and the right margin without hyphenating the word.
With automatic hyphenation, Office Word 2007 automatically inserts hyphens where they are needed. If you edit the document later and change line breaks, Office Word 2007 will re-hyphenate the document.
-
Make sure that no text is selected.
-
On the Page Layout tab, in the Page Setup group, click Hyphenation, and then click Automatic.
An optional hyphen is a hyphen that is used to control where a word or phrase breaks if it falls at the end of a line. For example, you can specify that the word «nonprinting» breaks as «non-printing» instead of «nonprint-ing.» When you insert an optional hyphen in a word that is not at the end of a line, the hyphen will be visible only if you turn on Show/Hide.
-
On the Home tab, in the Paragraph group, click Show/Hide.
-
Click in the word where you want to insert the optional hyphen.
-
Press CTRL+HYPHEN.

To automatically hyphenate part of a document, do the following:
-
Select the text that you want to hyphenate.
-
On the Page Layout tab, in the Page Setup group, click Hyphenation, and then click Automatic.
When you manually hyphenate text, Office Word 2007 searches for text to hyphenate. After you indicate where you want to hyphenate the text, Word inserts an optional hyphen. If you later edit the document and change line breaks, Office Word 2007 displays and prints only the optional hyphens that still fall at the end of lines. Word doesn’t re-hyphenate the document.
-
Select the text you want to hyphenate.
-
On the Page Layout tab, in the Page Setup group, click Hyphenation, and then click Manual.
-
If Office Word identifies a word or phrase to hyphenate, do one of the following:
-
To insert an optional hyphen in the location that Office Word proposes, click Yes.
-
To insert an optional hyphen in another part of the word, move the insertion point to that location, and then click Yes.
-
Nonbreaking hyphens prevent hyphenated words, numbers, or phrases from breaking if they fall at the end of a line of text. For example, you can prevent 555-0123 from breaking; instead, the entire item will move to the beginning of the next line.
-
Click where you want to insert a nonbreaking hyphen.
-
Press CTRL+SHIFT+HYPHEN.
The hyphenation zone is the maximum amount of space Office Word 2007 allows between a word and the right margin without hyphenating the word. You can change the hyphenation zone to make it wider or narrower. To reduce the number of hyphens, make the hyphenation zone wide. To reduce the raggedness of the right margin, make the hyphenation zone narrower.
-
On the Page Layout tab, in the Page Setup group, click Hyphenation, and then click Hyphenation Options.
-
In the Hyphenation zone, type the amount of space you want.
You can remove all automatic hyphenation and each instance of manual hyphenation, such as optional and nonbreaking hyphens.
-
To remove automatic hyphenation, on the Page Layout tab, in the Page Setup group, click Hyphenation, and then click None.

-
To remove manual hyphenation, on the Home tab, in the Editing group, click Replace.
-
If you don’t see the Special button, click More.
-
Click Special, and then click either Optional Hyphen to remove manual hyphens, or Nonbreaking Hyphen to remove nonbreaking hyphens.
-
Leave the Replace box empty.
-
Click Fix Next, Replace, or Replace All.
See Also
Line and page breaks
Insert a page break
Change spacing between paragraphs
Need more help?
Word for Microsoft 365 Word 2021 Word 2019 Word 2016 Word 2013 Word 2010 Word 2007 More…Less
You can often improve the look of your document by keeping certain words and paragraphs together on the page or across page breaks. Also, you can use hyphenation to improve overall readability.
Word automatically breaks the text at a space or a hyphen at the end of a line. To keep two words or a hyphenated word together on one line, you can use a nonbreaking space or nonbreaking hyphen instead of a regular space or hyphen.
-
Click where you want to insert the nonbreaking space.
-
On the Insert tab, in the Symbols group, click Symbol.
-
In the box that opens, click More Symbols.
-
In the Symbol dialog box, on the Special Characters tab, click the Nonbreaking Space row to highlight it, and then click Insert.
-
Click Close.
Tip: You can also use the keyboard shortcut. Click where you want to insert the nonbreaking space, and press Ctrl+Shift+Spacebar.
Sometimes you want a hyphenated word to stay together on one line, without it breaking across lines.
-
Click where you want to insert the nonbreaking hyphen.
-
On the Insert tab, in the Symbols group, click Symbol.
-
In the box that opens, click More Symbols.
-
In the Symbol dialog box, on the Special Characters tab, click the Nonbreaking Hyphen row to highlight it, and then click Insert.
-
Click Close.
Tip: You can also use the keyboard shortcut. Click where you want to insert the nonbreaking hyphen, and press Ctrl+Shift+Minus Sign.
Word automatically breaks paragraphs at the end of a page, so a paragraph that started on one page continues on to the next page. To keep the whole paragraph on the same page, follow these steps.
-
Right-click the paragraph that you want to keep together. In the box that opens, select Paragraph.
-
In the Paragraph dialog box, click the Line and Page Breaks tab.
-
In the Pagination section, select the Keep lines together check box, and click OK.
If two consecutive paragraphs or a subhead and a paragraph are closely related, you might want to keep them on the same page.
-
Right-click the paragraph or subhead that you want to keep with the content that follows it. In the box that opens, select Paragraph.
-
In the Paragraph dialog box, click the Line and Page Breaks tab.
-
In the Pagination section, select the Keep with next check box, and click OK.
Tip: It’s best not to add additional line breaks between your paragraphs because Word interprets each line break as a beginning of a new paragraph, and page breaks might not occur properly. If you want spaces between paragraphs, use the Paragraph Spacing controls. For more information, see Change spacing between paragraphs.
If a paragraph has a page break in the middle so that only the last line appears at the top of the following page, this lonely line is called a “widow.” If, on the other hand, a paragraph has a page break in the middle so that only the first line appears at the bottom of a page while the rest of the paragraph appears on the next page, this lonely line is called an “orphan.”
If you want to avoid widow and orphan lines in your document, follow these steps.
-
Right-click the paragraph in which you want to avoid widows and orphans. In the box that opens, select Paragraph.
-
Click the Line and page breaks tab.
-
In the Pagination section, select the Widow/Orphan control check box.
-
Click OK.
If a word is too long to fit at the end of a line, Microsoft Office Word 2007 moves the word to the beginning of the next line instead of hyphenating it. However, you can use the Hyphenation feature to automatically or manually hyphenate the text, insert optional or nonbreaking hyphens, and set the maximum amount of space allowed between a word and the right margin without hyphenating the word.
With automatic hyphenation, Office Word 2007 automatically inserts hyphens where they are needed. If you edit the document later and change line breaks, Office Word 2007 will re-hyphenate the document.
-
Make sure that no text is selected.
-
On the Page Layout tab, in the Page Setup group, click Hyphenation, and then click Automatic.
An optional hyphen is a hyphen that is used to control where a word or phrase breaks if it falls at the end of a line. For example, you can specify that the word «nonprinting» breaks as «non-printing» instead of «nonprint-ing.» When you insert an optional hyphen in a word that is not at the end of a line, the hyphen will be visible only if you turn on Show/Hide.
-
On the Home tab, in the Paragraph group, click Show/Hide.
-
Click in the word where you want to insert the optional hyphen.
-
Press CTRL+HYPHEN.
To automatically hyphenate part of a document, do the following:
-
Select the text that you want to hyphenate.
-
On the Page Layout tab, in the Page Setup group, click Hyphenation, and then click Automatic.
When you manually hyphenate text, Office Word 2007 searches for text to hyphenate. After you indicate where you want to hyphenate the text, Word inserts an optional hyphen. If you later edit the document and change line breaks, Office Word 2007 displays and prints only the optional hyphens that still fall at the end of lines. Word doesn’t re-hyphenate the document.
-
Select the text you want to hyphenate.
-
On the Page Layout tab, in the Page Setup group, click Hyphenation, and then click Manual.
-
If Office Word identifies a word or phrase to hyphenate, do one of the following:
-
To insert an optional hyphen in the location that Office Word proposes, click Yes.
-
To insert an optional hyphen in another part of the word, move the insertion point to that location, and then click Yes.
-
Nonbreaking hyphens prevent hyphenated words, numbers, or phrases from breaking if they fall at the end of a line of text. For example, you can prevent 555-0123 from breaking; instead, the entire item will move to the beginning of the next line.
-
Click where you want to insert a nonbreaking hyphen.
-
Press CTRL+SHIFT+HYPHEN.
The hyphenation zone is the maximum amount of space Office Word 2007 allows between a word and the right margin without hyphenating the word. You can change the hyphenation zone to make it wider or narrower. To reduce the number of hyphens, make the hyphenation zone wide. To reduce the raggedness of the right margin, make the hyphenation zone narrower.
-
On the Page Layout tab, in the Page Setup group, click Hyphenation, and then click Hyphenation Options.
-
In the Hyphenation zone, type the amount of space you want.
You can remove all automatic hyphenation and each instance of manual hyphenation, such as optional and nonbreaking hyphens.
-
To remove automatic hyphenation, on the Page Layout tab, in the Page Setup group, click Hyphenation, and then click None.
-
To remove manual hyphenation, on the Home tab, in the Editing group, click Replace.
-
If you don’t see the Special button, click More.
-
Click Special, and then click either Optional Hyphen to remove manual hyphens, or Nonbreaking Hyphen to remove nonbreaking hyphens.
-
Leave the Replace box empty.
-
Click Fix Next, Replace, or Replace All.
See Also
Line and page breaks
Insert a page break
Change spacing between paragraphs
Need more help?
Want more options?
Explore subscription benefits, browse training courses, learn how to secure your device, and more.
Communities help you ask and answer questions, give feedback, and hear from experts with rich knowledge.
![]()
By default, Word automatically drops text to the next line when there’s a space or hyphen at the end of that line. But what if you want to keep those words containing the space or hyphen together on the same line?
With a bit of tweaking to spacing or inserting a manual break, you can certainly make this happen. But there’s another way. We’ll show you how to use nonbreaking spaces and hyphens to keep words together in your Microsoft Word document.
How to Insert a Nonbreaking Space
The nonbreaking space in Microsoft Word is considered a symbol, a special character. So you can simply replace the space between the words you want to keep together with a nonbreaking space.
Place your cursor where you want to insert the nonbreaking space. If you already have a space, you can simply select it by dragging your cursor through it.

If not, you can put the two words together with your cursor between them where you want the space.
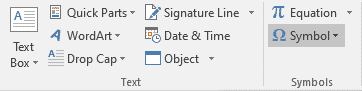
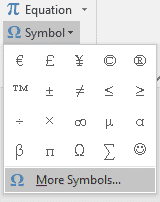
Go to the Insert tab and click the Symbol drop-down arrow. Select “More Symbols.”
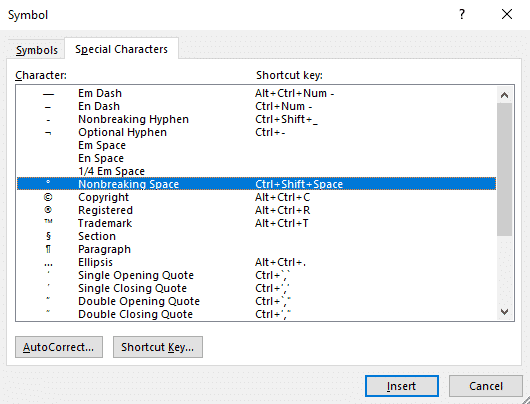
In the Symbol window that appears, click the Special Characters tab. Select “Nonbreaking Space” in the list, click “Insert,” and then “Close.”
You should then see your text adjust. The words on either side of the nonbreaking space should be together on the same line.
How to Insert a Nonbreaking Hyphen
The nonbreaking hyphen in Word works the same way as the nonbreaking space. But obviously, you’ll use this character for keeping hyphenated words together.
Place your cursor where you want to insert the nonbreaking hyphen. If you already have the hyphen, you can simply select it by dragging your cursor through it.
If not, you can put the two words together with your cursor between them where you want the hyphen.
Head to the Insert tab, click the Symbol drop-down arrow, and select “More Symbols.”
In the Symbol window, click the Special Characters tab. Select “Nonbreaking Hyphen” in the list, click “Insert,” and then “Close.”
You should then see your text adjust with the hyphenated word together on the same line.
Similar to keeping words on the same line, you can keep the lines of a paragraph together and stop them from splitting between pages. In addition, you can eliminate widow and orphan lines in your Word documents too!
READ NEXT
- › Discord Direct Message Won’t Go Away? Here’s the Fix
- › How to Get a Refund on the PlayStation Store
- › Save Hundreds on Elegoo’s New PHECDA Laser Engraver Through Kickstarter
- › The New Winamp Is Here, but It’s Not What You’d Expect
- › Android’s Nearby Share Has (Unofficially) Arrived on Mac
- › Windows 11 Has a New Photo Gallery in the File Explorer
How-To Geek is where you turn when you want experts to explain technology. Since we launched in 2006, our articles have been read billions of times. Want to know more?
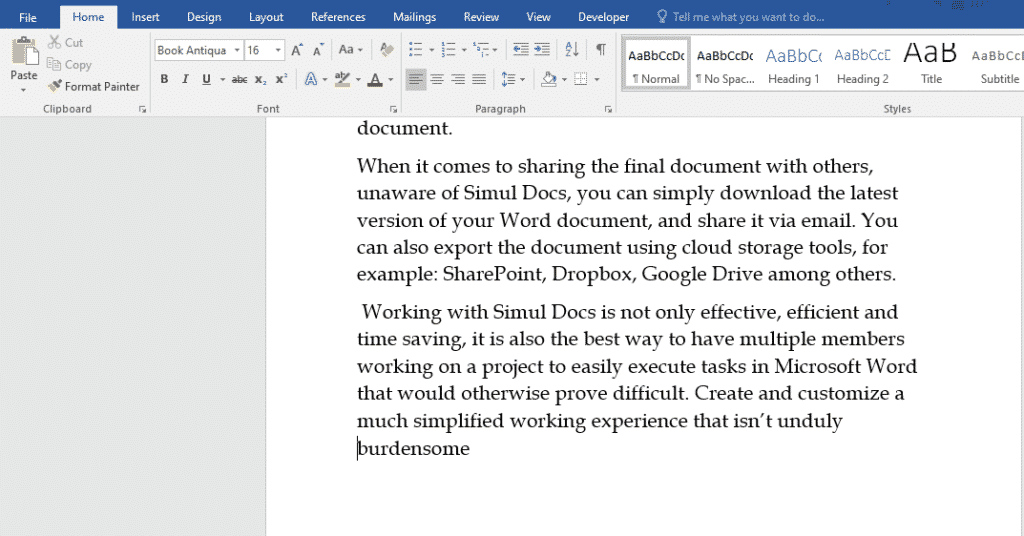
Any regular Microsoft Word user has probably noticed that Word automatically breaks text at a space or a hyphen at the end of the line. Such an experience is frustrating and can be both confusing and aesthetically unpleasant to the readers.
This article will help you stop awkward breaks in hyphenated words or other groups of words that need to appear together on a single line in Microsoft Word documents.
In order to keep two words, hyphenated words and other groups of words together on one line, you can use a nonbreaking space or nonbreaking hyphen (instead of a regular space or hyphen) and the non-breaking lines and paragraphs
Here are several ways to keep two words together on a line in a Microsoft Word document.
Keeping two words together on the same line using non-breaking space
If you want specific words or characters to stay together on the same line, you ought to use non-breaking spaces instead of regular spaces.
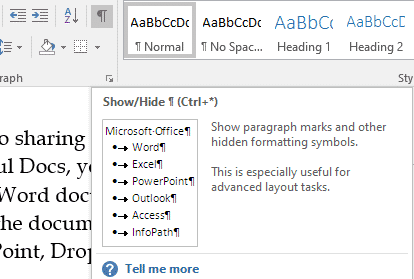
One way to achieve this is by turning on the Show Hide feature in the group for paragraph features under the Home tab.
Below is a simple step by step tutorial to get this done:
Step 1. Open your Microsoft Word document and go to the end of the sentence where you want to keep words together.
Step 2. Remove the space between the two words you want to keep together.
Step 3. Click the Home tab and turn on the Show Hide feature.
Step 4. Place the cursor between the words you want to keep together.
Step 5. Press CTRL+ Shift + Space.
The two words will remain together on the same line, regardless of the changes made to the paragraph.
Doing this adds a character that looks like the degree symbol which is your non-breaking space. It is only visible when you turn on the Show Hide feature.
Alternatively, you can insert nonbreaking space in your Microsoft Word document using the method below:
Step 1. Click where you want to insert the nonbreaking space.
Step 2. On the Insert tab in the Symbols group, click Symbol.
Step 3. Select the More Symbols option from dialog box.
Step 4. In the Symbol dialog box that will appear, select the Special Characters tab then click the Nonbreaking Space row to highlight it, and then click Insert.
Keeping two words together on the same line using non-breaking hyphens
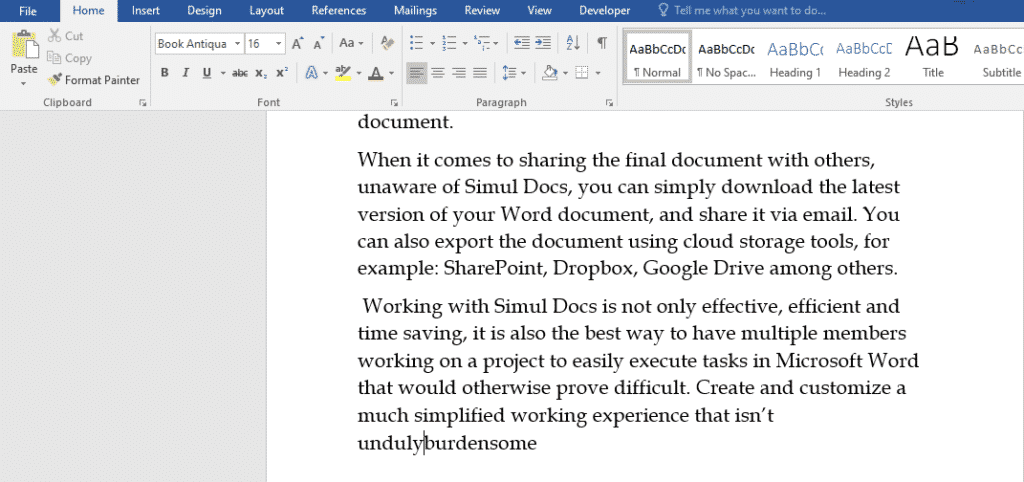
If you put a hyphenated word at the end of a line in a Word document, the line is most likely to break right at the hyphen character.
The easiest way to resolve this is by replacing the hyphen used with a nonbreaking hyphen, as demonstrated below:
Step 1. Position the cursor between the two words or characters you want to keep together, deleting all spaces in between.
Step 2. On the Insert tab in the Symbols group, click Symbol.

Step 3. Select the More Symbols option from dialog box.

Step 4. In the Symbol dialog box that will appear, select the Special Characters tab then click the Nonbreaking Hyphen row to highlight it, and then click Insert
All you need to efficiently collaborate on Microsoft Word documents is Simul Docs
Working together on Microsoft Word documents as a team can prove to be tiresome with the constant back and forth of emails sharing different versions the same document. In such scenarios, it is difficult to keep track of the changes made to the Microsoft document, posing a risk of loss of valuable edits.
Although Microsoft added the Tracked Changes feature to Word documents, it is only effective if turned on during the editing process and before changes are made.
With Simul Docs being employed on a day to day basis, collaboration on Word documents is made easy rendering the aforementioned predicament is a thing of the past.

This version control and collaboration tool automatically recognizes and tracks when multiple authors are making changes simultaneously. As a result, each collaborators changes are saved as separate versions of the Word document, eliminating the possibility of relevant data being overridden and or lost.

Simul Docs compiles all the different versions of the Microsoft Word document with just one click, merging it all into one master file, with the changes made marked for easy review of the document.
Furthermore, in the event that the need arises to revert to the original Microsoft Word Document, Simul Docs enables the user to restore the previous versions of the document with ease.
Simul Docs is also helpful when it comes to transferring information from the previous versions and adding it to the final Microsoft Word document.
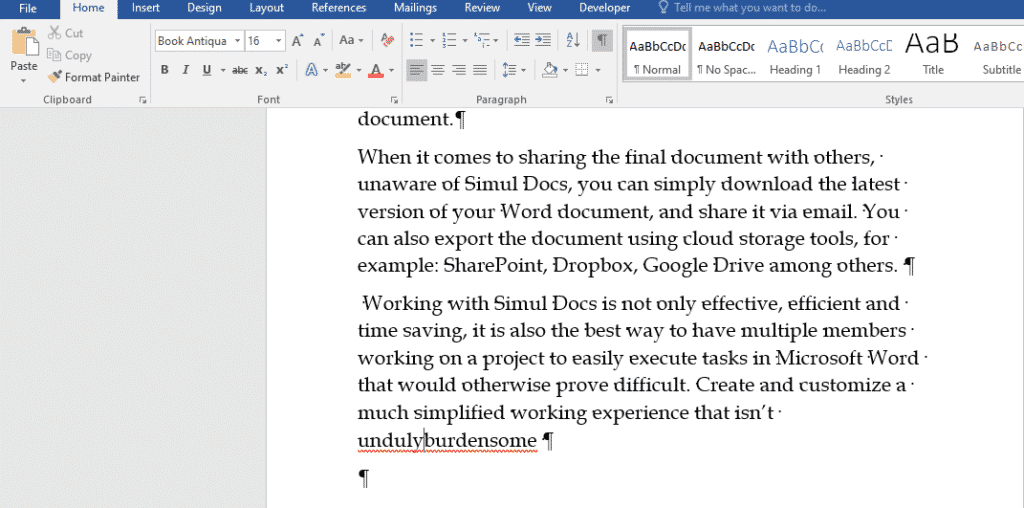
Sharing the master file is as simple as downloading the latest version of your Word document, and sharing it via email. You can also export the document using cloud storage tools, for example: SharePoint, Dropbox, and Google Drive.

Therefore, whether collaborating on a Microsoft Word document in an office setting or from across the globe, Simul Docs is the number one solution to most of the challenges that may arise from working together.
This tutorial is about How to keep words on the same line in Microsoft Word. We will try our best so that you understand this guide. I hope you like this blog, How to keep words on the same line in Microsoft Word. If your answer is yes, please do share after reading this.
So lets keep reading for intertesting info:
Check How to keep words on the same line in Microsoft Word
Most of the time we want the text in a Microsoft Word document to wrap automatically, that is, go to the next line, when it is too long to fit on a single line. Word wrapping is great, except when splitting text that we want to keep together, like text. B. Dates, names, phone numbers, sentences, formulas, titles, or other text that you want to stay together on the same line. Fortunately, Word offers some easy ways to keep text together. Microsoft Word is a widely used commercial word processor developed by Microsoft.
Microsoft Word is a component of the Microsoft Office productivity software suite, but can also be purchased as a stand-alone product. Microsoft Word was first introduced in 1983 and has been revised several times since then. It is available for Windows and Apple operating systems. Initially, MS Word was not very popular due to its radically different appearance compared to WordPerfect, the leading word processor at the time.
However, Microsoft has continually improved Word over the years, including a 1985 version that could run on a Mac. The second major version of Word in 1987 included an update to major features, along with new features like compatibility. with rich text format (RTF).
How to keep words on the same line in Microsoft Word
unbreakable space
The first step is to activate a feature called ‘Show Hide on the Home tab in the Paragraph group of functions. This will display non-printable characters. However, they will not be displayed when the document is printed. By enabling this, we can see that we have what are called smooth spaces: that is, where dots appear between those words. We are going to delete them where we want to put a non-breaking space.
- Go to the end of the sentence where you want to keep the words together.
- Delete the space between the two words you want to keep together.
- Turn on “Show Hide”.
- Place the cursor between the words.
- Press CTRL + Shift + Space.
scripts that do not separate
This is the same with nonbreaking spaces, but for words that are separated by hyphens. Such words breaking off at the end of a sentence are aesthetically displeasing. To make sure the words stay together, we’ll follow these simple steps using state-of-the-art technology.
- Remove the hyphens between ‘state of the art’.
- Turn on “Show Hide”.
- After deleting the first dash, press CTRL + Shift + Dash.
- Repeat this for the remaining scripts as this doesn’t work for all scripts at once.
Final words: How to keep words on the same line in Microsoft Word
I hope you understand this article, How to keep words on the same line in Microsoft Word. If your answer is no, you can ask anything via the contact forum section related to this article. And if your answer is yes, please share this article with your friends and family to give us your support.
James Hogan
James Hogan is a senior staff writer at Bollyinside, where he has been covering various topics, including laptops, gaming gear, keyboards, storage, and more. During that period, they evaluated hundreds of laptops and thousands of accessories and built a collection of entirely too many mechanical keyboards for their own use.