
- Remove From My Forums
-
Question
-
Hello. In Word (2013), I frequently paste text only (screenshot). Is there a way to do this with a single keystroke? If not, is there a series of keystrokes that will do this?
Thanks in advance.
Answers
-
Hi,
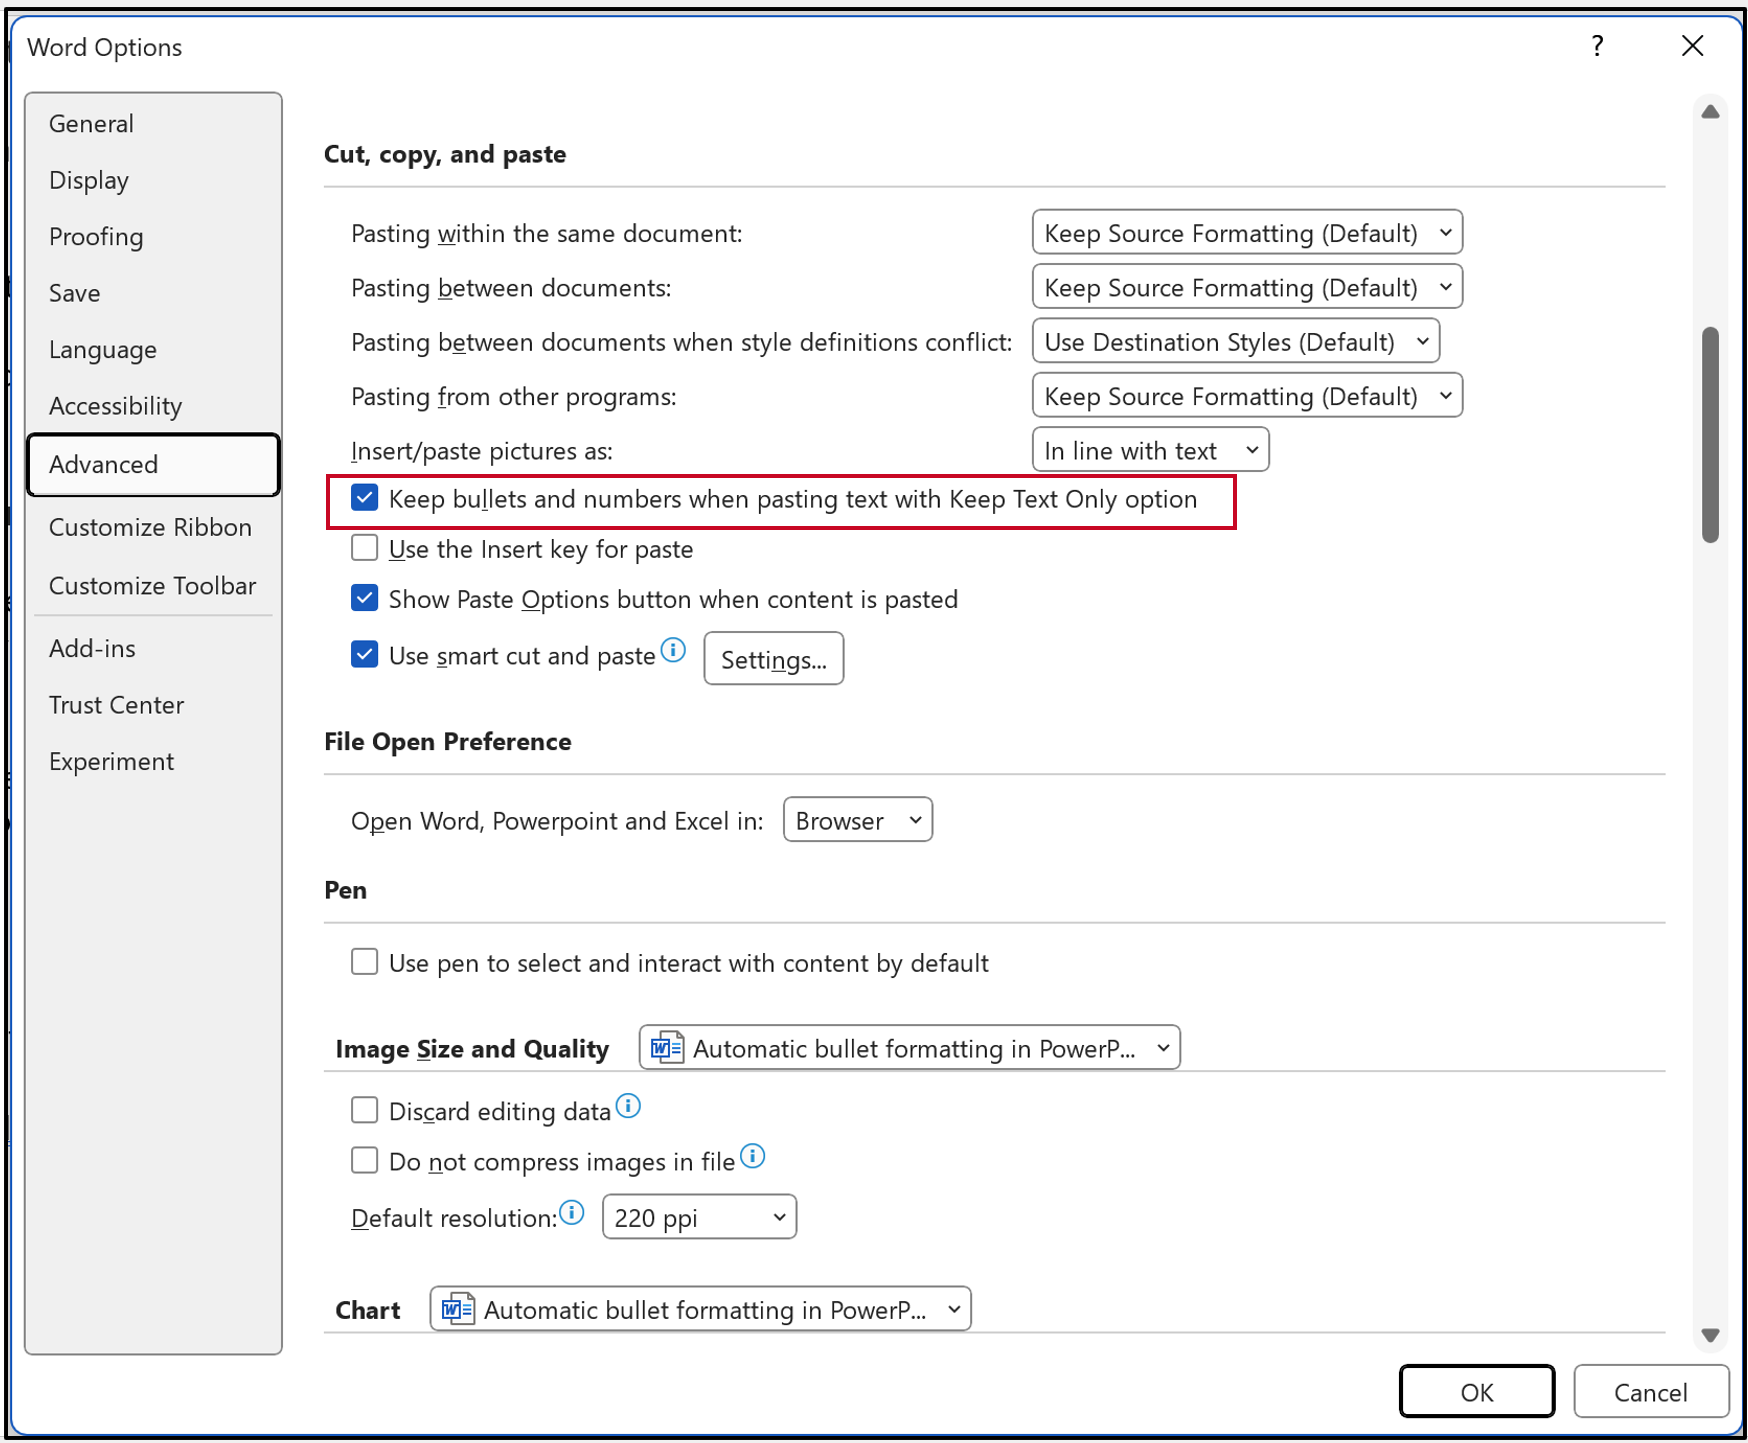
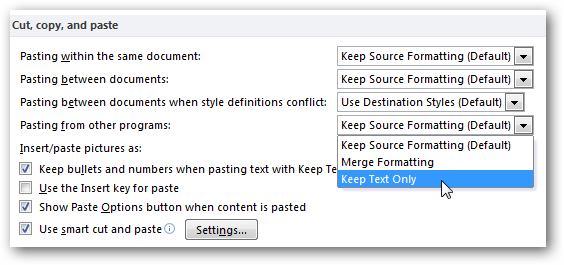
Please go to File-Options- Advanced, under the Cut, copy and paste option, you can choose for the default paste type:

If my understanding is incorrect, please provide more information about your problem and I’m glad to help you.
Regards,
Emi Zhang
Please remember to
mark the replies as answers if they helped.
If you have feedback for TechNet Subscriber Support, contact
tnsf@microsoft.com.-
Marked as answer by
Tuesday, December 5, 2017 2:56 PM
-
Marked as answer by
Hi, Microsoft 365 Insiders! I’m Ali Forelli, a Product Manager on the Word team working on Accessibility features. I’m happy to announce that the Paste Text Only shortcut is available in Word for Windows and Word for Mac!
Paste Text Only shortcut in Word
Wouldn’t it be great if you could just copy and paste text from a website into your document and have it look good? Imagine not having to manually remove the source formatting like font size, type, or background color.
You might be familiar with this shortcut Ctrl + Shift + V (Cmd + Shift + V on Mac)—it’s also called “keep text only” or “paste plain text”—because of its popularity in other applications like Microsoft Teams, Word for the web, Google, and Gmail. No matter what you call it, the Paste Text Only shortcut is now available in Word for Windows and Word Mac.
How it works
- Select a range of text from your current document, or another document or
- In your Word document, place the cursor where you want the text to appear.
- Press Ctrl + Shift + V (Cmd + Shift + V on Mac). Notice how the pasted content matches the neighboring text formatting, rather than preserving its original font size, color, etc.
Feedback in action
Word has been a product since 1983 (Word turns 40 this year!). This long-standing legacy creates a precedent for established user expectations. While the engineering team continues to work on new features for improved user experiences with refreshed and more advanced technology, we don’t always have the opportunity to revise pre-existing behavior.
In the case of keyboard shortcuts, the industry standard has diverged from Word’s initial implementation of these features. Indeed, users expect that Ctrl + Shift + V will paste plain text, so when this doesn’t work, the experience can be frustrating. The Word team heard about this problem from users, so we’re updating keyboard shortcuts as a direct response to your feedback. Accessibility is a priority for Word, and we want to make the cut, copy, paste experience as seamless as possible.
Other changes to shortcuts
By updating the paste text only shortcut, some existing keyboard shortcuts have changed. Below is a table of the full list of changes.
| Feature | New Shortcut (Windows) | New Shortcut (Mac) |
|---|---|---|
| Paste Text Only | Ctrl + Shift + V | Cmd + Shift + V |
| Copy Format Painter | Ctrl + Alt + C | Cmd + Option + C |
| Paste Format Painter | Ctrl + Alt + V | Cmd + Option + V |
| Paste Special | Alt + H + V + S | None |
| Copyright Symbol | ( + C + ) or Insert > Ω Symbol > © | ( + C + ) or Insert > Ω Symbol > © |
Want to restore the previous shortcut settings?
To restore the keyboard shortcut assignments to their original settings, you can head over to the Customize Keyboard Shortcuts help article. Below you will find a table of the command names which you may want to reset.
Note: The Copywrite command is in the Common Symbols category of the Customize Keyboard dialog. All other commands can be found in the All Commands category.
| Feature | Command Name | Previous Shortcut (Windows) |
|---|---|---|
| Paste Text Only | PasteTextOnly | None |
| Copy Format Painter | CopyFormat | Ctrl + Shift + C |
| Paste Format Painter | PasteFormat | Ctrl + Shift + V |
| Paste Special | EditPasteSpecial | Ctrl + Alt + V |
| Copyright Symbol | Copyright | Ctrl + Alt + C |
Tips and tricks
- To disable numbers and bullet icons from being pasted in Paste Text Only:
-
- Select File> Options > Advanced.
- Navigate to the Cut, copy, and paste
- Clear the Keep bullets and numbers when pasting text with Keep Text Only option check box.
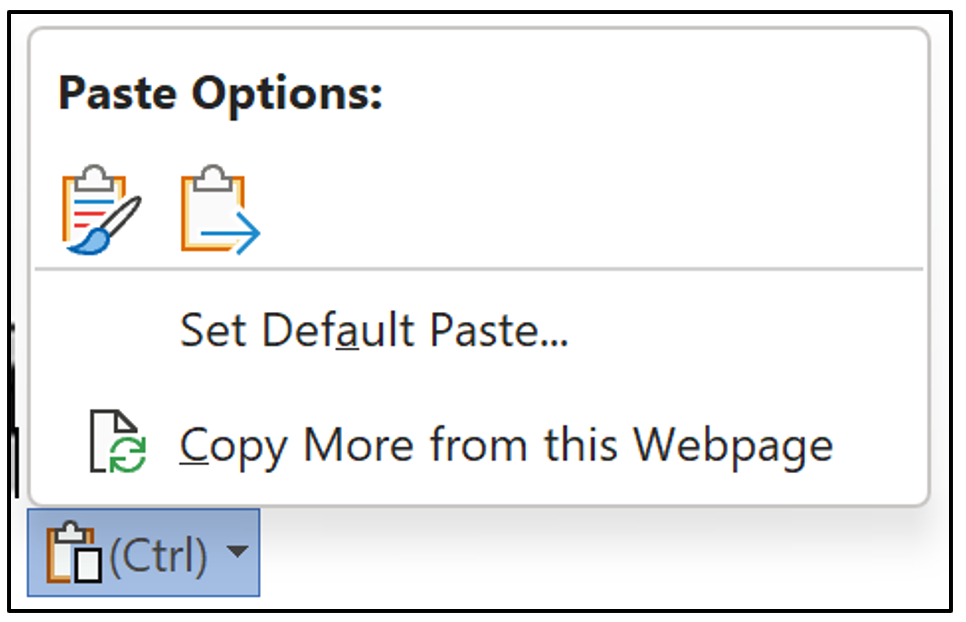
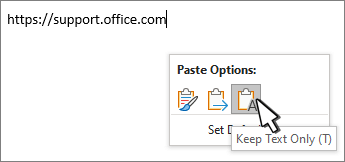
- To use the Paste Options floatie to choose other paste options:
-
- Paste content in your document, and notice the collapsed Paste Options floatie will appear next to your pasted content.
- Press Ctrl to open the Paste Options floatie or click with your mouse to expand.
-
- Choose one of the available past options.
- To change your default paste options:
-
- Select from the Paste Options floatie or go to File > Options > Advanced.
- Navigate to the Cut, copy and paste section.
-
- For each option, you can choose between Keep Source Formatting, Merge Formatting, or Keep Text Only.
Availability
These shortcuts are available to M365 Home and M365 Business Standard Beta Channel users running:
- Windows: Version 16.0.15831.20174 or later
- Mac: Version 16.67.1113.0 or later
Don’t have it yet? It’s probably us, not you.
Features are released over some time to ensure things are working smoothly. We highlight features that you may not have because they’re slowly releasing to larger numbers of Insiders. Sometimes we remove elements to further improve them based on your feedback. Though this is rare, we also reserve the option to pull a feature entirely out of the product, even if you, as an Insider, have had the opportunity to try it.
Feedback
Please share your feedback with us directly from Word. Click Help > Feedback and tell us what you think!
Вы устали от того, что после вставки скопированного текста в Word, вместе с ним копируются цвета, форматирование, ссылки и всё остальное? Вот как Вы можете защититься от засорения Вашего документа неформатированным текстом.
По умолчанию, Word сохраняет форматирование текста и других объектов, которые Вы вставляете в документ, включая ссылки, цвета, шрифт и прочее. В лучшем случае это может немного раздражать, в худшем – испортить всё остальное форматирование Вашего документа.
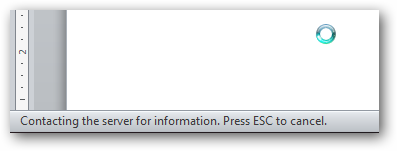
Если Вы копируете большой объём текста или картинок с сайта, и вдруг интернет-соединение стало медленным, Word может даже на некоторое время зависнуть, пока получает и обрабатывает данные. Это совсем не весело!
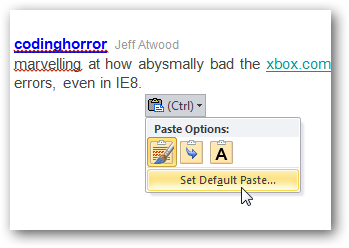
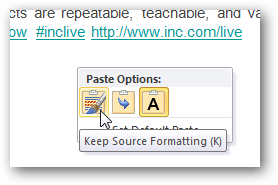
В Microsoft Word есть одна спасительная возможность: Вы можете щелкнуть маленькое всплывающее окно под вставленным текстом и выбрать Plain Text (Только текст), чтобы оставить только текст и никаких других деталей форматирования. Тем не менее, это потребует ещё 2 дополнительных щелчка мышью. Если же Вы постоянно хотите вставлять только текст и больше ничего, то гораздо выгоднее будет установить это в настройках по умолчанию. К счастью, сделать это можно очень просто. Если Вы только что вставили текст, нажмите на всплывающее окно и выберите пункт Set Default Paste (Вставка по умолчанию).
Есть другой путь – открыть диалоговое окно Word Options (Параметры Word). Для этого перейдите на вкладку File (Файл) > Options (Параметры), если у Вас Word 2007, нажмите кнопку Office > Word Options (Параметры Word).

Выберите категорию Advanced (Дополнительно), промотайте вниз до раздела Cut, copy, and paste (Вырезание, копирование и вставка).
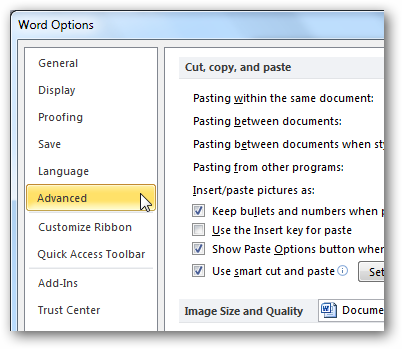
Здесь Вы можете изменить большое количество настроек вставки. Чтобы по умолчанию включить вставку только текста, выберите Keep Text Only (Сохранить только текст) в выпадающих меню. Вы можете изменить установки для всех опций или только для избранных. Часто мы хотим сохранить форматирование, когда копируем в пределах одного документа, поэтому первую опцию оставим без изменений, а для всех остальных установим Keep Text Only (Сохранить только текст).
После того как изменения настроек сделаны, попробуйте вставить тот же текст, чтобы убедиться, что всё работает правильно. Теперь вставится только текст, даже если были скопированы картинки, ссылки и различное форматирование. Такие установки по умолчанию довольно удобны, так как значительно ускоряют работу.

Если же Вы решите вставить текст вместе с форматированием, ссылками и прочим содержимым, просто щелкните по всплывающему меню и выберите Keep Source Formatting (Сохранить исходное форматирование). В этом случае Вам придётся делать лишние действия мышью, только если необходимо вставить дополнительное содержимое.
Таким образом, Вы можете сэкономить своё время и извлекать только нужный текст с веб-сайтов, других программ и прочих источников без задержек из-за копирования большого объёма и, не тратя драгоценное время на обработку вставленного содержимого.
Оцените качество статьи. Нам важно ваше мнение:
Word for Microsoft 365 Word 2021 Word 2019 Word 2016 Word 2013 Word 2010 More…Less
In Word, you can choose to paste text using the formatting of the source, destination, or just pure text. If you always want one of the options, set it as the default for pasted text.
Set default paste options
By default, Word preserves the original formatting when you paste content into a document using CTRL+V, the Paste button, or right-click + Paste. To change the default, follow these steps.
-
Go to File > Options > Advanced.
-
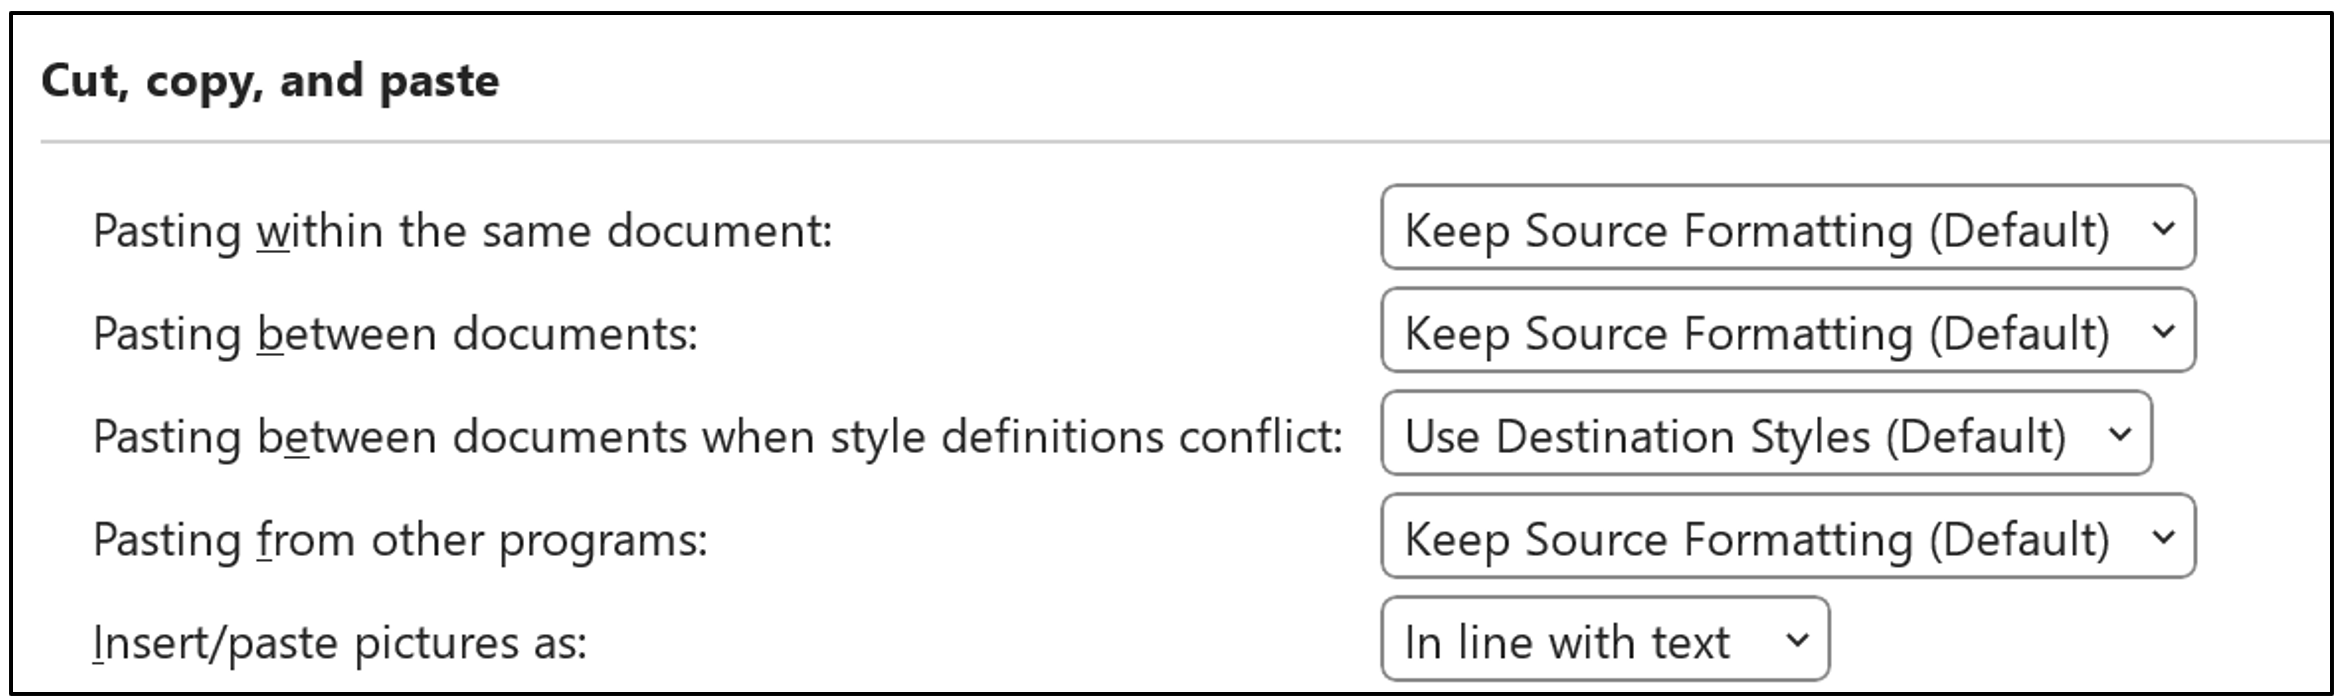
Under Cut, copy, and paste, select the down arrow for the setting to change .
-
Pasting within the same document When you paste content into the same document from which you copied the content.
-
Pasting between documents When you paste content that was copied from another Word document.
-
Pasting between documents when style definitions conflict When you paste content that was copied from another Word document, and the style that is assigned to the copied text is defined differently in the document where the text is being pasted.
-
Pasting from other programs When you paste content that was copied from another program, such as a browser.
-
-
Each setting has options you can set:
Keep Source Formatting
Merge Formatting
Keep Text OnlyFor more info on these options, see Get the look you want.
-
Select OK.
Notes:
-
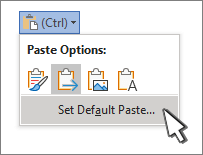
You can also select Set Default Paste from the Paste Options
menu. -
Change options when pasting content
When you copy content from a formatted source, such as a webpage or another Word document, you can select options at the time you paste it into your document.
-
Click or tap where you want to paste the content.
-
Press CTRL + V and then select Paste Options
. -
Hover over the buttons for a live review.
-
Select the paste option to use.
The Paste Options  button lets you select formatting options and is on by default. If you don’t see the button, it might be turned off. Follow these steps to turn it on.
-
Go to File > Options > Advanced.
-
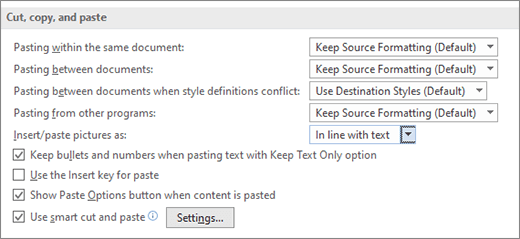
In the Cut, copy, and paste section, select Show Paste Options button when content is pasted.
-
Select OK.
If the setting is on but you don’t see the button when you paste, make sure you’re pasting formatted content, not pure text (like from NotePad.)
When you copy text from a Word document, webpage, or other app’s document and paste it into a Word document, you can choose how the text is formatted. You can keep the original formatting, merge with the destination formatting, or paste just plain text.
-
Keep Source Formatting (K) This option retains formatting that was applied to the copied text. Any style definition that is associated with the copied text is copied to the destination document.
-
Merge Formatting (M) This option discards most formatting that was applied directly to the copied text, but it retains formatting that is considered emphasis, such as bold and italic, when it is applied to only a portion of the selection. The text takes on the style characteristics of the paragraph where it is pasted. The text also takes on any direct formatting or character style properties of text that immediately precedes the cursor when the text is pasted.
-
Picture (U)
This option is only available on Microsoft 365 Subscription. Converts text into an image and pastes that. The text can’t be changed, but you can treat it like any other picture or image and use effects, borders, or rotation. When selected, choose options from the Picture Format tab. -
Keep Text Only (T) This option discards all formatting and nontext elements such as pictures or tables. The text takes on the style characteristics of the paragraph where it is pasted and takes on any direct formatting or character style properties of text that immediately precedes the cursor when the text is pasted. Graphical elements are discarded, and tables are converted to a series of paragraphs.
When you paste items from a bulleted or numbered list into another list, you can keep their original formatting or sequence, or blend in with the numbering or bullets of the destination list.
Paste numbered items so the sequence continues Choose Continue List (C) to have inserted items stay in sequence in the list.
Keep original sequence on numbered items Choose New List (N) to have inserted items keep their original list sequence.
Paste bulleted items into a numbered list To keep the bullets, choose Keep Source Formatting (K). To convert bullets to numbers, choose Merge Formatting (M).
Paste numbered items into a bulleted list To keep the original numbers, choose Don’t Merge List (D). To convert the numbers to bullets, choose Merge List (M).
Paste Text Only lists By default, bullets and numbers are preserved when pasting text only. To turn this behavior off:
-
Go to File > Options > Advanced.
-
Clear Keep bullets and numbers when pasting text with Keep Text Only option.
-
Select OK.
Need more help?
In Word 2003 and 2007, you couldn’t easily paste copied text as unformatted text. You either had to go through several clicks in the menus, or set up a macro and assign a keyboard shortcut to it (see this blog post for how to do this in Word 2003/2007: https://cybertext.wordpress.com/2009/07/02/word-keyboard-shortcut-to-paste-unformatted-text/).
However, in Word 2010 you don’t have to do any of that as there’s a quick and easy way to paste as unformatted text using the keyboard. Laura alerted me to it in her 13 November 2012 comment on the Word 2003/2007 post above, and, with some more help a few days later from Xuberi, I finally got it!
To paste copied text as unformatted text in Word 2010 using the keyboard:
- Press Ctrl+v to paste the copied text into your document.
- Press and then release Ctrl to activate the Paste Options icon.
- Press t to select the ‘Text only’ option (pressing t is a separate action to pressing Ctrl in step 2 — DO NOT press them together otherwise it won’t work).
More detailed explanation:
What happens in Word 2010 when you press Ctrl+v (Step 1) is that you get the Paste Options icon, and it has (Ctrl) next to it, indicating that the Ctrl key activates the options (you don’t get this in Word 2003 or 2007):

So when you press and release Ctrl (step 2 above), the Paste Options display:

Now you press the key for the paste option you want — hover over each option’s icon to see which key activates it:

The keyboard options are:
- H — Use destination theme
- K — Keep source formatting
- M — Merge formatting
- T — Keep text only (the unformatted text option).
See also:
- How to paste as unformatted text in Word 2003/2007: https://cybertext.wordpress.com/2009/07/02/word-keyboard-shortcut-to-paste-unformatted-text/
- Office 2010: Paste options button not displaying: https://cybertext.wordpress.com/2012/04/12/office-2010-paste-options-button-not-displaying/
[Links last checked November 2012]
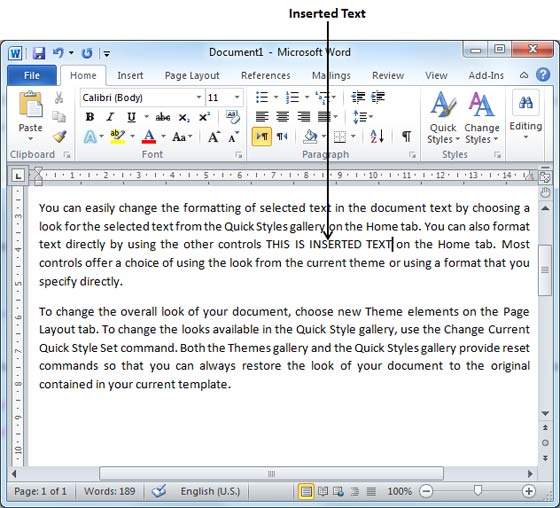
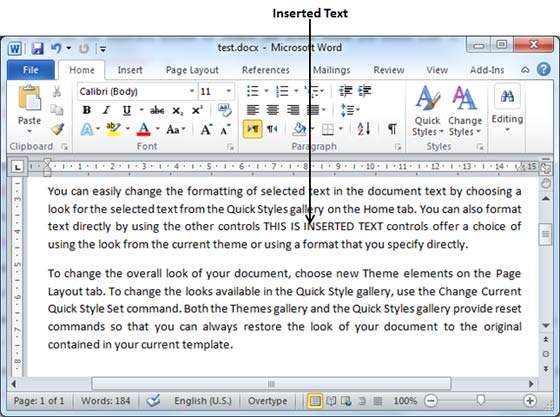
We’ll talk about how to Insert Text in MS Word in this chapter. A lot of the time, you have to go back and add more text to an existing line. There are two ways to insert text to existing text in Microsoft Word, and we’ll show you how to use both of them.
Table of contents
- Insert Text in MS Word
- What is Inserting Text in MS Word?
- What is the Use of Inserting Text?
- How to Insert Text Quickly in Your Word Document
- Insert Text Using Textbox
- Summary
What is Inserting Text in MS Word?
Inserting text is one of the many things that MS-Word can do. For example, if a user is writing something like an article or assignment, he or she might realize that they forgot to write something in the middle, at the beginning, or anywhere else in the document. So, in this case, the feature that comes in very handy is Inserting text, which will do the work for the user.
What is the Use of Inserting Text?
The use of Inserting text in MS Word it has the ability to position the cursor using the mouse or arrow keys at any point in a document and begin typing.
The insert text function permits you to add characters to your document without erasing your previous work.
How to Insert Text Quickly in Your Word Document
Time needed: 2 minutes.
Here are the basic steps for inserting text or making a new document in Word;
- Insert Text in Microsoft Word with Text Replacement
Step 1: First open MS-Word on your PC.
Step 2: Now, Open the document or create a new one in which you want to perform this operation.
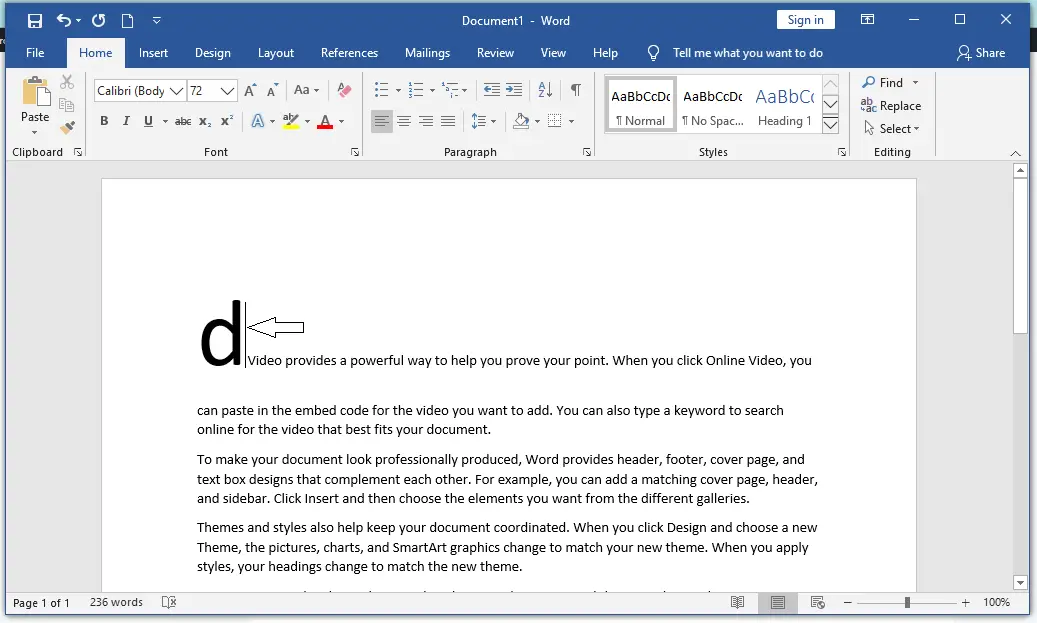
Step 3: Now, Put the cursor where you want to insert the text.
Step 4: Now, Write or type the text which needs to be inserted.
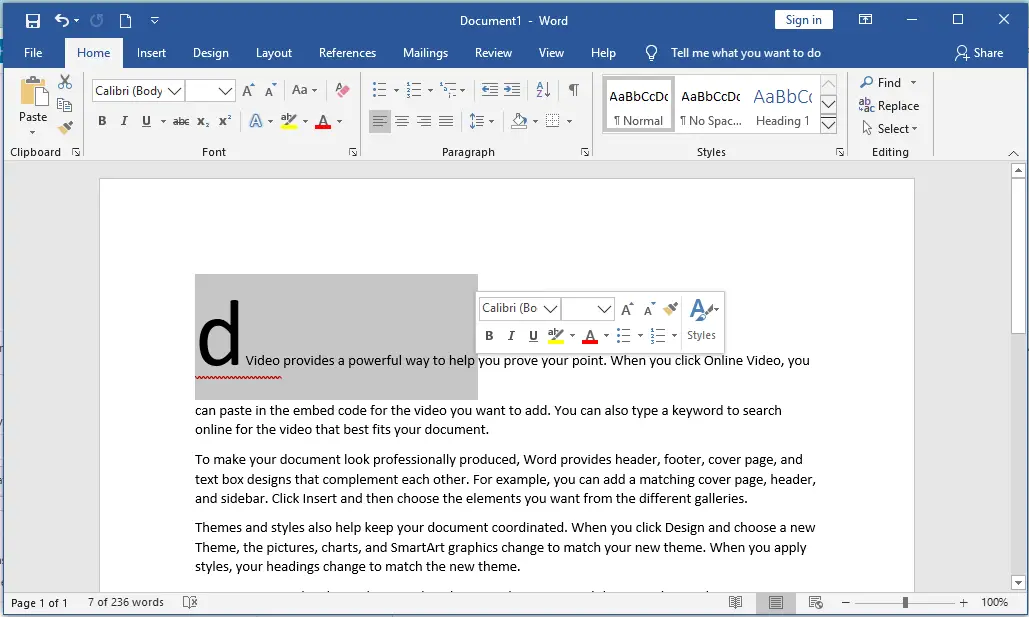
Like here we insert MS Word Tutorial. As shown in the figure below:
Step 5: So, the text is inserted successfully.
- Insert Text in Microsoft Word with Text Replacement
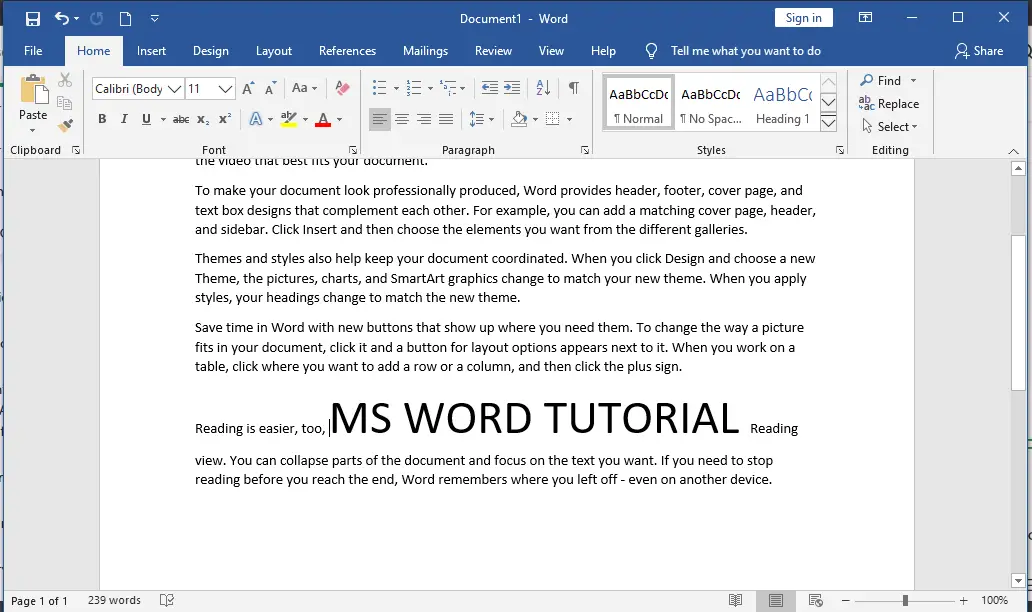
Here are some examples on how to Insert Text in MS Word with replacing some text. Sometimes, a certain part of the whole document or some text needs to be changed to something else.
1. Open the document you wish to perform this action on, or create a new one.
2. Now, choose the text you’d like to change.
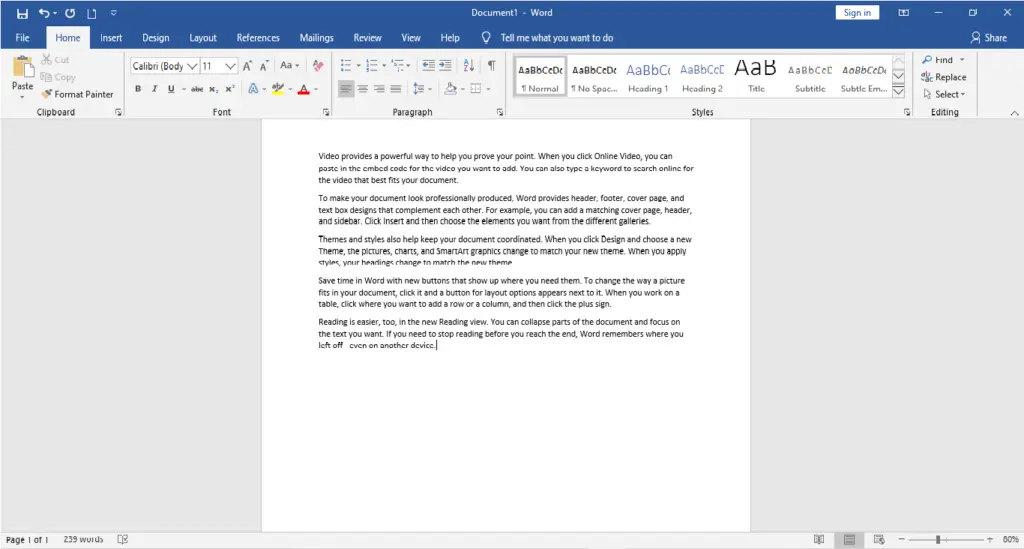
3. Now, press the “Backspace” key and start typing the text you want to add. Or, you can just start typing the text you want to insert, and the “selected text by default” feature will go away or be deleted when you do.
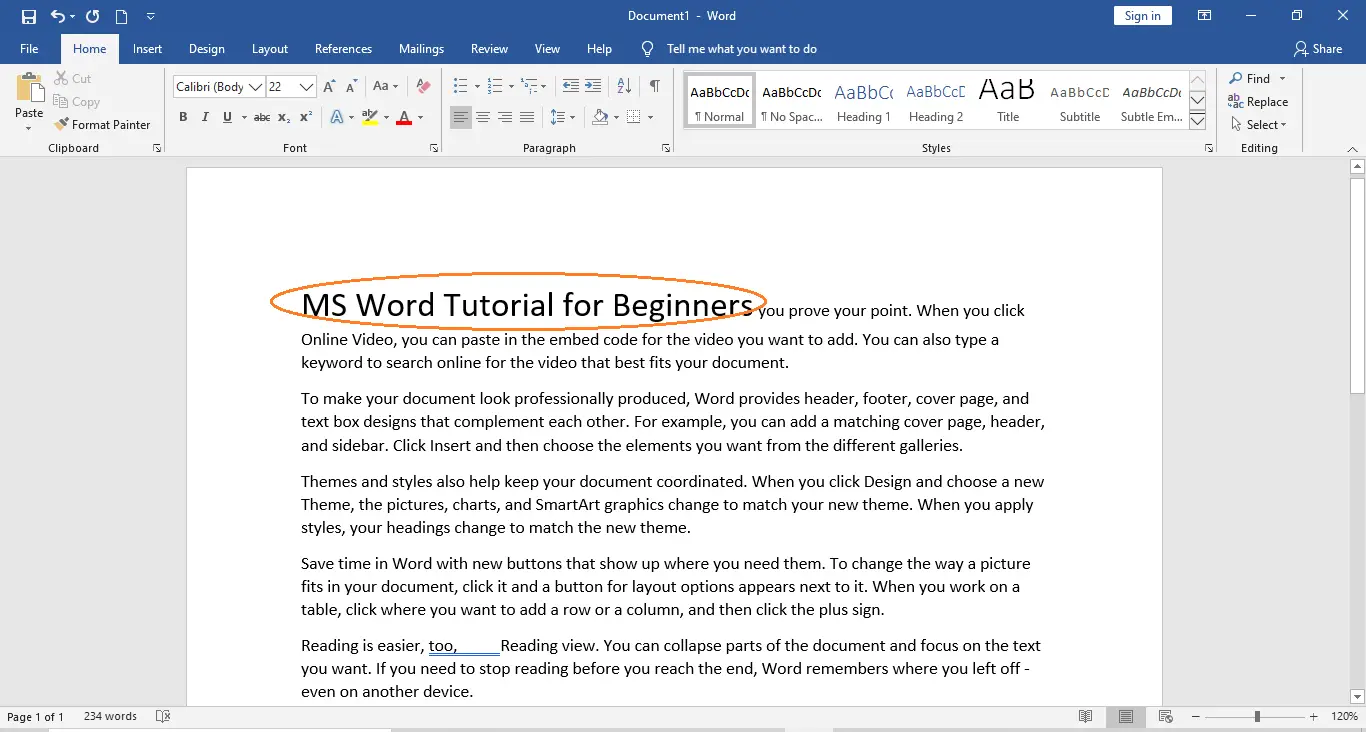
Here, we replace the first paragraph with “MS Word Tutorial for Beginners“.
Insert Text Using Textbox
The MS Word allows us to Insert Text boxes anywhere within the document where required. This is another excellent tool provided by Microsoft Word.
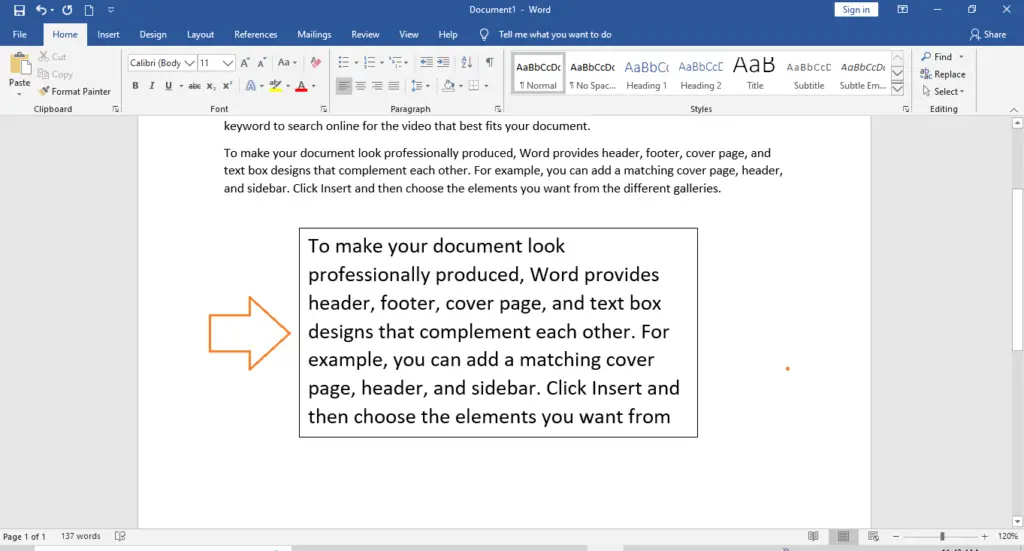
A text box is an object you can add to your document that lets you put and type text anywhere in your file. Text boxes can be useful for drawing attention to specific text and can also be helpful when you need to move text around in your document
Now, Open the document or create a new one in which you want to perform this operation.
Now, go to “insert tab” above. (As shown in the image below)
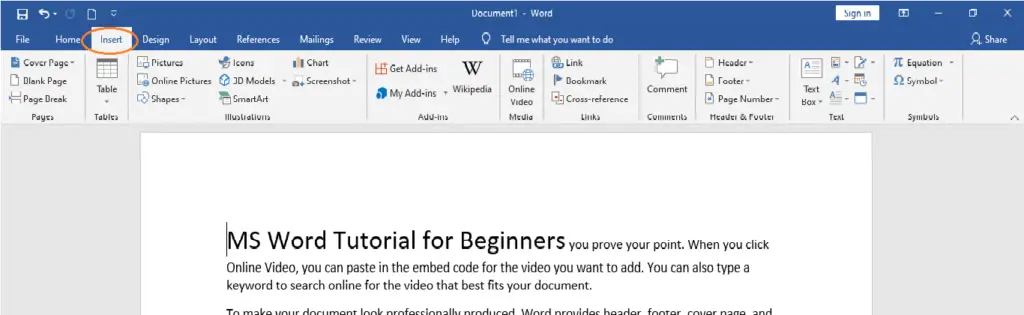
Now, In the insert tab, there is a section called “Text“.
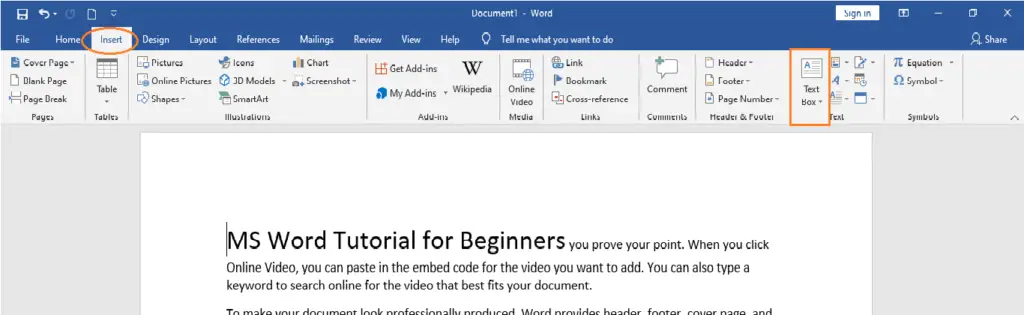
Now, In section Text, there is an option called “Text box“. Click on that option of Text box. Then, Select one of the text boxes available as per you choice. Here, for example, a simple text box has been selected.
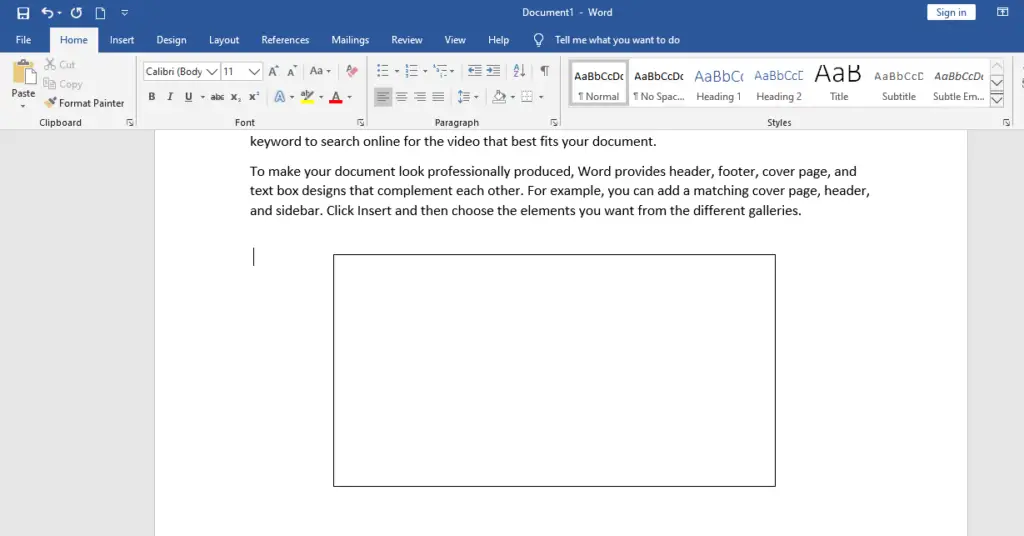
Now, insert text or type anything that you want.
Summary
In summary, we’ve talked about Inserting text in MS Word as well as what those terms mean. Also, we learn different ways to insert text in a document.
We hope this guide helps you as you plan to create a document in MS Word.
PREVIOUS

NEXT

In this chapter, we will discuss how to insert text in Word 2010. Many times it is required to go back and insert additional text in an existing line. Microsoft Word provides two ways to insert text in existing text and we will show how to use both the methods of inserting text −
Insert and Add Text
First we will see how inserted text will be added into the existing content without replacing any existing content.
Step 1 − Click the location where you wish to insert text; you can also use the keyboard arrows to locate the place where the text needs to be inserted.
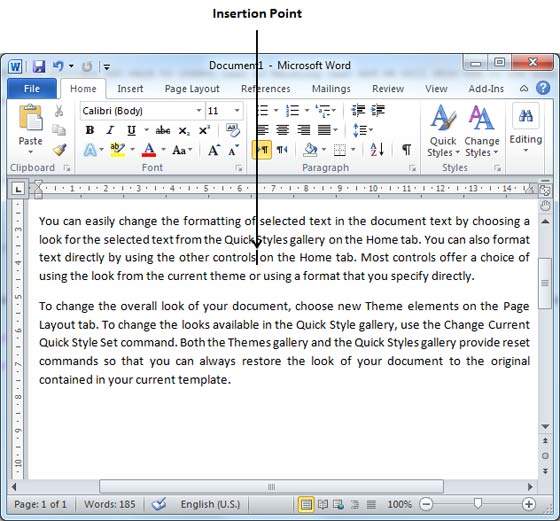
Step 2 − Start typing the text that needs to be inserted. Word inserts the text to the left of the insertion point, moving the existing text to the right
Insert and Replace Text
In the Insertion mode, text will be added into the existing content but same time it will over write all the content which comes in its way.
Step 1 − Right-click the status bar and select the Overtype option from the displayed menu.
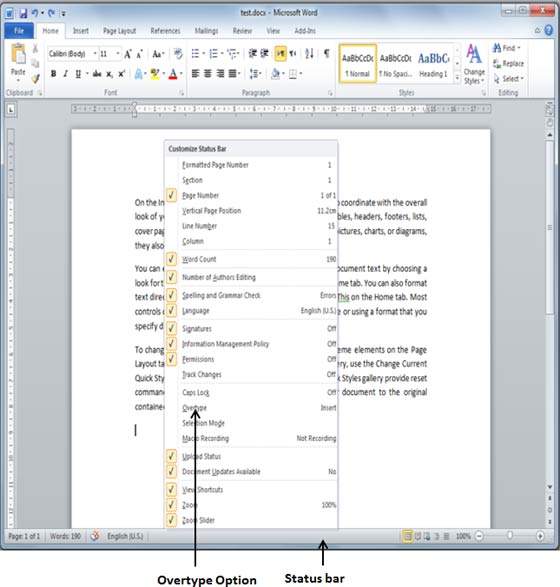
When you select the Overtype option, the status bar will show the insert mode as shown below −
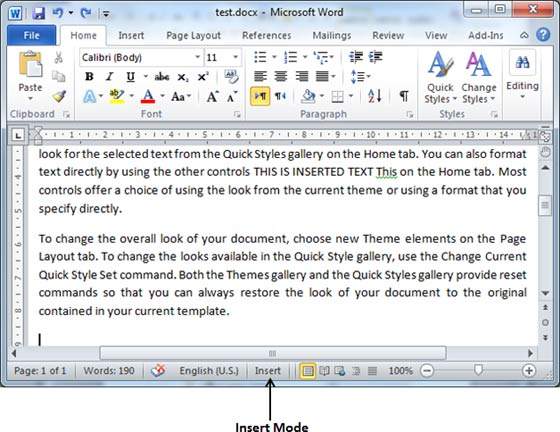
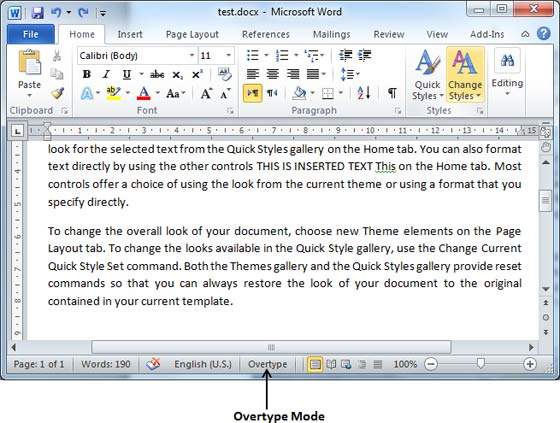
Step 2 − Click on the Insert text available at the status bar and it will switch to the Overtype mode as shown below −
Step 3 − Now click the location where the text needs to be inserted or you can use the keyboard arrows to locate the place where the text needs to be inserted.
Step 4 − Start typing the text that needs to be inserted. Word will replace the existing text with the newly typed text without moving the position of the exiting test.
Note − Microsoft Word 2010 disabled the functionality of the Insert key and it does nothing, so you will have to follow-up with the above mentioned procedure to turn-on or turn-off the Insert mode.
I have two tables one just below another, and I can’t insert a new empty line of regular text between them.
- When I hit Enter, Microsoft Word only adds a new row to the first or the second table, or to the text contained in one of the tables.
- When I try to paste, the pasted contents (text, or table) also gets inserted into one of the tables (so I even got a table in a table…).
- I’ve tried the «Document Outline» mode too, but to no success either.
Any ideas?
![]()
shA.t
4884 silver badges18 bronze badges
asked Sep 14, 2012 at 9:57
![]()
3
Ctrl+Shift and Enter works for me on Word 14 (aka Word 2010 in Office 2010).
This works, if your cursor is at the start of the second table.
![]()
answered Apr 28, 2013 at 12:20
![]()
PauloPaulo
3813 silver badges2 bronze badges
5
It sounds like the tables are actually attached to each other if there is no line between them.
Don’t know what version you are using, but in Word 2010, I simply split the table.
Started with this;

Chose the row of the table where I wanted to split above and clicked the split button;

Result;

answered Sep 14, 2012 at 11:48
![]()
CharlieRBCharlieRB
22.5k5 gold badges55 silver badges104 bronze badges
2
Table Properties —
correct
- Text Wrapping = None
incorrect (causes the problem)
- Text Wrapping = Around
If you want to have text and lines between two tables, both tables must be «inline» with the text (Wrapping = None) in order to put text between them. If one of the two tables is floating above the text (Wrapping = Around) with the text moving around it, you can’t insert text in-between.
answered Mar 3, 2014 at 22:03
![]()
I had a similar problem with a table at the top of a new section—all the usual suggestions did not work. This was my answer, I suspect it will resolve your issue as well: https://superuser.com/a/175181/146915
![]()
answered Feb 6, 2013 at 22:05
![]()
MalcolmMalcolm
2732 silver badges9 bronze badges
I had the same problem, but I solved it. Maybe it’s not the most elegant solution, but it works. In the table above I added a row at the bottom (or at the top of the table below).
Select marked row and convert it into text.
Select Layout -> Data -> Convert to Text.
In this way I got a blank line between the tables.
![]()
answered Oct 5, 2013 at 8:28
![]()
Place the cursor at the end of the first table.
Then press Ctrl+Shift+Enter. It will break the last row of table to create a free row, where u could write the texts. Then the breaked table row can be deleted by selecting it and press Ctrl+X
answered Jul 23, 2017 at 7:33
![]()
Hah, just a moment after posting the question I invented some convoluted method which worked in my case:
- Added some empty newlines at the end of the document.
- Shift-selected text starting in the middle of the empty lines at the end and going Up ↑ till I had the whole second table selected.
- Cut (Ctrl-X)
- Leave some empty lines below the first table, go ↓ Down below them.
- Paste (Ctrl-V) the second table and what follows.
Still, I’d be more than happy to learn some simpler way to do that, especially that copy&paste has potential to break some layout etc. in M$ Word, so this method might not always work.
answered Sep 14, 2012 at 10:03
![]()
akavelakavel
7881 gold badge8 silver badges25 bronze badges
I had the same problem, caused by cutting two tables out of a web page and pasting them into Word. I kicked myself when I stopped to think — if it’s genuinely two tables as it was in my case, select the second one, cut it, add a new line or two below the first table then paste the second table back after the newline. Simples.
answered May 20, 2013 at 15:57
![]()
One solution is to right click and add a caption above the second table. Then you can simply replace the caption with normal text.
answered Feb 16, 2014 at 15:39
![]()
Click on the little box on the upper left hand side of the table to select it. Table Tools will show up on the ribbon. Click on layout and select «Split Table» in the Merge section.
answered Sep 17, 2014 at 19:24
![]()
⌘+Shift and Enter works for me in Word 2011 on OSX.
This works if your cursor is at the start of the second table.
![]()
answered Apr 29, 2015 at 9:56
![]()
Just place your cursor to the right of the table and hit Shift and Control and Enter at the same time.
![]()
Heptite
19.1k5 gold badges58 silver badges70 bronze badges
answered Jun 7, 2016 at 18:28
![]()
1
I know there are many answers here, this is what worked for me (and didn’t) in Word 2013:
- Position cursor to the right of the first table (where you want to insert space after that table and before the next)
- Press Shift+Enter (Alt+Enter seems to make a page break, Ctrl+Shift+Enter does something odd with the last row of the first table.)
![]()
answered May 8, 2017 at 22:39
![]()
1
Place your cursor at the end of the row you want to create space and then press Alt+Enter.
Bingo! its done.
answered Oct 21, 2014 at 18:27
![]()
2
 Please Note:
This article is written for users of the following Microsoft Word versions: 97, 2000, 2002, and 2003. If you are using a later version (Word 2007 or later), this tip may not work for you. For a version of this tip written specifically for later versions of Word, click here: Inserting Text with a Shortcut Key.
![]()
Written by Allen Wyatt (last updated September 19, 2020)
This tip applies to Word 97, 2000, 2002, and 2003
Brendan would like to know if there is a way to assign a shortcut of my choosing, say Ctrl+J, to a sentence. This would mean every time he hits Ctrl+J it would paste that sentence. Brendan knows about AutoText, but he can’t see a way to assign a shortcut like Ctrl+J to a particular AutoText entry.
Actually, AutoText includes sort of a built-in shortcut key. Once you create the AutoText entry, you can type the mnemonic for the entry and press F3. Word expands the mnemonic to its longer form. If you want to have a special shortcut key for a particular AutoText entry, you can follow these steps:
- Define your AutoText entry as you normally would.
- Choose Customize from the Tools menu. Word displays the Customize dialog box.
- Click on the Keyboard button. Word displays the Customize Keyboard dialog box. (See Figure 1.)
- Position the insertion point in the Press New Shortcut Key text box.
- Press the shortcut key you want to use. For instance, if you want to use Ctrl+J, then press Ctrl+J. Just below the Current Keys text box you should see the name of any commands currently using this shortcut. (In this case, Ctrl+J is used to justify a paragraph so you may want to use a different shortcut.)
- In the Categories list scroll down and select AutoText. The defined AutoText entries appear at the right side of the dialog box.
- In the list of AutoText entries, select the one you defined in step 1.
- Click the Assign button to assign the shortcut.
- Click on Close to dismiss the Customize Keyboard dialog box.
- Click on Close to dismiss the Customize dialog box.
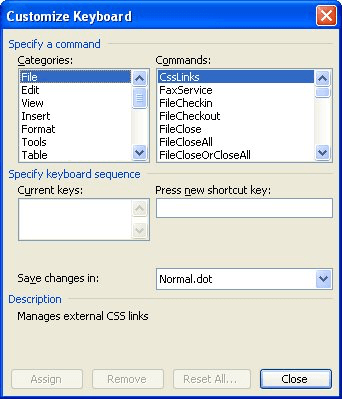
Figure 1. The Customize Keyboard dialog box.
There are other options besides using AutoText, however. You could, of course, record a macro of you typing the desired text. The macro could then be assigned to a shortcut key and would be replayed (again typing the text) anytime you invoke the shortcut key.
Perhaps the easiest alternative, however, is to create an AutoCorrect entry for your text. All you need to do is come up with a non-ambiguous series of keystrokes, such as cj, and then have Word replace that text with something else. In other words, the program can «correct» the characters cj, replacing them with the longer sentence. There is no shortcut key to remember in this instance, just the short text you want «corrected.» (How you create Autocorrect entries has been discussed in other issues of WordTips.)
WordTips is your source for cost-effective Microsoft Word training.
(Microsoft Word is the most popular word processing software in the world.)
This tip (6765) applies to Microsoft Word 97, 2000, 2002, and 2003. You can find a version of this tip for the ribbon interface of Word (Word 2007 and later) here: Inserting Text with a Shortcut Key.
Author Bio
With more than 50 non-fiction books and numerous magazine articles to his credit, Allen Wyatt is an internationally recognized author. He is president of Sharon Parq Associates, a computer and publishing services company. Learn more about Allen…
MORE FROM ALLEN
Spell-checking Uppercase Words
When Word checks the spelling of a document, it can either check or ignore words that are in uppercase letters. Here’s …
Discover More
Changing Outline Heading Level
Working with a document’s outline can be a great way to organize your writing. Word provides a variety of tools for …
Discover More
Endnotes in a Separate Document
When you add endnotes to a document they are normally positioned (as one would expect) at the end of the document. You …
Discover More
 This tutorial shows three ways to cut, copy, and paste in Microsoft Word. First, we’ll use keyboard shortcuts. Then, we’ll use the tools in the ribbon. Lastly, we’ll use the shortcut menu. Plus, the bonus tip at the end shows how to choose a pasting option after pasting your text.
Table of Contents
- How to Use Keyboard Shortcuts to Cut, Copy, and Paste
- How to Use the Ribbon to Cut, Copy, and Paste
- How to Use the Shortcut Menu to Cut, Copy, and Paste
- Bonus Tip: How to Choose a Pasting Option after Pasting Text
But first…
What Does It Mean to Cut, Copy, and Paste?
Cutting: When you cut text or an image, you are removing it from its original location, which can be your current Word document or another editable location, such as Microsoft Excel or Google Docs. Once cut, it will be placed in the Clipboard, which is a temporary storage area on your computer.
Copying: When you copy text or an image, you are placing a duplicate in the Clipboard, but you are not removing it from its original location.
Pasting: After cutting or copying, you can then use the paste function to move the text or image from the Clipboard to a new location in your document.
For an advanced look at the Clipboard, please see “How to Use the Clipboard in Microsoft Word.”
Do you want to copy and paste formatting instead of text? Check out “How to Use the Format Painter in Microsoft Word.”
This tutorial is available as a YouTube video showing all the steps in real time.
Watch more than 150 other writing-related software tutorials on my YouTube channel.
The images below are from Word for Microsoft 365. These steps also apply to Word 2021, Word 2019, Word 2016, and Word 2013.
How to Use Keyboard Shortcuts to Cut, Copy, and Paste
The following keyboard shortcuts work in Windows across all Microsoft Office apps, Adobe Acrobat, Google Docs, and many other locations such as email platforms, social media comment boxes, and website text boxes.
To Cut or Copy
- Select the text or image you want to cut or copy.
- Press the keyboard shortcut:
Cut: Ctrl + X
Copy: Ctrl + C
Your text or image should now be cut or copied.
To Paste
- Place your cursor where you want to insert the text or image.
- Press the keyboard shortcut:
Paste: Ctrl + V
Your text or image should now be pasted into the new location in your document.
How to Use the Ribbon to Cut, Copy, and Paste
The ribbon method requires more steps than the keyboard shortcuts; however, it offers more customization options for pasting.
To Cut or Copy
- Select the text or image you want to cut or copy.
- Select the Home tab in the ribbon.

- Select Cut or Copy from the Clipboard group.

Your text or image should now be cut or copied.
To Paste
- Place your cursor where you want to insert the text or image.
- Select the Home tab in the ribbon (see figure 1).
- Select the Paste button to paste the text or image without additional options.

- Select the Paste Options menu arrow for additional options.
![]()
- Choose an option from the drop-down menu:
A. Keep Source Formatting maintains the formatting (e.g., font, size, color, etc.) of the pasted text.
B. Merge Formatting changes the formatting of the pasted text to match the formatting of the new location.
C. Picture pastes the text or other content as an image (only available in Word for Microsoft 365).
D. Keep Text Only removes the formatting of the pasted text and adds the formatting of the new location.

What Is the Difference between Merge Formatting and Keep Text Only?
The difference between Merge Formatting and Keep Text Only is a bit confusing, so let’s dig into them a little deeper.
Merge Formatting matches the formatting of the pasted text to the formatting of the new location. However, it doesn’t remove existing emphasis formatting (boldness, italics, or underlining) from the pasted text.
For example, if you use Merge Formatting to paste a twenty-word paragraph with black font and five bold words into a location with red font, all twenty words will turn red. But, the five bold words will maintain the bold format.
Keep Text Only removes all formatting from the pasted text, including emphasis formatting, and then adds the formatting of the new location to the pasted text.
So, if you use Keep Text Only to paste that same twenty-word paragraph with black font and five bold words into a location with red font, all twenty words will turn red and the five bold words will lose the bold format.
- (Optional) For further customization, choose an advanced option from the drop-down menu:
-
- Paste Special opens the Paste Special dialog box with additional options including pasting as HTML format and unformatted Unicode text.
- Set Default Paste opens the Word Options dialog box where you can choose default options for pasting within the same document, pasting between documents, and pasting from other programs.

Your text or image should now be pasted into the new location in your document.
How to Use the Shortcut Menu to Cut, Copy, and Paste
The shortcut menu attached to the Mini toolbar lets you cut, copy, and paste from inside the document.
To Cut or Copy
- Select the text or image you want to cut or copy.
- Right-click the selected text or image, and then select Cut or Copy from the shortcut menu.

Your text or image should be cut or copied.
To Paste
- Right-click where you want to insert the text or image, and then select an option from the shortcut menu:
A. Keep Source Formatting
B. Merge Formatting
C. Picture (only available in Word for Microsoft 365)
D. Keep Text Only
See the definition for each option in step 5 of the section above.

Your text or image should now be pasted into the new location in your document.
Bonus Tip: Choose a Pasting Option after Pasting Text
Word provides a convenient way to choose a pasting option after you have pasted text into its new location.
- Select the Paste Options button that appears after you paste your text into its new location.

- Select an option from the shortcut menu:
A. Keep Source Formatting
B. Merge Formatting
C. Picture (Word for Microsoft 365 only)
D. Keep Text Only

Your pasted text should change formatting according to your selection.
Important Note: The Paste Options button will disappear once you perform another function such as typing or pressing the Enter key, so if you want to use this button, you must do so immediately after pasting your text.
Related Resources
How to Insert Files into Existing Files in Microsoft Word (PC & Mac)
How to Change the Font, Font Size, and Font Color in Microsoft Word
How to Insert and Modify Images in Microsoft Word
How to Add Page Numbers in Microsoft Word
Updated June 18, 2022