
Word for Microsoft 365 Word 2021 Word 2019 Word 2016 More…Less
In Word, you can easily add citations when writing a document where you need to cite your sources, such as a research paper. Citations can be added in various formats, including APA, Chicago-style, GOST, IEEE, ISO 690, and MLA. Afterwards, you can create a bibliography of the sources you used to write your paper.
To add a citation to your document, you first add the source that you used.
Add a new citation and source to a document
-
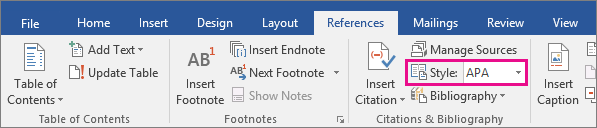
On the References tab, in the Citations & Bibliography group, click the arrow next to Style and click the style that you want to use for the citation and source. For example, social sciences documents usually use the MLA or APA styles for citations and sources.

-
Click at the end of the sentence or phrase that you want to cite.
-
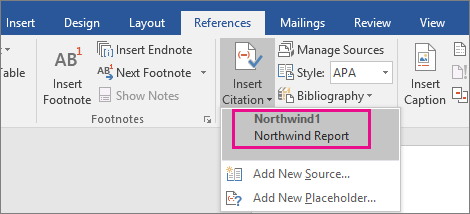
On the Reference tab, click Insert Citation and then do one of the following:
-
To add the source information, click Add New Source, and then, in the Create Source dialog box, click the arrow next to Type of Source, and select the type of source you want to use (for example, a book section or a website).
-
To add a placeholder, so that you can create a citation and fill in the source information later, click Add New Placeholder. A question mark appears next to placeholder sources in Source Manager.
-
-
If you chose to add a source, enter the details for the source. To add more information about a source, click the Show All Bibliography Fields check box.
-
Click OK when finished. The source is added as a citation at the place you selected in your document.
When you’ve completed these steps, the citation is added to the list of available citations. The next time you quote this reference, you don’t have to type it all out again. You just add the citation to your document. After you’ve added a source, you may find you need to make changes to it at a later time. To do this, see Edit a source.
Notes:
-
If you’ve added a placeholder and want to replace it with citation information, see Edit a source.
-
If you choose a GOST or ISO 690 style for your sources and a citation is not unique, append an alphabetic character to the year. For example, a citation would appear as [Pasteur, 1848a].
-
If you choose ISO 690-Numerical Reference and your citations still don’t appear consecutively, you must click the ISO 690 style again, and then press ENTER to correctly order the citations.
Add citations to your document
-
Click at the end of the sentence or phrase that you want to cite, and then on the References tab, in the Citations & Bibliography group, click Insert Citations.
-
From the list of citations under Insert Citation, select the citation you want to use.
Find a source
The list of sources that you use can become quite long. At times, you might need to search for a source that you cited in another document.
-
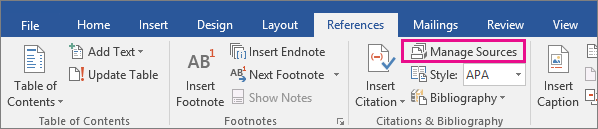
On the References tab, in the Citations & Bibliography group, click Manage Sources.
If you open a new document that does not yet contain citations, all of the sources that you used in previous documents appear under Master List.
If you open a document that includes citations, the sources for those citations appear under Current List. All the sources that you have cited, either in previous documents or in the current document, appear under Master List.
-
To find a specific source, do one of the following:
-
In the sorting box, sort by author, title, citation tag name, or year, and then look for the source that you want in the resulting list.
-
In the Search box, type the title or author for the source that you want to find. The list dynamically narrows to match your search term.
-
Note: You can click the Browse button in Source Manager to select another master list from which you can import new sources into your document. For example, you might connect to a file on a shared server, on a research colleague’s computer or server, or on a Web site that is hosted by a university or research institution.
Edit a source
-
On the References tab, in the Citations & Bibliography group, click Manage Sources.
-
In the Source Manager dialog box, under Master List or Current List, select the source you want to edit, and then click Edit.
Note: To edit a placeholder to add citation information, select the placeholder from Current List and click Edit.
-
In the Edit Source dialog box, make the changes you want and click OK.

Need more help?
Insert and Manage Dynamic Cross-Reference Fields in Microsoft Word
by Avantix Learning Team | Updated October 9, 2021
Applies to: Microsoft® Word® 2010, 2013, 2016, 2019 or 365 (Windows)
In Microsoft Word, you can insert a cross-reference to content in another part of your Word document and then update it if the target of the cross-reference changes. A cross-reference can refer to a heading, bookmark, the caption of a table or figure as well as other target items. Since a cross-reference is a field, it can be updated and formatted manually, using styles or using switches in the field.
Recommended article: How to Keep Text Together in Microsoft Word (Paragraphs, Lines or Words)
The information inserted by a cross-reference field can be text, a page number, a section number, a paragraph number, a caption number, a caption label or a combination of items. The cross-reference field is a code so it can also include special information in the code (called a switch) that make the field act or appear in a specific way. For example, a cross-reference field may act as a hyperlink so you can jump directly to the target of the cross-reference by Ctrl-clicking the field.
It’s easiest to create cross-references to built-in heading styles but they can also be used with bookmarks, footnotes or endnotes.
For example, you could insert a cross-reference to a built-in heading style as follows:
See Section 4: About Our Services on page 5.
In this case, the cross-reference refers to a style’s paragraph number, paragraph text and a page number so you would need to insert three separate cross-references and type some of the text (like the word See) as well as appropriate spacing.
Inserting a cross-reference to a built-in heading
It’s common to create a cross-reference to a built-in heading in Microsoft Word.
To insert a cross-reference to a built-in heading in the current document:
- Position the cursor where you want to insert your cross-reference.
- Type text that you want to precede the cross-reference (such as See) and any necessary spacing.
- Click the References tab in the Ribbon.
- In the Captions group, click Cross-reference. A dialog box appears.
- In the Reference type drop-down menu, select Heading.
- In the Reference to drop-down menu, select Heading text, Page number, Heading number, Heading number (no content) or Heading number (full content).
- In the For which heading list, click the item you want to reference.
- Ensure Insert as hyperlink is selected If you want to be able to Ctrl-click the cross-reference to jump to the referenced item.
- Click Insert. Word inserts an invisible bookmark to the target.
- Repeat for other items you want to include in the cross-reference. The dialog box can remain open.
- Click Close.
In the following example, note that Heading has been selected as the Reference type in the Cross-reference dialog box:

In the Cross-reference dialog box, the Separate numbers with and Include above/below check boxes are enabled under some conditions.
All paragraphs that are formatted with one of the built-in heading styles (Heading 1-9) are automatically shown in the dialog box. Although you can use outline levels, it’s best to use the built-in heading styles (these appear in the Home tab in the Ribbon in the Styles group and in other areas in Word).
Inserting a cross-reference to a bookmark
You can also insert a bookmark and then insert a cross-reference to the bookmark.
To insert a cross-reference to a bookmark in the current document:
- Position the cursor where you want to insert a bookmark.
- Click the Insert tab in the Ribbon.
- Click Bookmark in the Links group. A dialog box appears.
- Type a name for the bookmark without spaces.
- Click Add.
- Click where you want to insert the cross-reference to the bookmark.
- Type text that you want to precede the cross-reference (such as See) and any necessary spacing.
- Click the References tab in the Ribbon.
- In the Captions group, click Cross-reference. A dialog box appears.
- In the Reference type drop-down menu, select Bookmark.
- In the Reference to drop-down menu, select Bookmark text, Page number or one of the other options as required.
- In the For which heading list, click the item you want to reference.
- Ensure Insert as hyperlink is selected If you want to be able to Ctrl-click the cross-reference to jump to the referenced item.
- Click Insert.
- Repeat for other items you want to include in the cross-reference. The dialog box can remain open.
- Click Close.
The following is an example of a bookmark created in the Bookmark dialog box:

Inserting a cross-reference to a table or figure
You can cross-reference tables and figures in Word if you have inserted captions using Insert Caption on the References tab in the Ribbon.
To insert a cross-reference to a table or figure in the current document:
- Click where you want to insert the cross-reference to the table or figure (which has already been captioned).
- Type text that you want to precede the cross-reference (such as See) and any necessary spacing.
- Click the References tab in the Ribbon.
- In the Captions group, click Cross-reference. A dialog box appears.
- In the Reference type drop-down menu, select Table or Figure.
- In the Reference to drop-down menu, select the required option – Entire caption (which includes the figure caption or table title with the label and number), Only label and number (such as Table 10), Only caption text (which includes the figure caption or table title without the label and number), Page number or Above/below (which inserts the word above or below with no additional text related to the table or figure).
- In the For which heading list, click the table or figure you want to reference.
- Ensure Insert as hyperlink is selected If you want to be able to Ctrl-click the cross-reference to jump to the referenced item.
- Click Insert.
- Repeat for other items you want to include in the cross-reference. The dialog box can remain open.
- Click Close.
In the following example, note that Table has been selected as the Reference type in the Cross-reference dialog box:

Showing or hiding field codes
Cross-references are fields. Normally, the result of a field is displayed but you can also view the field codes.
To show or hide all field codes in your document, press Alt + F9.
The following is an example of a field code:
{ REF _Ref46507086 h }
Understanding cross-reference field codes
When you insert a cross-reference, a field code will be inserted based on what the reference refers to.
There are three types of cross-reference fields in Word – PAGEREF, NOTEREF and REF. The first part of the field code of a cross-reference field indicates which type of field it is.
A cross-reference field that refers to the page on which the target is found is a PAGEREF type. When you select Page number as the Reference to insert in the Cross-reference dialog box, the inserted cross-reference field will be PAGEREF.
A cross-reference field with a footnote or an endnote as the target will be the NOTEREF type.
All other cross-reference fields will be the REF type.
Part of the field code inside a cross-reference field refers to a bookmark that points to the target. A bookmark in Word is a named location or a named block of text or other content in a document.
If you refer to a built-in heading style in a cross-reference, Word automatically adds a bookmark around the heading text at the beginning and the end (excluding the paragraph mark) if a bookmark is not already found. The name of the bookmark is included in the field code of the cross-reference field. Bookmarks that are automatically added are named _Ref followed by eight or nine digits.
If you are inserting a cross-reference to a caption, a bookmark will also be added to enclose the part of the caption content to be displayed by the cross-reference field. The bookmark will include different parts of the caption depending on the kind of caption reference you select (such as the entire caption or only the label and number).
The following is an example of a cross-reference for a REF field:
{ REF _Ref449977221 p h d».»* CHARFORMAT }
The syntax for REF fields is:
{ REF Bookmark [* Format Switch ] [Switches ] }
Switches are optional.
The underscore at the start of the bookmark name means that the bookmark is being treated as a hidden bookmark in Word. You cannot add hidden bookmarks manually.
Hidden bookmarks are invisible in the document even if you turn on display of bookmarks. You can view invisible bookmarks in the Bookmarks dialog box, but you must turn on Hidden bookmarks to display them.
Formatting cross-references
Cross-references can be formatted manually, using styles or using switches in the field code. A switch holds special information that causes the field to act or appear in a specific way.
One easy way to format a cross-reference is by using a character style such as Emphasis or Intense Emphasis.
To apply the Emphasis, Intense Emphasis or Intense Reference character style to a cross-reference:
- Select the cross-reference as well as any surrounding text that refers to it.
- Click the Home tab in the Ribbon.
- Click the More down arrow in the Style gallery in the Styles group.
- Click Emphasis, Intense Emphasis or Intense Reference.
The benefit of this method is that you can later modify the style or find and replace the style with a different style.
In a future article, we’ll take a look at more advanced formatting techniques for cross-references.
Updating cross-references
If a document has been edited, you will likely need to update the cross-references since cross-references do not update automatically.
It is important that the markers that are added at the beginning and end of the target of a cross-reference are not deleted or moved during editing. If they are, you will need to reinsert the cross-reference because you will receive an error when you update.
You can update cross-references manually by pressing Ctrl + A to select all and then pressing F9.
Cross-references will also be updated when you switch to Print Preview or when you print (if the Word option Update fields before printing is turned on).
To ensure that fields are updated before printing:
- Click the File tab in the Ribbon.
- Click Options.
- Select Display in the categories on the left.
- In Printing options, select Update fields before printing.
- Click OK.
Be sure to check after update to see if there are any errors in your cross-references.
Subscribe to get more articles like this one
Did you find this article helpful? If you would like to receive new articles, join our email list.
More resources
14 Timesaving Microsoft Word Selection Shortcuts
How to Update All Figure Numbers in Microsoft Word
How to Insert the Not Equal Sign in Word (5 Ways to Type or Insert ≠)
How to Keep Text Together in Microsoft Word (Paragraphs, Lines or Words)
How to Create a Table of Contents in Word (Insert, Format and Update a TOC)
Related courses
Microsoft Word: Intermediate / Advanced
Microsoft Excel: Intermediate / Advanced
Microsoft PowerPoint: Intermediate / Advanced
Microsoft Word: Long Documents Master Class
Microsoft Word: Styles, Templates and Tables of Contents
Microsoft Word: Designing Dynamic Word Documents Using Fields
VIEW MORE COURSES >
Our instructor-led courses are delivered in virtual classroom format or at our downtown Toronto location at 18 King Street East, Suite 1400, Toronto, Ontario, Canada (some in-person classroom courses may also be delivered at an alternate downtown Toronto location). Contact us at info@avantixlearning.ca if you’d like to arrange custom instructor-led virtual classroom or onsite training on a date that’s convenient for you.
Copyright 2023 Avantix® Learning
Microsoft, the Microsoft logo, Microsoft Office and related Microsoft applications and logos are registered trademarks of Microsoft Corporation in Canada, US and other countries. All other trademarks are the property of the registered owners.
Avantix Learning |18 King Street East, Suite 1400, Toronto, Ontario, Canada M5C 1C4 | Contact us at info@avantixlearning.ca
 Please Note:
This article is written for users of the following Microsoft Word versions: 97, 2000, 2002, and 2003. If you are using a later version (Word 2007 or later), this tip may not work for you. For a version of this tip written specifically for later versions of Word, click here: Inserting a Cross-Reference to Text.
![]()
Written by Allen Wyatt (last updated January 26, 2018)
This tip applies to Word 97, 2000, 2002, and 2003
Word allows you to insert the text of cross-references in the following manner:
- Select the text you want to be cross-referenced.
- Assign this text a bookmark name.
- Position the insertion point where you want the cross-reference to appear.
- Press Ctrl+F9 to insert field brackets. Make sure the insertion point stays between the brackets.
- Type ref followed by the name of the bookmark used in step 2.
- Press F9 to update the field information. Word replaces the field with the text to which the bookmark was assigned.
WordTips is your source for cost-effective Microsoft Word training.
(Microsoft Word is the most popular word processing software in the world.)
This tip (1391) applies to Microsoft Word 97, 2000, 2002, and 2003. You can find a version of this tip for the ribbon interface of Word (Word 2007 and later) here: Inserting a Cross-Reference to Text.
Author Bio
With more than 50 non-fiction books and numerous magazine articles to his credit, Allen Wyatt is an internationally recognized author. He is president of Sharon Parq Associates, a computer and publishing services company. Learn more about Allen…
MORE FROM ALLEN
Adding a Horizontal Watermark with a PostScript Printer
In Windows, printer drivers translate formatting into a printer control language, like PostScript, that the printer …
Discover More
Converting a Table into Text
Word includes a powerful table editor that allows you to create and work with tables easily. At some point, however, you …
Discover More
Understanding Shortcuts
One way of optimizing your user interface is through the use of shortcuts. This tip provides a brief overview of what …
Discover More

Comprehensive VBA Guide Visual Basic for Applications (VBA) is the language used for writing macros in all Office programs. This complete guide shows both professionals and novices how to master VBA in order to customize the entire Office suite for their needs. Check out Mastering VBA for Office 2010 today!
More WordTips (menu)
Referencing a Page Number In Another Document
Page references are a common element of many documents. If you need to have a page reference to a page in a different …
Discover More
Setting Defaults in the Cross-reference Dialog Box
Some types of documents rely on cross-references quite a bit. Setting up the Cross-reference dialog box the first time in …
Discover More
Condensing Figure Caption References
Word can automatically add captions to your figures. You can then reference those captions from within your document. If …
Discover More
Subscribe
FREE SERVICE: Get tips like this every week in WordTips, a free productivity newsletter. Enter your address and click «Subscribe.»
View most recent newsletter.
Videos
Links and Sharing
Add citations to your document Click at the end of the sentence or phrase that you want to cite, and then on the References tab, in the Citations & Bibliography group, click Insert Citations. From the list of citations under Insert Citation, select the citation you want to use.
Contents
- 1 How do you add References manually?
- 2 Can I add a referencing style to Word?
- 3 How do I turn on References in Word?
- 4 How do you add more references?
- 5 How do you do apa style referencing?
- 6 How do I add Oxford Referencing to Microsoft Word?
- 7 How do I insert references in Word 2010?
- 8 How do you put references in a research paper?
- 9 Is APA the same as Harvard?
- 10 How do you write references?
- 11 How do I reference a website in APA?
- 12 How do I install Oscola in Word?
- 13 How do you reference in-text Harvard style?
- 14 How do you reference a website Harvard style?
- 15 How do you copy and paste references in Word?
- 16 How do I insert a reference in Word 2016?
- 17 How do you add references to a research paper in Word?
- 18 How do you incorporate references in an essay?
- 19 Which referencing style is the best?
- 20 Is APA 6th Harvard?
How do you add References manually?
Select “References” and then “New Reference”, or press “Ctrl+N” on your keyboard or click the “New Reference” button (a clipboard with a plus sign). Choose the appropriate reference type from the “Reference Type” drop-down menu.
Can I add a referencing style to Word?
In your Word document, click on the References tab in the Ribbon. In the Citations & Bibliography group, click the arrow next to Style. Click the style that you want to use for the citation and source. Click at the end of the sentence or phrase that you want to cite.
How do I turn on References in Word?
Go to Add-In tab -> Reference Manager -> Instant Formatting. Click the Enable Instant Formatting box to toggle Instant Formatting. Click OK to save changes to the Instant Formatting settings. Click OK to format all citations and build the bibliography.
How do you add more references?
Put your cursor at the end of the text you want to cite. Go to References > Style, and choose a citation style. Select Insert Citation. Choose Add New Source and fill out the information about your source.
How do you do apa style referencing?
About APA Style
The APA referencing style is an “author-date” style, so the citation in the text consists of the author(s) and the year of publication given wholly or partly in round brackets. Use only the surname of the author(s) followed by a comma and the year of publication.
How do I add Oxford Referencing to Microsoft Word?
The Oxford referencing system
On any Microsoft Word document, simply click on the ‘Insert’ menu and select ‘Footnote’ (or ‘Reference’ and then choose ‘Footnote’ from the drop-down list).
How do I insert references in Word 2010?
- On the References tab, in the Citation & Bibliography group, choose the style of citation you want to use.
- Position the cursor where you want the citation to appear, and then click Insert Citation, Add New Source.
- In the Create Source dialog box, select the type of source and then fill in the fields shown.
How do you put references in a research paper?
Book: online / electronic
- Author/Editor (if it is an editor always put (ed.)
- Title (this should be in italics)
- Series title and number (if part of series)
- Edition (if not the first edition)
- [Online]
- Place of publication (if there is more than one place listed, use the first named)
- Publisher.
- Year of publication.
Is APA the same as Harvard?
APA (American Psychological Association)
APA referencing is a variant on Harvard style. Many of the conventions are the same, with brief author-date citations in brackets in the body of the text and full citations in the reference list.
How do you write references?
References
- author(s) name and initials.
- title of the article (between single quotation marks)
- title of journal (in italics)
- any publication information (volume, number etc.)
- page range.
- accessed day month year (the date you accessed the article)
- from name of database.
- item number (if given).
How do I reference a website in APA?
When citing a web page or online article in APA Style, the in-text citation consists of the author’s last name and year of publication. For example: (Worland & Williams, 2015). Note that the author can also be an organization. For example: (American Psychological Association, 2019).
How do I install Oscola in Word?
To create a footnote in Microsoft Word, click your mouse on the place you want it to refer to. Click on ‘References’ at the top and then on ‘Insert Footnote‘. A number will appear in the text, and also at the bottom of the page, where you write your citation.
How do you reference in-text Harvard style?
An in-text citation should appear wherever you quote or paraphrase a source in your writing, pointing your reader to the full reference. In Harvard style, citations appear in brackets in the text. An in-text citation consists of the last name of the author, the year of publication, and a page number if relevant.
How do you reference a website Harvard style?
To reference a website in Harvard style, include the name of the author or organization, the year of publication, the title of the page, the URL, and the date on which you accessed the website. Author surname, initial. (Year) Page Title. Available at: URL (Accessed: Day Month Year).
How do you copy and paste references in Word?
Use the keyboard shortcut CTRL+C (CMD+C for Mac) to copy. Alternatively you can use the menu “Edit > Copy”. In your email, IM, Google Docs or any other text editing field, paste the content you just copied. Do so by pressing CTRL+V (CMD+V for Mac) or the menu “Edit > Paste”.
How do I insert a reference in Word 2016?
To add a citation to your document, first add the source you used.
- On the References tab, click the arrow next to Bibliography Style, and click the style that you want to use for the citation and source.
- Click at the end of the sentence or phrase that you want to cite.
- On the References tab, click Insert Citation.
How do you add references to a research paper in Word?
Add citations to your document
- Click at the end of the sentence or phrase that you want to cite, and then on the References tab, in the Citations & Bibliography group, click Insert Citations.
- From the list of citations under Insert Citation, select the citation you want to use.
How do you incorporate references in an essay?
You must cite all information used in your paper, whenever and wherever you use it. When citing sources in the body of your paper, list the author’s last name only (no initials) and the year the information was published, like this: (Dodge, 2008). (Author, Date).
Which referencing style is the best?
How to do I choose a citation style?
- APA (American Psychological Association) is used by Education, Psychology, and Sciences.
- MLA (Modern Language Association) style is used by the Humanities.
- Chicago/Turabian style is generally used by Business, History, and the Fine Arts.
Is APA 6th Harvard?
The Harvard (APA 6th) system of referencing requires you to set this information out in a certain way, and the examples below will show you how to do this.
![]()
Download Article
A user-friendly guide to creating interactive links in Microsoft Word
![]()
Download Article
- Linking to Another Document or Website
- Linking to a Blank Email Message
- Linking to a Place in the Same Document
- Video
- Q&A
- Tips
|
|
|
|
|
Do you want to add a clickable link in your Microsoft Word document? You can easily turn any text or image in your document into a hyperlink. When clicked, a hyperlink can bring readers to another place in the document, an external website, a different file, and even a pre-addressed email message. This wikiHow article will walk you through creating different types of hyperlinks in your Word document.
Things You Should Know
- To link to a website or document, highlight the text. Click the «Insert» tab, then «Link». Find your file or paste your website link. Click «OK».
- Click «E-mail Address» in the Hyperlink menu. Enter an email address and subject, then click «OK».
- Click «Insert», then «Bookmark» to save a position in the document. Click «Place in This Document» in the Hyperlink menu, then click the bookmark.
-
1
-
2
Select the text or image that you want to turn into a link. You can turn any text or image in your document into a link. Highlight the text or click the image that you want to convert into a hyperlink.
- To insert an image into your document, click the Insert tab and select «Pictures.» You’ll be able to browse your computer for an image file to add. You can also insert clip art to use as a link.
Advertisement
-
3
Press ⌘ Command+K (Mac) or Ctrl+K (Windows). This opens the Insert Hyperlink window. You can also get to this menu by clicking the Insert tab and then clicking the Link button in the toolbar.
-
4
Select Existing File or Web Page from the left panel. More options will appear in the right panel.
-
5
Select a file or enter a web address. You can choose to link to an existing document, a new document, or a website.
- To link to a website or a file that’s accessible on the web, type or paste the full address (including the «https://» at the beginning) into the «Address» field near the bottom of the window.
- To link to a file on your computer or local network, select that file in the center panel. If it’s in the current folder, click Current folder to open its contents. If you opened it recently, click Recent Files to browse those. You can also use the menus at the top to navigate to the correct folder and select the file.
- To create a new blank document instead of opening a certain file, click Create a new document in the left menu, then choose a location for the document.
-
6
Set a ScreenTip (optional). You can change the text that appears when the user hovers the cursor over the link by clicking the ScreenTip button at the top-right corner and specifying your text.
- If you don’t change it, the screen tip will display the website address or file path.
-
7
Click OK to save your link. To open the link within the Word document, hold Command (Mac) or CTRL (Windows) and click the link.
- If you want to remove the hyperlink, right-click the hyperlink and select Remove Hyperlink.[2]
- If you want to remove the hyperlink, right-click the hyperlink and select Remove Hyperlink.[2]


Advertisement
-
1
Open a project in Microsoft Word. This looks like a W on top of a blue square.
- You must have a subscription to use Office 365.
-
2
Select the text or click the image you want to turn into an email link. You can use any text or image in your document. When you’re finished with this method, clicking the selected text or image will bring up a new email message to the address of your choice.
-
3
Press ⌘ Command+K (Mac) or Ctrl+K (Windows). This opens the Insert Hyperlink window. You can also get to this menu by clicking the Insert tab and then clicking the Link button in the toolbar.
-
4
Click E-Mail Address in the left panel. This allows you to set up the blank message.
-
5
Enter the e-mail address and subject. This will be the address that the reader will be sending the email to. What you enter into the «Subject» field will be automatically filled in for the reader, but they will be able to change it if they want.
- If you use Outlook, you’ll see recently used email addresses in the field at the bottom of the window. Feel free to select one of those.
- Some mail apps, especially web-based email apps, may not recognize the subject line.
-
6
Set a ScreenTip (optional). You can change the text that appears when the user hovers the cursor over the link by clicking the ScreenTip button at the top-right corner and specifying your text. If you don’t change it, the screen tip will show the email address.
-
7
Click OK to save your link. To open the link within the Word document, hold Command (Mac) or CTRL (Windows) and click the link.
- If you want to remove the hyperlink, right-click the hyperlink and select Remove Hyperlink.


Advertisement
-
1
Open a project in Microsoft Word. This looks like a W on top of a blue square.
- You must have a subscription to use Office 365.
-
2
Place your cursor at the location you want to link to. You can use the Bookmark tool to create links to specific spots in your document. This is great for tables of contents, glossaries, and citations. You can highlight a portion of text, select an image, or just place your cursor in the spot you want.
-
3
Click the Insert tab. It’s in the menu bar at the top of Word, between Home and Draw.
-
4
Click the Bookmark icon. It’s in the toolbar at the top of Word in the «Links» section.
-
5
Enter a name for the bookmark. Make sure the name is descriptive enough that you’ll be able to recognize it. This is especially important if you are using a lot of bookmarks or more than one person is editing the document.
- Bookmark names have to start with letters but can also contain numbers. You can’t use spaces, but you can use underscores instead (e.g. «Chapter_1»).
-
6
Click Add to insert the bookmark. Bookmarks will appear on the page surrounded by brackets. You won’t see the bookmark on the page if you’re using the current version of Word, but in earlier versions, it may be surrounded by brackets.
- If you want to see brackets around the bookmark so you don’t forget where you placed it, click the File menu, select Options, and click Advanced in the left panel. Then, scroll down the right panel and check the box next to «Show bookmarks» under the «Show document content» header.
-
7
Select the text or image you want to create the link from. Highlight the text or click the image that you want to turn into a link to your bookmark.
-
8
Press ⌘ Command+K (Mac) or Ctrl+K (Windows). This opens the Insert Hyperlink window. You can also get to this menu by clicking the Insert tab and then clicking the Link button in the toolbar.
-
9
Click Place in This Document in the left panel. This displays a navigation tree with your heading styles and bookmarks.
-
10
Select the bookmark you want to link to. Expand the «Bookmarks» tree if it isn’t already and select the bookmark you created. You can also select from heading styles you’ve applied throughout the document.
-
11
Set a ScreenTip (optional). To change the text that appears when the user rests the cursor over the link, click the Screen Tip button at the top-right corner. If you don’t change the text, the screen tip will display the website address or file path.
-
12
Click OK to save your link. To test the hyperlink, hold Command (Mac) or CTRL (Windows) and click the link.
- This will recenter the view to the line on which you placed the bookmark.
- If you want to remove the hyperlink, right-click the hyperlink and select Remove Hyperlink.


Advertisement
Add New Question
-
Question
What hyperlinks are inserted into a document by default?

A link to any website or a file with a url will become a hyperlink automatically after you press the space bar, tab key, or return/enter key.
-
Question
How can I add hyperlinks to Microsoft Word?
Edit>Add Hyperlink>add the link. To test the link, Ctrl+Click and it should get you there.
-
Question
How can I embed a hyperlink into a word or phrase in a Word document?
Highlight the word/phrase you want to embed a link into, got into the insert tab, press link. A box that says «insert hyperlink» on the top should pop up, copy/type the link you want into the box at the bottom that says «address» and then press «ok» and you are done!
Ask a Question
200 characters left
Include your email address to get a message when this question is answered.
Submit
Advertisement
-
You can remove a hyperlink by right-clicking it and selecting Remove Hyperlink.
-
Looking for money-saving deals on Microsoft Office products? Check out our coupon site for tons of coupons and promo codes on your next subscription.
-
If you type a URL into a document (e.g., https://www.wikihow.com), Word will automatically make that text a clickable link.
Thanks for submitting a tip for review!
Advertisement
About This Article
Article SummaryX
1. Select the text or object you want to turn into a hyperlink.
2. Click the Insert tab.
3. Click the Link button in the toolbar.
4. Click Existing File or Web Page in the left and enter the URL.
5. To link to another file instead of a website, leave the «»Address»» bar blank and select the file instead.
6. Click OK.
Did this summary help you?
Thanks to all authors for creating a page that has been read 675,541 times.