
Open the document in Word that contains the text you want to center. Use your mouse to select the text. Click the Home tab at the top of the window. Click the Center button in the Paragraph section of the ribbon.
Contents
- 1 How do I center text on a page in Word?
- 2 How do I center text in the middle of a cell in Word?
- 3 What is center alignment?
- 4 How do I turn on alignment guides in Word?
- 5 How do I align only part of a line in Word?
- 6 What is center text?
- 7 How do you center text on a keyboard?
- 8 How do you center text in CSS?
- 9 How do I show alignment lines in Word?
- 10 What is alignment guide in Word?
- 11 How do you use the Word alignment?
- 12 How do you align text in a resume?
- 13 What is the default text alignment?
- 14 How do I center text vertically in Word for Mac?
- 15 How do I align text opposite sides in Word?
- 16 Which alignment is used to move the text to the right?
- 17 How do you center a form?
- 18 How do you center a button?
- 19 What is the shortcut key to Centre align the text?
- 20 What is the shortcut to align text to the center?
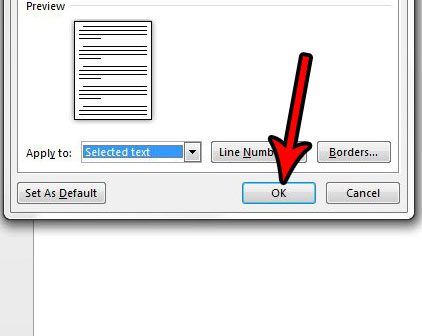
Select the text that you want to center. in the Page Setup group, and then click the Layout tab. In the Vertical alignment box, click Center. In the Apply to box, click Selected text, and then click OK.
How do I center text in the middle of a cell in Word?
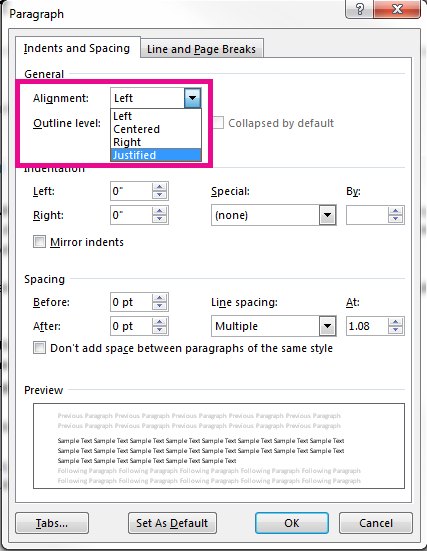
Select the text that you want to center, and then click Paragraph on the Format menu. On the Indents and Spacing tab, change the setting in the Alignment box to Centered, and then click OK.
What is center alignment?
Centre Alignment means that the text in the page is exactly in the centre….. also the distance from the left and right margin is equal to the text of the paragraph.
How do I turn on alignment guides in Word?
Turn on the snap-to options
- Select a chart, picture, or object in the document.
- On the right end of the ribbon, select Format > Align > Grid Settings. The Grid and Guides dialog box appears.
- Turn on one or both of these options: Option. Description. Snap objects to grid when the gridlines are not displayed.
How do I align only part of a line in Word?
Now, let’s create that right-aligned tab as follows:
- On the Home tab, click the Paragraph group’s dialog launcher and then click Tabs in the bottom-left corner.
- Enter 6.5 in the Tab stop position.
- Click Right in the Alignment section (Figure C).
- Click Set.
- Click OK.
What is center text?
In computing, the term “center” is frequently used to describe text that is horizontally in the middle of a line.When text is highlighted, the keyboard shortcut Ctrl + E can be used in many text editors, word processors, and spreadsheets to center text.
How do you center text on a keyboard?
Ctrl+E Center – centers text between margins. Ctrl+R Align Right – aligns text to the right margin, and the left margin is ragged.
How do you center text in CSS?
To center text in CSS, use the text-align property and define it with the value “center.” Let’s start with an easy example. Say you have a text-only web page and want to center all the text. Then you could use the CSS universal selector (*) or the type selector body to target every element on the page.
How do I show alignment lines in Word?
Click the shape or object in the document. Under Drawing Tools on the Format tab, in the Arrange group, click Align, and then click View Gridlines.
What is alignment guide in Word?
Microsoft Word is equipped with live layout and alignment guides to help you align, resize, and move objects.Move the shape (or other element) around the document to see layout guides and allign them to existing objects.
How do you use the Word alignment?
Examples of alignment in a Sentence
The school has to bring its programs into alignment with state requirements. New alignments have been created within the political party. These example sentences are selected automatically from various online news sources to reflect current usage of the word ‘alignment.
How do you align text in a resume?
Once you have the Tabs window open, you’ll need to make three selections:
- Tab stop position. The tab stop position tells Word where you want text aligned on the page.
- Alignment. Select Right to make sure the text is aligned right, as shown in the blue circle.
- Leader.
What is the default text alignment?
The default alignment for text in a Word document is for it to be left justified. However, you can change that. The alignment buttons on the Home tab (in the Paragraph group) allow us to justify, or align, not only text but other objects as well.
How do I center text vertically in Word for Mac?
1 Select the text you want to center between the top and bottom margins. 2 On the Page Layout tab, click the Page Setup Dialog Box Launcher. 3 Select the Layout tab. 4 In the Vertical alignment box, click Center 5 In the Apply to box, click Selected text, and then click OK.
How do I align text opposite sides in Word?
Click in the ruler to place a tab marker and then drag it over to the right hand side of your page. Now double click on the marker and change the alignment to right. Now when you press TAB while typing on that line, instead of just indenting your text a bit, you can type text aligned to the right of the page.
Which alignment is used to move the text to the right?
To make text right aligned, select and highlight the text first, then hold down Ctrl (the control key) on the keyboard and then press R. To make text justified, select and highlight the text first, then hold down Ctrl (the control key) on the keyboard and then press J.
How do you center a form?
- Wrap your form in a div.
- Set the div’s display to block and text-align to center (this will center the contained form).
- Set the form’s display to inline-block (auto-sizes to content), left and right margins to auto (centers it horizontally), and text-align to left (or else its children will be center-aligned too).
How do you center a button?
How to center a button in CSS?
- text-align: center – By setting the value of text-align property of parent div tag to the center.
- margin: auto – By setting the value of margin property to auto.
- display: flex – By setting the value of display property to flex and the value of justify-content property to center.
What is the shortcut key to Centre align the text?
Ctrl + E
In MS Word Ctrl + E is the shortcut key to “Centre Align” the selected text.
What is the shortcut to align text to the center?
Ctrl + E
The shortcut key Ctrl + E is used to align the line or selected text to the centre of the screen.
Text in a Microsoft Word document occasionally needs to be put in the center of the page between the left and right margins.
You might also need to know how to center text in Word vertically in Word documents, which means that it needs to be in the middle of the top and bottom margins.
You can vertically center text in Microsoft Word by selecting the text, choosing the Layout tab, clicking the Page Setup button, choosing the Layout tab, clicking the Vertical Alignment tab, choosing Center, then clicking Apply.
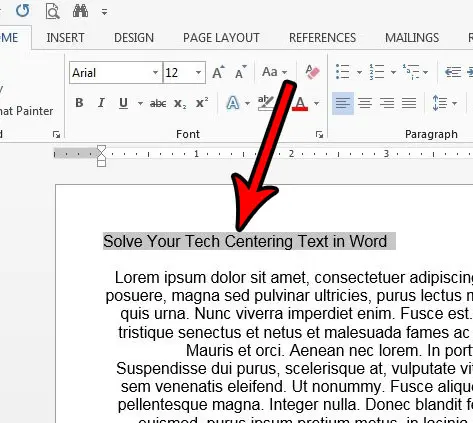
How to Horizontally Center Text in Microsoft Word
- Open the document in Word that contains the text you want to center.
- Use your mouse to select the text.
- Click the Home tab at the top of the window.
- Click the Center button in the Paragraph section of the ribbon.
How to Vertically Center Text in Microsoft Word
- Open the document containing the text to center vertically.
- Use your mouse to select the text you wish to center.
- Click the Page Layout tab.
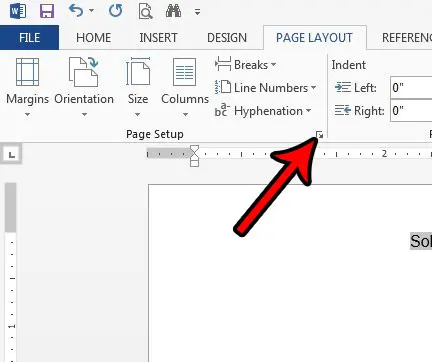
- Click the small Page Setup button at the bottom-right corner of the Page Setup section of the ribbon.
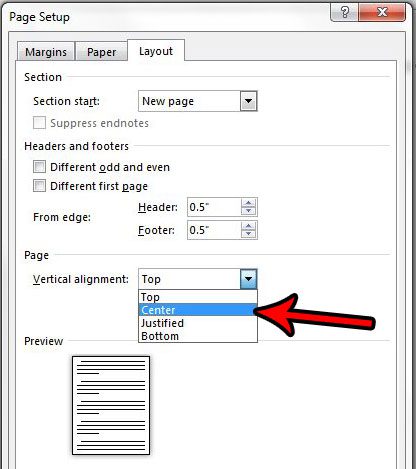
- Click the dropdown menu to the right of Vertical alignment and choose the Center option.
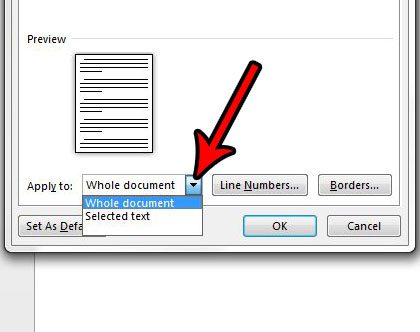
- Click the dropdown menu to the right of Apply to and choose the appropriate option, then click the OK button.
Our article continues below with additional information on how to center align text in Microsoft Word, including expanded sections with pictures for the steps above.
Last update on 2023-04-13 / Affiliate links / Images from Amazon Product Advertising API
| As an Amazon Associate, I earn from qualifying purchases.
Adding content to a document in Microsoft Word can include a variety of options. You can format that text using a number of different tools and dialog box menus in the application, and many of those changes can be applied by simply selecting the text you want to change.
But if you need to align text to the center of the page, whether it is vertical alignment or horizontal alignment, then you may be wondering where that setting is found.
When you start typing in a Word document that is using the Normal template, all of the text that you enter will be left aligned by default.
This means that the first letter on each line will be against the left margin of the page. This is the standard for most corporations and institutions and is the most common alignment format used in documents.
But sometimes, a part of your document will need to be centered on the page, either horizontally or vertically.
Our tutorial below will show you how to center text in Microsoft Word using either the horizontal or vertical alignment option so that you can achieve the desired display result for your document.
You may also want to know how to get rid of space after paragraphs in Google Docs if you use that application for document editing, too.
Expanded – How to Center Text in Microsoft Word Horizontally
The summary section above gives a brief overview of how to horizontally center text in Word, but this section provides pictures as well if you would like a little more information. Note that I am using Microsoft Word 2013 in the images below, but the process is the same in most other versions of Word as well.
Find out how to use all small caps in Word if you have been struggling to manually apply that formatting in your document.
Step 1: Open your document in Microsoft Word.
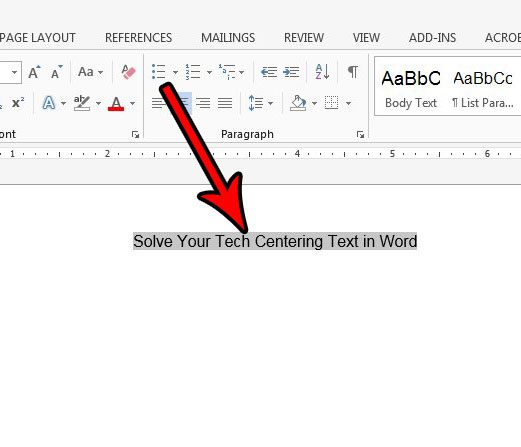
Step 2: Use your mouse to highlight the text that you want to center horizontally.
Step 3: Click the Home tab at the top of the window.
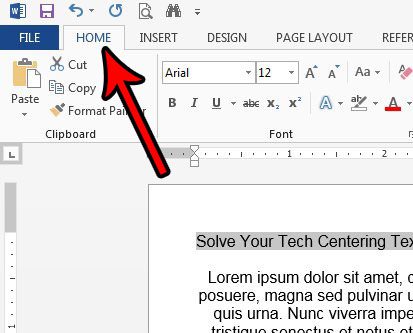
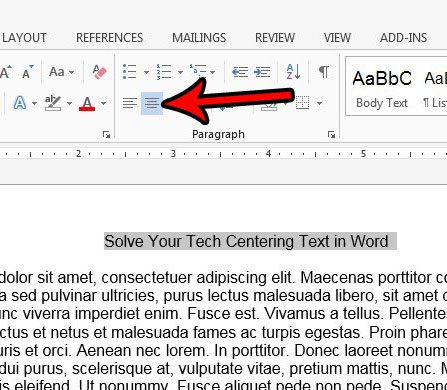
Step 4: Select the Center button in the Paragraph section of the ribbon.
The next section includes information on how to center text vertically if the text you want to modify in your document needs to be in the middle of the page.
Expanded – How to Center Text in Microsoft Word Vertically
We outlined how to vertically center text in the summary section above, but this section will provide images as well. This section was performed using Microsoft Word 2013.
Step 1: Open your document in Microsoft Word.
Step 2: Use your mouse to select the text that you want to center vertically.
If you wish to center the entire document you can skip this step.
Step 3: Click the Page Layout tab at the top of the window.
Step 4: Click the Page Setup button in the Page Setup section of the ribbon.
It’s the tiny button at the bottom-right corner of the section.
Step 5: Click the dropdown menu to the right of Vertical alignment, then choose the Center option.
Note that the vertical alignment drop down menu also has options for Top, Justified, and Bottom.
Step 6: Select the dropdown menu to the right of Apply to, then choose the option that fits your needs.
If you selected text earlier, then the Selected sections option will only vertically center that selected text. The Whole document option will vertically center the entire document, and the This point forward will vertically center all of the document text after the point at which your mouse cursor is currently located. Some of the vertical alignment options may not appear depending on the selected text’s locations, whether or not any text is selected, or the composition of the document.
Step 7: Click the OK button to apply the vertical centering.
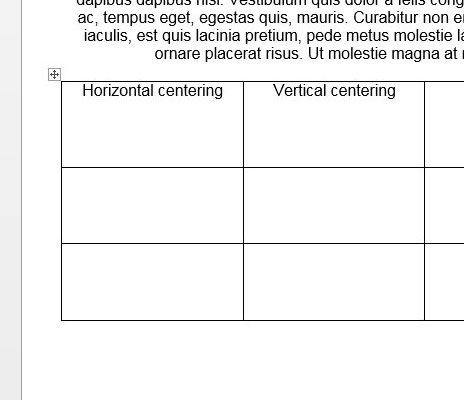
How to Center Text in a Table in Microsoft Word
If you have a table in your document and need to center the text in one of the table cells, then you get to use some table-specific centering options. By default the data in your table will be horizontally centered at the top of the table cell, but there are options that let you customize the alignment within a cell.
Step 1: Open the document containing the table text that you want to center.
Step 2: Click inside the cell containing the data you wish to center.
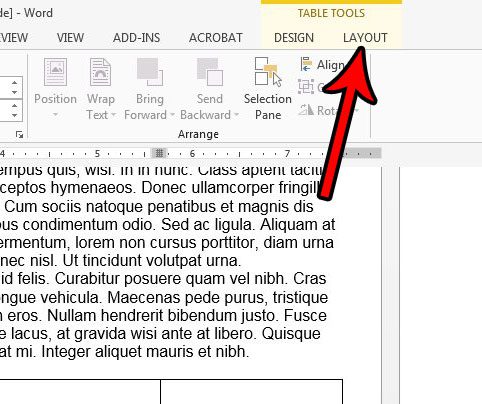
Step 3: Click the Layout tab at the top of the window under Table Tools.
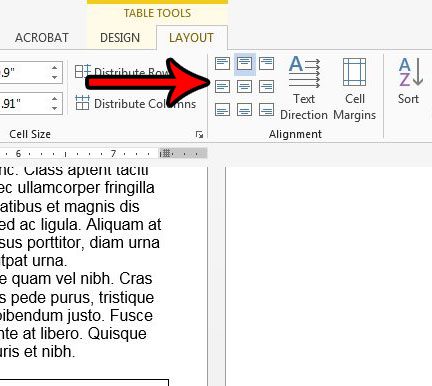
Step 4: Click the desired alignment option in the Alignment section of the ribbon.
Additional Notes on How to Center Text in Word
- You can also center text horizontally by selecting it and then pressing Ctrl + E on your keyboard.
- One of the most common reasons to align text either horizontally or vertically is to add a title. If you are adding a title, be sure to check your work or school’s guidelines on titles, as they often include additional requirements like font sizes. You can adjust font styles in the Font section of the ribbon on the Home tab.
- If you center some text in your document, the center align text setting will typically persist. You will likely need to select the Left Align option after centering your text if you want to return to normal text alignment after centering some of your text.
- If you vertically center text in Word, you will have several options concerning what parts of your document should be centered. These options include the selected text, the whole document, or “this point forward.”
If you have left aligned text on a page and you need it to be center aligned, then the keyboard shortcut option might be a little easier than using the option on the Home tab.
However, when you need to create vertical centered text on a cover page or title pages, then you will need to use the Page Setup button in the Page Setup group and make the adjustment from the Vertical alignment drop down menu on the Layout tab.
Does your document have a title page, but you need to number your pages and skip that title page? Find out how to start page numbering on the second page in Word so that a page number doesn’t display on the title page.
Additional Sources

Matthew Burleigh has been writing tech tutorials since 2008. His writing has appeared on dozens of different websites and been read over 50 million times.
After receiving his Bachelor’s and Master’s degrees in Computer Science he spent several years working in IT management for small businesses. However, he now works full time writing content online and creating websites.
His main writing topics include iPhones, Microsoft Office, Google Apps, Android, and Photoshop, but he has also written about many other tech topics as well.
Read his full bio here.
If all the larger text in your document will be the same font size, and all the smaller text will be the same, select one bit of smaller text, and then, in the Font dialog box, on the Advanced tab, select Raised in the Position field, and then set the By value to a value that puts the text at the height that you want. Then create a character style for the smaller text. If the correctly styled smaller text is selected when you create the new style, the new style will have the properties of that text by default. (Instead of creating a new style, you could repurpose one of Word’s existing styles, updating it to match the style of the smaller text). Then apply the style to all relevant text.
Alternatively, depending on the characteristics of the specific font that you’re using, and the specific sizes that you’re using, just styling the smaller text as a superscript by clicking the Superscript button might get you vertical centered text, or at least close enough to look convincing.
![]()
Download Article
An easy-to-follow guide on aligning text in the center of Word documents
![]()
Download Article
Microsoft Word offers a huge array of options for customizing your documents — so huge, in fact, that it can be hard to figure out how to do simple things like center your text. Luckily, the method is easy to remember once you know it. Simply click the «Center» option under the «Paragraph» label at the top of the page (or hit Ctrl+E as a shortcut to switch between centered and left-aligned text).
-

1
Highlight the text you want to center. If you already have text in the document, the first thing you must do is highlight it. Put the mouse cursor at the start of the text you want to center. Click and hold the left mouse button. Move the cursor to the end of the text you want to highlight. The text should now be bordered by a transparent blue box.
-
2
Click the «Center» button in the upper toolbar. Follow these directions:[1]
- Look at the toolbar at the top of the Word window (the space with all the options). The word «Home» in the top left should be selected (it will be by default). If it isn’t (or you’re not sure), click on «Home.»
- Next, look under the «Paragraph» header, which is below «Home» and to the right. You should see three small buttons that look like pages with the text aligned to the left, center, and right.
- Click the button with the text aligned in the center.
Advertisement
-
3
Deselect your text. The text you selected should now be aligned evenly between the left and right margins. Now, click where you would like to continue typing and proceed with the rest of your document.
- If your text didn’t center, you may have accidentally deselected it before hitting the center button. You need to center your text while it’s selected without clicking anywhere else on the page.
-
4
If you haven’t typed anything yet, just click the «Center» button. If your document is completely blank, click the «Center» button from the directions above and any text you type will be center-aligned.
- If you want to add centered text at the end of your document, click at the end of your document, hit the enter/return key to start a new line, and click the «Center» button.
-
5
Alternatively, hit Ctrl+E. This keyboard combination will switch you back and forth between left-aligned text and centered text.[2]
If you use it while text is highlighted, the text will change to centered (and back if you hit the keys again). If you use it on a blank line, it will change the alignment of the cursor so that the next words you type are centered. -
6
Use the other buttons to change your alignment. The buttons next to the «Center» button in the toolbar allow you to get different text alignments. They all work the same way as the center button does. From left to right, the alignment buttons are:
- Align left
- Align center
- Align right
- Justify (similar to center except that words will automatically be stretched so that all the lines are the same width).


Advertisement
-
1
Highlight the text you want to center. This method will align the text midway between the top and bottom margins on the page. To start, highlight the text the same way as you would if you were aligning it horizontally (see method above).
- If you haven’t typed anything yet, skip this step. When you’re done, the text that you type will be centered vertically.
-
2
Open the Layout menu. Follow these directions:[3]
- Click «Page Layout» in the upper toolbar (to the right of the «Home» tab that’s selected by default).
- Click the «Page Setup» button.
- In the window that pops up, click the «Layout» tab.
-
3
Select a centered vertical alignment. In the tab you just selected, look for the «Vertical Alignment» box. Select «Center.»
-
4
Apply the changes. Clicking «OK» will change the alignment and return you to your document. If you like, you can use the options under «Apply to» to change which parts of your document are centered vertically.
- For example, if you have highlighted text that you want to center vertically, be sure to choose the «Selected text» option from the «Apply to» menu.


Advertisement
Add New Question
-
Question
How do I vertically align text in a table with rows?

Ankit Bhatt
Community Answer
Select the text within the table, then go to Layout in the ribbon area. You’ll see an alignment tab there; select any option from the Center line (Align Center Left, Align Center or Align Center Right). All of these will align your text vertically, along with the horizontal alignment you specify.
-
Question
How can I save a document in a folder on the desktop?
In the top left hand corner of the program, select ‘File’ and then select the ‘Save As…’ option. You can then save it to any directory you want. If the folder you want to put it into isn’t already on the desktop, you’ll need to move it there using windows explorer, or if you want to create a new folder on your desktop, right-click the desktop, and mouse over the ‘New’ option, and select ‘Folder’.
-
Question
If I have 3 lines, should 2 be above the center or below?
If the text is centered, the second line should be directly in the center, not above or below it.
Ask a Question
200 characters left
Include your email address to get a message when this question is answered.
Submit
Advertisement
-
If you want to emphasize important information, you may want to bold, italicize, or underline your information in addition to—or instead of—centering it. By default, these options are to the left of the alignment options under the «Font» header.
Thanks for submitting a tip for review!
Advertisement
About This Article
Thanks to all authors for creating a page that has been read 290,097 times.
Is this article up to date?
Word for Microsoft 365 Word 2021 Word 2019 Word 2016 Word 2013 Word 2010 Word 2007 More…Less
Alignment determines the appearance and orientation of the edges of the paragraph: left-aligned text, right-aligned text, centered text, or justified text, which is aligned evenly along the left and right margins. For example, in a paragraph that is left-aligned (the most common alignment), the left edge of the paragraph is flush with the left margin.
Vertical alignment determines the position of the text within a section of a document relative to the top and bottom margins, and is often used to create a cover page.
-
Select the text that you want to align.
-
On the Home tab, in the Paragraph group, click Align Left
or Align Right .
 or Align Right
  .
.-
Select the text that you want to center.
-
On the Home tab, in the Paragraph group, click Center
.
 .
.-
Select the text that you want to center.
-
On the Layout or Page Layout tab, click the Dialog Box Launcher
in the Page Setup group, and then click the Layout tab. -
In the Vertical alignment box, click Center.
-
In the Apply to box, click Selected text, and then click OK.
 in the Page Setup group, and then click the Layout tab.
When you justify text in Word, you give your text straight edges on both sides of the paragraph. Justifying extends each line of your text to the left and right margins. Justifying text might make the last line of text in a paragraph considerably shorter than the other lines.
-
Select the text you want to justify.
-
On the Home tab, in the Paragraph group, click Justify
.
 .
.Tips:
-
In the Paragraph group, click the Dialog Box Launcher
, and select the Alignment drop-down menu to set your justified text. -
You can also use the keyboard shortcut, Ctrl + J to justify your text.
In Office Word 2007, you can choose from a selection of predesigned cover pages to create a professional-looking document quickly and easily.
-
On the Insert tab, in the Pages group, click Cover Page.
-
Click the cover page that you want.
A cover page is always added to the beginning of the open document.

See also
Adjust indents and spacing