
Track changes in Word
Note: If a document has been shared with you for review, you may not be able to turn off Track Changes. If you want to edit the document without tracking changes, you’ll need to either save a copy or ask the person who sent it to you to share it again with review mode turned off.

Turn Track Changes on and off
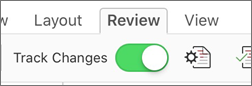
On the Review tab, select Track Changes.
-
When Track Changes is on, the section is highlighted. Deletions are marked with a strikethrough, and additions are marked with an underline. Different authors’ changes are indicated with different colors.
-
When Track Changes is off, the section is not highlighted. Word stops marking changes, but the colored underlines and strikethroughs are still in the document.
Tip: You also can add a Track Changes indicator to the status bar. Right-click the status bar and select Track Changes.
View tracked changes
Note: When a document is in Editing or Reviewing mode, you can select a tracked change to view a collaborator’s full, suggested change in a card that displays. Hover over the Accept or Reject button to see a preview of what that action would do to your final document.
Choose whose changes to track
You can choose to track only your own changes or everyone’s changes.
-
To track only your own changes — On the Review tab, select Track Changes > Just Mine.
-
To track everyone’s changes — On the Review tab, select Track Changes > For Everyone.
Tip: to use a password to keep others from turning off Track Changes — On the Review tab, select Track Changes > Lock Tracking.
Choose how you would like to see the changes in the document
You can choose the type of markup you want to see.
-
On the Review tab, select Tracking.
-
Select All Markup for the drop-down list to display.
-
Select one of the following options.
-
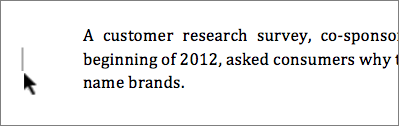
Simple Markup displays tracked changes with a red line in the margin.
-
All Markup displays tracked changes with different colors of text and lines for each reviewer
-
No Markup hides the markup to show the document with changes incorporated
-
Original displays the original document without tracked changes and comments showing. However, any tracked changes or comments in the document that have not been accepted, rejected, or deleted remain in the document.
Choose the way track changes display
You can choose the types of revisions that display and the way they display. If you choose to show revisions as balloons, they display in the margins of the document. If you choose to display them directly within the document in line. In line revisions display all deletions with strikethroughs instead of inside balloons.
-
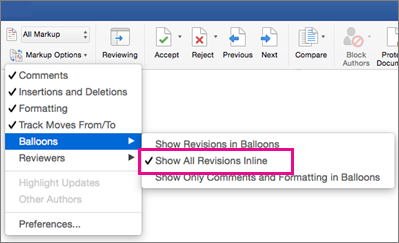
On the Review tab, select Track > Show Markup.
-
Select Balloons and then select the type of display you want.
-
Show Revisions in Balloons
-
Show All Revisions Inline
-
Show Only Formatting in Balloons
Note: If you want to see tracked changes in balloons, you must be in Print Layout view or Web Layout view.
Display changes by type of edit
-
On the Review tab, select Track Changes > Show Markup.
-
Select the type of edit.
-
Insertions and Deletions
-
Formatting
The check mark next to the item indicates that it’s selected.
Note: Even if you hide a type of markup by clearing it on the Show Markup menu, the markup automatically displays each time the document is opened by you or a reviewer.
Display changes by reviewer(s)
-
In Review > Tracking, select Show Markup.
-
Select Specific People.
-
Select to clear all check boxes except the ones next to the names of the reviewers whose changes you want to show.
Note: To select or clear all check boxes for all reviewers in the list, select All Reviewers.
Navigate tracked changes in Changes menu section
You can navigate from one tracked change to another.
-
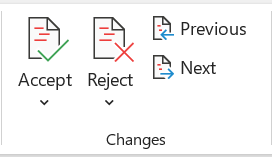
In Review > Changes, select Next to view the next tracked change.
-
In Review > Changes, select Previous to view the previous tracked change.
Accept or Reject tracked changes
There are multiple ways to address tracked changes. The most proficient method is to identify the commentor and respond to the tracked change is through the card display when you click the marked change. The card displays the commentor name and the option to accept or reject the suggestion.

Accept or reject tracked changes in sequence using the main menu
You can resolve teach tracked change from the beginning of the document to the end of the document in sequence.
-
Select Review > Changes > Next.
-
Select Accept or Reject. The next sequential tracked change is highlighted for your review and action.
Note: You can also accept or reject individual tracked changes using the main menus’ drop-down menus. This method is often used as a methodical approach to reviewing tracked changes.
Accept changes using the main menu
-
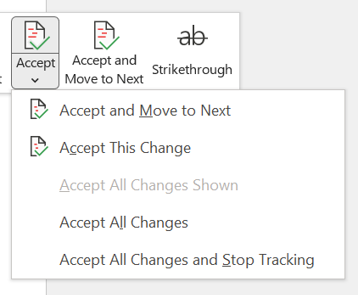
In Review > Changes, select Accept.
-
Select one of the options.
-
Accept and Move to Next
-
Accept This Change
-
Accept All Changes
-
Accept All Changes and Stop Tracking
Reject changes using the main menu
-
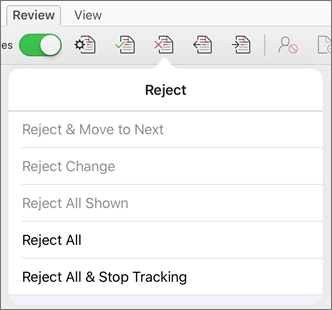
In Review > Changes, select > Reject.
-
Select one of the options.
-
Reject and Move to Next
-
Reject This Change
-
Reject All Changes
-
Reject All Changes and Stop Tracking
Accept or reject changes within a document with a right click
Working within a document, you can right-click on a tracked change to accept or reject the change. Using the right-click method displays a banner menu option and a drop-down menu option.
Accept changes in-line with the right-click banner option
-
Right-click a tracked change in the document to review a single suggestion.
-
On the banner, select one of the following.
-
Accept > Accept and Move to Next
-
Accept > Accept This Change
-
Accept > Accept All Changes
-
Accept > Accept All Changes and Stop Tracking
-
Accept and Move to Next
Accept changes in-line with the right-click drop-down menu option
-
Right-click a tracked change in the document to review a single suggestion.
-
In the drop-down menu, select one of the following.
-
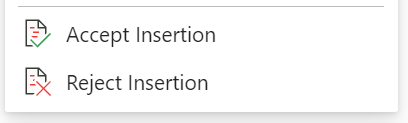
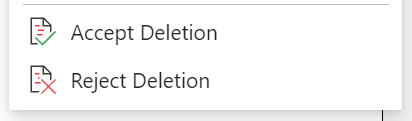
Accept Insertion (or Accept Deletion)
-
Reject Insertion (or Reject Deletion)
Accept or reject all tracked changes at once on the main menu
Accept all tracked changes
-
In Review > Changes, select Accept.
-
Select one of the options.
-
Accept All Changes Shown
-
Accept All Changes
-
Accept All Changes and Stop Tracking
Reject all tracked changes
-
In Review > Changes, select Reject.
-
Select one of the options.
-
Reject All Changes Shown
-
Reject All Changes
-
Reject All Changes and Stop Tracking
Note: When Review>Tracking>Show Markup>Specific People>All Reviewers is selected, the Accept All Changes Shown and Reject All Changes Shown options do not display.
Hide tracked changes and comments when printing
Hiding changes doesn’t remove them from the document. You must use the Accept and Reject commands in the Changes group to remove markup from your document.
-
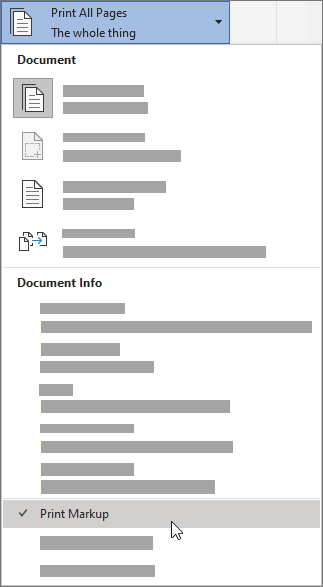
Go to File > Print > Settings > Print All Pages.
-
Under Document Info, select Print Markup to clear the check mark.

View all your changes in a summary list on the Reviewing Pane
-
In Review > Tracking, select Reviewing Pane.
-
Choose if you want to see the Reviewing Pane next to or below your document.
-
Select Reviewing Pane Vertical to see a list of all changes next to your document.
-
Select Reviewing Pane Horizontal to see a list of all changes below your document.
You can use the Reviewing Pane as a handy tool for to check that all tracked changes have been removed from your document so that they show up to others who might view your document. The summary section at the top of the Reviewing Pane displays the exact number of visible tracked changes and comments that remain in your document.
The Reviewing Pane also allows you to review long comments that don’t fit within a comment bubble.
Note: The Reviewing Pane, unlike the document or the comment balloons, is not the best tool for making changes to your document. Instead of deleting text or comments or making other changes in the Reviewing Pane, make all editorial changes in the document. The changes will then be visible in the Reviewing Pane.
Important: Comments are no longer part of the Track Changes function.
Turn on Track Changes
You can set Word for the Web to track changes for all users who are collaborating on the document or to track only your changes.
-
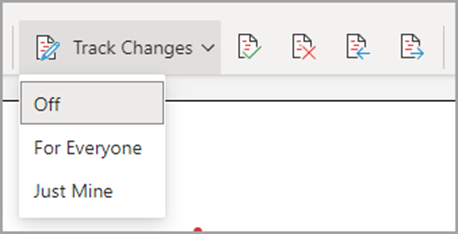
On the Review tab, select Track Changes.
-
In the Track Changes drop-down list, select one of the following:
-
To track only the changes that you make to the document, select Just Mine.
-
To track changes to the document made by all users, select For Everyone.
-
Turn off Track Changes
-
On the Review tab, select Track Changes.
-
In the Track Changes drop-down list, select Off.
Select the Markup view
-
On the Review tab, select Markup view.
-
Select one of the markup options.
-
Markup in margin (Simple Markup) — See suggestions in the margin
-
Markup on page (All Markup) — See suggestions on the page
Review, accept, or reject changes
Accept or reject tracked changes in sequence
You can review each tracked change in sequence and decide whether to accept or reject the change.
-
Click or tap at the beginning of the document.
-
On the Review tab, select Track Changes.
-
Select Accept or Reject. As you accept or reject changes, Word will move to the next change.
Tip: To move through changes in the document without accepting or rejecting them, select Next or Previous.
-
Repeat until you’ve reviewed all of the changes in your document.
Accept or reject a single change
Rather than move through changes in sequence, you can accept or reject a single change. When you accept or reject the change, Word will not move to the next change in the document.
-
Click the change.
-
Select the option to accept or reject it.
When tracked changes are turned on, Word marks any changes made by any authors of the document. This is useful when you’re collaborating with other authors because you can see which authors made a particular change.
Turn Track Changes on
-
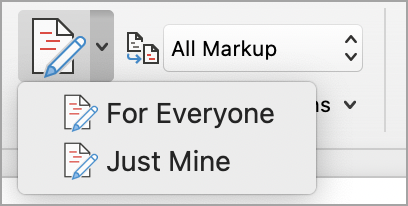
On the Review tab, select Track Changes.
-
Select to track only your own changes or everyone’s change.
-
To track only your own changes — On the Review tab, select Track Changes > Just Mine.
-
To track everyone’s changes — On the Review tab, select Track Changes > For Everyone.
Note: To turn Track Changes off, select Track Changes again.
Accept or reject all tracked changes at once on the main menu
Accept all tracked changes
-
Select Reviewing > Accept.
-
Select one of the options.
-
Accept All Changes Shown
-
Accept All Changes
-
Accept All Changes and Stop Tracking
Reject all tracked changes
-
Select Reviewing > Reject.
-
Select one of the options.
-
Reject All Changes Shown
-
Reject All Changes
-
Reject All Changes and Stop Tracking
Word shows changes in the document by displaying a line in the margin. If you switch to All Markup view, you’ll see changes inline and in balloons.
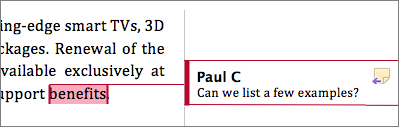
Anytime someone adds a comment, it’ll show up in a balloon.
Review changes inline
To see changes inline instead of in balloons, do the following:
-
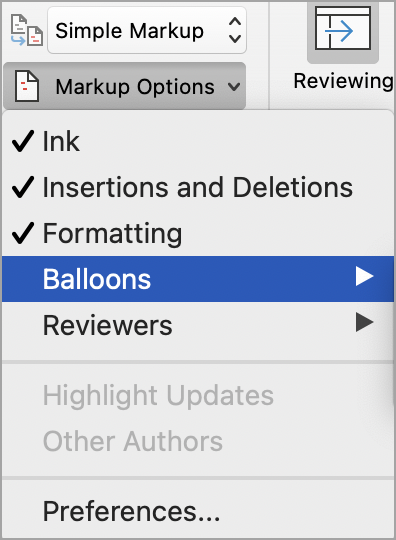
On the Review Tab, select Markup Options
-
Point to Balloons and select Show All Revisions Inline.
Keep Track Changes on
To prevent others from turning off Track Changes, lock Track Changes on with a password.
Important: Be sure to remember the password so you can turn Track Changes off when you’re ready to accept or reject the changes.
Lock Track Changes with a password
-
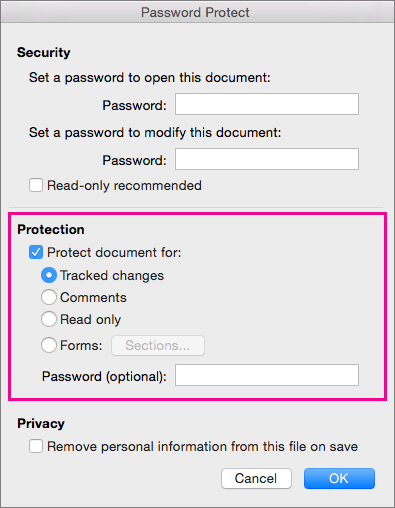
On the Review tab, select Protect > Protect Document.
-
In the Password box, enter a password.
-
Re-enter your password and select OK.
While tracked changes are locked, you can’t turn off change tracking, and you can’t accept or reject changes.
Unlock Track Changes
-
On the Review tab, select Protect > Protect Document.
-
Under Protection, uncheck Protect document for.
-
Enter your password and select OK.
For more info, see
remove the tracked changes and comments.
Turn Track Changes on or off (Word for iPad)
-
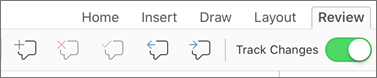
Tap the Review tab.
-
Tap the control next to Track Changes to turn Track Changes on or off.
Show or hide markup (Word for iPad)
-
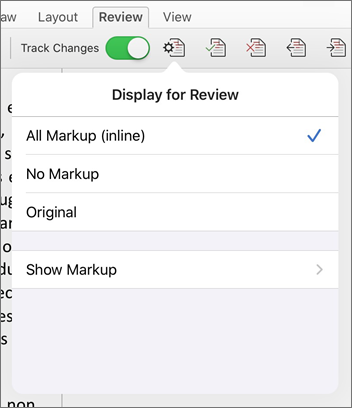
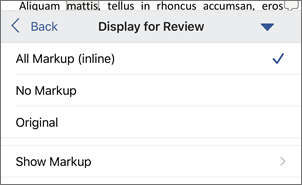
On the Review tab, tap the Display for Review icon.
-
In the Display for Review list, tap the option you want:
-
All Markup (inline) shows the final document with tracked changes visible inline
-
No markup shows the final document without tracked changed
-
Original shows the original document with no tracked changes
-
Show tracked changes by type (Word for iPad)
-
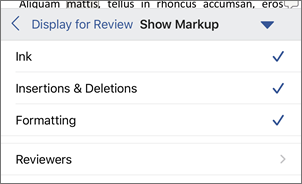
On the Review tab, tap the Display for Review icon.
-
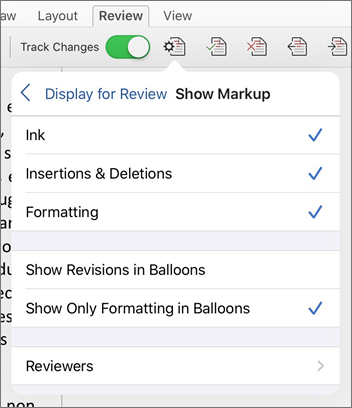
In the Display for Review list, tap Show Markup.
-
In the Show Markup list, tap the option you want:
-
Ink shows or hides any marks made by digital inking in the document.
-
Insertions & Deletions shows or hides inserted or deleted text.
-
Formatting shows or hides formatting changes.
-
Show Revisions in Balloons shows changes in balloons in the right margin.
-
Show Only Formatting in Balloons shows only formatting changes in balloons and keeps the other changes as inline tracking.
-
Show tracked changes by reviewer (Word for iPad)
If there are multiple reviewers for the document, Word will show all changes by default. However, you can choose to show only changes made by specific viewers.
-
On the Review tab, tap the Display for Review icon.
-
In the Display for Review list, tap Show Markup.
-
In the Show Markup list, tap Reviewers.
-
In the Other Authors list, tap the names of the reviewers whose changes you want to see or tap All Reviewers.
Accept changes (Word for iPad)
-
Tap twice on a change in the document to select it.
-
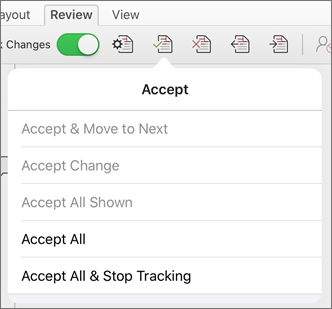
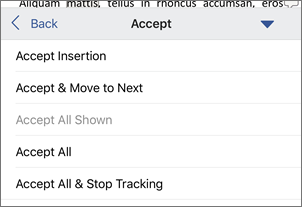
On the Review tab, tap the Accept icon.
-
Do one of the following:
-
Tap Accept & Move to Next to accept the change and move to the next change in the document.
-
Tap Accept Deletion, Accept Insertion, or Accept Change to accept the selected change, identified contextually by type, and not move to the next change in the document.
-
Tap Accept All Shown to accept all changes that are visible, but not changes that are hidden. For example, if you’re viewing only changes made by a specific reviewer, tapping Accept All Shown accepts only the changes made by that reviewer.
-
Tap Accept All to accept all changes in the document.
-
Tap Accept All & Stop Tracking to accept all changes in the document and turn off Track Changes.
-
-
To move to another change without accepting or rejecting it, tap the Previous or Next icon.
Reject changes (Word for iPad)
-
Tap twice on a change in the document to select it.
-
On the Review tab, tap the Reject icon.
-
Do one of the following:
-
Tap Reject & Move to Next to reject the change and move to the next change in the document.
-
Tap Reject Deletion, Reject Insertion, or Reject Change to reject the selected change, identified contextually by type, and not move to the next change in the document.
-
Tap Reject All Shown to reject all changes that are visible, but not changes that are hidden. For example, if you’re viewing only changes made by a specific reviewer, tapping Reject All Shown rejects only the changes made by that reviewer.
-
Tap Reject All to reject all changes in the document.
-
Tap Rejects All & Stop Tracking to reject all changes in the document and turn off Track Changes.
-
-
To move to another change without accepting or rejecting it, tap the Previous or Next icon.
Delete comments (Word for iPad)
-
Tap twice on a comment in the document to select it.
-
Tap the Review tab.
-
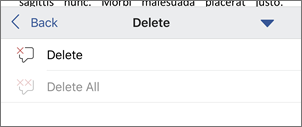
Tap the Delete icon to delete the comment or press and hold the Delete icon until the Delete list appears, and then do one of the following:
-
Tap Delete to delete only the selected comment.
-
Tap Delete All to delete all comments in the document.
-
-
To move to another comment without deleting it, tap the Previous or Next icon.
Turn Track Changes on or off (Word for iPhone)
-
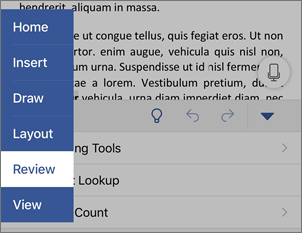
Tap the pen icon at the top to open the ribbon.
-
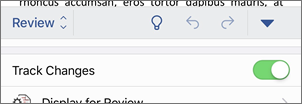
Tap the Review tab.
-
Tap the control next to Track Changes to turn Track Changes on or off.
Show or hide markup (Word for iPhone)
-
On the Review tab, tap Display for Review.
-
Tap the option you want:
-
All Markup (inline) shows the final document with tracked changes visible inline
-
No markup shows the final document without tracked changed
-
Original shows the original document with no tracked changes
-
Show tracked changes by type (Word for iPhone)
-
On the Review tab, tap Display for Review.
-
Tap Show Markup.
-
In the Show Markup list, tap the option you want:
-
Ink shows or hides any marks made by digital inking in the document.
-
Insertions & Deletions shows or hides inserted or deleted text.
-
Formatting shows or hides formatting changes.
-
Show tracked changes by reviewer (Word for iPhone)
If there are multiple reviewers for the document, Word will show all changes by default. However, you can choose to show only changes made by specific viewers.
-
On the Review tab, tap Display for Review.
-
Tap Show Markup.
-
Tap Reviewers.
-
In the Other Authors list, tap the names of the reviewers whose changes you want to see or tap All Reviewers.
Accept changes (Word for iPhone)
-
Tap twice on a change in the document to select it.
-
On the Review tab, tap Accept.
-
Do one of the following:
-
Tap Accept & Move to Next to accept the change and move to the next change in the document.
-
Tap Accept Deletion, Accept Insertion, or Accept Change to accept the selected change, identified contextually by type, and not move to the next change in the document.
-
Tap Accept All Shown to accept all changes that are visible, but not changes that are hidden. For example, if you’re viewing only changes made by a specific reviewer, tapping Accept All Shown accepts only the changes made by that reviewer.
-
Tap Accept All to accept all changes in the document.
-
Tap Accept All & Stop Tracking to accept all changes in the document and turn off Track Changes.
-
Reject changes (Word for iPhone)
-
Tap twice on a change in the document to select it.
-
On the Review tab, tap Reject.
-
Do one of the following:
-
Tap Reject & Move to Next to reject the change and move to the next change in the document.
-
Tap Reject Deletion, Reject Insertion, or Reject Change to reject the selected change, identified contextually by type, and not move to the next change in the document.
-
Tap Reject All Shown to reject all changes that are visible, but not changes that are hidden. For example, if you’re viewing only changes made by a specific reviewer, tapping Reject All Shown rejects only the changes made by that reviewer.
-
Tap Reject All to reject all changes in the document.
-
Tap Reject All & Stop Tracking to reject all changes in the document and turn off Track Changes.
-

Delete comments (Word for iPhone)
-
Tap twice on a comment in the document to select it.
-
One the Review tab, tap Delete, and then do one of the following:
-
Tap Delete to delete only the selected comment.
-
Tap Delete All to delete all comments in the document.
-
-
To move to another comment without deleting it, tap the Previous or Next icon
Need more help?
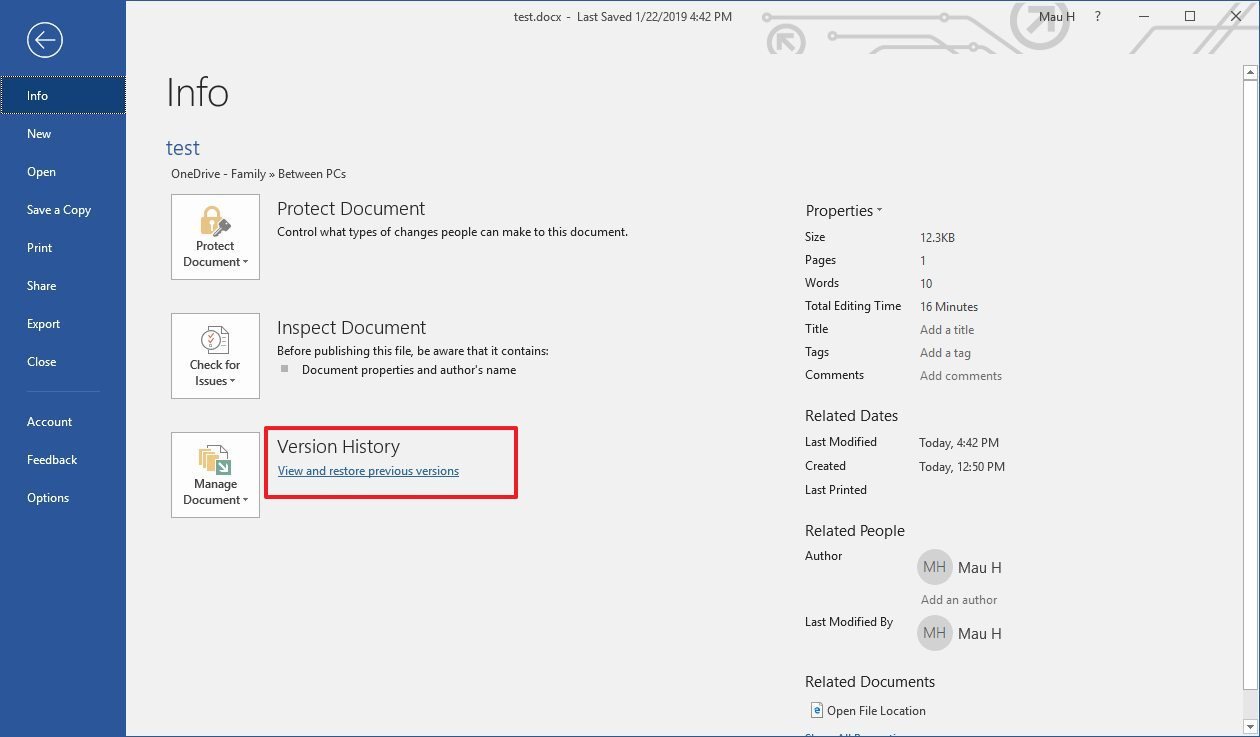
Go to File > Info > Version History. Select a version to open it. If you want to restore a previous version you’ve opened, select Restore.
Contents
- 1 How do I find document version history?
- 2 Can you recover previous versions of a Word document?
- 3 How do I view writing history in Word?
- 4 How do I turn on revision history in Word?
- 5 Why can’t I see version history in Word?
- 6 Why can’t I see version history in SharePoint?
- 7 How do I recover a previous version of a file I saved over?
- 8 How do I recover a file I accidentally replaced?
- 9 How do I recover an overwritten file?
- 10 How do I view track changes?
- 11 What is Microsoft Word history?
- 12 How do I accept all track changes in Word?
- 13 How do I recover a previous version of a Word document Mac?
- 14 How do you track changes on Word?
- 15 Why is browse history greyed out in Word?
- 16 Why is my browser version history greyed out?
- 17 How do I recover a previous version of a Word document 2007?
- 18 How do I enable version history in SharePoint?
- 19 Does OneDrive do versioning?
- 20 How do I turn on version history in OneDrive?
How do I find document version history?
On your computer, open a document, spreadsheet, or presentation.
- At the top, click File Version history. See version history.
- Choose the latest version. You can find who updated the file and their changes.
Can you recover previous versions of a Word document?
Click File > Info. Under Manage Documents, select the file labeled (when I closed without saving). In the bar at the top of the file, select Restore to overwrite any previously saved versions. Tip: You can also compare versions by selecting Compare instead of Restore.
How do I view writing history in Word?
This is done by opening the “Review” tab, then clicking on “Track Changes” To view the changes by category (Main document, Header/footer, etc.), click on “Review” / and “Reviewing Pane.” To view the text with markups, within the “Review” tab, click on “Final: Show Markup” (which will show the final version with markups
How do I turn on revision history in Word?
Turn tracked changes on or off
- Open the document that you want to edit.
- On the Review tab, under Tracking, select the Track Changes switch to turn on track changes. Tips: Each reviewer’s changes are displayed in a different color. If there are more than eight reviewers, Word will reuses colors.
Why can’t I see version history in Word?
Go to File > History. Note: If you don’t see History on your navigation pane it’s possible that you actually have a subscription version of Office. Select the Info button on the navigation pane and see if you can access Version History there.
Why can’t I see version history in SharePoint?
I don’t see a version history option
Versioning is on by default in SharePoint libraries, and off by default in SharePoint lists. Versioning needs to be turned on to see the version history option on menus or in ribbons. To turn on version history, see Enable and configure versioning for a list or library.
How do I recover a previous version of a file I saved over?
Right-click the file or folder, and then click Restore previous versions. You’ll see a list of available previous versions of the file or folder. The list will include files saved on a backup (if you’re using Windows Backup to back up your files) as well as restore points.
How do I recover a file I accidentally replaced?
Restore Previous Versions (PC) – In Windows, if you right-click on a file, and go to “Properties,” you will see an option titled “Previous Versions.” This option can help you revert to a version of your file before the overwrite occurred, allowing you to get your data back.
How do I recover an overwritten file?
Method 1. Recover Overwritten Files from the Previous Version
- Right-click the file and choose “Properties”.
- Open the “Previous Version” tab.
- Select the latest version and click “Restore” to get back the overwritten files.
How do I view track changes?
Turn on Track Changes to show edits made in a document, and use Show Markup to show the types of revisions you’d like to display. Select Review > Track Changes to turn it on. Make edits in your document and Word captures any edits you make. Select Review > Track Changes to turn it off.
What is Microsoft Word history?
Microsoft Word, word-processor software launched in 1983 by the Microsoft Corporation. Software developers Richard Brodie and Charles Simonyi joined the Microsoft team in 1981, and in 1983 they released Multi-Tool Word for computers that ran a version of the UNIX operating system (OS).
How do I accept all track changes in Word?
To remove all tracked changes from a document, be sure that all changes are showing, and then do the following:
- Click the Review tab on the ribbon.
- To accept all changes, click Accept All Changes in Document.
- To selectively accept or reject changes, click Accept and Move to Next or Reject and Move to Next.
How do I recover a previous version of a Word document Mac?
On your Mac, open the document, then choose File > Revert To > Browse All Versions.
Browse, restore, duplicate, and delete versions
- Restore your document to this version: Click Restore.
- Duplicate this version in a new document: Press and hold the Option key, then click Restore a Copy.
How do you track changes on Word?
How to use Track Changes
- Open Microsoft Word.
- Choose the Review tab at the top of the document.
- Either click the Track Changes button (PC) or toggle the Track Changes switch (Mac).
- Make sure that you change ‘Simple Markup’ to ‘All Markup’ from the drop down bar next to Track Changes.
Why is browse history greyed out in Word?
File–>Restore are supported if the files are saved in SharePoint or OneDrive. If it is an local file, this feature is grayed out. In this situation, you may have an chance to find back the file in AutoRecover folder of Excel for Mac. Go to ~/Library/Containers/com.
Why is my browser version history greyed out?
If the See revision history is greyed out or you can’t select it, the document you are viewing does not allow you to edit and hence, you can’t see the revision history.
How do I recover a previous version of a Word document 2007?
Closed Without Saving
- Start Microsoft Office and click on the “File” tab.
- Click “Recover Unsaved Documents” on the lower right side of the window.
- Select the file you want to restore and click “Open.” The document opens with a Recovered Unsaved File bar across the top.
How do I enable version history in SharePoint?
View, restore, or delete versions in a SharePoint 2010 list or library
- Go to the list or library with the item or document for which you want to view history.
- Next to the document or item you want to view version history, select the down arrow, and then select Version History.
Does OneDrive do versioning?
OneDrive for Business has settings for versioning which allows you to track and manage items as they progress. When versioning is turned on, older versions of items are kept when revisions are made.
How do I turn on version history in OneDrive?
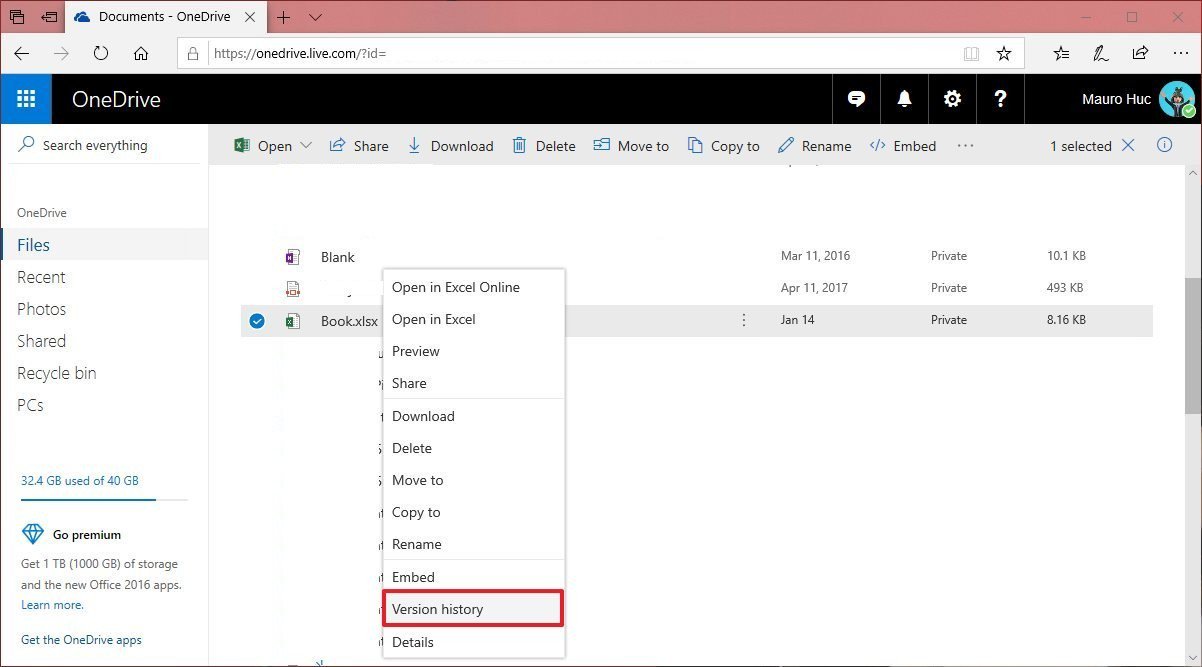
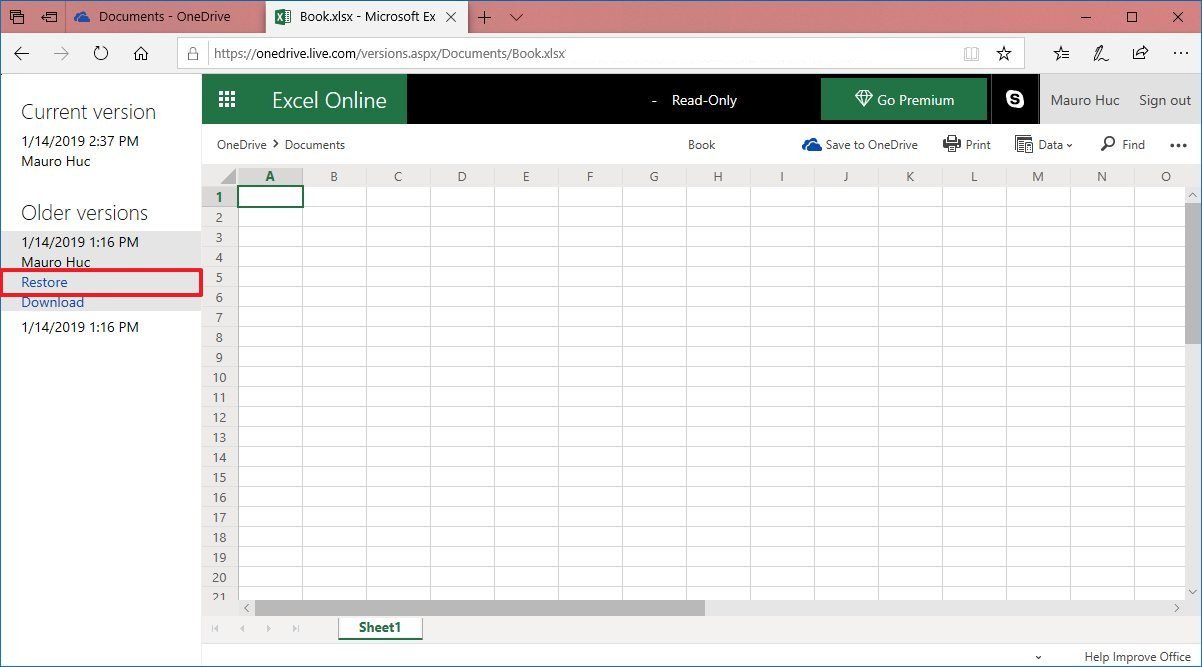
Using the version history is easy; just navigate to OneDrive.com, right-click the file you want to restore or view a previous version and then select Version history. The Version History window shows the date of the previous revisions, who it was modified by and the size of the previous revision.
Simul is a version control and collaboration tool for Microsoft Word. It shows you a full history of all changes made to your Word document in a simple interface.

Used in thousands of organisations worldwide
How It Works
Easily upload documents from anywhere
Drag and drop Word documents from your computer, or import them from cloud file services like Dropbox, Box, OneDrive, SharePoint & Google Drive.

Automatically create versions each time the document is changed
Invite people to collaborate on your document and each time they make a change, Simul automatically creates a new version.
Here’s how it works:

Open the latest version in 1 click
Collaborators can access and open the latest version of a document in just 1 click.

Make edits in Word or Word Online
Simul integrates directly with Word and Word Online, so you can make edits to a document in their preferred environment.

Automatically create a new version
When you click ‘Save’ in Word or Word Online, a new version is automatically created in Simul and instantly available to all collaborators to continue working on.
See what changed between each version
Simul makes it easy to see what changed between each version, regardless of whether tracked changes were turned on or not.

See the full history of a document
See every version of a document — including what changed, who changed it and when — in a simple interface.


Easily access content from previous versions
Open previous versions of your document in Word or Word Online in 1 click, and then simply copy and paste content from the old version into the latest one (or into other documents).
Revert to a previous version in 1 click
Revert back to a previous version of your document in just 1 click, or create a copy of it and take your document in a new direction whilst retaining all the content from your other versions.

![]()
“Simul allows anyone on our team to access the latest version of a document instantly. It automatically creates versions, allows us to compare them to see what changed, and gives us a full version history of the document. It’s made writing research reports so much easier.”

Nikolas Balanis — Cancer Researcher
Get Started For Free
See how Simul can help you with a 14 day free trial, and paid plans start at just $15 per month.
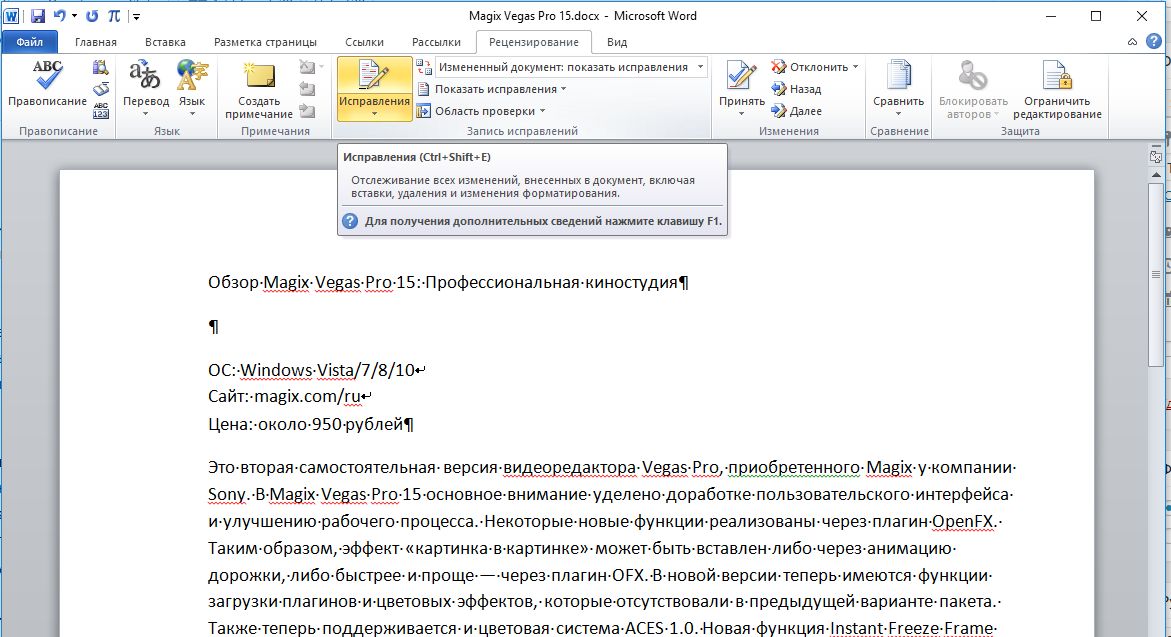
С помощью встроенной функции Word можно просмотреть всю историю редактирования документа. CHIP расскажет, как это сделать. Откройте в текстовом редакторе Word нужный документ и перейдите на вкладку «Рецензирование». В ленте меню перейдите в группу «Запись исправлений» и нажмите кнопку «Исправления».
Как убрать отображение записанных изменений в ворде?
Удаление записанных изменений
Нажмите кнопку Просмотр , > Далее > принять или отклонить. Word сохраняет или удаляет изменение, а затем переходит к следующему. Чтобы одновременно сохранить все изменения, щелкните стрелку под кнопкой пригласите и выберите команду Применить все изменения.
Как сохранить правки в ворде?
Щелкните или нажмите в начале документа и перейдите в раздел > Рецензирование. Щелкните стрелку под кнопкой » сохранить «, а затем выберите команду » Применить все изменения».
Где хранятся последние документы Word?
Как найти папку со временными файлами
- Откройте Word и перейдите в меню «Файл».
- Выберите раздел «Параметры».
- В окне, которое перед вами откроется, выберите пункт «Сохранение».
- Как раз в этом окне и будут отображаться все стандартные пути для сохранения.
Как посмотреть историю изменения файла?
Как восстановить предыдущую версию файла
- Откройте на компьютере документ, таблицу или презентацию Google.
- В верхней части экрана нажмите Файл История версий Смотреть историю версий.
- Выберите версию на панели справа.
- В верхней части экрана нажмите Восстановить эту версию Восстановить.
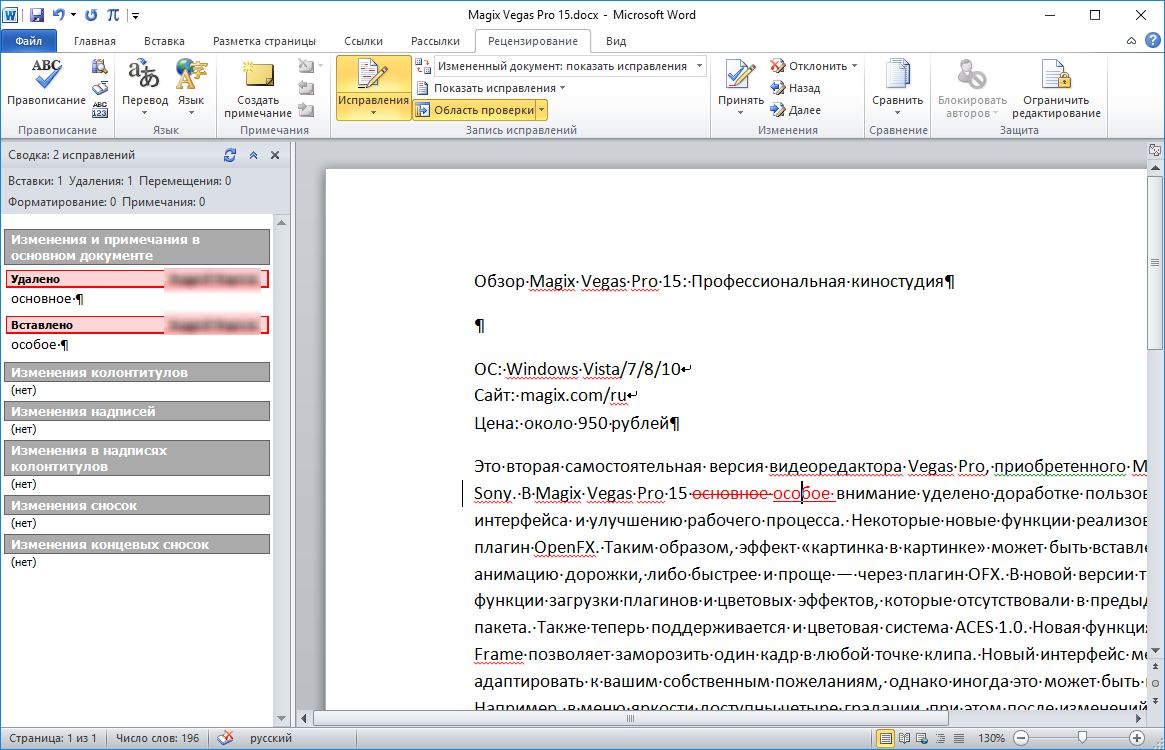
Как посмотреть все изменения в ворде?
Отображение всех изменений в тексте
- На вкладке » Рецензирование » перейдите к разделу » Отслеживание».
- Нажмите кнопку Показать исправления.
- Наведите указатель мыши на пункт выноски и выберите Показывать все исправления в тексте.
Как пропустить все подчеркивания в ворде?
Кликните правой кнопкой мышки по подчеркнутому слову и откройте меню «Орфография». Вам будут предложены два варианта: «Добавить в словарь» и «Пропустить всё». Наконец, вы можете полностью отключить красное подчеркивание в «Ворде». Для этого нужно нажать на кнопку «Файл» и перейти в раздел «Параметры — Правописание».
Как убрать поле исправлений в ворде?
Скрытие исправлений и примечаний в Word
- Чтобы просмотреть изменения по одному, щелкните «Рецензирование», а затем выберите «Принять» или «Отклонить». …
- На вкладке «Рецензирование» в группе «Примечания» щелкните стрелку возле кнопки «Удалить», а затем выберите пункт «Удалить все примечания в документе».
Как пропустить все орфографические ошибки в ворде?
На вкладке Файл выберите пункт Параметры, откройте раздел Правописание, снимите флажок Автоматически проверять орфографию и нажмите кнопку ОК. Чтобы снова включить проверку орфографии, повторите описанный выше процесс и установите флажок Автоматически проверять орфографию.
Как работать в ворде в режиме правки?
Включаем режим правки в Microsoft Word
- Откройте документ, в котором нужно включить режим правки, и перейдите во вкладку “Рецензирование”. …
- Нажмите на кнопку “Исправления”, расположенную в группе “Запись исправлений”.
- Теперь можно приступить к редактированию (исправлению) текста в документе.
Как внести изменения в документ Word?
Откройте документ, в котором нужно включить режим правки, и перейдите во вкладку “Рецензирование”. Примечание: В Microsoft Word 2003 для включения режима правки необходимо открыть вкладку “Сервис” и там выбрать пункт “Исправления”. 2. Нажмите на кнопку “Исправления”, расположенную в группе “Запись исправлений”.
Как изменить документ в ворде?
Если вам открыли доступ для редактирования документа в Word, то вы получите уведомление по электронной почте. Чтобы начать работу с файлом, вам нужно открыть ссылку из письма в веб-браузере Word Web App. Затем выберите Редактировать документ – Изменить в браузере.
Как посмотреть недавно закрытые документы Ворд?
Изменение количества файлов, отображаемых в списке последних использованных файлов
- Откройте вкладку Файл.
- Выберите пункт Параметры.
- Нажмите кнопку Дополнительно.
- В группе Отображение в списке Число документов в списке последних файлов: выберите необходимое количество отображаемых файлов.
Как открыть последний документ в ворде?
Чтобы принудительно восстановить документ Word Используйте одно из следующих действий: При использовании Word 2007: нажмите кнопку Microsoft Office, выберите команду Открыть, выберите документ Word, щелкните стрелку вниз на кнопке Открыть в правом нижнем углу экрана Открытие и выберите команду Открыть и восстановить.
![]()
Microsoft Word has made it incredibly easy to track the changes made to any document and to restore previous versions. We’re going to show you how to view and restore previous versions of a Word document.
To use this method, you’re going to need an active Microsoft 365 subscription. This is a requirement because Microsoft Word enables version history only when files are saved to OneDrive. Fortunately, you get 1TB of OneDrive storage along with your Microsoft 365 subscription.
You’ll also need to save your document to OneDrive, which will ensure that it’s being saved automatically. Once this is done, you can continue to work on the document, and Microsoft Word will keep storing various versions of your document.
The first step is to view previous versions of Word documents. The fastest way to do this is by clicking the file name in the top bar in Microsoft Word.

Here, you’ll need to select “Version History.”
Alternatively, you can click the “File” button from the top menu bar.
Now, select “Info.”
Click the “Version History” button.
This will open up the Version History pane on the right. The most recent version of your document will be listed at the top. Word also helpfully sorts your changes by date, which makes it a lot easier to track older versions of large documents.
To view any version of a document, click “Open version.” This will open that version of the file. You can confirm that it’s an older version by checking for the Previous Version label above the document.
On the same line, you can select the “Compare” button to see what was changed. This will copy the old version of the file to a new document and highlight the changes made compared to previous versions of the document.
We’re going to show you how to find exactly what was changed here. First, click the up arrow icon below “Revisions.”
This will show you exactly what kinds of changes were made to the document and how many revisions in all were made in this version.
To check out the changes made in more detail, scroll down in the left pane. This highlights all the modifications.
On the right side, you’ll see a vertical red line next to some paragraphs. This is just a simple way to show that changes were made here in this version of the document. There’s a way to see more detailed changes, too.
Go to the “Review” menu.
In the Tracking section, click the down arrow next to “Simple Markup.”
Now, select “All Markup.” This will reveal the details that we were after. Parts that were removed are highlighted with a red font and a strikethrough. Additions are colored red and also have an underline.
Once you’re done reviewing these changes, feel free to save the document if you need to.
Restore Previous Versions of Word Documents
We’ll now close this document and return to the previous one where we first saw the option to compare an older version. Here, you can click the “Restore” button to make this the most recent version of your Word document.
In case you didn’t want to do this, you can always go to the Version History pane and restore older versions using the same method.
READ NEXT
- › How to Prevent Accidentally Dragging and Dropping Text in Microsoft Word
- › How to View and Restore Old Versions of PowerPoint Files
- › Android’s Nearby Share Has (Unofficially) Arrived on Mac
- › How to Get a Refund on the PlayStation Store
- › Five Types of Phone Damage That Aren’t Covered by Your Free Warranty
- › Spotify Is Shutting Down Its Free Online Game
- › Save Hundreds on Elegoo’s New PHECDA Laser Engraver Through Kickstarter
- › This 64 GB Flash Drive From Samsung Is Just $8 Right Now
How-To Geek is where you turn when you want experts to explain technology. Since we launched in 2006, our articles have been read billions of times. Want to know more?
Помимо множества функций, значительно упрощающих работу с документами, Microsoft Office обладает одной ключевой — программа может автоматически отслеживать изменения, внесенные в документ, и сохранять все версии. История документа позволяет вам восстановить предыдущую версию в Word, Excel или PowerPoint с помощью Windows 10 или веб-версии приложения.
Более того, с помощью истории можно одновременно посмотреть на несколько версий и сравнить их, отследить процесс создания документа.
Хоть это и полезная функция, которая позволит вам не беспокоиться о том, что вы или кто-то другой изменит документ, нужно помнить, что она работает только с документами, которые сохраняются в OneDrive, OneDrive для бизнеса или в SharePoint, причем в зависимости от платформы процесс включения этой функции может отличаться.
В этой инструкции мы расскажем, как включить историю в Office, чтобы восстанавливать прошлые версии документов.
Возможноть сохранять все версии и просматривать их появляется только если сохранить документ в OneDrive, таким образом, сначала вам требуется убедиться, что Office 365 или Office 2019 или Office 2016 подключены к облаку.
Как включить историю в Office
Чтобы подключить десктопную версию Office к OneDrive, сделайте следующее:
- Откройте приложение Office. (Например, Microsoft Word.)
- Создайте пустой документ.
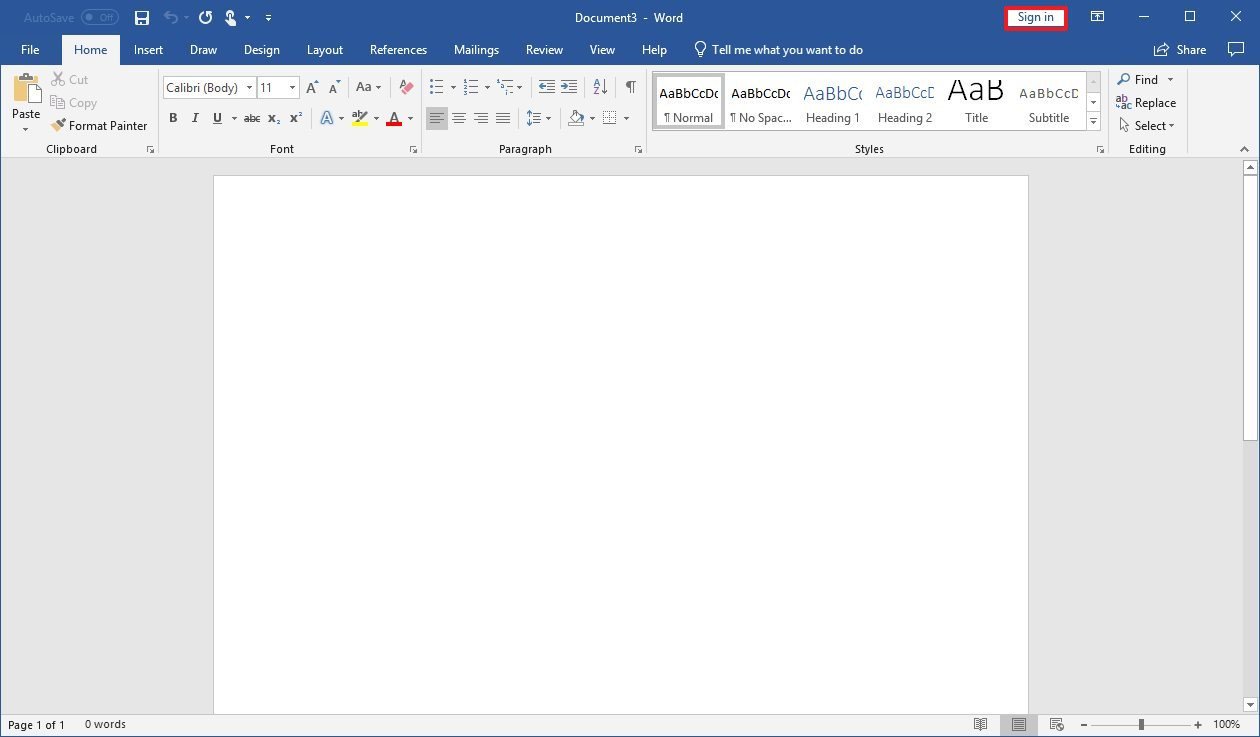
- В правом верхнем углу выберите Войти.

- Используйте свои данные для входа в аккаунт Office или Microsoft, чтобы подключиться к OneDrive.
Выполнив эти шаги, воспользуйтесь инструкцией ниже, чтобы Office начал сохранять версии ваших документов в Word, Excel и PowerPoint.
Как пользоваться историей в Office
Вот что нудно сделать, чтобы воспользоваться историей в декстопной версии Office:
- Откройте приложение Office. (Например, Microsoft Word.)
- Создайте пустой документ.
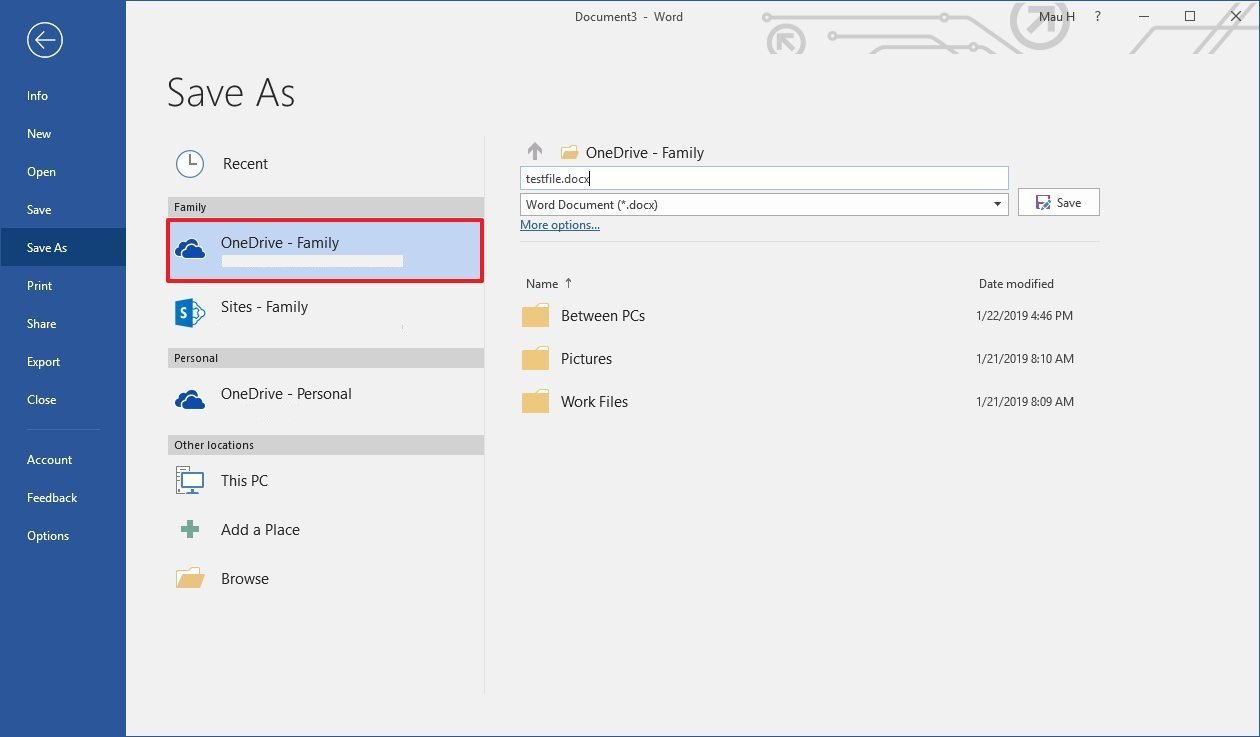
- Выберите Файл.
- Нажмите Сохранить.
- Сохраните файл в папке OneDrive (если вы воспользуетесь другим расположением, история не будет открываться).
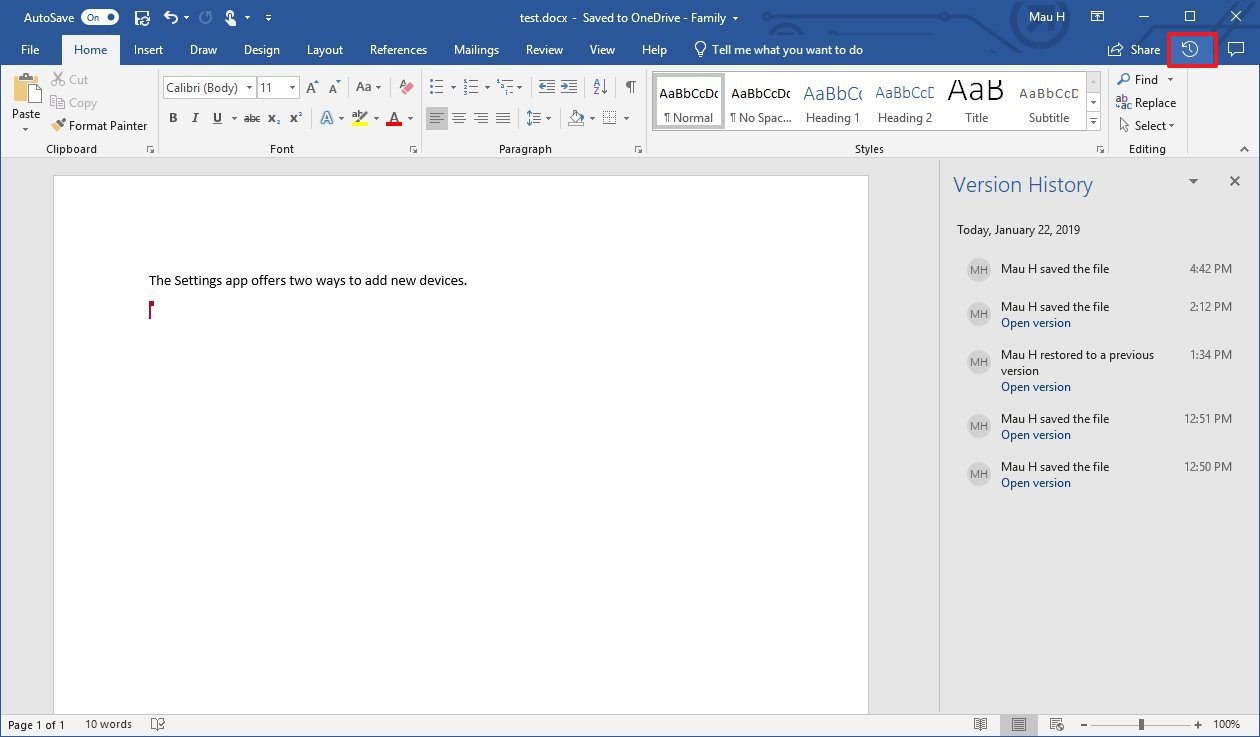
- В правом верхнем углу нажмите История документа.
- Выберите версию, которую вы хотите восстановить и просмотреть.
- Опционально: если вы не уверены, какая версия вам нужна, нажмите «Сравнить».
- Нажмите Восстановить.


Когда вы выполните эти шаги, все версии документа можно будет просмотреть и восстановить.
Если вы восстановили не ту версию, не переживайте: Office создает резервную копию каждой версии, а значит, повторив все вышеперечисленные шаги, вы можете открыть правильную версию.
Также вы можете зайти в раздел История документа через Файл > Информация, где нужно выбрать Просмотреть и восстановить прошлые версии.
Как открыть историю в Office онлайн
Если вы пользуетесь онлайн-версией Office, вы также можете просмотреть и восстановить предыдущие версии, но по какой-то загадочной причине здесь придется следовать другой инструкции, даже если вы пользуетесь OneDrive или OneDrive для бизнеса.
История документа Office через OneDrive
Чтобы просмотреть и восстановить предыдущие версии документа Office онлайн, проделайте следующее:
- Откройте OneDrive онлайн.
- Найдите расположение документа, историю которого вы хотите просмотреть.
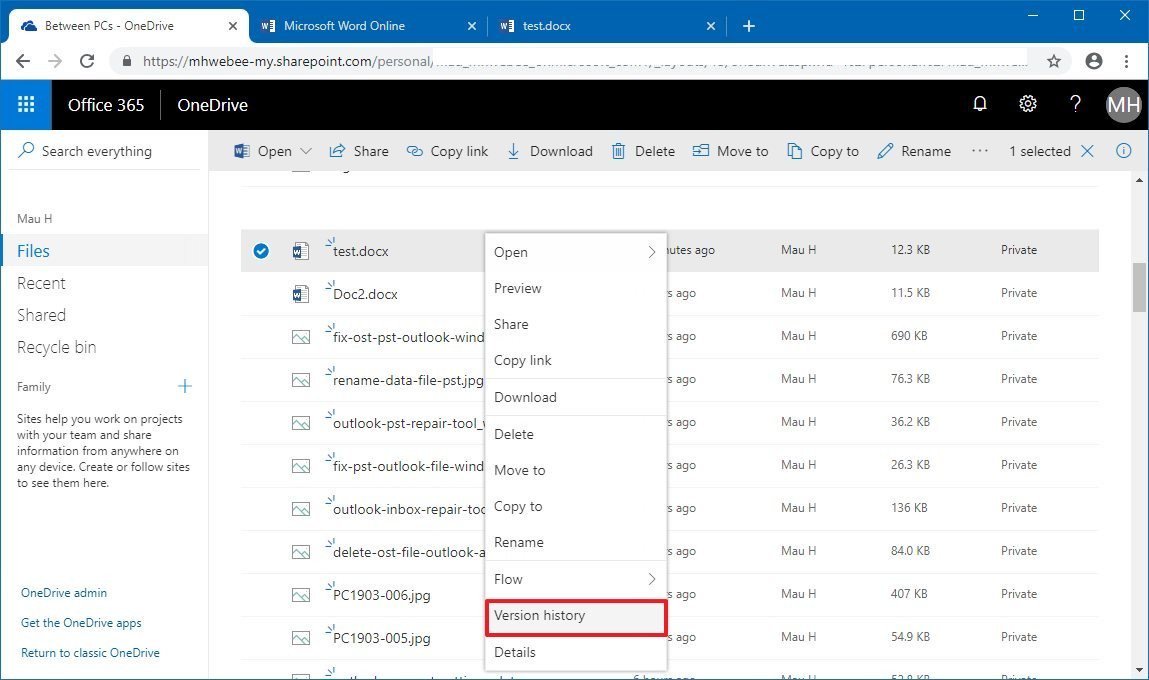
- Нажмите на файл правой кнопкой мыши и выберите Посмотреть историю.

- Браузер откроет окно с панелью справа, на которой есть все доступные версии документа.
- Выберите и просмотрите версию.
- Нажмите Восстановить.
После выполнения этих шагов вы сможете начать работу со старой версией документа.
Как открыть историю документа в OneDrive для бизнеса
Если вы пользуетесь OneDrive для бизнеса, сделайте следующее:
- Откройте OneDrive для бизнеса онлайн.
- Найдите расположение документа, историю которого авы хотите просмотреть.
- Нажмите на файл правой кнопкой мыши и выберите Посмотреть историю.

- На панели справа нажмите на иконку с многоточием, чтобы выбрать действие. Выберите из вариантов:
- Восстановить — восстанавливает версию документа в оригинальную папку OneDrive.
- Открыть файл — запускает файл в десктопной версии Office на вашем ПК.
- Удалить версию — удаляет версию из OneDrive.
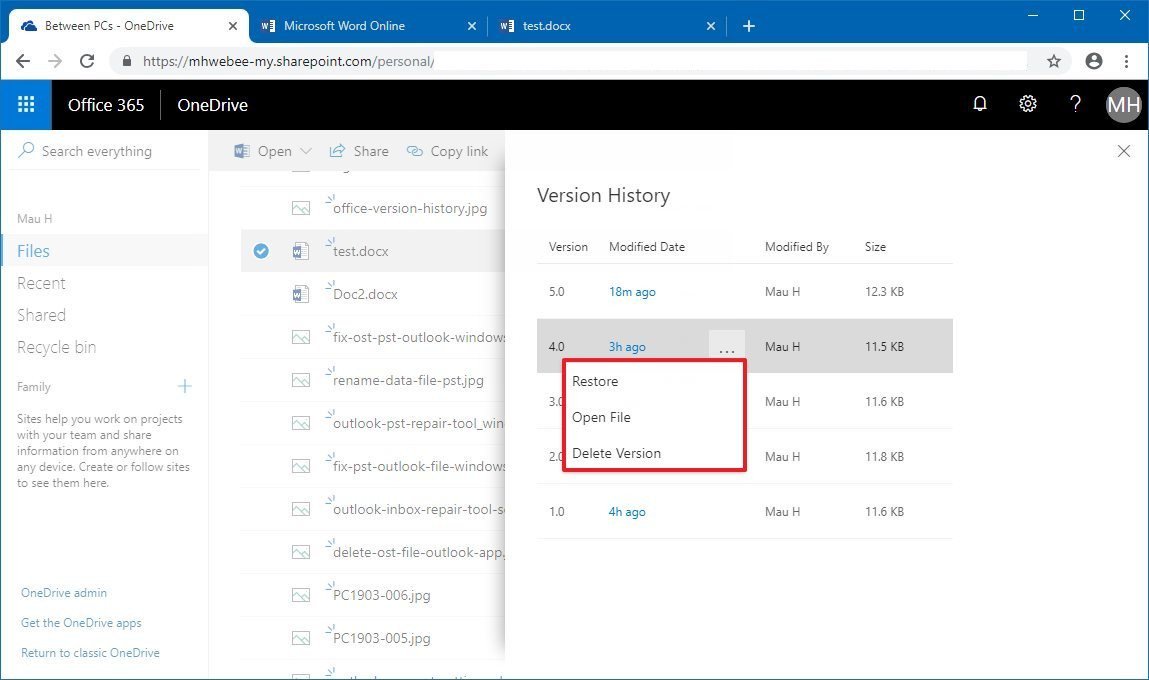
Если вы выбрали Восстановить, тогда вы можете начать работу с прошлой версией файла, открыв документ еще раз с помощью онлайн- или десктопной версии приложения. Однако, если вы выбрали Открыть файл, старая версия будет скачана и откроется в десктопном приложении. Затем вам понадобится нажать Восстановить, чтобы начать работать с одной из предыдущих версий.
- Status
- Not open for further replies.
-
#1
http /www.cracked.com/article_20058_5-clues-hidden-in-computer-files-that-can-get-you-busted.html
According to this article, not only does Microsoft Word give the option of tracking who made what changes to a document and when … but it actually does so by default, and the only way to prevent the changes from being seen by anyone else is if you know the edit history is there and manually delete it! This has purportedly been used to reveal military fraud, catch political campaign criminals in their acts, and even prove that corporations had purposefully lied about their product to get more sales … all because some people didn’t know the MS Word records your changes by default and didn’t think to manually delete the metadata.
I downloaded MS Word for the first time in forever just to try this out. I’m used to using Apache Open Office. But I wanted to see this edit history in action, so I went ahead and downloaded MS Word.
I’ve been created my own documents so I could see my own edit history, making sure to save often so I would have plenty of edit histories to view. But no matter how many times I make edits to the document and save it, whenever I use the Document Inspector, this is what I get:

I thought this was supposed to be a default setting!
If you have to turn on the «track changes» feature, how did all these stories i read about where militaries and corrupt political candidates got exposed happen?

-
- Jun 20, 2006
-
- 990
-
- 0
-
- 20,610
- 225
-
#3
Both of those say I need to turn on «track changes» manually.
I’m looking for the feature that actually gets cyber criminals caught because they don’t know it exists.

-
- Mar 16, 2013
-
- 7,343
-
- 76
-
- 39,590
- 1,498
-
#4
Both of those say I need to turn on «track changes» manually.
I’m looking for the feature that actually gets cyber criminals caught because they don’t know it exists.
«Track changes» is NOT on by default. At least not in Word 2010, 2013, or 2016.
To my knowledge, it has never been the default.
-
#5
To my knowledge, it has never been the default.
THen obviously there’s some other feature that’s recording the revision history and getting these cyber criminals caught.
What is it?

-
- Sep 7, 2013
-
- 3,343
-
- 3
-
- 32,915
- 1,319
-
#6
That has nothing to do with Word’s «track changes» feature.
-
#7
That has nothing to do with Word’s «track changes» feature.
But I clearly read about people proving that military reports were fraudulent by downloading copies of those documents off a website. They didn’t have access to the original hard drives; they only had copies of the files in question.
-
- Mar 16, 2013
-
- 7,343
-
- 76
-
- 39,590
- 1,498
-
#8
That has nothing to do with Word’s «track changes» feature.
But I clearly read about people proving that military reports were fraudulent by downloading copies of those documents off a website. They didn’t have access to the original hard drives; they only had copies of the files in question.
«clearly read»….where?
- Status
- Not open for further replies.
| Thread starter | Similar threads | Forum | Replies | Date |
|---|---|---|---|---|
|
I
|
Chrome history folder | Apps General Discussion | 5 | Aug 13, 2018 |
|
|
Monitor , record history of used process | Apps General Discussion | 3 | May 1, 2018 |
|
A
|
Local backup software needed for Windows 10 (NOT File History) | Apps General Discussion | 8 | Apr 3, 2018 |
|
N
|
How can I have back my history? | Apps General Discussion | 1 | Aug 23, 2017 |
|
J
|
Check history of app development | Apps General Discussion | 1 | Aug 5, 2016 |
|
D
|
How to recover browser history of phone | Apps General Discussion | 1 | Jul 17, 2016 |
|
J
|
Can you retrieve deleted history from google chrome | Apps General Discussion | 1 | Jun 17, 2016 |
|
W
|
How do i recover deleted history in Google Chrome | Apps General Discussion | 2 | Feb 20, 2016 |
|
I
|
Firefox Surfing History | Apps General Discussion | 4 | Dec 11, 2015 |
|
S
|
How to move skype history to another location? | Apps General Discussion | 2 | Aug 24, 2015 |
|
J
|
lost chrome history | Apps General Discussion | 2 | May 16, 2015 |
|
K
|
does the chrome app send you deleted history to your e-mail? | Apps General Discussion | 1 | May 6, 2015 |
|
J
|
I deleted my history and now I need to go back and find a certain webpage, how can I restore the search history? | Apps General Discussion | 1 | Mar 23, 2015 |
|
B
|
Can a virus be transmitted in such way ?Browsing porn using phone. Porn sites also showed in the laptop’s chrome history. | Apps General Discussion | 3 | Mar 13, 2015 |
|
G
|
How to Delete a City from the History Listing in Dark Sky | Apps General Discussion | 0 | Dec 4, 2014 |
|
P
|
If I deleted my search history in google chrome how do I get it back? | Apps General Discussion | 6 | Nov 18, 2014 |
|
A
|
How to Clear Your Browser History | Apps General Discussion | 0 | Nov 11, 2014 |
|
|
How to View Your iTunes Store Purchase History | Apps General Discussion | 0 | Oct 31, 2014 |
|
|
How to Delete Google Maps Location History | Apps General Discussion | 0 | Sep 25, 2014 |
|
|
Checking deleted browser history | Apps General Discussion | 3 | Sep 11, 2014 |


- Advertising
- Cookies Policies
- Privacy
- Term & Conditions
- Topics
Откройте в текстовом редакторе Word нужный документ и перейдите на вкладку «Рецензирование». В ленте меню перейдите в группу «Запись исправлений» и нажмите кнопку «Исправления». Теперь все изменения текста станут видимыми; они отмечены красными полосами на левой стороне текста.
 При нажатии на красной полосе Word отображает первоначальный текст в перечёркнутом виде. Фрагменты текста, к которым редактор оставил комментарий, Word выделяет красным цветом. При наведении на них курсора мышки комментарий отображается в выноске. Если проследовать по красной выноске к правому краю страницы, открывается поле с возможностью ответа на комментарий.
 Если вы хотите документировать изменения более подробно, следует отредактировать параметры. Для этого под вкладкой «Рецензирование», в правом углу группы «Запись исправлений» нажмите маленькую кнопку с символом стрелки в пункте «Исправления». Выберите строку меню «Параметры исправлений».
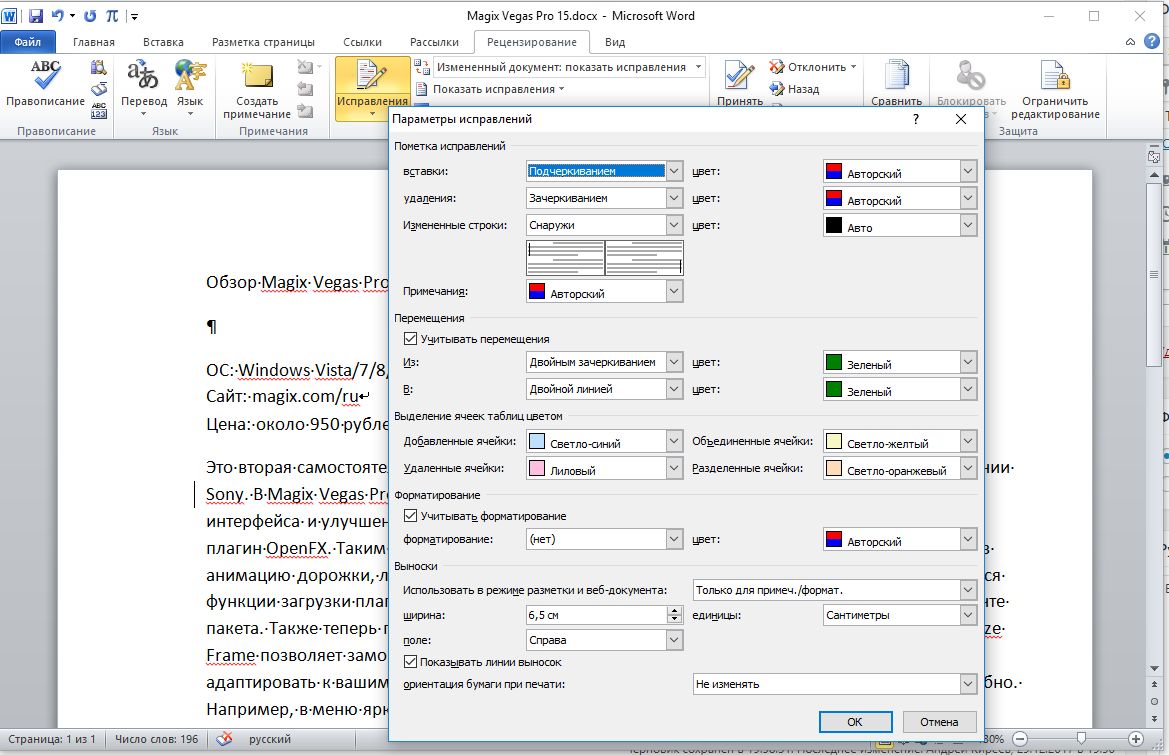 Теперь вы получаете доступ к многочисленным дополнительным опциям функции отслеживания. Чтобы никто из пользователей не смог отключить эту функцию (она работает посредством нажатия кнопки «Отклонить и перейти к следующему» в группе «Изменения» и вызова команды «Отклонить все изменения и завершить отслеживание»), её можно заблокировать.
Для этого следует нажать не кнопку «Исправления», а одноименную надпись под ней и активировать пункт «Заблокировать отслеживание». На всякий случай можно также установить пароль.
Читайте также:
Как не нумеровать первую страницу в Word
Как редактировать PDF непосредственно в текстовом редактре Word
Фото: компания-производитель
Isn’t it frustrating when you edit a document but miss out on a few important points? You are sure you had them in other versions of the document, but how do you retrieve them? This tutorial takes you through how to see edit history in word online to reduce the stress.
Can you view edit history on Word online? Yes, viewing the edit history of documents in word online is possible. All you need to do is open the document you would like to retrieve information about, go into the File menu. Once in the menu go down to Info and select Version history.
Can you see the editing history of a Word document?
The editing history of a word online document comes in handy when you would like to look at the alterations made. You can use this feature to go back to previous versions of the document. You could also use it as a guide to review changes made to the document.
In word online it is possible to view the editing history of a word online document by following these simple steps.

- Start by opening the document you would like to work on. Documents on word online can be found by logging in to the officeonline website. You can also login to onedrive and access documents you have been working on from there.
- Once you have the document open start by clicking on the File option on the top ribbon.

- Clicking on the File option will take you to the home screen of the word document.
- Scroll down to Info on the blue pannel on the left side of your screen
- On the right you will now have various options to choose from. You can choose to open the document in the desktop application. You could also protect the document. Here what we are concerned about it viewing previous versions of the document.
- For this you will need to click on the third option ‘ Version History’.
Read How to make an online form in Word
How to use version history for documents in Office
The Version History option in word online is used to view previous versions of the document. This could mean viewing all the edits made in the document or the number of times the document has been viewed and or edited.
Once you have opened the document you are working on. Click on the File to open the menu. From here click on Info, The Version History is the third option in this menu.
Once you click on this you will find a list of all the edits made to the document. This menu shows up on the right of the screen.

If you look closely at the edits menu you will see that it captures in detail the following:
- The Date of the Edit – This gives you a fair idea of when the document was opened and edited.
- The Time of the Edit – this is particularly helpful when you open the document multiple times in a day. You can with this choose the right version.
- The Person who edited the document – this is the best part as you will be able to see who made the said edits to the document. You can then review the edits.
- There is also a toggle button to turn on and off the show changes option.
To open a particular version, simply click on the version you would like to open. You will in no time have the document in front of you. You can then make the necessary edits. This will then show in the Version history the next time you visit the info section.
Check out How to change language in word online
How to see edit history in word online on an Android device?
If you are someone like me you will surely use your phone to edit and view documents. With word online it has become extremely convenient to review files on the go. Here is how you can check the edit history of word online documents on an Android device.

- Start by locating the document you would like to edit. Documents can be found on officeonline or in the one drive application. You can also use the word application available on the play store for Android devices.
- Once you have the document in front of you tap on it. you willnow have it open
- Now on the top of your screen you will have various options. Tap on the three dots for a menu at the bottom.

- This menu consists of various options right from reading the document out loud to printing it. Select History
- Hhistory is nothing but the edit history or versions of the document.

- Under History you will see the edits listed according to dates. You will see the time of the edit and who has modified the document.
- To open a specific document version simply tap on it.
- You can now view the changes made.
Read How to add google fonts to word online
How to use Version History for word online documents on One Drive?
When you log in to OneDrive you get an overview of all the documents you have saved. Once in the folder, you will see all the documents under My files. You can also visit the recent folder to check for documents recently edited.
You from here will be able to see everything about the document. This includes the name of the person who has modified the document the date, the size of the document. This section most importantly tells the user if the document is private or shared.

If you need to view the version history of a word document from the one drive folder here is what you can do
- Right-click on the file you require
- Scroll down to Version History
- Click on Version History
- You will not have a list of all the versions available
- Cloose the one you would like to restore your document to.
Read How to put a list in alphabetical order in Microsoft word online
How to view previous versions of a word online document on Mac OS?
Here is how you can view and restore previous versions of word online documents on macOS
- Open the document that you would like to edit or restore
- Select the name of the word document if you are using Microsoft 365 for Mac.
- You can then select Browse Version History from the options available
- If you are using office 2016 or 2019 for Mac you will need to go to the File menu and select Browse Version History.
- The various versions of the document will show up in a separate window
- Click on the one you would like to view or restore.
How to check version history in Word online?
Every version created in word online is saved. You can view the various versions created and revert to a previous version. Here is how you can check the previous versions of the document you are working on in Word online.
- Start by opening the document you need to view the history for.
- In the top ribbon you will see the various formatting options and right on top is a slot with the name of the document.

- Click on the name of the document. You will now have a drop-down menu.
- From here you can edit the name of the document and also view the Edit History. Click on Version History

- You will now have the different versions of the document listed on the right side of your screen.
- Here you can see the version, the date edited, and the person who edited it.
- Click on the version you would like to view.
Frequently asked question
Does word online have a revision history option?
Yes, the online version of Word has an option where you can review and restore previous versions of the document. This option can be found in the File section under info. All you need to do is click on the Version History option. YOu will then have a list of edits made and versions available. simply click on the version you would like to restore.
Hope you found this tutorial helpful. It took you through
- How to see edit history in word online?
- Can you see the editing history of a Word document?
- Using version history for documents in Office
- How to see edit history in word online on an Android device?
- Using Version History for word online documents on One Drive?
- How to view previous versions of a word online document on Mac OS?
- How to check version history in Word online?
- Does word online have a revision history option?
Check out other word online tutorial articles here
- MLA formatting in word online
- Removing the space after paragraphs in word online
- How to convert Word file into Excel file online?
- Can we add a subscript in word online?
- How to move an image on top of another on Microsoft word online

My name is Carissa Gudino and I am an expert in word online, using Word Online in my day-to-day tasks. In this blog, I will share with you tips and tutorials on how to use word online to its fullest potential. I work for various clients in various countries like the United States, Canada, the United Kingdom, Australia, New Zealand, etc. My tutorials are designed to help beginners, as well as more experienced users, learn new tricks and tips on Microsoft word online. Check out more.