Summary
In Microsoft Word, you can hide the white space at the top and bottom of each page and reduce the amount of gray space that appears between pages in print layout view. Gray space to the left and right of the page is not affected. This behavior is controlled by the White space between pages option.
When you select the White space between pages option, Word controls the white space of any newly created documents as well as the current document according to the following rules and special cases:
Behavior Explanation
—————————————————————————
Per Window When the option is set and multiple
documents are open at the same time,
the document with focus is affected; other
open documents are not affected.
Per Document When you save and close a document, the
setting is retained in the document.
If the document is open when you create
a new document, the new document acquires
the setting. For example, if white space
is hidden in the document you open,
white space will be hidden in new
documents you create.
Per user option Set on a per user basis. The setting is
stored in the HKEY_CURRENT_USER registry
key with other Options settings.
Backwards compatibility If you open the document in Word 2000 or
Word 97, the setting is ignored. However,
because the setting is stored in the
document, you can edit the document in
Word 97 or Word 2000, save the file, and
this setting will not be lost when you
reopen the document in Word 2002 or in a later version.
Special zoom behavior When you zoom to show more than one page
in print layout view, the white space in
the document will be displayed
regardless of the state of the option.
The «White space between pages» option is
unavailable (dimmed). Adjusting the Zoom
percentage to show one page returns the
view to the previous state.
Special page element behavior Adding a page border, page numbers, header,
or footer resets the «White space between
pages» option. To hide the white space,
click to clear the «White space between
pages» check box.
Special process behavior When finding or replacing text or when
proofing the document in the foreground,
if Word finds an item in the header or
footer area, Word switches to Normal view
and displays the item in a pane below the
document. The state of «White space between
pages» option does not change.
More Information
In Microsoft Word 2002 and in Microsoft Office Word 2003, you can use either of the following methods to show or to hide white space:
-
On the Tools menu, click Options. Click the View tab and then click to select or clear the White space between pages check box.
-
Rest the mouse pointer over the gray area above or below a page and then click when you see the Hide White Space or Show White Space pointer.
In Microsoft Office Word 2007, use either of the following methods to show or to hide white space:
-
Follow these steps:
-
Click the Microsoft Office Button, and then click Word Options.
-
In the left pane, click Customize.
-
In the Choose commands from list, click All Commands.
-
Click White Space Between Pages, click Add, and then click OK. The White Space Between Pages option will appear on the Quick Access Toolbar.
-
-
Rest the mouse pointer over the gray area above or below a page and then click when you see the Double-click to hide white space or Double-click to show white space
If you are hiding the white space, page breaks are still visible and noticeable in the document.
Need more help?
Show or Hide White Space in Microsoft Word Documents
by Avantix Learning Team | Updated February 9, 2022
Applies to: Microsoft® Word® 2010, 2013, 2016, 2019 or 365 (Windows)
You can show or hide white space at the top and bottom of pages in Microsoft Word documents. If you hide white space, you won’t be able to see headers, footers or top and bottom margins in Print Layout View. The gray space that typically appears at the top and bottom of pages as you scroll through your document will also disappear. If you want to show or hide spaces between words, you’ll need to click Show/Hide ¶ on the Home tab in the Ribbon.
Print Layout View is the default view in Word. You can click the View tab in the Ribbon and select Print Layout in the Views group to go to this view if necessary.
In Word documents, margins are set for the top and bottom of pages by default and can be changed on the Layout tab in the Ribbon. Headers and footers appear in the top and bottom margin areas (with the exception of floating objects) so if white space is hidden, headers and footers may seem to be missing.
Recommended article: How to Hide Comments in Word (or Display Them)
Do you want to learn more about Microsoft Word? Check out our virtual classroom or live classroom Word courses >
Showing or hiding white space using a shortcut
To show or hide white space in Word using a shortcut:
- Position the cursor at the top of the document (you can press Ctrl + Home to move the cursor to the top of the document).
- Move the pointer into the gray area just above the first page (below the Ruler) until the pointer turns into an up and down arrow. A message appears to Double-click to show white space or Double-click to hide white space.
- Double-click. If you are hiding white space, you can also position the pointer in the gray area between pages and then double-click.
If you show or hide white space, this setting will continue in any new documents you create. When white space is hidden, the setting affects not just the white space between pages but anything that is part of the header or footer (including watermarks and other graphics anchored to the header or footer). When you save and close a document, the setting is retained in the document.
If you hide white space, page breaks are still visible in the document. If you print the document, the headers and footers will print even if white space is hidden.
Showing or hiding white space using the Options dialog box
To show or hide white space using the Word Options dialog box:
- Open a Word document where you want to show or hide white space.
- Click the File tab in the Ribbon.
- Select Options. A dialog box appears.
- In the categories on the left, select Display.
- In the pane on the right, check or uncheck Show whitespace between pages in Print Layout view.
- Click OK.
The Options dialog box, with the Display category selected, appears as follows:

Because this feature isn’t obvious, it can cause problems for users if areas in their document seem to be missing (such as headers or footers).
Subscribe to get more articles like this one
Did you find this article helpful? If you would like to receive new articles, join our email list.
More resources
14+ Word Selection Shortcuts to Quickly Select Text
How to Remove Hard Returns in Word Documents
How to Superscipt or Subscript in Word (with Shortcuts)
How to Insert the Not Equal Sign in Word (5 Ways to Type or Insert ≠)
How to Insert or Type the Degree Symbol in Word (5 Ways to Insert °)
Related courses
Microsoft Word: Intermediate / Advanced
Microsoft Excel: Intermediate / Advanced
Microsoft PowerPoint: Intermediate / Advanced
Microsoft Word: Long Documents Master Class
Microsoft Word: Styles, Templates and Tables of Contents
Microsoft Word: Designing Dynamic Word Documents Using Fields
VIEW MORE COURSES >
To request this page in an alternate format, contact us.
Our instructor-led courses are delivered in virtual classroom format or at our downtown Toronto location at 18 King Street East, Suite 1400, Toronto, Ontario, Canada (some in-person classroom courses may also be delivered at an alternate downtown Toronto location). Contact us at info@avantixlearning.ca if you’d like to arrange custom instructor-led virtual classroom or onsite training on a date that’s convenient for you.
Copyright 2023 Avantix® Learning
Microsoft, the Microsoft logo, Microsoft Office and related Microsoft applications and logos are registered trademarks of Microsoft Corporation in Canada, US and other countries. All other trademarks are the property of the registered owners.
Avantix Learning |18 King Street East, Suite 1400, Toronto, Ontario, Canada M5C 1C4 | Contact us at info@avantixlearning.ca
Как убрать пустое место внизу страницы в ворде?
Как убрать пробел внизу страницы в ворде?
Выделите абзац, следующий за ненужным разрывом страницы. В меню «Формат» выберите пункт «Абзац», а затем пере выберите вкладку «Разрывы строк и страниц». Снимите флажки Не разрывать абзац, Не отрывать от следующего и Разрыв страницы перед.
Как убрать разрывы строк в ворде?
Удаление переносов из абзаца
- Выделите абзац или абзацы.
- На вкладке Главная в Word или на вкладке Формат текста в сообщении Outlook нажмите кнопку вызова диалогового окна «Абзац» .
- Выберите вкладку разрывы строк и страниц .
- В разделе Форматированиевыберите вариант не расставлять переносы.
- Нажмите кнопку ОК.
Как в ворде сделать разделение на страницы?
Вставка разрыва страницы вручную
- Щелкните или коснитесь того места документа, в который нужно вставить разрыв страницы.
- Перейдите в раздел макет > Параметры страницы, нажмите кнопку разрыви выберите пункт страница.
Как убрать разделы в колонтитулах в ворде?
Удаление разрыва раздела
- На ленте «Главная»выберите «Показать все непечатаемые символы».
- Разрывы разделов выглядят примерно так:
- Вы выберите разрыв раздела и нажмите кнопку DELETE.
Как удалить скрытые символы в Ворде?
п. Чтобы включить, или, наоборот, отключить знаки форматирования текста («непечатаемые символы») в Microsoft Word нужно на вкладе «Главная» нажать на кнпоку «Отбразить все знаки». После этого у Вас начнут отображаться знаки абзаца, разрыва страниц, неразрывные пробелы (как поставить неразрывный пробел) и т.
Как удалить все разделы в ворде?
Удалите все разрывы раздела по одному вручную
- Выберите разрыв раздела, который Вы хотите удалить.
- Нажмите клавишу Delete на своей клавиатуре.
- Удерживайте клавишу «Ctrl», чтобы выбрать все разрывы раздела один за другим, а затем нажмите клавишу Delete.
Как убрать лишние абзацы в ворде?
Если Вам нужно просто удалить лишний абзац на странице в Ворде, выделите его мышкой – для этого достаточно кликнуть по нему три раза левой кнопкой мыши. Затем нажмите кнопку «Delete» или «Backspace» на клавиатуре.18 мая 2016 г.
Как убрать большой отступ в Ворде в начале страницы?
Выделите текст, который нужно настроить. Перейдите на вкладку Главная и в нижней части меню выберите интервалы между строками и абзацами > Параметры междустрочных интервалов . Откроется диалоговое окно Абзац. На вкладке Отступы и интервалы выберите нужные параметры и нажмите кнопку ОК.
Как в wordpad сделать разделение на страницы?
Добавление разрыва страницы перед абзацем
- Щелкните абзац, перед которым необходимо вставить разрыв страницы.
- На вкладке Разметка страницы нажмите кнопку вызова диалогового окна Абзац, а затем перейдите на вкладку Положение на странице.
- Установите флажок С новой страницы.
Как сделать разрыв страницы в ворде клавишами?
Сделать разрыв страницы в MS Word можно, и используя горячие клавиши. Поставьте курсор в начале текста, как было описано выше, и нажмите сочетание клавиш «Ctrl+Enter». Теперь Вы знаете, как можно вставить разрыв страницы в документе Ворд.
Как перейти на другой лист в ворде?
Еще проще и быстрее добиться желаемого результата позволяет сочетание клавиш. Установив курсор в нужное место, нажмите Ctrl+Enter. Появится начало новой страницы в позиции курсора.
Как объединить разделы колонтитулов в ворде?
Делается это двойным кликом по верхней или нижней области листа либо перейдите на вкладку «Вставка» и в блоке «Колонтитулы» нажмите «Нижний колонтитул», затем выберите «Изменить». Теперь поставьте курсор в конце листа, после которого будет добавлен разрыв.
Как изменить раздел нижнего колонтитула?
По двойному клику левой кнопки мыши на штампике основной надписи перейдите к редактированию нижнего колонтитула. Или перейдите в ленте верхнего меню Вставка → Нижний колонтитул → Изменить нижний колонтитул.
Как убрать связь между колонтитулами?
Откройте вкладку Колонтитулы, дважды щелкнув в области верхнего или нижнего колонтитула (вверху или внизу страницы). Выберите «Как в предыдущем», чтобы отключить связь между разделами.
Описание параметра «Пустого пространства между страницами» в программе Word
Обзор
В Microsoft Word можно скрыть пустое пространство в верхней и нижней части каждой страницы и уменьшить промежутки между страницами в режиме разметки. Не влияет на серую область слева и справа от страницы. Это поведение управляется параметром пустого пространства между страницами .
При выборе параметра поля между страницами , Word управляет пробелы все созданные документы, а также текущего документа особых случаев по следующим правилам:
Behavior Explanation
—————————————————————————
Per Window When the option is set and multiple
documents are open at the same time,
the document with focus is affected; other
open documents are not affected.
Per Document When you save and close a document, the
setting is retained in the document.
If the document is open when you create
a new document, the new document acquires
the setting. For example, if white space
is hidden in the document you open,
white space will be hidden in new
documents you create.
Per user option Set on a per user basis. The setting is
stored in the HKEY_CURRENT_USER registry
key with other Options settings.
Backwards compatibility If you open the document in Word 2000 or
Word 97, the setting is ignored. However,
because the setting is stored in the
document, you can edit the document in
Word 97 or Word 2000, save the file, and
this setting will not be lost when you
reopen the document in Word 2002 or in a later version.
Special zoom behavior When you zoom to show more than one page
in print layout view, the white space in
the document will be displayed
regardless of the state of the option.
The «White space between pages» option is
unavailable (dimmed). Adjusting the Zoom
percentage to show one page returns the
view to the previous state.
Special page element behavior Adding a page border, page numbers, header,
or footer resets the «White space between
pages» option. To hide the white space,
click to clear the «White space between
pages» check box.
Special process behavior When finding or replacing text or when
proofing the document in the foreground,
if Word finds an item in the header or
footer area, Word switches to Normal view
and displays the item in a pane below the
document. The state of «White space between
pages» option does not change.
Дополнительные сведения
В Microsoft Word 2002 и Microsoft Office Word 2003 можно использовать одним из следующих способов, чтобы показать или скрыть пробелы:
В меню Сервис выберите команду Параметры. Перейдите на вкладку Вид и затем установите или снимите флажок поля между страницами .
Поместите указатель мыши над областью серого выше или ниже страницы и нажмите кнопку Скрыть пробелы или Показать пробелы указатель.
В Microsoft Office Word 2007 воспользуйтесь одним из следующих методов требуется показать или скрыть пробелы:
Выполните следующие действия.
Нажмите Кнопку Microsoft Office, а затем нажмите кнопку Параметры Word.
В левой области нажмите кнопку настроить.
В списке выбрать команды из выберите Все команды.
Щелкните Пустое пространство между страницами, нажмите кнопку Добавитьи нажмите кнопку ОК. Параметр Поля между страницами будет отображаться на панели быстрого доступа.
Поместите указатель мыши над областью серого выше или ниже страницы и нажмите кнопку просмотра дважды щелкните, чтобы скрыть пробелы или дважды щелкните, чтобы показать пробелы
При скрытии пробелы, разрывы страниц по-прежнему видны и заметно в документе.
Как удалить ненужные и пустые страницы в Word?
Примечание. Перечисленные ниже методы редактирования подходят для использования в любой версии MS Word. Разница может быть лишь в названии и расположении кнопок на панели управления.
Самый простой способ удалить пустую страницу в Ворде
Пустые страницы обычно «прячутся» в конце документа, но иногда их можно встретить и посредине. Чтобы не подшить в диплом или какой-либо важный документ эти самые ненужные страницы, обязательно проверяйте весь текст на наличие «белых пятен». Самый простой способ избавиться от них – выделить мышкой и нажать Delete , либо кликнуть правой кнопкой мыши и выбрать Удалить .
Чтобы удалить пустые страницы в конце документа Word, используйте клавиши Ctrl и End, а затем – Backspace . Если страница не исчезла, нажимайте Backspace несколько раз, пока не получится удалить страницу.
Обратите внимание! Пустые места в Word – это, преимущественно, лишние абзацы и пробелы, случайно поставленные вручную или скопированные из Интернета. Чтобы не удалять пустые абзацы вслепую и увидеть все поставленные случайно непечатные символы, включите отображение символов абзаца. Сделать это можно при помощи комбинации клавиш Ctrl+Shift+8 , либо нажав значок ¶ в верхней панели инструментов в Ворде (на вкладке «Главная»). Теперь поместите курсор перед лишними знаками абзаца (¶) и нажмите Delete.
Как удалить разрывы страницы?
Еще один невидимый элемент, который появляется «ниоткуда» и создает в документе пустые места – это добавленный вручную разрыв страницы, либо же установленный принудительный разрыв разделов «с четной страницы», «с нечетной страницы» или «со следующей страницы». Разрыв тоже можно увидеть, если активировать отображение символов.
В большинстве случаев удалить разрыв страницы просто: нужно установить курсор перед разрывом или выделить его, а затем удалить, нажав кнопку Delete .
Совет: чтобы быстрее найти каждый разрыв (часто они бывают не только в конце, но и в середине документа) и удалить лишнюю страницу в Ворде, переключитесь в режим черновика. Для этого перейдите во вкладку Вид и нажмите кнопку Черновик .
Непредвиденная проблема может возникнуть, если разрыв находится в середине документа. В этом случае после удаления разрыва нередко нарушается форматирование, а именно, форматирование текста над удаленным разделом распространяется на текст под разрывом. Чтобы решить проблему, необходимо заменить тип разрыва следующим образом:
- В меню «Макет» (или «Разметка страницы») выбрать пункт «Параметры страницы».
- В открывшемся окне перейти в «Источник бумаги».
- Открыть список «Начать раздел» и выбрать «На текущей странице», нажать «Ок».
После этого пустая страница исчезнет, не повлияв на форматирование.
Как удалить титульный лист?
В Word 2003 титульная страница удаляется точно также, как и любая другая (выделить текст левой кнопкой мыши и удалить). Однако в последних версиях текстового редактора (Word 2016 и пр.) требуется выполнить следующие действия:
- Наводим курсор на вкладку «Вставка» и выбираем «Титульная страница».
- Указываем «Удалить текущую титульную страницу», подтверждаем.
Удаление пустой страницы после таблицы
Особого внимания требует оформление документа, последние строки которого занимает таблица. После нее непременно будет идти пустой лист, для которого не работает ни один вышеописанный вариант удаления.
Дело в том, что в Майкрософт Ворд после таблицы автоматически ставится абзац. Поэтому, если таблица занимает всю последнюю страницу, этот самый абзац переносится на новую страницу, то есть, следующий чистый лист.
Можно сократить текст в заполненной таблице, поменять размер шрифта или межстрочный интервал, чтобы убрать одну строку и «подтянуть» таблицу вверх, тем самым освободив место для технического абзаца. Если же необходимо сохранить все содержимое документа, и при этом избавиться от ненужной страницы в конце, следуйте нашей инструкции:
- Сначала нужно отобразить непечатаемые символы абзаца нажатием соответствующей кнопки.
- Теперь выделите символ ¶ после таблицы.
- Нажмите на клавиатуре сочетание клавиш CTRL + D.
- В открывшемся диалоговом окне «Шрифт» поставьте галочку напротив пункта «Скрытый» и нажмите «Ок».
- Отключите отображение знаков.
Таблица и остальное содержимое останется прежним, а коварная пустая страница должна пропасть!
Мы рассмотрели все основные причины появления пустых страниц и методы их удаления. Как видите, в этом нет ничего сложного. Теперь ваши документы выглядят опрятно и готовы к печати или отправке адресату.
Top-Notch Ways Of Using Hide White Space In Microsoft Word
Formatting an essential document in Microsoft word might be challenging. Editing, adjusting, removing graphics and other changes create blank spaces. However, some parts are easily manageable since you need to click on the backspace button, and you are all done.
The primary significance of the document with less spacing is that it improves readability for the reader. The reading flow becomes easy because of the minor blank space breaks that show the end of a thought. Having a wide spacing increases the time to read the document and the number of pages required for printing purposes. Therefore, reducing your copy is essential to saving your resources. In addition, documents with less spacing become eco-friendly when printed and give a good appearance to the document.
How Do You Show Or Hide White Space In Microsoft Word Documents?
It is possible to hide and even show white space on the top or bottom in a Microsoft word document. When you hide the whitespace, it is impossible to view headers, footers, shelter, and bottom margins in a print layout. In addition, the grey space that appears on top and bottom of the pages will disappear. To show or hide spaces between words, click on show/Hide ¶ on the Home tab.
It is important to note that the print layout view is a default view in Microsoft Word, and you can click on the view tab and select print layout. By default, a Microsoft word document’s margin is perfectly set at the top and bottom of the pages and is easy to change on the layout tab. Headers and footers appear in both top and bottom margin areas, and when the whitespace is not appearing, headers and footers may look as if they are missing.
How to Show or Hide White Space Using Shortcut
The process is quite simple
- Place the cursor at the top of the document
- Move the pointer in the grey region below the ruler and let it turn to the up and down arrow.
- You will get a message telling you to double click to either show or hide white space.
- Double click, and you are all done.
Showing and hiding white space continues in a new document you create. Hiding the white space affects it and the entire part of the header and footer, including watermarks. Saving and closing the paper ensures that the setting remains unchanged in the document. Hiding the white space does not affect page breaks appearing on the record. However, when printing the document, footers and headers print despite the white space even if they appear as if they are not appearing.
How to Show or Hide White Space Using Dialog Box
The process is also simple:
a. Open Microsoft word document
b. Click on the File tab
c. Select options, and a dialog box will appear
d. Find Display in the categories
e. On the correct plane, check shows whitespace given print layout
a. Click okay
However, the feature is not apparent and can cause problems to users if areas in their documents are missing.
Removing Blank Lines in Microsoft Word
It is easy to hide the white space on the top or bottom of every page to reduce the grey space. However, the grey area will not have any effect since the white space option controls it perfectly between the pages. Selecting white space between page option words maintains the new document and the current document.
Direct blank lines are somehow easy to remove; however, the document size affects tracing the blank lines. Therefore, the availability of several blank lines in an extensive document tracing process takes quite some time and is more intensive. Going through several pages is not tedious, but going through many pages is essential to conduct the process in a streamlined way.
Start on the top of your paper; scanning it slowly in every paragraph until you determine the blank lines, which require formatting. Place the cursor at the start of the line below the space. Ensure that you place it correctly at the beginning of the text. Click on the backspace on the keyboard to remove the single area. In the case of double-spacing, continue clicking on the backspace until everything is okay. It is important to note that the cleared space affects the formatting down in the document and when sections are on a new title on a new page, removing the areas pulls the heading upwards to the earlier page. Ensure you are keen on every header that requires some changes while scrolling down your document.
How to Use the Replace Function
Large documents are easy to format via replace function that removes unwanted spaces via a single process. It offers custom control, including eliminating all areas while leaving a break between paragraphs. The procedure is relatively easy to understand and apply.
i. Open Microsoft word document
ii. Click on the Home tab in the primary toolbar.
iii. Locate editing group and click replace, which will open a new dialogue
iv. Click on replace and select more
v. Select paragraph mark option
vi. Go to find what section
vii. Go to replace all
It removes all the blank lines in the whole document when you click on it.
How to Work Effectively With Page Breaks
The show and hide white space feature is vital, especially on long documents with page breaks. To insert a page break to move the text to another page, click on Ctrl and Enter or choose Insert tab in the ribbon and continue picking Page break. It will enable you to trace the white space easily when zooming in the document while scrolling down through your paper.
Double click to show the white space makes it simple to go through a long record. It is simple to adjust the spacing of the paragraphs in Microsoft Word. While formatting APA, double-spacing the paper is essential; it is successfully achievable via line spacing.
The above are effective ways that you can use to hide white space in Microsoft Word. K2Technologies gives quality Microsoft solutions to organizations in the United States. By partnering with K² Technologies, you will get the best services and consultations on Microsoft technology. Reach out to us today for a quality solution worth experiencing.
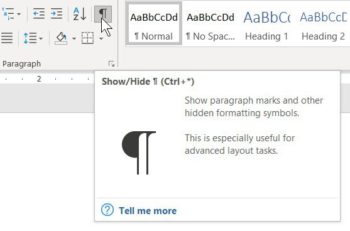
If you work with long documents in Microsoft Word, you should know about the Show/Hide white space feature. Now, you may already know about the Show/Hide option in Word to display non-printing characters. You’ll find this under the Home tab. Show/Hide is the paragraph mark icon that you can enable (turn on or turn off) to show or to see some of the hidden information in that document. And, with long documents, I would recommend that you keep this turned on. But what about the vertical white space between pages in long Word documents? How can you make it easier to navigate, edit, and format your Word files?
Continue reading or watch my video on the simple steps to show or hide vertical white space in long Word documents.
Working with Page Breaks in a Word Document
The Show/Hide white space feature is especially helpful if you have a longer document that might have page breaks in it. When you want to insert a page break to move the text to the next page, press [Ctrl] + [Enter]. You can also choose the Insert tab in the ribbon and then pick Page Break. With page breaks, one of the things that can happen is we can have these massive amounts of white space, especially if the document is zoomed in and we’re scrolling quite a bit as we’re moving from one section or one page to another.
Double-Click to Show or Hide White Space
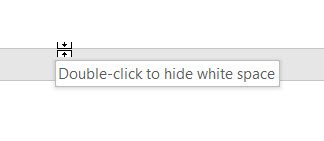
Here’s the trick. Move to the top or bottom margin of that page. Hover your mouse over the edge of the page and notice “Double-click to hide white space.” Simply double-click, and now that extra white space is being hidden. We can bring it back at any time. This can make it much easier to navigate through lengthy documents without seeing all of that white space in the document margins and where you might have page breaks.
Any time you want to display white space in the document, hover over the edge of the pages and notice, “Double-click to show white space.” Double-click, and now we have it back. Also, make sure to take advantage of the document view options under the View tab so you can display your document in any way that’s helpful to you, whether or not you show white space.
Discover more ways to save time editing and formatting your Word documents at: TheSoftwarePro.com/Word.
© Dawn Bjork, MCT, MOSM, CSP®, The Software Pro®
Microsoft Certified Trainer, Productivity Speaker, Certified Speaking Professional
Dawn Bjorkhttps://www.TheSoftwarePro.com
A Microsoft Certified Trainer (MCT) and Certified Speaking Professional (CSP), Dawn Bjork is known as The Software Pro® for her work as a productivity speaker, software trainer, virtual presenter, and author of numerous training courses and videos. In addition to these credentials, Dawn is also a certified Microsoft Office Specialist Master (MOSM) and Certified Virtual Presenter (CVP).
When she’s not busy sharing her expert knowledge on software with the world, Dawn can be found hiking the Colorado mountains, trying to master Pilates, or attempting to play golf.

To fit more content on the screen, you can hide the white space on and between pages, such as top and bottom margins with all information on them. Thus, the pages will not display in the usual way. After a page break or between objects, any white space, headers, and footers will be hidden.
Note: Be careful! Any object in the header or footer, including watermarks, text boxes, and other graphics anchored to the header or footer, will also be hidden with the margins. Therefore, some important information in your document may disappear!
To display or hide the white space between pages, do one of the following:
- On the File tab, click the Options button:

In the Word Options dialog box, on the Display tab, select or deselect the Show white space between pages in Print Layout view check box:

- Move the mouse pointer to the top or bottom edge of the page to the location where the mouse pointer changes into a double arrow:
- If you see the Hide White Space pointer, double-click to show white space:

- If you see the Show White Space pointer, double-click to hide white space:

- If you see the Hide White Space pointer, double-click to show white space:


Please, disable AdBlock and reload the page to continue
Today, 30% of our visitors use Ad-Block to block ads.We understand your pain with ads, but without ads, we won’t be able to provide you with free content soon. If you need our content for work or study, please support our efforts and disable AdBlock for our site. As you will see, we have a lot of helpful information to share.

- Remove From My Forums
-
Question
-
In Word 2013 how do I show multiple pages in Print Layout as well as hide the white space at top and bottom? In Word 2010, and earlier, this is possible, but in 2013 it appears that you can do only one, not both. Thank you.
Answers
-
Try Zoom out the Print Layout, see if it is what you want:

.
And try double click the space between any two pages, see if it is what you want:
Max Meng
TechNet Community Support
-
Marked as answer by
Max Meng
Friday, June 21, 2013 7:56 AM
-
Marked as answer by

All replies
-
Try Zoom out the Print Layout, see if it is what you want:
.
And try double click the space between any two pages, see if it is what you want:
Max Meng
TechNet Community Support-
Marked as answer by
Max Meng
Friday, June 21, 2013 7:56 AM
-
Marked as answer by
-
That works in Word 2010, but, in 2013, unfortunately, when viewing multiple pages and you try to remove the white space as you suggest, it pops you back to single page view, though the pages are connected top-to-bottom and the white space is hidden. But,
you still can’t see multiple pages across without the white space. As far as I can tell, the ability to have both white space removed AND multiple side-by-side pages has been removed from the program. -
I can reproduce this. The zoom is maintained at whatever value Word selected when you clicked the Multiple Pages option, but what you get are single pages.
Stefan Blom, Microsoft Word MVP
-
Edited by
Stefan BlomMVP
Sunday, June 30, 2013 2:09 PM
(typo)
-
Edited by
-
Thank you. Where at Microsoft would you recommend I post this as a requested wish list item? By the way, I explored the Read Mode view, and, while it allowed me to see more text on screen, like multiple pages, it does not allow any editing.
-
I’d like to add my own desire to have these combined functionalities. I miss that ability from 2010. Thanks!
Latest Articles for Microsoft
-

Image: lexiconimages/Adobe Stock
CXOMicrosoft report: Low-code tools a lifeline for overburdened IT teams
A new report underscores the effectiveness of low-code tools in reducing costs and helping IT professionals deal with growing demands.
-
Image: irissca/Adobe Stock
Artificial IntelligenceChatGPT cheat sheet: Complete guide for 2023
Get up and running with ChatGPT with this comprehensive cheat sheet. Learn everything from how to sign up for free to enterprise use cases, and start using ChatGPT quickly and effectively.
-
Image: Farknot Architect/Adobe Stock
SoftwareHow to access Microsoft Remote Desktop on your Mac
If you need to access Windows applications or PCs using your Mac, a remote desktop connection is the way to go. Here’s how to set up and use the connection.
-
Image: PhotoGranary/Adobe Stock
SoftwareMicrosoft PowerToys: A cheat sheet
Users are always searching for ways to make their computing lives better, and the Microsoft PowerToys are made specifically for this purpose.
-
Image: StackCommerce
Tech & WorkRun Windows programs at native speed on macOS, Linux or ChromeOS for just $50
Ditch those clunky emulators and run your Windows software on other operating systems as quickly and easily as on a Windows computer.
-
Image: Microsoft
SoftwareGet lifetime access to Microsoft Office 2021 for just $50
Whether you’re starting a new business venture and need Microsoft Office’s help or you just want to get better organized in your personal life, it’s a good time to take advantage of this limited-time deal.
-
Image: PhotoGranary/Adobe Stock
DeveloperNew ways to bring MongoDB data and apps to Azure Cosmos DB
Microsoft is making it easier to move existing MongoDB workloads to its Cosmos database.
-
Image: wachiwit/Adobe Stock
Tech & WorkTurbocharge your company’s productivity with advanced Excel skills for only $10
Learn all of Excel’s features, plus how to program and streamline your workflow with automated tasks in this Excel Training bundle.
-
Image: Adobe Stock/alvaher
SecurityMicrosoft adds GPT-4 to its defensive suite in Security Copilot
The new AI security tool, which can answer questions about vulnerabilities and reverse-engineer problems, is now in preview.
-
Image: Pixabay
SoftwareLoop components make collaboration easier in Office and Microsoft 365 apps
Structured chunks of data you can share and update in multiple places are showing up in different Office applications. Here’s what you can do with these Loop components.
-
Image: Andy Wolber/TechRepublic
SoftwareGoogle Workspace pricing (2023): How to choose the right plan for your business
Moving to Google Workspace? Understand the differences between business and enterprise plans so you can choose the right one for your business.
-
Image: gguy/Adobe Stock
SecurityMassive adversary-in-the-middle phishing campaign bypasses MFA and mimics Microsoft Office
Microsoft has already seen millions of phishing emails sent every day by attackers using this phishing kit. Learn how to protect your business from this AitM campaign.
-
Image: Hugo Baeta
CloudRunning WordPress on Azure for secure, fast and global content delivery
Learn about Microsoft’s WordPress on Azure App Service, as well as an interesting alternative from WP Engine.
-
Image: PhotoGranary/Adobe Stock
CloudAzure Monitor’s Change Analysis helps you troubleshoot problems quickly
Azure Monitor’s Change Analysis helps you troubleshoot problems quickly.
-
Image credit: Microsoft
Artificial IntelligenceMicrosoft adds Copilot AI productivity bot to 365 suite
Copilot, a natural language bot that can pull from data across the Microsoft 365 suite, is now in testing with select commercial customers.