
Microsoft Word is a simple program that is used to create all kinds of documents. Whether you need a professional-looking document for work or just creating a school project, Microsoft Word is a perfect choice.
Although the majority of Microsoft Word tutorials and guides are geared towards productivity, not many of them cover the aspect of creative writing.
Microsoft Word is packed with a plethora of amazing features, and while most of those features make Word seem like the perfect program for business settings, it works equally great for creative writers.
1. Learn About Article Structure
If you do not know how to structure your article properly, everything will look like a mess. This can be a challenge for creative writers, especially with broad subjects.
However, there is a structure that you can easily follow. Always start with an announcement of the overall theme or topic.
Then proceed to the introduction of the topic, the presentation, and the conclusion. If you need help creating structured reports and documents in Word, you can check out this article.
2. Keyboard Shortcuts Are Useful
One of the first things you should learn is the keyboard shortcuts for Microsoft Word. You can improve your productivity a lot by using shortcuts, as this allows you to focus more on creative writing than formatting and other things.
3. Enhance Your Vocabulary
How often do you use Google to find synonyms of words that you want to use in your document? Well, did you know that Word has that feature already? All you have to do is select the word, right-click on it, and select Synonyms from the drop menu, as is shown below.

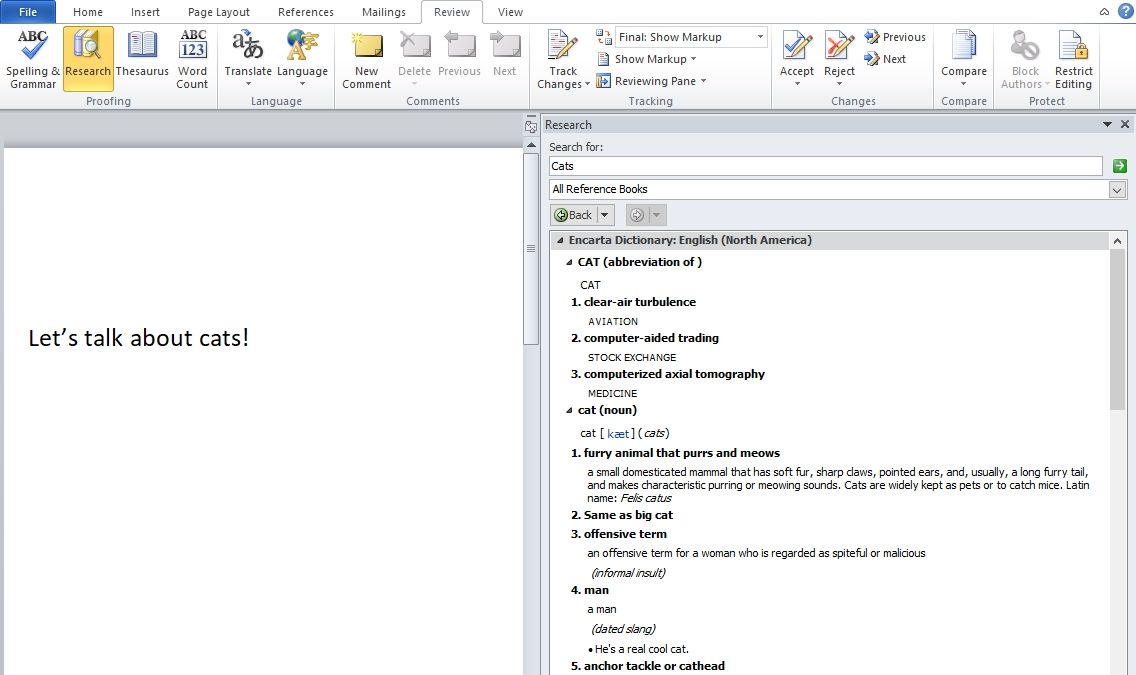
In addition, you should also learn more about the Researcher toolset. Most of us like to use Google when writing an article, whether you are trying to gather some information or make your document seem richer.
With the Researcher toolset, you can easily search up all kinds of information, and use filters to find higher quality content.
4. Text-to-Speech Is Quite Helpful
If you spent all day answering emails, creating presentations, and writing documents, you are probably tired. But if you aren’t feeling like typing, and you need to make some documents, you should check out the Dictation feature in Word.
This feature works effortlessly; you can talk to your computer and type what you are saying. This is an Office add-in for not only Microsoft Word but also PowerPoint and Outlook. You can learn more about this tool on Microsoft’s official website.

One thing you should keep in mind is that if you are using Dictation to write your documents, it is always a good idea to check what you wrote before submitting the document.
Dictation does not always work, as some of us might hope, which can also depend on your microphone. Checking your document will ensure that you correct all the avoidable mistakes.
On top of being able to use Dictation, you have the ability to review your article with Read Aloud option.
It does not matter how many times we re-read our articles, it is common to overlook some basic mistakes. With the Read Aloud option, you can hear what you typed out loud, thus catch mistakes a lot easier.
5. Check Your Grammar
While we are on the topic of avoidable mistakes, Microsoft Word does a great job checking your grammar. It always has. But, with the newest updates, you have a lot more options to check out.
All you have to do is click on File>Options and select Proofreading. You can see the pictures below.
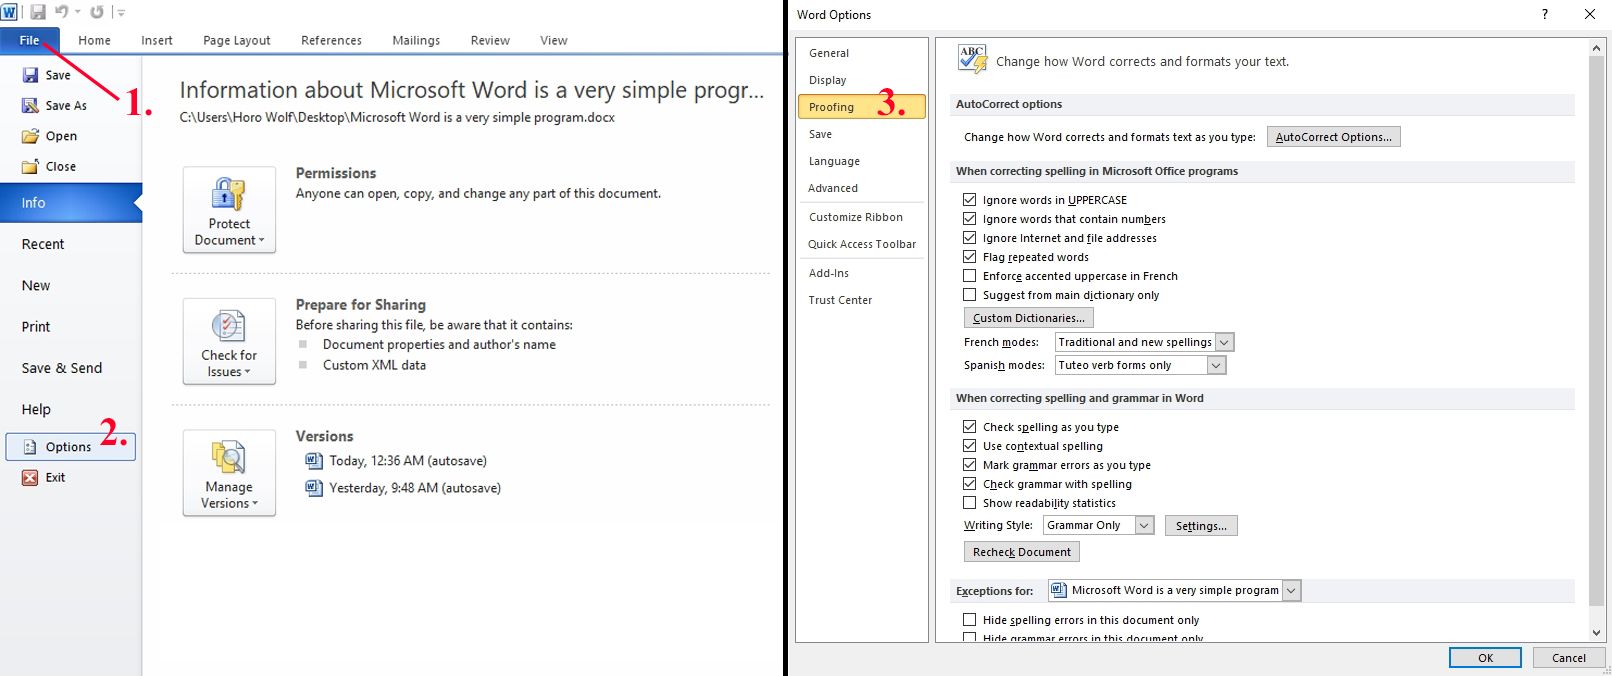
From this many, you can select whatever you want. You can choose to have your document corrected as you type, check your grammar and style, or hide your spelling errors in case you are not writing in English.
There are advanced options as well, where you can add your own dictionary, correct mistakes you often make, etc.
6. Pay Attention to Your Word Count
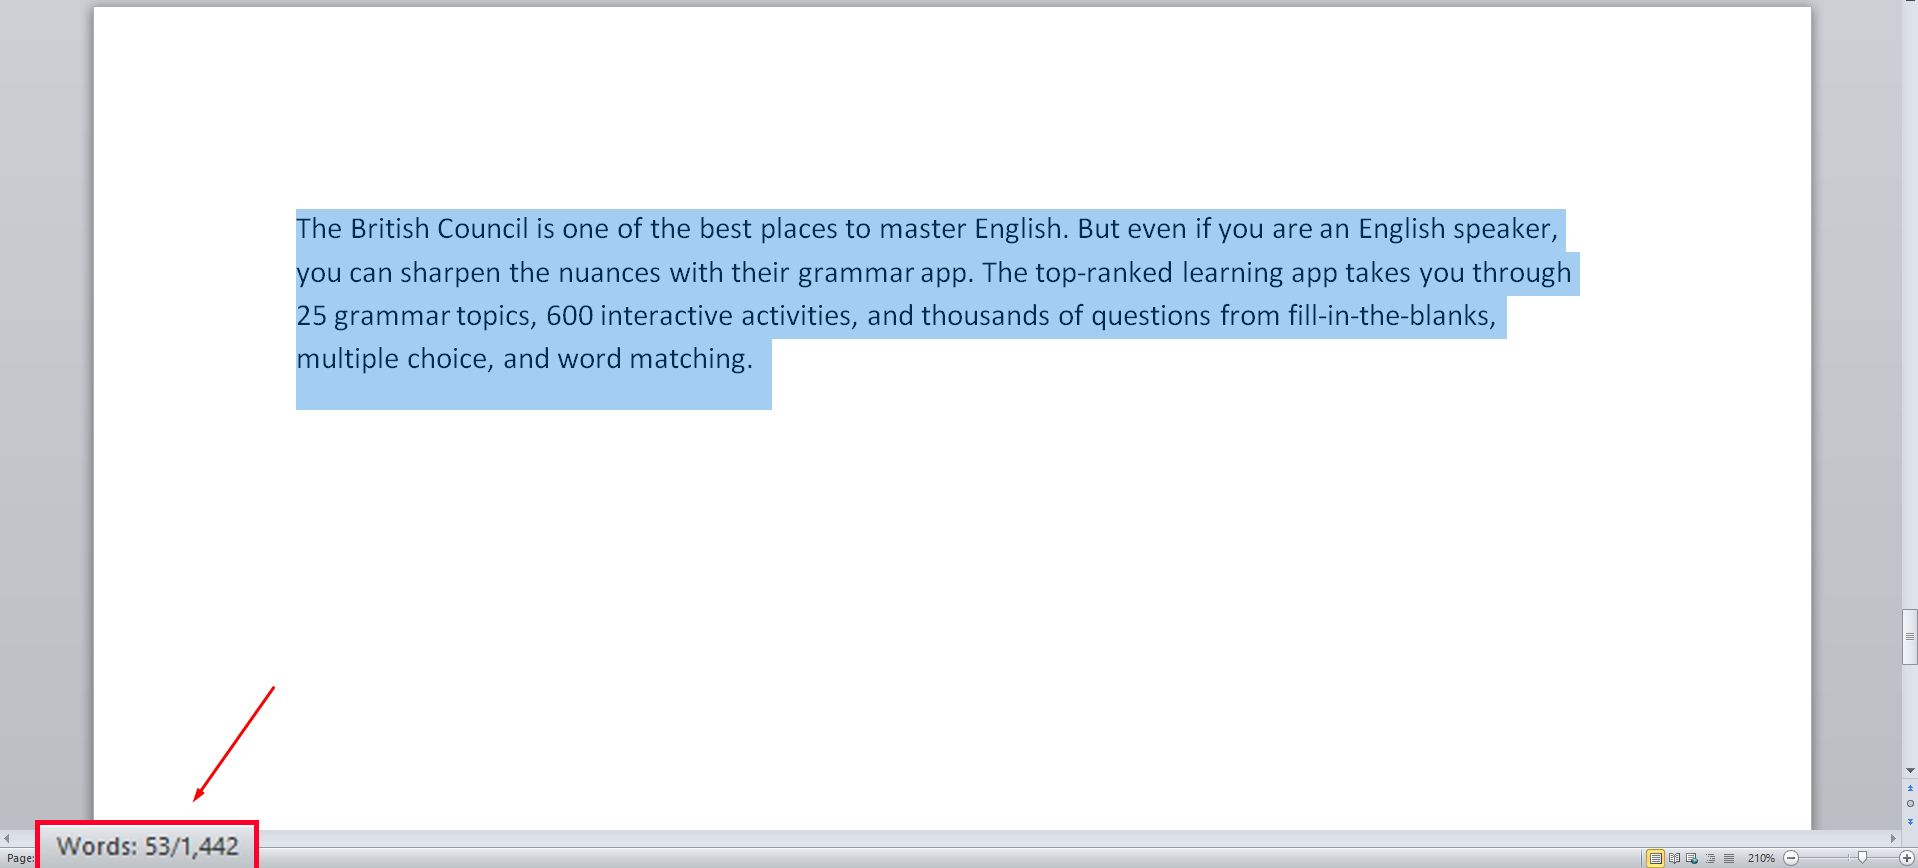
The length of an article should depend on what you are writing about and your target audience. So what is the ideal length of an article? The longer the content, the more shares it will get. Studies have shown that posts that are over 3000 words long do well.
However, when your topic is not broad enough to cover 3000 words, it’s always better to write shorter, more direct articles instead. Luckily for you, Word will keep track of the number of words as you write them. You can also select a sentence/paragraph to see how many words it has.
7. Autosave Your Work
As writers, we all want to make sure that we have backups for our backups. One of the worst things that can happen is to lose hours of work in just a second, which you can avoid.
Microsoft Word allows you to set up the AutoRecover option, which will also autosave your document. This means that if your document suddenly closes, Microsoft Word will recover your document for any number of reasons.
8. Create Notes for Yourself
It does not matter if you are working with an editor or you are editing the document by yourself, creating comments is a good way to keep yourself up-to-date. Sometimes, we just have too many things to deal with, and it is easy to forget important things.
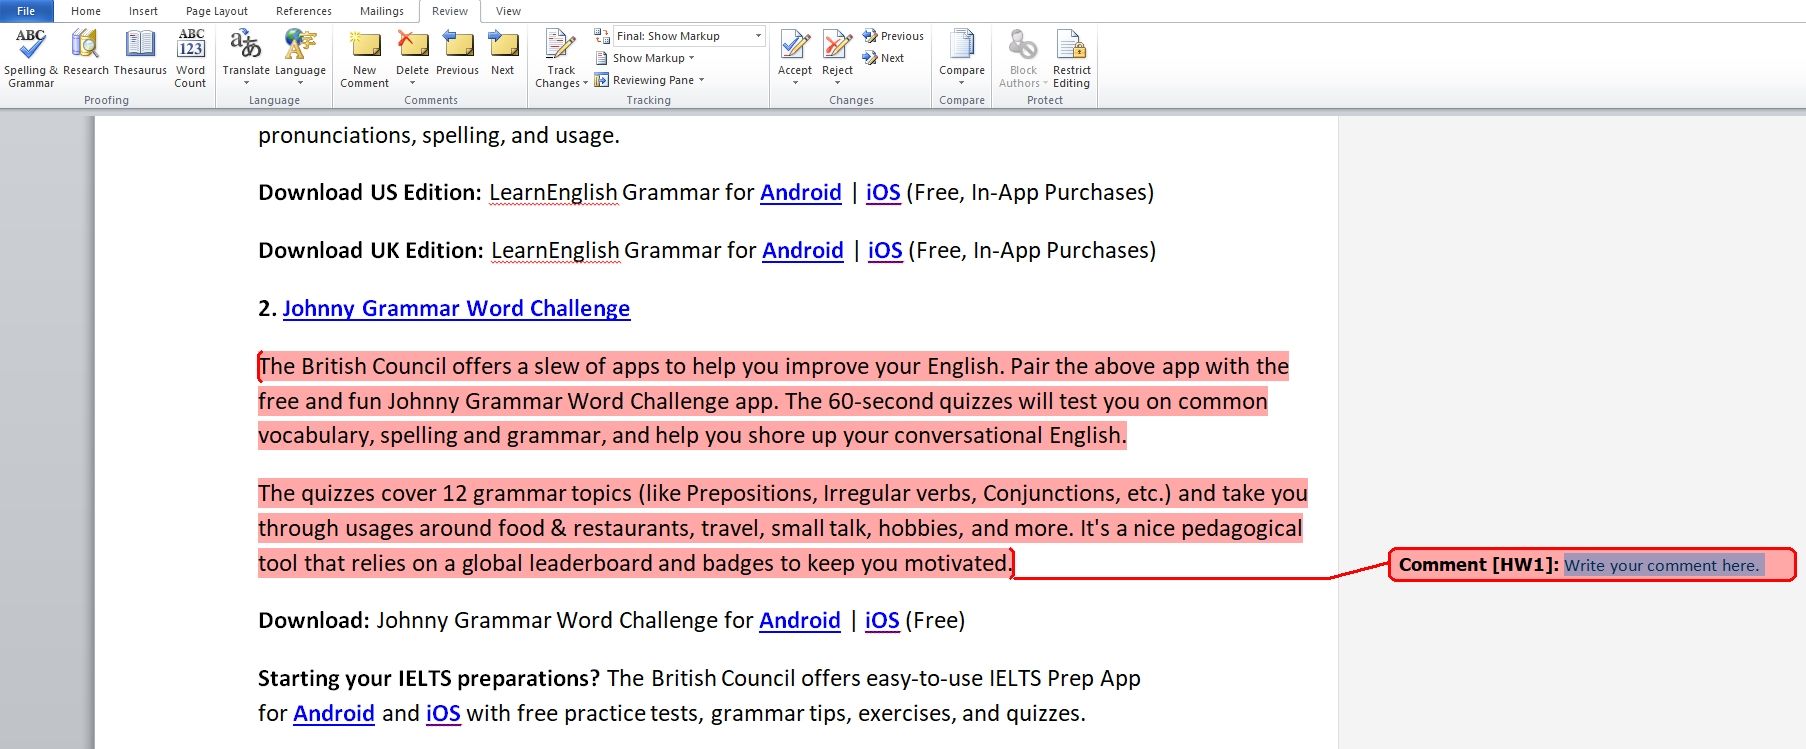
For example, if you are unsure about something that you wrote and would like to get back to it a bit later, writing comments to that section of the document will help you remember later.
Creative Writing Is Simple if You Know What You Are Doing
There are many simple guidelines you can follow in order to make your creative writing assignments easier. Of course, a lot of this will depend on the topic or theme that you are covering.
With that said, things, such as the Dictation option where you can talk to your computer and have everything typed out automatically, can always come in handy!
It’s easy as a writer to fall into the trap of shiny new toys. There’s an endless number of book writing software programs claiming to be the best at one thing or another, from Microsoft Word to Scrivener to Vellum—and the list goes on and on.
They flash their sexy features at you and promise to be the very thing you need to become the writer you want to be. But sadly, these programs will not make you into the writer you want to be. They offer the world, but often only take your time.
That’s why I would like to offer a defense for using the industry book writing software standard, Microsoft Word.
The Secret to Choosing the Right Book Writing Software
In chapter seven of his leadership classic, Good to Great, Jim Collins addresses the issue of new technology and how businesses should use them. (Before you say that this doesn’t apply to you because you are not running a business, if you are publishing what you write in hopes of someday making money, then you have started a small business, and Collins’s book has loads of wisdom for you.)
When it comes to technology, Collins says that truly great companies understand how and when to embrace shiny new toys. “Good to great organizations,” Collins says, “think differently about technology and technological change than mediocre ones.”
While the average company seeks to use every new technology that arises to solve their problems, great companies use technology as “an accelerator of momentum, not a creator of it.”
Pause for a moment and ask yourself, what does it take to become a great writer?
Like mastering any skill, becoming a great writer takes discipline, focus, intentionality, and hours upon hours of practice.
- Scrivener may be a wonderful tool for dividing up book chapters and helping you organize information, but it is not going to put your butt in the chair and help you bang out those words.
- Vellum may be a wonderful tool for formatting, but it is not going to hammer out chapter after chapter until your plot holes are full.
- While Grammarly may spot potential errors for you, it will not wake you up early before work so you can write and keep you up late at night until the manuscript is finished.
This is what Collins means when he says technologies should be used as an accelerant, not a momentum creator. If you aren’t already putting in the hard work to be the kind of writer you want to be, it doesn’t matter what new writing software you invest in. It is not going to help.
In fact, often new technologies can be a distraction. Each writing software program has its quirks. When we switch to something new, we have to invest time in learning how to use it. Not only are we trying to master the craft of writing, we are trying to master new tech as well. And if we are always chasing the new thing hoping it will make us into the writers we want to be, then we will exponentially slow our progress as writers.
So what is a new writer to do? If the fancy programs aren’t going to solve your problems, where should you turn?
3 Invaluable Strengths of Microsoft Word
When you are learning the daily discipline of writing, I recommend using Microsoft Word for three simple reasons. (In a recent article comparing Scrivener to Word, Joe Bunting explained the strengths of Word. I recommend you go back and look at the reasons he laid out as they make my case for the software. I will do my best not to repeat his arguments.)
1. Word Is the Foundation
Microsoft Word is the standard all the other programs are built on. Word was one of the first writing software programs on the scene, which means it set the tone for the features programs need to have, and it continues to do so. As Microsoft Word goes through evolutions, the other writing software programs follow suit.
Therefore, if you can master Word, you can master any of the others because you understand where they are coming from.
When you are developing the daily discipline of writing, you might as well do it on a program that is going to help you graduate to something else in the future. Once you understand your strengths and weaknesses as a writer, you can then make a decision about what specialized technology you need to master. And if you have learned how to be a writer on Word, you will easily make a jump to something else because its creators had Word in mind when they made it.
2. Word Is Common Among Non-Writers
When I finish a book, the first thing I do is send it to beta-readers. Before I publish it, I need fresh eyes on it. Because I have written it in Word, anyone can read it.
While fancy book writing software programs might be popular among writers, Word is the standard for professionals. It’s in every university. It’s at almost ever business. Even if a business isn’t using Word, they have a way to convert and read Word documents.
Being able to attach your book to an email and send it off to a friend for a second opinion is invaluable. Word allows you to do that simply, without hassle.
Additionally, if you turn on the “Track Changes” feature, Word allows those readers to review your work without making permanent changes to the document. When they return the book to you, you won’t have to search it for changes. They will be marked and ready for you to accept or reject.
3. Every Platform Accepts Word
I’ve used Word to write and “publish wide” three novels, two short stories, and four compilations with other authors. This week, in fact, I published a new short story using Amazon KDP, Kobo Writing Life, and Draft to Digital. While each platform wants something a little different, all three distribution platforms will accept a document I can create with Microsoft Word.
When you do finish your work and it is time to distribute, Word has what you need to get the job done.
Choose Wisely
While other book writing software programs might have flashy features that promise to make you an incredible writer, until you’ve built the habits and disciplines you need as a writer, until you know your strengths and weaknesses, don’t be lured in by their siren song. Rather, learn to be a writer on the industry standard.
Those other programs will only accelerate what you are currently doing. They won’t create new momentum. If you can publish with Microsoft Word, then the other programs will feel familiar when you are ready to try something new.
If you’re looking for programs to accelerate your writing, check out our list of the Top 10 Pieces of Software for Writers (hint: Microsoft Word is #6!).
Do you use Microsoft Word for your writing? What makes it useful for you? Let us know in the comments.
PRACTICE
Today, focus on your writing, not the medium you’re using to write it. Open up Microsoft Word, or if you want to go back to true old school basics, pull out a pen and paper. Then, take fifteen minutes to write a story about a character who’s always excited for the next best thing.
When you’re done, share your writing in the comments, and don’t forget to leave feedback for your fellow writers!

Jeff Elkins
Jeff Elkins is a writer who lives Baltimore with his wife and five kids. If you enjoy his writing, he’d be honored if you would subscribe to his free monthly newsletter. All subscribers receive a free copy of Jeff’s urban fantasy novella «The Window Washing Boy.»
 This tutorial shows how to use the Editor in Word for Microsoft 365. The Editor is an update to the spelling and grammar check available in older versions of Word.
If you are using an older version of Word that doesn’t have an Editor button, please see my other tutorial “How to Use the Spelling and Grammar Check in Microsoft Word.”
This tutorial covers five topics:
- How to Select Grammar Issues and Refinements
- How to Run the Editor
- How to Review the Suggested Edits
- How to Finish the Edit
- How to Run a Fresh Edit
Attention Mac Users: The Editor is available in Word for Microsoft 365 for Mac. The basic steps are similar to those shown here. However, the process of selecting grammar issues and refinements is different, so we will cover the Editor in Word for Mac in a separate tutorial.
This tutorial is also available as a YouTube video showing all the steps in real time.
Watch more than 150 other writing-related software tutorials on my YouTube channel.
Are you looking for information about editing in Word with Track Changes instead of using the Editor? If so, visit “How to Use Track Changes in Microsoft Word” for a step-by-step tutorial covering ten editing tasks.
How to Select Grammar Issues and Refinements
The Editor can check for over 150 grammar issues and refinements beyond spelling, including the following:
- hyphenation
- passive voice
- Oxford comma
- clichés
All the grammar and refinement options are available in the Word Options dialog box. You should select from these options before running the Editor.
- Select the File tab in the ribbon.

- Select the Options tab in the Backstage view.

- Select the Proofing tab in the Word Options dialog box.

- Review the spelling and grammar options that affect how the Editor interacts with your document:
A. Ensure that Check spelling as you type and Mark grammar errors as you type are selected if you want issues to be marked in the text as you type.
B. Ensure that Check grammar and refinements in the Editor Pane is selected to include grammar and refinements.
C. (Optional) Ensure that Show readability statistics is selected to show your readability statistics after running the Editor.
D. Ensure that Hide spelling errors in this document only and Hide grammar errors in this document only are not selected.

Pro Tip: Always run the Editor, even if you have spelling and grammar issues marked as you type, because you may not notice all the in-text edits. Plus, the Editor seems to be more thorough than the check provided as you type.
- Select Grammar & Refinements or Grammar in the Writing Style menu. (Most users will want to choose Grammar & Refinements because it offers more options.)

- Select the Settings button.

- Select or deselect options from the Grammar Settings dialog box.

Defining each grammar option is beyond the scope of this tutorial. However, the Microsoft Office Support website provides a detailed explanation for many of the options sorted by language.
- Select the OK button to close the Grammar Settings dialog box.

- Select the OK button to close the Word Options dialog box.

Now that you have decided how you want Word to proof your document, you can run the Editor.
- Select the Home tab in the ribbon.

- Select the Editor button. (The Editor button is also available in the Proofing group on the left end of the Review tab.)

The Editor Pane will appear on the right side of your screen.
How to Review the Suggested Edits
- Review your Editor Score. This score will change based on choices you make within the Editor Pane. Therefore, you may choose to disregard this number while working with the Editor.

- (Optional) Select a level of formality from the drop-down menu.
- Formal—The Editor will apply all the grammar and refinement rules, resulting in the most recommendations.
- Professional—The Editor will apply most of the grammar and refinement rules, resulting in fewer recommendations than the Formal option.
- Casual—The Editor will apply the fewest number of grammar and refinement rules, resulting in the fewest recommendations.
Your Editor Score will change based on your choice of formality.

Pro Tip: Use the Formal writing option for the strictest edit even on less formal writing because you can always ignore suggestions—but you can’t ignore suggestions you never see.
- Select the Editor Score (see figure 12) to review each of the recommendations starting from the current placement of your cursor. Or, skip to step 4 to review by category.
- Select the Corrections or Refinements category you want to review. The available categories will depend on your selections in the Grammar Settings dialog box (see figure 7).
Categories with a checkmark don’t have any suggestions.

Spelling
- Choose a suggestion to change the individual spelling error.

Or, open the drop-down menu for the suggestion and select Change All to change every instance of the spelling error.
You can also choose (a) Ignore Once to ignore that spelling one time, (b) Ignore All to ignore that spelling every time it appears in the document, or (c) Add to Dictionary to add the word with its current spelling to your custom dictionary.

If the Editor is unable to provide any spelling suggestions, it will still let you add the word to your custom dictionary, ignore the word once, or ignore all instances of the word.
After you select or ignore a suggestion, the Editor will automatically move to the next issue in that category or return you to the main view to chose a new category.
Grammar and Refinement Issues
- Review each grammar or refinement issue. In some cases, the Editor will suggest a way to rewrite the text.
Or, select (a) Ignore Once to ignore that instance of the issue or (b) Don’t check for this issue to stop checking for that type of issue in the rest of the document.

Open the drop-down menu above the text box if you want additional information about the issue.

Pro Tip: The navigation arrows on the right side of the pane let you move forward and backward to issues you have not yet addressed. The arrow on the left side will return you to the Editor’s main view.

The Editor Pane also provides options to search the web for similar text and give feedback to Microsoft about the Editor.

How to Finish the Edit
If you included readability statistics in your proofing options in the Word Options dialog box (see figure 4), the Readability Statistics dialog box will appear after you have accepted or ignored all the Editor’s suggestions.
- Select the OK button to close the Readability Statistics dialog box.

- Select the OK button in the dialog box stating that you have finished reviewing the Editor’s suggestions.

How to Run a Fresh Edit
If you have updated your text since running the Editor, you may want to run a fresh check.
- Select the File tab in the ribbon (see figure 1).
- Select the Options tab in the Backstage view (see figure 2).
- Select the Proofing tab in the Word Options dialog box (see figure 3).
- Select the Recheck Document button.

- Select the Yes button in the dialog box stating that the new spelling and grammar check (Editor) will recheck issues that you ignored during the last check.

- Select the OK button to close the Word Options dialog box (see figure 9).
Follow the steps in the How to Run the Editor section above to recheck your document.
Important Note: Microsoft plans to continually add new features to Word for Microsoft 365. Therefore, your version of Word may have different features than those shown here.
Related Resources
How to Change the Proofing Language in Microsoft Word
How to Use the Clipboard in Microsoft Word
How to Edit Your Custom Dictionary in Microsoft Word
How to Create an Exclusion Dictionary in Microsoft Word
Updated September 25, 2022
Hardly anyone can guess of something other than Microsoft Office when it comes to text processing, presentation preparation or big data calculations. Of course, this software does not service large corporations that use advanced professional programs, but writers, bloggers, and other computer users know Microsoft Word as the most popular software used online.
This company tends to enhance the effectiveness of the time you spend working with Word by creating a gallery of Microsoft’s free templates that can be used for personal, academic and professional writing purposes. Using these templates, you can start working on your project while focusing on writing instead of formatting.

A good writing template can save your time and improve your understanding of the layout of your text before you proofread and edit it. Here is the list of the top 10 free Microsoft Office templates you can use and benefit from as a writer. For that, You need to have installed Word, Publisher, Excel, and PowerPoint.
Most of these templates can be used following this very simple procedure:
-
Open the relevant application (Word, PowerPoint, or Excel)
-
Click «File» then «New»
-
Browse for the desired template in the template library.
1. Familiy NewsTemplate (MS Word)
This template can be used for information sharing or marketing purposes. It is a great representation of the effectiveness of free writing software offered by Microsoft. You can create a newsletter faster and tailor it according to your preferences and taste. You can change colors, fonts and layout using the formatting provided. Moreover, it is possible to add some extra features like family pictures to make your newsletter more engaging.
2. Story or Novel Manuscript Template (MS Word)
This template provides a framework that allows you to start writing immediately. It offers the most basic form of formatting but gives you enough understanding of how to format it to excel during submission.
3. Business Letter Template (MS Word)
It is a very handful template that can be used by office managers and personal assistants, as well as other people involved in business correspondence. It provides a perfect layout for your business letter or memo so that you know how to format your addressee’s credentials and put references to your company.
4. CV template (MS Word and MS PowerPoint)
Everyone needs to prepare a good resume at some point, so if you are looking for the perfect template for that, you can look at the CV templates that are included in the Power-user add-in. You can choose between several templates of beautiful resumes in Word or PowerPoint templates. This should help you reach your professional goals.

5. Cover Letter Template (MS Word)
Following the resume, MS Word emphasizes the need for a good cover letter and facilitates your writing. It provides you with a perfect sample that can be transformed or rewritten to meet the needs of the occupation you target.
6. Email or Newsletter Template (MS Publisher)
This template is used by the writers who intend to keep in touch with their target audience. It helps in formatting their email and in sending it out. This template offers you a neat and inviting to the eye layout, that highlights special events, releases, and other relevant information.
7. Catalog Template (MS Word)
This template is truly the best among the Microsoft office templates free of charge if you need to create a presentation of your project or handout material. The majority of Microsoft Office users admit that this template includes only basic formatting, but it provides the list of elements necessary to include in the title page for your presentation to look professional.
8. Writing Project Timeline Planning Template (MS Excel)
This template is truly the best among Microsoft office templates free of charge if you need to combine many projects in one document with timeline and charts. The majority of Microsoft office users may find it difficult to understand how to utilize this template since it requires special skills, but when you try once, you will never hesitate to do this again.
9. Book Stack Presentation Template (MS PowerPoint)
This template incorporates the best offered by Microsoft PowerPoint to help you create a perfect layout. You can shift and alter colors and fonts, but the main formatting has already been done for you. You can concentrate on your writing and content only.
10. Animated Flipping Book Template (MS PowerPoint)
This is a perfect opportunity to create a presentation in the form of a story or novel that will tell itself through dynamic animation. It includes amazing visual elements that bring your creativity to the new level. Even though the idea is quite simple, it still attracts many audiences worldwide.
About the author:
Sandra Larson is a professional writer who has built her career by writing creative content for marketing purposes. She has spent several years reaching proficiency with professional software for writers like Microsoft and recommends using templates to ease your writing. In this article, Sandra lists the top 10 list of MS Office templates that can be effectively utilized by writers in their professional, academic and personal writing.
 |
Категория: | Офисный пакет |
| Поддерживаемые ОС: | Windows 10,8,7,XP | |
| Разрядность: | 32 bit, 64 bit, x32, x64 | |
| Для устройств: | Компьютер | |
| Язык интерфейса: | на Русском | |
| Версия: | Последняя | |
| Разработчик: | The Document Foundation |
Writer — В пакете LibreOffice эта программа выполняет функцию текстового редактора, в нем можно работать с текстом по большому функционалу, подойдет для всех видов работ по редактированию текста. Не беспокойтесь данный текстовый процессор может работать со всеми популярными форматами файлов, если вам прислали документ в формате .docx вы сможете без труда открыть и редактировать.
LibreOffice Writer — как Word только бесплатно
В общем пакете программ LibreOffice есть отличный заменитель привычного всем Word от разработчика Microsoft, название его Writer. Приложение поддерживает форматы которые перенесены из word и умеет с ними работать на том же уровне. Самое удивительное что разработчик софта не использует не какие лицензии встроенные в программу в отличии от Microsoft, времена разные и то что мы имеем бесплатные аналоги всеми привычных программ дают возможность продолжать работу без каких либо ограничений от разработчика.
Данный продукт очень крутой и хороший редактор текста возможно недооцененный со стороны большинства, но на самом деле есть тому объяснение, рынок захвачен программой Word так как Windows очень популярная OS. В России в комплекте они всегда поставляют только свой набор продуктов офисных приложений не показывая альтернатив таких как Writer, и многие уже к этому привыкли и скачивают ворд со всевозможными кряками подвергая опасности свой ПК.
LibreOffice для версий windows:
|
|
Программы входящие в пакет LibreOffice
Текстовый редактор
Скачать

Скачать LibreOffice — Writer бесплатно
| Приложение | Распаковщик | Интерфейс | Формат | Версия | Загрузка |
|---|---|---|---|---|---|
| LibreOffice Writer | OpenBox | (на русском) |
x64 | Бесплатно |
Скачать ↓ |
| LibreOffice Writer | OpenBox | (на русском) | x32 | Бесплатно |
Скачать ↓ |
Как установить:
Запустите файл.

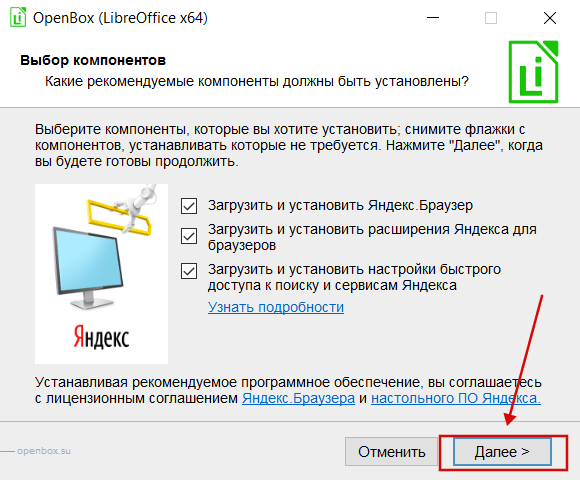
Ознакомьтесь с информацией и нажмите «Далее».
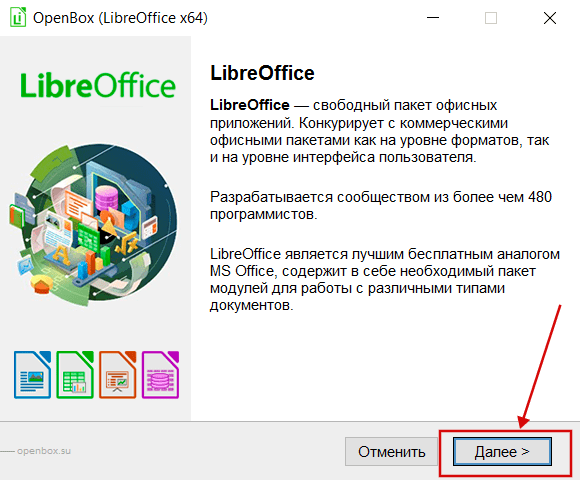
Нажмите «Далее», или снимите галочки с рекомендуемого ПО и нажмите «Далее». Если снять все галочки, рекомендуемое ПО не установится!
После всех шагов нажмите «Установить».

Не рискуйте со взломанными версиями Word когда есть бесплатная альтернатива в виде Writer. Редактирование текста всегда актуально для многих видов деятельности, скачивайте пакет LibreOffice и наслаждайтесь всеми преимуществами бесплатного аналога.