
We often wish to express that we are “easy to work with” on a resume, as it is a good aspect for any worker to possess. However, there are more applicable and appropriate terms that we could use to describe being “easy to work with”.
What Can I Say Instead Of “Easy To Work With” On My Resume?
Considering we utilize our resume as a means to getting a new position of employment, it is important to use the most formal and professional terminology that we can. Because of this, we are going to go over the following better terms for saying that we are “easy to work with”:
- Team Player
- Flexible
- Temperate
- Cooperative
- Personable
- Agreeable
- Disciplined
- Diligent
- Conscientious
- Attentive
The preferred version for the purposes of this article is a “team player”. This is because the term team player accurately represents what it means to be easy to work with and therefore, an excellent addition to any staff or workplace.
Team Player
When we think of a “team player”, we generally picture someone who is always willing to put in a good amount of effort to achieve a common goal. Cambridge Dictionary defines a “team player” as someone who is good at working with other people closely.
This means that to say we are a “team player”, is an excellent addition to any resume. It showcases or willingness to work with others and to constantly learn and improve.
Here are a few examples that showcase the use of this term:
- He is an excellent team player and always willing to go above and beyond for us.
- She was known around the office as being the ultimate team player. If you needed assistance on a task, she was the woman to ask.
- Our company requires a good team player to add to our marketing team.
Flexible
When we say that we are “flexible” employees, we are meaning to say that we are easily adaptive. Cambridge Dictionary defines “flexible” as being able to change or be changed easily according to the situation. This is considered a highly sought-after quality in employees.
When you are “flexible”, you are the type of person who can overcome any conditions or circumstances, keep a level head in the process.
We will now go over the following examples for this term:
- He is known to the managers as being flexible and always willing to pick up extra shifts when we are short-staffed.
- Her schedule is flexible, just ensure to give her a call-in advance so that she can get a babysitter for her daughter.
- Our company requires its employees to be incredibly flexible, working both day and night shifts. Is this something you are able to comply with?
Temperate
When we say that we are a “temperate” person or employee, we are meaning to say that we are aware of how to practice self-restraint or use moderation. Cambridge Dictionary defines “temperate” as behaviour that is considered calm and controlled.
Because of this, being a “temperate” employee is considered an asset. This is someone who is able to stay calm and grounded in any given situation, making them very easy to work with.
For additional information and clarity, here are a few examples using this term:
- She is a very temperate manager, which makes her very approachable to the entire staff.
- He was temperate in his abilities to smooth over any escalating situation, whether it be between customers or his coworkers.
- You both need to learn how to be more temperate and leave your problems at the door when you come to work.
Cooperative
To say that we are a “cooperative” employee means that we are willing to work with the staff to reach a common goal. This makes us very easy to work with and assistive. Cambridge Dictionary defines “cooperative” as being willing to help or do what people ask.
Therefore, to be a “cooperative” employee is an asset to any company or workplace, as this is someone who is agreeable and hard working.
We will now go over the following examples that use this specific term:
- I asked him to turn down the music behind the bar, as the customers were complaining and he is not being cooperative.
- He is very cooperative when it comes to trading shifts with other employees that require it.
- For this fundraiser to be successful, we must all be cooperative and work according to schedule.
Personable
Another great alternate term that we can choose to use is “personable”. When we say that we are “personable” employees, we mean to express that we always come to work in a good mood. Cambridge Dictionary defines “personable” as having a pleasant appearance and character.
Therefore, a “personable” worker is not only easy for their coworkers to work alongside, but they are also approachable and polite to any customers or guests.
Here are a few examples that we can go over for additional clarity over this term:
- She was very personable, which made hotel guests feel incredibly comfortable asking her questions.
- He was personable, which made him an excellent person to sit at the front desk, greeting anyone who entered the building.
- I am an intelligent, hard-working and personable employee, and I know I would be an excellent asset to your business.
Agreeable
When we say that we’re an “agreeable” person, we meant to express that we’re enjoyable person, that is willing to work to find solutions with anyone in need of it. Cambridge Dictionary defines an agreeable” person as someone pleasant or pleasing, or able to be accepted by everyone.
When we are “agreeable” employees we are often willing to take on tasks or help others that require them.
Some examples that highlight the use of this term are:
- These talks are aimed at finding a mutually agreeable solution between these two businesses.
- She is a very agreeable person, that is always able to take on extra tasks – showcasing how hard she works for this company.
- He is a cheerful and agreeable coworker, which has caused him to make many friends amongst the staff.
Disciplined
When we say that we are “disciplined” employees, we mean to express that we act in a very professional manner. Cambridge Dictionary defines “disciplined” as behaving in a very controlled way. Therefore, we are saying that we work in a focused and controlled manner.
Someone who is a “disciplined” employee is easy to trust and generally known for being very reliable.
The following examples showcase how you can appropriately use this term:
- He is a very disciplined worker, who I can always rely on to get the job done and in an impressively timely manner.
- His karate class is very well-disciplined, even the very young children.
- She has a very disciplined approach to management, much like her mother did before her.
Diligent
Someone who is “diligent” is considered a very easy employee to work with or rely on. Cambridge Dictionary defines “diligent” as being careful and using a lot of effort. This means that a “diligent” employee puts an immense amount of care and conscientiousness into their work on a daily basis.
Therefore, the term “diligent” is a superb option to use as a personal asset on your resume.
We can now look at the following examples, that use this term in an applicable way:
- She was a phenomenal student and now working as an incredibly diligent doctor – we couldn’t be prouder.
- Their lawyer is extremely diligent in preparing their upcoming case.
- He is a diligent forensic analysis and has solved many cases through his solo efforts.
Conscientious
We often consider a “conscientious” worker as someone who always wants to do the right thing. Cambridge Dictionary defines “conscientious” as putting a lot of effort into your work. Therefore, a “conscientious” employee is someone who is easy to rely on, as they do their work well.
Someone who is “conscientious” at work, is someone who puts forth an abundance of effort and completes it thoroughly.
Here are various examples that show the use of this term:
- She has become a very trustworthy and conscientious employee – someone we can all rely on.
- He is not only conscientious of his work but also the feelings and efforts of his fellow employees.
- We wanted to thank the management team for being so conscientious of the needs of the staff members!
Attentive
The last alternative that we will be going over is “attentive”. Cambridge Dictionary defines being “attentive” as listening carefully. An employee who is “attentive” is viewed as someone who pays close attention to detail, ensuring that tasks are completed correctly the first time.
At the same time, an employee who is “attentive”, often attends to the needs and feelings of their fellow workers or clients. This is considered a very polite and courteous employee, making being “attentive” a huge asset.
We will now go over the last examples for this article:
- She was consistently attentive to the needs of her coworkers, making sure that everyone had a great day and worked hard.
- He was a captivating motivational speaker, which caused his audiences to be attentive.
- The hotel was known for having a very pleasant atmosphere and incredibly attentive customer service.
What Does It Mean To Be “Easy To Work With”?
When we say that we are “easy to work with”, we can be expressing a multitude of qualities and attributes. We can be expressing that we are an employee that shows up on time, works incredibly hard, gets along well with anyone, and much more.
This is why we choose to use appropriate terms, as opposed to a broad statement like “easy to work with”. While this is still great quality, utilizing terms allows us to narrow down the specific attributes that we wish to acknowledge.
You may also like:
12 Good Synonyms For “Skills” On Your Resumé
11 Professional Synonyms For “Great Job”

Martin holds a Master’s degree in Finance and International Business. He has six years of experience in professional communication with clients, executives, and colleagues. Furthermore, he has teaching experience from Aarhus University. Martin has been featured as an expert in communication and teaching on Forbes and Shopify. Read more about Martin here.
![]()
![]()
![]()
Our File table is designed
to
make it easy to work with a lot of input files and perform batch processing.
![]()
![]()
Наши файл таблица разработана, чтобы сделать его легко работать с большим количеством входных файлов и выполнять пакетную обработку.
![]()
Our File table is designed
to
make it easy to work with a lot of input files and compressing PDFs in batch.
![]()
![]()
Наша таблица файлов предназначен чтобы сделать его легко работать с большим количеством входных файлов и сжатия РDF- файлов в пакете.
![]()
Our File table is designed
to
make it easy to work with a lot of input files for batch processing,
adding protection
to
multiple PDFs simultaneously.
![]()
![]()
Наши файл таблица разработана, чтобы сделать его легко работать с большим количеством входных файлов для пакетной обработки, Добавление защиты
в нескольких РDF- файлов одновременно.
![]()
The Graphic control is
easy
and convenient for the operator, the screen is a touch screen and
with
a large area,
![]()
![]()
Графическое управление
простое
и легкое для оператора, большой сенсорный экран-
![]()
![]()
![]()
Наш файл таблица разработана, чтобы сделать его легко работать с большим количеством входных файлов.
![]()
Dmitrie is a reliable and proactive person, easy to work with, provides top quality
work.
![]()
![]()
![]()
some of the things we were forced
to
re-register in the territory controlled by Ukraine.
![]()
некоторые вещи мы были вынуждены перерегистрировать на территории, подконтрольной Украине.
Understandable and extremely easy to work with portal give each visitor the opportunity
to
significantly
simplify search of the necessary spare parts.
![]()
Понятная и крайне простая работа с порталом дают каждому посетителю возможность существенно
упростить поиск нужной запчасти.
The great thing about Czech Glass Beads is that they are extremely versatile,
![]()
![]()
Большая вещь о чешский стеклянный бисер является то, что они чрезвычайно универсальны,
![]()
Thin artistic wire such as the 26 gauge and
![]()
![]()
Тонкий художественный провод, например,
в 26 калибров и 28 калибра являются наиболее гибкими и легко работать.
![]()
All kinds of beads can be found in this page,
![]()
![]()
Все виды бусинок можно найти на этой странице,
круглой формы является чрезвычайно универсальным и легко работать.
![]()
As such it is more suitable for creation of slide effect and easy to work with SkinWrap/SkinFX.
![]()
![]()
таком виде он больше подходит для создания slide эффекта и удобен в работе со SkinWrap/ SkinFX.
![]()
But such tools for creating an interface, as iUI help make the application more like the iPhone look and
dynamic, easy to work with applications that are similar
to
the iPhone-application remote control,
made on XML and PHP.
![]()
А такие инструментарии
для
создания интерфейса, как iUI помогают придать приложению более похожий на iPhone внешний вид и
динамику, удобные для работы с приложениями, подобными приведенному здесь приложению iPhone- ПДУ,
сделанному на XML и PHP.
Using iPhone can be viewed on the page just as if they were open
to
Mac’e or PC. But such tools for creating an interface, as iUI help make the application more like the iPhone look and
dynamic, easy to work with applications that are similar
to
the iPhone-application remote control,
made on XML and PHP.
![]()
помощью iPhone можно просматривать обычные страницы так, как если бы они были открыты на Mac’ е или PC. А такие инструментарии
для
создания интерфейса, как iUI помогают придать приложению более похожий на iPhone внешний вид и
динамику, удобные для работы с приложениями, подобными приведенному здесь приложению iPhone- ПДУ,
сделанному на XML и PHP.
![]()
Значительно упростит работу с вашим BlackBerry, обеспечивая удобство и быстроту набора текста.
![]()
![]()
![]()
![]()
Следователь просит оперативника добыть то, с чем ему будет проще работать.
![]()
Parties had found it easier to work with Word documents due
to
their obligation
to
consult the public
and the need
to
translate the documentation into national languages.
![]()
![]()
Стороны указали, что им проще работать с документами в формате Word в связи
с
их обязанностью
проводить консультации
с
общественностью и необходимостью переводить документацию на национальные языки.
![]()
Much easier to work with your BlackBerry, providing the convenience and speed of typing,
while maintaining your budget because of the low price.
![]()
![]()
Значительно упростит работу с вашим BlackBerry, обеспечивая удобство и быстроту набора текста,
и при этом сохранит ваш бюджет благодаря низкой цене.
![]()
A second participant noted that it had proven easier to work with a permanent member than
with
a non-permanent one on a particular situation of concern.
![]()
![]()
Второй участник отметил, что оказалось легче работать с постоянным, чем непостоянным членом в контексте конкретной проблемной ситуации.
![]()
The lesser density possessed by coating preserving at the
![]()
![]()
Чем меньшей плотностью обладает покрытие,
сохраняя при этом хорошую укрывающую способность, тем легче работать с таким материалом.
![]()
![]()
Результатов: 735,
Время: 0.2046
Английский
—
Русский
Русский
—
Английский
Microsoft Word Features – If you’re migrating to Microsoft Word for your word processing needs, you’re in for a pleasant surprise. More so if you’ve been using Microsoft’s own more-rudimentary tools like Notepad or Word pad. The Word application comes packed with several easy-to-use features that make working with text in ms word (apparently boring) text a fun, creative task!
In this post, we cover all the tricks you will need while working with pure text. You can format them, reshape them into fancy WordArt, apply eye-catching “effects” like shadows and glows, and “style” them consistently so your Word document looks professionally designed, all while having access to basic text-editing features like copy, paste, find, replace, etc. right at your fingertips.
We suggest you use this guide as a framework for practical exercise. This means that even as you read along on the awesome Word features, you should also open up a Word document on your computer or laptop and try it all out. This will help you grasp the finer nuances of Word’s rich text-editing features.
We bet you’re eager to get started, so without further ado, we begin our exciting tryst with Microsoft Word.
Below are the 4 best and useful features of Microsoft Word.
-
The basics in word
In Microsoft Word, every text file is called a “document” and carries the extension “.docx”. Earlier versions (2003 and before) carried the .doc extension but with limited text-editing features. (So if you’re working with text in ms word, an older version document, the first thing to do is to save it in the new .docx format.)
You should also explore the “Save As” feature from the File menu, as this exposes you to the wide variety of file formats Text in Microsoft Word supports. Important ones include PDF, HTML and XML formats to make your Word document compatible with other software applications.
Once you’ve saved your document, the next thing you’ll explore is basic text-editing features. These can include:
- Select text for further editing:
Simply highlight the text with your mouse to “select it”. Alternately, you can place your cursor at the start of the text and use the (Shift + Right-arrow) keys to select text. Using the (Shift + Right-arrow + Control) keys will select one word at a time while using the (Shift + Down-arrow + Control) keys will select text one paragraph at a time.
- Basic editing features:
These include the standard Cut (Control + X), Copy (Control + C) and Paste (Control + V) features common across word-processing tools. Microsoft Word also allows you to copy the look and feel – AKA the “format” of text across your document.
Intrigued?
Here’s how you do it.
- Copy the selected text using the standard copy command (Control + C). This additionally copies the formatting options of the selected text. In our case, let us assume that our copied text looks like this: Original text.
- Paste the text using the keyboard shortcut (Control + V). Alternately, you can use the Paste button on the top-left corner of the Home tab.
- This will bring up a smart tag, asking you which paste option to choose.
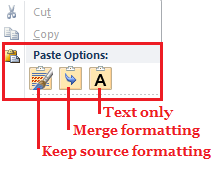
- The first paint-brush-logo button (which is also the default option) retains source formatting, so the pasted text looks like this: Original text.
- The second arrow-logo button merges the source format with the destination format and looks like this: Original text.
- The third “A”-logo button copies only plain text and looks like this: Original text.
You can also the special copy command (Control + Shift + C) to copy only the format of the text and then use the Format-Painter tool (available in the top-left corner of the Home tab) to paste the format across different blocks of text. To do this, you click on the Format-Painter button and drag your mouse over the text you want to edit.
Before editing:
- This is the source text. (Copied with Control + Shift + C)
- This is the destination text.
After editing with the Format Painter tool:
- This is the destination text.
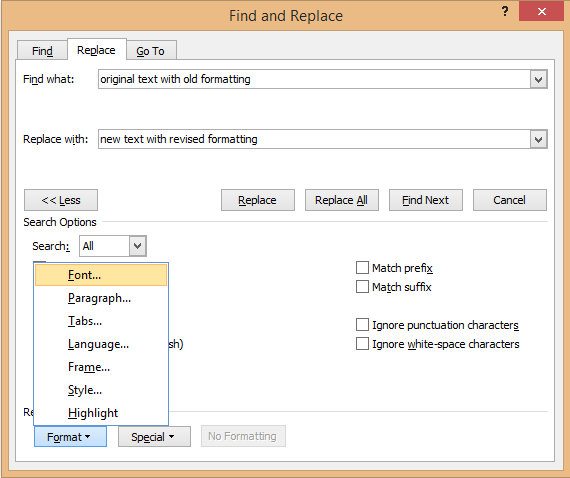
Microsoft Word also comes loaded with other standard editing features like the Find command (Control + F) and the Find-Replace command (Control + H). This multi-dimensional command comes loaded with additional options that combine together to get you the results other text-editing tools provide quickly. For instance, you can find or replace text based on a case-sensitive search, including wildcards, suffixes and prefixes, ignoring punctuation and spaces within searches, etc. It’s quite a handful!
As with most Microsoft Word features, this command too factors special formatting needs and can be used to replace a text with its format across a document. For instance, you can use this feature to consistently replace the word ‘bold’ with ‘bold’ all through the document.
-
Formatting warriors
If you haven’t guessed already, the most loved aspect of Word is the wide variety of formatting features it provides. We’ve explored just a few. But to uncover all the gems available, you need to become intimately familiar with the Home Tab View.

The Home tab contains 5 command groups for better formatting: Clipboard, Font, Paragraph, Styles and Editing.
- Clipboard: This contains the cut-copy-paste commands explained above.
- Paragraph: This contains commands to control the alignment and spacing between lines in a paragraph. Special commands include the Shading command (Alt + H) and the Border command (Alt + B) that allow you to color text cells and border them (as if they were in a table), respectively.
- Styles: This is explained in detail below.
- Editing: This group captures the standard find-replace features explained above.
And this brings us to Word’s most popular command group: Font!
- Font: This is the group you will use most to format your text.
The font menu is your one-stop point for exploring all available font-editing features in Microsoft Word. You can invoke it by a right-click and choose the “Font…” option or use the keyboard shortcut (Control + D). And it looks like this:
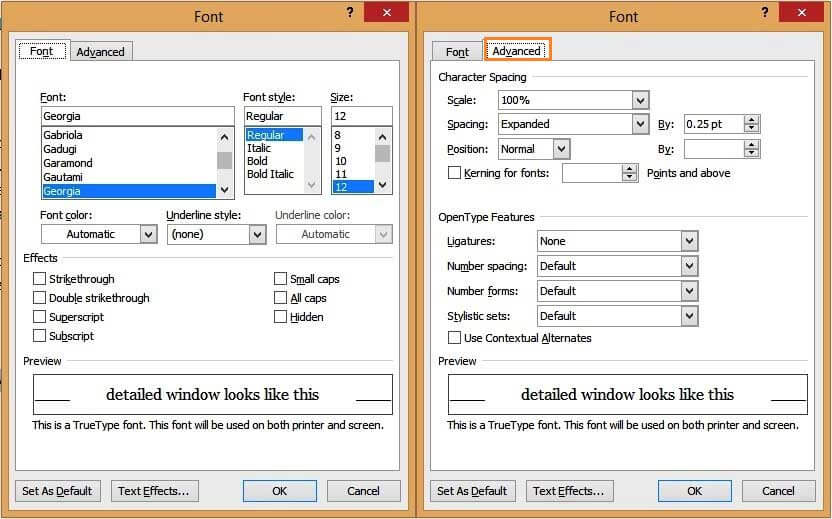
This menu allows you to change the font typeface, size, color and style all at once. Also, do take note of the advanced options, as they control the finer aspects of your text. There are two facets here:
-
Character spacing
This allows you to control the default size of the text characters and the spacing between them. A tip here is to turn on “Kerning for Fonts” so your text is more evenly spaced (between characters).

-
Open type features
Use this to edit the ligature of your font. (This determines how characters look when combined together.) For instance, here’s what happens to the numeric characters with Georgia font, when you set the “number forms” feature to “lining”: they get neatly aligned.

Another feature you can play with is the stylistic sets, which determine how the characters react to each other. Here’s an example of what happens when you use a stylistic set of 5 on the Gabriola font.
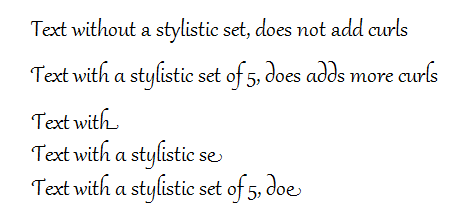
As you can see, the look of the text changes as you type along! Fun huh?
Commonly used font shortcuts include.
| # | Keyboard Shortcut | Feature |
| 1 | Control + B | Bold text |
| 2 | Control + I | Italicize text |
| 3 | Control + U | Underline text |
| 4 | Control + (equal sign) | Subscript text |
| 5 | Control + Shift + (plus sign) | Superscript text |
| 6 | Control + Shift + > | Increase text size |
| 7 | Control + Shift + < | Decrease text size |
| 8 | Control + D | It brings up the font menu so that you can change all options at once |
Word’s text formatting features don’t end there. A creative editor can also play with the WordArt command, accessible through the Home tab.

This uses a mixture of 4 text effects: outline, shadow, reflection, and glow to decorate your text with a single mouse click. You can use this feature to highlight text differently in your document. For instance, you can use an outline for headings, or a special WordArt for the title of your document, etc.

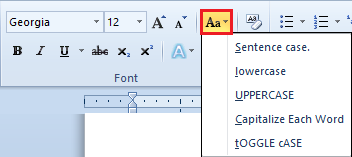
The final command we will explore in the font group is the “Change Case” command. Again, this is accessible through the Home tab and allows you to change the case of blocks of text with a single mouse click.
Frequently used shortcuts in this group include:
| # | Keyboard Shortcut | Feature |
| 1 | Control + Shift + A | Upper case |
| 2 | Control + K | small capitals |
| 3 | Shift + F3 | Toggle between the different case options |
Phew!
As you’re sure to have realized, that’s a LOT of text formatting in ms word features available for use. And if there’s one thing designers consistently find challenging; it’s in maintaining consistency in format across a whole document.
- How do you take care to apply the same format for all major headings?
- Or ensure that all quotes apply in italics?
- Or that sub-titles are aligned at the center of the page?
- Or….
This leads you to the next Word feature: Styles.
-
Styles
I bet the word’s got you curious, “Style”. What does it mean to text-editing software?
Word uses styles to create a pre-defined “way” of (consistently) formatting font and paragraphs across a single Word document. Take a moment now to look at the Styles command group on the Home Tab. It looks a bit like this:

Note: Don’t miss the tiny down-arrow (highlighted in red in the picture above); this can list the styles in one single column for easier viewing.
You can think of each style listed here as a “template,” capturing important information on your font characteristics, alignment preferences, and much more. These preferences are clubbed together in a common style. So each time you want to apply your favorite settings to a slice of text, you don’t have to go through the drill manually; you use a style to capture those settings and effortlessly apply them across the document.
A couple of keynotes here:
- Microsoft Word comes loaded with some “default” styles, like Normal, Heading, Emphasis, etc. Each is a collection of different preferences (called Style properties), so you can choose the style that suits your needs best.
- You can create your own Style in Microsoft Word, but this stays local to the document in use.
The first style you will see is the “Normal” style. This captures the body text that runs through your document and hence is the most frequently used style. In fact, we must mention that all other styles are built on top of this style. (For instance, if the Normal style captures the font as “Calibri” with size 12 point, the Heading style will capture the same font with a bigger size).
Let’s take a step back here and get you to look at an actual style. Scroll your mouse to the Normal style box in the Home tab, right-click on it, and click “Modify…” You should bring up a screen that looks like this:
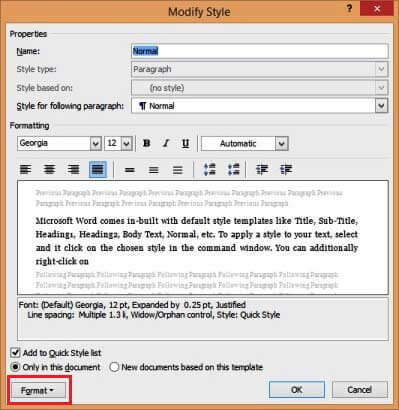
Each style has a unique name and captures a set of common text formatting features. The preview screen is especially helpful, so you get a peek before you actually OK the style. Further, the style is summarized (in Word lingo) just below the preview screen so that you can skim through it for consistency. With this window, you can quickly edit the basic font, paragraph and alignment settings.
To alter the finer details, you will have to explore the “Format” command (highlighted in red in the previous picture). This format button is much like what you get when you right-click on the text and select the “Format…” option. But here’s a preview of the things you can format with style:
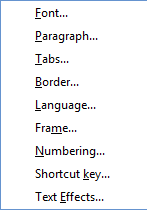
Yes, you can capture common preferences across font, paragraph, tabs, border, language, frame, numbering, shortcut keys and text effect Microsoft word features in 1 power-packed style. Wow!
Let’s take a play with this right now, so you can apply it in your document.
- Change the name of the style to “MyStyle” and select the “Add to Quick Style List” checkbox below the preview screen. This will create a new style locally accessible in your document.
- Click on the Format button and bring up the settings for Font. You’re familiar with this screen. Change this to your favorite font and size. Make it bold and change the font color.
- Click OK to apply the style.
The new name should appear in the Style window. Each time you highlight text and click on that new style, your favorite settings are applied, pronto! And if at any point you want to get back to the normal style, you can use the keyboard shortcut (Control + Shift + N) to do this. Nice! J
The last Microsoft Word feature we will explore in this post will give you something extra for those times when you want your text to “pop”: Text effects!f
-
Text effects
Prior to the 2010 version, Word had limiting design features. This is where the software lacked as professionals sought fancy design software to add zing to their pages. But with the introduction of Text effects in 2010, you have the fanciest of text-design features right there in Word. It would help if you tried this now to know more.
Select some text in your document (not more than 3-5 words, so you note the difference), and bring up the format menu (Control + D). Click on the Text Effects button at the bottom of the window. And voila, let loose your creative (text) design! J Don’t be fooled by the simple window that comes up.
Here’s a sneak peek…
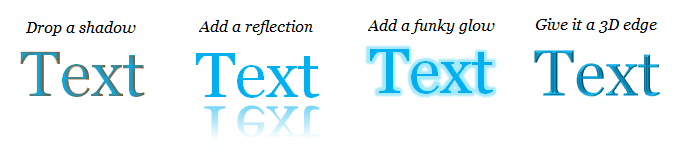
We suggest that you take time to explore text effects in thorough detail. You should explore:
- What a simple outline can do for your text.
- How to add a shadow to text.
- Create a surreal feel by adding a reflection to your text.
- Make your text glow (and not just in the dark)!
Through it, you will discover some of Word’s fancier “text-editing” features!
Signing off…
As this post illustrates, Microsoft Word is much more than a mere text-editing tool. There is a lot of emphasis on formatting, opening you up to a world of desktop publishing options that are compatible with Word files.
For instance, you could use Microsoft Word to draft an entire book, including a well-structured page layout design. You could also use it to create an online magazine or a blog. The makers correctly recognize that there’s plenty more you can do when you provide rich formatting features to the text-editing software. And we believe that Word provides this right!
Wish to be a Pro in using Microsoft Office Word?
Recommended Articles:-
Here are some articles that will help you to get more detail about the Microsoft Word Features you Easy Working so just go through the link.
- How to Improve your Microsoft Excel Skills?
- Excel Skills
- Advanced Excel Formulas and Functions
- Top Easy 20 Microsoft Excel Shortcuts
Word 2016 is designed to help you create professional-quality documents. Word can also help you organize and write documents more efficiently.
When you create a document in Word, you can choose to start from a blank document or let a template do much of the work for you. From then on, the basic steps in creating and sharing documents are the same. And Word’s powerful editing and reviewing tools can help you work with others to make your document great.
Start a document
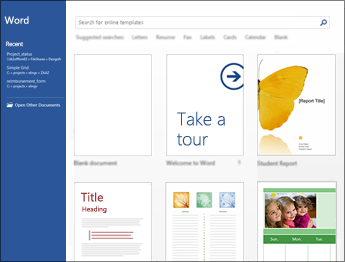
It’s often easier to create a new document using a template instead of starting with a blank page. Word templates come ready-to-use with pre-set themes and styles. All you need to do is add your content.
Each time you start Word, you can choose a template from the gallery, click a category to see more templates, or search for more templates online.
For a closer look at any template, click it to open a large preview.
If you’d rather not use a template, click Blank document.
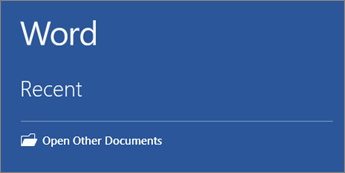
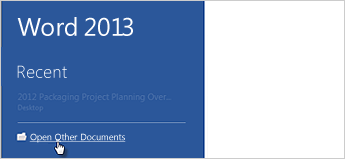
Open a document
Every time you start Word, you’ll see a list of your most recently used documents in the left column. If the document you’re looking for isn’t there, click Open Other Documents.
If you’re already in Word, click File > Open and then browse to the file’s location.
When you open a document that was created in earlier versions of Word, you see Compatibility Mode in the title bar of the document window. You can work in compatibility more or you can upgrade the document to use Word 2016.
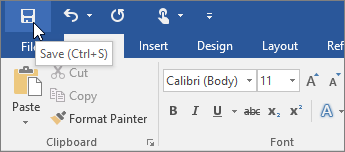
Save a document
To save a document for the first time, do the following:
-
On the File tab, click Save As.
-
Browse to the location where you’d like to save your document.
Note: To save the document on your computer, choose a folder under This PC or click Browse. To save your document online, choose an online location under Save As or click Add a Place. When your files are online, you can share, give feedback and work together on them in real time.
-
Click Save.
Note: Word automatically saves files in the .docx file format. To save your document in a format other than .docx, click the Save as type list, and then select the file format that you want.
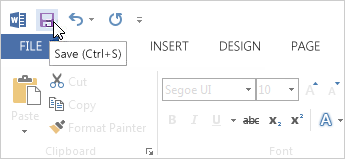
To save your document as you continue to work on it, click Save in the Quick Access Toolbar.
Read documents
Open your document in Read Mode to hide most of the buttons and tools so you can get absorbed in your reading without distractions.
-
Open the document you want to read.
Note: Some documents open in Read Mode automatically, such as protected documents or attachments.
-
Click View > Read Mode.
-
To move from page to page in a document, do one of the following:
-
Click the arrows on the left and right sides of the pages.
-
Press page down and page up or the spacebar and backspace on the keyboard. You can also use the arrow keys or the scroll wheel on your mouse.
-
If you’re on a touch device, swipe left or right with your finger.
Tip: Click View > Edit Document to edit the document again.
-
Track changes
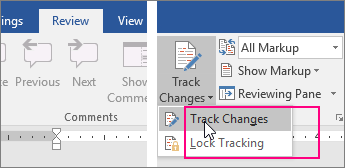
When you’re working on a document with other people or editing a document yourself, turn on Track Changes to see every change. Word marks all additions, deletions, moves, and formatting changes.
-
Open the document to be reviewed.
-
Click Review and then on the Track Changes button, select Track Changes.

Read Track changes to learn more.
Print your document
All in one place, you can see how your document will look when printed, set your print options, and print the file.
-
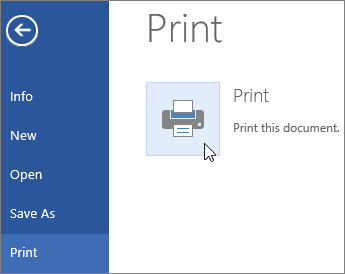
On the File tab, click Print.
-
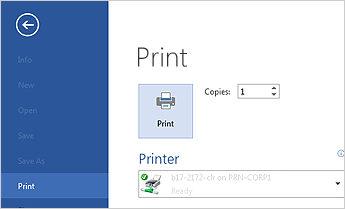
Do the following:
-
Under Print, in the Copies box, enter the number of copies you want.
-
Under Printer, make sure the printer you want is selected.
-
Under Settings, the default print settings for your printer are selected for you. If you want to change a setting, just click the setting you want to change and then select a new setting.
-
-
When you’re satisfied with the settings, click Print.
For details, see Print a document.
Beyond the basics
For more on the fundamentals of using Word, see What’s new in Word 2016.
Top of Page
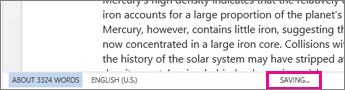
With Word for the web, you use your web browser to create, view, and edit the personal documents that you store on OneDrive. If your organization or college has a Microsoft 365 plan or SharePoint site, start using Word for the web by creating or storing documents in libraries on your site.Save changes
Word saves your changes automatically. Look on the status bar at the bottom left corner of Word for the web. It will either show Saved or Saving.
Share documents online
Because your document is online, you can share it by sending a link instead of an email attachment. People can read it in their web browser or mobile device.
Click File > Share > Share with People.

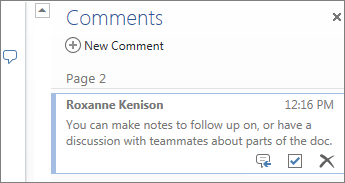
Comment in the browser
A comment balloon shows where comments have been made in the doc.

Reply to comments, and check off items you’ve addressed.
Edit in the browser
If you try to type in the document and nothing happens, you’re probably in Reading view. Switch to Editing view: click Edit Document > Edit in Word for the web.

Type and format text, add pictures, adjust the layout of the page, and more. For more advanced editing, click Open in Word.
Work together on the same doc
To work together in Word for the web, you edit a document as you normally would. If others are also editing it, Word for the web alerts you to their presence. You can see everyone who is currently working in the document by clicking in the ribbon.

Clicking on an author’s name jumps you to where they’re working in the doc. And you’ll see the changes they make as they’re happening. They can be working in Word for the web, Word 2010 or later, or Word for Mac 2011.
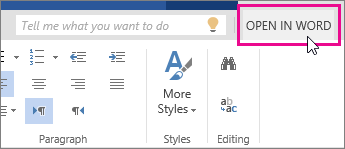
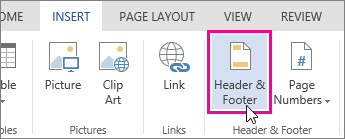
Add a header or footer
Go to Insert > Header & Footer to add headers and footers to your document.
Click Options to choose how you’d like them to appear.

Add page numbers
Click Insert > Page Numbers and then choose from the gallery where you’d like the page numbers to appear.
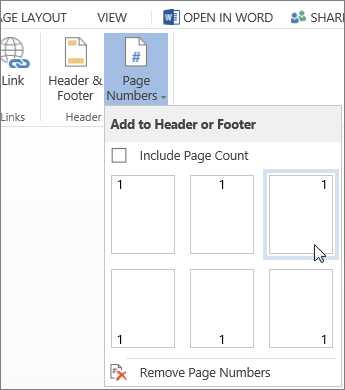
Select Include Page Count to show the current page number along with the total number of pages (page X of Y).
Find and replace text
Quickly search for every occurrence of a specific word or phrase in your document by clicking Home > Find (or type Ctrl+F). Results appear next to your document so you can see the term in context. Clicking on a search result jumps you to that occurrence.
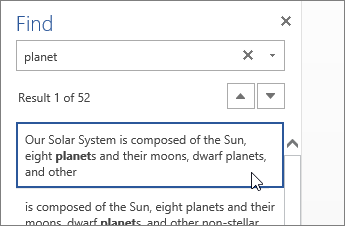
Click Replace (or type Ctrl+H) to find and replace text.
Print in Word for the web
Go to File > Print. Word for the web creates a PDF preview of your document that keeps all the layout and formatting of your document. Send the PDF to your printer and it will print the way you expect.
Microsoft Word 2013 is a word-processing program designed to help you create professional-quality documents. Word helps you organize and write your documents more efficiently.
Your first step in creating a document in Word 2013 is to choose whether to start from a blank document or to let a template do much of the work for you. From then on, the basic steps in creating and sharing documents are the same. Powerful editing and reviewing tools help you work with others to make your document perfect.
Choose a template
It’s often easier to create a new document using a template instead of starting with a blank page. Word templates are ready to use with themes and styles. All you need to do is add your content.
Each time you start Word 2013, you can choose a template from the gallery, click a category to see the templates it contains, or search for more templates online. (If you’d rather not use a template, just click the Blank document.)
For a closer look at any template, just click it to open a large preview.
Top of Page
Open a document
Every time you start Word, you’ll see a list of your most recently used documents in the left column. If the document you’re looking for isn’t there, click Open Other Documents.
If you’re already in Word, click File > Open and then browse to the file’s location.
When you open a document that was created in earlier versions of Word, you see Compatibility Mode in the title bar of the document window. You can work in compatibility more or you can upgrade the document to use features that are new or enhanced in Word 2013.
Top of Page
Save a document
To save a document for the first time, do the following:
-
Click the File tab.
-
Click Save As.
-
Browse to the location where you’d like to save your document.
Note: To save the document on your computer, choose a folder under Computer or click Browse. To save your document online, choose a location under Places or Add a Location. When your files are online, you can share, give feedback and work together on them in real time.
-
Click Save.
Note: Word automatically saves files in the .docx file format. To save your document in a format other than .docx, click the Save as type list, and then select the file format that you want.
To save your document as you continue to work on it, click Save in the Quick Access Toolbar.
Top of Page
Read documents
Open your document in Read Mode to hide most of the buttons and tools so you can get absorbed in your reading without distractions.
-
Open the document you want to read.
Note: Some documents open in Read Mode automatically, such as protected documents or attachments.
-
Click View > Read Mode.
-
To move from page to page in a document, do one of the following:
-
Click the arrows on the left and right sides of the pages.
-
Press page down and page up or the spacebar and backspace on the keyboard. You can also use the arrow keys or the scroll wheel on your mouse.
-
If you’re on a touch device, swipe left or right with your finger.
Tip: Click View > Edit Document to edit the document again.
-
Top of Page
Track changes
When you’re working on a document with other people or editing a document yourself, turn on Track Changes to see every change. Word marks all additions, deletions, moves, and formatting changes.
-
Open the document to be reviewed.
-
Click Review and then on the Track Changes button, select Track Changes.

Read Track changes to learn more.
Top of Page
Print your document
All in one place, you can see how your document will look when printed, set your print options, and print the file.
-
Click the File tab and then click Print.
-
Do the following:
-
Under Print, in the Copies box, enter the number of copies you want.
-
Under Printer, make sure the printer you want is selected.
-
Under Settings, the default print settings for your printer are selected for you. If you want to change a setting, just click the setting you want to change and then select a new setting.
-
-
When you’re satisfied with the settings, click Print.
For details, see Print and preview documents.
Beyond the basics
Go beyond the basics with your documents by creating a table of contents or saving a document as a template.
Top of Page
Important:
Office 2010 is no longer supported. Upgrade to Microsoft 365 to work anywhere from any device and continue to receive support.
Upgrade now
In this article
-
What is Word?
-
Find and apply a template
-
Create a new document
-
Open a document
-
Save a document
-
Read documents
-
Track changes and insert comments
-
Print your document
What is Word?
Microsoft Word 2010 is a word-processing program, designed to help you create professional-quality documents. With the finest document-formatting tools, Word helps you organize and write your documents more efficiently. Word also includes powerful editing and revising tools so that you can collaborate with others easily.
Top of Page
Find and apply a template
Word 2010 allows you to apply built-in templates, to apply your own custom templates, and to search from a variety of templates available on the web.
To find and apply a template in Word, do the following:
-
On the File tab, click New.
-
Under Available Templates, do one of the following:
-
To use one of the built-in templates, click Sample Templates, click the template that you want, and then click Create.
-
To reuse a template that you’ve recently used, click Recent Templates, click the template that you want, and then click Create.
-
To use your own template that you previously created, click My Templates, click the template that you want, and then click OK.
-
To find a template on Office.com, under Office.com Templates, click the template category that you want, click the template that you want, and click Download to download the template from Office.com to your computer.
-
Note: You can also search for templates on Office.com from within Word. In the Search Office.com for templates box, type one or more search terms, and then click the arrow button to search.
Top of Page
Create a new document
-
Click the File tab and then click New.
-
Under Available Templates, click Blank Document.
-
Click Create.
For more information about how to create a new document, see Create a document.
Top of Page
Open a document
-
Click the File tab, and then click Open.
-
In the left pane of the Open dialog box, click the drive or folder that contains the document.
-
In the right pane of the Open dialog box, open the folder that contains the drawing that you want.
-
Click the document and then click Open.
Top of Page
Save a document
To save a document in the format used by Word 2010 and Word 2007, do the following:
-
Click the File tab.
-
Click Save As.
-
In the File name box, enter a name for your document.
-
Click Save.
To save a document so that it is compatible with Word 2003 or earlier, do the following:
-
Open the document that you want to be used in Word 2003 or earlier.
-
Click the File tab.
-
Click Save As.
-
In the Save as type list, click Word 97-2003 Document. This changes the file format to .doc.
-
In the File name box, type a name for the document.
-
Click Save.
For more information about how to create a document that is compatible with Word 2003 or earlier versions, see Create a document to be used by previous versions of Word.
Top of Page
Read documents
-
Open the document that you want to read.
-
On the View tab, in the Document Views group, click Full Screen Reading
-
To move from page to page in a document, do one of the following:
-
Click the arrows in the lower corners of the pages.
-
Press PAGE DOWN and PAGE UP or SPACEBAR and BACKSPACE on the keyboard.
-
Click the navigation arrows at the top center of the screen.
Tip: Click View Options, and then click Show Two Pages
to view two pages, or screens, at a time.
-
 to view two pages, or screens, at a time.
For more information about how to view documents, see Read documents in Word.
Top of Page
Track changes and insert comments
-
To turn on change tracking, on the Review tab, in the Tracking group, click Track Changes.
-
To insert a comment, on the Review tab, in the Comments group, click New Comment.
For more information about how to track changes made while revising, see Track changes and insert comments.
Top of Page
Print your document
-
Click the File tab and then click Print.
-
Do the following:
-
Under Print, in the Copies box, enter the number of copies that you want to print.
-
Under Printer, make sure that the printer that you want is selected.
-
Under Settings, the default print settings for your printer are selected for you. If you want to change a setting, click the setting you want to change and then select the setting that you want.
-
-
When you are satisfied with the settings, click Print.
For more information about how to print a file, see Preview and print a file.
Top of Page
Microsoft Word Exercises for practice: – This article is very important for a basic computer course, for college and school students learning Microsoft Word online and offline. In this, you will get the best ideas on how to learn and practice Microsoft Word.
The best way to learn anything is by doing exercises and creating samples of existing materials from experts. It’s ok that you know about Bold, Italic, Page Layout, Insert Menu, View options, etc. but it’s great if you can use such options in creating anything in Microsoft Word.
I mean tools are the same, but the field, seed, and process are changed. So, Can you do that with the same tools? I know farmers do it daily.
So, let’s explore how to learn Microsoft Word. Microsoft Word Exercises ideas that I think every student around the world should practice.
Microsoft Word practice exercises for beginners:
1. Create and Design Admission/Enquiry Forms etc.
To create this kind of form, you need to use shapes, text boxes, colors, formatting options, tables, and horizontal lines in MS word. This is a very good exercise to practice because it will give you an idea of how to use such options practically on various official documents that we use in our daily official life.
These days many people do not create forms and charts usually they download them. That makes the forms boring. And often you see similar kinds of formats in forms. But as a student or teacher or small business owner if you learn to create such forms not only do you expand your thinking and creativity but you can also utilize this ability in business and job.
See a sample in the image below.

2. Create bills/leaflets/brochures. See the sample below.
Everyone contains various designs of bills such as your refrigerator shopping bill, computer bill, electricity bills, and various other kinds of bills. So you can practice in Microsoft Word to create that type of bill format. It’s good for practice in which you will learn the Insert menu option, text adjustment between the table, page size, and text boxes.

3. Design E-book cover pages / Magazine front/ books front/back page using the cover page option in Insert Menu.
This practice is an advance. But try to find the books, and magazine cover pages. And try to make it similar in MS Word. Imagine if you’re the designer, how you will design the same content or front page. You will learn while practicing this about the Cover Page option in MS Word or you can design without using that option. The benefit of learning this is about understanding the various practical uses of Microsoft word in our daily life.

4. Create Business Cards using Shapes, text, and colors.
People use Adobe Photoshop, Corel Draw and websites to create business cards nowadays automatically and manually. You can also use that. But it’s about mastering MS Word options and skills. When you create and design anything in Microsoft word. Your basic computer skills become strong. That helps you in the future when you start working on a Computer or MS Office or MS Word. Also, basic computer skills are very important before doing any degree course in IT. So, Design the business cards similarly you’re seeing in the below sample picture.

This is an advanced exercise, but if you do it and create cards then the options you’ve learned during your computer courses in MS Word remain forever in your brain.
Related: Importance of MS word in Education
5. Use smart art and create organizational charts and showcase relations:
Smart Art is one of the favorite options in Microsoft Word. Smart art is used to draw diagrams that are used to showcase the content visually that will be easy to understand and manage. Such as you’re seeing below the smart art image Hierarchy Diagram is used to create an organizational chart or structure of the Telecom company.
This is the best method to understand and teach certain things to students, teachers, parents, and companies. You will see such organizational charts in the company’s office and government head offices.

Radial Cluster:
I have created this radial cluster diagram and organizational chart using Smart Art in Microsoft Word to showcase the difference between Managed WordPress Hosting and Shared Hosting” in one of the latest published posts. You can practice and create a similar chart to showcase the relation or useability differences.

Organizational Chart:

I hope that you can clearly see (if not zoom in the browser using (Ctrl++) both WordPress hosting and shared hosting smart images that are created in Microsoft Word.
When you practice MS Word Option to create the above diagram or any other, you got many problems. Those problems are not there while you were learning MS Word. These are the problem such as font size adjustment, lines adjustment, etc. colors, shape adjustment, etc. when you actually use tools or Word applications to communicate your point of view.
So, when you solve these problems by yourself or with the help of your computer course instructor it will be great for your computer knowledge and MS Office skills. Because when you solve the problem and you learn very important working lessons in MS Word. This is why you’re learning.
Related: Steps to create simple business plan using templates in Word App
6. Make books content page or index page
This is another idea in which you need to create an index or content page of the book. In this process you will learn about the first-line indent, hanging indent, and the perfect use of the ruler bar in Microsoft Word.
And also about a page number, and a hyperlink (if it is an eBook). You can discuss this article with your computer teachers, to allow us or provide us with similar things to practice on.

7. Try to create a similar Header & Footer that you’re seeing in the Book
This is the most important option and thousands of students find it difficult to use the header and footer. It’s easier to learn header and footer one time but if you’re not practicing it in various ways or the things such as books header and footer, it’s tough for you to explain it to others.
That’s why I am suggesting you try using the different styles of header and footer. And you will get such an example from the books.

8. Insert the Image into the shape
This is a little easy. But it’s important that you know easier things more than difficult things. Because in interviews especially related to IT, people ask easier questions than difficult ones.
So, practicing even on small things is also beneficial. You don’t know when it will be helpful for you in the future.
So, insert an image into the shape. Take and draw a shape from the Illustration menu, place it on a page a little higher in size, then double-click on the shape. Go to the shape fill option and click on the picture. As an example, you can see the following image.

Related: – Top 10 powerful uses of Microsoft Word.
9. Practice hyperlinking and creating links between word document texts to D: /, Play songs from Microsoft word text, and create the link between internal and external files.
This is the most important option in Microsoft Word. Most of the processes on the internet contain links. The hyperlink is the starting point in which you learn how things are connected with each other.
Even it’s also a great option for Web Designers or web designing teachers to teach “How website links work” by using the hyperlink as an example.
As you can see in the image below, I am displaying the connection between the play song text to the location of the song.
Now you need to select the text in which have written the play song and then insert a hyperlink (Ctrl+K) and in the hyperlink address, put the path of the song. After that press, the Ctrl button and click on the blue link, so now any song that you selected will start playing.

Here is my complete article based on the Hyperlink option: – Hyperlink Example within Microsoft Word Document
10. Design a Happy Birthday Message by using Word Art and print it.
I think it’s the easiest thing for you. You can use the Word Art option for this. You can create the best wishes message in MS Word. After that, you can print. And give it to the person. It’s about creating small things at home. This is also a good way to make kids interested in learning the computer.
Also good for students and kids to create fun things and print or give it as a gift to parents. So, they will enjoy your creativity.

11. Create a chart and show the product price comparison between years:
The chart option is very important in Microsoft word and excel. But the use of the chart option and any other option in MS word depends on the demand for a certain content type.
For example, you’re writing a book or making notes about something in which you have to write and explain the price comparison between 3-4 years. Then you can use the chart for visualizations to analyze the data.
In visual format or in the chart it’s easier for people to understand, what you mean. And also it gets more views or focuses than the content.

So, try to create the chart you’re seeing in the above image.
12. Get the newspaper and see the text-based advertisement and Design that advertisement in Microsoft Word.
Design and create text or image-based advertisements that you saw in the newspaper. Designing such an advertisement will be very beneficial role for Microsoft Word students or people learning Advanced Microsoft Word skills. Advertisement designs contain high-quality images, text, and layouts. And these designs are created by experts. When students practice expert material and create similar or better than that.
I think that movement is great for learners and teachers. So, try to create as many as you like. It will make you master MS word. And I think doing exercises after completing the class topic is the best way to learn MS Word.

13. Take a double-column book or newspaper and design or create a similar paragraph style in the word document.
Not all often type or create content in a double column. I know computer teachers can teach you such options. But they will not able to explain the deepest or professional uses of such options for certain reasons.
So, I will suggest that you can use the column option and find the newspaper similarly as you’re seeing below and create or type the text as you’re seeing in the newspaper. And if you’re getting a problem, ask your teachers. So, when your teachers teach you how to do that thing or this thing, it will be great for your knowledge.

14. Create a letterhead, Identity card of any company or institution that you got and insert the Watermark with that company name in the document.
You can create an identity card, visiting card or birthday card in MS word. As you’re seeing below this is an example of cards and letterheads. But you can find such things. And practice your MS-Word knowledge in creating an identity card, and letterhead.
This will give you an idea of how to adjust the text in different shapes and areas. Also, this is a good exercise in which you learn after printing, what size you need to adjust on the page. And when you do that, you learn very precious things in MS Word.

In this video tutorial, you will get basic ideas to create a letterhead. You will get ideas to insert letterhead content in the header and footer, you will also learn how you can use watermarks in letterhead, and how to print and adjust content on the page. The video tutorial is in Hindi, but even if you’re not familiar with Hindi Langauge, you can still learn and watch it for practice ideas:
Step by Step Guide to create printable letterhead in Microsoft Word and Google Docs
15. Decorate a word document with a page border, and content border, add patterns, and write beautiful text in it.
This is the easiest page layout option, in which you can learn about page borders in MS Word, text borders, color or shading on the page, and pattern.
These options are very beautiful when you’re creating eBooks, making notes, and doing anything that required the following type of style. See the image below and try to create something similar to this one.

16. Insert Images and Practice on Format Menu and Image options.
You can use image options and style to decorate, retouch, and adjustment of colors and brightness in ms word. As you’re seeing, I have created various styles and image effects. These are easy to create.
But to learn more advanced effects later in other professional software, it’s important for you to learn and practice such things during your basic computer course.
17. Insert a template or download the new template in Microsoft Word from the Internet and edit those templates with your content.
There are 100+ templates almost for anything in the Microsoft Word Template option. The top benefit of using the template is that if you don’t know how to create or design a certain thing then you can just download the template and replace the existing text with your text. And it’s done.
This is the most important option which you should learn because it’s tough when you don’t know how to design or create anything, so try to practice on 10+ templates and see what it will look like.

Related: Uses and features of Microsoft Word.
18. Write 10 lines or 10 sentences and then change the font, style, color, and size of each sentence. Make each one different from than previous and next.
Fonts are the face of the text. And the following image is displaying various fonts and styles. Just create similarly. During the practice, you will learn which font will be better for the specific text. Just write 10 lines and differentiate each one.
 Etc.
Etc.
I think such an exercise will be enough to make you above average among all the students around the world doing basic computer courses or learning Microsoft Word.
Because after learning Microsoft word, you have to work with professionals or in companies. And almost all official works are related directly and indirectly to the above exercises.
So, this is the best method to learn Microsoft Word by doing exercises. And this is about practical knowledge.
I hope these Microsoft Word Exercises ideas will be helpful for you. To learn more visit: Top 10 Basic and Advanced Microsoft Word skills
Things You Should Know
- To create a basic document, choose a template from the list provided or start with a blank document.
- Use the File tab to open, save, and start documents, and the Insert tab to add any images, symbols, or other media to your document.
- Highlight your text and play around with formatting options in the «Home» tab. You can change the font, italicize/bold/underline your words, and play around with font size.
-
1
Open the Microsoft Word application. Do this by double-clicking the Microsoft Word icon.
-
2
Review the available templates. On the right side of the screen, you’ll see several templates of interest:
- Blank document — A blank document with default formatting.
- Creative Resume/Cover Letter — A clean, pre-formatted resume (and accompanying cover letter) document.
- Student Report with Cover Photo — A document format geared toward an academic demographic.
- Fax Cover Sheet — A document to preface fax reports.
- You can also search for specific templates online from within Word by using the search bar at the top of this screen.
Advertisement
-
3
Choose a template. Doing so will open the template in Word with whatever pre-determined formatting applies to it. Now that your document is open, you’re ready to review your Toolbar options.
- When in doubt, open a blank document.


Advertisement
-
1
Click the File tab. It’s in the top left side of the screen (or in the menu bar for Mac users). From here, you have several useful options on the far left side of your screen:
- Info (PC only) — Click this to review the documents statistics, such as when it was last modified, as well as any potential issues with the document.
- New — Click this to bring up the «New Document» page that lists all of the pre-formatted templates. Opening a new document will prompt you to save your old one.
- Open — Click this to review a list of recently-opened documents. You can also select a directory (e.g., «This PC») in which to search.
- Save — Click this to save your document. If this is your first time saving this particular document, you’ll be prompted to enter a name, save location, and preferred file format as well.
- Save As — Click this to save your document «as» something (e.g., a different name or file format).
- Print — Click this to bring up your printer settings.
- Share — Click this to view sharing options for this document, including email and cloud options.
- Export — Click this to quickly create a PDF or change the file type.
-
2
Click ← in the top left corner of your screen. If you’re using a Mac, you won’t have this option—simply click your document to exit the «File» menu.
-
3
Review the Home tab to see your formatting options. At the top of your screen—from left to right—are five sub-sections of this tab:
- Clipboard — Whenever you copy text, it is saved on your clipboard. You can view copied text by clicking the Clipboard option here.
- Font — From this section, you can change your font style, size, color, formatting (e.g., bold or italic), and highlighting.
- Paragraph — You can change aspects of your paragraph formatting—such as line spacing, indentation, and bullet formatting—from this section.
- Styles — This section covers different types of text for various situations (e.g., headings, titles, and subtitles). You’ll also see the popular «No Spacing» option here, which removes excess spaces between lines of text.
- Editing — A couple of commonly-used tools—such as «Find and Replace», which allows you to quickly replace all appearances of one word with another—live here.
-
4
Click the Insert tab to review the types of media you can place in your document. Insert is to the right of the Home tab. The Insert tab allows you to add things like graphics and page numbers to your document. From left to right, a couple of notable options include the following:
- Table — Clicking this option will allow you to create an Excel-style table right in your document.
- Pictures — Use this feature to insert a picture into your document.
- Header, Footer, and Page Number — These options are all essential for writing in MLA- or APA-style formatting. The Header places a space at the top of the document for comment, while the Footer goes at the bottom—page numbers are customizable.
- Equation/Symbol — These options use special formatting to accurately display simple equations. You can select these equations or symbols from the pertinent drop-down menu.
-
5
Click the Design tab to create your own template. It’s to the right of the Insert tab.
- The Design tab contains pre-designed themes and formats listed across the top of the page.
-
6
Click the Layout tab to customize your page’s formatting. This tab contains options for changing the following aspects of your document:
- Margins
- Page orientation (vertical or horizontal)
- Page size
- Number of columns (defaults to one)
- Location of page breaks
- Indentation
-
7
Click the References to manage your citations. If you have a bibliography page, you can also manage it from here.
- For quick bibliography formatting, click the Bibliography drop-down menu and select a template.
- In the «Citations & Bibliography» group of options, you can change your bibliography formatting from APA to MLA (or other citation styles).
- The «Captions» group has an option to insert a table of figures. This is useful for scientific review papers or similar documents in which statistical data is prioritized over quotations.
-
8
Click the Mailings tab to review your document sharing options. You can review your email settings and share your documents from within this section.
- You can also print an envelope or label template by clicking the pertinent option in the top left corner of your screen.
- The Select Recipients drop-down menu allows you to choose Outlook contacts as well as an existing contact list within Word.
-
9
Click the Review tab. The Review section is geared towards editing, so it includes options for marking up documents and proofreading. A couple of important options include:
- Spelling & Grammar — Click this option (far left corner) to underline any spelling or grammatical errors.
- The «Changes» section — This is to the far right of the toolbar. From here, you can enable the «Track Changes» feature which automatically formats any additions or deletions you make in a document to appear in red print.
-
10
Decide on the set of options that best apply to your work. If you’re a student, for example, you’ll likely use the Insert and References tab often. Now that you’re familiar with the toolbar options, you can format your first Word document.


Advertisement
-
1
Open a new Blank Document in Word. If you have an existing document, you can open that instead.
-
2
Enter text. Do this by clicking on the blank section of the document and typing away.
- If you opened an existing document, be sure to save your work before re-formatting.
-
3
Highlight a section of text. To do this, click and drag your cursor across your writing, then let go when you’ve highlighted the section you wish to edit.
-
4
Consider what you want to do to the writing. Some potential options include:
- Quickly format your writing. Do this by right-clicking (or two-finger clicking) your highlighted text and then selecting an option from the right-click menu.
- Change the font of your selection. You can do this by clicking the drop-down bar at the top of the «Font» section (Home tab) and then selecting a new font.
- Bold, italicize, or underline your highlighted section. To do this, click the B, I, or U in the «Font» section of the Home tab.
- Change your document’s spacing. This is easiest to accomplish by right-clicking your selected text, clicking Paragraph, and modifying the «Line Spacing» value in the bottom right corner of this window.
-
5
Continue working with Word. Your preferred options for your documents will differ based on the intention behind creating them, so the more you work within your own particular format, the more proficient you’ll become.


Advertisement
Add New Question
-
Question
How do I copy and paste?

To copy a certain piece of text, highlight it and press Ctrl + C. Then click the spot you want to place the copied text and press Ctrl + V to paste.
-
Question
How do I place a logo in MS Word?
Press the Insert tab and then press the Pictures button. You will then be allowed to select the image.
-
Question
How can I save a document to a specific location?
Click File —> Save As… and you’ll be allowed to select the destination location (and filename and format) of the file.
Ask a Question
200 characters left
Include your email address to get a message when this question is answered.
Submit
Advertisement
-
A red line under a word means the word is misspelled, a green underline suggests a grammatical error, and a blue underline pertains to formatting.
-
If you right-click (or two-finger click) an underlined word, you’ll see a replacement suggestion at the top of the right-click menu.
-
You can quick-save your document by holding down Control (or Command on Mac) and tapping S.
Thanks for submitting a tip for review!
Advertisement
-
Don’t forget to save your work before closing Word.
Advertisement
About This Article
Article SummaryX
1. Create blank documents or from templates.
2. Format text colors, fonts, and sizes.
3. Insert media like photos and animations.
4. Insert data like tables, page numbers, headers, and equations.
5. Customize the on-screen and print layouts.
6. Add references and citations.
Did this summary help you?
Thanks to all authors for creating a page that has been read 213,472 times.
Is this article up to date?
Forget pesky paywalls, download and use Microsoft Word for free and get access to the familiar experience you know and love anytime, anywhere

(Image: © Shutterstock / monticello)
When it comes to word processing, Microsoft Word continues to reign supreme over alternatives like Google Docs and Adobe Acrobat. Although these alternatives are getting better and better, making the market more competitive for Microsoft, Word still shines above the rest because it is user-friendly, feature-packed, and allows you to work with documents quickly and effectively.
In our review of Microsoft Word (opens in new tab), we’re clear that this application is completely indispensable because of its features, support, and intuitive interface. As mentioned in that article, Word’s current capabilities extend far beyond text formatting, to encompass features like web page formatting, instant translation, and 3D model insertion.
When it comes to Microsoft, Word (along with the whole Microsoft 365 (opens in new tab) suite) offers everything you could possibly want when it comes to productivity, communication, and collaboration. The Microsoft 365 suite, which includes Word, Excel, PowerPoint, Outlook, OneDrive, and Teams, provides you with a comprehensive set of tools to help you stay productive, connected, and organized.
With the suite of apps, you can create documents, spreadsheets, presentations, manage contacts and emails, store and share files, and collaborate with colleagues in real time. Microsoft 365 also includes a variety of security features to help keep your data safe and secure. With Microsoft Word and the Microsoft 365 suite, you have everything you need to stay on track.
However, the cost is a major deterrent for most people to take advantage of what it has to offer. Even without the entire Microsoft 365 suite, Word on its own is fantastic, having very little to leave you frustrated.
The most upsetting thing about Word is that it’s been hidden behind a paywall for most of the past 30 years. This has left the door open for Google Docs and other word processors and document editors to offer their subpar services for free, which is an extremely compelling offer considering Word and Docs are somewhat similar on the surface.
As previously mentioned, Microsoft Word has more competition than ever, especially beyond the paywall. Alternative applications, like Google Docs (opens in new tab), are on the scene, forcing Microsoft to offer Word for free just to compete.
While it’s true that you’re more limited in scope and some features aren’t available, on the whole, the free version of Microsoft Word will get the job done sufficiently for most people. You can still create professional documents, edit and format text, and insert images and tables.
Additionally, there’s no longer any requirement to buy a copy or sign up for Microsoft 365 to use Microsoft Word, which is a huge relief if you’re on a budget. However, if you decide you’d like to make the purchase, the best Microsoft Office and Microsoft 365 deals (opens in new tab) will ensure you get the lowest price possible, especially if you are trying to avoid a hefty price tag.
If you’re currently shopping for the best MacBook and Macs (opens in new tab) and feel like that’s going to be enough of a financial outlay for now, or you already have a laptop and just can’t justify any extra expenses at the moment, the straightforward step-by-step instructions below will help you download and use Microsoft Word for free.
Best Microsoft 365 and Office deals
How to use Microsoft Word for free on Windows 10, Mac, Chrome OS, and Linux
The easiest way to download and use Microsoft Word for free is right in your web browser. Whether you’re on Windows 10 (opens in new tab), Mac, Chrome OS, or Linux, using Google Chrome, Microsoft Edge, Safari, or any other major browser, you can access a free-to-use version of Microsoft Word.
All you need is a Microsoft account and a data connection to access the free version of Word. Open t (opens in new tab)he official Microsoft Office website in your browser (opens in new tab) of choice to gain access to Word, Excel, Powerpoint, and other Microsoft products.
Using Microsoft Word online is a lot like Google Docs in that you have automatic cloud backups of your work with OneDrive. You also have the ability to collaborate with other people in real time. This isn’t the full version of Microsoft Word, but it has the same interface, is just as safe, and has all the basic suite of features that the majority of people will need access to.

How to use Microsoft Word for free on iOS and Android
More advanced features are available to users with a Microsoft 365 subscription, but if all you’re looking for is basic access to Microsoft Word on your smartphone or tablet, this will do the job very well. You can download and use Microsoft Word for free from either the Apple App Store (opens in new tab) or Google Play Store (opens in new tab).
Using Microsoft Word on a smartphone or a tablet might not be your first choice because of how small and difficult phones can be to deal with and type on, but it is free. Previously, Microsoft had a standalone Word app for both iOS and Android, but it has now merged Word with Excel and Powerpoint on mobile in a single Microsoft Office application.
This allows for better access to any Excel spreadsheets or Powerpoint presentations that you might need while using Word, as all three are integrated into this one application.
To use it, you only need to log in with a Microsoft account for free access to basic features, as well as online collaboration, backup to OneDrive, and the ability to create PDF files from your documents.
Summary
Not only is there no requirement to pay to use Microsoft Word anymore, but there’s also no requirement to even install it if you’re using it on a PC. The development of the browser-based application for Windows 10, Mac, Linux, and Chrome OS users makes it easy and convenient to work solo or in collaboration.
The mobile application also provides free on-the-go access to basic editing features from your pocket, and all of this only requires a Microsoft account to keep everything in sync.
Microsoft Word is great because it is an easy-to-use word-processing program that allows users to create and edit documents quickly and effectively. It has a wide range of features, such as a spell-checker, grammar checker, table creation, and text formatting. Additionally, Word is compatible with a variety of other Microsoft Office programs, making it a great tool for collaboration, allowing you to stay on target with all of your projects and tasks.
We’ve listed the best Microsoft Office alternatives.
Ray is a Staff Writer for TechRadar, having previously contributed numerous pieces to other technology websites such as Makeuseof and Thesweetbits. He has been writing about a multitude of topics within the tech industry for years, and now lends his experience to variable content on TechRadar. In his free time, you’ll likely find Ray riding trails in the Sierra Nevada Mountains on his mountain bike.