
Microsoft Word can be used to make a lot of documents, in different formats and different sizes. If you are using Microsoft Word to make a document, you can either choose from any of the sizes that are available on the program. Or, customize the dimensions of the page according to your requirements. And this is not it, you can also choose a specific format according to the page size on Microsoft Word that will help you make your document even better.
The size for an A4 sheet is 8.5 by 11 inches. This is the size of a usual printing sheet that is often used in schools for printing assignments and tests, and even in offices for printing presentations. But for documents that are supposed to be larger in size in comparison to these sheets, users might want to change the size of their printing document. While physically, they can print the document on a larger scale by using a different printer and a larger piece of paper, but unless you edit the document manually on Microsoft word, the size of the document will remain pretty much the same.
So, if you need to print a document on a larger scale, say on A3, then you must alter the size of the document on the software first. The process is very simple which can be followed easily to change the size of a page. Follow the steps as mentioned below to change the size of the document you are working on, on Microsoft Word.
- Open your Microsoft Word file. The default settings for a Word file is the size of an A4 sheet, which is the most commonly used size for printing when working on Microsoft. But sometimes, business and workplaces require other important sizes like legal papers, or letters, which can also be made on Microsoft Word.

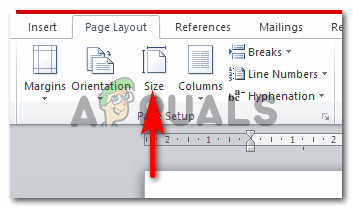
Open a Word file - Now, look at the top ribbon of options for Microsoft Word. Currently, you would be on the Home tab. You need to click on the ‘Page Layout’ which is right next to Insert. This is where you will find options to change the size of your page.

Click on the Page Layout tab on the top tool panel - Right under the Page Layout tab, is another tab for ‘Size’, with an icon with looks like a page with lines for its width and height. This is where you can edit the size of your page the way you want to.

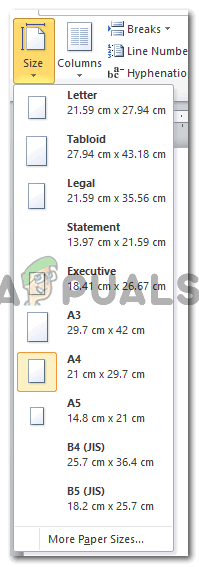
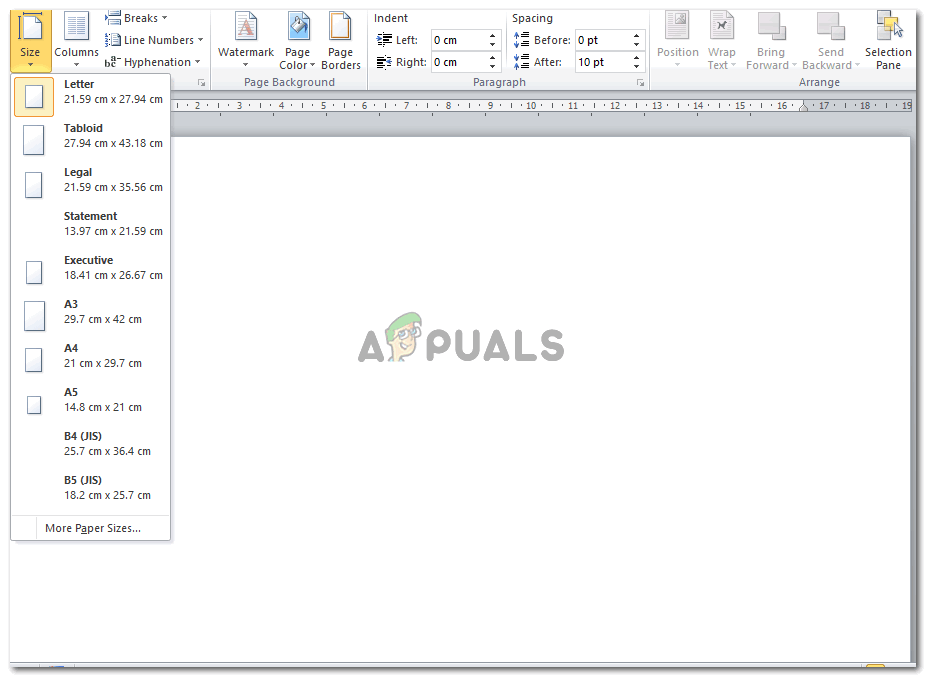
Size tab, to change the size of the page - When you click on Size, a dropdown list of options will appear. All these options are of different sizes. Letter, Tabloid, Legal, Statement,Executive,A3,A4,A5,B4, and B5. These are the mentioned types of paper sizes that are available on Microsoft Word. If any of these is what you require for your work, all you have to do is click on one of these to make it your page size on the current document you are working for.

Select a page size, or customize it 
I selected a different page size to show how the space for work changes If, however, these are not the sizes you need, and the dimensions for your document are entirely different, then you should click on the option right at the end of this dropdown list which says ‘More Paper Sizes’.
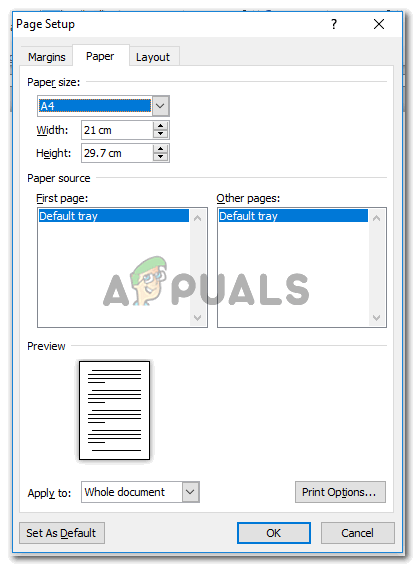
- Clicking on More Paper Sizes will show you a new box, which is the Page Setup Box. You can enter the dimensions of your page here in place for width and height. You can either type in the number of inches, or press the upward or downward arrows next to the space for width and height to adjust the dimensions.

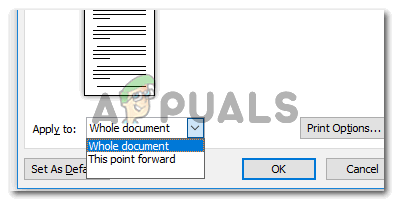
Add dimensions for the page as per your requirement Another important thing that you should not is that right at the end of this box, there is a tab that says ‘Apply to’. This could be the option for people who don’t want to apply the same size as the page on the whole document but only bits of it. Here, when you click on the downward arrow for Apply to, you can choose the second option which says ‘This Point Forward’. This will apply the dimensions that you entered on only the pages that are going to appear this point forward.

Apply on Whole Document or This Point Forward, you can choose from this dropdown list.

Can You Alter the Size of a Page After a Document has been Made?
Of course, you can. The option for altering the page size can be accessed at all times. However, the slight problem here is that every time you change the page size after a document has been made is that you will have to edit the formatting of your work every time as the work gets adjusted according to the page size.

Habiba Rehman
Major love for reading, but writing is what keeps me going. Dream to publish my own novels someday.
Back to top button
You can use Microsoft Word to create documents in different formats and sizes. You can choose from the standard sizes built into Word. The other possibility is to customize the dimensions according to your requirements.
By default, a new Word document uses an A4 size sheet, measuring 8.27 inches by 11.69 inches. Schools and offices use the A4 size most for printing presentations. But documents can be larger or smaller in comparison to A4. Also, the user might want to change the page size of the document for printing.
It is always possible to print on a larger paper using a special printer setting. But if your printer does not allow that, the only option is to change the size of the document in Word.
The process is very simple and you only have to follow the steps in our instructions. You can change the size of all the pages while working on a Microsoft Word document. Sometimes, you may want to change the size of a specific page inside a document.
Thus, you may set up a custom page size for:
- All pages in a document
- Specific pages in a document
We will show you both the methods.
Let us begin.
Method #1: Custom page size for all pages in a document.
Step #1: Open the document
Open the Word document for which you want to change the page size. The document could be new or an existing one. The process is the same for both.
Click on the Layout tab on the top menu bar to change the ribbon.

Step #2: Select a standard page size
In the Page Setup section, click on the Size icon. This will open various selections for page size.

You can select from standard sizes like:
- Letter (8.5” x 11”)
- Tabloid (11” x 17”)
- Legal (8.5” x 14”)
- Statement (5.5” x 8.5”)
- Executive (7.25” x 10.5”)
- A3 (11.69” x 16.54”)
- A4 (8.27” x 11.69”)
- A5 (5.83” x 8.27”)
- B4(JIS) (10.12” x 14.33”)
- B5(JIS) (7.17” x 10.12”)
Step #3: Select a non-standard page
Click on More Paper Sizes. This will open the Page Setup dialog.

Click on the Paper tab.
Under Paper size, click on the downward arrow. Scroll down and click on Custom Size.
Enter your desired Width and Height of the page in inches.
Click on the downward arrow next to Apply to:. Word offers two options:
- Whole document—The page size applies to all the pages in the document.
- This point forward—The page size applies to all pages following the cursor.
Click on Whole document.
Click on Ok to exit the dialog.
Word changes all the pages in your document to your custom size.

Method #2: Custom page size for specific pages in a document
Step #1: Open the document
Click on the View tab on the top menu bar to change the ribbon.
Step #2: Increase the number of pages on display
In the Zoom section, click on Multiple Pages.

Drag the Zoom slider in the bottom right-hand corner of your screen to the left side.

This will increase the number of pages Word is displaying on the screen.

Place the cursor at the beginning of the page you want to change.
Step #3: Change the page size
Click on the Layout tab in the top menu bar to change the ribbon.
In the Page Setup section, click on Size.

This will open various selections for page size.

Click on More Paper Sizes. This will open the Page Setup dialog.

Click on the Paper tab.
Under Paper size, click on the downward arrow. Scroll down and click on Custom Size.
Enter your desired Width and Height of the page in inches.
Click on the downward arrow next to Apply to:. Word offers two options:
- Whole document—The page size applies to all the pages in the document.
- This point forward—The page size applies to all pages following the cursor.
Click on This point forward.
Click on Ok to exit the dialog.
Word changes the size according to your choice for all pages following the cursor.

Step #4: Revert to original page size for the rest of the document
Place the cursor at the beginning of the page from where you want to revert to the original size.
Repeat Step #3, only this time enter the original Width and Height of the pages.
Word changes the rest of the pages in the document to their original size.

Conclusion
We have shown you how to change to a custom page size for all pages or for a few pages of your document. Follow our instructions step by step for easily implementing the change in page size.
If you want to learn how to setup custom page size in Google Doc, check out this tutorial.
Changing the Paper Size in Word
You aren’t tied to letter-size paper and documents in Word
Updated on January 4, 2021
What to Know
- Mac: Go to File > Page Setup, choose Page Attributes from the drop-down menu, then set the Paper Size.
- Word 365: Go to File > Print > Page Setup, select the Paper tab, then set the Paper Size.
- If you don’t see the size you want, select Custom or Manage Custom Sizes to set your own margins and define a nonprintable area.
This article explains how to change paper size in Word. Instructions apply to Word for Mac and Microsoft 365.
How to Change a Document Paper Size for Printing
You can change a document paper size for a new file or for an existing one.
-
Open a new or existing file in Microsoft Word.
-
On a Mac, choose the File menu and select Page Setup.
-
In Word 365, choose File.
-
Select Print in the left pane, then click the Page Setup link at the bottom of Settings.
-
On a Mac, when the Page Setup dialog box appears, it should be set on Page Attributes. If not, click the drop-down selector at the top of the box and select Page Attributes.
-
For Word 365, you may need to click the Paper tab at the top of the dialog.
-
Using the drop-down menu next to (or under) Paper Size, select the size paper you want from the available options. When you make a selection, the Word document on-screen changes to that size. For example, if you pick US Legal on the menu, the document size changes to 8.5 by 14.
Paper Size Limitations in Word
For U.S. versions of Microsoft Word, the default paper size is 8.5 inches by 11 inches. While you probably print most of your letters, reports, and other documents on this size paper, changing the page size in Word to use a different-size paper is a straighforward task.
Word does not place many limitations on page size or orientation. There is a good chance that your printer sets greater limitations on the paper you use than Word does, so before you make any changes to the page size, you should consult your printer documentation. It may save you a lot of frustration in the long run.
How to Set Up a Customized Paper Size
If you don’t see the size you want in the drop-down menu, set up any specific size you want.
-
On Mac and non-Microsoft 365 versions of Word, click Manage Custom Sizes at the bottom of the list of paper size options.
-
Click the plus sign to add a new customized size. The fields populate with the default measurements, which you will change.
-
Highlight untitled in the customized size list and change the name to something you’ll remember or recognize by typing over it.
-
Click in the field next to Width and enter a new width. Do the same in the field next to Height.
-
Set a Non-Printable Area by choosing User Defined and filling in the margin amounts in the Top, Bottom, Left, and Right fields. You can also select your printer to use its default non-printing areas.
-
Click OK to return to the Page Setup screen.
-
Select Other or the name you gave the customized size in the drop-down paper size menu. Your document changes to that size on the screen.
Word 365 is a bit different. Set the Paper size to custom, and then set the various parameters in the Paper, Margins, and Layout tabs. Then Click OK.
If you enter a paper size that the chosen printer cannot run, the name of the customized paper size is grayed out in the paper size drop-down menu.
Thanks for letting us know!
Get the Latest Tech News Delivered Every Day
Subscribe
The default document size in Microsoft Word is 8.5-by-11 inches — regular letter paper. However, the paper size for any document can be changed, whether it’s an existing document or a new document. For example, if you need to print some legal business documents on legal-size paper but the documents are currently set to letter-size, resize them to legal-size before printing. All the settings relating to the size and layout of your Word documents can be found in the Page Layout tab of the program.
-
Double-click your Microsoft Word document to open it in Microsoft Word. Open the «Page Layout» tab by clicking it in the ribbon.
-
Click the «Size» button in the Page Setup group in the ribbon. A drop-down menu will appear.
-
Click the desired paper size to which you want to resize the document. Click «More Paper Sizes» at the bottom of the menu if you don’t see the right size or want to customize the size.
-
Type the desired width and height (in inches) in the Width and Height boxes in the Paper Size section of the dialog that opens up. Click «OK» to apply the size change.
-
Open the «File» menu and click «Save» to save your document with its new size or click «Print» to print it.
Many regular documents in Microsoft Word won’t use fonts much larger than 20 pt. But when you are making a flyer or a banner, you might need really big text.
Our tutorial below will show you a simple way to go above the seeming 72 pt font limit that Word appears to have in place.
How to Use Really Big Font Sizes in Word
- Open your document.
- Select the text to resize.
- Choose the Home tab.
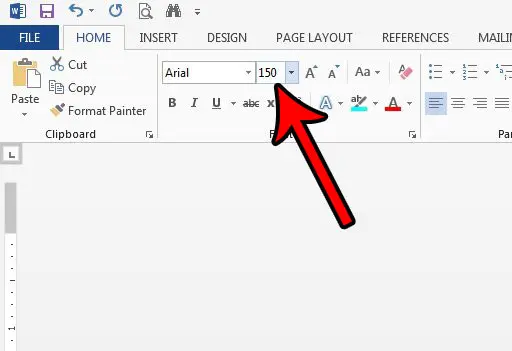
- Click inside the Font size field and delete the current value.
- Type your desired font size and press Enter.
Our guide continues below with additional information about using font sizes bigger than 72 pt in Microsoft Word, including pictures of these steps.
Microsoft Word includes a lot of options that let you customize the way your text looks. Whether you want to make small caps in Word, or italicize your text, Word makes it possible to do so.
When you are making certain types of documents with Microsoft Word, you might feel like your design choices are being limited by the seemingly small “maximum” font size of 72pt.
However, this isn’t the actual maximum size of the text that you can use in your document, it is merely the smallest listed size.
This can be an issue when you are using things like cursive fonts that might be very small or thin and require much larger font styles.
It may not seem like it, but the field that is displaying the font size is something into which you can type a value.
This allows you to use any font size that you want (with a value between 0 and 1638) for your document purposes.
So you can go bigger than the 72 pt font size that is listed in Word 2013. You can also use the same technique if you want to go lower than 8 pt font sizes, too.
How to Go Bigger than 72 pt Fonts in Word 2013 (Guide with Pictures)
The steps in this article were performed in Microsoft Word 2013. The result of completing these steps is that text in your document can use a bigger font size than the 72 that is available from the dropdown menu. You are able to use larger font sizes up to a max of 1638 pt.
Step 1: Open your document in Word 2013.
Step 2: Select the text for which you want to increase the font size.
If you haven’t added the text yet you can skip this step.

Step 3: Click the Home tab at the top of the window.

Step 4: Click inside the Font Size field in the Font section of the ribbon, delete the current value, enter your new font size, then press Enter on your keyboard.
Note that this can make your text very large. If you attempt to enter a font size greater than 1638 you will get an error notification.
Frequently Asked Questions
What is the largest font size in Microsoft Word?
You can use font sizes up to 1638 pt in Microsoft Word.
For anything larger than 72 pt you will need to use the steps above where you manually enter the desired point size in the Size field on the Home tab.
What is the largest font size in Google Docs?
If you are also using Google’s word-processing software you can make a similar adjustment there with the same steps.
However, the largest font in Google Docs is 400 pt.
How do I increase the page size in Microsoft Word?
Once you start using larger font sizes in your documents you will probably find that they don’t fit too well on letter or legal-sized paper.
You can change paper sizes in Microsoft Word by selecting the layout tab at the top of the window, clicking the Size button in the Page Setup group, then choosing one of the options there.
You could also elect to choose the More Paper Sizes option, then click the Paper size dropdown menu and select Custom size at the bottom of the list.
You can then manually enter your own paper size if you need something other than the default options listed.
You can use a similar technique to make very large text in Photoshop, too. It can be very helpful with high-definition images where the 72 pt listed maximum is way too small.

Matthew Burleigh has been writing tech tutorials since 2008. His writing has appeared on dozens of different websites and been read over 50 million times.
After receiving his Bachelor’s and Master’s degrees in Computer Science he spent several years working in IT management for small businesses. However, he now works full time writing content online and creating websites.
His main writing topics include iPhones, Microsoft Office, Google Apps, Android, and Photoshop, but he has also written about many other tech topics as well.
Read his full bio here.