
Word for Microsoft 365 Word for the web Word 2021 Word 2019 Word 2016 Word 2013 Word 2010 Word 2007 Word Starter 2010 More…Less
Before you print, you can preview your document and specify which pages you want to print.

Preview your document
-
Select File > Print.
-
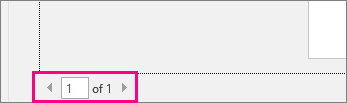
To preview each page, select the forward and backward arrows at the bottom of the page.

If the text is too small to read, use the zoom slider at the bottom of the page to enlarge it.
-
Choose the number of copies, and any other options you want, and select the Print button.

-
Select File > Print.
-
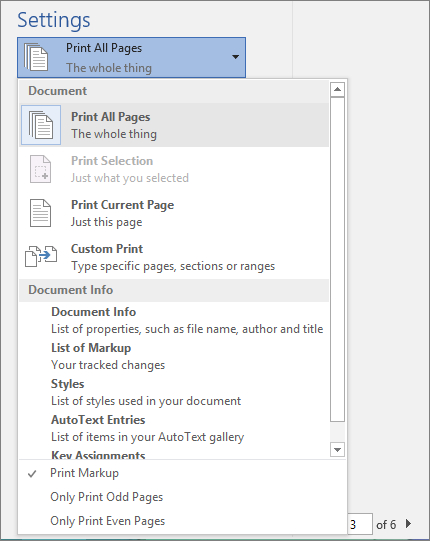
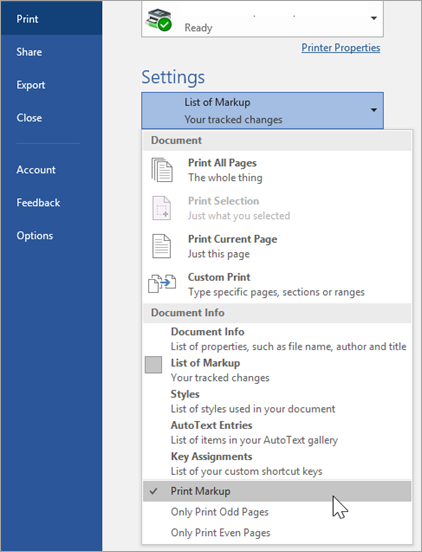
To print only certain pages, print some of the document’s properties, or print tracked changes and comments, select the arrow under Settings, next to Print All Pages (the default), to see all of your options.
-
To print only certain pages, do one of the following:
-
To print the page shown in preview, select Print Current Page.
-
To print consecutive pages like 1 -3, select Custom Print and enter the first and last page numbers in the Pages box.
-
To print individual pages and a range of pages (like page 3, and pages 4-6) at the same time, select Custom Print, and enter the page numbers and ranges separated by commas (e.g. 3, 4-6).
-
Note: If the printer you’ve chosen under Printer supports color, black and white, and grayscale printing options, the options will appear in the list under Settings.
-
Select File > Print.
-
Under Settings, choose the color printing option, and any other options you want, and select the Print button.
-
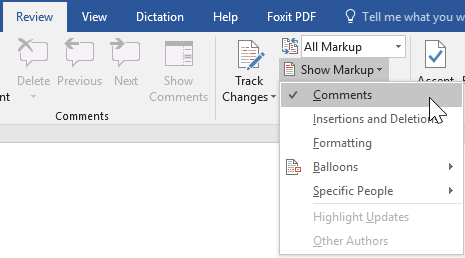
Open a document that has comments. If the comments option doesn’t show immediately, go to Review > Show Markup, and select only Comments from the list.
You can choose to print comments from one specific reviewer by selecting the reviewer under Specific people.
-
Select File > Print.
-
Under Settings, select Print Markup.
-
Select Print.
Your document will print with comments.
Note: If you want to print your document without any comments, go to Review > Tracking > No Markup and then print your document.
Printing from Word for the web may seem a little confusing. That’s because it first creates a PDF to preserve the layout and formatting, and then you print the PDF.
Note: If you’re using Internet Explorer on Windows 7 or an earlier operating system, you’ll need to download and install the free Adobe Reader app before you can print your document.
Print your document
-
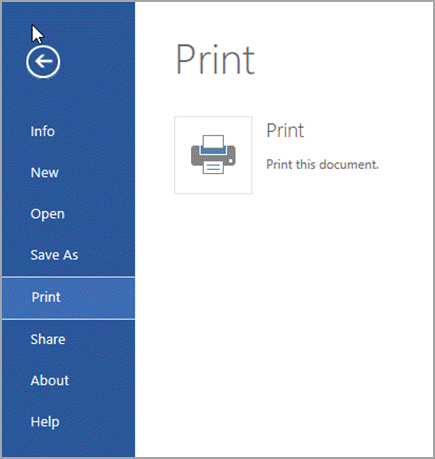
Click File >Print > Print.
Notes:
-
If you’re in Reading view, click Print near the top of your screen.
-
-
-
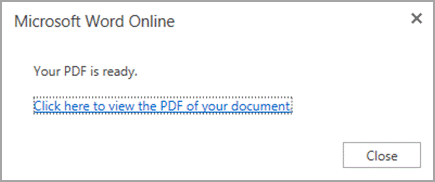
Word for the web generates a PDF copy of your document.
-
Click Click here to view the PDF of your document to open the PDF preview of your document.
Tip: If your default PDF viewer is Word, cancel the Word for the web print job, open the document in Word (Edit Document > Edit in Word) and print it from Word (File > Print).
-
Print your document:
-
On Windows 7, choose a printer and change or keep any other settings you want, and then click Print.
-
On Windows 8, in the Reader app, swipe up from the bottom of the screen (or right-click anywhere) and select Print. On the Print page, choose a printer, choose the settings you want, and then click Print.
-
On Windows 10, in the Reader app, swipe up from the bottom of the screen (or left-click anywhere) and select Print. On the Print page, choose a printer, choose the settings you want, and then click Print.
-


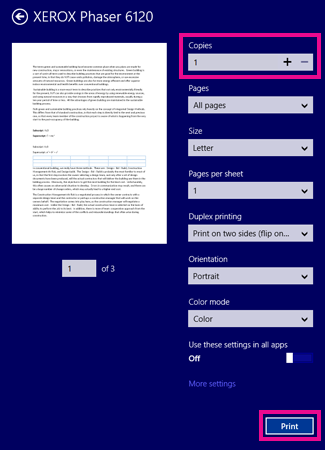
If you want multiple copies of a printout, change the number of copies in the Print page:
-
On Windows 7 or earlier, at the top of the Print page is a box labeled Copies with up and down arrows for you to choose how many copies of the document you want. Make your choice (either by entering a number or using the arrows), and then click Print.
-
On Windows 8 or Windows 10, choose how many copies to print (either by entering a number or using the + and – buttons), and then click Print.

Note: If the printer you’ve chosen under Printer supports color, black and white, and grayscale printing options, the options will appear in the list under Settings.
-
Click File > Print.
-
Under Settings, choose the color printing option, and any other options you want, and click the Print button.
See also
-
Print in black and white
-
Your printer manufacturer’s website (where you can find updated printer drivers)
-
Microsoft 365 Community Forums
-
Tutorial: Printer Problems in Windows
Need more help?
Want more options?
Explore subscription benefits, browse training courses, learn how to secure your device, and more.
Communities help you ask and answer questions, give feedback, and hear from experts with rich knowledge.
In this post you’ll discover where to go to print a Word document and the setting you have at your disposal.
1. How to preview your document before you print
Before you print your document, you should check that the layout is okay. The Print Preview feature allows you to view how your entire page looks and how the document flows.
To preview a document:
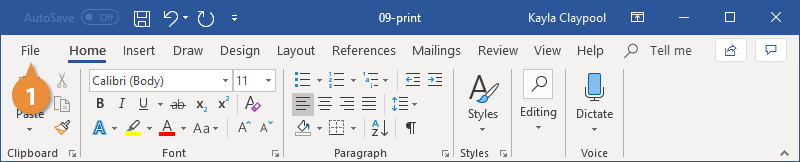
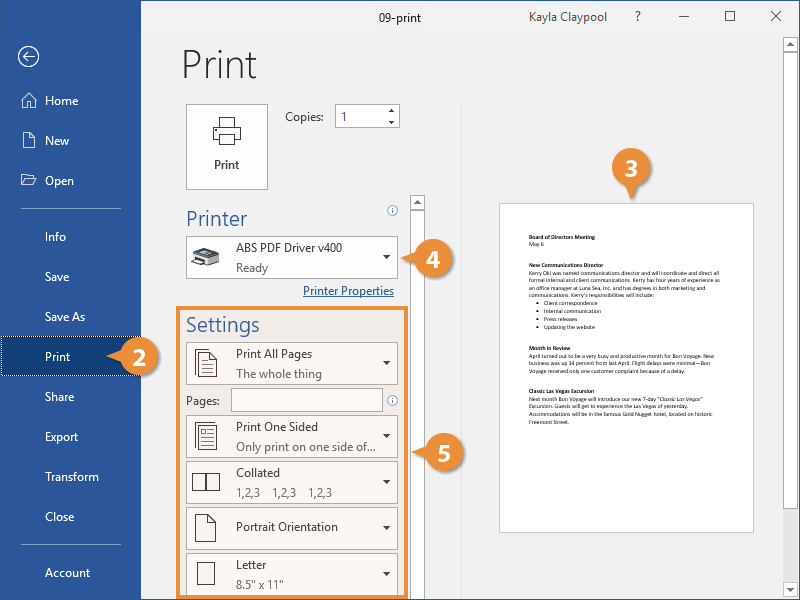
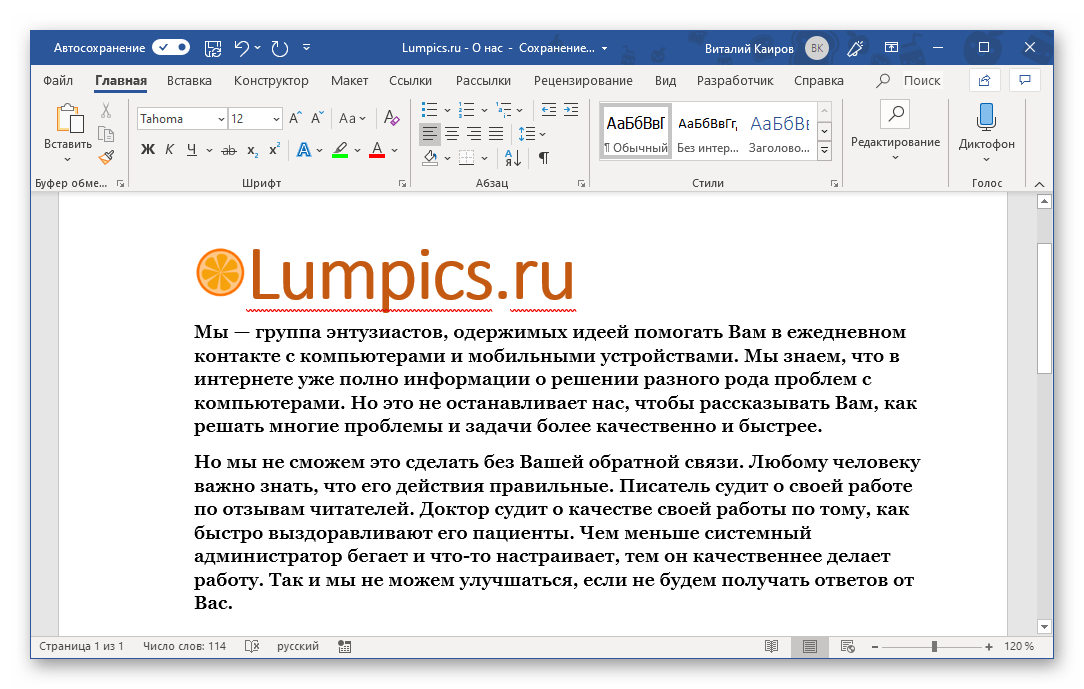
1. Press Ctrl + P or click the File tab in the top-left corner of the screen, then choose Print in the left panel. The document preview is displayed in the main window.
2. Click the up and down arrows underneath the preview page to go to the previous or next page.
3. Drag the slider or click the + or – to zoom in for a closer look or zoom to see more pages at once.

2. How to print a word document
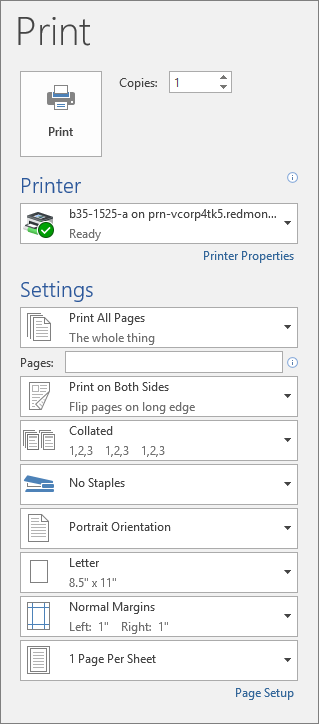
In the Print dialog:
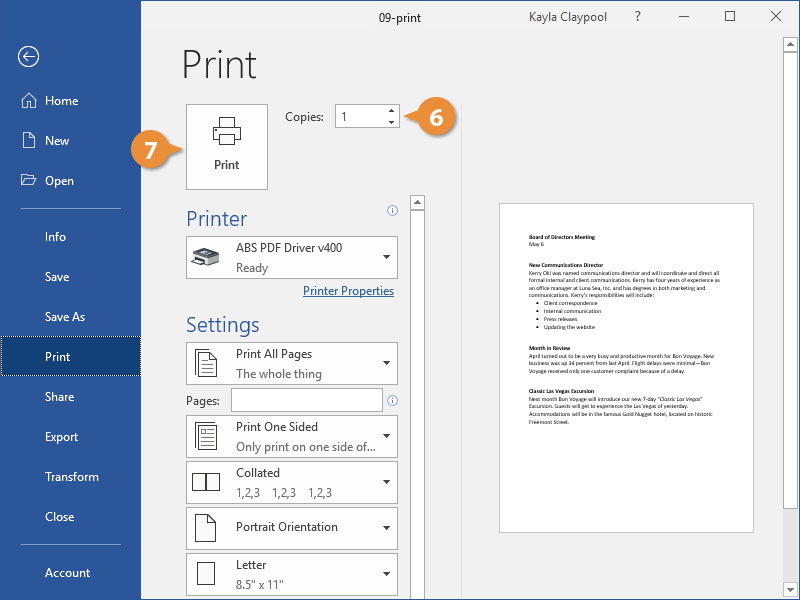
1. Choose how many copies to print.
2. Choose which printer to use (if you have more than one connected).
3. Choose whether to print all pages, a selection of pages or just the section of your document that is currently selected.
4. In the text box, you can specify:
- A single page (e.g. 2)
- A selection of pages (e.g. 2, 4, 7, 8, 10)
- A range of pages (e.g. 2-6)
- Any combination of the above (e.g. 2, 4-7, 10)
5. If your printer has the capability:
- Choose to Print One Sided or Print on Both Sides (also known as Duplex printing).
- Choose whether to staple your document, where to apply the staples and how many staples to use.
6. If you are printing multiple copies, choose whether to collate them (print each copy as a unit) or uncollate them (all page 1’s are printed then all page 2’s etc.)
7. Click the large print button at the top.

3. The key points
- To preview document prior to printing, press Ctr+P or select the File tab and choose Print on the left side panel.
- The Print Settings allow you to select which printer to use, which page or range of pages you want to print, whether or not to collate and whether to print one sided or two sided.
- While the options exists, you should not need to adjust the orientation, paper size or margin size as these would already be set up within the document.
- Click the Large Print button above the settings to start printing.
I hope you found plenty of value in this post. I’d love to hear your biggest takeaway in the comments below together with any questions you may have.
Have a fantastic day.


About the author
Jason Morrell
Jason loves to simplify the hard stuff, cut the fluff and share what actually works. Things that make a difference. Things that slash hours from your daily work tasks. He runs a software training business in Queensland, Australia, lives on the Gold Coast with his wife and 4 kids and often talks about himself in the third person!
SHARE

How to Print Word Documents
When you’re ready to print a document, and if you have a printer connected to your computer, you can preview a document and print it.
Print a Document
- Click the File tab.

- Click Print.
- Examine the print preview on the right side of the screen to ensure the document appears correct.
- Select the correct printer by clicking the Printer list arrow and selecting it from the list.
- Adjust the printer settings using the options below the printer, described in the following table.

- Set the number of copies in the Copies text field.
- Click Print.
The document is sent to the printer.
Press Ctrl + P.
| Print Settings | |
|---|---|
| Print Range | Print the whole document, a certain page range, a single section, or just even or odd pages. |
| Print One Sided / Both Sides | Print the document one-sided, enable a printer’s two-sided printing function, or manually flip the pages during printing. |
| Collate | Collating prints multiple copies of the document all the way through (1, 2, 3, 1, 2, 3), while printing uncollated prints multiple copies of each page together (1, 1, 2, 2, 3, 3). |
| Orientation | Select Portrait (taller) or Landscape (wider). |
| Page Size | Select the size of paper you’re printing on. |
| Page Margins | Adjust the margins between the edge of the page and the text. |
| Pages Per Sheet | Arrange multiple pages on a single sheet. |

FREE Quick Reference
Click to Download
Free to distribute with our compliments; we hope you will consider our paid training.
Содержание
- Печать документов в Ворде
- Печать стандартных документов
- Печать неформатных документов
- Решение возможных проблем
- Заключение
- Вопросы и ответы
Современный документооборот все больше осуществляется в цифровом пространстве. Иметь дело с бумагой нам приходится значительно реже, но время от времени необходимость печати документа на принтере все же возникает. Сегодня мы расскажем о том, как это сделать в Microsoft Word.
Печать документов в Ворде
Процесс распечатки текстовых документов в редакторе от Microsoft мало чем отличается от такового в любых других программах, предоставляющих аналогичную возможность. Нюансы заключаются разве что в предварительном оформлении, подготовке и некоторых настройках. Забегая вперед, отметим, что Word позволяет печатать не только стандартные страницы A4, но и ряд других форматов.
Печать стандартных документов
Если вы имеете дело с обычным текстовым файлом, распечатать его не составит труда. Аналогичным образом обстоят дела и с документами, в которых есть графические объекты.
Читайте также: Как вставить изображение в Ворд
- Прежде всего убедитесь в корректности оформления файла, который требуется отправить на печать. Содержащиеся в нем текстовые и/или графические данные, не должны выходить за пределы области печати, сам же текст должен иметь именно тот вид, который вы хотите в дальнейшем получить на бумаге. Избежать возможных проблем с разметкой или устранить их в случае обнаружения поможет следующая статья:

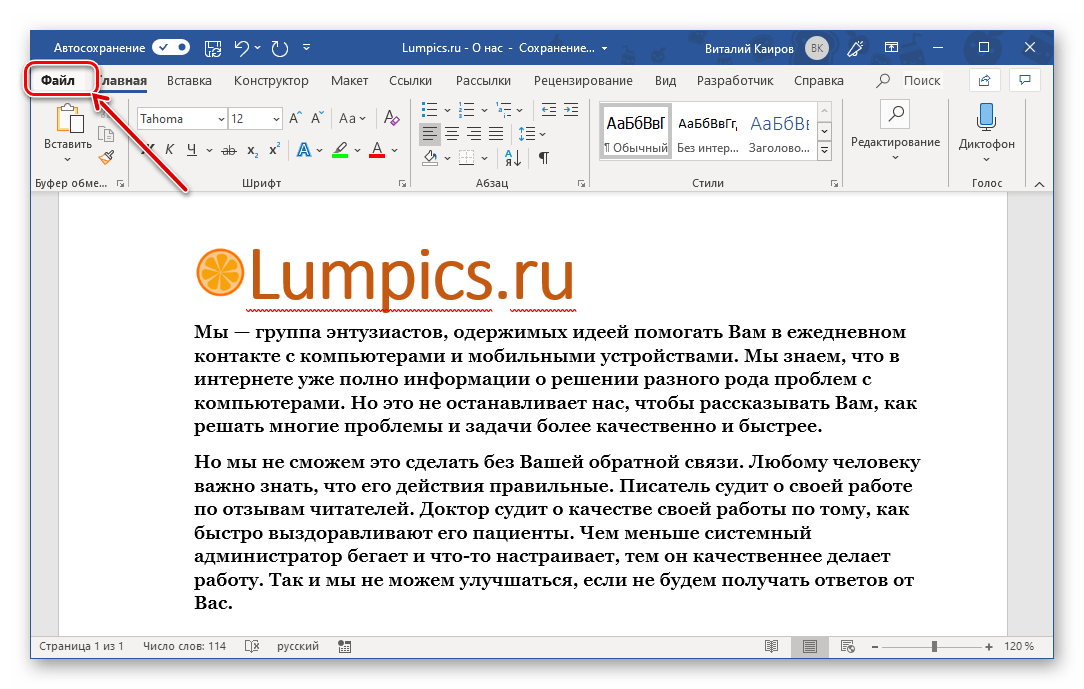
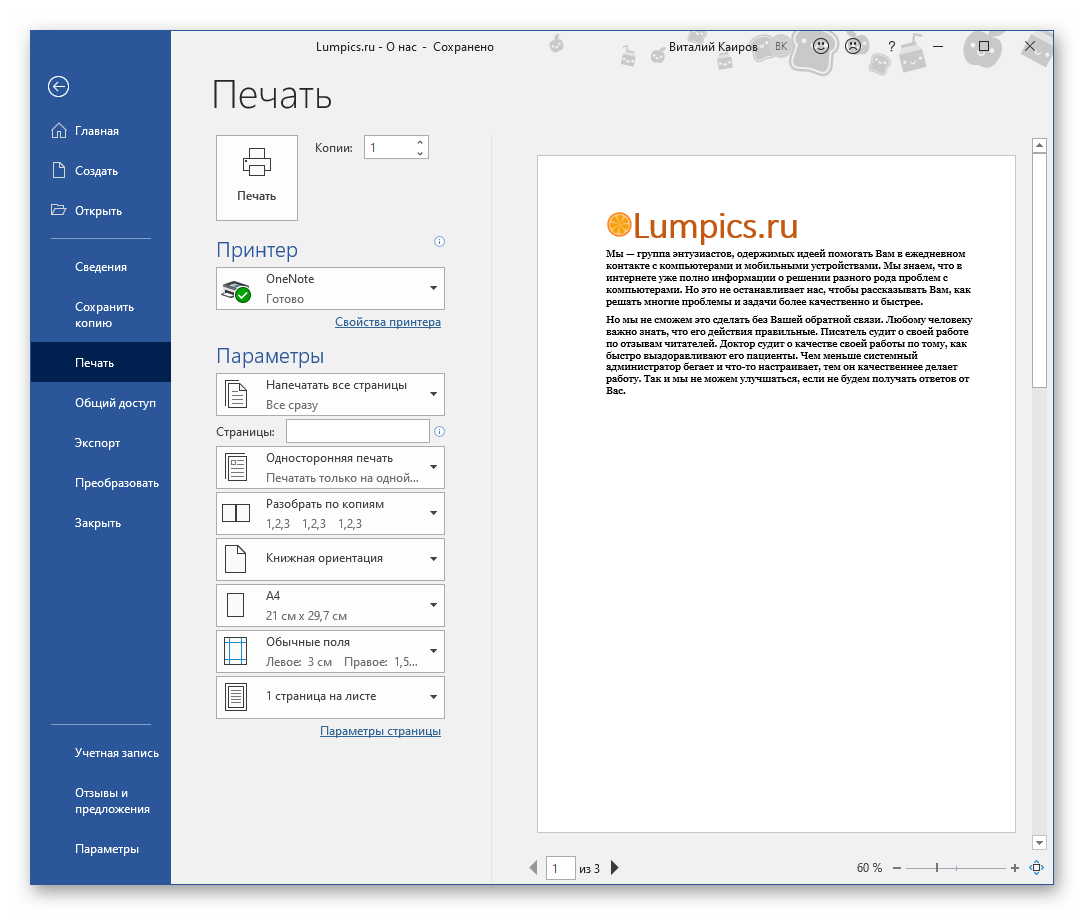
Подробнее: Настройка полей в Microsoft Word - Откройте меню «Файл», нажав по наименованию соответствующей вкладки на панели быстрого доступа.
Примечание: В версиях Ворд до 2007 года включительно кнопка, которую необходимо нажать для перехода в меню программы, выполнена в стиле старого логотипа офисного пакета от Майкрософт.
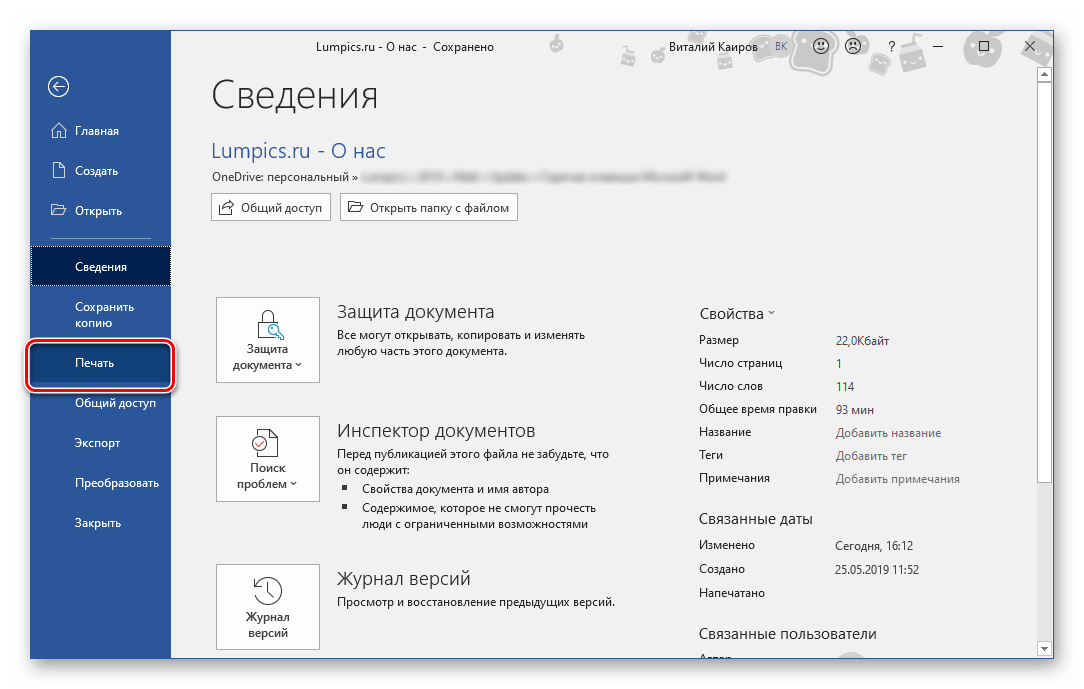
- В списке доступных параметров выберите пункт «Печать».
При необходимости включите предварительный просмотр документа – это поможет еще раз перепроверить правильность оформления.

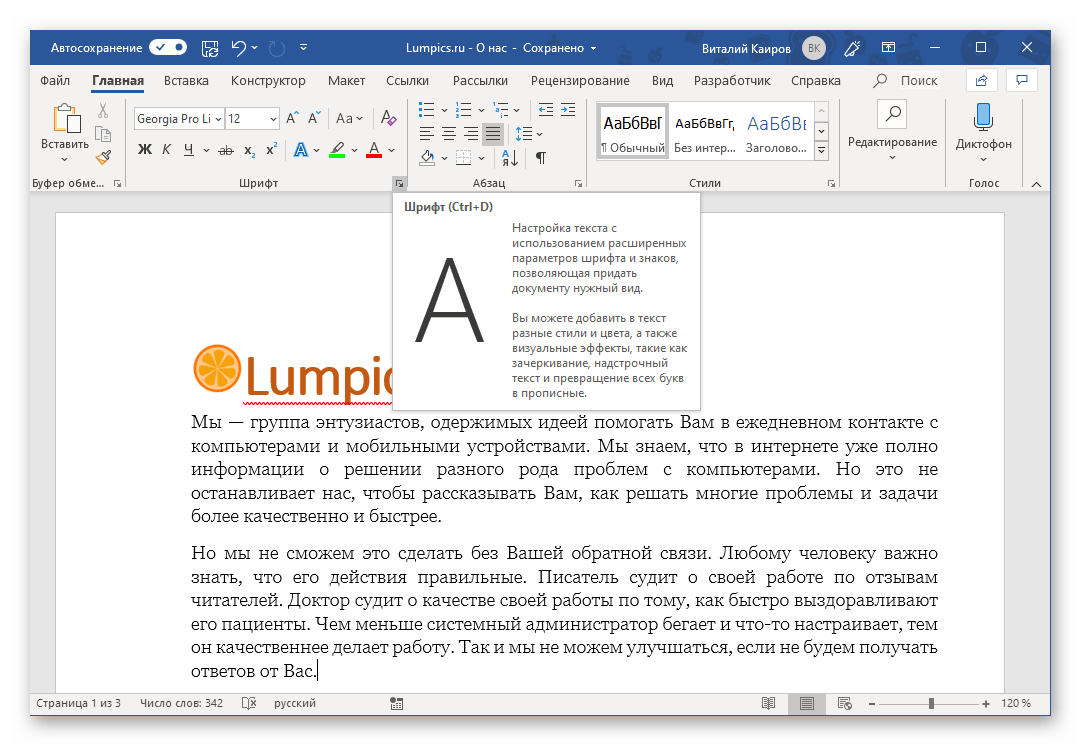
Подробнее: Предварительный просмотр документов в WordПримечание: Перейти к разделу «Печать» рассматриваемого текстового редактора можно и значительно проще – достаточно нажать клавиши «CTRL+P», которые являются универсальными для большинства программ, наделенных аналогичной функциональностью.
Читайте также: Горячие клавиши для удобной работы в Ворде
- В разделе «Принтер» из выпадающего списка выберите подключенное к компьютеру, заведомо работающее и правильно настроенное печатающее устройство.

Читайте также:
Настройка принтера по сети в Windows
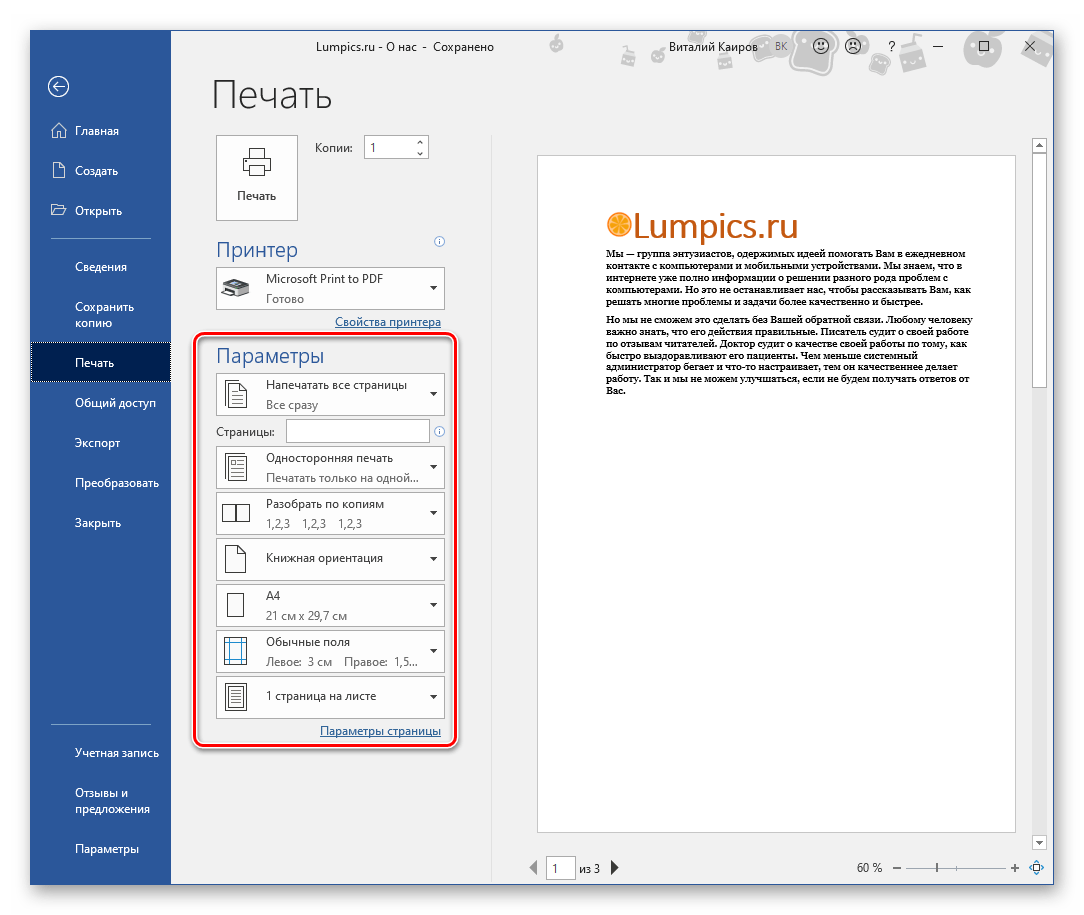
Установка драйверов для принтера - В блоке опций «Параметры» (ранее «Настройка») определите основные параметры печати. Доступны следующие:
- Количество распечатываемых страниц – все, отдельные страницы или диапазон таковых;
- Тип печати – односторонняя или на обеих сторонах листа (последнее возможно только вручную);
- Количество копий (опционально);
- Ориентация страницы – книжная или альбомная, но лучше делать это еще перед настройкой печати;
- Формат страницы – A4, A5, A3 и т.д. Как и в случае с ориентацией, это нужно определять заранее, чтобы не нарушить оформление документа. К тому же данная возможность зависит в первую очередь от особенностей принтера;
- Размеры и тип полей;
- Количество страниц на листе.
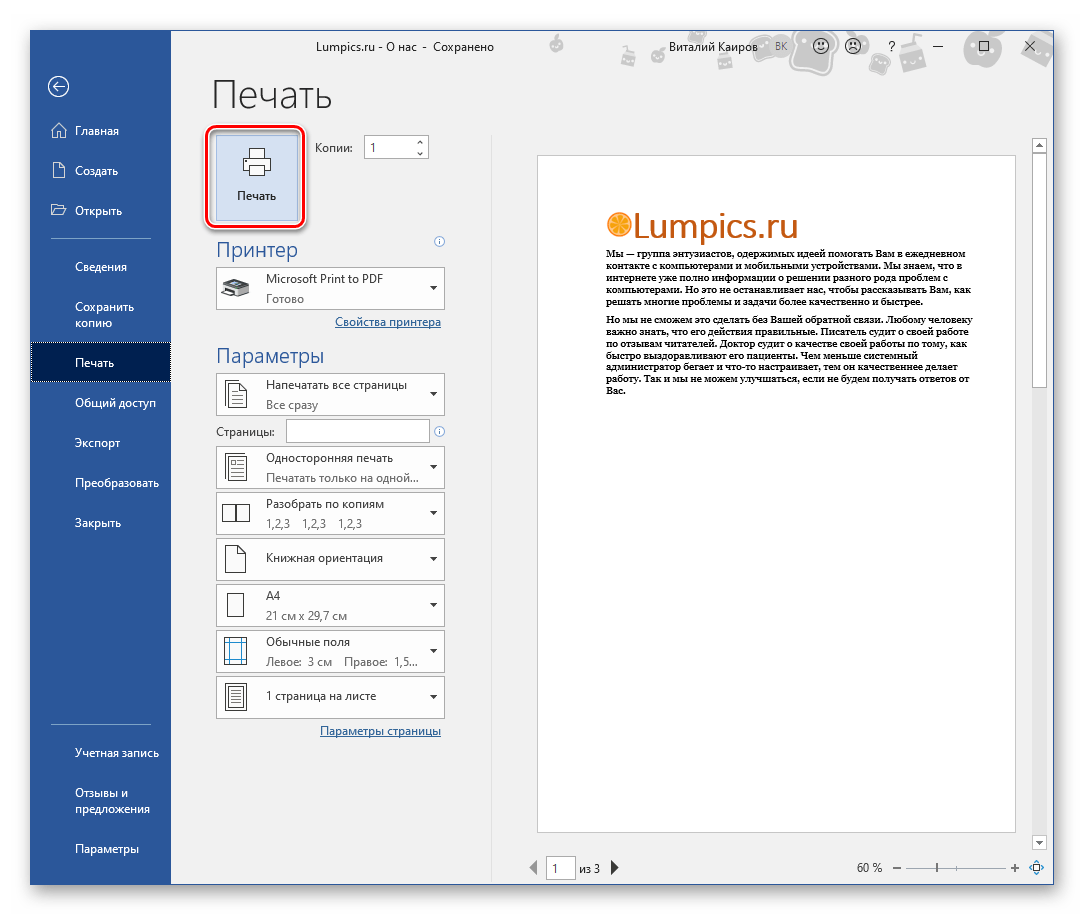
- Завершив с настройкой и, ориентируясь на окно предварительного просмотра, убедившись в ее правильности, нажмите по кнопке «Печать», расположенной в самом верху.
Примечание: Возле кнопки «Печать» можно также указать желаемое количество копий документа.
- Если с принтером все в порядке и сам Word работает корректно, будет начата процедура печати, по завершении которой вы сможете забрать бумажные копии файлов из лотка печатающего устройства.

Вот так просто выполняется печать документов в Ворде, но иногда можно столкнуться и с куда более серьезными задачами по оформлению и последующей распечатке текстовых файлов. Об их решении пойдет речь далее.
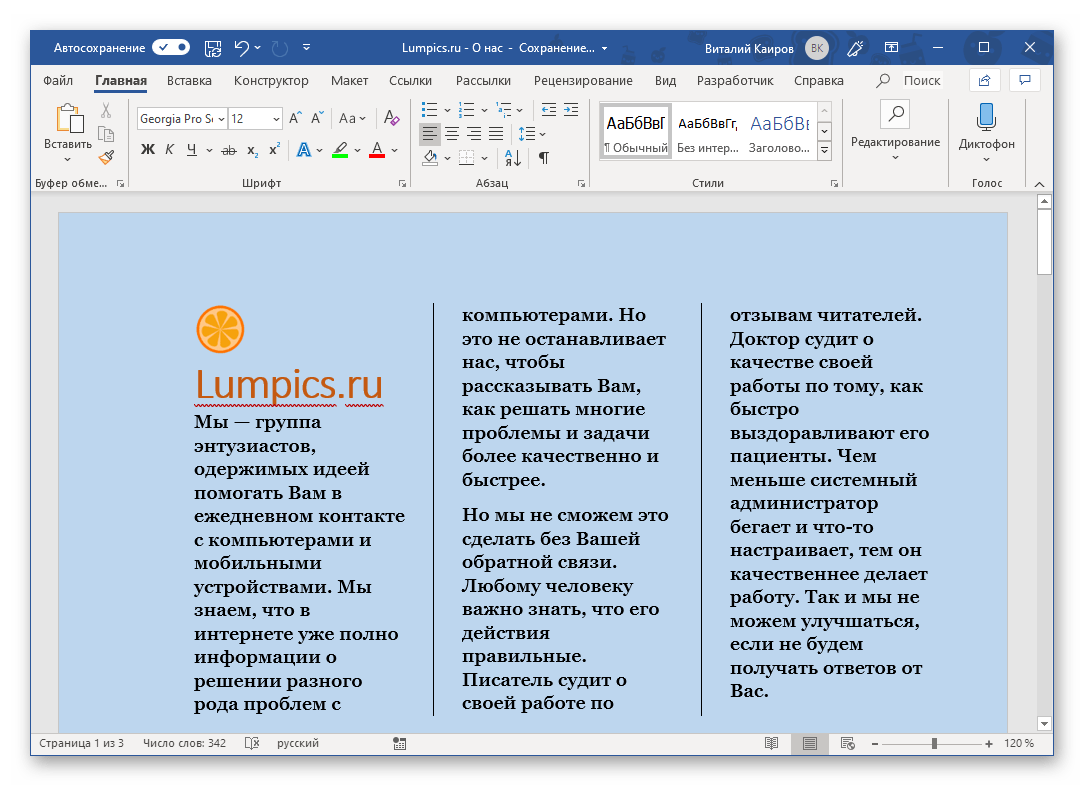
Печать неформатных документов
Если текстовый документ, который вы выводите на печать, имеет стандартный формат A4 и он точно правильно оформлен, проблем с его печатью возникнуть не должно. Но ведь Microsoft Word позволяет создавать и отличные от «стандарта» текстовые файлы, и нередко процесс их распечатки сопряжен с рядом трудностей. Собственно, последние могут возникнуть еще на этапе создания документа того или иного формата. Об основных из них, а также о нюансах печати, мы писали ранее, просто найдите в представленном ниже списке интересующую вас тему, ознакомьтесь с соответствующей инструкцией, и в результате получите уже готовый бумажный документ нужного типа.
Подробнее:
Создание документов книжного формата
Создание брошюр и буклетов
Создание форматов, отличных от A4
Изменение фона документа
Создание подложки и водяного знака
Правильно оформить текстовый документ перед его печатью на принтере поможет следующая статья:
Подробнее: Форматирование текста в документе Ворд
Решение возможных проблем
Иногда при попытке печати текстовых документов можно столкнуться с разного рода проблемами. К счастью, причины большинства из них легко обнаружить и устранить.

Принтер не печатает документы
В случае возникновения проблем с печатью первым делом следует проверить оборудование, ответственное за этот нехитрый процесс. Возможно, дело в его неправильной настройке или отсутствии актуального драйвера. Не исключено и механическое повреждение. Установить точную причину и избавиться от нее помогут представленные по ссылкам ниже материалы.
Подробнее:
Устранение проблем в работе принтеров HP и Epson
Печать документов на принтере в Windows
Не печатает только Word
Если же в работоспособности и правильной настройке печатающего оборудования вы убедились, и даже проверили его в других программах, остается винить только Ворд. Иногда этот текстовый редактор и сам недвусмысленно дает понять, что он не может распечатывать документы (характерные сбои, ошибки), но бывает и так, что проблема зарыта значительно глубже — в программных или системных компонентах. Выявить ее и наверняка решить поможет наша подробная статья по данной теме.
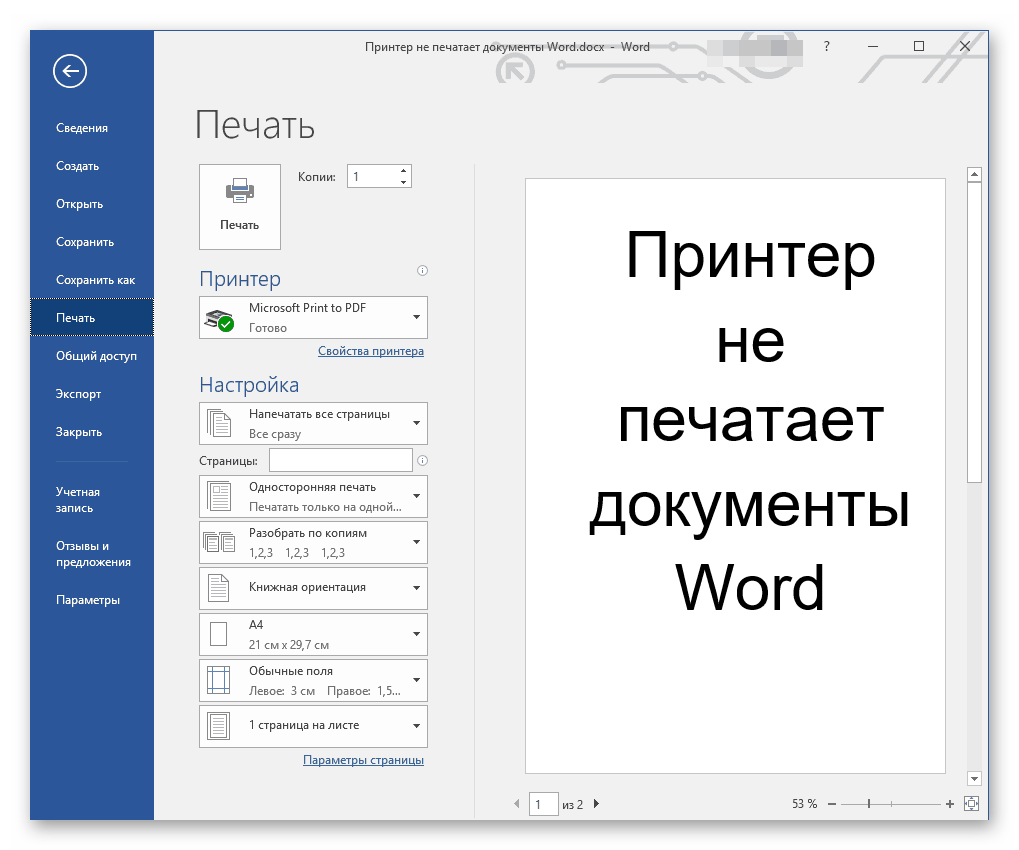
Подробнее: Что делать, если Word не печатает документы
Печатается не все содержимое
Бывает и так, что документ печатается, но некоторые из содержащихся на его страницах элементов не выводятся на печать (например, изображения, фигуры или измененный фон страницы). В данном случае нужно просто проверить параметры печати и, если потребуется, активировать в них отключенные пункты.
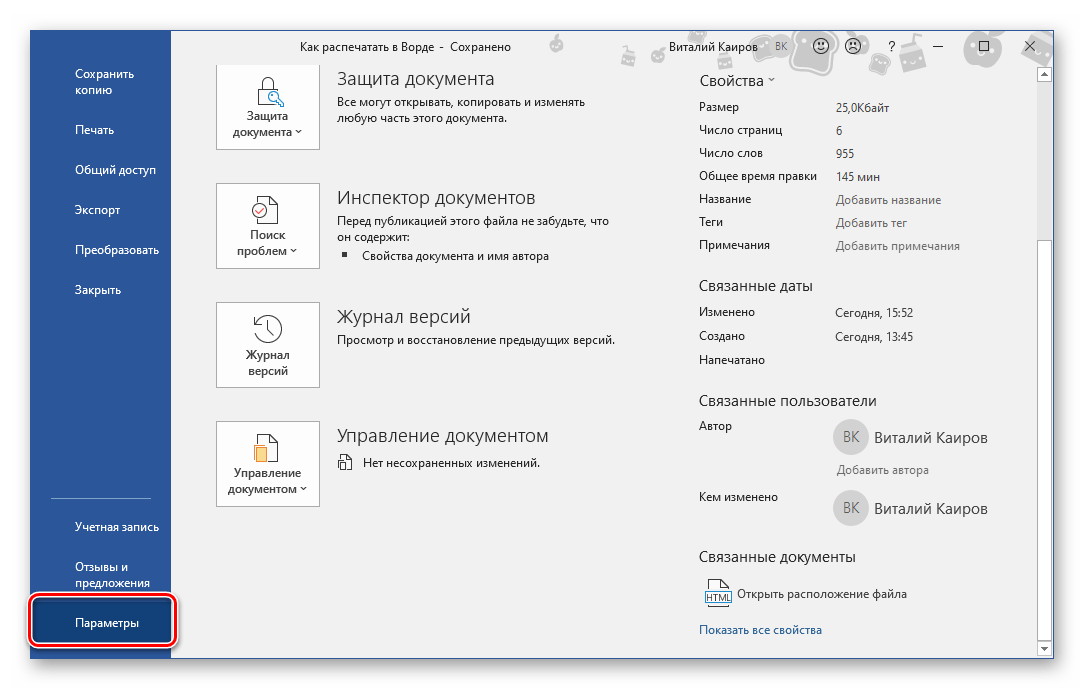
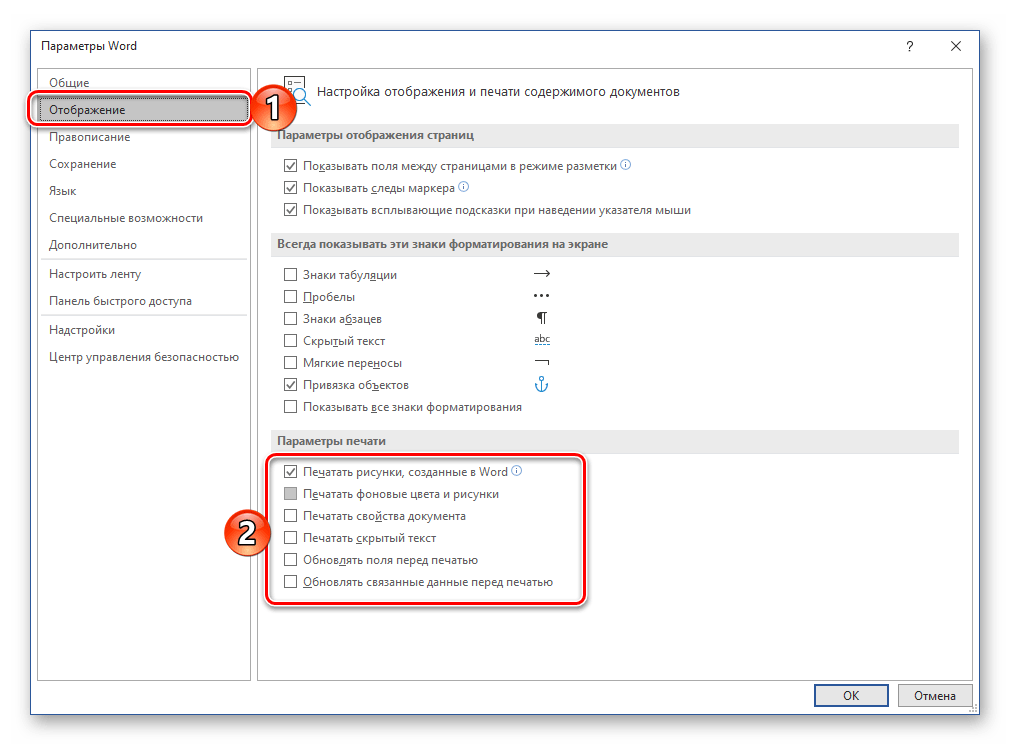
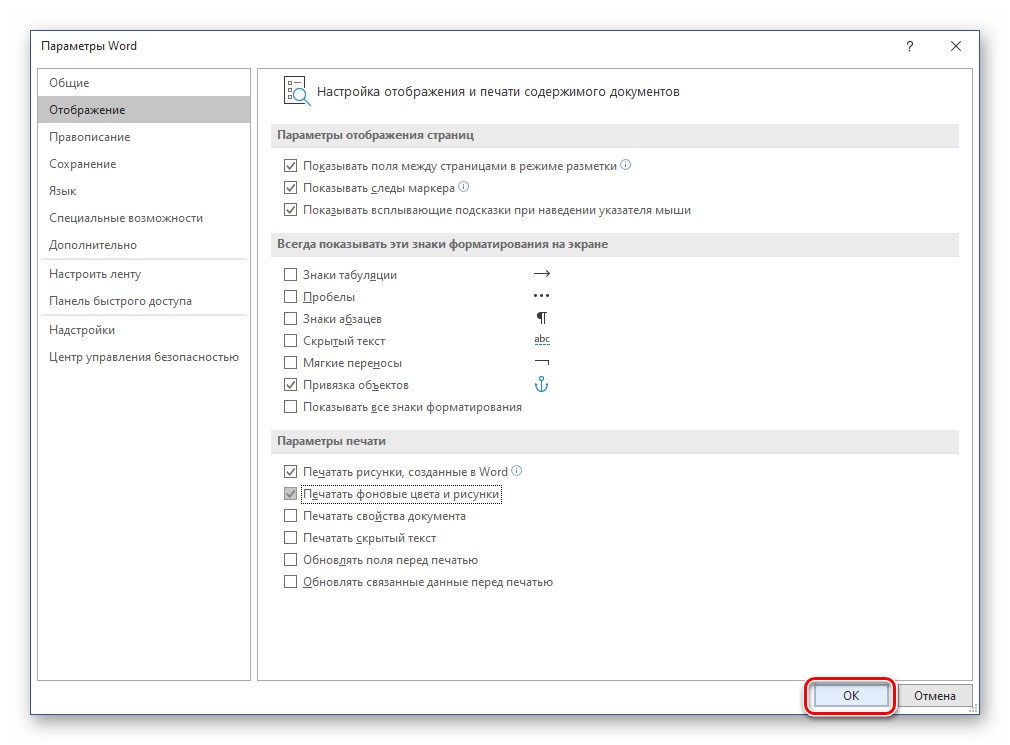
- Откройте меню «Файл» и перейдите к разделу «Параметры».
- На боковой панели перейдите во вкладку «Отображение» (ранее данный раздел назывался «Экран») и в блоке «Параметры печати» установите галочки напротив тех пунктов, описание которых соответствует тому, что вам требуется распечатать помимо основного содержимого документа.
- Нажмите «ОК», чтобы сохранить внесенные изменения, и попробуйте повторно инициировать процесс печати.
Как видите, даже самые серьезные проблемы с печатью документов в Ворде всегда можно обнаружить и устранить. Избежать их вовсе поможет четкое следование инструкции, изложенной в первой части статьи.
Заключение
Распечатать файл в Microsoft Word не составит труда даже для малоопытного пользователя. Более того, данный текстовый редактор позволяет создавать и печатать на принтере не только стандартные форматы документов, и теперь вы знаете, как это делается.
In this article, we will focus on demonstrating you with 3 effectual methods to print the current page in your Word document.
Printing is an important issue relating to Word document. Sometimes, it’s not the entire document but only the current page that you want to print. Luckily, Word provides workarounds for you to achieve such need. You can read this post and choose one method you like to help you print current page smoothly.
Method 1: Go through the Print Command
- First and foremost, move your cursor to the page you want to print out.
- Then click “File” tab.
- Next click “Print” on the left column in backstage.
- Enter the copy number you need.
- And choose a printer.
- Then click the drop-down box to select “Print Current Page” option.
- Lastly, click “Print” button on the top of the column.


Method 2: Use Keyboard
In case you prefer using keyboard more often, you can press “Alt” first. Then you shall find each command in the Ribbon is assigned with a letter. Press the same letter key to achieve the same effect of clicking.
- First when you press “Alt”, you can see there is a letter “F”. Then press “F” to go to the backstage view.

- Next press “P”.
- Then press “A” and use the arrow key to select option. After this, you may find letters are gone, just pressing “Alt” again, and they shall be back.
- Next press “P” to print.


Here is our video demonstration:
Method 3: Run Word Macro
- To begin with, click “Developer” tab first.
- Then click the “Visual Basic” option to open the VBA editor. If the “Developer” tab is not activated, you can choose to press “Alt+ F11” instead.

- Next click “Normal” project.
- Then click “Insert” tab.
- And choose “Module” on the drop-down menu.

- Now double click on the module to bring out the coding area.
- Paste the bellowing codes there:


Sub PrintCurrentPage()
  Dim strFileNumber As String
  Dim objDoc As Document

  Set objDoc = ActiveDocument
  strFileNumber = InputBox("Enter the number of copy you need: ")

  '  set Microsoft XPS Document Writer as the active printer.
  Application.ActivePrinter = "Microsoft XPS Document Writer"
  objDoc.ActiveWindow.PrintOut Range:=wdPrintCurrentPage, Copies:=strFileNumber
End Sub
- Next hit “F5” or click “Run”.

- Now there will be an input box popping up. Enter a number indicating how many copies you want. Then click “OK”.


Note:
In code line Application.ActivePrinter = “Microsoft XPS Document Writer”, replace “Microsoft XPS Document Writer” with the printer you actually use.
Get Help with Broken Word Documents
While working in Word, your Word suddenly collapses. What’s more heart-broken is to have a damaged doc. To see all your efforts and time spent now become inaccessible is never easy. Therefore, you should take hold of a prominent fixing tool as soon as possible so as to recover your data.
Author Introduction:
Vera Chen is a data recovery expert in DataNumen, Inc., which is the world leader in data recovery technologies, including corrupt xls and pdf repair software products. For more information visit www.datanumen.com