
Creating fill in the Blanks (FITB) documents can be a wonderful way for educators to assess their student’s understanding of a particular topic. Fill in blanks is an interactive and efficient method for teachers to gauge comprehension without overwhelming or intimidating students. In this guide, we will explain how to create fill in the blanks documents in Microsoft Word to make assessment and grading simple and efficient. From inserting blanks to adding answer options, we will walk through the creating process fill in blanks documents so you can confidently assess your students’ understanding.
What is Fill in the Blanks Documents
Fill in the blanks documents are a type of document that allows users to input information into pre-defined fields. It is document type used in surveys and applications, as they provide structure and only allow specific responses. These documents include multiple blank spaces or questions to be filled out by the user. When complete, the form will contain all the necessary information to process or complete a task. These documents are an effective way to gather and organize data for analysis and decision-making. They can also help streamline document management processes, since the required fields allow for easy organization of collected information.
Step-By-Step Guide
1. Open MS Word and create a new document.
2. Fill in the text of the document, leaving out words or phrases where you want the reader to enter their information.
3. Select the word or phrase that you want to be filled in and highlight it with your cursor.
4. Go to “Format” and click on “Font.” In the front window, select the “Text Fill” option and enter a color for the background of your fill in the Blank text.
5. Go back to “Format” and select “Paragraph.” A new window will appear; here, you can adjust the alignment of your fill in the Blank text.
6. Go to “Insert” and select “Shapes.” Choose a shape that you want to appear around the fill in the Blank text, such as a rectangle or circle, and drag it onto the document.
7. Highlight the fill in the Blank text and the shape you just inserted. Right-click on one of them and select “Grouping,” then select “Group.”
8. Finally, save your document for your computer or print it to share with others.
Tips for Customizing
1. Use the fill in the blanks feature to create simple, multiple-choice questions within your document quickly and easily.
2. Consider using blanks to generate forms or questionnaires that can be used as surveys or assessments.
3. Utilize blanks dropdown menus to give readers multiple selections instead of just one answer.
4. Create blanks options that appear only when necessary, allowing you to provide extra resources or relevant content based on the reader’s answers.
5. Choose two blank sections that are not immediately visible, so readers must search for them.
6. Use Blanks to create interactive quizzes or activities that can be used for educational purposes.
7. Fill in the blanks document sections can also hide secret messages or bonus content, adding an extra layer of excitement and mystery.
8. Make blanks sections appear differently on the page using different font styles, colors, or sizes.
9. Fill in Blank documents can also generate unique usernames and passwords for readers needing access to specific information.
10. Fill in blanks documents is a great way to condense long forms into more manageable chunks, making them easier for readers to complete. Get to know about ChatGPT Essay Writing.
Best Practices
When creating a blanks document, it is essential to ensure it is accessible to all users. Here are some best practices to ensure accessibility:
1. Use plain language – avoid technical jargon; be clear and concise when writing your blanks sentences. This will help readers understand what they must do without ambiguity or confusion.
2. Include visual cues – adding visuals, such as images and illustrations, can help break up the blanks text and provide a clearer understanding of what needs to be done. Visual cues can also help draw attention to important document parts that should not be overlooked.
3. Use simple editing tools – when creating fill in the blank’s documents, use basic MS Word operations such as underlining, bolding, capitalizing, and inserting tabs for clarity and organization.
4. Ensure readability – make sure your blanks document is easily scannable using bulleted lists, headings, and white space. This will make the document much easier to navigate and comprehend.
Troubleshooting Common Issues
Troubleshooting common issues when creating a fill in the blanks document in Microsoft Word can help ensure your document is created properly. If you experience any problems with blanks functionality, such as not being able to enter text into designated fields or difficulty formatting the document, there are a few steps you can take to isolate and resolve the issue.
First, check your “Word Options” to ensure fill in the blanks is enabled; from the File menu, select “Options,” followed by “Advanced.” Scroll down until you see the fill in blanks settings, and make sure they are set to enabled. If blanks is already enabled, disable it, and then re-enable the feature.
If blanks is still not working properly, double check the fill in the blank field settings by going to “Design” in the ribbon and selecting “Properties.” This will open a dialog box containing blanks settings, and you should make sure “Show Fill-in Prompts” is checked.
You may also need to adjust the font size of your file in Blank fields; if they are too small, text may not be visible. To change the font size, highlight the fill in the blanks field, right-click on it, and select “Font” from the menu. From there, you can adjust the font size as needed.
If filling in blanks still does not seem to be working properly, try creating a new Fill in the Blank document from scratch. This will ensure your current document does not contain any incompatible settings or formatting that may prevent fill in blanks from working.
![]()
Testing Your Fill in the Blanks Document
Once you have created your fill in the blanks document, testing it to ensure that everything works properly is important. You can fill in the blanks with random words and phrases and then preview or print the document to make sure that everything appears as expected. It may also be helpful to send a copy of the document to a friend or colleague to evaluate it out and ensure that they can fill in all the blanks correctly. Testing your fill in blank documents is important to ensure it functions properly and looks professional.
Final Thoughts
Creating fill in the blanks documents in MS Word is an easy and efficient way. It generates forms or assessments without starting from nothing. Fill in blanks documents are highly customizable, allowing users to tailor them to their needs. Creating Blanks documents is quick and straightforward. It allows users to produce documents with minimal effort quickly. fill in the blank’s documents are a great tool for quickly creating forms, surveys, and assessments that can be reused multiple times. With MS Word’s fill in the blanks feature, professionals can easily generate copious amounts of content quickly and efficiently.
Just so, How do I fill in a form in Word without moving lines?
On the Shape Format tab in the Shape Styles group, click the Shape Outline button, and in the drop-down list, select No Outline. Notice that the text box lines become invisible. Then click the Shape Fill button, and in the drop-down list, click No Fill.
Besides, How do you type over on a keyboard? To use Insert key to control Overtype mode, select the Use Insert key to control overtype check box. To keep Overtype mode enabled always, select the Use overtype mode check box.
How do I create a fill in the blank line in Word 2010?
How to Make a Fill-In-The-Blank Form With Microsoft Word 2010
- Launch Word and type the form name at the top of the Word page. …
- Press “Enter” to drop to a new line or “Enter” twice for a line of space below the top text. …
- Click the “Insert” tab, then click the “Shapes” button.
Subsequently, How do I type above a line in Word? Choose the “Scribble” tool, which looks like a squiggly line. When the cursor changes to a plus sign, click inside the text box above the line, press and hold down the left mouse button and draw what you want to write. Release the left mouse button when the word is complete.
How do I add text instead of overwrite?
Press the “Ins” key to toggle overtype mode off. Depending on your keyboard model, this key may also be labeled “Insert.” If you simply want to disable overtype mode but keep the ability to toggle it back on, you are done.
What is overtype mode in Word?
In Overtype mode, when text is added to a document where there is existing text, the existing text is replaced by the newly added text as it’s entered, character by character.
What is insertion mode?
A data entry mode that causes new data typed on the keyboard to be inserted at the current cursor location on screen.
Where is the INS key?
Sometimes displayed as Ins, the Insert key is a key on most computer keyboards near or next to the backspace key. The Insert key toggles how letters, numbers, characters, or other text is inserted.
What is Insert mode and overtype mode?
overtype mode, in which the cursor, when typing, overwrites any text that is present in the current location; and. insert mode, where the cursor inserts a character at its current position, forcing all characters past it one position further.
How do I insert text without box in Word?
Remove the border
- Select the text box or shape. If you want to change multiple text boxes or shapes, click the first text box or shape, and then press and hold Ctrl while you click the other text boxes or shapes.
- On the Format tab, click Shape Outline, and then click No Outline.
How do you type without typing in Word?
You can use speech-to-text on Microsoft Word through the “Dictate” feature. With Microsoft Word’s “Dictate” feature, you can write using a microphone and your own voice. When you use Dictate, you can say “new line” to create a new paragraph and add punctuation simply by saying the punctuation aloud.
What is the difference between inserting and Overtyping text?
Insert mode adds text, but it does not erase anything. Press the Insert key (located to the right of the Backspace key) once; you can change your computer to Overtype mode. When your computer is in Overtype mode, text you type replaces any existing text to the right of the insertion point and erases it.
How do I activate the Insert key?
How to Enable the Insert key in Microsoft Word:
- Go to file > word options > advanced > editing options.
- Check the box that says, “use the Insert key to control overtype mode”
- Now the insert key works.
Where is Insert key on laptop keyboard?
Where Is the Insert Key on Laptop Keyboards?
- On the 0 Key of the Numpad as a Modified Key. If your laptop keyboard has a Numpad, the Insert key is most likely invoked by turning the Num Lock off and pressing the 0 key. …
- Hidden Behind a Key Combination. …
- No Insert Key At All.
How do I turn on the Insert key?
How to Enable the Insert key in Microsoft Word:
- Go to file > word options > advanced > editing options.
- Check the box that says, “use the Insert key to control overtype mode”
- Now the insert key works.
How do you use Insert on a laptop?
On the 0 Key of the Numpad as a Modified Key
To frequently toggle the Insert functionality, you can also use the combination of Shift + 0 while Num Lock is active, as Shift allows you to override Num Lock, similar to how pressing it alongside a letter key while Caps Lock is on allows you to insert lowercase letters.
How do you Insert on a computer?
How to Use the Insert Key on a Microsoft Keyboard
- Open a document in Microsoft Word.
- Look towards the bottom of the Word window. …
- Switch to overwrite mode by pressing the “Insert” key. …
- Press “Insert” again.
What is the Ins key on a keyboard?
(INSert key) A keyboard key that is used to switch between insert and overtype mode or to insert an object at the current cursor location.
How do I stop Overtyping?
Turn off overtype mode:
- Click File > Options.
- Click Advanced.
- Under Editing options, clear both the Use the Insert key to control overtype mode and the Use overtype mode check boxes.
How do I turn on overwrite in Word 2013?
On the “Info” screen, click “Options” in the list of items on the left. The “Word Options” dialog box displays. Click “Advanced” in the list of items on the left. In the “Editing options” section, click the “Use overtype mode” check box so there is a check mark in it.
- Reference 1
- Reference 2
- Reference 3
- Reference 4
- Reference 5
Microsoft Word 2010 is an optimal business choice for communications leaving your office, such as letters, invoices and marketing materials, but don’t rule out the software program for when you’re seeking to bring in information as well. Let Word help you design fill-in-the-blank forms, ideal for culling job applicants, preparing new hires for confidentiality agreements and anywhere else you want people to be able to give you input. Word’s fill-in forms can be a jumping off point for your electronic information gathering or they can be printed for manual completion.
-
Launch Word and type the form name at the top of the Word page. You can also type additional information such as the department using the form, the form creator’s name and any directions for using the form.
-
Press “Enter” to drop to a new line or “Enter” twice for a line of space below the top text. Type the first form question or command, such as “Name” or “Job Title Applied For.”
-
Click the “Insert” tab, then click the “Shapes” button. Click the basic Line shape. When the cursor changes to a plus sign, hold down the “Ctrl” key to give you a straight drawing line, and drag the cursor to the right of the text you just typed, giving your form recipients a place to write.
-
Press “Enter” and type the next question on the form. Right-click the line you drew above and press the “Ctrl-C” keys to copy the line. Press the “Ctrl-V” keys to paste in the copied line and drag it into place to the right of the new question you just typed. Adjust line size as needed.
-
Type the next question. Press “Ctrl-V” to paste another copy of the line. You do not have to keep clicking and copying the line, as it is still in memory. Adjust the line sizes for each question. For example, a fill-in line for someone’s birth date will be shorter than the line for a description of a past job.
-
Add any additional text and lines to the rest of the form page or pages as necessary. For questions in which you want recipients to have multiple lines, paste copies of the line and drag them directly underneath each other, with a small space in between each for recipients to write.
-
Save the form to your network or desktop in a location you’ll remember.
- Free Courses
- Microsoft Word
- How to Create a Word Document

How to Create New Documents in Word

Creating a new document is one of the most basic commands you need in Word. You can create a new blank document, or you can create a new document based on a template.
Create a Blank Document
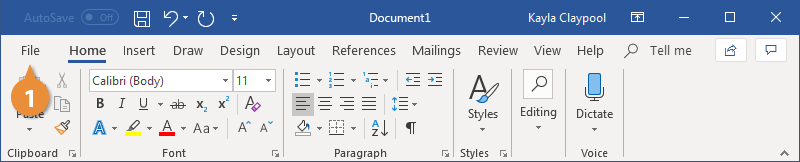
- Click the File tab.

- Click New.
- Select Blank document.

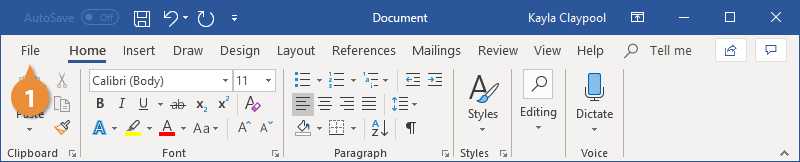
A new, blank document is created in a new window.
Press Ctrl + N to open a new blank document.
Create a Document from a Template
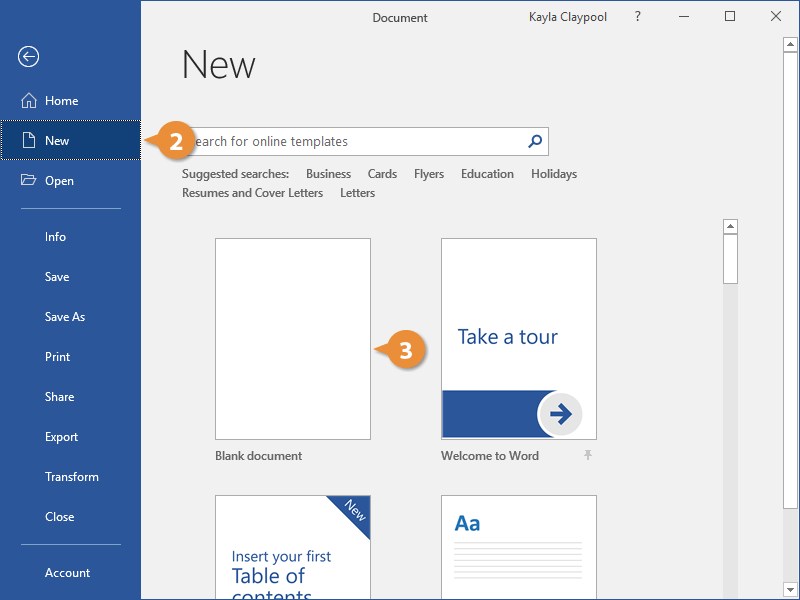
- Click the File tab.
- Click New.
The New screen has a few ways for you to select a template.
First, several featured templates will appear, after the Blank document template.
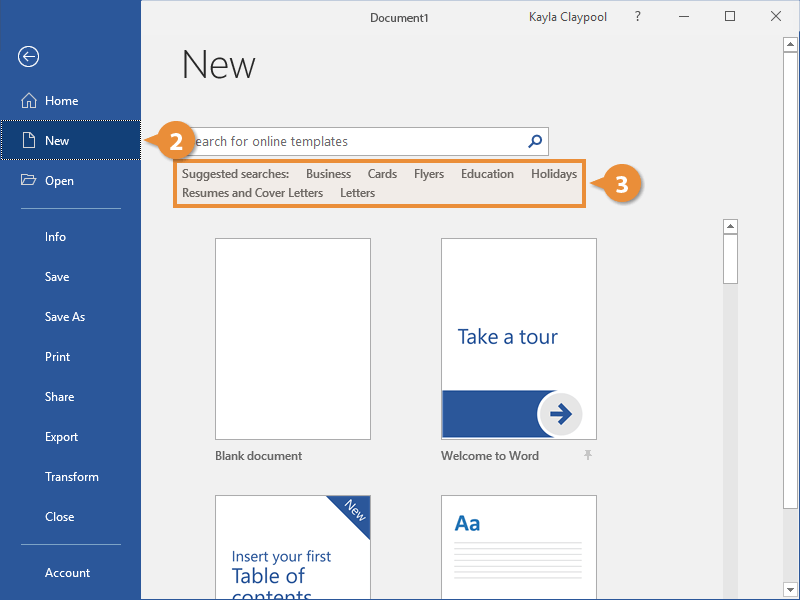
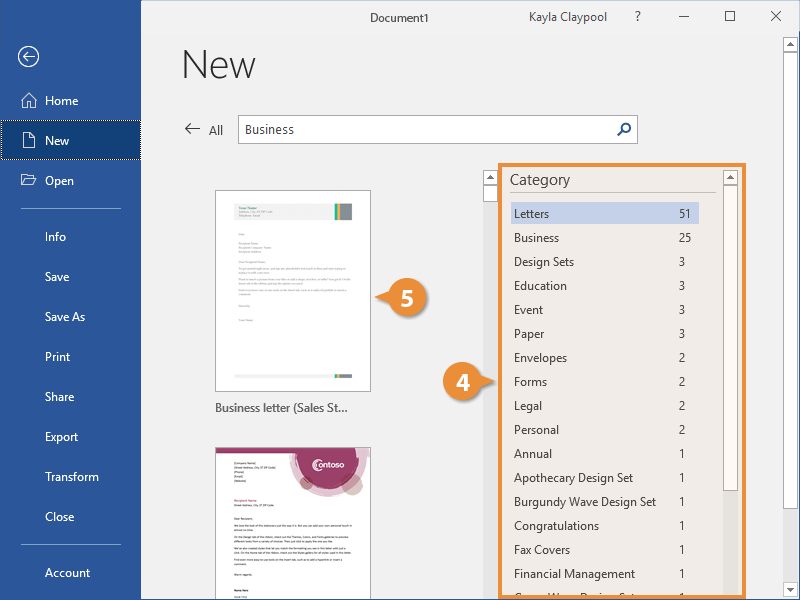
You can also search for a template using the search field or select a template category from the suggested searches.
- (Optional) Select or search for a template category.
Preview images of the templates will appear for the selected category, along with a Category list.
- (Optional) Select or search for a template category.
Selecting additional categories allows you to narrow your template search even more. Only templates that fit into all the selected categories will appear.
- Select a template.
A larger preview of the template appears, along with a description.
- Click Create.
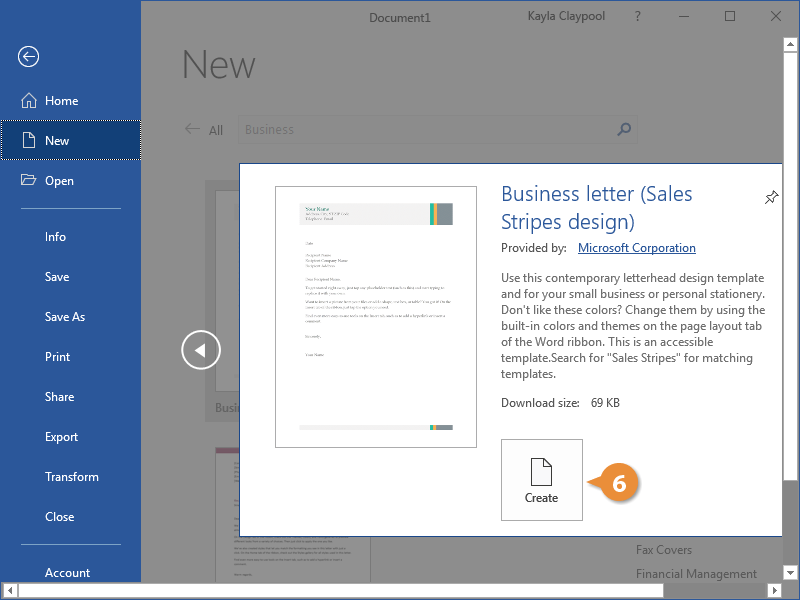
A new document from the template is created. Now, just fill in the placeholders.

FREE Quick Reference
Click to Download
Free to distribute with our compliments; we hope you will consider our paid training.
Guest
-
#1
I am making an «Agreement» between two parties. I need a couple of boxes to
be fill in the blanks (for example: On this _____ day of ________________,
20___).
I wanted to Convert it to Adobe because I have the full version 5.0 but it
will not let me convert it.
PLEASE HELP!
Thanks!
Advertisements
Robert M. Franz (RMF)
-
#2
Hi Texansgal
I am making an «Agreement» between two parties. I need a couple of boxes to
be fill in the blanks (for example: On this _____ day of ________________,
20___).I wanted to Convert it to Adobe because I have the full version 5.0 but it
will not let me convert it.
Just to be sure I understand what you are asking: you create a real
«form» in Word, convert to Acrobat, and expect to end up with a real
«form» in PDF?
I don’t know of any tool that does this (which doesn’t mean much). The
best place to ask for such tools might be comp.text.pdf.
With the full Acrobat, you should be able to add form fields to any PDF,
so this would mean you only had to leave empty space in Word.
What the user of the resulting PDFs is suppsed to be able to _do_ with
them is a different question, BTW (typing and printing, saving the form
fields, saving the whole PDF —> be sure to mention this in the PDF
forum when you go asking there).
Greetinx
Robert
Guest
-
#3
I have Adobe Full Version 6.0 Prof. at home and I can just click on a box in
a Word Document and it will convert it to a PDF File. Then, I go in and make
text boxes to fill-in.
I would like to be able to do that in a Word Document. Maybe where the words
will not move when I type into the underlined spaces that we have provided
for people to fill in. Is this possible? I was trying to just put text boxes
in each space, but I want to be able to just TAB to the next box.
Thanks!
Robert M. Franz (RMF)
-
#4
texansgal said:
I have Adobe Full Version 6.0 Prof. at home and I can just click on a box in
a Word Document and it will convert it to a PDF File. Then, I go in and make
text boxes to fill-in.I would like to be able to do that in a Word Document. Maybe where the words
will not move when I type into the underlined spaces that we have provided
for people to fill in. Is this possible? I was trying to just put text boxes
in each space, but I want to be able to just TAB to the next box.
I don’t think the following is any/much good if your desired end result
is a PDF-form, but otherwise see:
I’m designing a form that needs to have “fill-in-the-blanks†lines. What
is the best way to create them? (by Suzanne S. Barnhill and Dave Rado)
http://www.mvps.org/word/FAQs/TblsFldsFms/LinesInForms.htm
HTH
Robert
Advertisements
Suzanne S. Barnhill
-
#5
Then you want a protected form. See
http://word.mvps.org/FAQs/Customization/FillinTheBlanks.htm and especially
the forms tutorials by Dian Chapman that this article links to.
—
Suzanne S. Barnhill
Microsoft MVP (Word)
Words into Type
Fairhope, Alabama USA
Email cannot be acknowledged; please post all follow-ups to the newsgroup so
all may benefit.